Tech Thursday: C5 Infotainment
Infotainment
Why Mod?
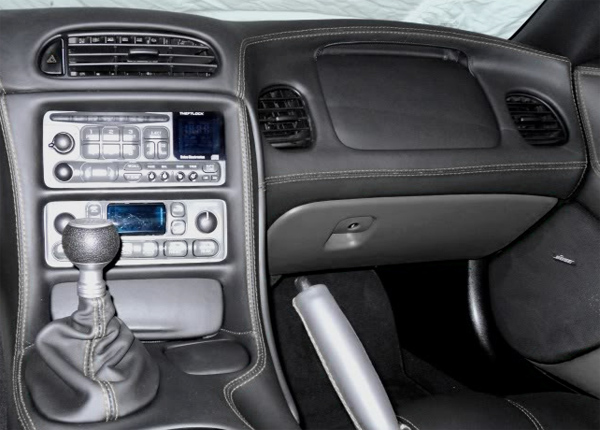
The C5 came with a radio and CD player. Now that navigation, DVD players and satellite radio are available, many C5 owners wind up installing aftermarket infotainment/NAV systems. The system’s only two redeeming features are that it can be used in concert with the Head’s Up Display (HUD) while aftermarket systems cannot.
For navigation, most owners simply use their smart-phones, buy a windshield mounted Garmin or TomTom or replace/forego the entire OEM radio opting for a Pioneer, Kenwood, or other aftermarket system. One of the first steps to installing a system is disassembling the center console, instructions are below (if anyone wants to perform this tear-down and send pics, we’d certainly appreciate them):
Tools required
torx drivers (#15)
metric sockets & driver (7, 10 mm)
phillips screwdriver
Step 1: remove the center console cover by removing the four phillips screws that attach it to its hinge
Step 2: remove the plastic covers at the back of the console area to expose the nuts securing the back part of the
console in place, then remove the nuts
Step 3: remove the active handling/traction control insert and disconnect the electrical connector for the switch
Step 4: remove the electrical connection to the auxiliary 12v power outlet and remove the outlet by untwisting
the back half
Step 5: remove the nuts holding the center part of the console
Step 6: remove the 3 torx screws securing the front part of the console in place, there are 2 near the cigarette
lighter and 1 left of the ignition key switch under a removable plastic cover
Step 7: pull the shift cover up through the console by squeezing it together
Step 8: pull the rear part of the center console back towards the trunk and then pull the front part of the console up off the posts and back a couple inches until you can access the backof the cigaratte lighter, unscrew the cigarette lighter (similar to the 12v power outlet)
Step 9: with your foot on the brake, lower the parking brake to get it out of the way and pull the console off and set it aside
Step 10: remove the 2 bolts holding the factory radio in place and pull the radio straight out a few inches, then disconnect the electrical connectors and antenna wire
Step 11: Install the stereo of your choice. Helpful pieces:
wiring harness (GM mini), stereo installation kit for common GM (includes plastic mounting parts), antenna converter cable (converts mini GM plug to standard size)
You’ll probably use the auxiliary power fuse to run your stereo because it’s switched with the ignition. You can pull a wire from the fusebox under the passenger floorboard to your stereo. See your owner’s manual for the fuse number and location.
Also, there are many useful links having to do with the C5’s stereo here. It has many, many how-to’s and might just answer your questions.