Ford F-150 Transmissions 2004-2014: Overview and How-Tos
Overview:
The Ford F-150 is America’s best selling vehicle, and even when a manual transmission was still available, the overwhelming majority of buyers opted to ditch the third pedal. Automatic transmissions have come a long way since they first appeared on the options list over 75 years ago. Some manufacturers have even begun treating them as sealed units, designed to last the life of the vehicle without any maintenance.
Ford hasn’t yet gone the sealed unit route for its trucks—but the need for periodic maintenance should not be seen as a weakness. The modern F-150’s automatic transmission is a thoroughly advanced, extremely complicated unit—meaning even extremely skilled DIY mechanics won’t generally crack open their gearboxes.
Doing any significant work on a transmission will require a significant amount of time and space, and even seemingly basic operations—like fluid/filter changes—are particularly messy jobs given the large amount of fluid involved. In reading the forum, you’ll see a lot of members expressing frustration that Ford didn’t make them easier on the home mechanic. Now, some of this is due to the increasing complexity of modern vehicles—virtually every aspect of maintenance is harder than it used to be—but there are also reports that Ford saw large numbers of owners using unapproved additives and improper fluids in their transmissions, which lead to premature failure.
Given the level of difficulty involved, this article should be seen as a jumping off point to get you familiar with the components of your transmission, rather than a shop manual for transmission maintenance or repair.
Table of Contents
General Information and Maintenance:
Diagnosing Problems With Your Transmission:
- Transmission Feels Like It’s “Slipping” >>
- Truck Makes a Grinding Sound >>
- Truck Will Not Shift to Overdrive >>
- Transmission Trouble in Cold Weather >>
Getting Your Transmission Serviced by a Mechanic:
- What Typical Transmission Service Involves >>
- What to Look For if the Tech Says You’ve Got a Leak >>
- Worst Case Senario/Cost Estimates >>
General Information and Maintenance:
For reference, we’ll be discussing the automatic transmissions on the generations of F-150 listed below. For information on exactly which transmission your truck has, you can use the Forum’s VIN decoder.
- 11th Generation (2004-08); 4R70E/4R75E
- 12th Generation (2009-14); 4R75E/6R80E
Service Intervals for 2004-2014 F-150s
For the novice, here’s a quick primer. Automatic transmissions work hydraulically, meaning they use fluid to conduct force, so healthy fluid is a key component to making sure your transmission is running optimally.
When looking for the full factory maintenance schedules covering every aspect of their trucks, the site forum members most often reference is Fleet.Ford.com. Since not every F-150 owner uses their truck the same way, the recommended change intervals can vary. These conditions qualify as severe use:
- Off-road operations
- Operating in dusty environments
- Extensive idling and/or driving at low speeds
- Towing
For 11th-generation truck owners, it’s pretty simple. Ford calls for the transmission fluid to be inspected every 15k miles and replaced every 30k miles—regardless of driving conditions.
For 12th-generation truck owners, it’s not much more complex. If you’re not using the truck under the conditions specified above, your transmission fluid is inspected every 15k miles, but doesn’t need to be changed until 150k miles. If you are, the recommendation is that it be changed every 30k miles.
How Important is to Service at the Recommended Intervals—Can I Skip It?
At the dealer, this service will run between $100-$150. One of the common questions we’ve seen on the Forum regarding the 30K service is also one of the most basic; “Should I do it?”
Now, there’s always going to be a faction of owners—regardless of vehicle type—who love to explain how they’ve never changed the transmission fluid in any of their vehicles, and they’ve always run perfectly. And while there’s no basis for it, there’s also a contingent that believes changing the oil on an older transmission will remove the accumulated gunk that’s been keeping it functioning.
But the general consensus on the Forum is that the transmission service—especially given the relatively infrequent intervals—is cheap insurance, and provides peace of mind. If you want your truck to last forever, play by the book.
I Want to Save a Few Bucks: Can I Do This Myself?
Transmission fluid resides in several different areas, including the:
- Torque converter: This is the link between the engine and the transmission. In the past, many torque converters had drain plugs to remove fluid. Modern F-150s do not have such a plug.
- Transmission fluid pan: It’s best to think about this as an oil pan, but for your transmission—because that’s exactly what it is.
- Transmission cooler/cooler lines: Your transmission is connected to a transmission cooler, which is essentially a radiator that circulates hot oil out and cool oil back in. The cooler is located in the front of your truck, next to the radiator, and it’s connected by two lines which complete the fluid’s circuit.

Now, there’s a lot of chatter on the Forum about this service, so we consulted Ford Automatic Transmission Engineer Mark Kovalsky—who wrote a great tutorial on changing the fluid on the E4OD and 4R100—about going the DIY route, and he had some great input.
He explained that since 1999, all F-150s transmissions have a thermostat in the cooler circuit, and the only way to open it is get it hot. When a dealer tech changes out the transmission fluid, they flush it out using a special heated flushing machine which connects at the cooler line and pushes new fluid into the lines as the old fluid is drained out (read some of his comments regarding it here).
This insures that every component—torque converter, pan, lines—gets clean fluid.These machines aren’t common—so it’s pretty unlikely your local independent transmission shop has one.
Now, there is a hack to swap out the fluid and avoid taking it to the dealer. It involves changing the fluid in the pan, getting the transmission up to temp to mix the old and new fluid, and changing the pan fluid again.
If you’re committed to going this route, forum member whitecyrstal1 put together a good tutorial on how to service the transmission pan and filter on 4R70E and 4R75E. But before you dig in to that job, make sure to read this great explanation of the “mystery part” you should find in the pan.
But our advice? Take it to the dealer.
Diagnosing Problems With Your Transmission:
In the following section, we’ve listed out some of the more common complaints we’ve heard from members regarding problems with their transmissions. The video below does a good job of explaining the inner workings of automatic transmissions—and and how they can fail—but if your fluid level is correct and there’s no obvious signs of contamination, it’s difficult to pinpoint exactly what the source of the problem is.
Transmission Feels Like it’s “Slipping”
A slipping transmission will be characterized by a rise in RPM with no corresponding rise in acceleration, followed by a clunk sound and jerking sensation when the transmission finally engages with the engine. Jump to 1:40 in the video below for an example of a slipping transmission.
If you’re experiencing any unusual performance from your gearbox, the easiest thing you can do is check the fluid. Click below to learn about checking your transmission fluid. Jump to how-to section >>
On many trucks, especially those equipped with 4WD, it’s not unusual to hear a whining during acceleration. But grinding is best described as an “ice in the blender” sound. Watch the video below for an example of a grinding transmission.
Member VTX1800N1 compiled an excellent overview of the system and explains where it can fail and produce a grinding noise. A word of warning, this is an extremely technical and long process, requires substantial knowledge about the vehicle’s components and should only be tackled by confident, mechanically experienced folks.
If you’re experiencing any unusual performance from your gearbox, the easiest thing you can do is check the fluid. Click below to learn about checking your transmission fluid. Jump to how-to section >>
Truck Will Not Shift to Overdrive
One of the other issues we’ve seen members report is the loss of the overdrive gear. You’ll know this is happening, as after topping out in fourth, it will feel like the truck drops into neutral. There will also be no engine braking in second gear, though the truck will be able to be driven normally with the overdrive switched off.
This is most likely due to a broken servo clip, which sounds innocent enough, but qualifies as an expert-level repair. Member tim98 posted a great thread about fixing his overdrive problem, and has been helping some of the Forum’s most hardcore members sort out their own issues. For mere mortals, his experience is valuable because it shows how a small piece can lead to a big problem.
So if you’ve lost overdrive and were worried about ponying up for an expensive rebuild or replacement, the thread above might set your mind at ease somewhat. While there will be a couple hours labor involved in fixing a broken servo clip, the parts cost should be less than $50.
Transmission Trouble in Cold Weather
When looking across the forum, there are numerous threads where members have described conditions where their trucks seem to slip shifting gears when cold.
While this can be disconcerting, in most cases, it’s completely normal. When member buckcop posted about his truck seeming to slip in reverse when cold, a few members chimed in that it’s nothing to worry about.
Member zap said:
“When you put it into gear, wait a few seconds before putting your foot on the gas which will make sure it is fully engaging. Maybe doesn’t happen much on Fords, but on Cummins equipped Dodges not waiting before opening up the throttle is a good way to blow transmissions. That slip might just be lag of the transmission not quite being ready to get into gear fully.”
And member 2000xl_toronto concurred:
“I think it is a function of the transmission. If I put both of my new model fords in reverse and do anything more than feather the throttle there is a lag then a bump and it jerks back. The transmission is just trying to protect itself from damage in my opinion.”
For a couple more comments on the subject, head over and check out the full thread.
Ford doesn’t make this convenient, as the owner’s manual recommends this be checked by a dealer. The manual even states that the transmission doesn’t have a dipstick, but rather a fluid level indicator—which is apparently a fancy word for dipstick. Semantics aside checking your AT fluid is easy enough to do yourself. Just follow the instructions below!
Conditions for checking transmission fluid:
- Truck should be parked on level surface
- Engine and transmission at operating temperature (driven around 20 miles)
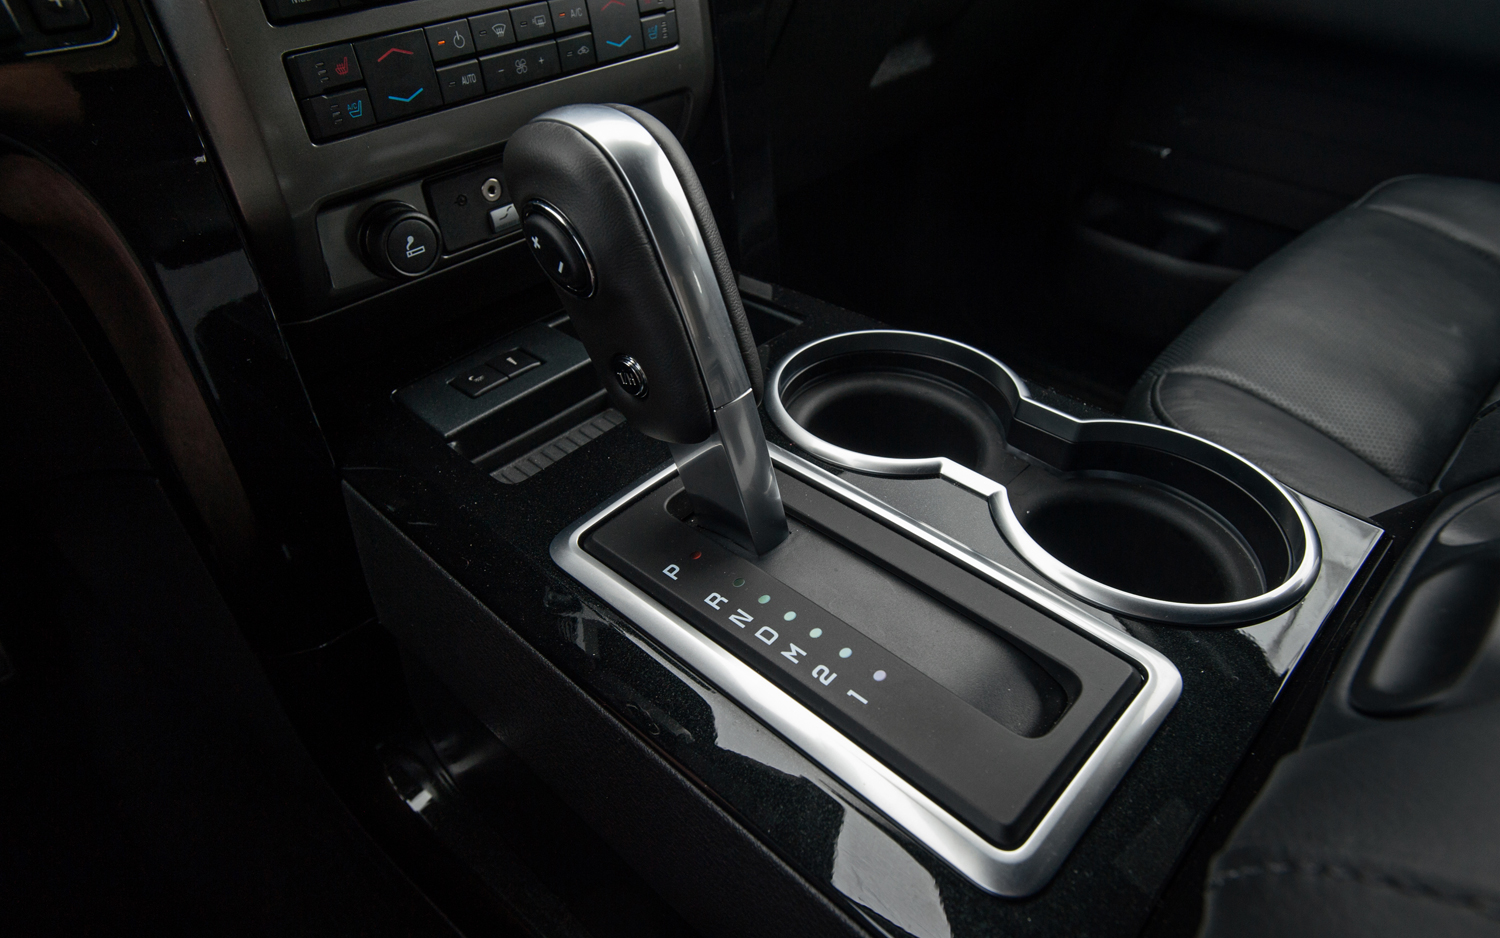
Checking/Adjusting Fluid Level 4R70E/4R75E:
Unlike some of the newer units these transmissions are still equipped with a conventional dipstick. Refer to the steps below to do it.
Automatic transmission fluid expands when warmed. To obtain an accurate fluid check, drive the vehicle until it is at normal operating temperature (approximately 20 miles [30km]). If your vehicle has been operated for an extended period at high speeds, in city traffic during hot weather or pulling a trailer, the vehicle should be turned off for about 30 minutes to allow fluid to cool before checking.
- Drive the vehicle 20 miles (30 km) or until it reaches normal operating temperature.
- Park the vehicle on a level surface and engage the parking brake.
- With the parking brake engaged and your foot on the brake pedal, start the engine and move the gearshift lever through all of the gear ranges. All sufficient time for each gear to engage.
- Latch the gearshift lever in P (Park) and leave the engine running.
- Remove the dipstick, wiping it clean with a clean, dry lint free rag.
- Install the dipstick making sure it is fully seated in the filler tube.
- Remove the dipstick and inspect the fluid level. The fluid should be in the designated area for normal operating temperature or ambient temperature.
Low fluid level
Do not drive the vehicle is the fluid level is at the bottom of the dipstick and the ambient temperature is above 50F (10C).
Correct fluid level
The transmission fluid should be checked at normal operating temperature 150F-170F (66C-77C) on a level surface. The normal operating temperature can be reached after approximately 20 miles (30 km) of driving.
You can check the fluid without driving if the ambient temperature is above 50F (10C). However, if fluid is added at this time, an overflow condition could result when the vehicle reaches normal operating temperature.
The transmission should be in this range at normal operating temperature (150F-170F [66C-77C]).
The transmission fluid should be in this range if at ambient temperature (50F-95 [10C-35C]).
High fluid level
Fluid levels above the safe range may result in a transmission failure. And overfill condition of transmission fluid may cause shift and/or engagement concerns and/or possible damage.
High levels can be caused by an overheating condition.
Adjusting automatic transmission fluid levels
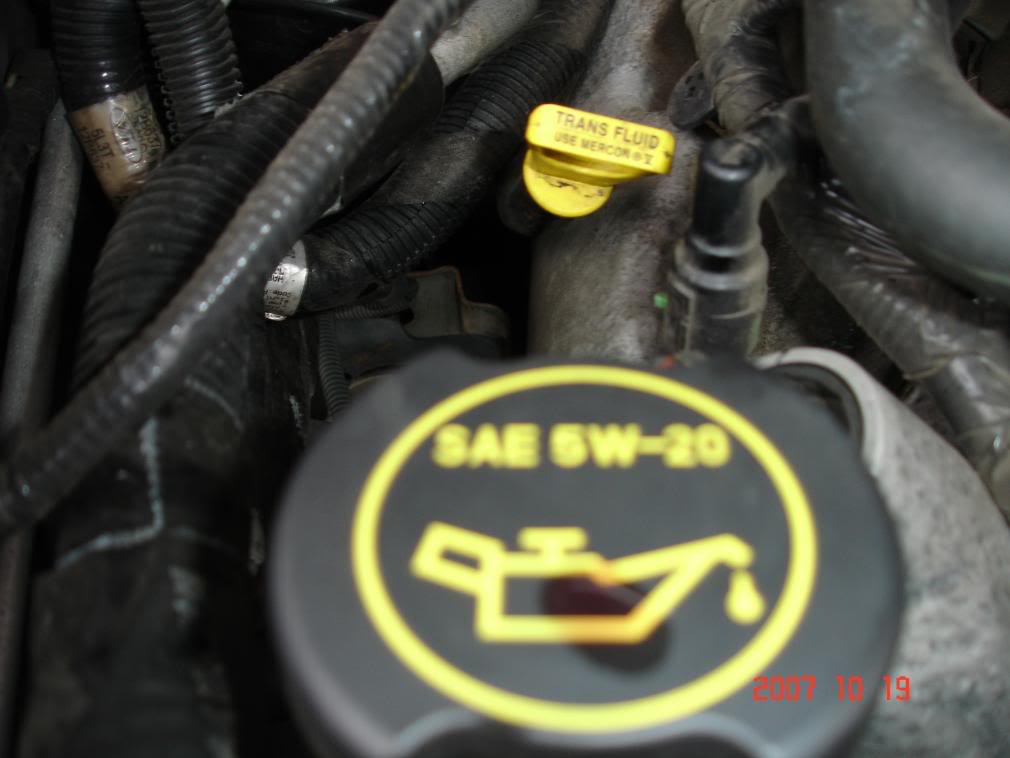
Before adding any fluid, make sure the correct type is used. The type of fluid used is normally indicated on the dipstick.
Use of non-approved automatic transmission fluid may cause internal transmission component damage.
If necessary, add fluid in 1/2 pint (250 ml) increments through the filler tube until the level is correct.
If an overfill occurs excess fluid should be removed by an authorized dealer.
An overfill condition of transmission fluid may cause shift and/or engagement concerns and/or possible damage.


Checking Fluid Level 6R60E and 6R80E:
Want a hint the Blue Oval doesn’t want you doing this? Here’s one: the dipstick is located under the truck, on the forward passenger side of the transmission, next to the catalytic converter. Here’s the company line regarding checking the transmission fluid in your six-speed: “Transmission fluid should be checked by an authorized dealer. If required, fluid should be added by an authorized dealer.”
That said, here’s the official procedure on checking it.
1. With the engine running, place the transmission selector lever in each gear position and hold approximately 5 seconds . Place the transmission selector lever in PARK.
2. With the engine idling (600-700 rpm) in PARK, position it on a hoist. For additional information, refer to JACKING & LIFTING.
3. Remove the transmission fluid fill plug transmission fluid level indicator assembly, located on the passenger side front portion of the transmission case.
4. Separate the transmission fluid lever indicator from the transmission fluid fill plug.
5. Wipe the transmission fluid level indicator clean. Reinstall the transmission fluid level indicator only back into the transmission fluid fill plug hole to check the transmission fluid level.
For a video tutorial on how to check the transmission fluid, check out the clip below.
- Transmission fluid should be red. If the fluid appears dark or has a burnt smell, it should be changed to prevent damage to the internal transmission components.
- Refer to the hash-marked areas on your dip stick in regards to fluid level. It’ll read just like the one used to measure oil level.
After removing the fluid level indicator, drip some of the fluid on to a paper towel to check the color:

- Presence of metal shavings in the fluid will be cause for concern. This indicates internal problems, and will require the transmission oil pan to be dropped to inspect for more material.
- If the fluid appears foamy, this can indicate the presence of coolant in the transmission fluid, and will require inspection of the cooling system.
How to Change Transmission Fluid
As stated above, this how to should be considered a hack for the 4R70E/4R75E, as the only factory-recommended way to change fluid involves the heated transmission flush machine found at Ford dealers.
It won’t guarantee that all of the fluid is removed, but it will get the majority. Also, this tutorial explains how to change the transmission fluid filter, which per Ford, does not need to be done—even under severe use cases.
The filter is designed to last the life of the vehicle, unless the transmission has be contaminated with particulate. Keep in mind, after all the steps are completed here, the vehicle will need to be driven to operating temperature—20 miles (30 km)—and have the process repeated to drain the fluid that has been stored in the lines and torque converter.
That said, it’s a helpful tutorial, though it assumes a level of familiarity with the machinery. With the warnings out of the way, we’ll hand it over to whitecyrstal1.
Required Materials:
- Safety Glasses
- 6 Quarts of Mercon V fluid
- Transmission oil filter
- Ratchet with 10mm socket and extensions
Cost:
- Around $30
Required Time:
- Three hours
1. With the vehicle securely placed on jack stands, start loosening the bolts in the pan at one end and slowly work it to the other end so the fluid will drain out the end where you started (having the pan under it to catch the fluid).
I ended up getting to the point that I had all but two bolts out before I dropped the pan. The two that I removed last were between the pan and the cross member. I kept loosening them to get more angle on the pan to get the most fluid out of it as I could before I dropped it. In order to do that I had to hold the pan up to loosen the bolts, the angle the pan was in gave no access to the bolts.
When the fluid stops it’s time to drop it. Now with both hands grab the filter and wiggle it down until it is out. I went ahead and wiped the under side off.


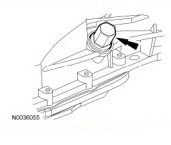
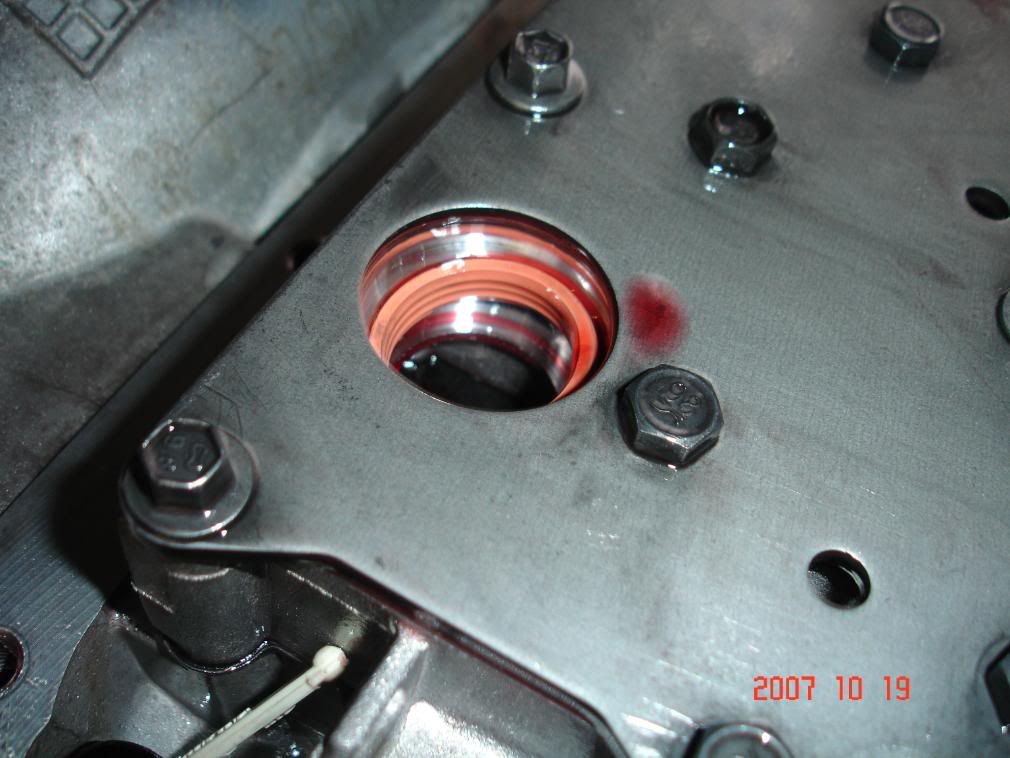
2. If it hasn’t come out with the filter, ring in the figures below will also need to be removed from the main control bore. Use a small screwdriver to remove the seal—use care not to damage the bore. Use a small screwdriver and position it above the ring, working it down slowly using caution not to let it touch the bore. DO NOT try and stick and object between it and the bore or you will scar the bore.

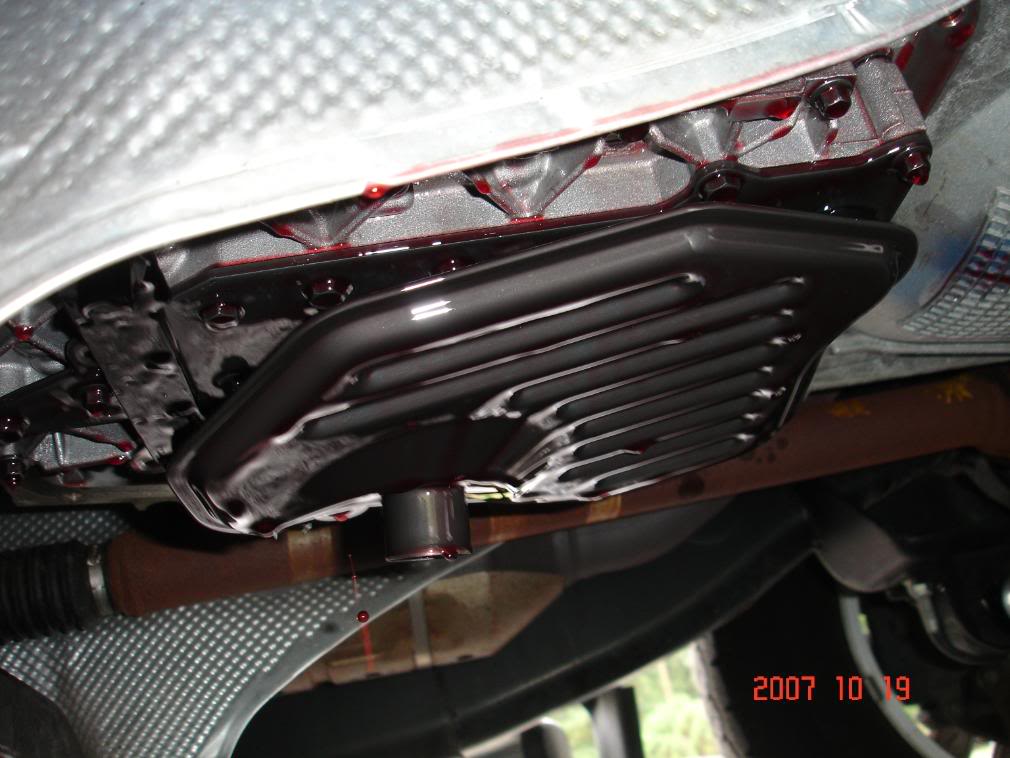
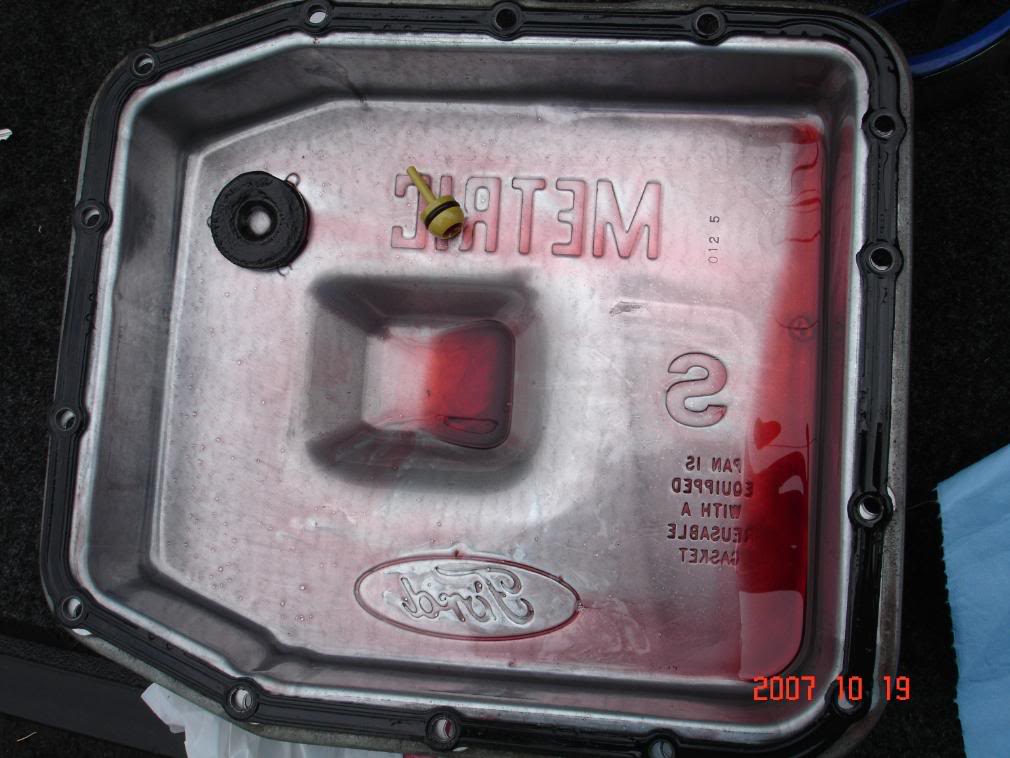
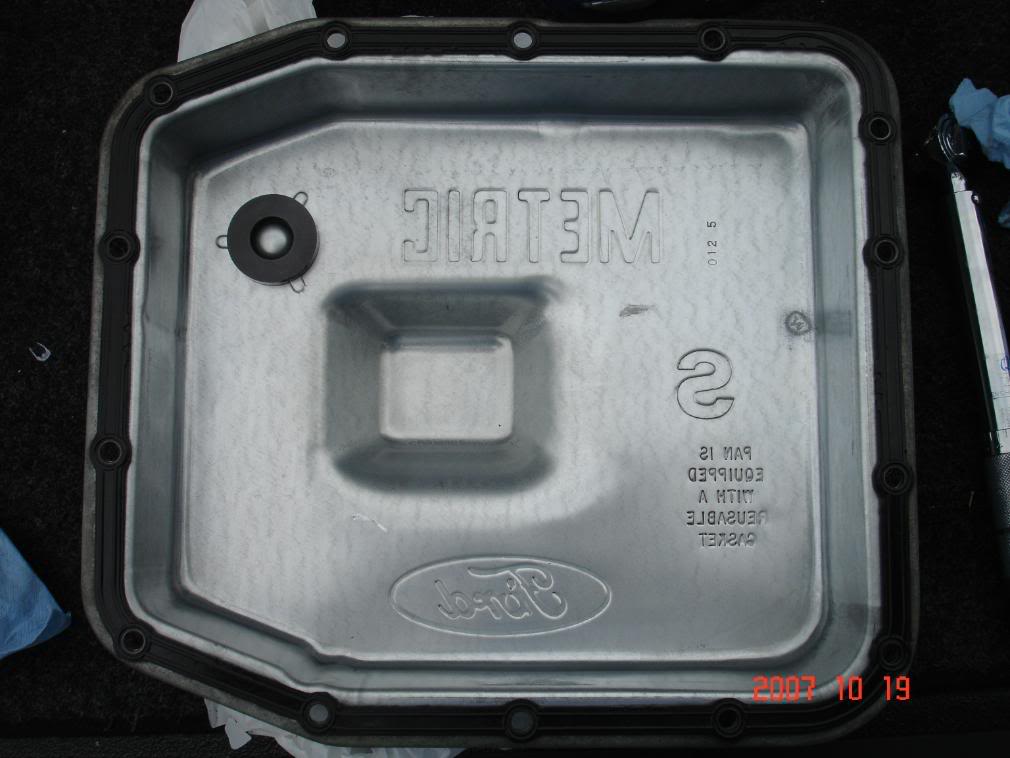
3. The picture below shows how the pan looks after it’s removed from the transmission. The plastic plug, or “Mystery Part” is a plug left over from the assembly line. It gets pushed into the pan when the dipstick tube is installed. If you see if, you know the pan has never been dropped before.
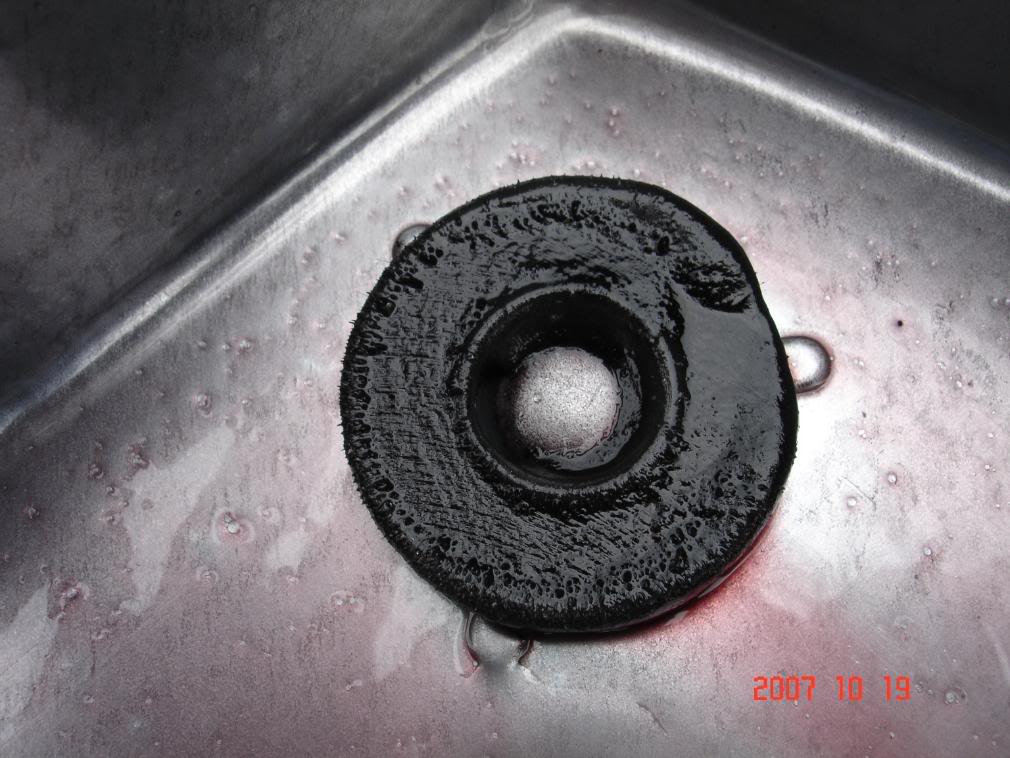
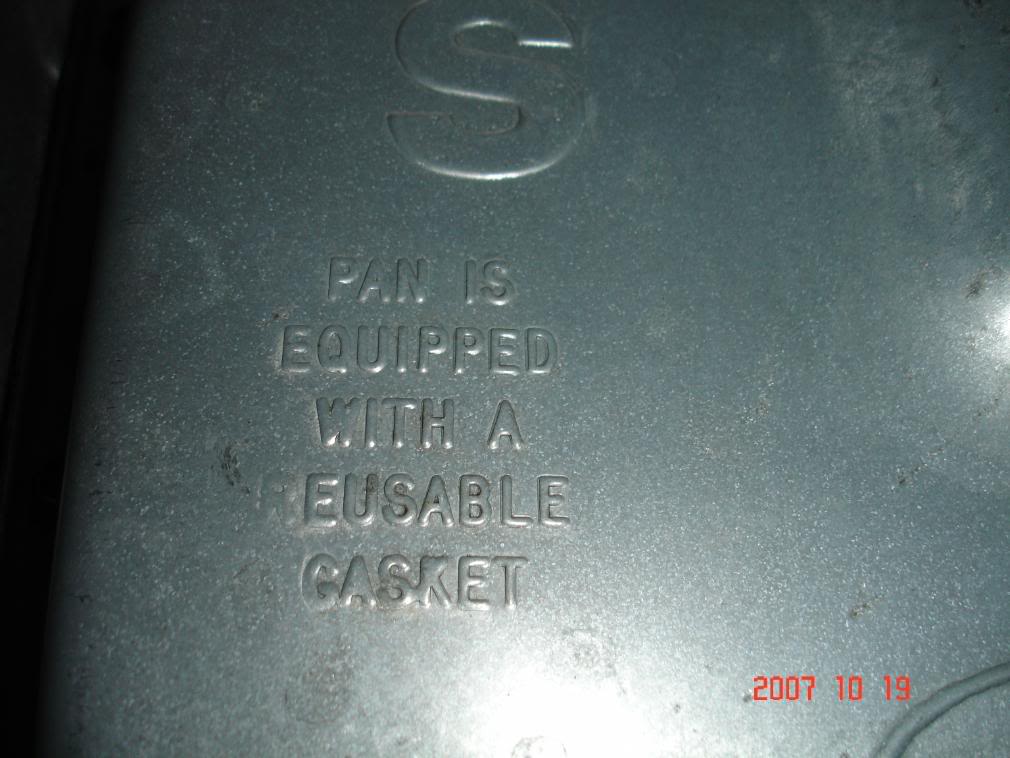
4. The pictures below show close ups of the fluid pan magnet—there to attract any metal shavings in the system—before and after cleaning, and also show the pan after being cleaned up.
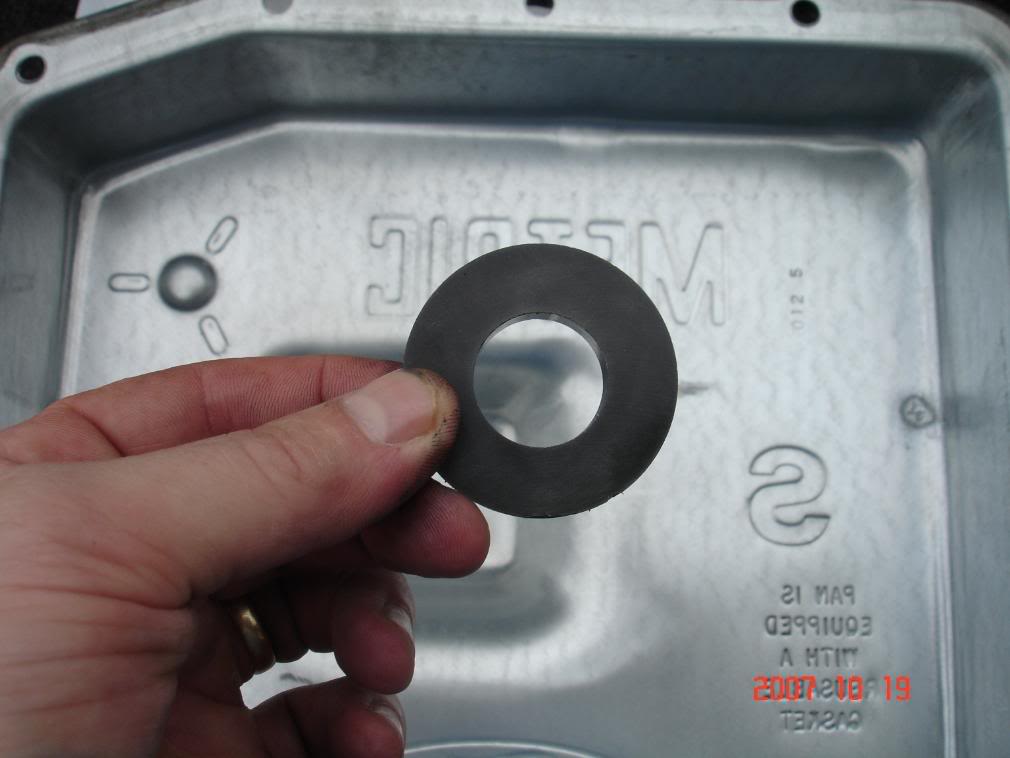
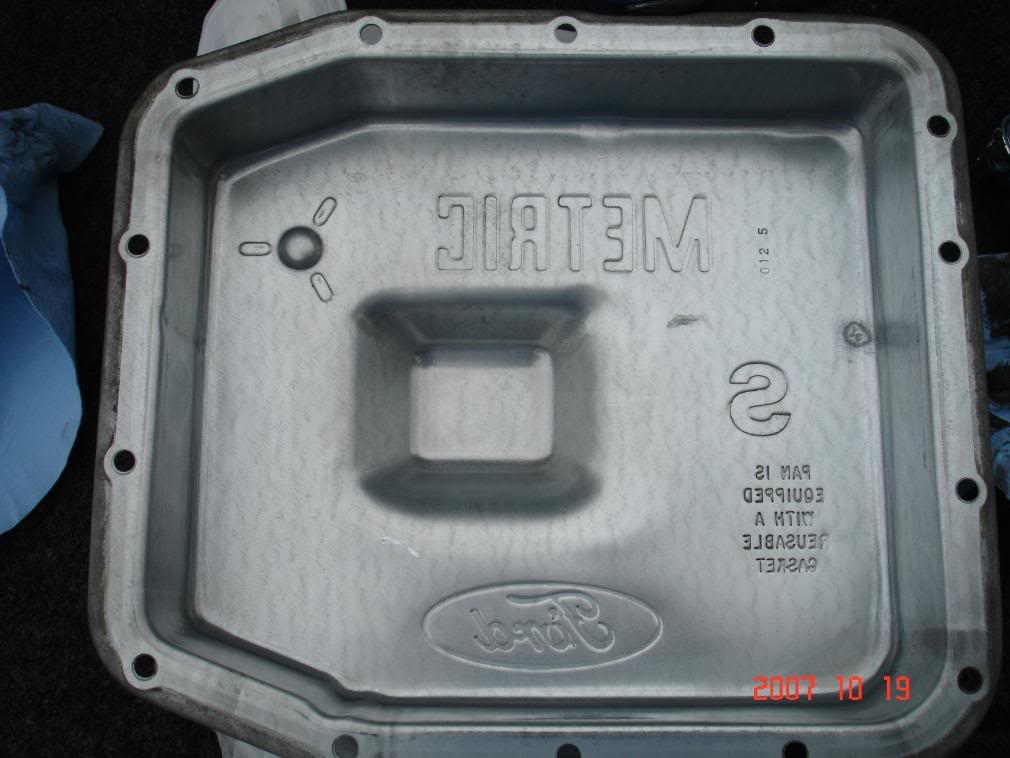
5. As it states on the pan, the its gasket is reusable. The pictures below also show the plan—with magnet reinstalled—and the comparison between the new and old filter.
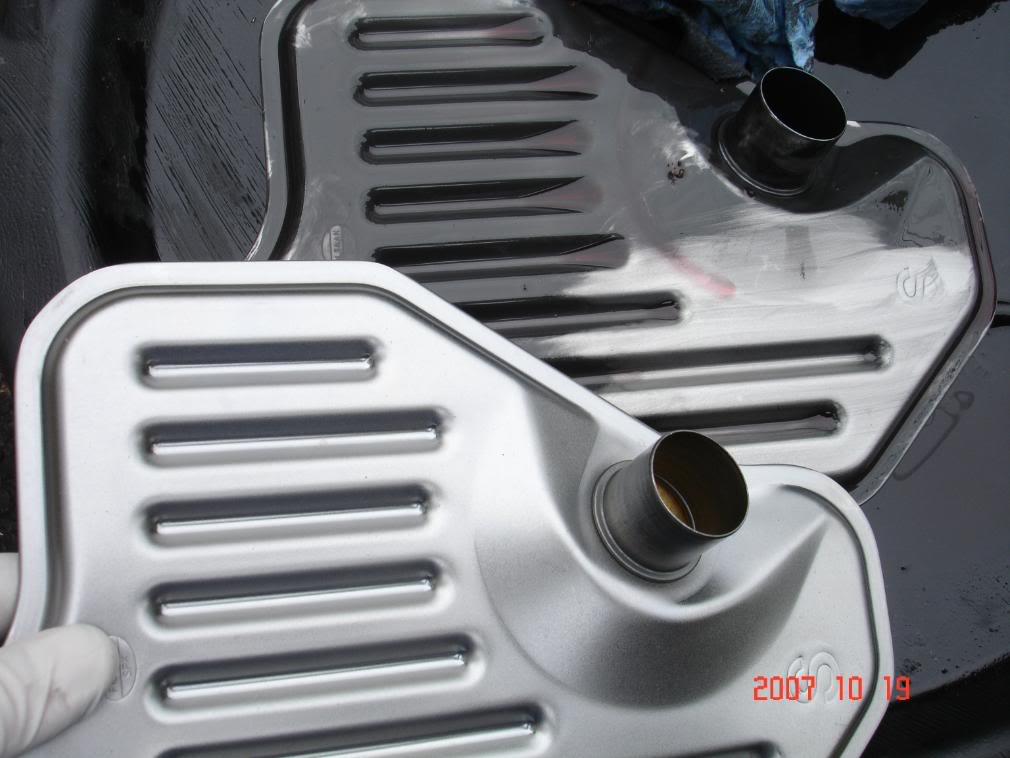
6. Next apply some some fluid on the seal on the new filter, then install the filter opposite the way it was removed until it’s all the way in the hole. Bolt the pan back on. The photos below show the new filter seal with some fluid on it, the new filter installed on the main bore, and the pan being bolted back on to the transmission.

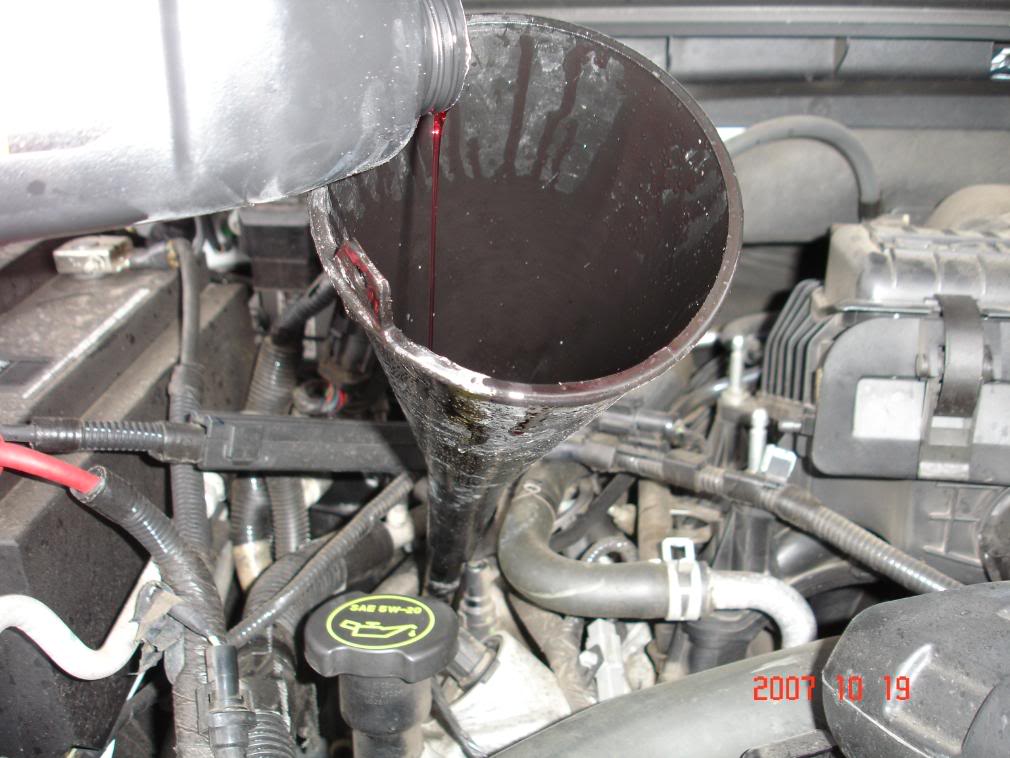
7. Get under the hood and locate the transmission stick. Pull the dipstick out, insert the funnel, and add 5qts of fluid. At this point, you need to get the tranny up to operating temperature (150-170 degs) to get an accurate reading and be able to top it off. At operation temp move the gear shifter through all the gears checking for gear engagements. The engine needs to be running when checking the fluid level, if it’s still low at this point add fluid in .5 pint (1/2 pint) increments until full in the cross hatch. It will probably take all six quarts to read full.
8. At this point, it’s time to drive the truck for 20 miles (30 km) to make sure all the oil has been pushed through the entire system, and drop the pan again. Since the object is just to remove the fluid which was still in the system, the filter does not need to be removed.
Getting Your Transmission Serviced by a Mechanic
As stated previously in this article, even some of the most adamant do-it-yourself mechanics tend to avoid doing their own transmission work—and there are good reasons for that.
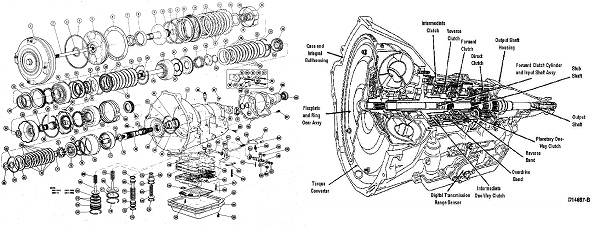
First off, there’s not really much you can tell about your transmission until it’s in pieces, and there are a ton of moving parts and delicate pieces which resemble honeycomb more than something you’d expect to find in a “gearbox.” A quick glace at the exploded diagrams below should provide explanation as to why lots of folks unworried at other aspects of maintenance often regard these units as cases full of equal parts witchcraft and rocket science. But the good news is the vast majority of owners won’t experience transmission problems, as today’s models are more reliable than ever.
Read below to see what to expect when getting your transmission serviced by a mechanic.
What Typical Transmission Service Involves
When a dealer tech changes out the transmission fluid, they flush it out using a special heated flushing machine which connects at the transcooler line and pushes new fluid into the lines as the old fluid is drained out (read some of his comments regarding it here). Watch the video below for a detailed explanation of how this trick piece of tech works.
Mechanics often get a bad rap for being dishonest, but that doesn’t mean you should go into every conversation with your tech thinking they’re going to cheat you.
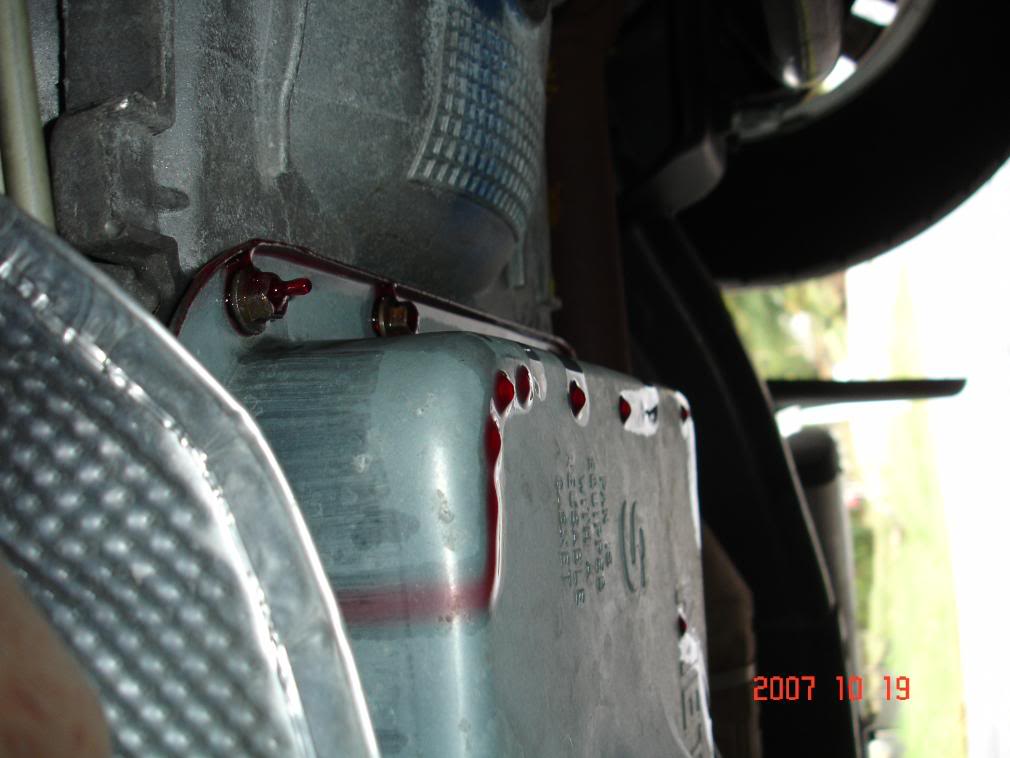
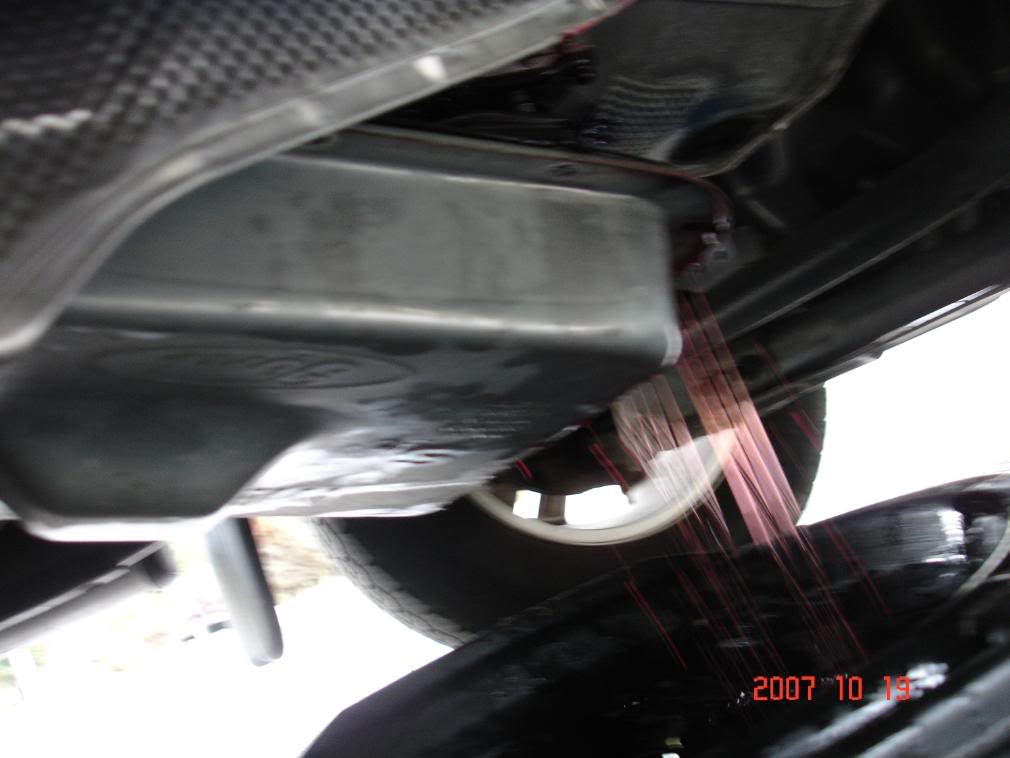
If they tell you that your transmission is leaking, they’ll generally take you out to the service bays and point out where the fluid is coming from. These transmissions are not designed to consume fluid—no amount of leaking is normal—and while the units are complex, seeing a leak doesn’t take a degree in mechanical engineering.
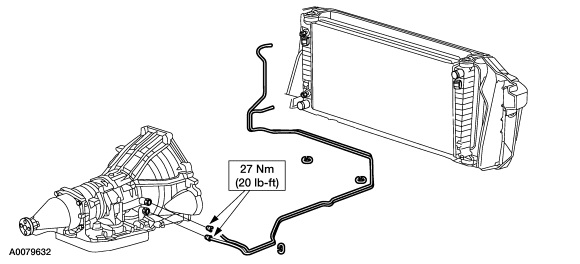
Transmission fluid is red, so if you see red liquid underneath your vehicle, you’ve got a leak. There are three places where leaks are commonly found, the transmission fluid pan, the transmission cooler, and the transmission cooler, which is mounted alongside the radiator. Here’s a basic view of the system:
The three most likely areas for a leak to appear are:
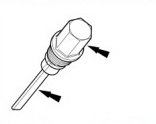
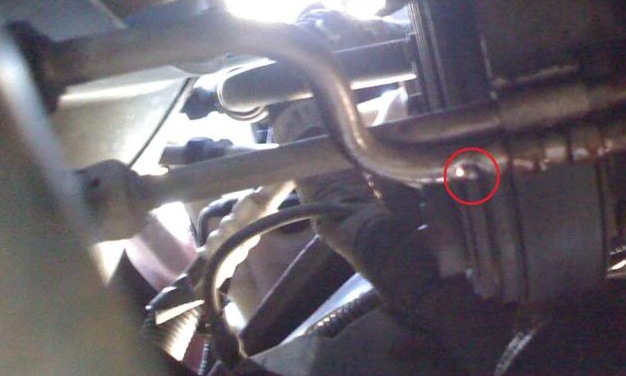
Cooler Lines: These complete the loop between the transmission and the transmission cooler. They can be damaged from road debris or can break if they’re over-tightened. They’ll look like this:
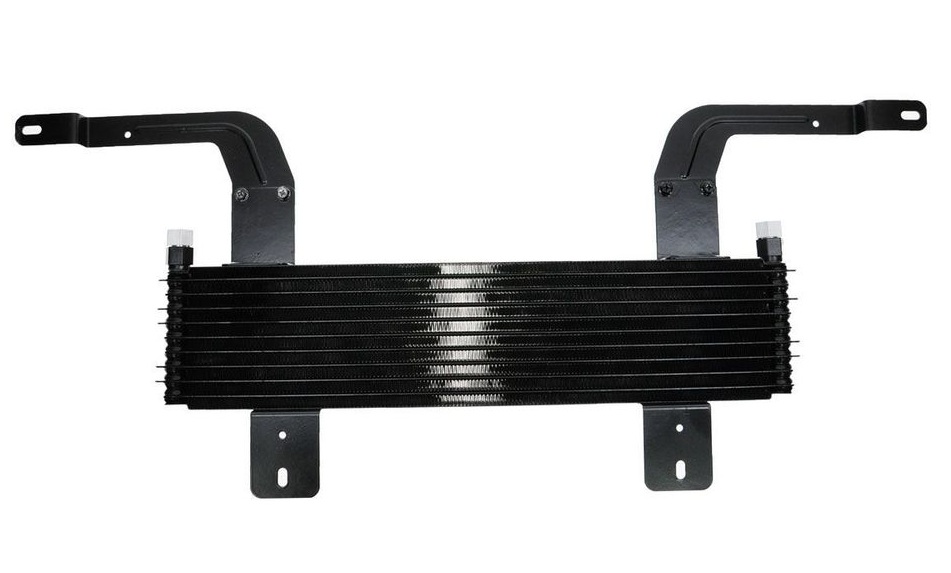
Transmission Oil Cooler: This is a tiny radiator for transmission fluid. It’s mounted vertically next to the radiator on the driver’s side. This picture shows a cooler outside of the vehicle. As with the cooler lines, it can begin to leak when hit with road debris.
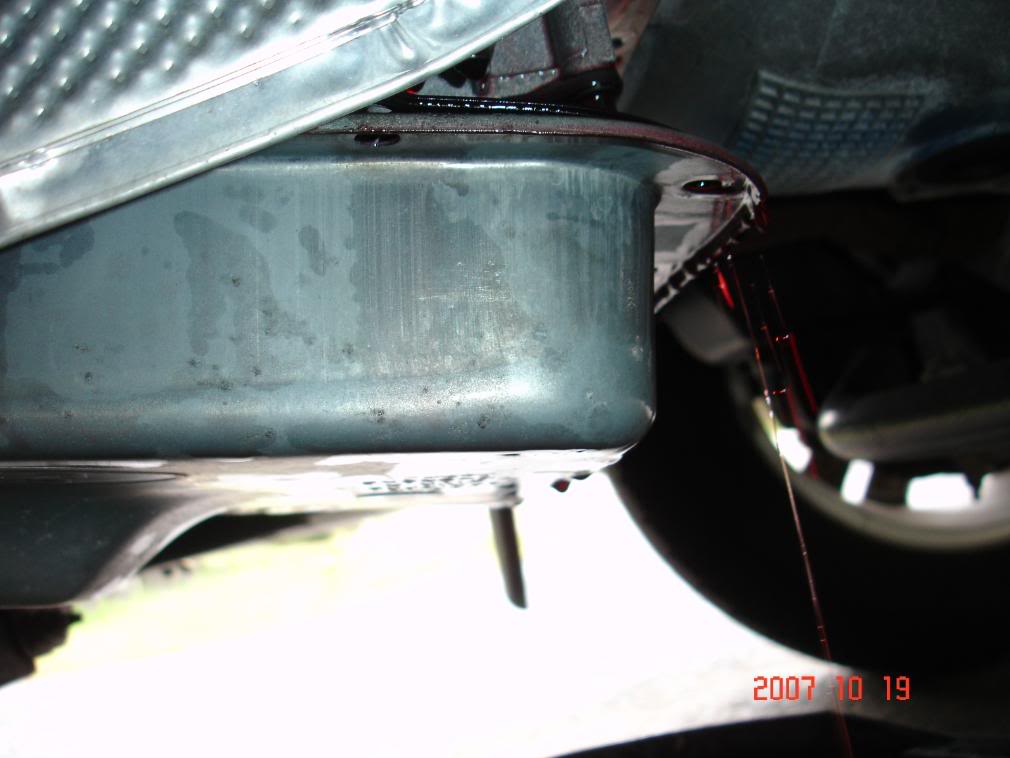
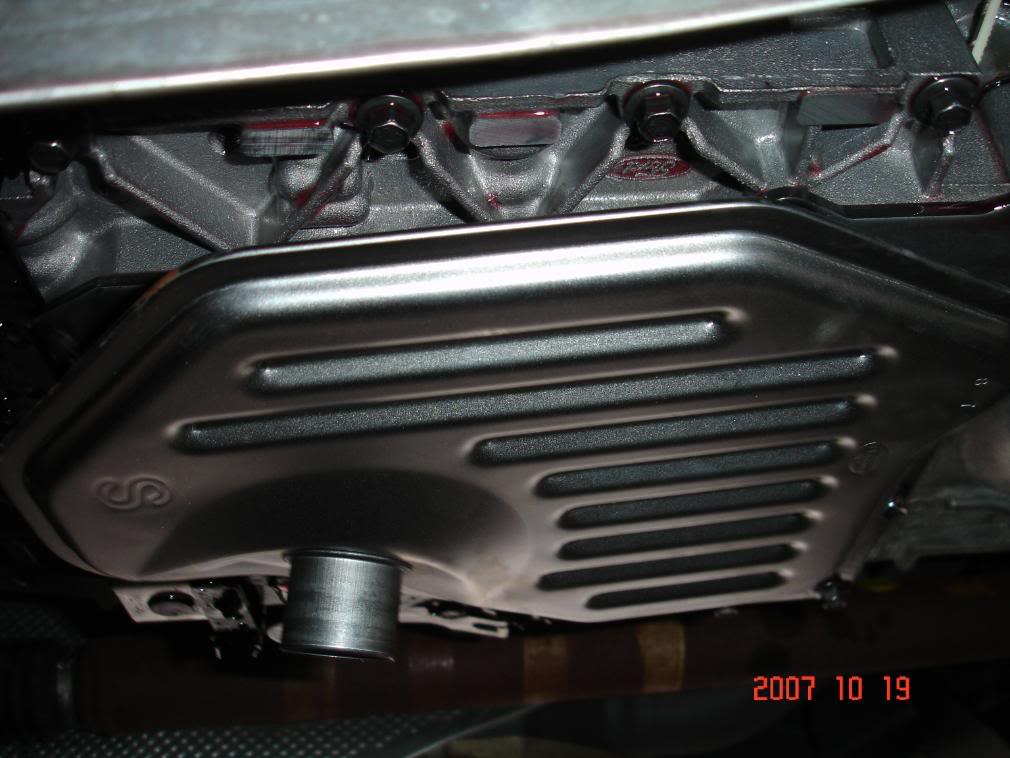
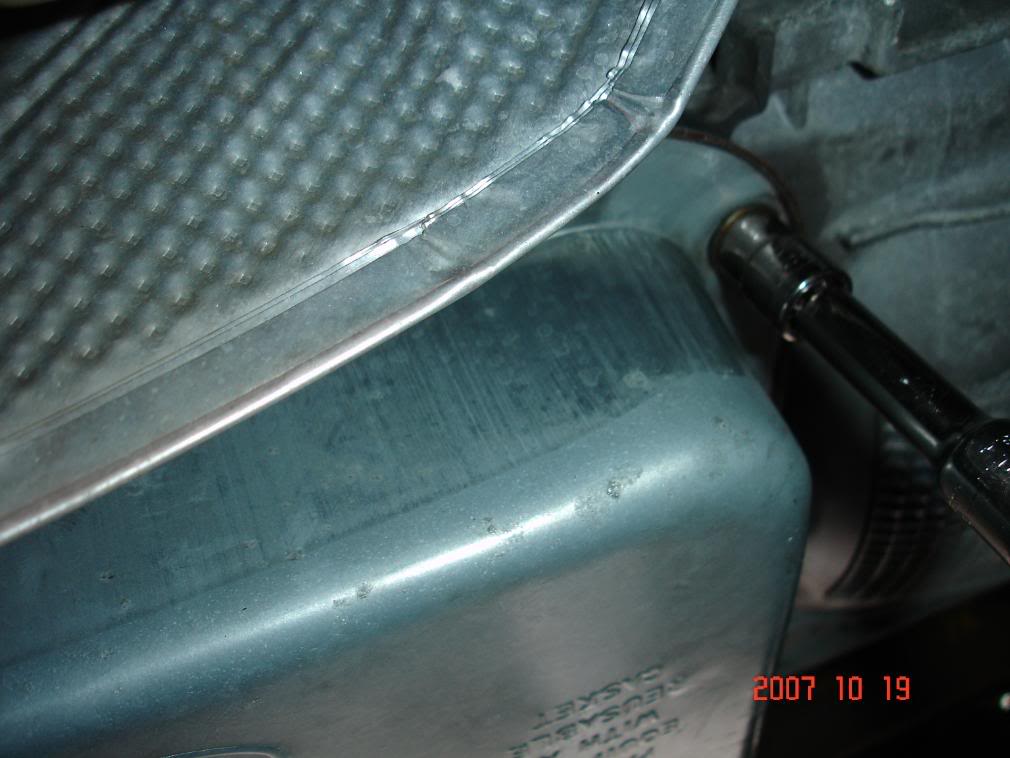
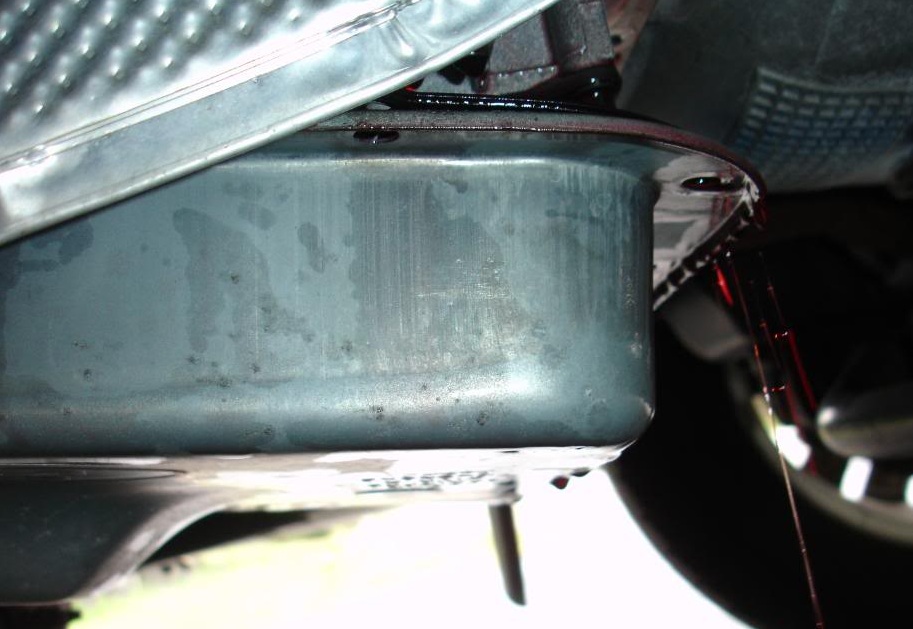
Transmission Fluid Pan: Located on the bottom of the transmission, the transmission fluid pan holds transmission oil and the transmission oil filter. It looks like this:
While the prices for swapping replacing these components can vary, if you’re already bringing your truck in for transmission service, replacing the lines won’t increase the cost of the job much, as they have to come off to hook up the machine which pushes the oil into the system. Dropping the pan will likely add an hour or two labor, as the fluid changing machine doesn’t require it to come off, though parts cost should be minimal.
Obviously, if you’re having transmission problems, the worst case scenario is that you need an entirely new unit. Dropping and replacing a transmission is an intense job—and it’s not going to be cheap. Exactly how much it will cost will depend on where you’re located and whether a dealership or independent mechanic will do the work. Estimates on the Forum price a complete swap anywhere from $1500 to over $3000 for some high performance—as in ready to handle over 600hp—builds.
Here’s what some members had to say about their experiences.
“The AAmco mechanic said there was not all that much that is offered for the 4r75e tranny as far as the aftermarket stuff. But he did tell me that it should last for at least 60,000 miles considering I am running 35″ tires, and that is a definite tranny killer.”
“I got my transmission replaced at Ford for $3,011 with a 3 year, unlimited mileage warranty.”
No driver wants to be faced with a large repair bill, but it’s not the end of the world. In looking across the forum, you won’t find many members willing to throw in the towel and ditch the truck over a transmission. Many repair shops and transmission rebuild companies will offer their own warranties to give you a sense of security when faced with dropping that much money on a repair. Some things to consider when weighing whether to pull the trigger and spend the money:
- Overall vehicle condition? Other expensive maintenance looming? How has it performed overall?
- What’s the cost difference between a comparable truck and the repair?
- Blue Book value vs. what it’s worth to you.
In the vast majority of cases it’s generally worth the money to repair your truck rather than take a hit by having to sell a vehicle with a major problem. In automotive circles, some of the best advise is essentially a variation of the old saying, “the devil you know is better than the devil you don’t.” Barring cases of sever abuse, it’s going to be worth it to fix a modern F-150 from this you which you know the history of rather than ponying up for another one.
The F-150 didn’t become the best-selling vehicle in America by being fragile—these trucks are known for being dependable, high-mileage beasts which reward preventative maintenance. Forum member bucky919 works with the new EcoBoost trucks every day, and his comment is indicative of what you’ll find about reliability:
“Our company trucks have over 80k on them right now, with just minor issues, for bouncing up and down oil field roads.”
That sounds like a good endorsement to us.