Need to Replace Your C6’s Headlights? Here’s Your DIY Photo Guide

Few things in life are more rewarding than being able to maintain and service your car with your own hands and knowledge. Sure, the techs at the dealer have access to high-tech tools, inside knowledge, and what not, but doing it yourself is always better — and cheaper!
Before you start, remember these simple rules:
- Rule 1: Don’t touch the bulb with your fingers.
- Rule 2: If you break rule one, clean with alcohol and dry cotton rag and wear surgical gloves.
- Rule 3: Don’t break the bulbs as they are under pressure
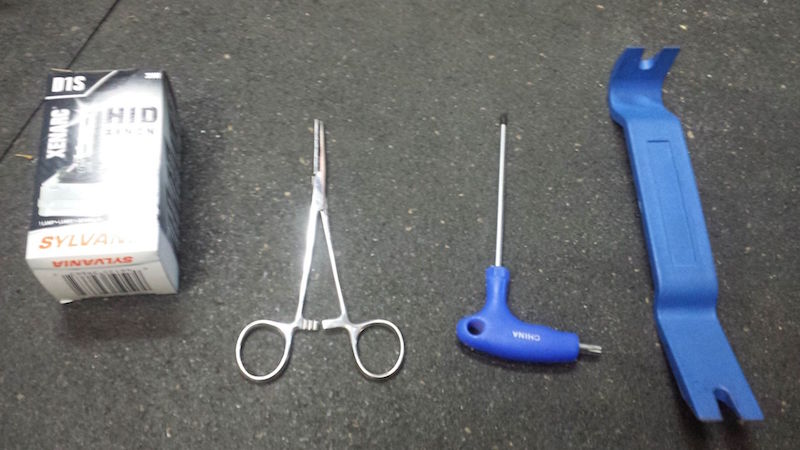
Tools:
- Torx wrench
- Rivet tool
- Shop cloth
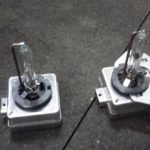
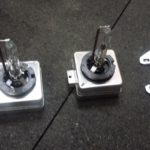
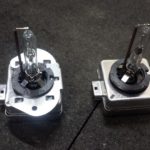
Once you buy the right bulb replacements for your Corvette (may vary depending on standard or optional equipment), you’ll have to do the hardest step of this operation: removing the front tire(s).
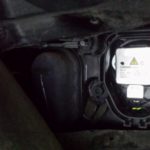
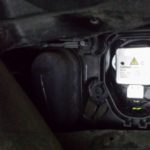
Once the tire is removed, locate the panel held in place by seven plastic rivets, and grab your handy-dandy rivet or body trim removal tool, and proceed to pop all of them out. Make sure you don’t attempt this with pliers, a knife, or anything else. Doing so will simply break them, make you feel like an idiot, and cost you a trip to the store and more money.
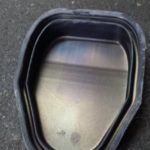
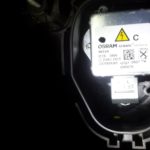
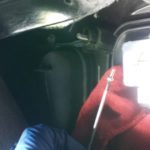
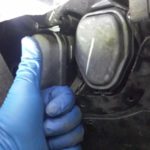
Once the cover is removed, locate the bulb cover, carefully remove the seal, pop off the plastic cover, and you’ll see the tiny Torx screw that holds the bulb in place. At this step you can place a shop rag (as pictured) underneath the bulb assembly to catch the screw in case it falls.
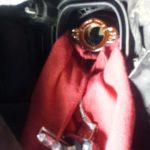
Lastly, remove the bulb, remove the attachment metal plate from the old bulb, place it on the new one, insert it, screw it, cover it. Voila!
For more details, check out this awesome DIY write up by Corvette Forum member Eric_G.
Chime in with your thoughts on the forum. >>