How-To Tuesday: Corvette A-Pillar Swap Out
This Week’s How-To Article Walks You Through the Step-by-Step Process of Swapping Out the A-Pillars on the Front of Your Corvette.
Obviously, one of the running theme’s around here is making your Corvette your own. We go through Corvette Forum How-To articles each week, and come up with something that can give you the customized Corvette to make your car the envy of the others. This week’s How-To article is about swapping out the A-pillars on the front of your Corvette. Just like most aftermarket options on the Corvette, there are many to choose from, but only one basic process to get them installed.
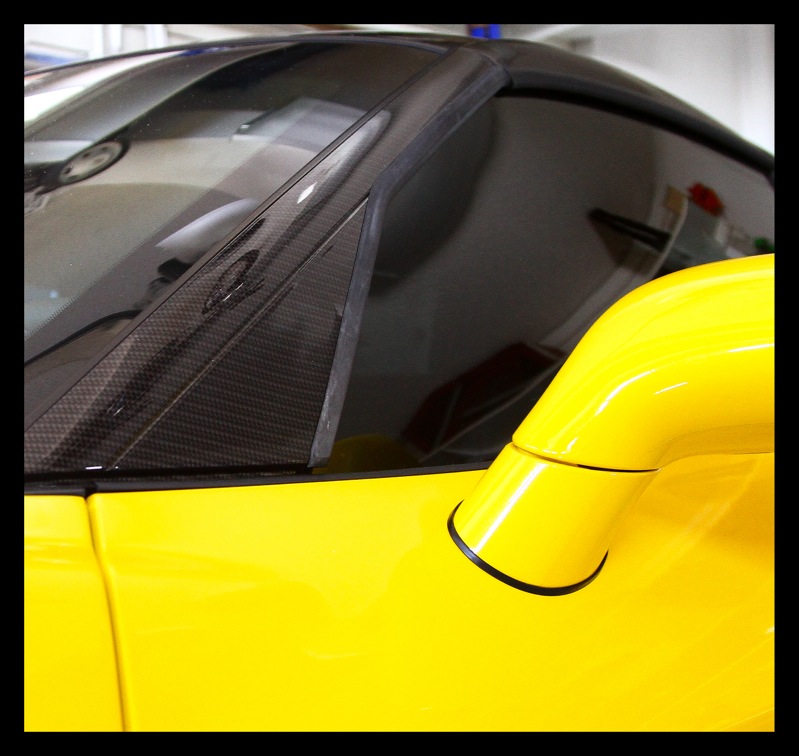
For those of you who may be drawing a blank on where the A-pillar is located on your Corvette, it’s the triangle-shaped carbon fiber piece in the above picture. It’s shaped similarly to an A, which is where it gets its name. The aftermarket for replacing this portion of the Corvette is as strong as any. From the factory, the part comes in a flat or matte black. That color from the factory can look good with a black paint scheme and tinted windows, but what if your car is another color, and you want the A-pillar to match? That’s where we have you covered.

As you can see in the C6 pictured above, the stock A-pillar has been swapped out to a body-paint-matching white. Some people love the look that the matching color provides, as it ties the painted roof panel to the rest of the car. This week’s How-To Tuesday article goes into depth on helping you make this transition on your Corvette.
The process should take you a few hours from start to finish, and is considered moderately difficult. So take your time in working through this project. And do let us see those before and after pictures!