
My 2003 Z06 Build
 02-22-2013, 01:36 AM
#1
Melting Slicks

Thread Starter
On the jeepforums, I used to really like reading people's build threads. Organized correctly, they ended up being a great resource and over time you got to see a jeep built to how the owner really wanted it. It's also really great looking back and seeing where you started and where you are now.
If it's ok I'd like to do the same thing here. As a reference, here's my old jeep build thread.
My end goal of the build is to have a comfortable DD and a fun track car. I'm not looking to do serious racing. Just a track day every couple of months.
So here's how it stood the day I got it:
~56,000 miles, 6 speed, z06, some minor stereo work, messed up interior but for the most part, stock.
Here's the latest:
Mods
Switchback LED Install and Fix / Skip-shift install | Projector Headlights | Custom TSW Nurburgring Center Caps
Pictures
GS Stripes | 3.1.13 Cars and Coffee | October MSR Trackday | New Wheels + Tinted Corners
Maintenance
Radiator Fluid Change / Heat Fix | Water Pump Change | Replace Swaybar Bushings
Custom HUD
Part #1
Mod List
Blackwing Air Intake, Skip-shift eliminator, CLB, Hurst Short Throw, Custom Head Unit, GS Stripes, Tinted Corners, Switchback LEDs, Projector HID Headlights, TSW Nurburgring 18/19 w/ Michelin Super Sports 265 35 18 front, 305 30 19 rear, Lowered on stock bolts, SS Brake lines, SS Brake pistons
If it's ok I'd like to do the same thing here. As a reference, here's my old jeep build thread.
My end goal of the build is to have a comfortable DD and a fun track car. I'm not looking to do serious racing. Just a track day every couple of months.
So here's how it stood the day I got it:
~56,000 miles, 6 speed, z06, some minor stereo work, messed up interior but for the most part, stock.
Here's the latest:

Mods
Switchback LED Install and Fix / Skip-shift install | Projector Headlights | Custom TSW Nurburgring Center Caps
Pictures
GS Stripes | 3.1.13 Cars and Coffee | October MSR Trackday | New Wheels + Tinted Corners
Maintenance
Radiator Fluid Change / Heat Fix | Water Pump Change | Replace Swaybar Bushings
Custom HUD
Part #1
Mod List
Blackwing Air Intake, Skip-shift eliminator, CLB, Hurst Short Throw, Custom Head Unit, GS Stripes, Tinted Corners, Switchback LEDs, Projector HID Headlights, TSW Nurburgring 18/19 w/ Michelin Super Sports 265 35 18 front, 305 30 19 rear, Lowered on stock bolts, SS Brake lines, SS Brake pistons
Last edited by dangerz; 05-24-2014 at 05:44 PM.
 02-22-2013, 01:36 AM
#2
Melting Slicks
Thread Starter
First thing I did was clean up the stereo. I installed a JVC KD-R730BT. The previous owner had really screwed up the interior. Almost every panel was cracked/broken somehow. He just cut speaker wires when he took the bass/amp out before selling it. It was a mess in there. Here's a picture of some of the wires I pulled:

He had the wire/trigger coming in from the ignition itself. I don't know what the hell he was thinking. I rerouted the power so it came from the stock stereo power harness and the trigger came from the Aux device connector in the passenger well. The new stereo also has bluetooth phone capabilities, so I ran the mic up through the drivers side a-pillar.
Next thing I did was install a Hurst shifter. This is a left-over I had from my previous vette (2000 base). I also installed a CLB while I had the dash apart and installed a new knee bolster. Lastly, oil/filter change and lowering on stock bolts.
This Saturday (and I will take more pictures this time) I plan on installing: skip-shift eliminator, clear corners, switchback corner lights and new ignition bezel (current one is broken)
02-22-2013, 08:36 AM
#4
Administrator


Member Since: Mar 2001
Location: In a parallel universe. Currently own 2014 Stingray Coupe.
Posts: 342,579
Received 19,186 Likes
on
13,910 Posts
C7 of the Year - Modified Finalist 2021
MO Events Coordinator
St. Jude Co-Organizer
St. Jude Donor '03-'04-'05-'06-'07-'08-'09-'10-'11-'12-'13-'14-'15-'16-'17-'18-'19-
'20-'21-'22-'23-'24
NCM Sinkhole Donor
CI 5, 8 & 11 Veteran


These kind of threads are great. So much useful information can be had from them. Best of luck in getting the car just how you want it and will be looking for more updates as you go along.
02-22-2013, 06:43 PM
#5
Melting Slicks
Thread Starter
Here's what I plan on doing this weekend. Switchback LED turn signal, clear corners, skip-shift eliminator and replacement ignition bezel (one of the many interior pieces I've replaced). I also ordered matte black GS stripes and an interior AC temperature sensor. I've noticed that my AC constantly blows cold air unless I set it to 90 degrees F, so I'm hoping a new sensor will help that.
I've also noticed that after I lowered the car on the stock bolts, the drivers side sits lower. I'm going to adjust the bolts this weekend to try and even if out, or if anything make the drivers side a tiny bit higher to compensate for me in the drivers seat.
As long as the weather cooperates, I'm also hoping for a good wash. Claybarred/polished/waxed last weekend, but we had nonstop rain so it's dirty again. >:[
02-23-2013, 06:53 PM
#6
Melting Slicks
Thread Starter
Lots of work done between yesterday and today. First thing I did was get my corners switched over to LED switchbacks. I used this as a semi-guide to help me along the way: http://www.corvetteflorida.com/forum...ad.php?t=13713
It's pretty straight forward though. I was able to do it without removing the brake ducts. You just have to be flexible enough :] I did run into an issue with the new lights though. It turns out that the switchbacks I ordered were too big. The batteries in my caliper were dead, but you can make out the markings on the ruler:
Original 16mm

Switchback 17mm
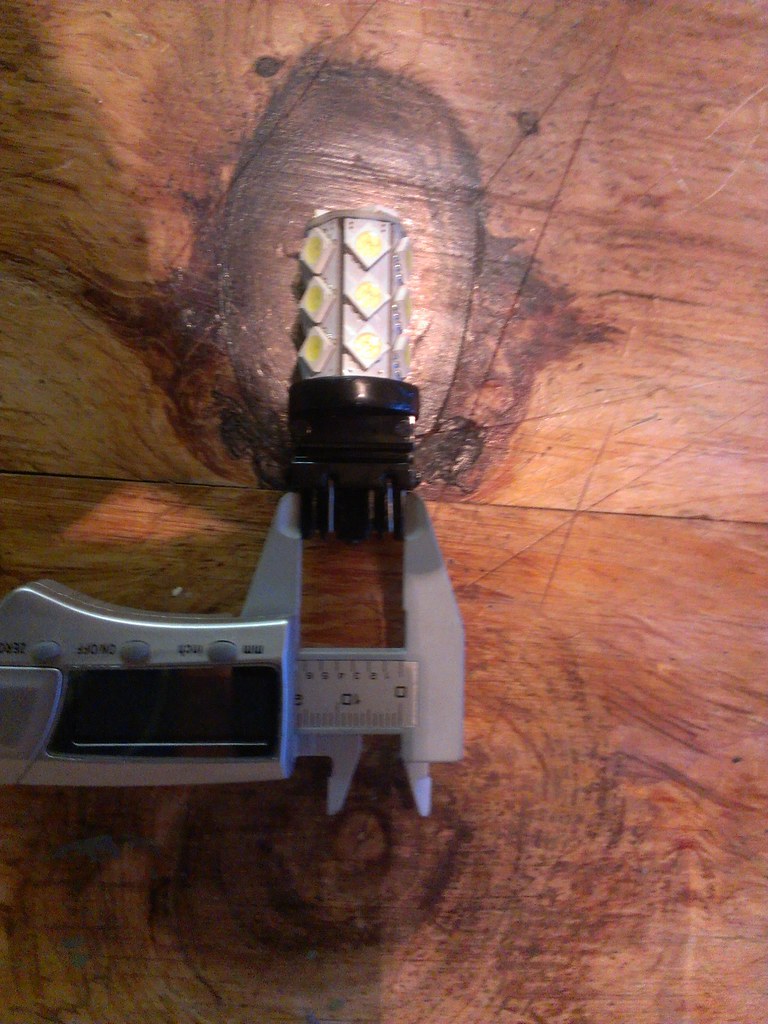
After figuring this out, I shaved the base of the switchback down by 1mm (.5 on each side) and they fit perfectly. If you're having problems getting yours to fit, you might have the same issue. I contacted the vendor that sold me the parts and he said he's going to talk to his factory to see what happened.
I also went ahead and installed Amber LED corners as well. These were plug and play. Remember that you should test them before putting everything back together. If you put them in the wrong way, they won't light up.
Once I got everything sorted out, I installed the Hyperflash harness. You could probably do this by just removing the knee bolster, but I went ahead and removed all the interior panels because I needed to replace the ignition key bezel with a new one. Plugged that in, tested everything and they all lit up. I put the car back together and left it for this morning.
This morning, I got it back up on ramps. I wanted to work on the lowering I did last time. As a reference, this is the guide I used: http://www.z06vette.com/forums/f117/...our-c5-107705/ When I had lowered it before, it had settled uneven. The left side was lower than the right and there wasn't much of a rake. First thing I did was work on the front.
Got the wheels off first. I then loosened the bolts as far as they would go until they would lock. I then turned them back 1/4 turn so they don't seize up. After getting the wheels back on, I did the back of the car. I ended up loosening the back all the way until the little washer looking thing on top was just touching the nut. I then reversed it 3 3/4 turns. This set it so I had just about 3 threads showing. I lowered the car and went for a nice drive. I measured it and I have a little under 1/4 inch rake between front and back. I figure I'll let it settle for a couple days and check again. If all goes well, I'll be taking it to get aligned next Friday.
After I got that done, it was time for the skip-shift eliminator. I hate the skip-shift. If I wanted the car to tell me how to shift, I would've gotten a manual. I also don't see how it could possibly save gas. Whenever I'm forced into 4th, I end up having to give it more gas to compensate for the gear. Anyway, I picked up this skip-shift eliminator. I have to give this vendor lots of credit. I went through the instructions before making any changes and I got caught up at the part where you're verifying wires. I figured I would try calling knowing full well that it was Saturday morning. I was extremely surprised when Richard picked up. He answered all my questions and even offered more tips to help me along. You can't beat that kind of customer support.
The skip-shift comes with excellent instructions with lots of pictures, but I took some along the way just in case. I also found it a lot easier to take the battery out instead of work alongside it. For those that don't know, removing the battery is easy.
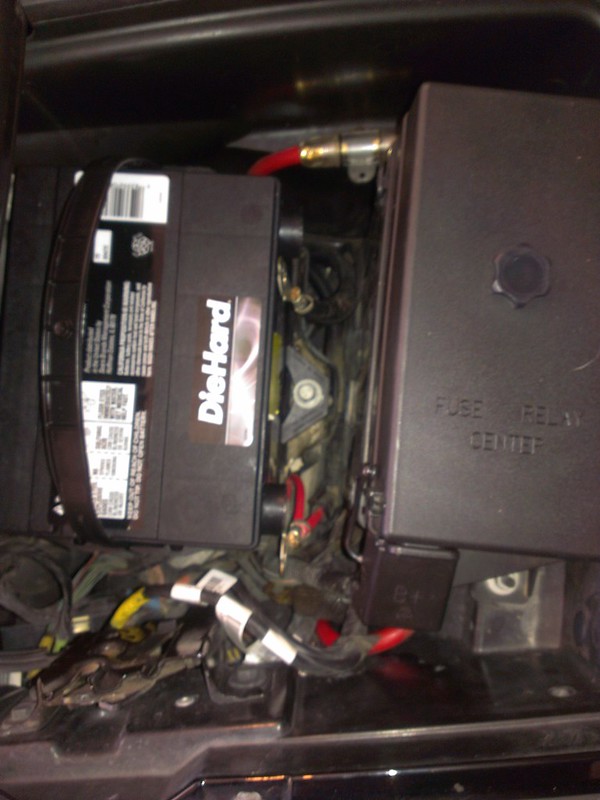
Directly in the center of that picture is a bolt. After you've removed the negative and positive cables from the battery, simply loosen that bolt (I believe it's 12mm, but someone can correct me if I'm wrong). Once the bolts is fully released, you can pull it up with the rubber attachment. At that point, the battery is free and you can lift it out of the bay. Once I got it out, the install went very well.
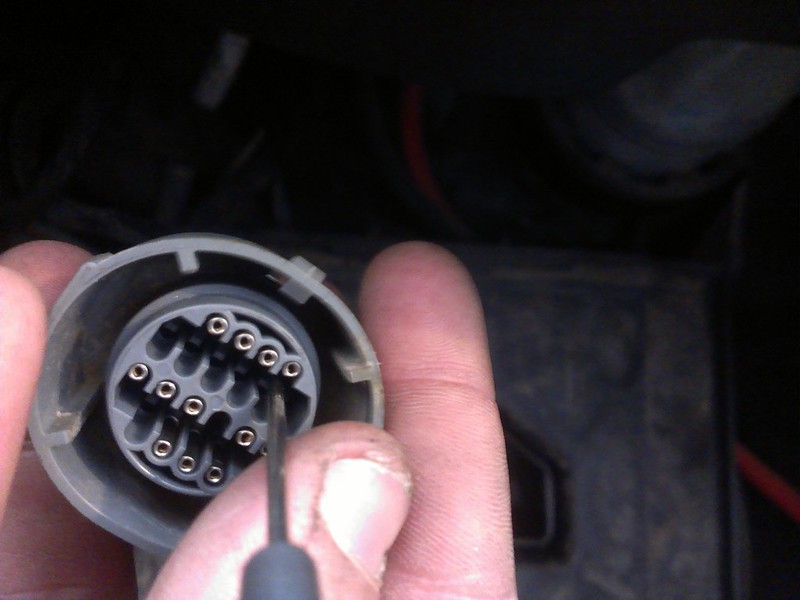
There were some minor gotcha's along the way. I ended up having 4 wires instead of 3 along the top row. The notes say that this is expected and that the most important thing to check is that the other 3 wires are the correct colors. You can see in the picture below, there's a gray, yellow, purple and yellow w/ black stripe. The yellow w/ black stripe is the extra one. As long as the gray/yellow/purple are in the right order (the terminals are also marked A,B,C) then you're ok and you can ignore the 4th wire.
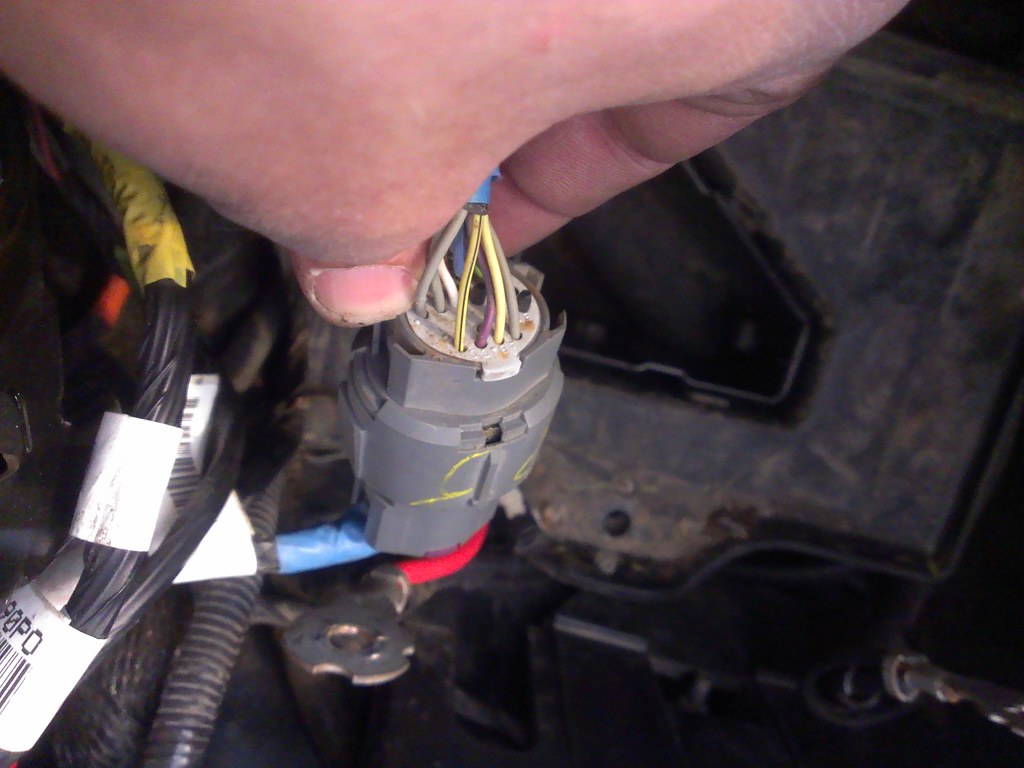
Mine were the correct colors, so I proceeded forward. The kit includes a post-removal tool to get the gray wire terminal out. I was having a hard time releasing it. I found that if I get a pair of eyeglass screwdrivers, I could use them to unclip the metal post and then use the post-removal tool that's included in the kit to push the gray wire down.
Once I got that part done, the skip-shift was totally disabled. Next was disabling the light. I'd like to say this was easy. The process is relatively straight forward: Find the white wire and cut it (amongst other little things). Unfortunately the wire loom is very tight, so it makes any kind of maneuvering around in the fuse box a pain. I was able to finally get it (sorry, no pictures of this part). I was going to try the method that disables the light without cutting, but it was too much of a pain and I can't imagine anyone actually wanting the 1-4 shift light.
So my tally for this weekend is:
Skip-shift eliminator installed
Lowering fixed
Clear Corners installed
Switchback LEDs installed
Hyperflash Harness installed
Ignition Switch Bezel fixed
Nothing technical, but plenty of work done. I washed her, went for a nice drive and took some pictures for good measure. I might try and find someone local to try and clean the paint up a little bit. It's had 10 years of exposure and it shows. I think a good detailer can fix most of it though. I gave it a good claybar/polish/waxing last weekend but I'm pretty rusty at that. I need to read up on it again.


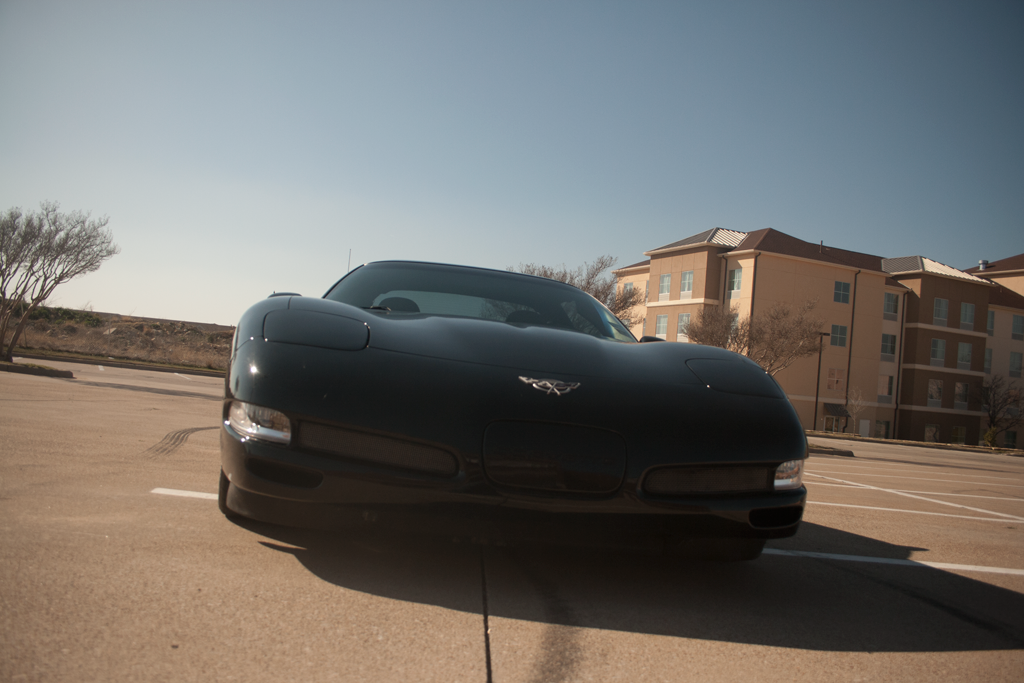
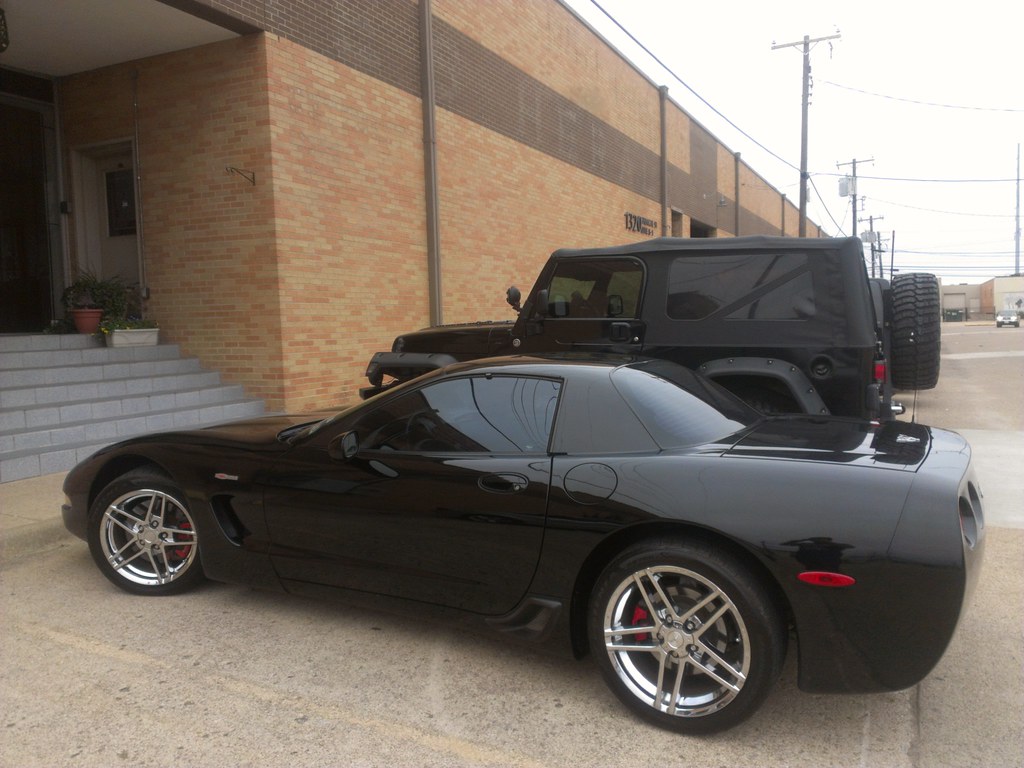
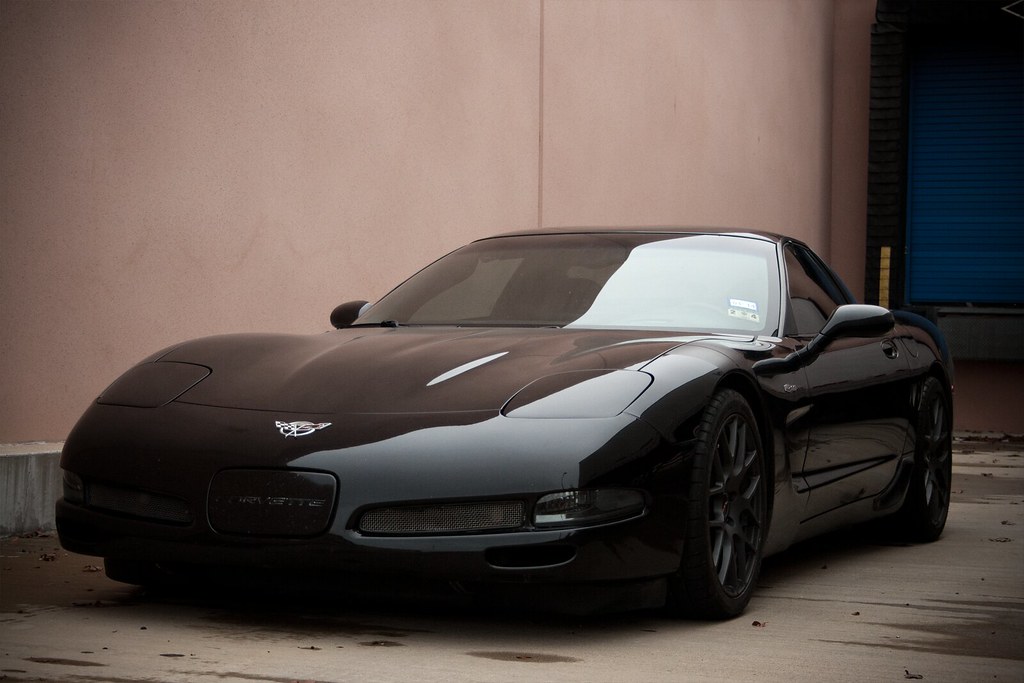
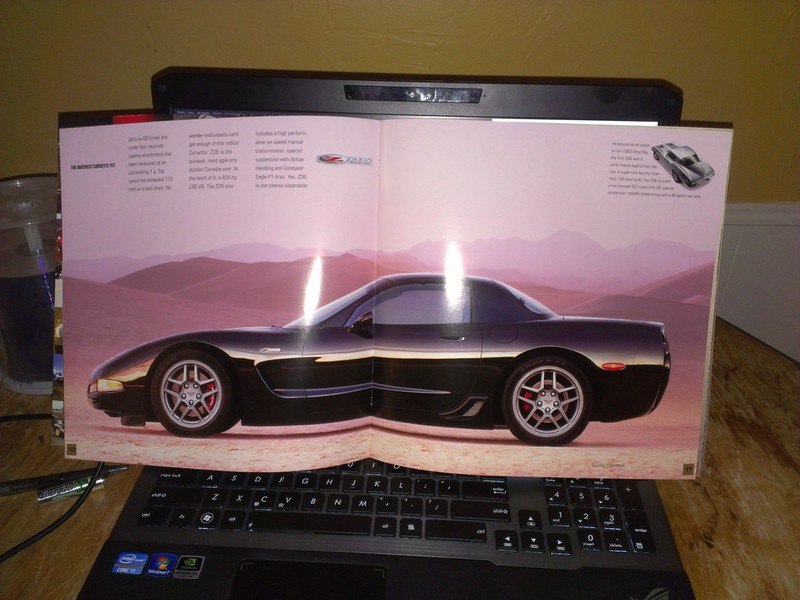
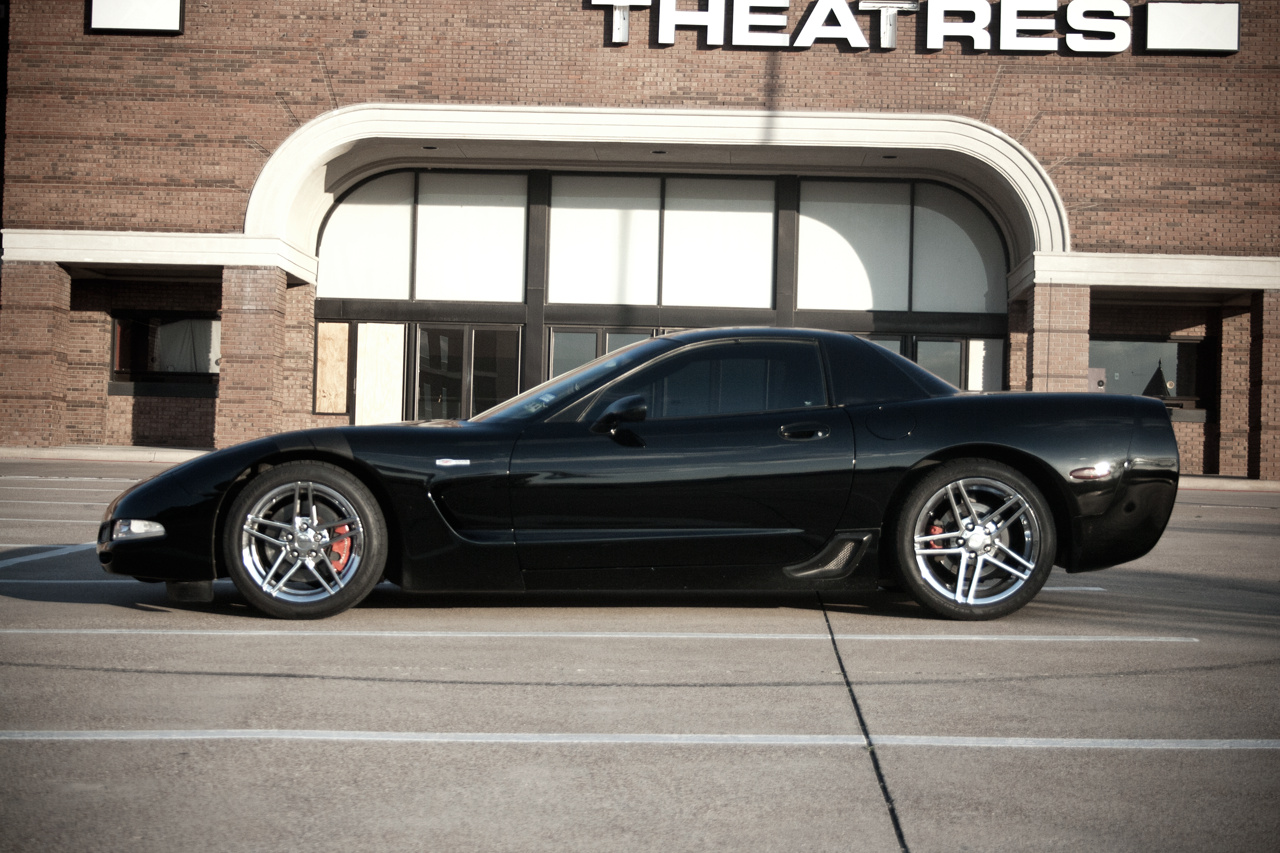
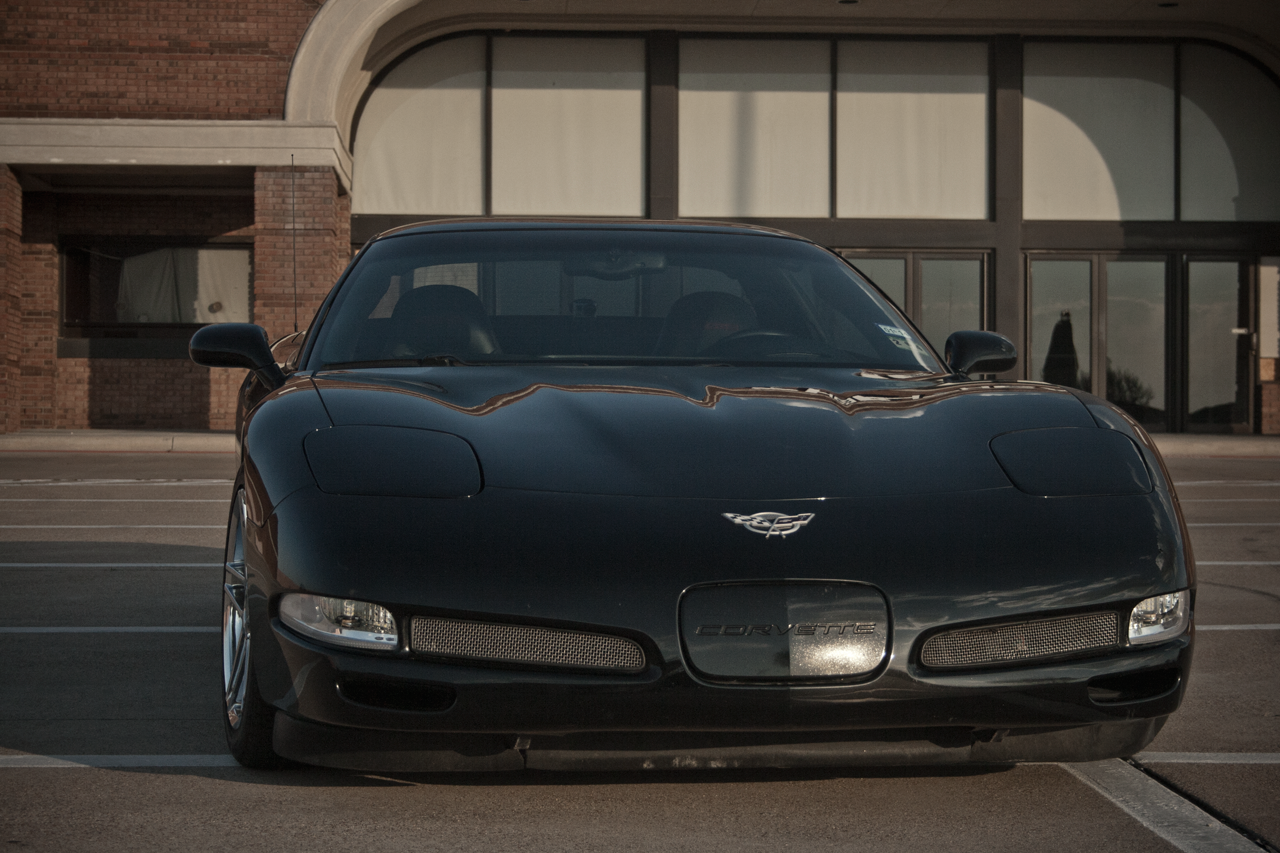
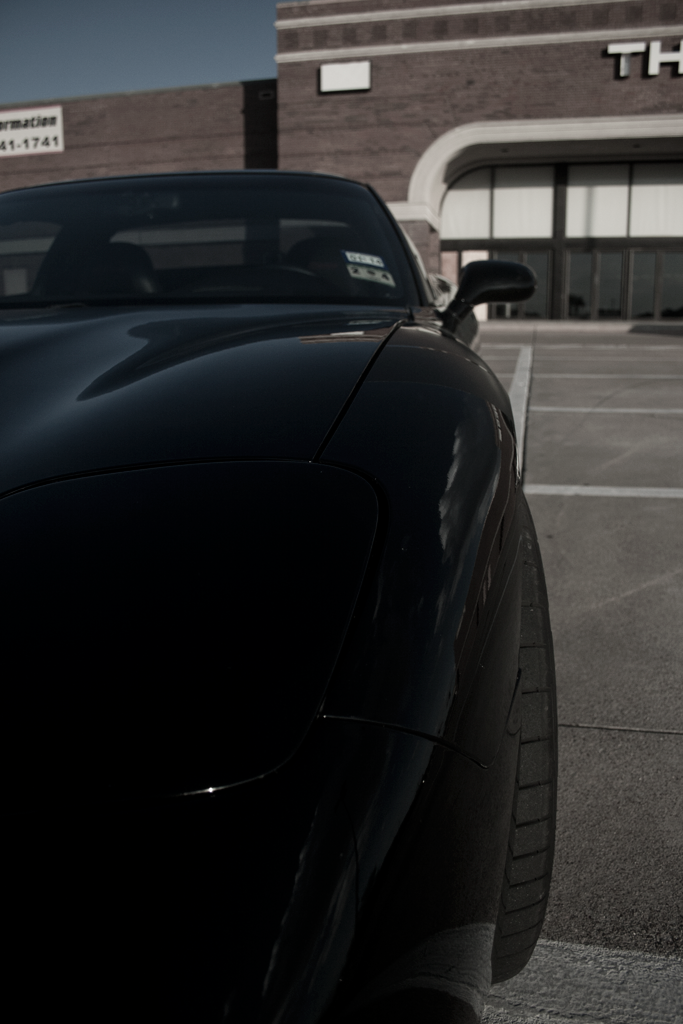
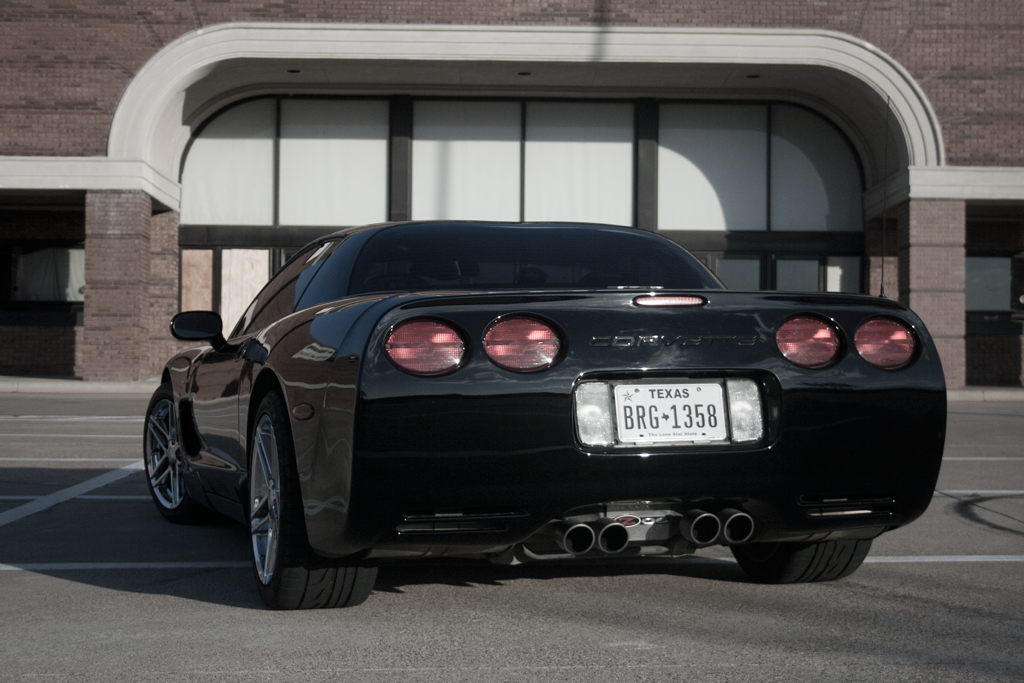
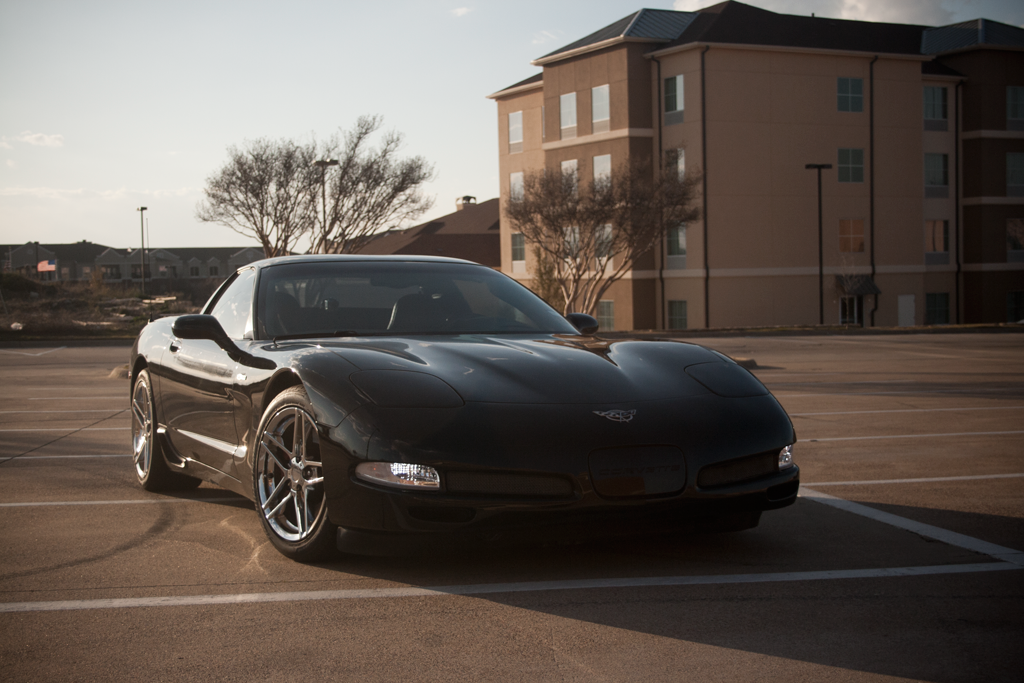
On a different note, I also purchased a 2003 Corvette brochure. I got it from the parts forum on here. It contains some awesome pictures in it. I really appreciate this shot of a black z06, just like mine :]


It's pretty straight forward though. I was able to do it without removing the brake ducts. You just have to be flexible enough :] I did run into an issue with the new lights though. It turns out that the switchbacks I ordered were too big. The batteries in my caliper were dead, but you can make out the markings on the ruler:
Original 16mm
Switchback 17mm
After figuring this out, I shaved the base of the switchback down by 1mm (.5 on each side) and they fit perfectly. If you're having problems getting yours to fit, you might have the same issue. I contacted the vendor that sold me the parts and he said he's going to talk to his factory to see what happened.
I also went ahead and installed Amber LED corners as well. These were plug and play. Remember that you should test them before putting everything back together. If you put them in the wrong way, they won't light up.
Once I got everything sorted out, I installed the Hyperflash harness. You could probably do this by just removing the knee bolster, but I went ahead and removed all the interior panels because I needed to replace the ignition key bezel with a new one. Plugged that in, tested everything and they all lit up. I put the car back together and left it for this morning.
This morning, I got it back up on ramps. I wanted to work on the lowering I did last time. As a reference, this is the guide I used: http://www.z06vette.com/forums/f117/...our-c5-107705/ When I had lowered it before, it had settled uneven. The left side was lower than the right and there wasn't much of a rake. First thing I did was work on the front.
Got the wheels off first. I then loosened the bolts as far as they would go until they would lock. I then turned them back 1/4 turn so they don't seize up. After getting the wheels back on, I did the back of the car. I ended up loosening the back all the way until the little washer looking thing on top was just touching the nut. I then reversed it 3 3/4 turns. This set it so I had just about 3 threads showing. I lowered the car and went for a nice drive. I measured it and I have a little under 1/4 inch rake between front and back. I figure I'll let it settle for a couple days and check again. If all goes well, I'll be taking it to get aligned next Friday.
After I got that done, it was time for the skip-shift eliminator. I hate the skip-shift. If I wanted the car to tell me how to shift, I would've gotten a manual. I also don't see how it could possibly save gas. Whenever I'm forced into 4th, I end up having to give it more gas to compensate for the gear. Anyway, I picked up this skip-shift eliminator. I have to give this vendor lots of credit. I went through the instructions before making any changes and I got caught up at the part where you're verifying wires. I figured I would try calling knowing full well that it was Saturday morning. I was extremely surprised when Richard picked up. He answered all my questions and even offered more tips to help me along. You can't beat that kind of customer support.
The skip-shift comes with excellent instructions with lots of pictures, but I took some along the way just in case. I also found it a lot easier to take the battery out instead of work alongside it. For those that don't know, removing the battery is easy.
Directly in the center of that picture is a bolt. After you've removed the negative and positive cables from the battery, simply loosen that bolt (I believe it's 12mm, but someone can correct me if I'm wrong). Once the bolts is fully released, you can pull it up with the rubber attachment. At that point, the battery is free and you can lift it out of the bay. Once I got it out, the install went very well.
There were some minor gotcha's along the way. I ended up having 4 wires instead of 3 along the top row. The notes say that this is expected and that the most important thing to check is that the other 3 wires are the correct colors. You can see in the picture below, there's a gray, yellow, purple and yellow w/ black stripe. The yellow w/ black stripe is the extra one. As long as the gray/yellow/purple are in the right order (the terminals are also marked A,B,C) then you're ok and you can ignore the 4th wire.
Mine were the correct colors, so I proceeded forward. The kit includes a post-removal tool to get the gray wire terminal out. I was having a hard time releasing it. I found that if I get a pair of eyeglass screwdrivers, I could use them to unclip the metal post and then use the post-removal tool that's included in the kit to push the gray wire down.
Once I got that part done, the skip-shift was totally disabled. Next was disabling the light. I'd like to say this was easy. The process is relatively straight forward: Find the white wire and cut it (amongst other little things). Unfortunately the wire loom is very tight, so it makes any kind of maneuvering around in the fuse box a pain. I was able to finally get it (sorry, no pictures of this part). I was going to try the method that disables the light without cutting, but it was too much of a pain and I can't imagine anyone actually wanting the 1-4 shift light.
So my tally for this weekend is:
Skip-shift eliminator installed
Lowering fixed
Clear Corners installed
Switchback LEDs installed
Hyperflash Harness installed
Ignition Switch Bezel fixed
Nothing technical, but plenty of work done. I washed her, went for a nice drive and took some pictures for good measure. I might try and find someone local to try and clean the paint up a little bit. It's had 10 years of exposure and it shows. I think a good detailer can fix most of it though. I gave it a good claybar/polish/waxing last weekend but I'm pretty rusty at that. I need to read up on it again.
On a different note, I also purchased a 2003 Corvette brochure. I got it from the parts forum on here. It contains some awesome pictures in it. I really appreciate this shot of a black z06, just like mine :]
 02-26-2013, 05:45 PM
#8
Melting Slicks
Thread Starter
I'm in the running for Ride of the Month at http://www.z06vette.com/forums/f170/...g-poll-125970/
So far I'm winning by 1 vote
So far I'm winning by 1 vote
02-27-2013, 09:53 AM
#9
Melting Slicks
Thread Starter
Installed GS stripes on her last night. Not sure how I feel about the look, but it's vinyl so it's not permanent. I also didn't do the greatest job, but there's a vinyl shop near where I work so if I like the look, I'll have them install a new set.
 03-01-2013, 07:34 PM
#11
Melting Slicks
Thread Starter
Warning: Picture dump time. I have pictures of the switchbacks and new GS stripes that I had installed today.


I also installed a Blackwing filter and got the car aligned. Very productive day.
Installing the blackwing wasn't too bad. It's straight forward but I always like to try and find guides when I can just to make sure I'm not missing anything. In this case, I used this guide. It was close enough to my car to make it work.
Also got Ride of the Month which is kinda neat. I was a fierce competition (there were only 2 other vettes, lol) but I won out in the end. My only regret is that I won it for the shortest month of the year.
 03-02-2013, 06:33 PM
#13

Man I love this thread! Great Z06 that you have there!!! I see that you are in Fort Worth. Cool!! Where is this Cars and Coffee event and how often is it? I'll bring my C2 67 coupe to one and get to check out the z06s. C5 Z06s are just the coolest looking Vettes around.
03-02-2013, 06:45 PM
#14
Melting Slicks
Thread Starter
Man I love this thread! Great Z06 that you have there!!! I see that you are in Fort Worth. Cool!! Where is this Cars and Coffee event and how often is it? I'll bring my C2 67 coupe to one and get to check out the z06s. C5 Z06s are just the coolest looking Vettes around.
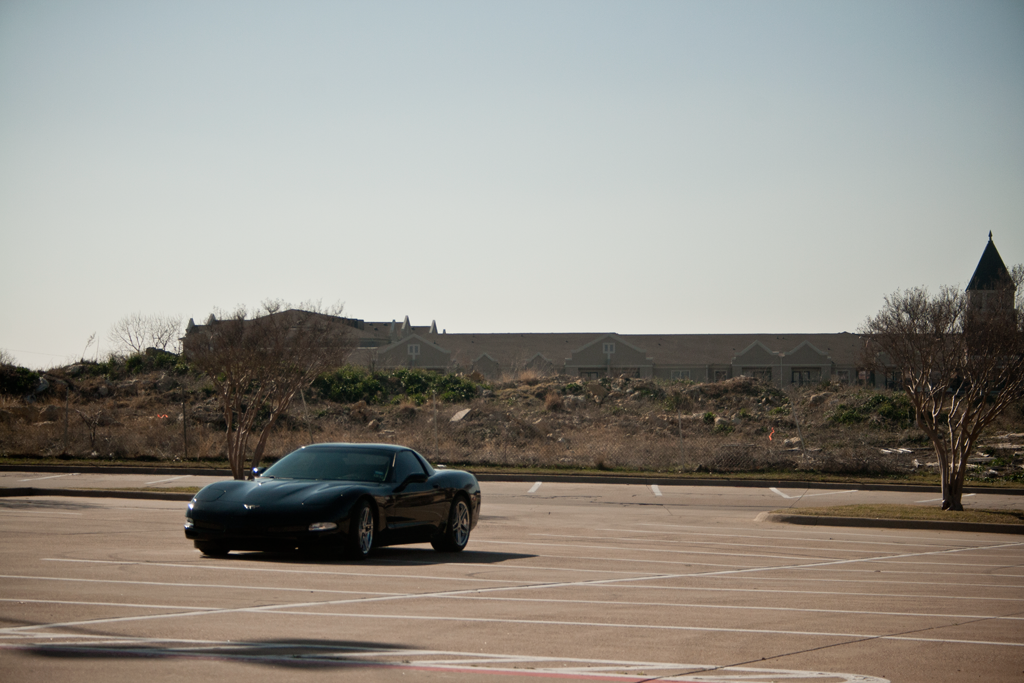
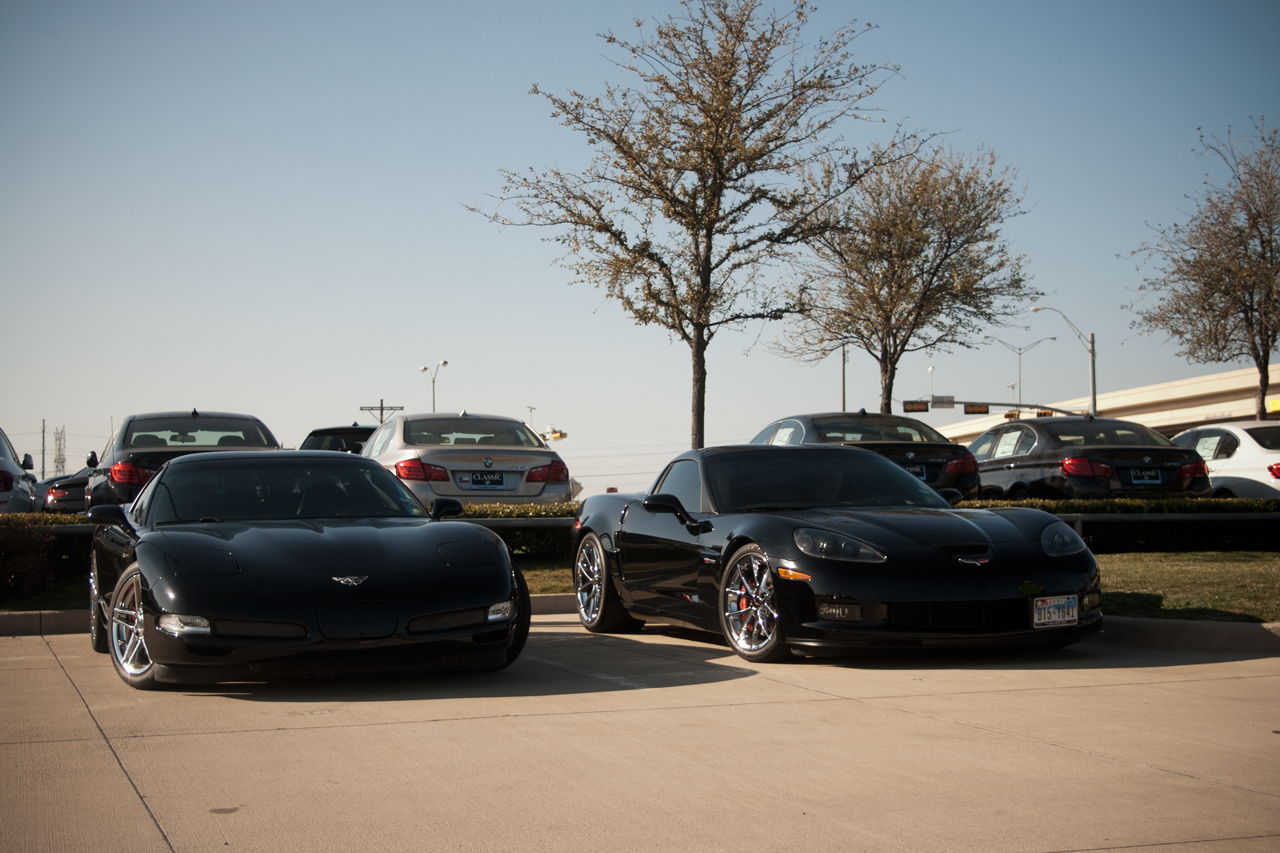
Fort Worth does a Cars and Coffee event, but it's every other month and the next one is in April. I'd love to see your C2 there. There was a strong Corvette showing today. We had an entire row and some more all to ourselves.


 03-07-2013, 10:26 AM
#16
Melting Slicks
Thread Starter
I've been having issues with the Auto-AC getting the temperature right. On manual mode, it would only warm up if I set it to 90. In automatic mode, it would be cool most of the time and eventually blow only cold air. After getting some advice from this thread, I ended up changing the internal temperature sensor. That didn't do anything. I then reset the actuators by going into diagnostic mode and holding the reset button on 99 hvac. I heard them spin up and go to each side, but they didn't throw any codes. This is a good sign because swapping those things out is a huge pain in the butt. The last recommendation was to check my radiator fluid. If it was low, the heater core wouldn't be getting enough fluid to work. I've been meaning to change my fluid anyway, so off I went.
First thing you need is supplies:
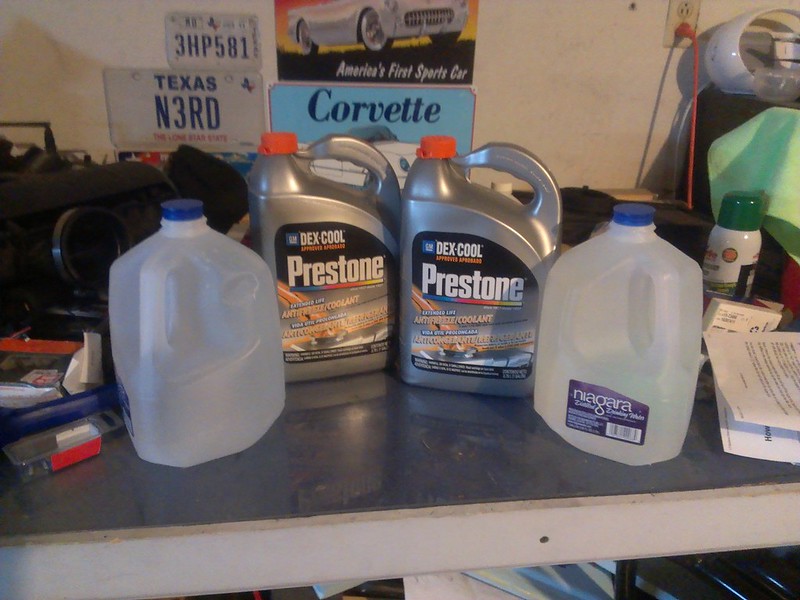
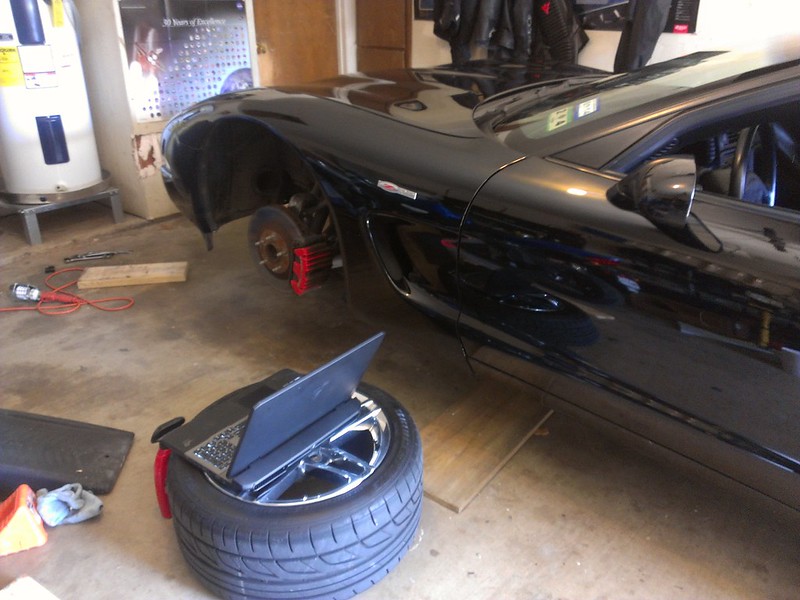
I read that the car holds 2 gallons of fluid. I wanted to be safe, so I got 2 gallons of distilled water and 2 gallons of radiator fluid. You'll want to get Dex-Cool and non-mixed so you can mix it yourself. Next, I got the car up on ramps. In all honesty this whole process can be done without ramps if you go through your right tire, but ramps makes it a lot easier.

This is an all too common site in my garage lately.
First thing we do is remove the reservoir cap. I thought I had a picture of that, but apparently I don't so I'll recycle a picture from the end.
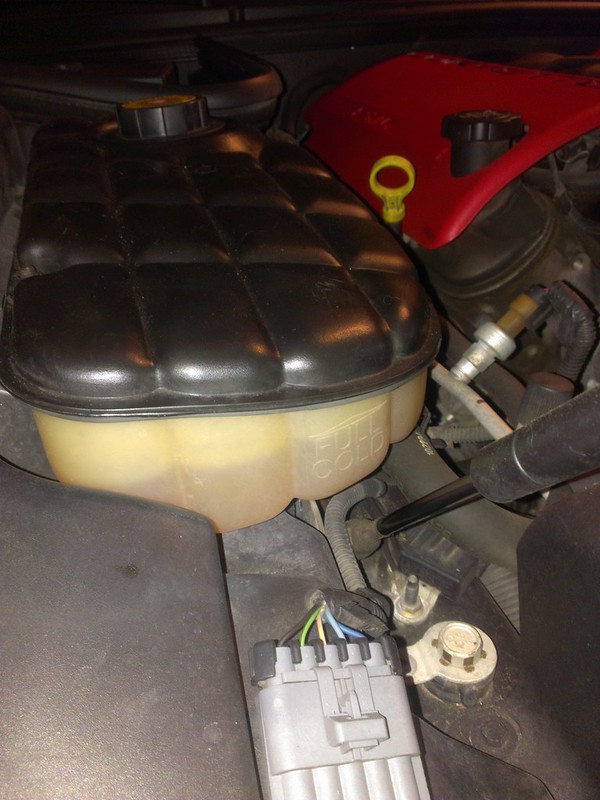
The cap is on top of the reservoir. Be very careful when removing it. If your engine is hot, there is going to be some pressure build-up. Ever so slowly, turn the cap. You'll start to hear some hissing as it starts to open up. If you go too fast, fluid will fly out and burn you. This stuff is hot - you don't want it on you. I am paranoid. I literally wore my motorcycle helmet, jacket and gloves. Need to protect the money maker
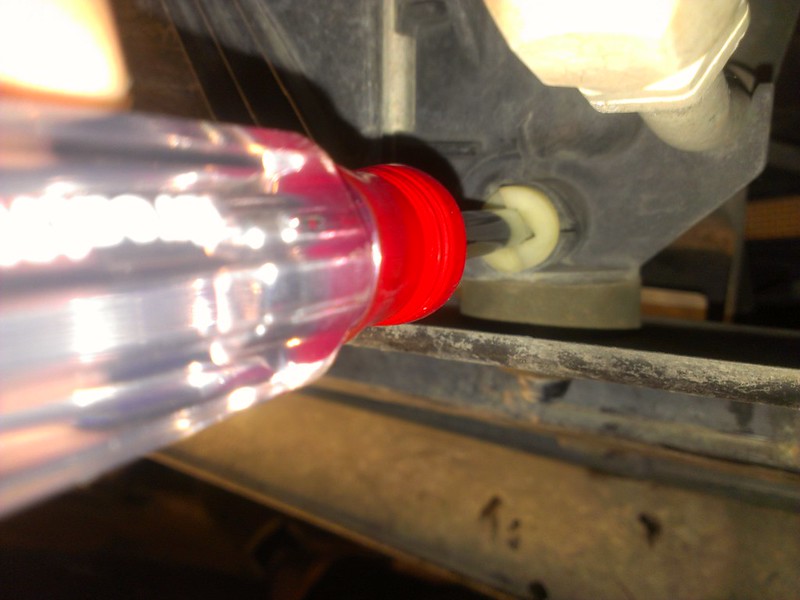
Now that we have the reservoir cap off, we drain the fluid. I had a hard time finding the plug at first (that's what she said?). Here's the easiest way to find it. On the passenger side, directly underneath your radiator, you'll find a little rubber nipple (don't get too excited, it's not the fun kind of nipple ) that looks like so:

Directly above that, you're going to find an off-white little **** looking .. thing. That's the drain plug.

That little guy is what you want to loosen. Some people use screw-drivers. I found the hole to be the perfect size for a 1/4 ratchet attachment. Now you want to be really careful here. That drain plug only turns 1/4 turn at the most and it is brittle plastic. Mine was very, very tight (insert inappropriate joke here).
If your car was recently on, your fluid will be very hot. Be careful. I wore my motorcycle glove for this. Call me what you want - at least my pretty hands were safe.

If you break it, NAPA has replacement plugs.
After you turn it, you need to pull it out slightly. I needed to use some needle nose pliers. Also be very careful here. I am apparently Macho Man Randy Savage. I pulled it out too hard and it flew across my garage. I was very fortunate in not breaking it. After it's pulled out, the fluid will drain out of the nipple.
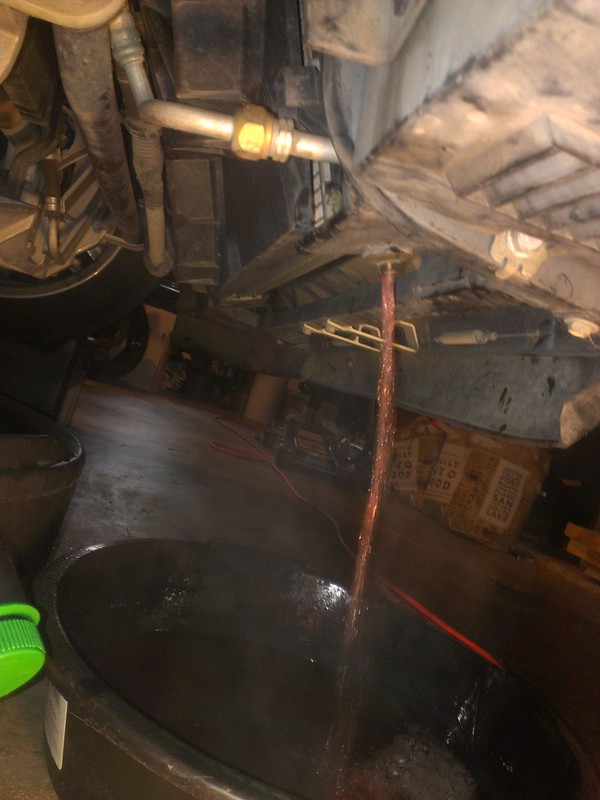
Word of warning: this stuff is sticky. If you have pets, it is also apparently very tasty (I wouldn't know). On top of being tasty and sticky, it is very, very poisonous. Please keep your pets out of the garage while doing this.
Once fluid is no longer dripping, I replaced the drain plug on the bottom. This is as simple as pushing it back in (remember, gentle). Once it's in, you'll want to turn it clockwise 1/4 turn. You'll feel it snap into place and you should no longer have any drips.
Now you need to put radiator fluid back in. Apparently this is where I stopped taking pictures - sorry. Fortunately the process is simple enough.
If possible, start by mixing a gallon of radiator fluid and a gallon of distilled water. If you can't, go ahead and pour that gallon of radiator fluid into the reservoir up top. Get enough in there that you can comfortably start the car and get it off the ramps. You want it to be level for the rest of the process. I pretty much emptied the entire gallon of radiator fluid and half a gallon of water. A funnel helps here. Once you've put some fluid in, turn the car on and take it off the ramps.
Once I got the car off the ramps (and with it still running), I regularly checked my reservoir. As it was getting low, I would top it off with some water. You want to shoot for a 50/50 mix of radiator fluid and water. I also turned the heat on to 90 degrees and fans full blast to cycle the fluid through the heater core. Remember that this whole time, your reservoir cap is off and you are regularly topping off the fluids as it gets low. You want to make sure there's always at least some fluid in the reservoir. It doesn't have to stay on the full line the whole time (after all, that's the 'cold fill' line) but there should be some left.
After your car has run for a few minutes, go ahead and turn the engine off and put the cap back on. For the next couple of minutes, you're going to want to check on the reservoir and make sure that as the fluid cools off, it settles around that 'cold fill' line. If you notice that you've put too much in, you're going to want to drain some out of the bottom by using the same procedure from earlier. It will be extremely hot - be careful. It is possible to drain the fluid without lifting the car, but you'll need to turn the front tires all the way to the right and need to have a container that can fit below the air damn.
So after I got that done and the levels were good, I took the car for a little spin. Heat worked excellently. The true test would be this morning on my commute to work. Fortunately it passed the test with flying colors. Outside temp was 45 degrees. As I drove into work, I set the inside temp to 72 and let it do its thing in auto mode. It worked flawlessly. I then went into manual mode. Before this, I had to set the temp to 90 to get any kind of heat. I now had heat from 70 to 90. Excellent.
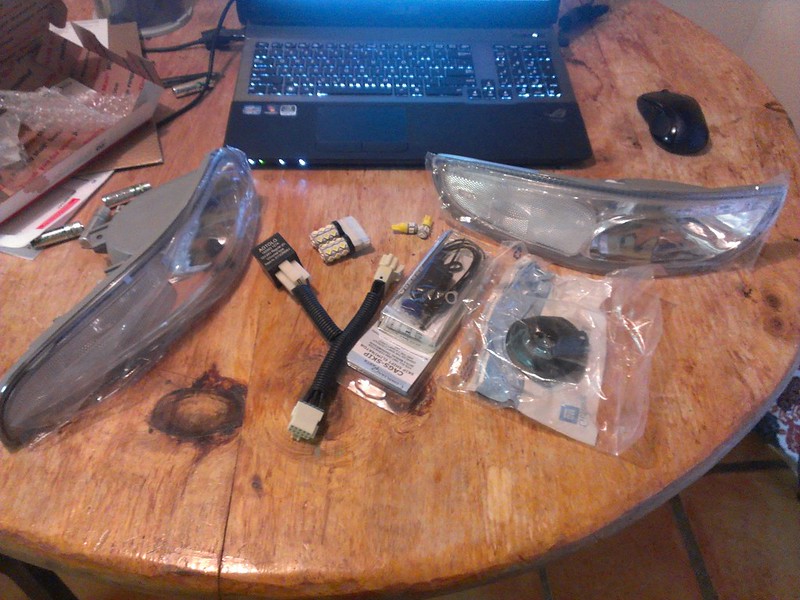
So now that I've gotten that fixed, next step is probably the diff fluid. I also have all the parts for front fog lights ordered or on the way. Expect an install of that sometime next week (probably Fridayish).
First thing you need is supplies:
I read that the car holds 2 gallons of fluid. I wanted to be safe, so I got 2 gallons of distilled water and 2 gallons of radiator fluid. You'll want to get Dex-Cool and non-mixed so you can mix it yourself. Next, I got the car up on ramps. In all honesty this whole process can be done without ramps if you go through your right tire, but ramps makes it a lot easier.
This is an all too common site in my garage lately.
First thing we do is remove the reservoir cap. I thought I had a picture of that, but apparently I don't so I'll recycle a picture from the end.
The cap is on top of the reservoir. Be very careful when removing it. If your engine is hot, there is going to be some pressure build-up. Ever so slowly, turn the cap. You'll start to hear some hissing as it starts to open up. If you go too fast, fluid will fly out and burn you. This stuff is hot - you don't want it on you. I am paranoid. I literally wore my motorcycle helmet, jacket and gloves. Need to protect the money maker
Now that we have the reservoir cap off, we drain the fluid. I had a hard time finding the plug at first (that's what she said?). Here's the easiest way to find it. On the passenger side, directly underneath your radiator, you'll find a little rubber nipple (don't get too excited, it's not the fun kind of nipple
) that looks like so:Directly above that, you're going to find an off-white little **** looking .. thing. That's the drain plug.
That little guy is what you want to loosen. Some people use screw-drivers. I found the hole to be the perfect size for a 1/4 ratchet attachment. Now you want to be really careful here. That drain plug only turns 1/4 turn at the most and it is brittle plastic. Mine was very, very tight (insert inappropriate joke here).
If your car was recently on, your fluid will be very hot. Be careful. I wore my motorcycle glove for this. Call me what you want - at least my pretty hands were safe.
If you break it, NAPA has replacement plugs.
After you turn it, you need to pull it out slightly. I needed to use some needle nose pliers. Also be very careful here. I am apparently Macho Man Randy Savage. I pulled it out too hard and it flew across my garage. I was very fortunate in not breaking it. After it's pulled out, the fluid will drain out of the nipple.
Word of warning: this stuff is sticky. If you have pets, it is also apparently very tasty (I wouldn't know). On top of being tasty and sticky, it is very, very poisonous. Please keep your pets out of the garage while doing this.
Once fluid is no longer dripping, I replaced the drain plug on the bottom. This is as simple as pushing it back in (remember, gentle). Once it's in, you'll want to turn it clockwise 1/4 turn. You'll feel it snap into place and you should no longer have any drips.
Now you need to put radiator fluid back in. Apparently this is where I stopped taking pictures - sorry. Fortunately the process is simple enough.
If possible, start by mixing a gallon of radiator fluid and a gallon of distilled water. If you can't, go ahead and pour that gallon of radiator fluid into the reservoir up top. Get enough in there that you can comfortably start the car and get it off the ramps. You want it to be level for the rest of the process. I pretty much emptied the entire gallon of radiator fluid and half a gallon of water. A funnel helps here. Once you've put some fluid in, turn the car on and take it off the ramps.
Once I got the car off the ramps (and with it still running), I regularly checked my reservoir. As it was getting low, I would top it off with some water. You want to shoot for a 50/50 mix of radiator fluid and water. I also turned the heat on to 90 degrees and fans full blast to cycle the fluid through the heater core. Remember that this whole time, your reservoir cap is off and you are regularly topping off the fluids as it gets low. You want to make sure there's always at least some fluid in the reservoir. It doesn't have to stay on the full line the whole time (after all, that's the 'cold fill' line) but there should be some left.
After your car has run for a few minutes, go ahead and turn the engine off and put the cap back on. For the next couple of minutes, you're going to want to check on the reservoir and make sure that as the fluid cools off, it settles around that 'cold fill' line. If you notice that you've put too much in, you're going to want to drain some out of the bottom by using the same procedure from earlier. It will be extremely hot - be careful. It is possible to drain the fluid without lifting the car, but you'll need to turn the front tires all the way to the right and need to have a container that can fit below the air damn.
So after I got that done and the levels were good, I took the car for a little spin. Heat worked excellently. The true test would be this morning on my commute to work. Fortunately it passed the test with flying colors. Outside temp was 45 degrees. As I drove into work, I set the inside temp to 72 and let it do its thing in auto mode. It worked flawlessly. I then went into manual mode. Before this, I had to set the temp to 90 to get any kind of heat. I now had heat from 70 to 90. Excellent.
So now that I've gotten that fixed, next step is probably the diff fluid. I also have all the parts for front fog lights ordered or on the way. Expect an install of that sometime next week (probably Fridayish).
Last edited by dangerz; 03-07-2013 at 10:33 AM.


 04-01-2013, 10:14 AM
#18
Melting Slicks
Thread Starter
Not too much new since the last post. I checked the brakes and they had a lot of life left. I was going to do a month of no mods, but a group buy was offered on a full projector setup. I don't like the stock c5 headlights so I bit the bullet.
Install was pretty straight forward. I used this guide to help me along. I didn't have any issues during the removal. Install wasn't too bad. Some things I learned along the way:
- The headlights attach to the bracket using self-tapping screws. You have to put these in extremely slowly and carefully or else you will break the posts that they attach to. I broke 2 of them, but I was able to get everything attached so it works.
- The headlights have halos on the front. I wired these to the front corner lights (not the amber one). The middle brown wire in the front light is what I used. This makes it so the halos light up when you turn the switch to the first position.
- Light output is significantly better than stock. I went with a 4300k colored bulb.
Aiming was a little scary, but that was mainly because I read about a lot of people who broke the gold aiming post. I used a lot of pb blaster and let it sit for a few hours. My horizontal aiming bolts had no problems, but my vertical ones squeaked a lot. They still worked though so I just had to get used to the squeaking.
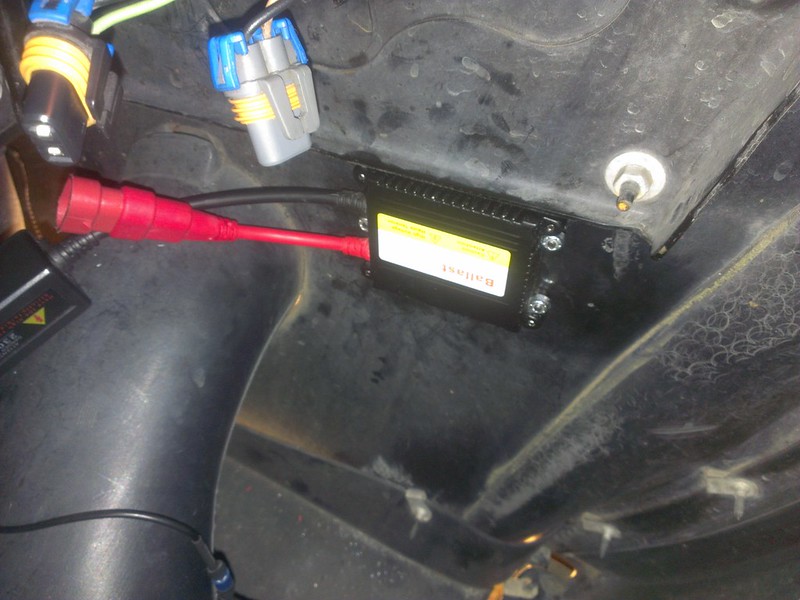
Here's where I mounted my ballast. It's directly under the headlight bracket.

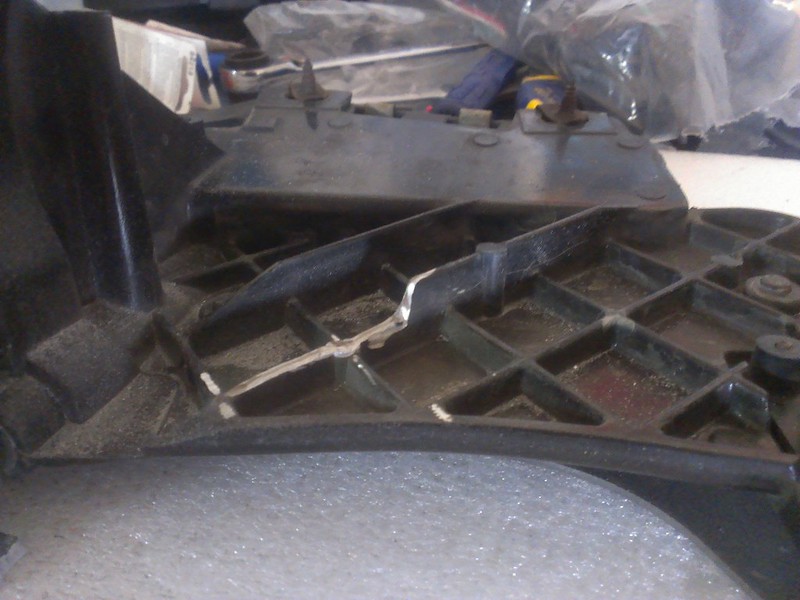
This is what I had to shave down to get the bracket to fit.
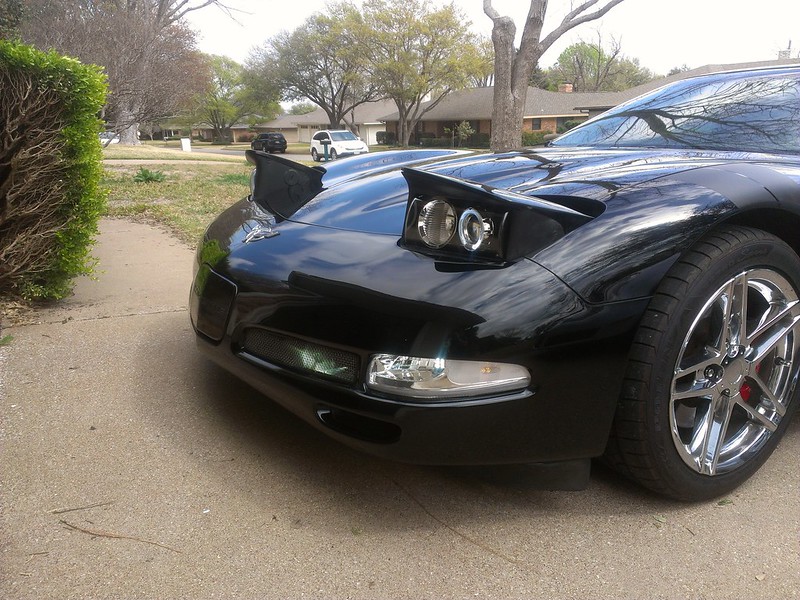
.. and finally, a before/after shot:
Before:
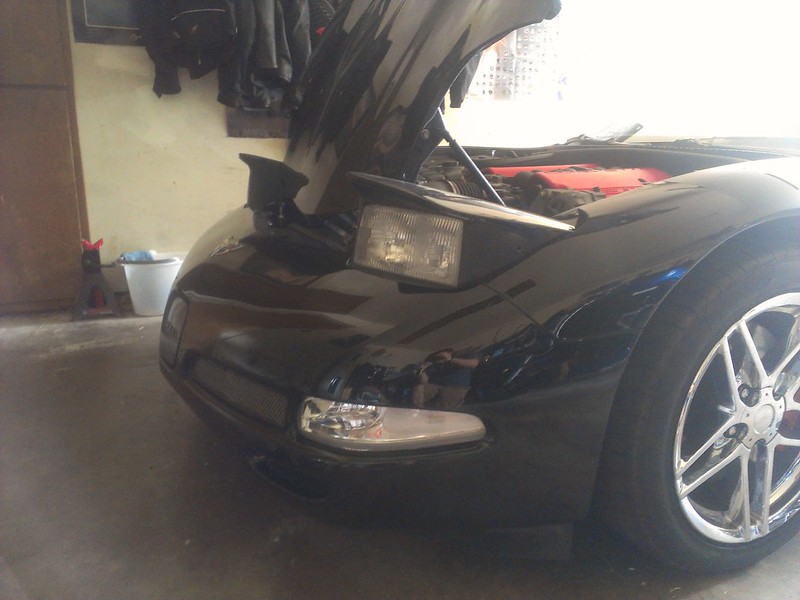
After (you can see the HALO on a little bit):
I'm going to go back in and just clean up some of the wires underneath.
Overall, it really changes the look of the front when the lights are up. I'm very happy happy with it. The halos are pretty drowned out when the lows are on, but you can still tell they're there.
Next thing on the list is having my valve springs replaced. I'd like to do a track day in a couple of months, but before I do that I want to replace the shocks (they are squeaking badly) and switch to SS brake lines. I also ordered an '03 z06 owners manual and I was able to score one of those z06 Overkill posters for $22. They don't count as mods, but they're nice-to-haves :]
Install was pretty straight forward. I used this guide to help me along. I didn't have any issues during the removal. Install wasn't too bad. Some things I learned along the way:
- The headlights attach to the bracket using self-tapping screws. You have to put these in extremely slowly and carefully or else you will break the posts that they attach to. I broke 2 of them, but I was able to get everything attached so it works.
- The headlights have halos on the front. I wired these to the front corner lights (not the amber one). The middle brown wire in the front light is what I used. This makes it so the halos light up when you turn the switch to the first position.
- Light output is significantly better than stock. I went with a 4300k colored bulb.
Aiming was a little scary, but that was mainly because I read about a lot of people who broke the gold aiming post. I used a lot of pb blaster and let it sit for a few hours. My horizontal aiming bolts had no problems, but my vertical ones squeaked a lot. They still worked though so I just had to get used to the squeaking.
Here's where I mounted my ballast. It's directly under the headlight bracket.
This is what I had to shave down to get the bracket to fit.
.. and finally, a before/after shot:
Before:
After (you can see the HALO on a little bit):
I'm going to go back in and just clean up some of the wires underneath.
Overall, it really changes the look of the front when the lights are up. I'm very happy happy with it. The halos are pretty drowned out when the lows are on, but you can still tell they're there.
Next thing on the list is having my valve springs replaced. I'd like to do a track day in a couple of months, but before I do that I want to replace the shocks (they are squeaking badly) and switch to SS brake lines. I also ordered an '03 z06 owners manual and I was able to score one of those z06 Overkill posters for $22. They don't count as mods, but they're nice-to-haves :]
Last edited by dangerz; 04-01-2013 at 10:16 AM.
04-01-2013, 10:32 AM
#19
Supporting Vendor
Member Since: Jan 2013
Location: Mooresville North Carolina
Posts: 359
Likes: 0
Received 2 Likes
on
2 Posts

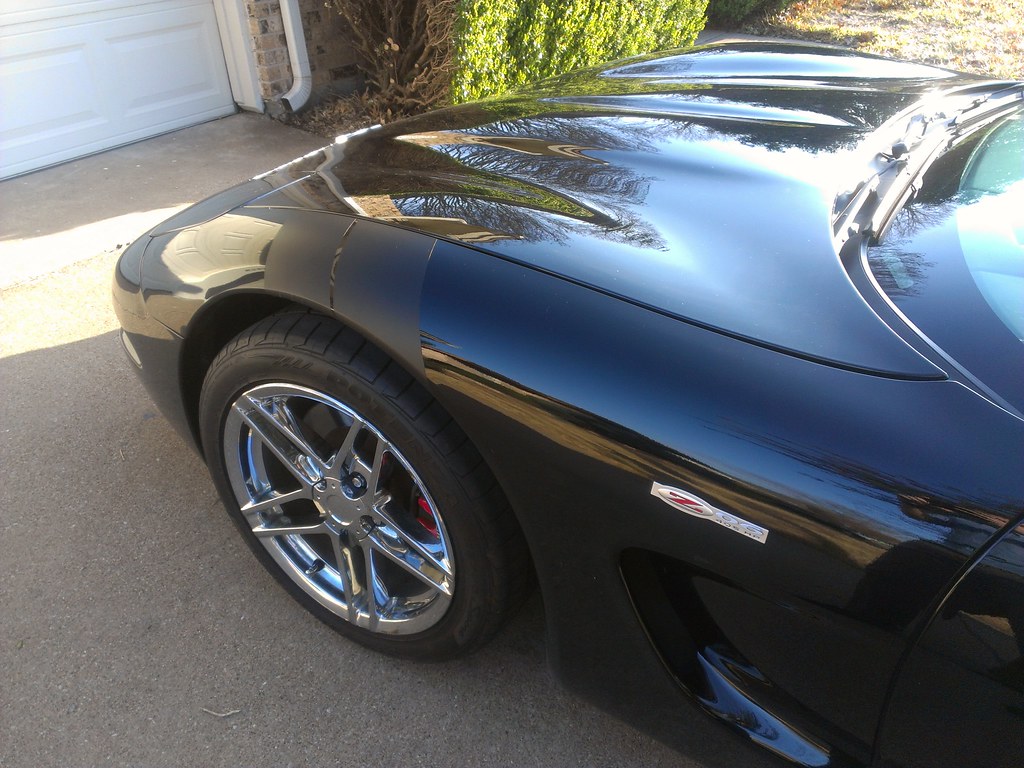
What a beautiful ride. Man do I love a black corvette!!! Owning one, not so much  black is a hard color to keep up with but looks amazing when clean.
black is a hard color to keep up with but looks amazing when clean.
__________________

See what's in our shop on Facebook! Customer Build Blogs!
www.pcmofnc.com
Performance Installs - Dyno Tuning - Mail Order Tuning & Sales
704-307-4227
See what's in our shop on Facebook! Customer Build Blogs!
www.pcmofnc.com
Performance Installs - Dyno Tuning - Mail Order Tuning & Sales
704-307-4227
04-01-2013, 10:34 AM
#20
Melting Slicks
Thread Starter
Tell me about it. I've just about given up on keeping it spotless. Even just sitting in my garage, it somehow finds a way to get dirty and dusty. My previous white coupe was a lot easier when it came to cleaning up.

