
Complete writeup w/pics Pioneer AVIC D2 w/aftermarket speakers and amp in a 2005 C6
 12-19-2012, 02:37 AM
#61


 12-19-2012, 06:28 PM
#62
Tech Contributor

If the button lights up and there's a grey/black wire under it, then yes. Ignore the orage wires in the adapter harness, they're useless in C6.
12-20-2012, 01:29 AM
#63

 01-19-2016, 11:38 AM
#66
Instructor

04-05-2016, 09:30 PM
#67
7th Gear
Member Since: Jul 2015
Location: Clarence NY
Posts: 7
Likes: 0
Received 0 Likes
on
0 Posts
Mmmmm�.sweet tea!
Ok, now in order for the NAV unit to accurately place you on the map, it uses a GPS antenna, A VSS (Vehicle Speed Sensor) wire tap, and a Reverse Gear wire tap.
The VSS wire tells the NAV unit how far and fast you are moving forward and the Reverse Gear wire tells the NAV unit how far you have moved backwards. Together with the GPS antenna it can calculate accurately where the heck you are and display YOU on the map�.kinda creepy and cool at the same time. Your car now KNOWS where you are!
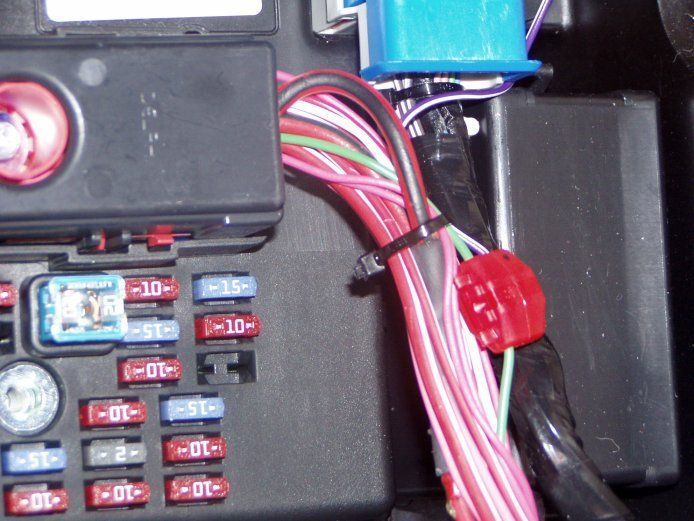
The Reverse Gear wire that you need to tap in to is located in the wire bundle at the BCM, which is found in the passenger side floorboard right next to the fuse box. It is the light green wire, there is only one so it isn't hard to find, unless of course, you're color blind. In which case this picture won't be much help to you. But for those of us who are not color spectrum impaired, it looks like this.
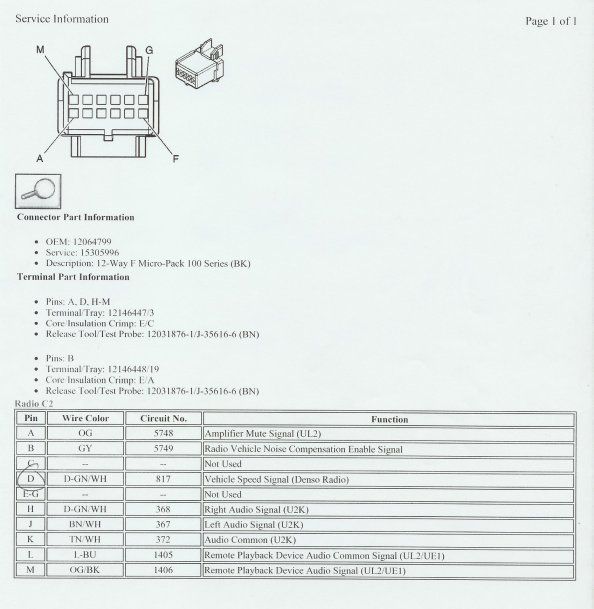
Since this car had the Bose stereo, the VSS wire is located in the black 12 pin wiring harness that goes into the back of the stereo. It is the dark green wire with a white stripe. Located at pin D. There is a second dark green wire with white stripe at pin H but that is the right audio signal wire so it is dead now. This is the wire you will need to tap.

(Note: Non-Bose systems do NOT have this wire here. If you do not have the Bose stereo you will have to go to either the instrument cluster bundle or the ECM to find the VSS wire. However it would be easier to go the instrument cluster. The VSS wire is located at pin 6 on the instrument cluster plug. Again, it is a dark green wire with white stripe.)
To further help you follow my description of the 12 pin connector going to the Bose stereo, here is a scan I made of the wiring diagram of the 12 pin connector that goes to the Bose stereo and the location of the VSS wire.
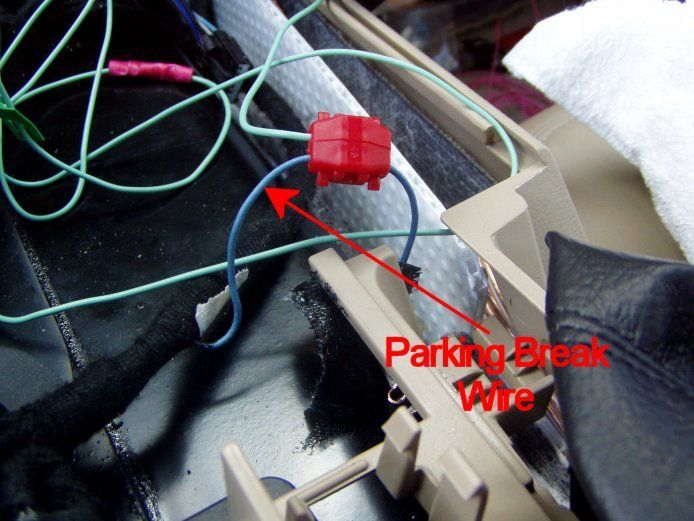
The parking break wire has to be tapped into the power wire that goes to the parking break switch. This is done for safety reason so you don't kill yourself and everyone else by fiddling with the NAV map while driving�and�cuz�"they" say so. Of course grounding that wire will bypass the safety feature but you didn't hear that from me�ok?
The wire you need is this light blue wire coming from the parking break to the main harness that goes to all the plugins and switches in the console.
(Disclaimer: By law I must tell you to tap in here or the parking break wire police will smote me on the head with a shillelagh and call me names, which ordinarily I don't mind as long as they are pretty women who spend all of my money and diminish my self esteem.)
Note: Keep a look out for this bugger! It's the dreaded ground loop�avoid it at all cost!

Now comes the making of the foundation board made of 3/4" MDF that I used to mount the sub enclosure to. It will also be used as an amprack. I simply measured and cut the contours of the rear hatch area. Here is a pic of it after carpeting and test fitting the amp and stuff and junk.
I then covered it in carpet, laid it down in the back and started building the frame of the sub enclosure that would eventually mount to it.
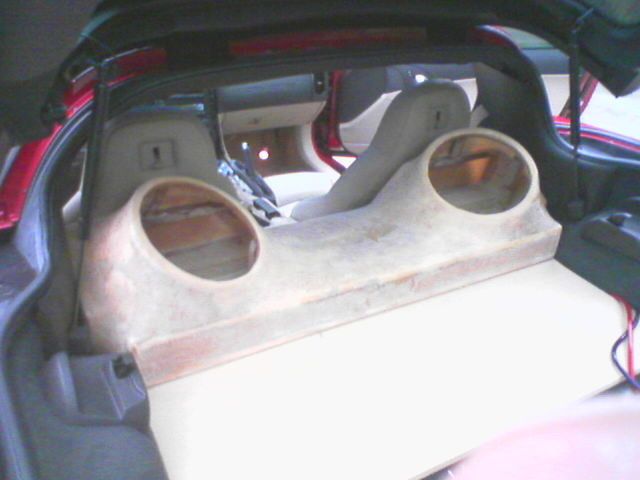
Here is the sub enclosure framed up and ready for fleece. This will be a fiberglass enclosure.

Here is the sub enclosure finished and sanded�and sanded�and sanded�
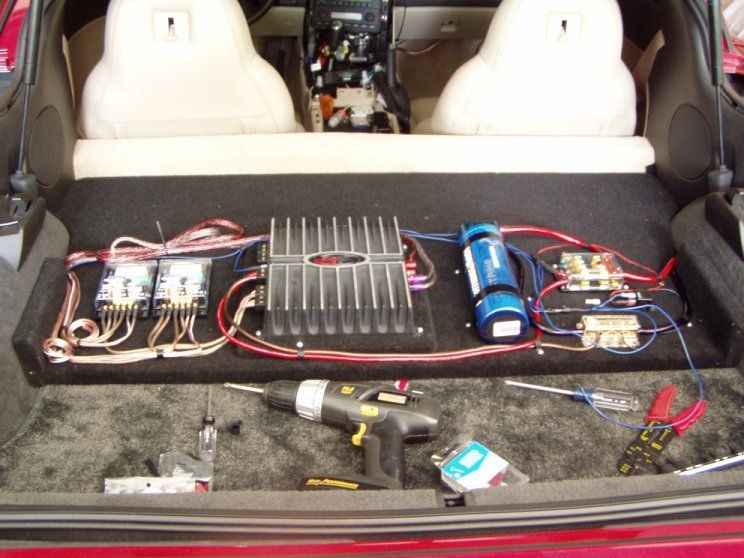
You can see where I am going with the amp rack here. I made a cover for the amp and stuff and junk and slapped it on giving the amp and cap the 'ole flush mount look.
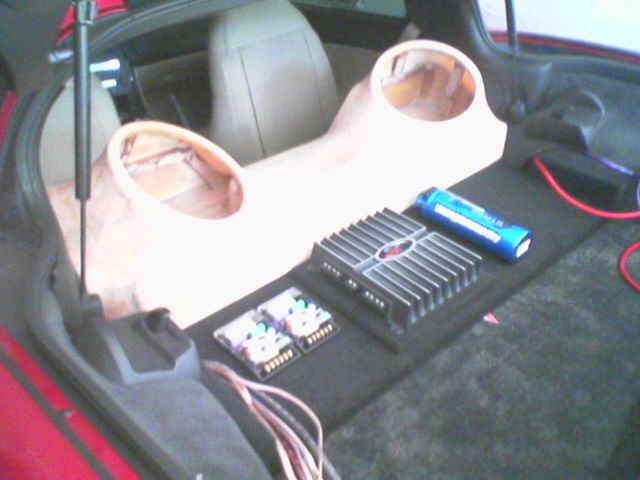
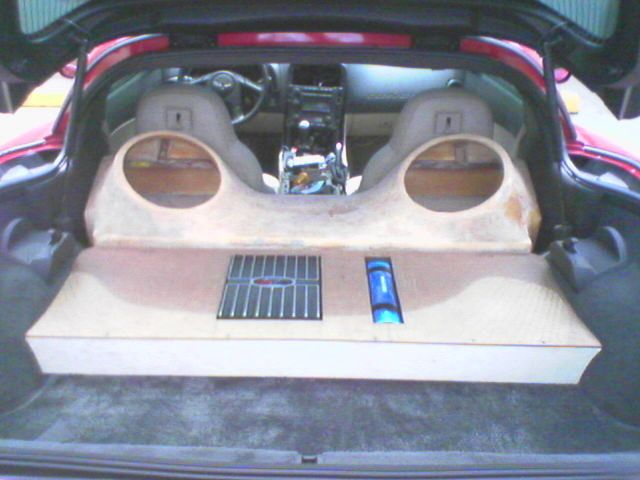
(Note: I have since replaced that amp and deep-sixed the cap. The new amp is a Fosgate P850.4 as seen below)


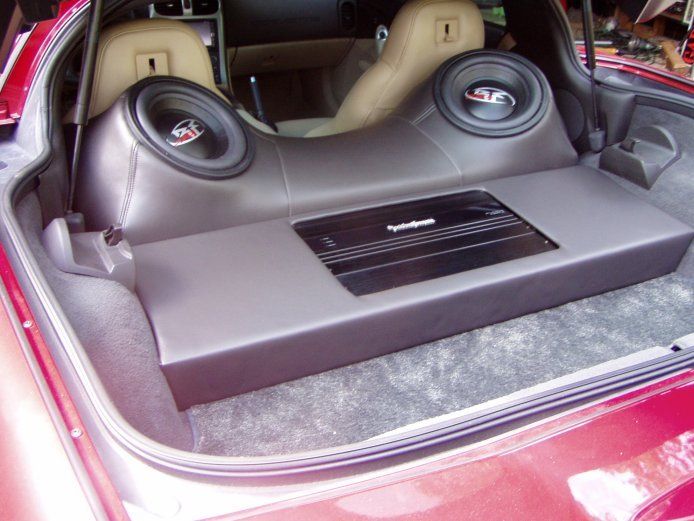
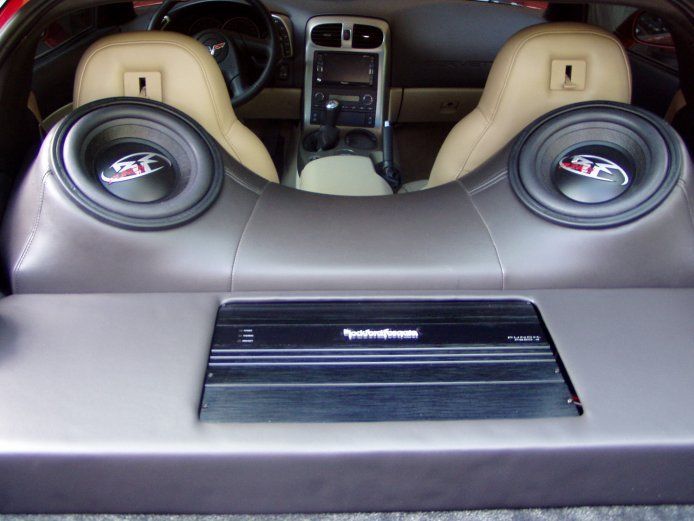
Now here are some pics of the finished product after having the sub enclosure and amprack lid covered in "midnight black" vinyl. This vinyl is a GM design so it matches the interior very well. Oh, and yes, the targa top fits in the back just fine.
Here is how it looks now after I installed the new amp.

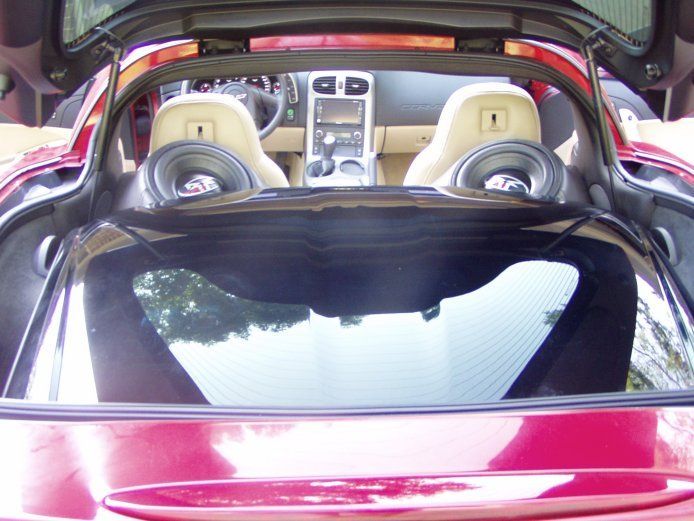
Here is the targa top stowed in the back with no obstructions. It kinda looks like a smiling frog doesn't it?
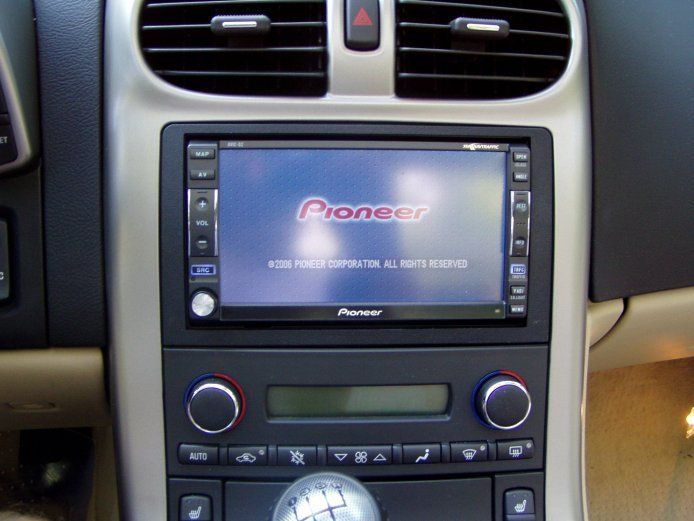
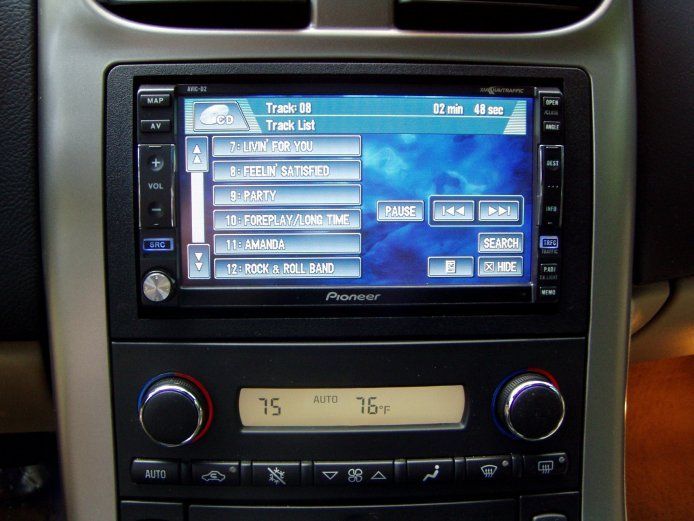
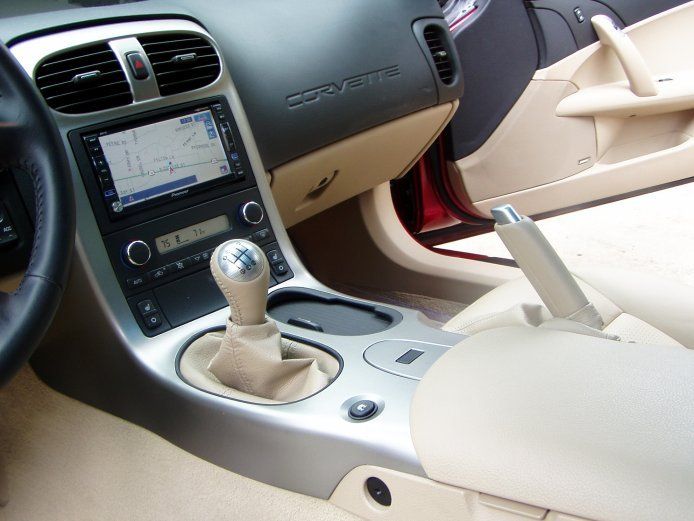
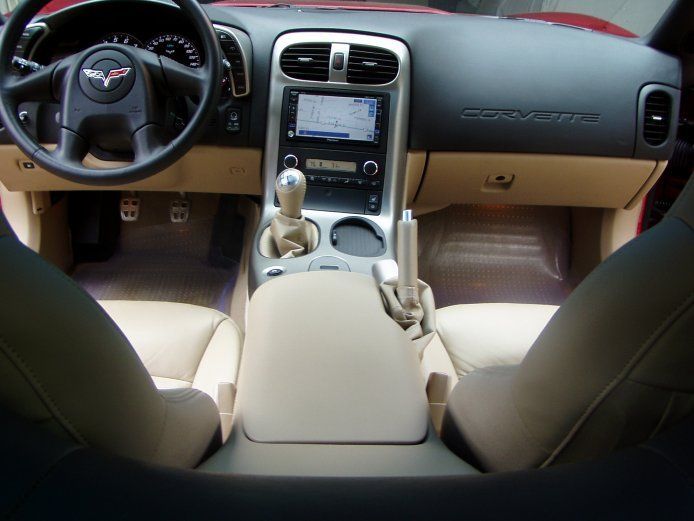
Now, if you do everything I mentioned above, and a lot that I didn't, then you too can have a Pioneer AVIC D2 in your C6 Corvette that looks like this�TADA!


Ok, now in order for the NAV unit to accurately place you on the map, it uses a GPS antenna, A VSS (Vehicle Speed Sensor) wire tap, and a Reverse Gear wire tap.
The VSS wire tells the NAV unit how far and fast you are moving forward and the Reverse Gear wire tells the NAV unit how far you have moved backwards. Together with the GPS antenna it can calculate accurately where the heck you are and display YOU on the map�.kinda creepy and cool at the same time. Your car now KNOWS where you are!
The Reverse Gear wire that you need to tap in to is located in the wire bundle at the BCM, which is found in the passenger side floorboard right next to the fuse box. It is the light green wire, there is only one so it isn't hard to find, unless of course, you're color blind. In which case this picture won't be much help to you. But for those of us who are not color spectrum impaired, it looks like this.
Since this car had the Bose stereo, the VSS wire is located in the black 12 pin wiring harness that goes into the back of the stereo. It is the dark green wire with a white stripe. Located at pin D. There is a second dark green wire with white stripe at pin H but that is the right audio signal wire so it is dead now. This is the wire you will need to tap.
(Note: Non-Bose systems do NOT have this wire here. If you do not have the Bose stereo you will have to go to either the instrument cluster bundle or the ECM to find the VSS wire. However it would be easier to go the instrument cluster. The VSS wire is located at pin 6 on the instrument cluster plug. Again, it is a dark green wire with white stripe.)
To further help you follow my description of the 12 pin connector going to the Bose stereo, here is a scan I made of the wiring diagram of the 12 pin connector that goes to the Bose stereo and the location of the VSS wire.
The parking break wire has to be tapped into the power wire that goes to the parking break switch. This is done for safety reason so you don't kill yourself and everyone else by fiddling with the NAV map while driving�and�cuz�"they" say so. Of course grounding that wire will bypass the safety feature but you didn't hear that from me�ok?
The wire you need is this light blue wire coming from the parking break to the main harness that goes to all the plugins and switches in the console.
(Disclaimer: By law I must tell you to tap in here or the parking break wire police will smote me on the head with a shillelagh and call me names, which ordinarily I don't mind as long as they are pretty women who spend all of my money and diminish my self esteem.)
Note: Keep a look out for this bugger! It's the dreaded ground loop�avoid it at all cost!
Now comes the making of the foundation board made of 3/4" MDF that I used to mount the sub enclosure to. It will also be used as an amprack. I simply measured and cut the contours of the rear hatch area. Here is a pic of it after carpeting and test fitting the amp and stuff and junk.
I then covered it in carpet, laid it down in the back and started building the frame of the sub enclosure that would eventually mount to it.
Here is the sub enclosure framed up and ready for fleece. This will be a fiberglass enclosure.
Here is the sub enclosure finished and sanded�and sanded�and sanded�
You can see where I am going with the amp rack here. I made a cover for the amp and stuff and junk and slapped it on giving the amp and cap the 'ole flush mount look.
(Note: I have since replaced that amp and deep-sixed the cap. The new amp is a Fosgate P850.4 as seen below)
Now here are some pics of the finished product after having the sub enclosure and amprack lid covered in "midnight black" vinyl. This vinyl is a GM design so it matches the interior very well. Oh, and yes, the targa top fits in the back just fine.
Here is how it looks now after I installed the new amp.
Here is the targa top stowed in the back with no obstructions. It kinda looks like a smiling frog doesn't it?
Now, if you do everything I mentioned above, and a lot that I didn't, then you too can have a Pioneer AVIC D2 in your C6 Corvette that looks like this�TADA!
04-06-2016, 09:24 AM
#68
Tech Contributor
The VSS wire is in the harness pictured above. Which plugs you re-use depends on which interface adapter you have. If you have the non-OnStar adapter then you'll only use the big 24 pin plug and the rest can just be wrapped and tucked in (to prevent rattles). If you're retaining OnStar just follow the adapter instructions, except instead of the orange interface wire use the gray/black wire at the TC/AH button for the dimmer wire connection.
