
My C6 Audio Install
 12-31-2009, 01:57 PM
#1
Racer

Thread Starter

So my first ever audio install is on the way. Just wanted to thank everyone here who provided me with all the info and details to get me to this point. I'm enjoying the whole process tremendously and I'm sure I'll need you again. 
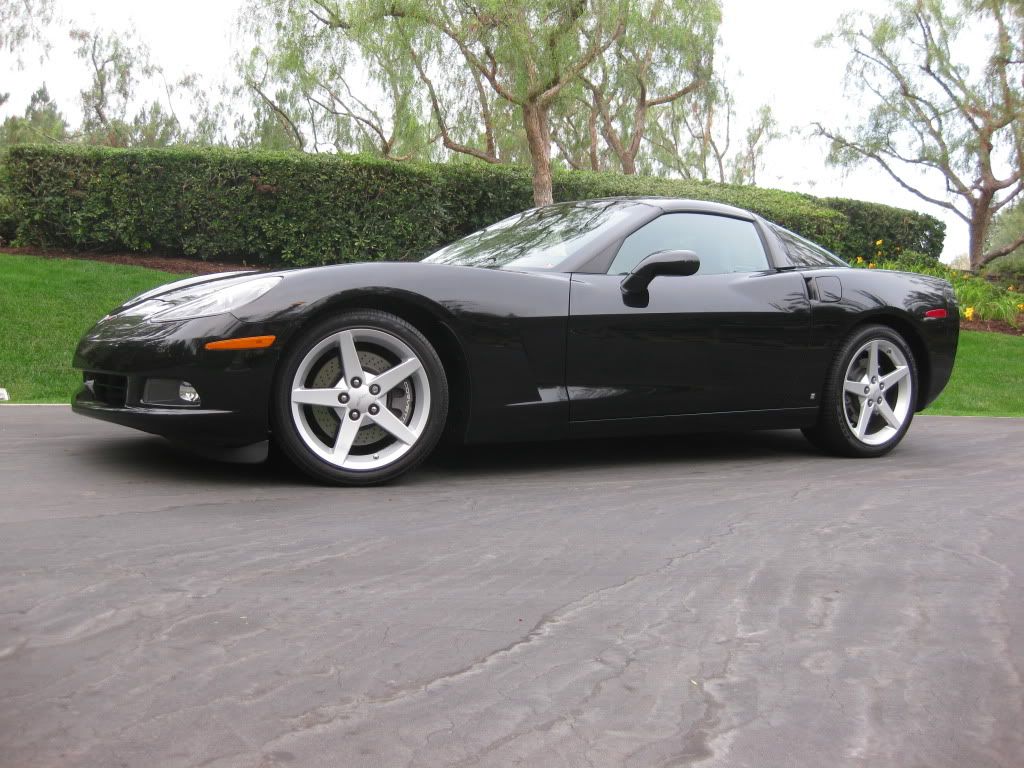
I recently acquired an '07 Z51 Bose no NAV w/ less than 5k miles. She is a true beauty and I love driving her. Previously I owned an '01 C5 Z06. This C6 is night and day better than the old car in every category except sound. I find myself driving her to work more and more everyday.

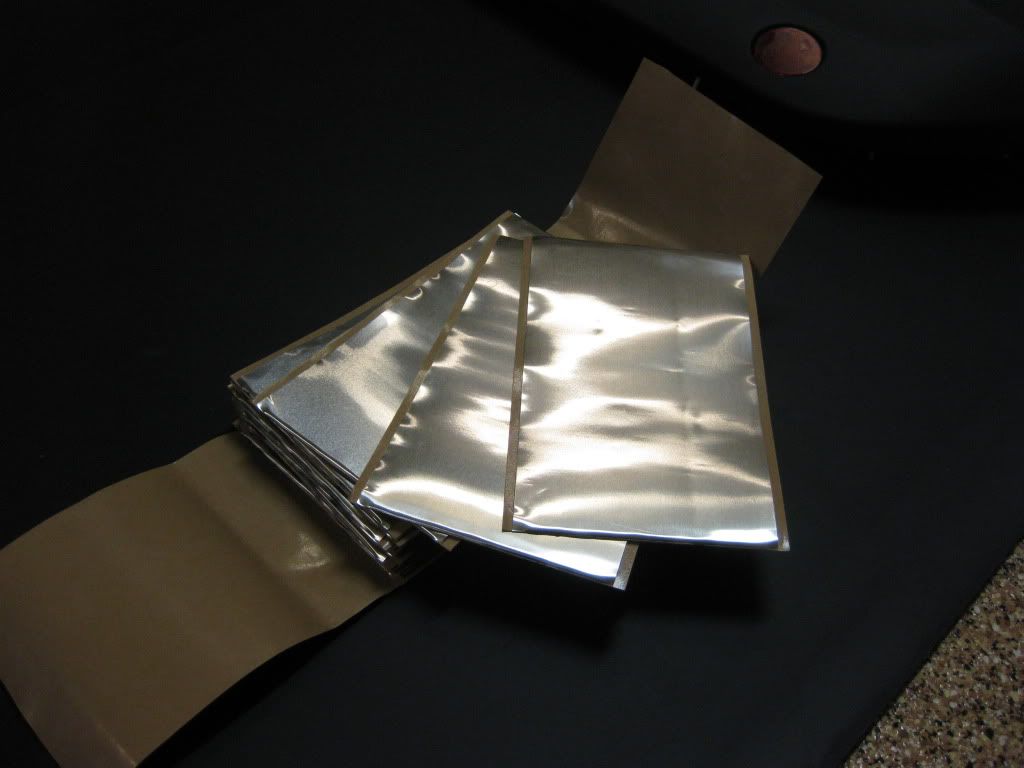
Originally I only wanted to install some heat/sound insulation with one of those foil bubble kits. I did that with the C5Z and liked the result. Realizing I was going to take my interior apart anyways, I decided to add some sound improvements. At first I only wanted to add sub, components, and amps. Then I realized with all this work let's make it truly worth it.
I wanted to do something I've never done before. I've always been fascinated by cars and car stereo in particular. However, I was one of those kids who would never live above his means. When I was in college, I barely had enough loan money to pay for books. I parked off campus to save on parking money ($350/yr). If my stereo broke, I take it apart and fix it. The nicest stereo I bought was a Sony entry model for less than $200. I still have that thing sitting somewhere in my parents house. So the thought of me buying an amp was quite honestly impossible.
Well thankfully, things are quite different now. More importantly, this is a perfect opportunity for me to immense myself in something I love. I remember the time when my college buddy (Mechanical Engineer) brought his brand new stereo to me to install in his car. That thing still work ten years after I put it in. So I love doing this stuffs. While I have limited experience, I think with the help of you all I can make this work.
I hope to learn something about my car by doing this. And I will share my experiences (and mistakes) with you. Hopefully you'll point out my mistakes and share your experiences with me too. So if you've never install a full system in your car before, welcome to the club.
For those who responded to my previously questions about stereos, thank you for your comments. If it seemed like I have no idea what I was talking about, it's because I don't. Nevertheless you gave me the confidence needed to begin this adventure. So enjoy and feel free to comment.
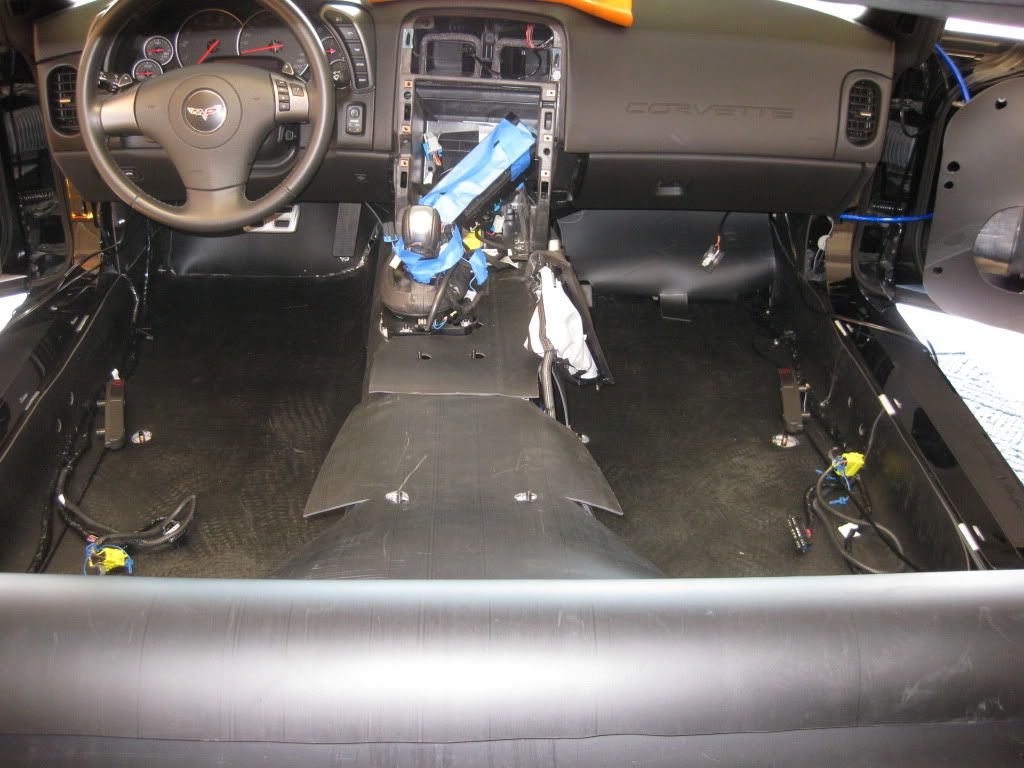
The parts are being delivered as we speak. It's the holidays so everything is slow. I can't wait for everything to get here. For now, I'm going to start disassembling the interior. Will post pics once I'm done with that.
Enjoy.
Jon.
I recently acquired an '07 Z51 Bose no NAV w/ less than 5k miles. She is a true beauty and I love driving her. Previously I owned an '01 C5 Z06. This C6 is night and day better than the old car in every category except sound. I find myself driving her to work more and more everyday.
Originally I only wanted to install some heat/sound insulation with one of those foil bubble kits. I did that with the C5Z and liked the result. Realizing I was going to take my interior apart anyways, I decided to add some sound improvements. At first I only wanted to add sub, components, and amps. Then I realized with all this work let's make it truly worth it.
I wanted to do something I've never done before. I've always been fascinated by cars and car stereo in particular. However, I was one of those kids who would never live above his means. When I was in college, I barely had enough loan money to pay for books. I parked off campus to save on parking money ($350/yr). If my stereo broke, I take it apart and fix it. The nicest stereo I bought was a Sony entry model for less than $200. I still have that thing sitting somewhere in my parents house. So the thought of me buying an amp was quite honestly impossible.
Well thankfully, things are quite different now. More importantly, this is a perfect opportunity for me to immense myself in something I love. I remember the time when my college buddy (Mechanical Engineer) brought his brand new stereo to me to install in his car. That thing still work ten years after I put it in. So I love doing this stuffs. While I have limited experience, I think with the help of you all I can make this work.
I hope to learn something about my car by doing this. And I will share my experiences (and mistakes) with you. Hopefully you'll point out my mistakes and share your experiences with me too. So if you've never install a full system in your car before, welcome to the club.
For those who responded to my previously questions about stereos, thank you for your comments. If it seemed like I have no idea what I was talking about, it's because I don't. Nevertheless you gave me the confidence needed to begin this adventure. So enjoy and feel free to comment.
The parts are being delivered as we speak. It's the holidays so everything is slow. I can't wait for everything to get here. For now, I'm going to start disassembling the interior. Will post pics once I'm done with that.
Enjoy.
Jon.
Last edited by MSO4; 01-02-2010 at 10:46 AM.
 12-31-2009, 02:21 PM
#2
Tech Contributor
For those of you who don't like to wonder over into C6 Gen...
It's great that you're enjoying the adventure. Many people end up getting frustrated and resent that they even started. Having fun along the way makes the end results even better, and from the looks of the equipment you went with I'm sure yours will sound amazing 
Bring it on
HU: Pioneer Z110BT $720 (after rebate) CarToys/Amazon
Amp: Arc Audio KS 300.4 $350 local shop
Component Speakers: Precision Power PPI 356CS $130 Ebay
Sub single 10inch: Arc Audio 10D2 $150 local shop
Sub Box: Madvette $250 (shipping VERY slow, takes a month regardless of what they say)
C6 front speaker mount $50 http://www.nakidparts.com/id28.html
Adapter/harnesses:
PAC C2R-GM24 radio interface (aka GMCO) $60 Amaz
Metra 95-3304 dash kit $20 Sonic Electronix (perfect match to OEM dash)
Metra 40-GM10 antenna adapter + 2 Ground Loop Isolators $15 Amaz
PAC SWI-PS retains steering control $50 WooferEtc (be sure to get newest version 1.6.8)
Power Acoustik LP-1CA rear camera $100 buy.com
Wires/wrap and other misc etc $150
Vibration damper stuff $225 http://www.sounddeadenershowdown.com/
Sound insulation $150 http://shop3.mailordercentral.com/su...%2D00005%2D48R
Heat insulation $100 Madvette (again, shipping takes a month no matter what they say)
So the entire project so far is $2.5k.
The fun I'm having right now, simply PRICELESS!
Bring it on
12-31-2009, 06:54 PM
#3
Racer
Thread Starter
For those of you who don't like to wonder over into C6 Gen...
It's great that you're enjoying the adventure. Many people end up getting frustrated and resent that they even started. Having fun along the way makes the end results even better, and from the looks of the equipment you went with I'm sure yours will sound amazing
Bring it on
It's great that you're enjoying the adventure. Many people end up getting frustrated and resent that they even started. Having fun along the way makes the end results even better, and from the looks of the equipment you went with I'm sure yours will sound amazing
Bring it on

I used this link to remove the interior:
http://www.madvettemotorsports.com/p...lation_Kit.pdf
It's mostly complete with these exceptions:
1. Center Console Removal
If you have an automatic, be sure to put the car in D or S before disconnecting the negative terminal from the battery. This will make removing the front radio console much easier.
Use a really small watch screw driver to help remove some of the electrical plugs (ie. cigarette).
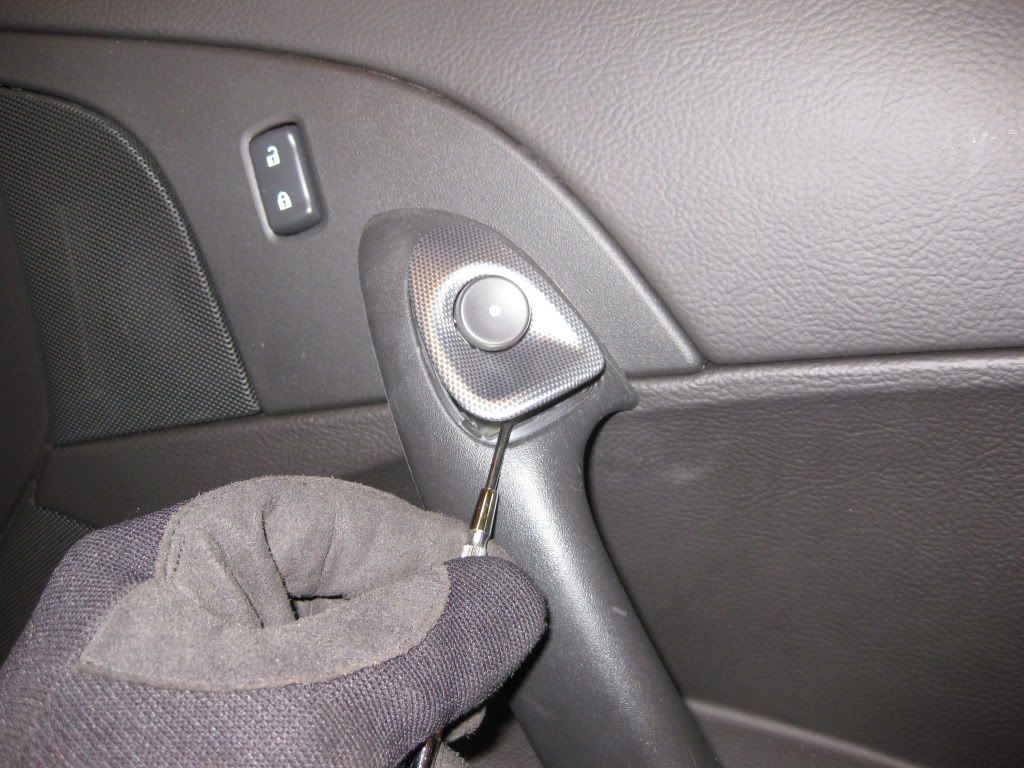
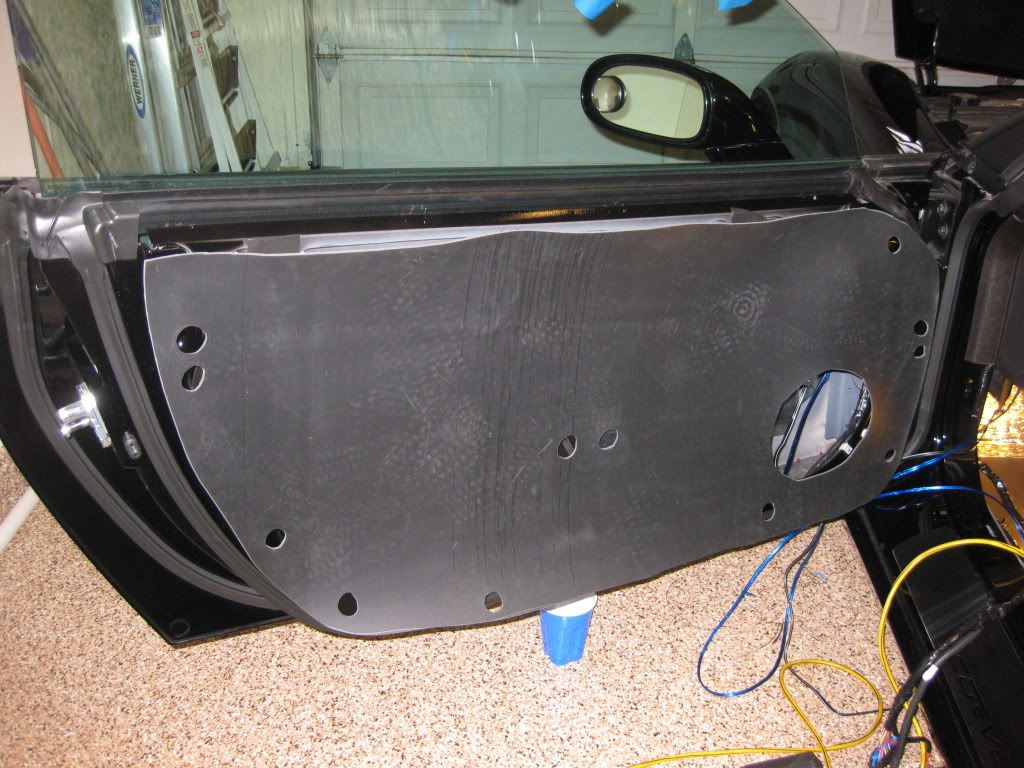
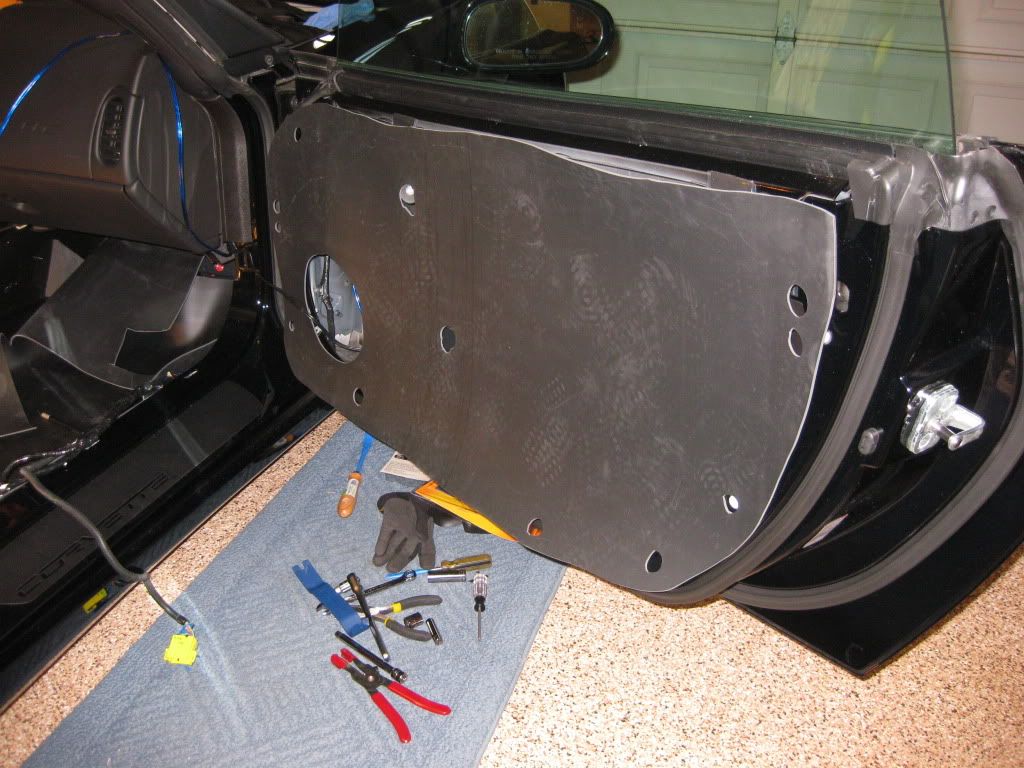
2. Door Panels
On the passenger side, there are two #30 Torx nuts to remove. One of them is inside the door release swich. Use the small screw driver above as shown below. Once you unplug the switch, you will see the Torx screw.
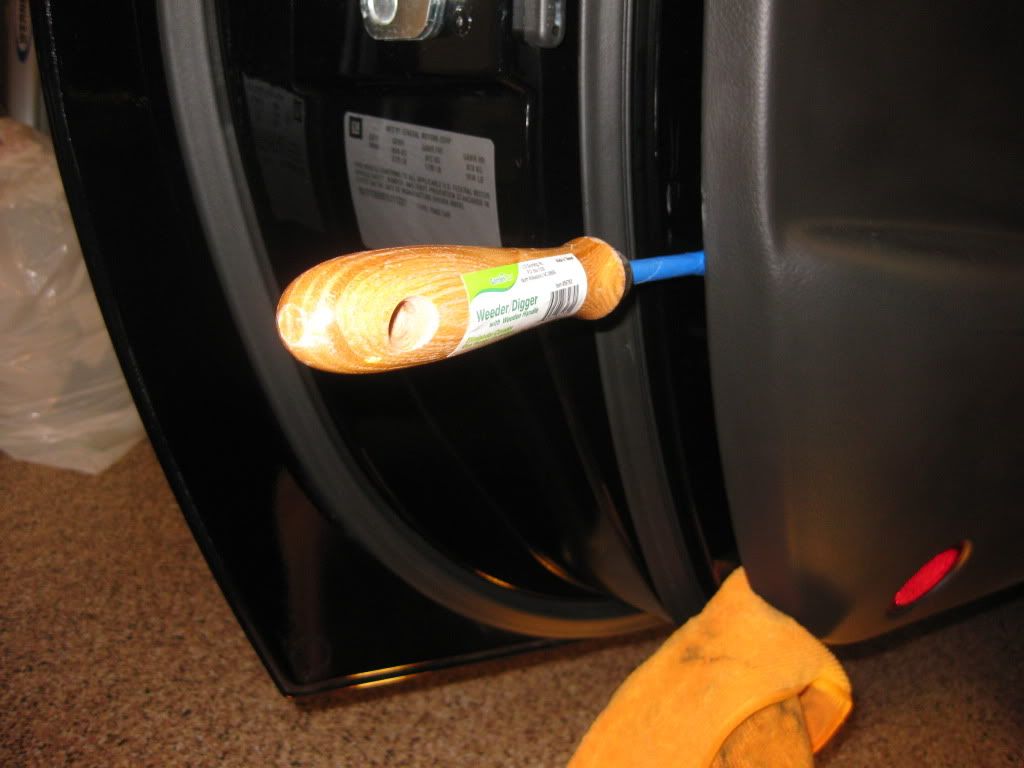
There are eight clips on each door. I put some painter tape around two screw driver to help with the removal instead of just yanking on the door panels. Pay attention to where the 8 clips are. The look like white nails sticking out of the door.


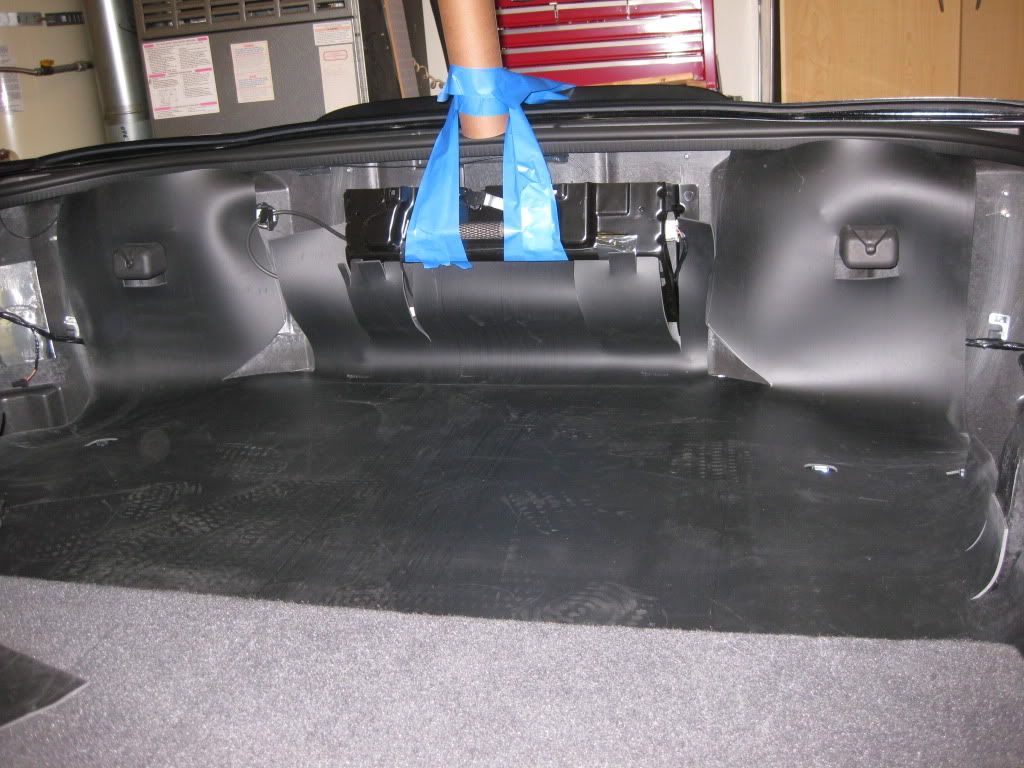
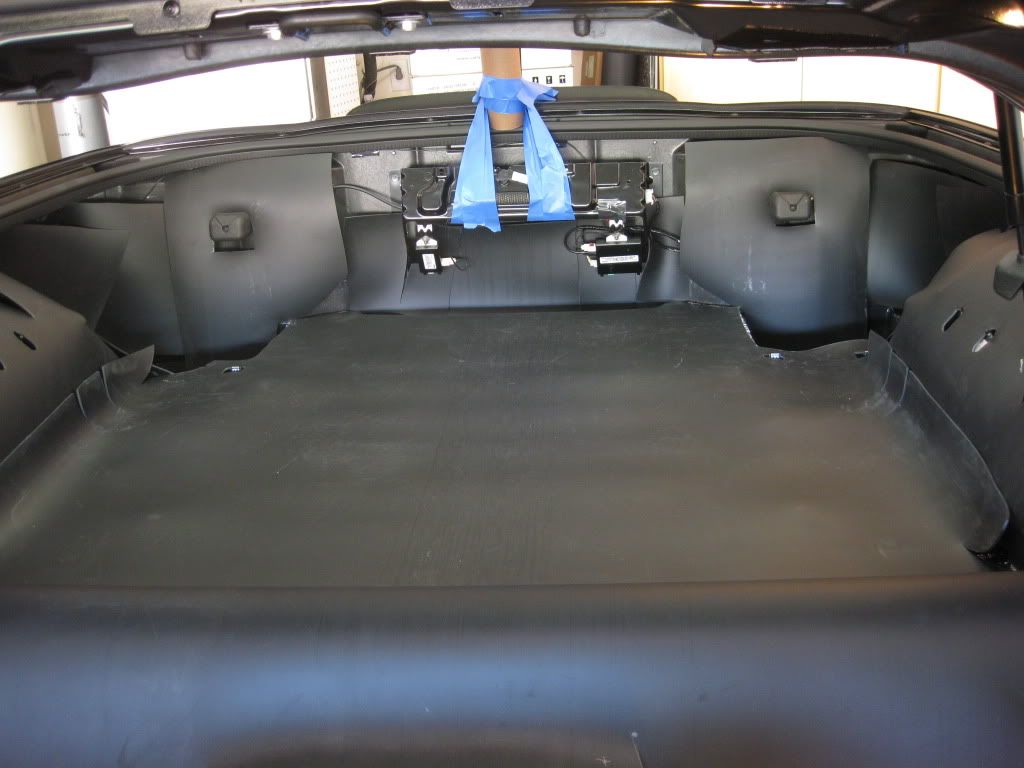
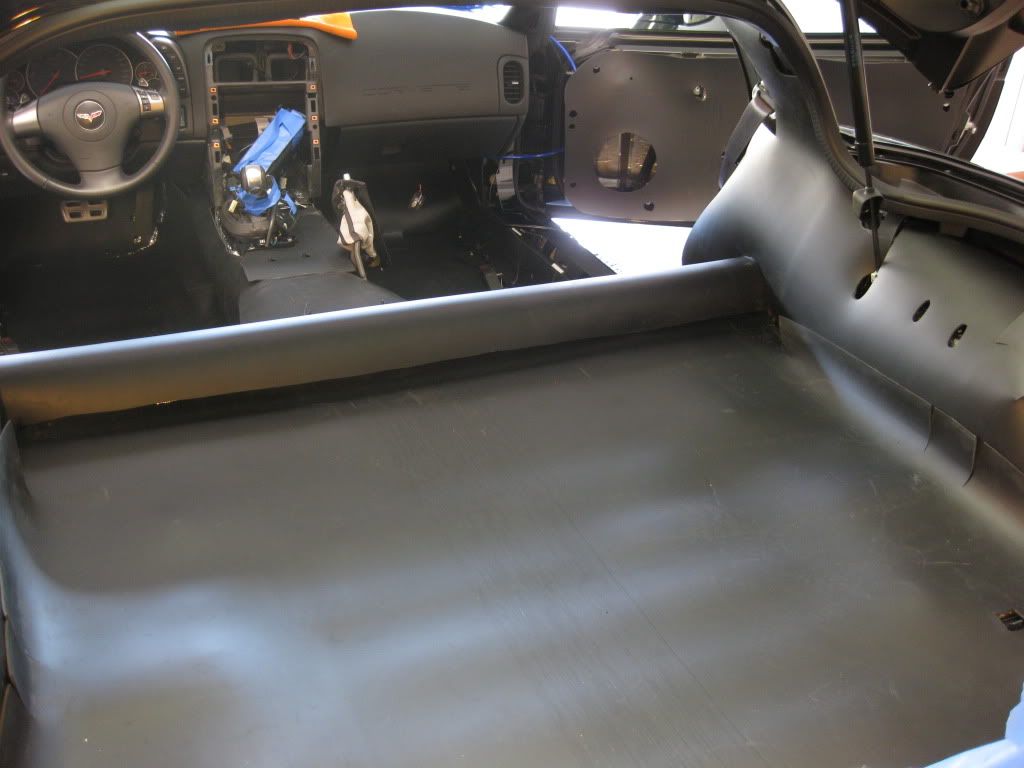
3. Rear hatch
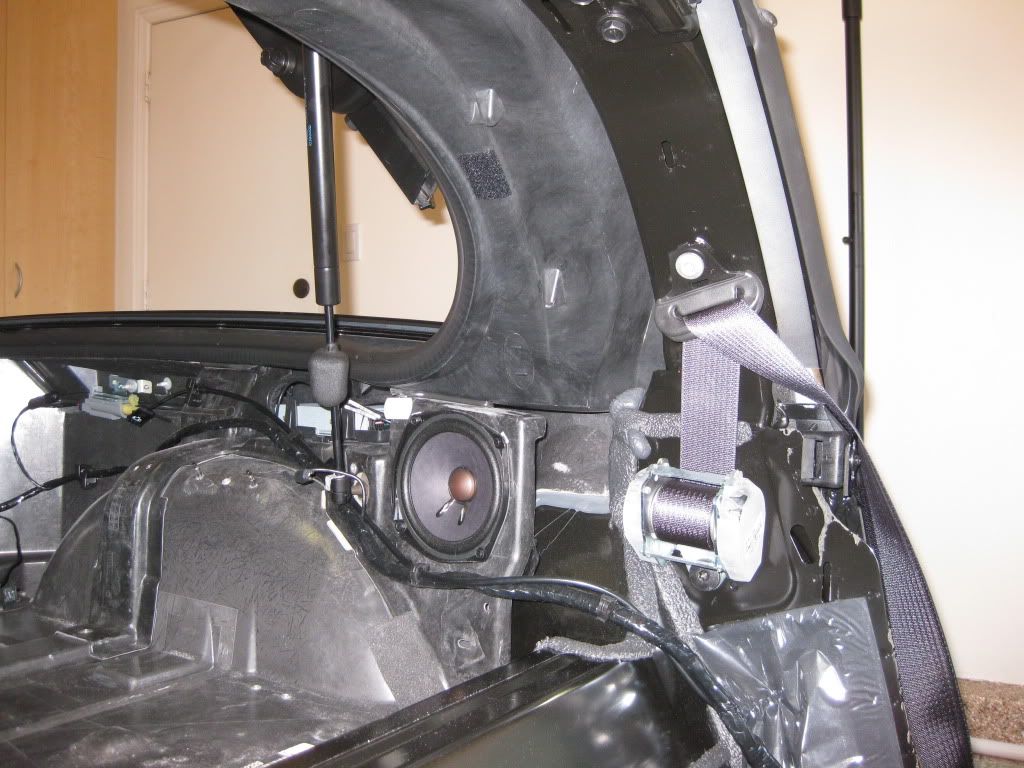
The hardest parts here are removal of the speaker trim and the hatch struts. Contrary to the instructions, I was able to do this by myself. I happen to have a roll of paper 35 inches in length. It so happens that that's the perfect length to help hold up the hatch while I mess with the strut assembly.
To do this, find your small watch screw driver again. Look at the bottom of the strut, there is a metal clip that wraps around the bottom part of the strut. Put the screw driver into that little notch and pull it out just enough for you to pull the strut out of the ball socket. Remember you're not removing the metal clip completely, just enough to pull the strut out.

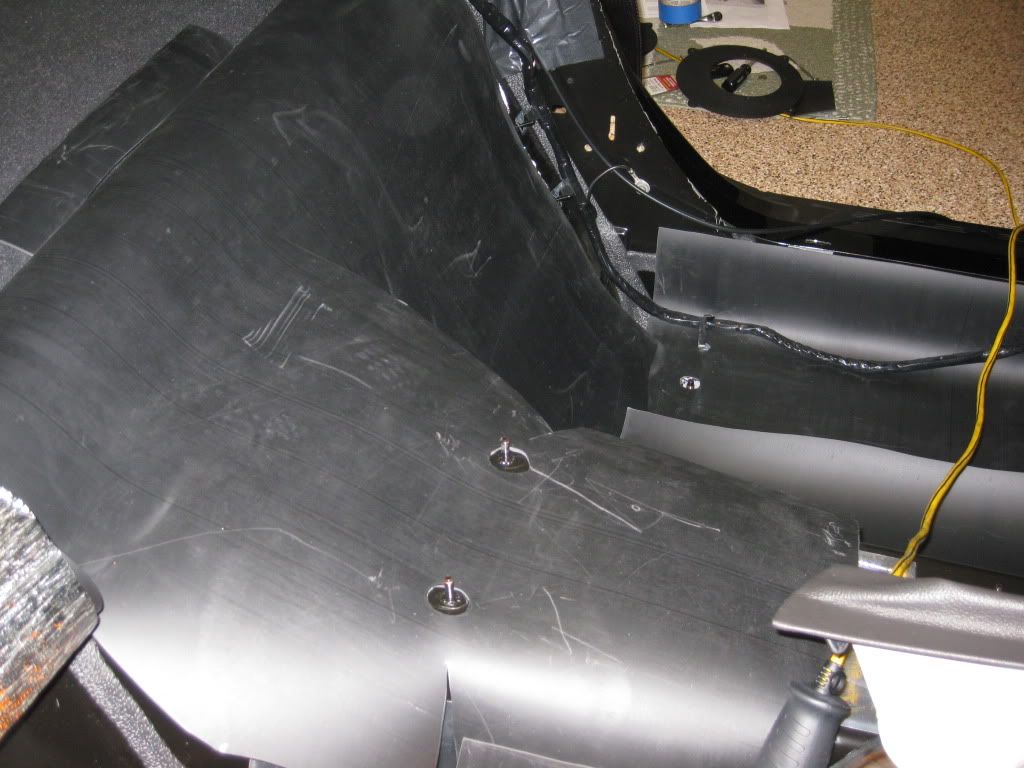
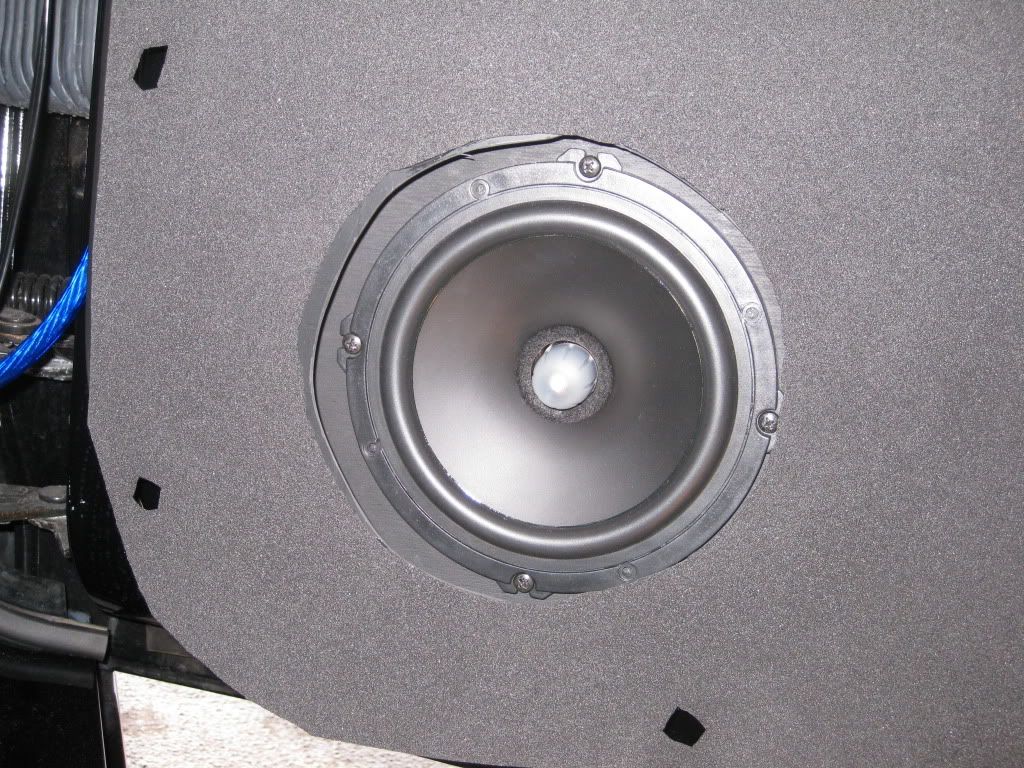
Now it's time to remove the rear speaker trim. Start where the seat belt slot is (toward the front of the car). There are 2 metal clips there. Start at the top of the halo and carefully pull to disengage. Then go toward the bottom edge and pull. Don't do it too hard since there is another plastic clip toward the rear of the car that won't come off as easily.
The first pic shows all 3 clips. On the second, the plastic clip is missing because it broke off while I pulled on the trim (look near the yellow electrical cord, there is a dark circular imprint left behind. Looks like it was glued in so I'll just use some superglue when it's time to reassemble.
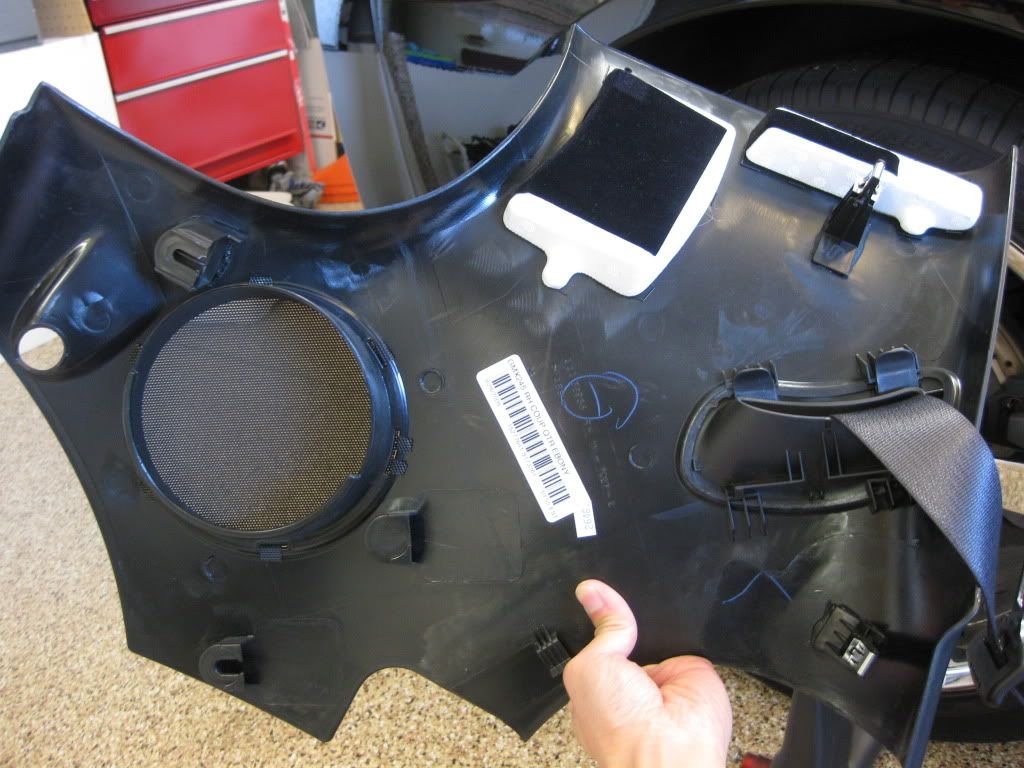
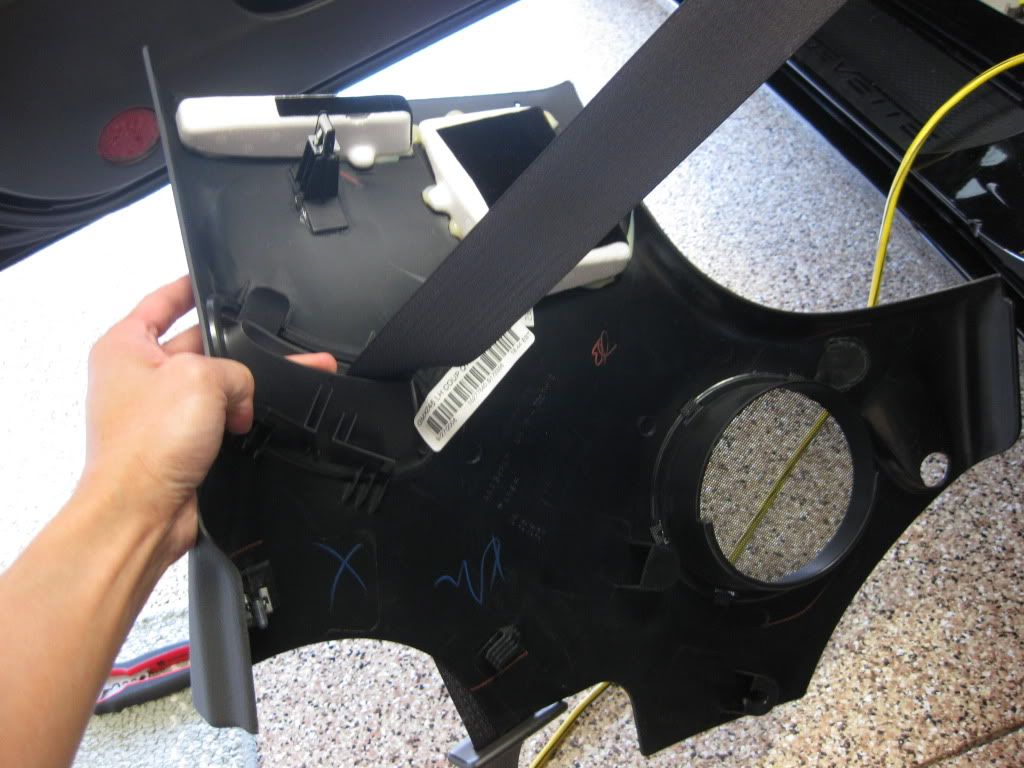
If you have small arms, you might be able to use a trim removal kit and remove the rearward clip without breaking it. Otherwise, mostly likely it will snap off when you pull that rear speaker trim back.

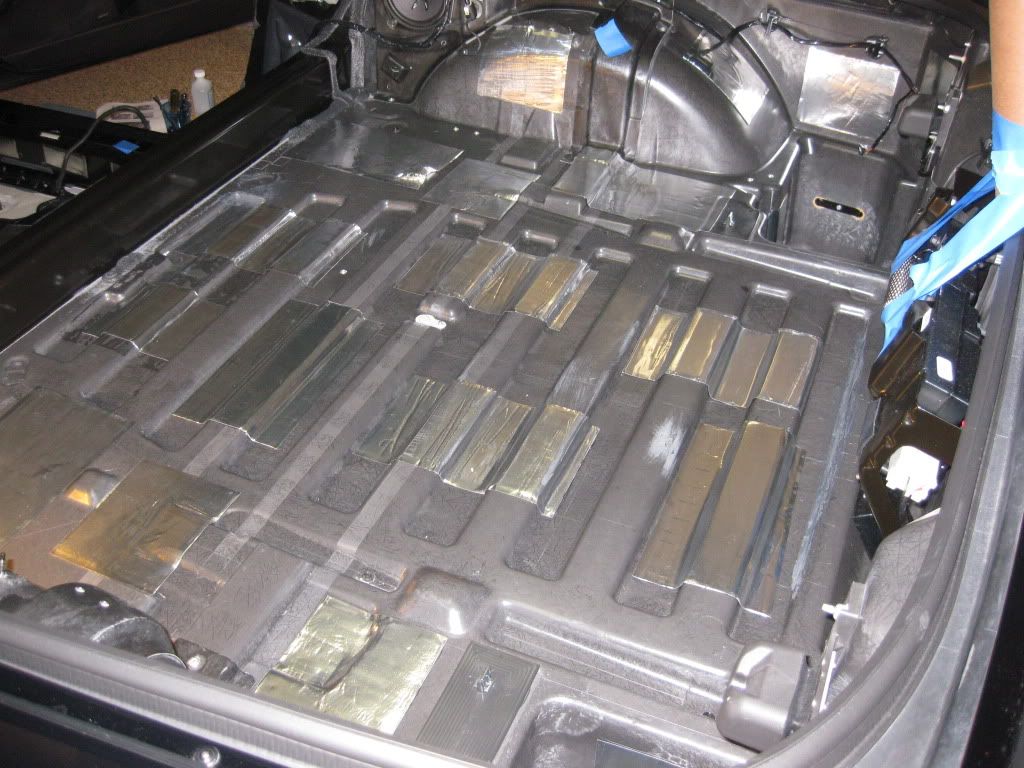
So that's it, clean up all the surfaces and we're ready to apply some vibration dampers.
I got my vibration damper stuffs from here:
http://www.sounddeadenershowdown.com/
I learned that to be effective, you only need 25-35% coverage. The owner actually walked me through the entire process as to where to apply and how much. I was extremely amazed by his knowledge of this stuff. The tiles he sells are very easy to apply because they are already cut into small 6x10 in pieces. I did this once 8 years ago and it was a PIA to cut up from a big roll. Makes applying it a whole lot easier when they come precut.
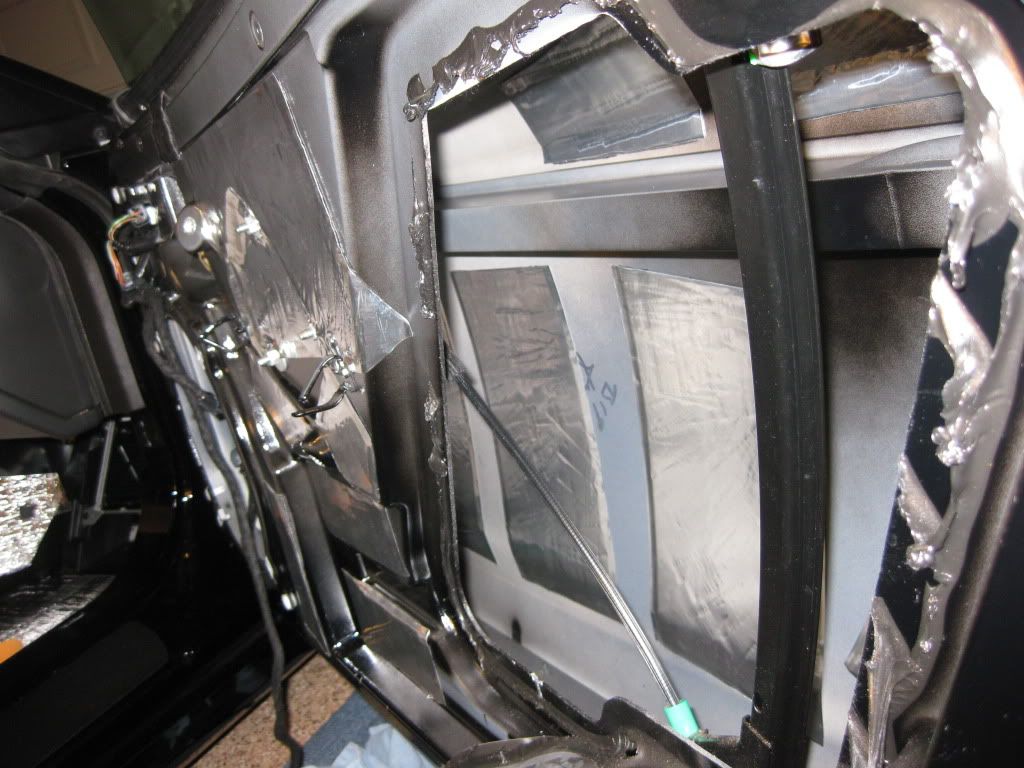

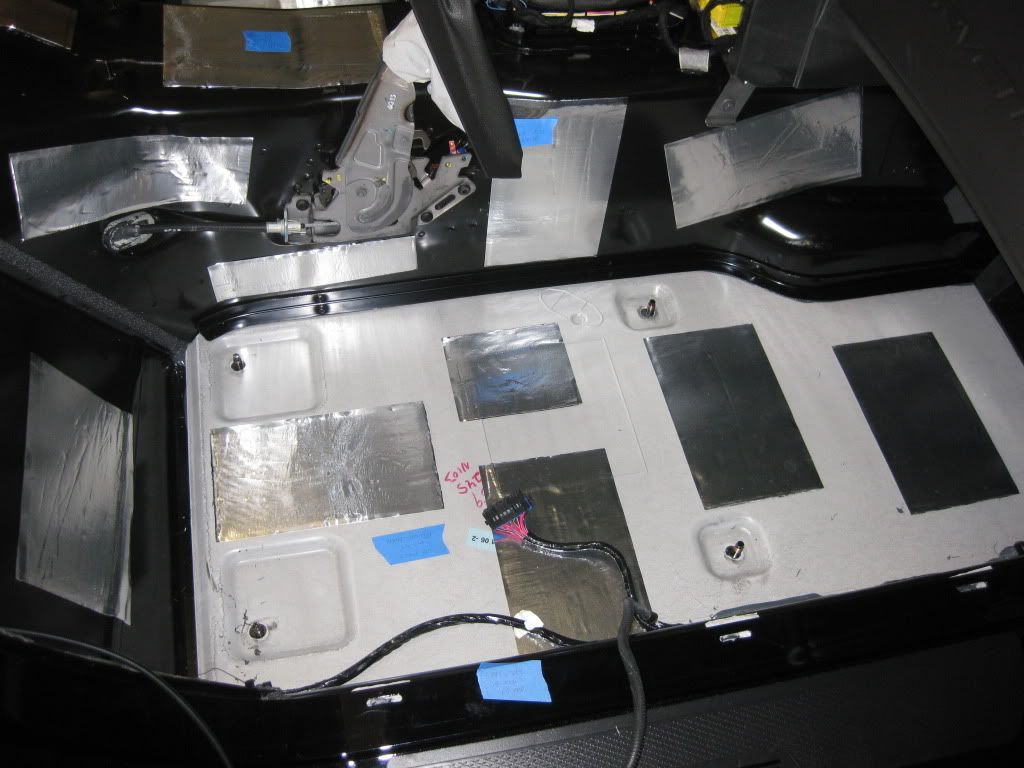
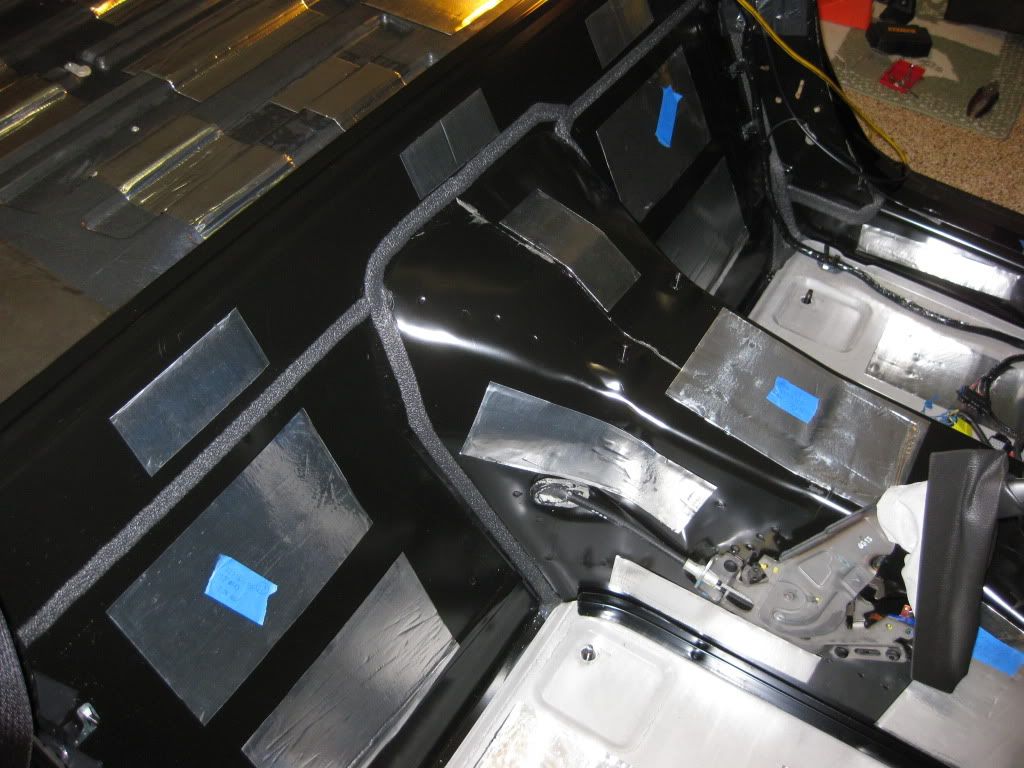
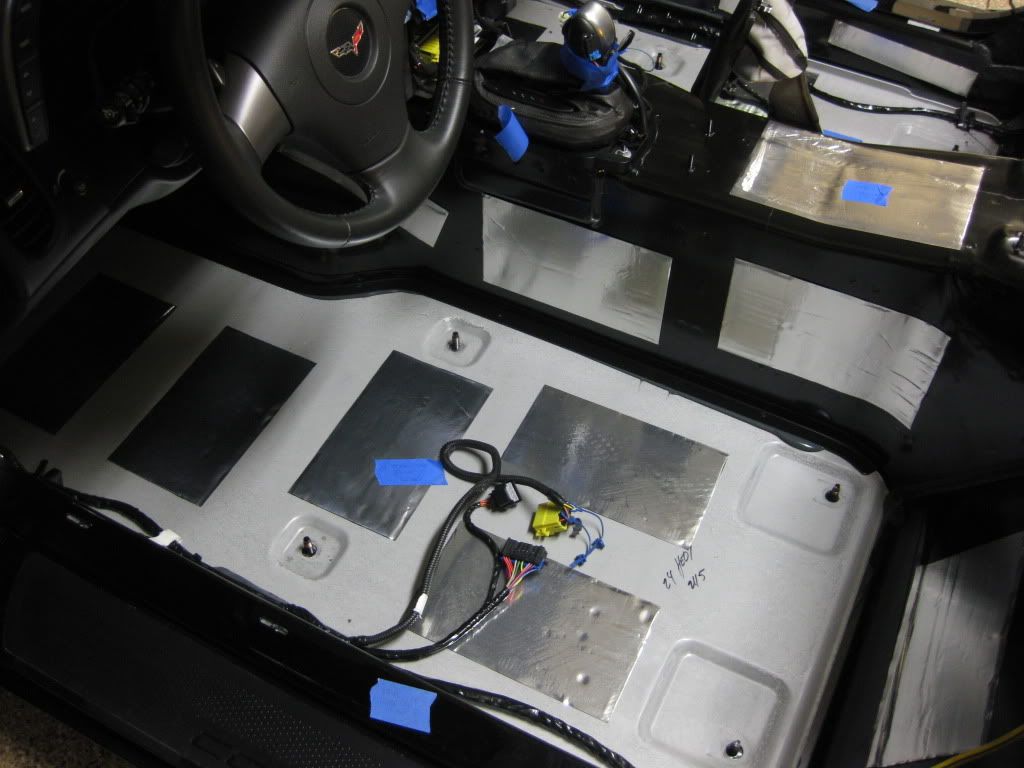
Ok, tomorrow I will apply a layer of MLV (mass loaded vinyl) to block road noise. MLV are the grand daddy of all the sound insulation stuffs so I can't wait. Only bad thing is these weigh one lb per square foot! I better get some rest now.
Last edited by MSO4; 01-02-2010 at 10:52 AM.
 12-31-2009, 09:10 PM
#5
Team Owner


Nice work - you're as OCD as I am. 
I am nearing the end of my project on the wife's C5 coupe that I took the week off for. Powered it up today and it sounded awesome.
I'm having a blast as well - plus, I know it's done to the level of detail I like.
Best of luck in the rest of your install.
I am nearing the end of my project on the wife's C5 coupe that I took the week off for. Powered it up today and it sounded awesome.
I'm having a blast as well - plus, I know it's done to the level of detail I like.
Best of luck in the rest of your install.
01-01-2010, 12:52 PM
#6
Racer
Thread Starter
Nice work - you're as OCD as I am.
I am nearing the end of my project on the wife's C5 coupe that I took the week off for. Powered it up today and it sounded awesome.
I'm having a blast as well - plus, I know it's done to the level of detail I like.
Best of luck in the rest of your install.
I am nearing the end of my project on the wife's C5 coupe that I took the week off for. Powered it up today and it sounded awesome.
I'm having a blast as well - plus, I know it's done to the level of detail I like.
Best of luck in the rest of your install.

Yes, nothing like doing everything up to your standard. Funny but I've done a lot of projects using your write ups in the past with my C5. In terms of workmanship, attention to details, and pride, I give you 10 out of 10. You're one of the reasons why I decided to do a write up on my install. I figure I can give back to a wonderful community that has given me so much. So thanks again.
Cheers!
01-01-2010, 09:24 PM
#7
Team Owner
You're doing an excellent job - can't wait to see the rest of your install. Beautiful coupe too.
I've been doing my usual photo-logging so I'll be posting a thread of my adventure in a couple of days as well. This has definitely been one of those for the Marathon-Mod Hall of Fame but worth it.
I've been doing my usual photo-logging so I'll be posting a thread of my adventure in a couple of days as well. This has definitely been one of those for the Marathon-Mod Hall of Fame but worth it.
01-02-2010, 08:01 AM
#8
Melting Slicks


Looks good.I'm collecting things now to do my audio upgrade. Down to just a few things. Just curious,you going to cut panels for to replace the rubber pieces in the door? Or just leave the stock rubber panels in there?
01-02-2010, 10:43 AM
#9
Racer
Thread Starter
You're doing an excellent job - can't wait to see the rest of your install. Beautiful coupe too.
I've been doing my usual photo-logging so I'll be posting a thread of my adventure in a couple of days as well. This has definitely been one of those for the Marathon-Mod Hall of Fame but worth it.
I've been doing my usual photo-logging so I'll be posting a thread of my adventure in a couple of days as well. This has definitely been one of those for the Marathon-Mod Hall of Fame but worth it.
I just reseal the original. My soundproof guy said as long as it has a good seal, using the original will be fine. Obviously if you're in a sound competition then you want a rigid panel. I used a heat gun to heat up the sticky stuffs and and it sticks really well.

 01-07-2010, 02:21 AM
#11
Racer
Thread Starter
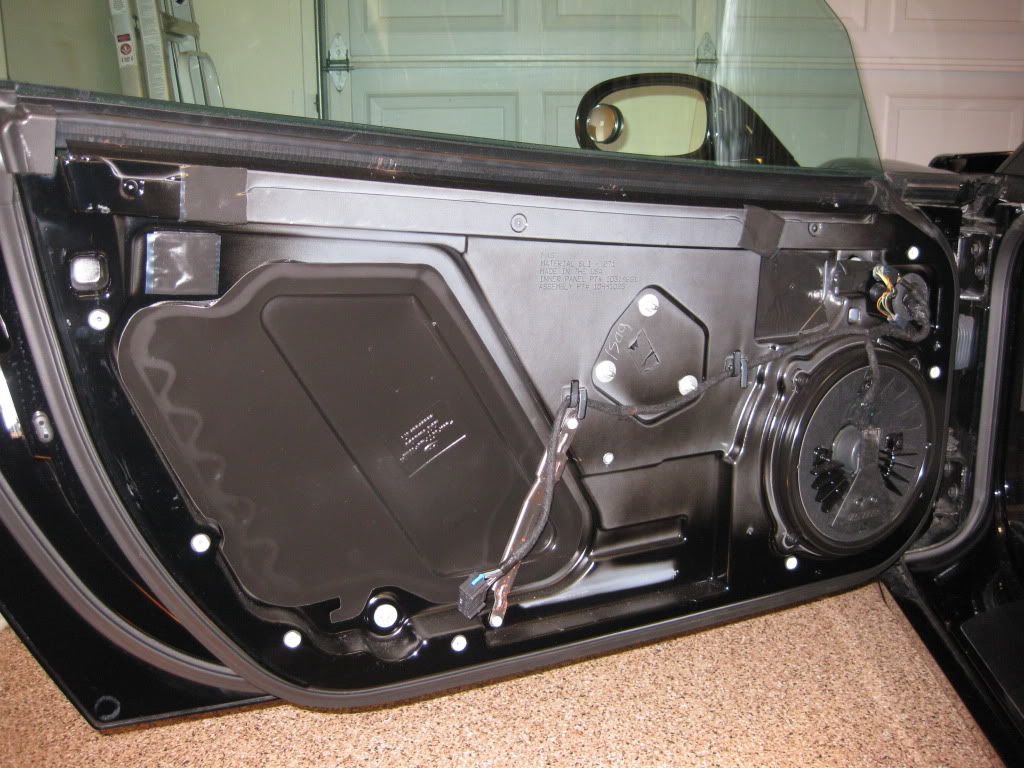
Took a few days off and finally got the garage totally clean and organized now. I finished all the vibration damper stuffs and even applied some extruded butyl 'Rope' to the doors.
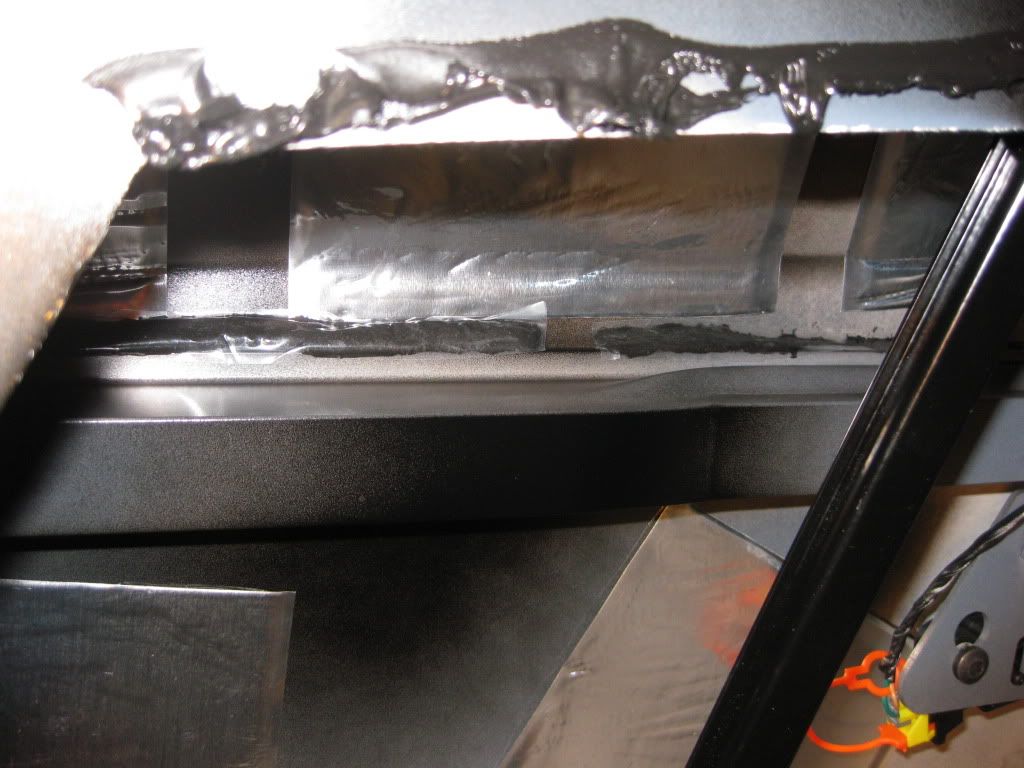
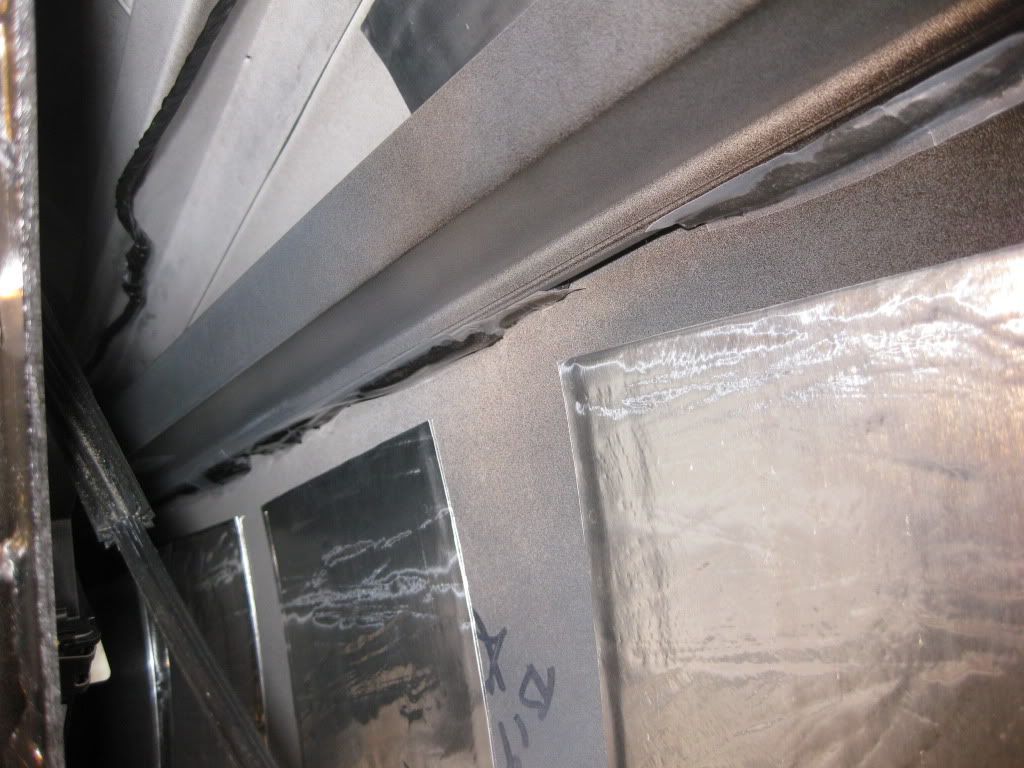
This is the Extruded Butyl "Rope"
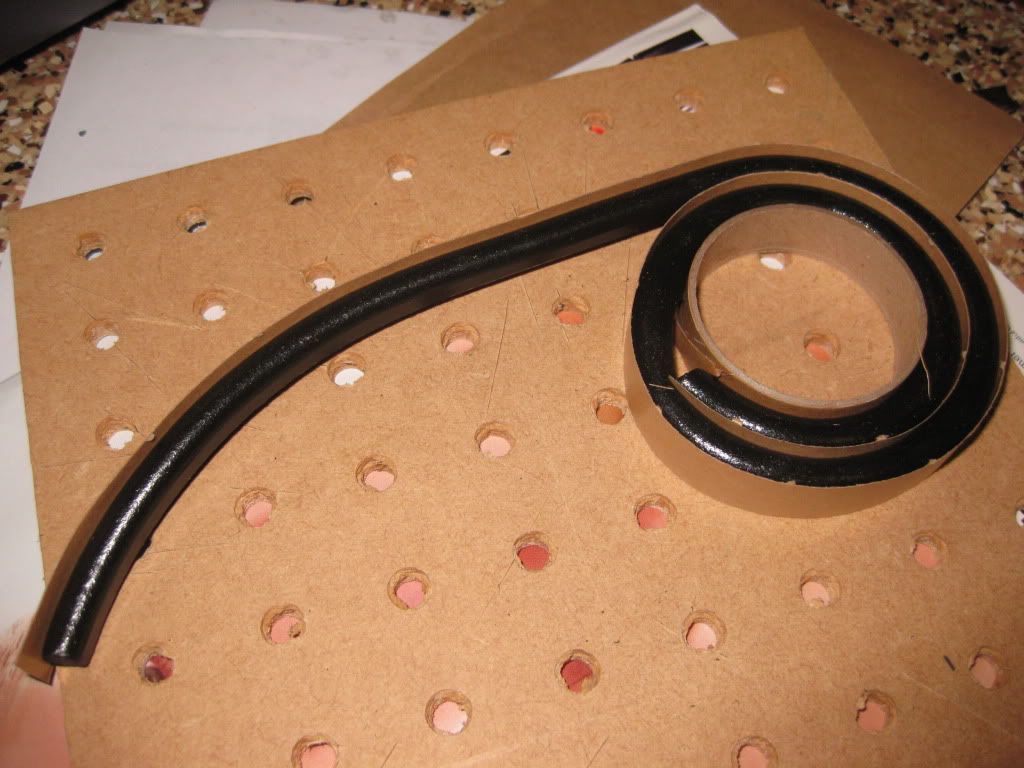
I squeeze this stuffs between the outer door skin and the crash protection bar. I leave a gap every few inches to allow water to drain. This cut down on panel vibration tremendously since the outer door skin is using the crash protection bar as an 'anchor' if you will so it cannot vibrate. To protect the 'rope' from dirt, I cut up thin strips of clear plastic and stick them over the 'ropes'.
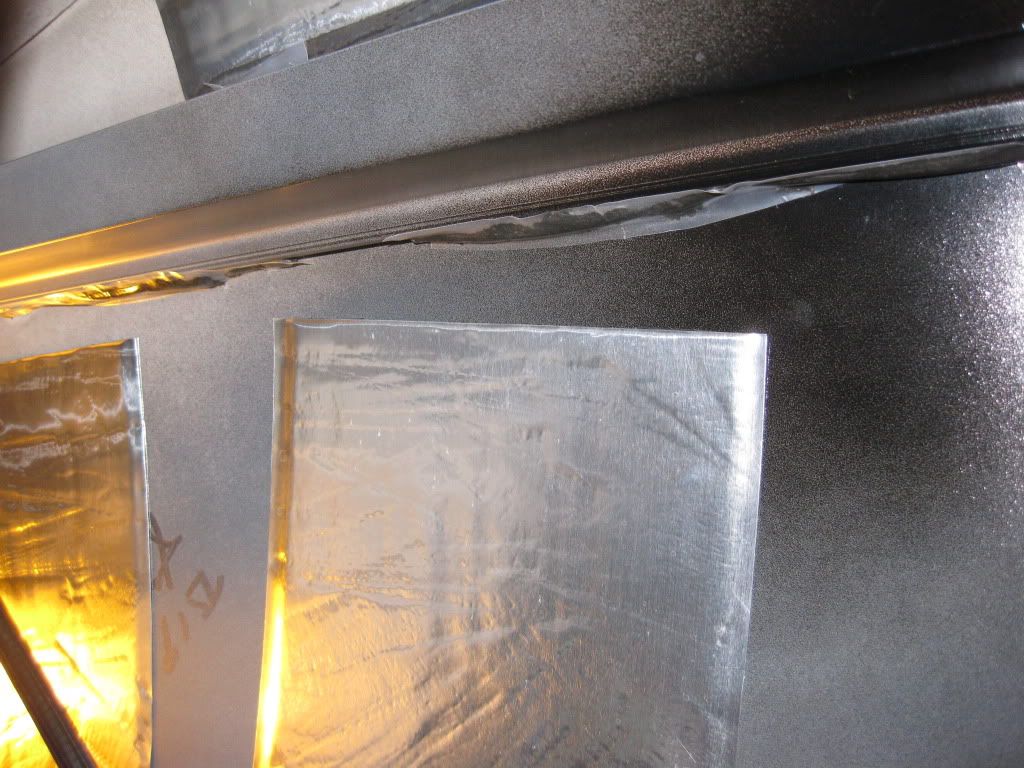
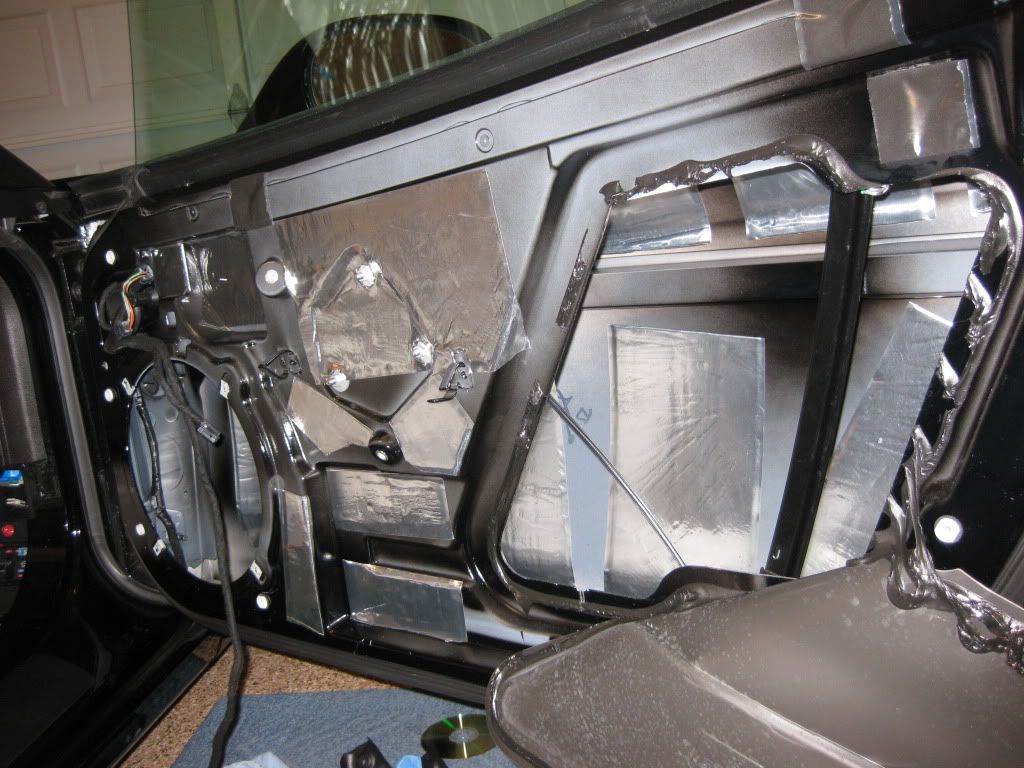
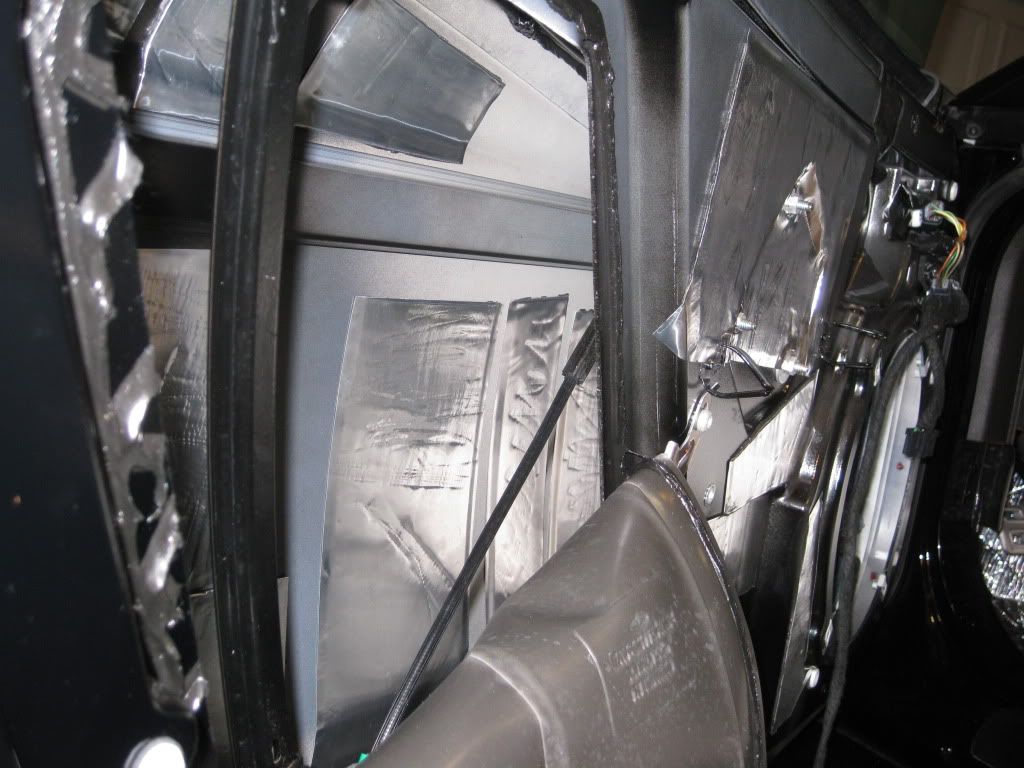
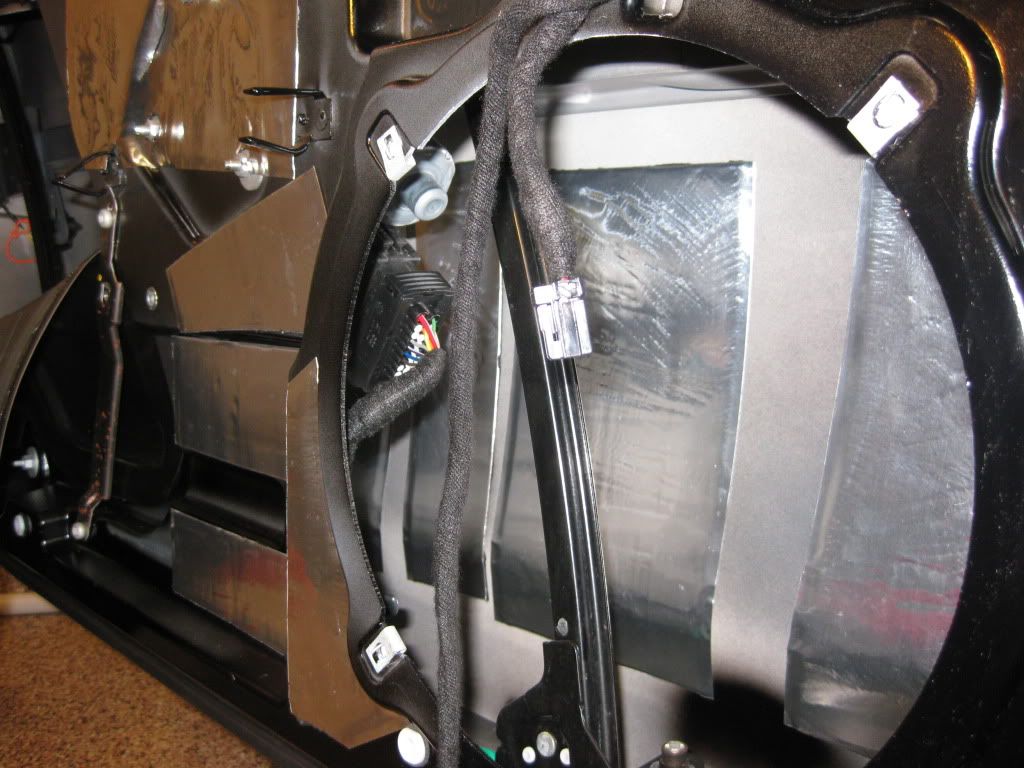
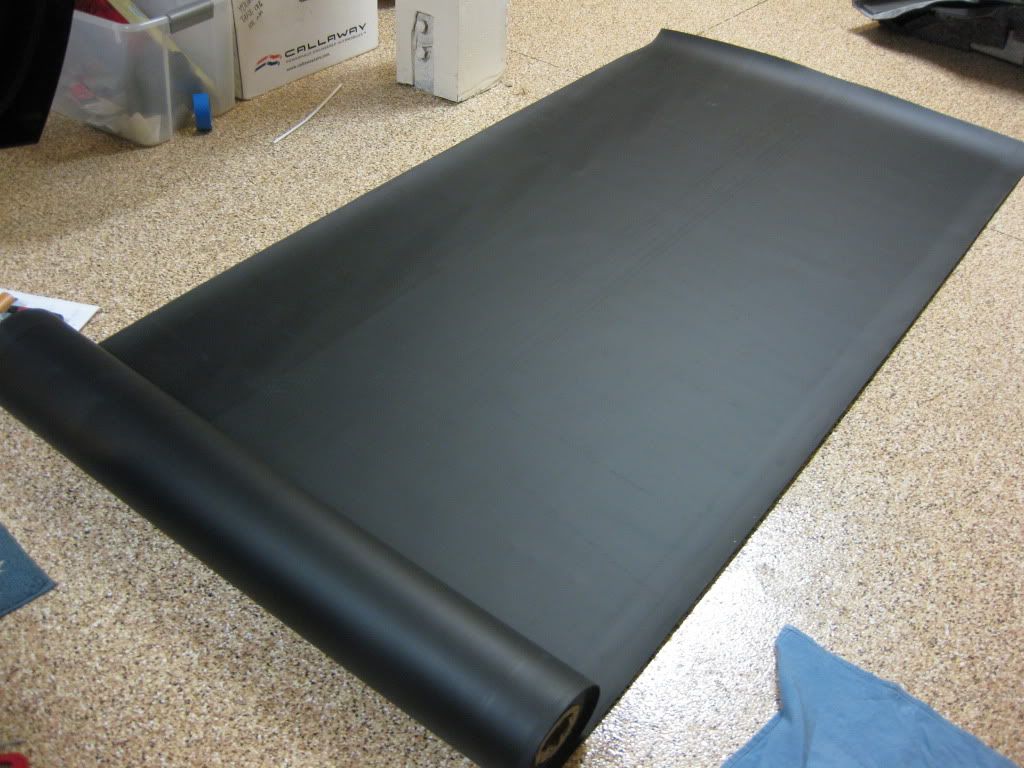
Then it was time to work with the mass loaded vinyl. This stuff is very effective as a noise insulation material. Here is the roll of MLV, very heavy stuff.
You can see how I install the MLV on the doors. They are very heavy so what I do is attach them to the doors with velcro patches. While on the doors I trim to fit. Since they are velcro in, I can remove and fit them against the doors to make sure they clear.
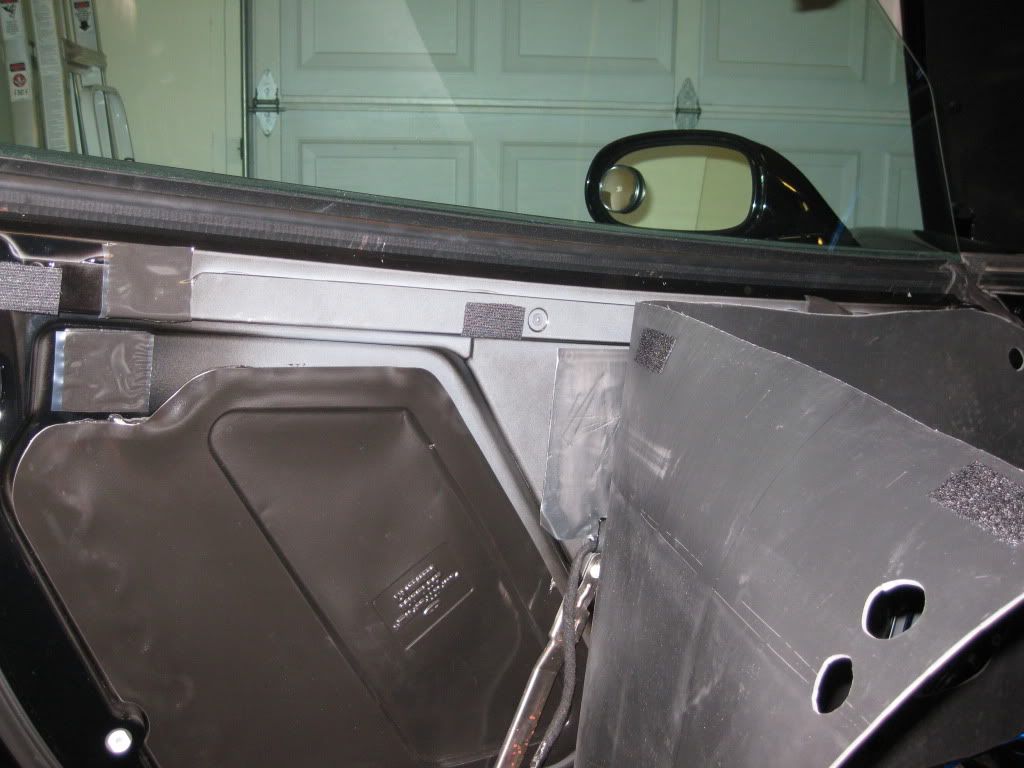

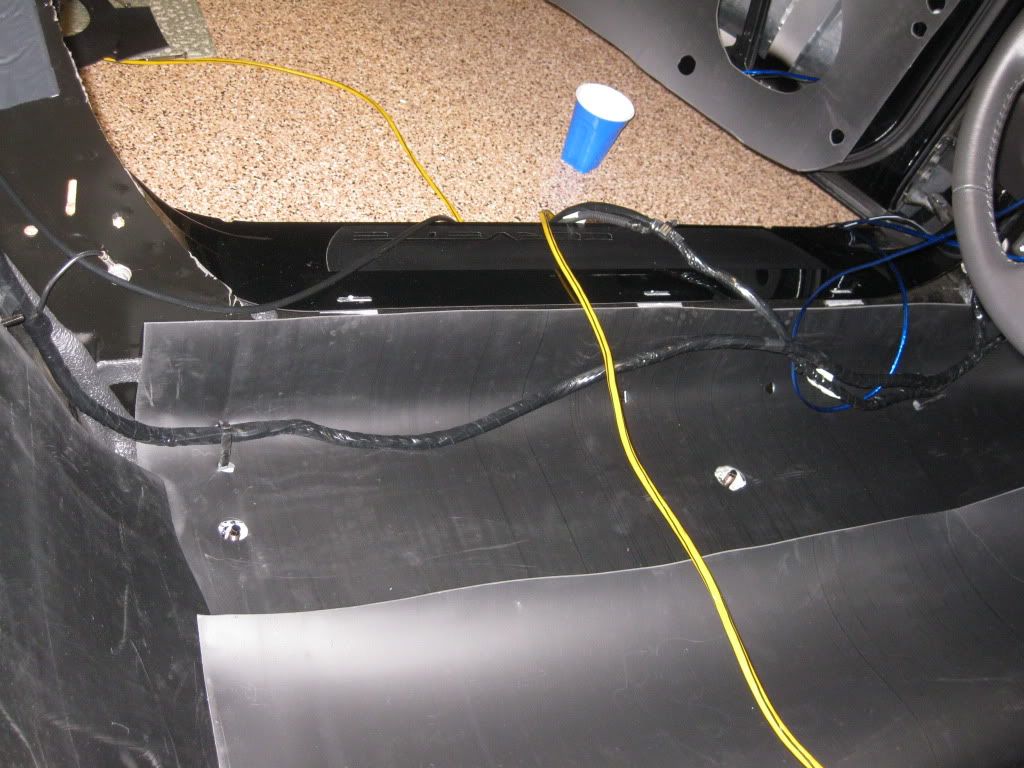
I'm planning to cut a small hole in the Madvette foil kit and sandwich them between the door the the MLV without the hassle of glueing them permanently. Also this allows me to remove them and service the car should I need to in the future.
I'm starting to run the amp power wire (firewall gomet), ground wire, and speaker wires through the doors. Hopefully this weekend I can get to the head unit and all the fun parts.
My Pioneer HU finally arrived so I had a chance to look over all the harness. I have a couple questions regarding the C2R-GM24 and the Pioneer harness. I did the searches but these wires still confuse me.
1. On the C2R-GM24 (GMCO) harness, I will tape off the orange and orange/white wires. What do I do with the BLUE wire? Again, I'm taking out all the C6 Bose non NAV stuffs and replacing with new Pioneer Z110BT and amp.
2. On the Z110BT power cord harness, there is a BLUE (antenna control) wire. Should I connect this wire with the BLUE on the C2R harness above?
3. Finally on the Z110BT RCA Connector harness, there is a BLUE/white (system remote control) wire. Do I run this wire straight to the amp turn on terminal? Or should I use the car's heated seat (add a fuse) as a turn on source?
Thanks.
This is the Extruded Butyl "Rope"
I squeeze this stuffs between the outer door skin and the crash protection bar. I leave a gap every few inches to allow water to drain. This cut down on panel vibration tremendously since the outer door skin is using the crash protection bar as an 'anchor' if you will so it cannot vibrate. To protect the 'rope' from dirt, I cut up thin strips of clear plastic and stick them over the 'ropes'.
Then it was time to work with the mass loaded vinyl. This stuff is very effective as a noise insulation material. Here is the roll of MLV, very heavy stuff.
You can see how I install the MLV on the doors. They are very heavy so what I do is attach them to the doors with velcro patches. While on the doors I trim to fit. Since they are velcro in, I can remove and fit them against the doors to make sure they clear.
I'm planning to cut a small hole in the Madvette foil kit and sandwich them between the door the the MLV without the hassle of glueing them permanently. Also this allows me to remove them and service the car should I need to in the future.
I'm starting to run the amp power wire (firewall gomet), ground wire, and speaker wires through the doors. Hopefully this weekend I can get to the head unit and all the fun parts.
My Pioneer HU finally arrived so I had a chance to look over all the harness. I have a couple questions regarding the C2R-GM24 and the Pioneer harness. I did the searches but these wires still confuse me.
1. On the C2R-GM24 (GMCO) harness, I will tape off the orange and orange/white wires. What do I do with the BLUE wire? Again, I'm taking out all the C6 Bose non NAV stuffs and replacing with new Pioneer Z110BT and amp.
2. On the Z110BT power cord harness, there is a BLUE (antenna control) wire. Should I connect this wire with the BLUE on the C2R harness above?
3. Finally on the Z110BT RCA Connector harness, there is a BLUE/white (system remote control) wire. Do I run this wire straight to the amp turn on terminal? Or should I use the car's heated seat (add a fuse) as a turn on source?
Thanks.
Last edited by MSO4; 01-07-2010 at 02:56 AM.
01-07-2010, 03:50 AM
#12
Tech Contributor
1-Plug the GMCO into the cars original harness, connect the red, yellow & black wires from the GMCO to the same colors on the HU harness, ignore all of the other wires on the GMCO for now.
2/3-Use the system control wire from the HU harness as the trigger for your amp, the GMCO turns the radio on/off with RAP then the radio turns the amp on as needed. The C6 has a powered antenna module, so you probably should connect the antenna control wire from the HU to the GMCO in order to get the best reception, but it isn't absolutely required. I don't know which color wire you need to connect it to on the GMCO (if there even is one), but I can tell you that it needs to somehow connect to the white wire at pin B3 of the original car harness that the big GMCO plug connects to (that may be the blue GMCO wire, may not). The illumination/dimmer control wire (orange/white ?) from the HU connects to the gray wire under the traction control switch. The other HU wires depend on what additional options you have, you can find most of that info here. If you're installing a steering wheel button adapter click here for info. All of the C6 radio schematics are available here if you need them.
2/3-Use the system control wire from the HU harness as the trigger for your amp, the GMCO turns the radio on/off with RAP then the radio turns the amp on as needed. The C6 has a powered antenna module, so you probably should connect the antenna control wire from the HU to the GMCO in order to get the best reception, but it isn't absolutely required. I don't know which color wire you need to connect it to on the GMCO (if there even is one), but I can tell you that it needs to somehow connect to the white wire at pin B3 of the original car harness that the big GMCO plug connects to (that may be the blue GMCO wire, may not). The illumination/dimmer control wire (orange/white ?) from the HU connects to the gray wire under the traction control switch. The other HU wires depend on what additional options you have, you can find most of that info here. If you're installing a steering wheel button adapter click here for info. All of the C6 radio schematics are available here if you need them.
01-07-2010, 04:38 AM
#13
Racer
Thread Starter
The C6 has a powered antenna module, so you probably should connect the antenna control wire from the HU to the GMCO in order to get the best reception, but it isn't absolutely required. I don't know which color wire you need to connect it to on the GMCO (if there even is one), but I can tell you that it needs to somehow connect to the white wire at pin B3 of the original car harness that the big GMCO plug connects to (that may be the blue GMCO wire, may not).
So the BLUE (antenna control) from the HU will connect with the BLUE from GMCO. Thanks Mark.
01-07-2010, 09:58 AM
#15
Advanced
That's correct, the blue wire from the HU goes to the blue wire on the gmco. If I remember correctly, it's all color to color. That is the way I did mine and don't have any problems. If you want your HU to dim with your lights, do as Mark said and run the orange/white wire from the HU to the grey/white wire (I think that's the color) at the traction control button. Your blue/white wire from the HU needs to go to your amp/amps to the remote power connection. If you have 2 amps, you can just jump the wire from one to the other.
01-10-2010, 02:24 AM
#16
Racer
Thread Starter
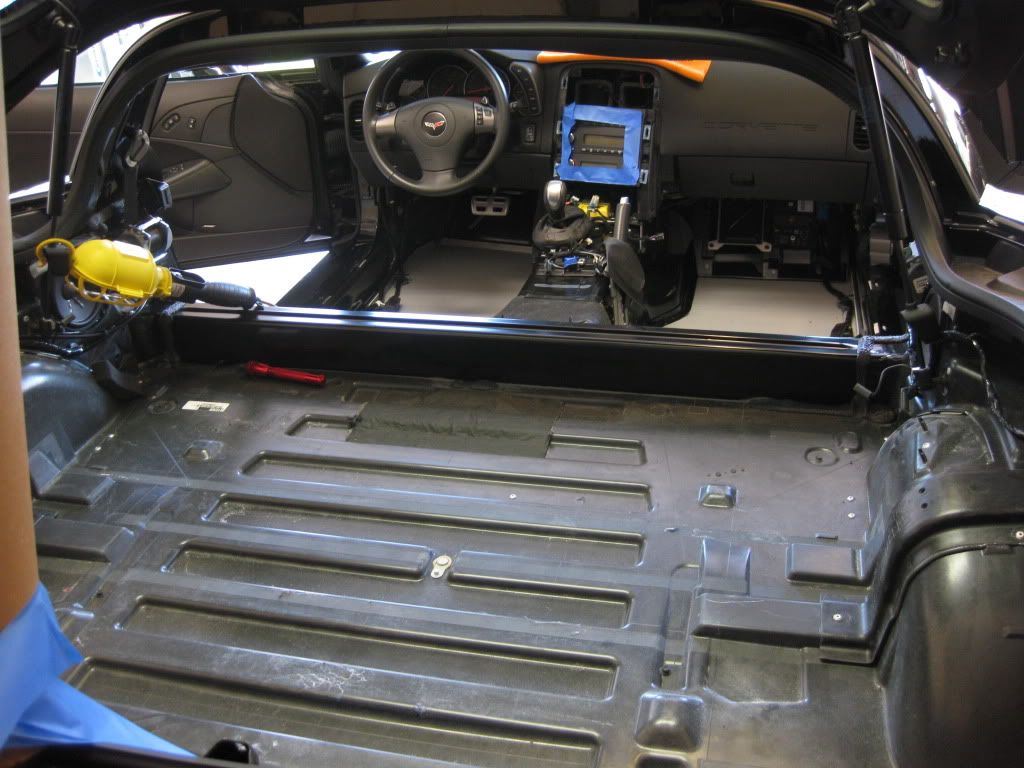
Today was just a beautiful day to work on the car. I had so much fun that I actually skipped lunch! But I did eat 1 1/2 portion for dinner to make up for it.
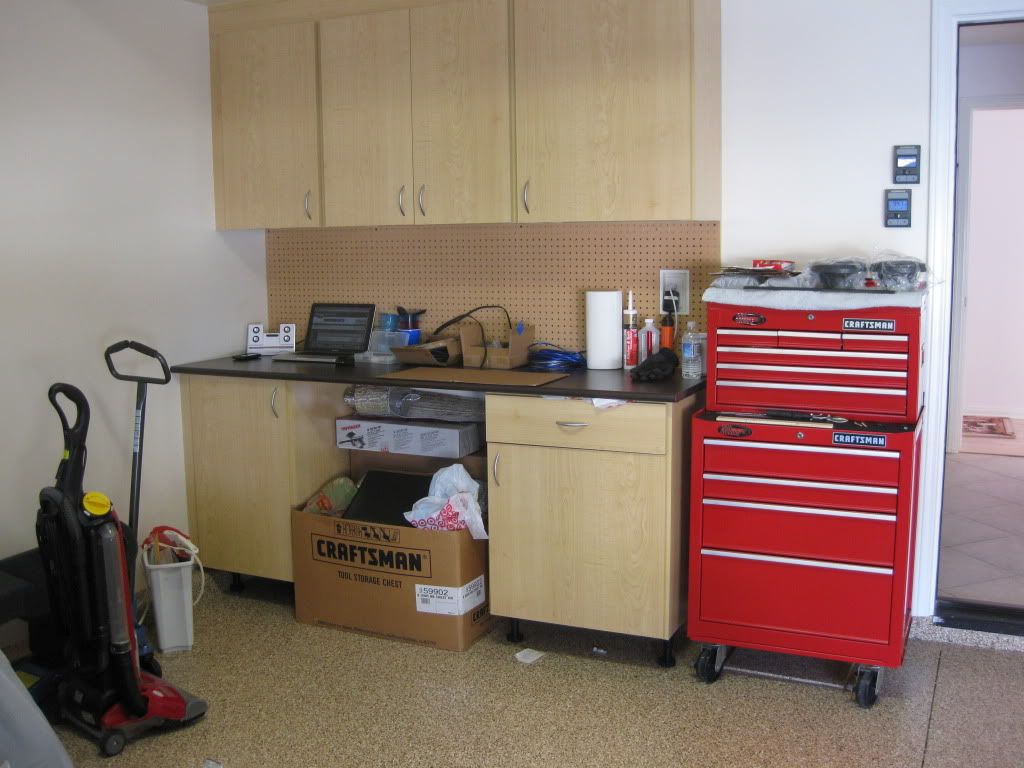
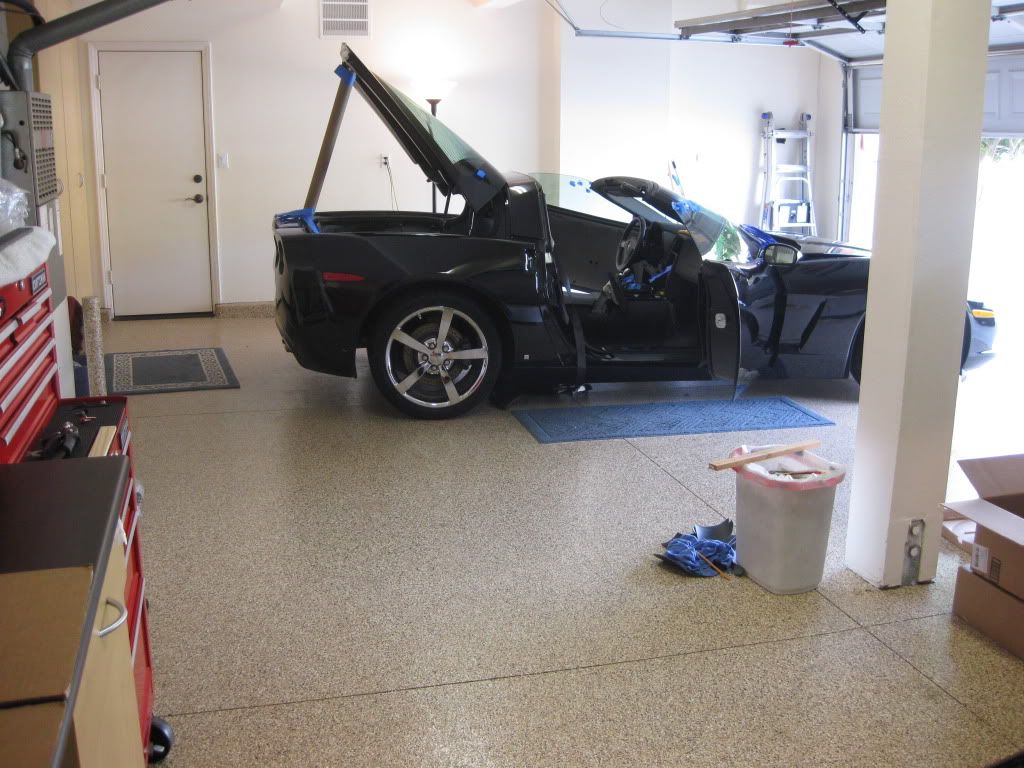
A coupe shots of the garage before I started. I try to keep it as clean and organized as possible.
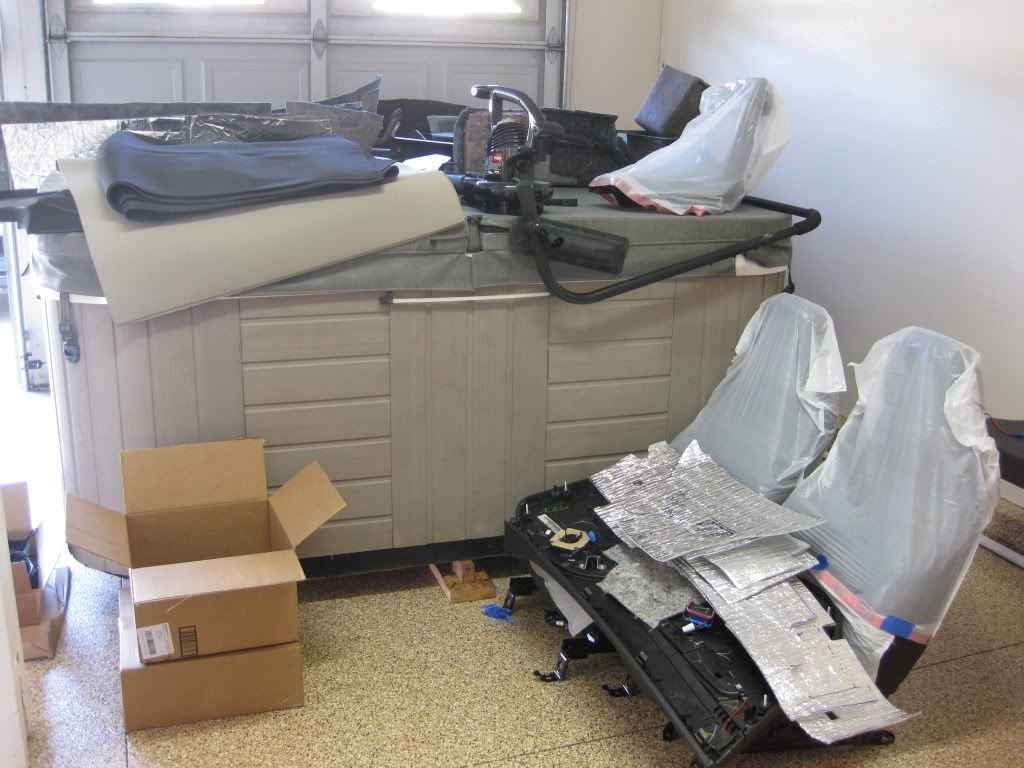
Here's another project in the works, my jacuzzi for the backyard!
Finishing up the MVL.


Preparing the speaker plates. I added some CLD tiles to the back of the plates.

Oh, I can almost hear the music.

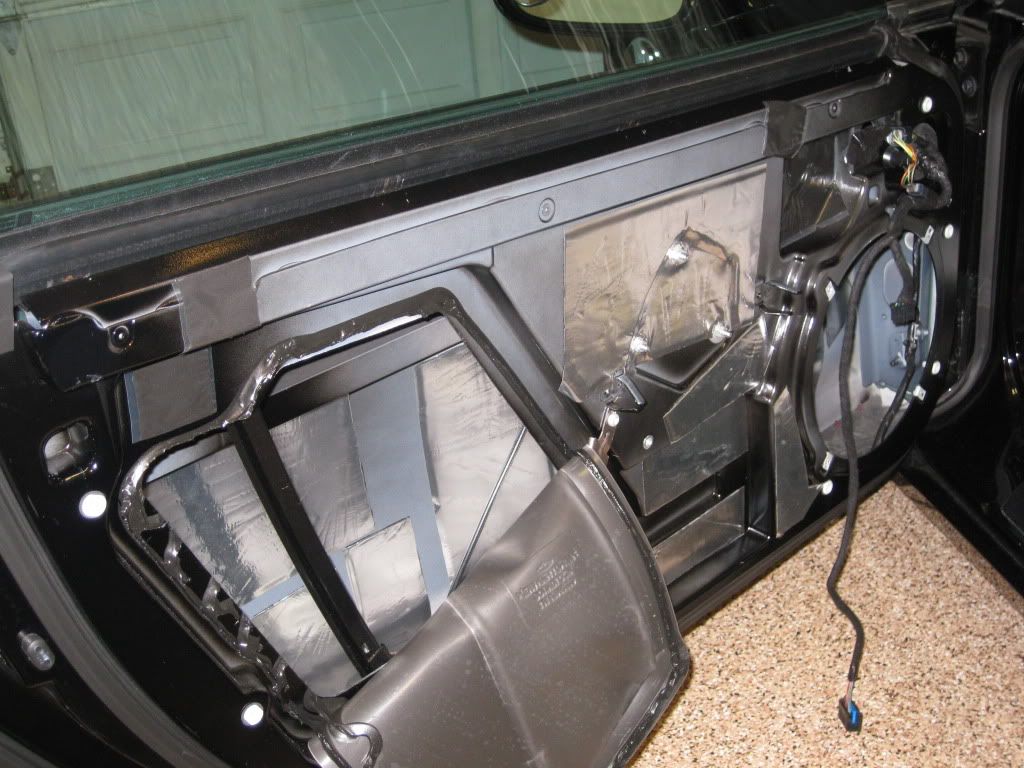
A layer of ensolite on top of the MLV to take care of door panel buzzes. And I love the way this looks.

Finally the doors are done.

Putting the door panels back was not as bad as I thought. Start by lowering the windows. Then line up the top pins first (don't pop them in yet, just roughly line it up). Then starting from the rear of the door and insert the hooks one at a time. It's easier if you tilt the door panel (bottom of the panel about a foot away from the door). Once all the hooks are in, line up all the pins and pop them in.
I tried the method of put the pins in first but was not successful. I find inserting the hooks first much easier. Also on the passenger door, the bottom door screw would not line up. I had to put a lot of weight on the door panel to get it to line up. I think all that MLV made it that way. Glad I was able to screw it in though.
A coupe shots of the garage before I started. I try to keep it as clean and organized as possible.
Here's another project in the works, my jacuzzi for the backyard!
Finishing up the MVL.
Preparing the speaker plates. I added some CLD tiles to the back of the plates.
Oh, I can almost hear the music.
A layer of ensolite on top of the MLV to take care of door panel buzzes. And I love the way this looks.
Finally the doors are done.
Putting the door panels back was not as bad as I thought. Start by lowering the windows. Then line up the top pins first (don't pop them in yet, just roughly line it up). Then starting from the rear of the door and insert the hooks one at a time. It's easier if you tilt the door panel (bottom of the panel about a foot away from the door). Once all the hooks are in, line up all the pins and pop them in.
I tried the method of put the pins in first but was not successful. I find inserting the hooks first much easier. Also on the passenger door, the bottom door screw would not line up. I had to put a lot of weight on the door panel to get it to line up. I think all that MLV made it that way. Glad I was able to screw it in though.
