
C5 Coupe Audio Overhaul
 01-03-2010, 08:45 PM
#1
Team Owner


Thread Starter
Once again, I took vacation time to do a major mod project – this time it was a much needed re-do of Mrs. Patches’ (Carole) C5 audio system. She has a portable Garmin Nuvi 660 GPS navigation system that attached to her center vent but it was like a big, silver wart poking out of her dash and my factory unit in my Hummer made her want something more integrated-looking. Christmas being just around the corner, I decided to surprise the wife with a complete overhaul of her audio system and include an integrated nav system. 
The double-din bezel I won here in Double D Mod’s giveaway a couple of months ago got the ball rolling. I want to thank Dennis, c5 BearsFan, for his generosity and for his valuable advice and assistance in getting all the right components ordered for this project. His partner, Greg, pentavolvo, was also extremely helpful – and patient – in answering all my questions and steering me in the right direction as I prepped for the install. Thanks to Ray, member razor2430, as well, for his invaluable advice and pictures.
Never having done this involved of an audio install, I did some thorough research – mostly here, the vendor sites and audio forums – to make sure I didn’t run into any showstopper issues. I decided to completely rip out the stock Bose system and replace it with a modern and multifunctional double-din head unit (HU), capable front and rear component speakers and a decent single sub woofer. The important thing is that the system should remain generally invisible, as Carole is not into the blinged-out look and likes to keep the car looking pretty close to stock. That meant a stealth box for the sub and a HU that blends nicely into the dash. She was also quite specific that the nav unit be as close to the look and operation of her Nuvi – Carole hates change and she didn’t want to relearn a new nav system. Dennis and Greg came to the rescue here, recommending the Kenwood DNX series HU that is completely Garmin based/immersed. It looks exactly like the Nuvi but with a much larger screen (7”). I’ve read the Pioneer vs. Kenwood debates posted here and would have probably gone Pioneer if it had been my car. Carole wanted as close to her existing Nuvi as possible so that meant Kenwood and that is, as they say, that.
So, here was the line-up I ordered:
Head unit: Kenwood DNX7140
· In-dash Navigation Receiver with DVD, CD, MP3, WMA playback
· iPod and iPhone USB direct connectivity
· Motorized flip-down face
· Full color LCD monitor
· 6.95" Touch screen display
· Wireless remote control
· Blue button lighting
· Variable color illumination
· Selectable wallpapers and customizable backgrounds
· Multi-Language GUI menu
· Power Output:
o Peak: 50 watts x 4 channels
o RMS: 22 watts x 4 channels
· CD Text Display
· MP3 ID3 Tag Display (Title/Artist/Album)
· Bluetooth by Parrot
· Rear camera ready
· HD radio ready
Amp: Infinity 5350a
Front speakers: Elemental Designs 3.65i with custom door speaker mounting plates
Rear Speakers: Polk DB 651
Sub-woofer: Elemental Designs 11kv with custom NVTHIS hidden sub box in center well
HD Radio tuner: Kenwood KTC-HR200
Rear view camera: Kenwood CCD-2000
Misc.: eDead sound deadener and Ensolite closed-cell foam from RAAMaudio (besides the Madvette kit I had already installed); GM wiring harness/antenna adapter
On to the install . . .
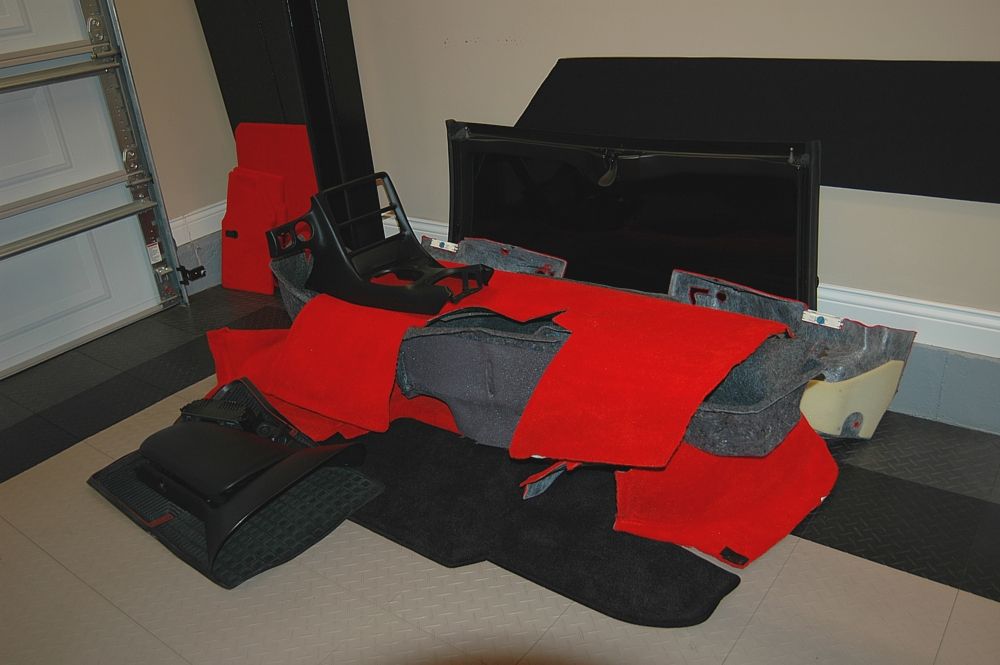
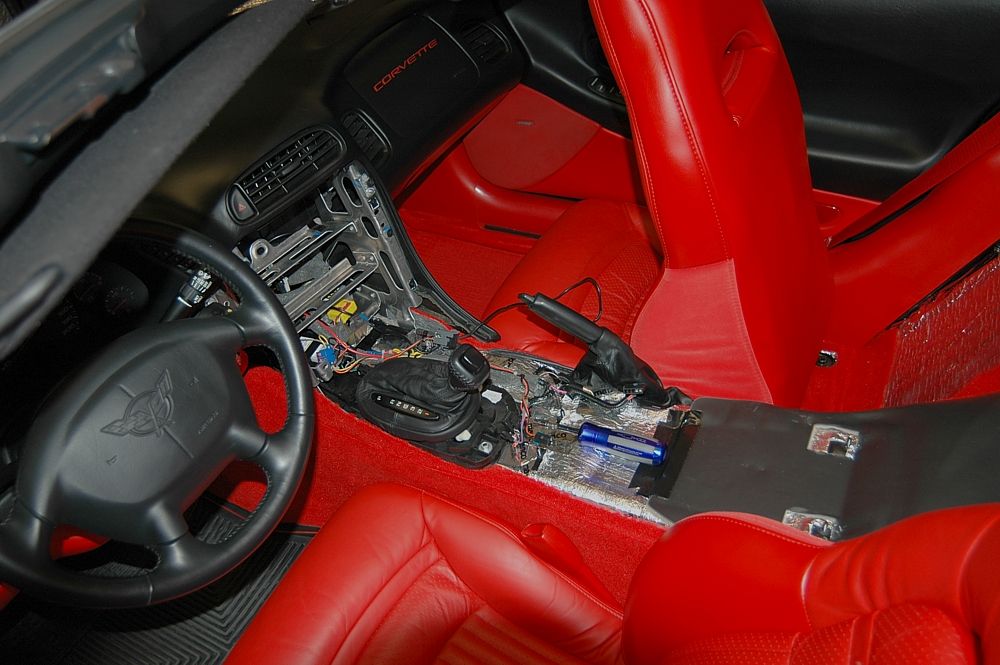
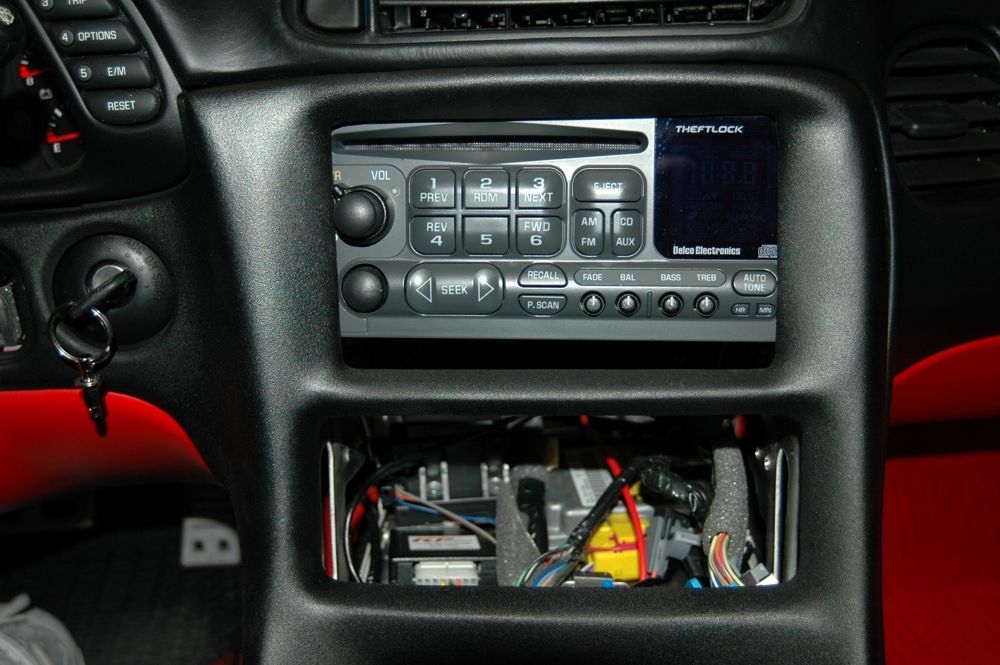
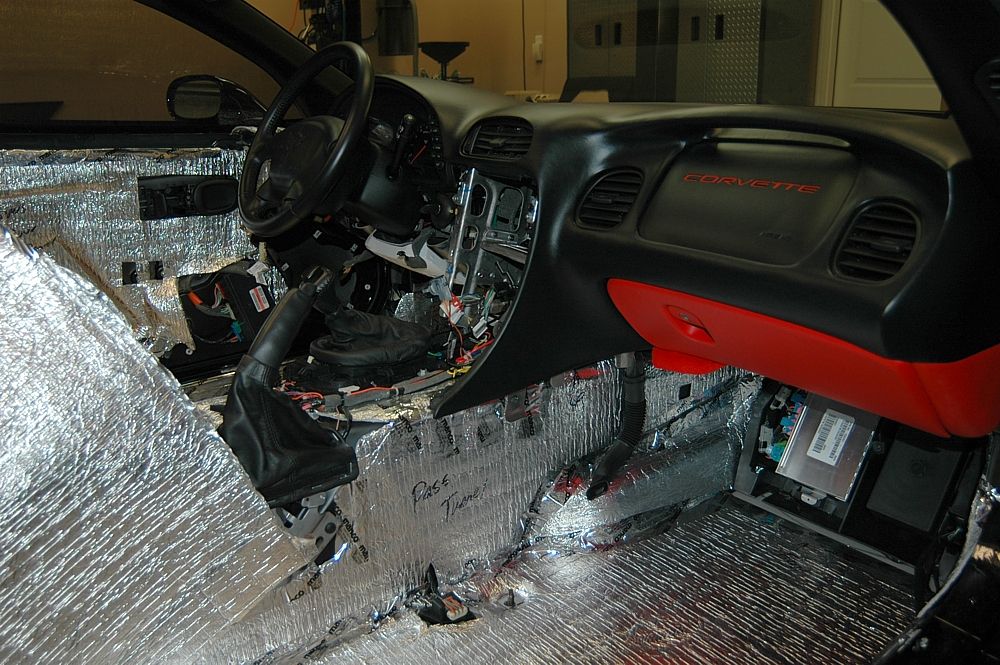
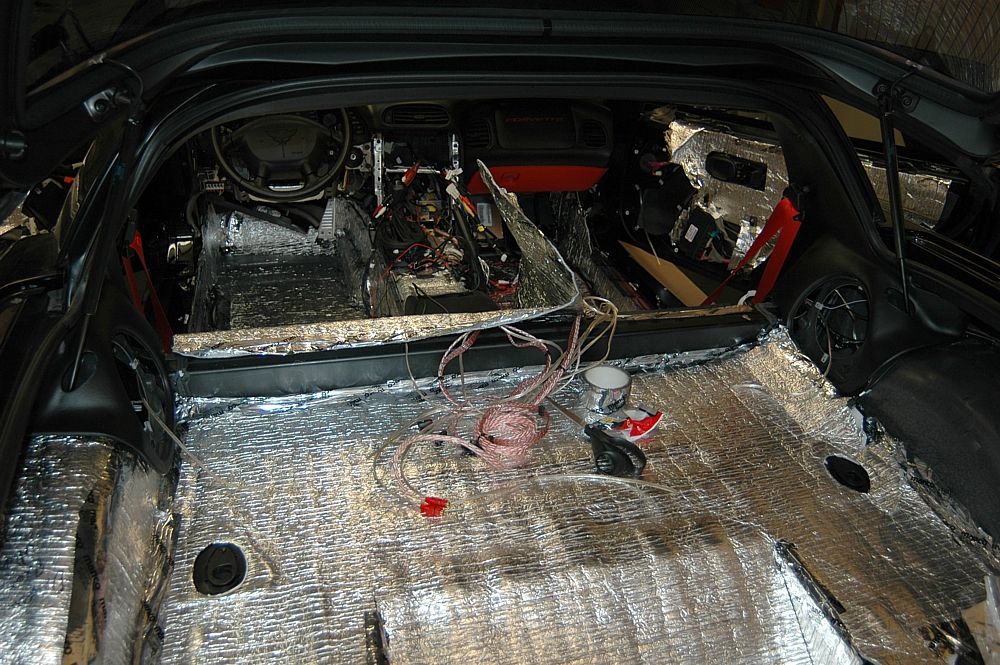
First order of business was to strip the rear interior section to the insulation and the center stack to remove the HU.
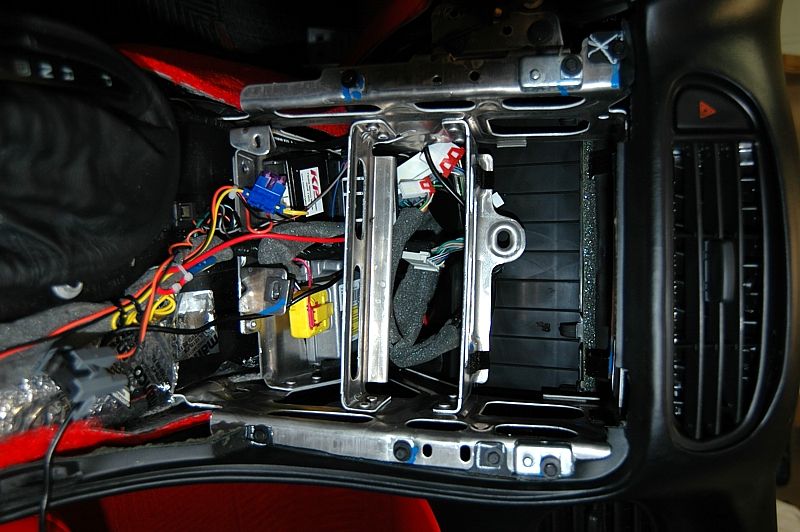
For a C5 double-din install, the two horizontal supports in the center stack that the HU and AC controller rest on must be removed by drilling out the rivets that hold them in place. It is much more difficult than one would imagine – I mean, how hard can it be to drill out eight rivets, right? Took me more than an hour and several new, hard drill bits. Those are some hard rivets. Luckily, I was forewarned and had ordered a right-angle drill attachment and new bits. They weren’t kidding . . .

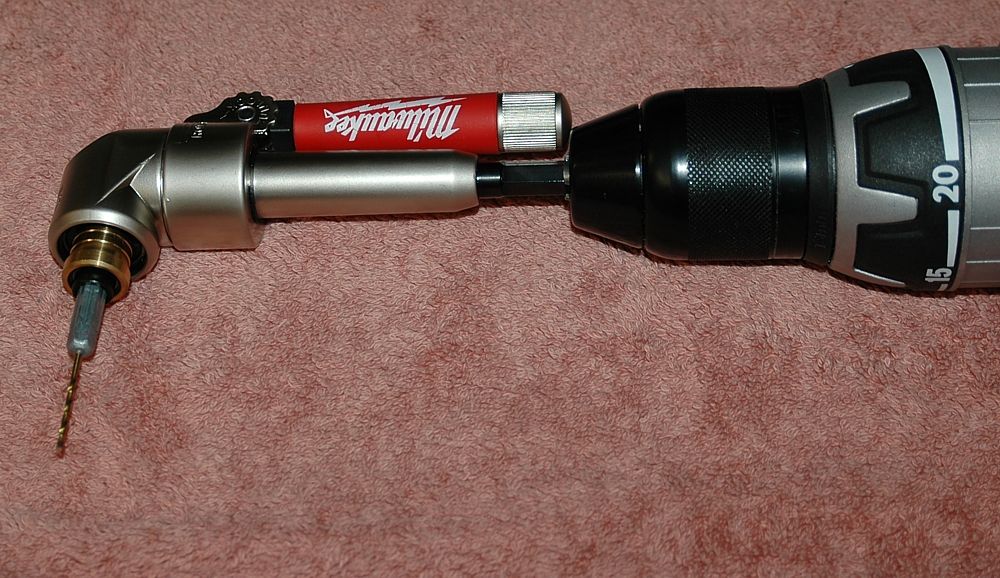
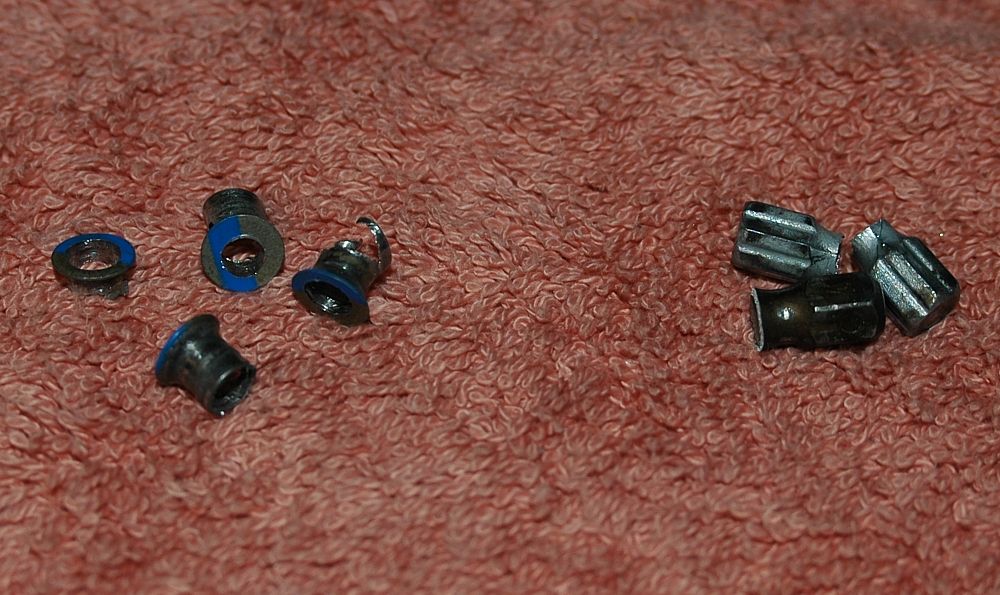
Rivets and broken drill shanks.
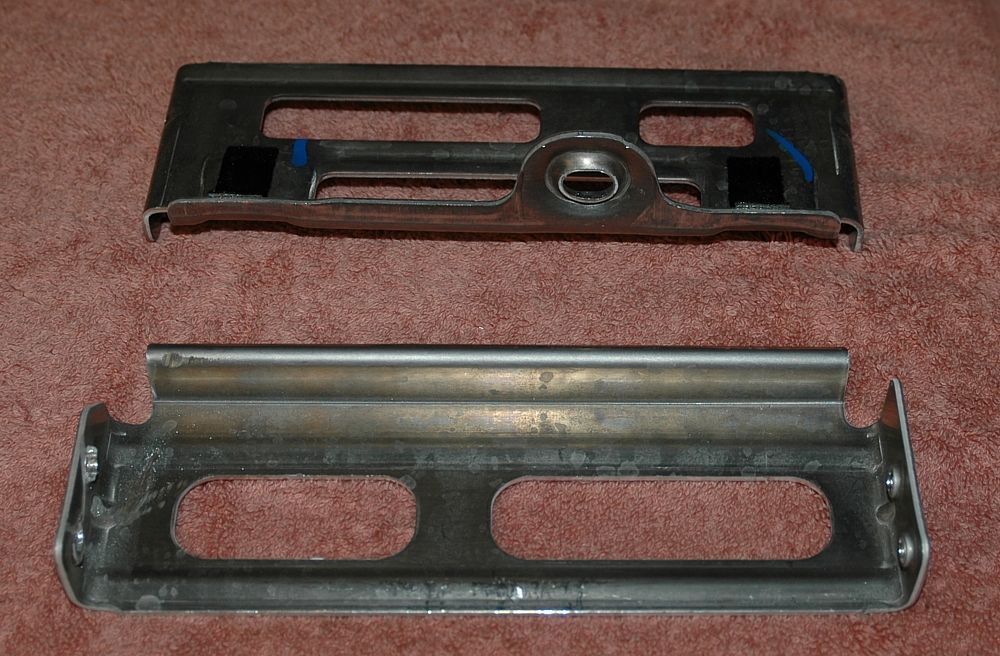
The removed supports.
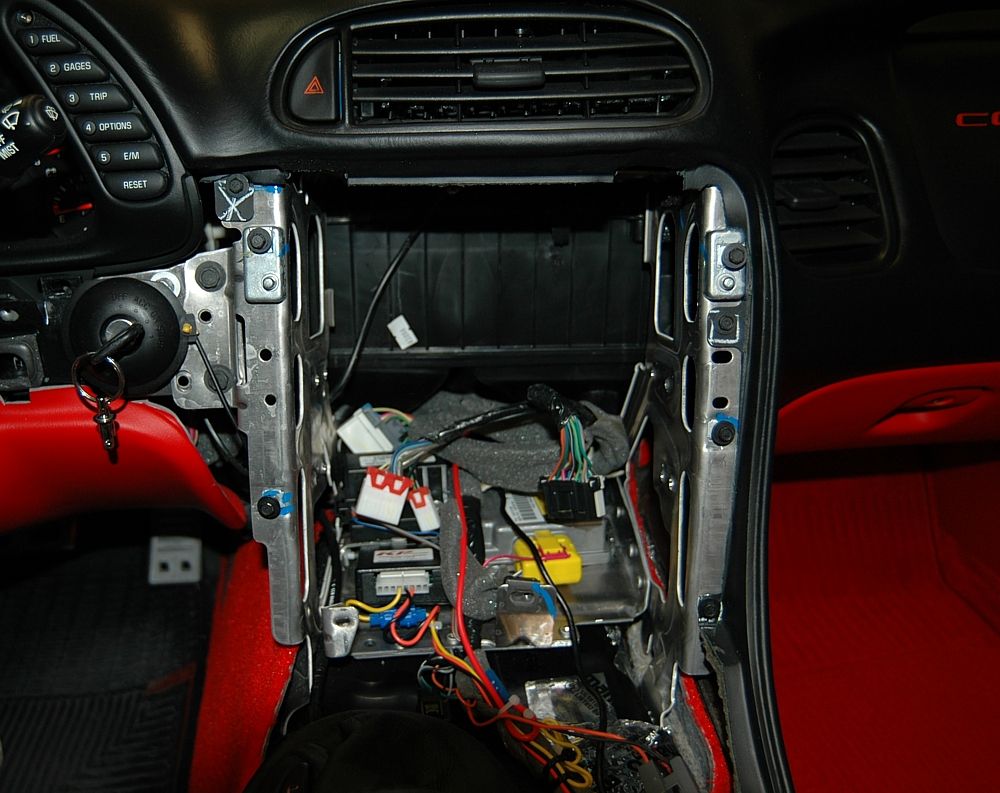
The center stack sans supports.
I set about fitting the new bezel from Double D Mods. Just for grins, here’s what it looks like placed over the stock HU.
The new HU with a set of brackets I fabbed up.
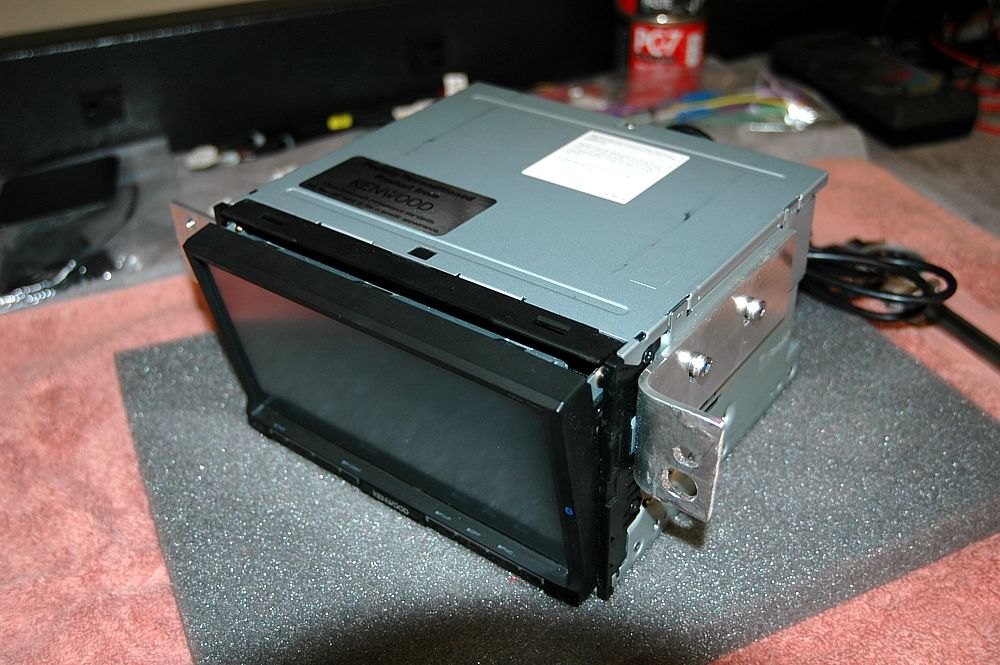
The HU temporarily placed to position it.
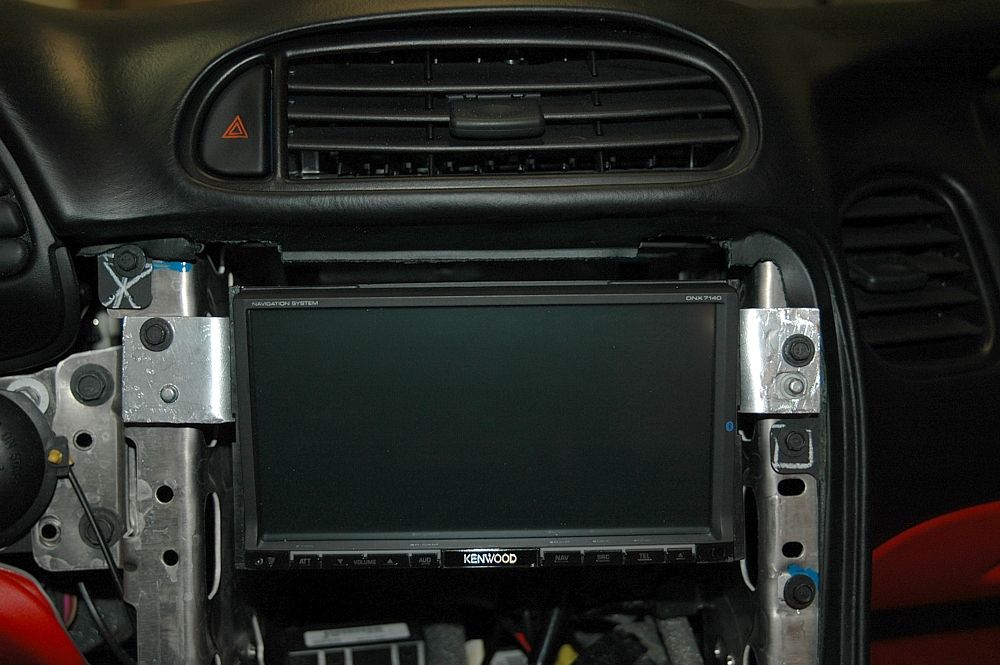
I decided to put one of the support brackets to work and drilled new mounting holes for it. This will help to support the weight of the HU and take some of the load off the brackets.
The AC controller needs to be repositioned as well since the HU is taller and I opted for the non-ashtray bezel. So I set about readjusting that as well.
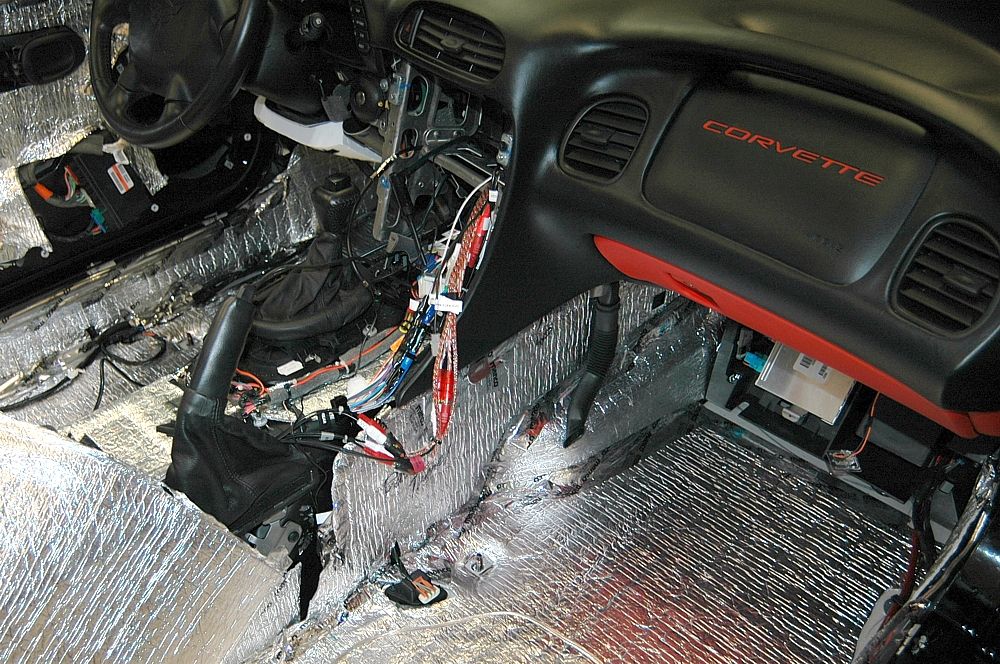
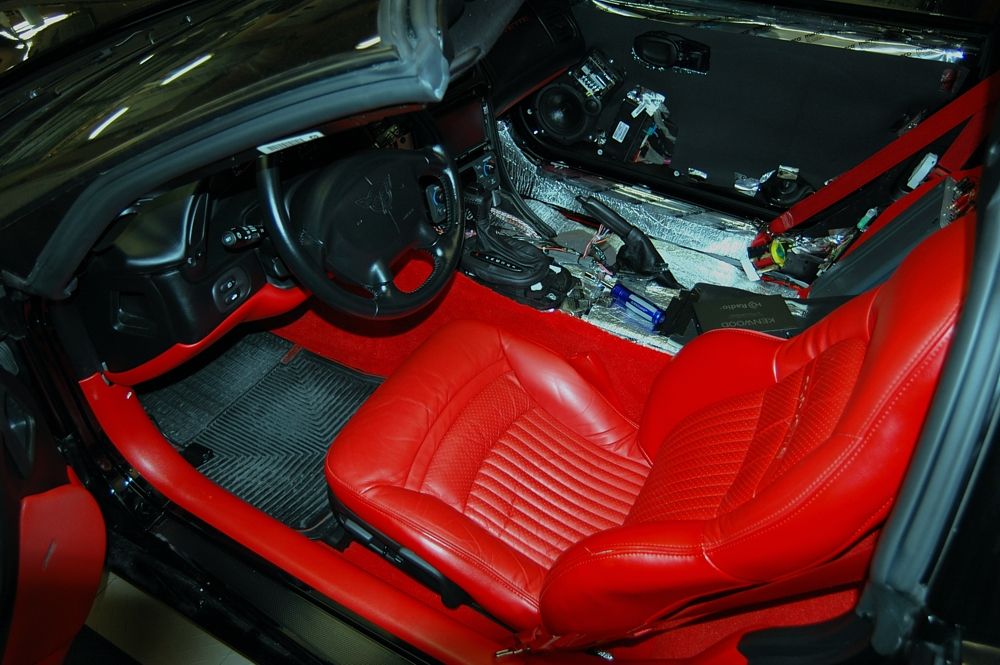
That done, I pulled the rest of the interior out and prepped for the remainder of the install.
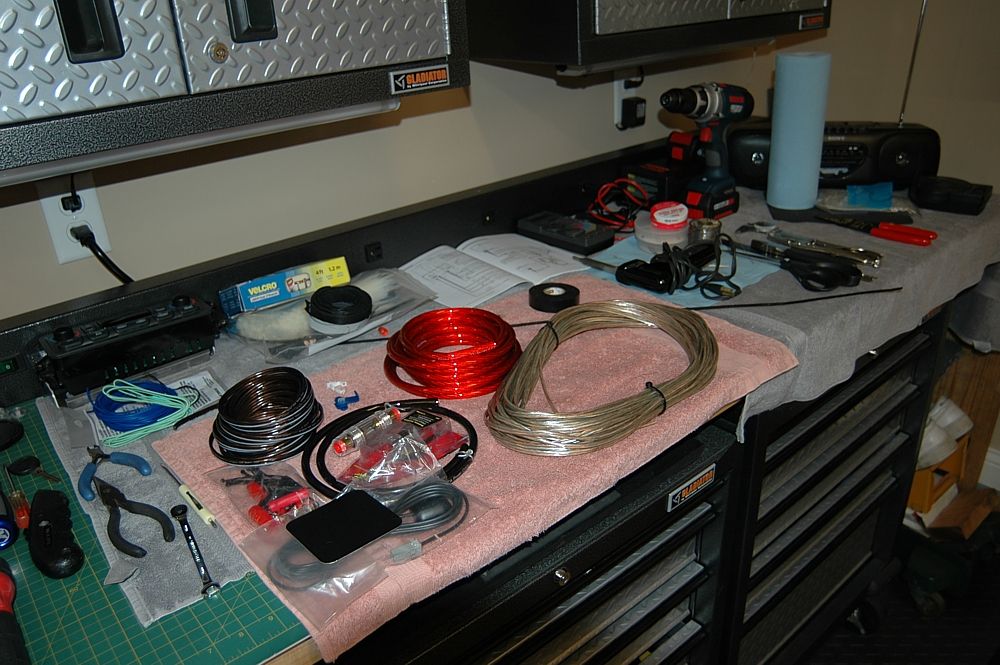
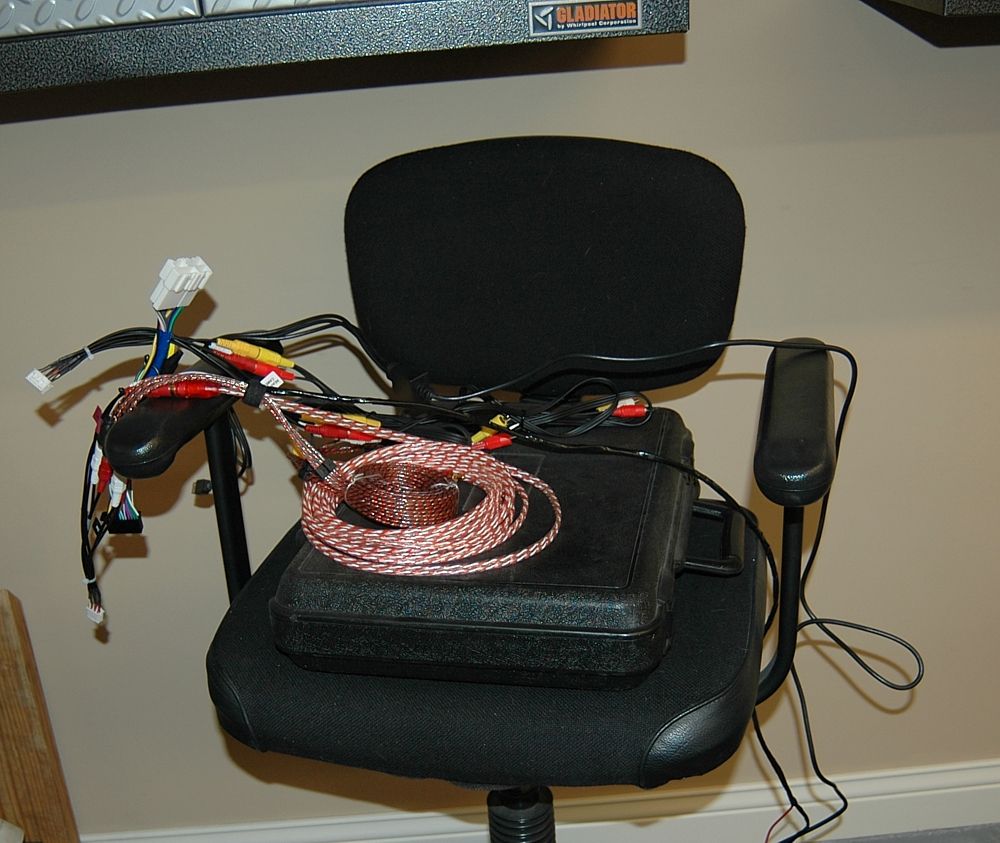
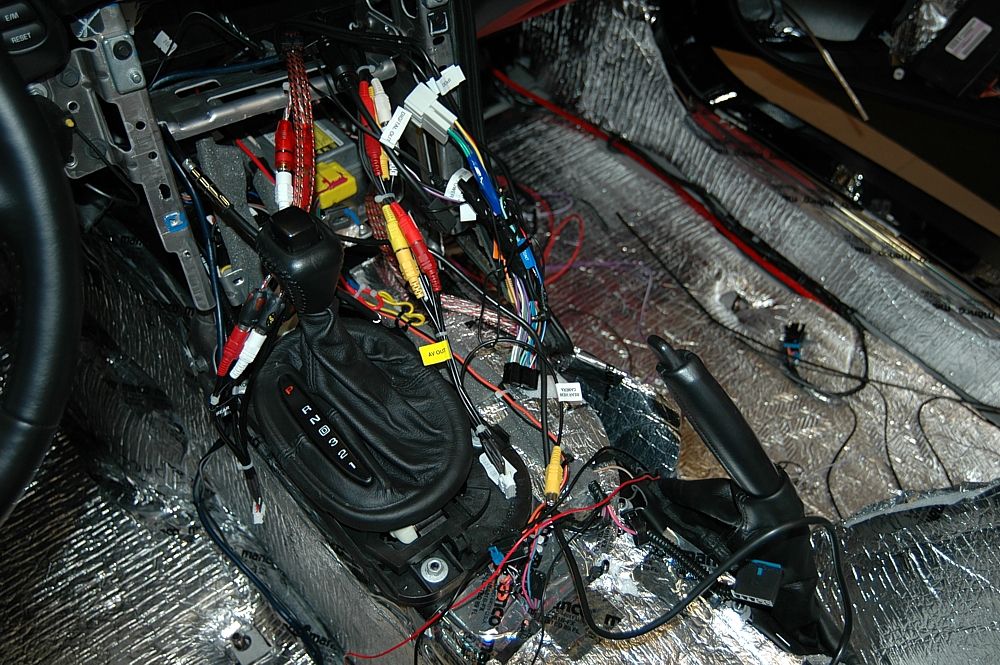
Laid out and made up all the harnesses. Btw, I used none of the existing wiring except for the power/ground hookup on the stock HU harness connector.
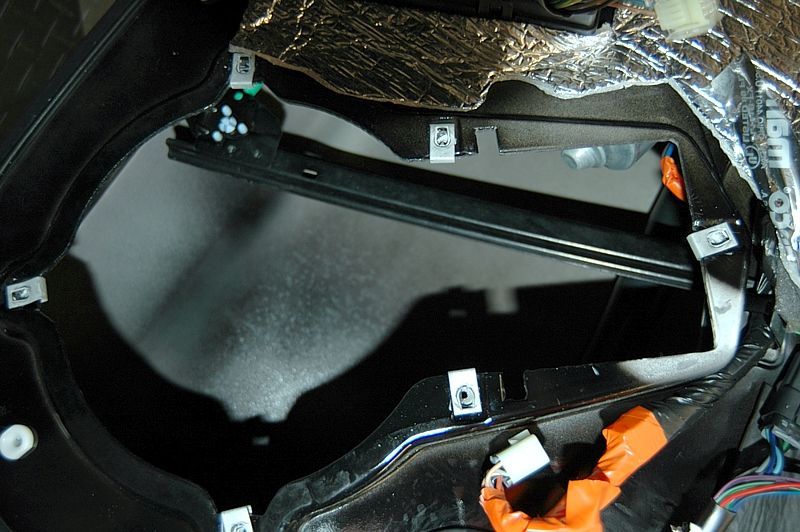
I removed the rest of the stock Bose system

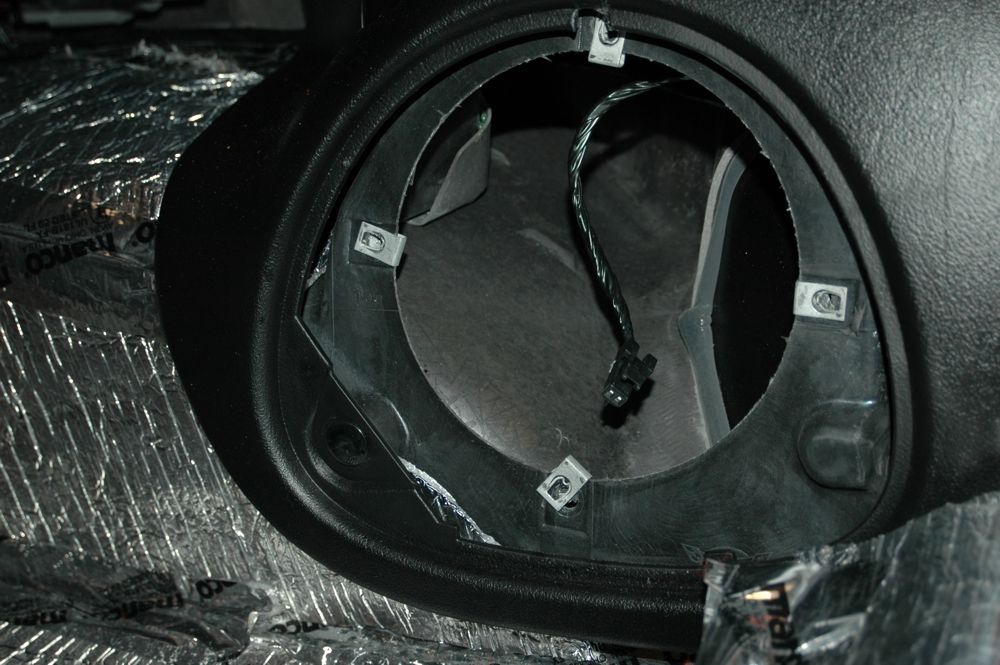
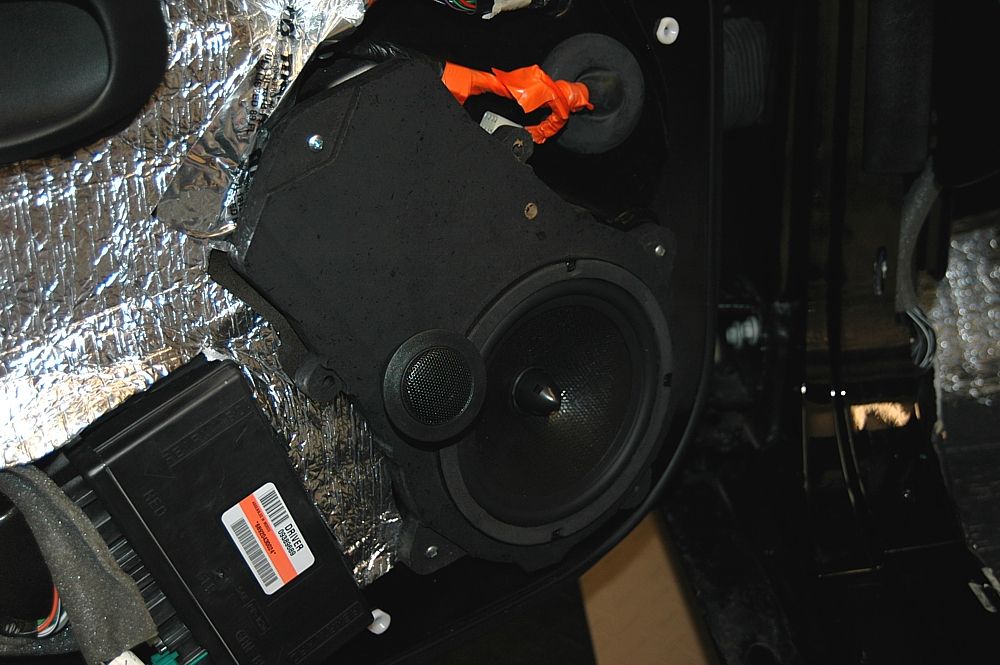
Front speaker mounting position
Rear speaker position
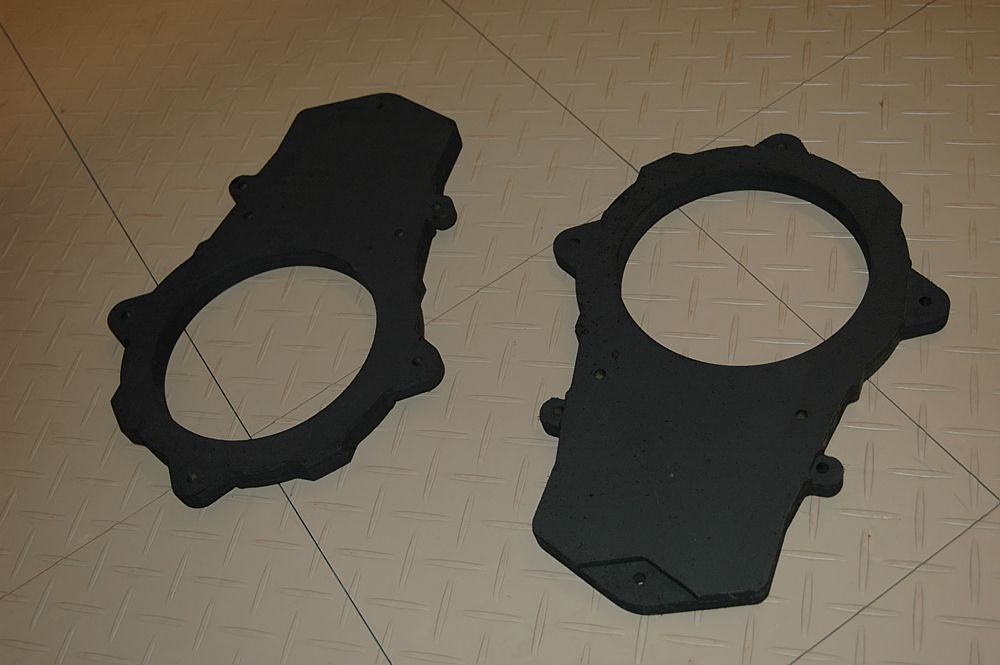
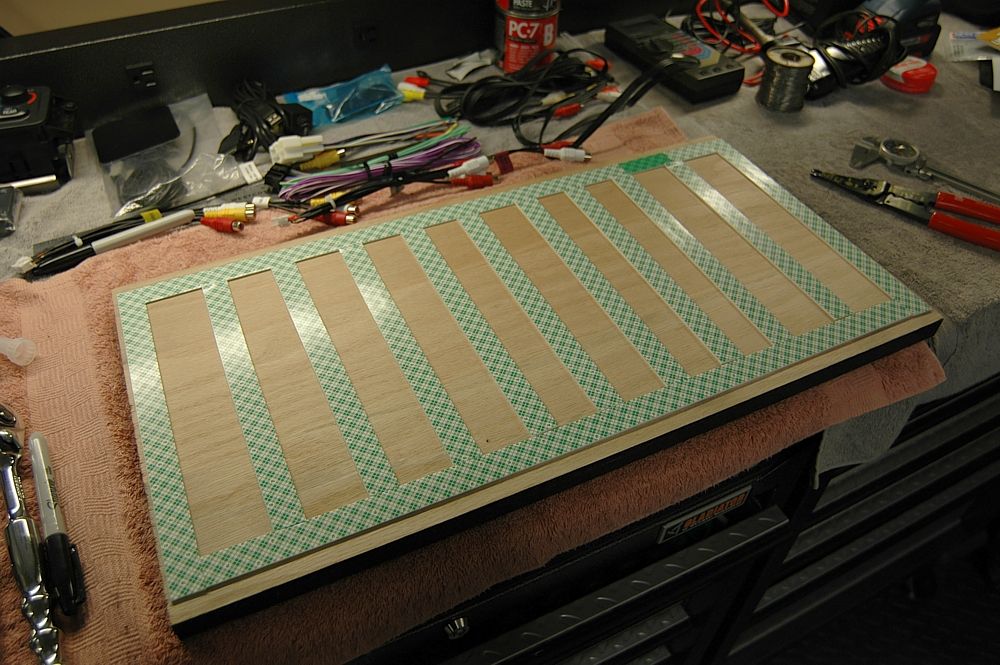
Here are the speaker mounts I ordered – I painted them to help resist any moisture that might collect on them.
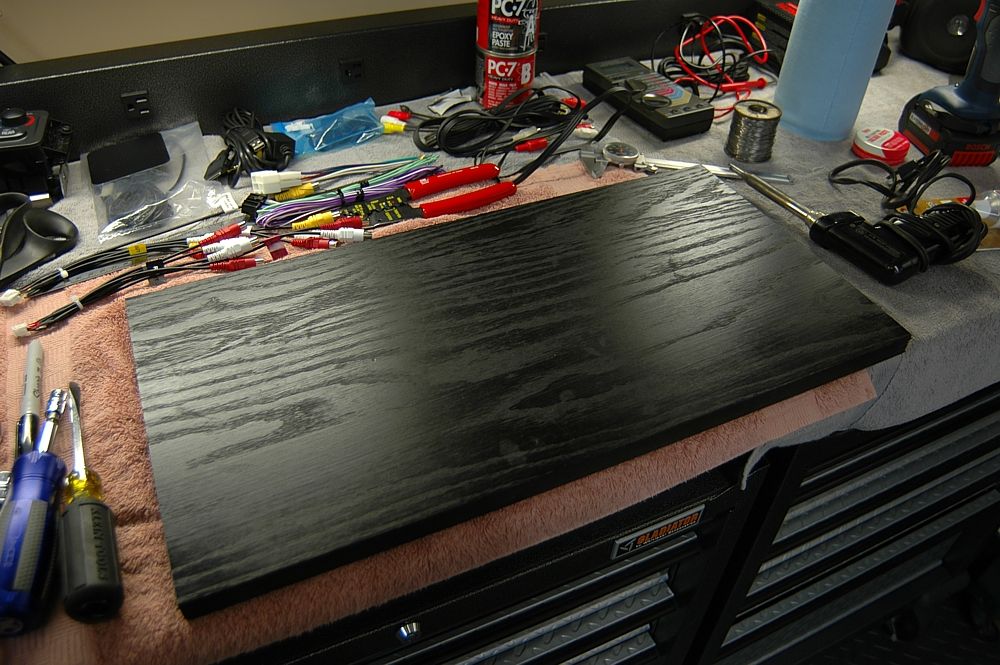
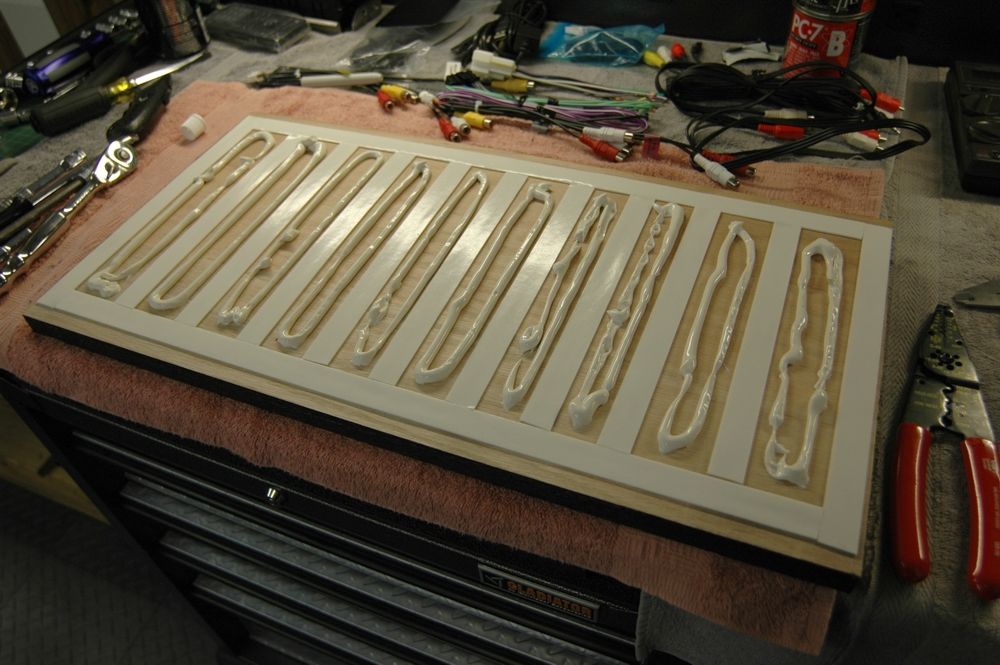
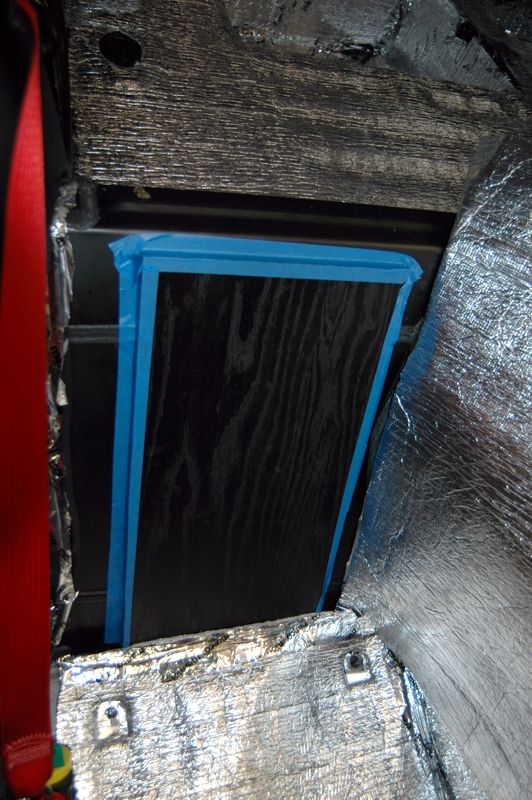
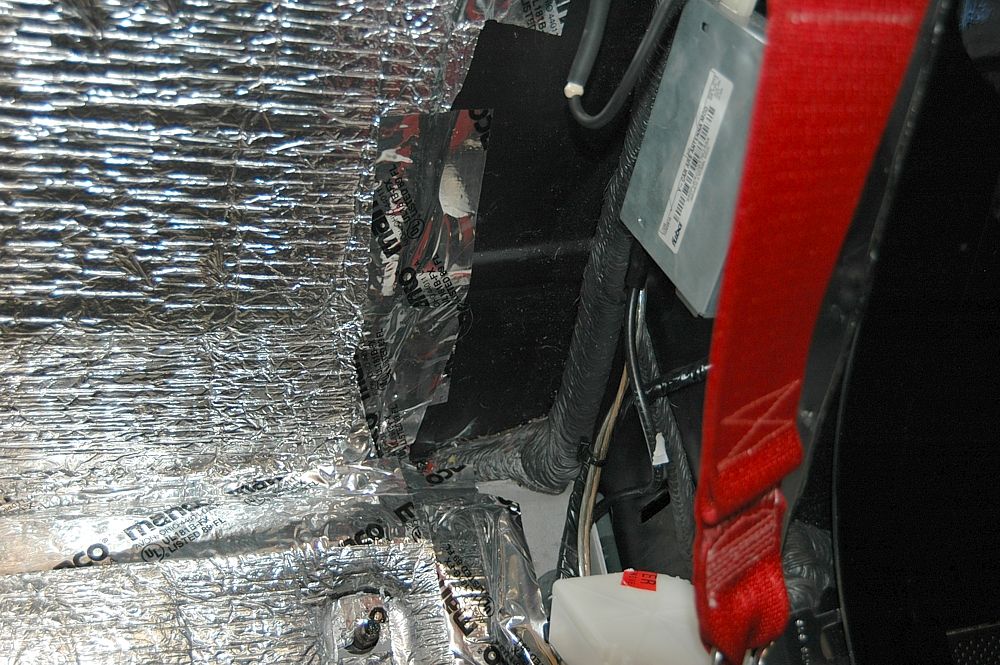
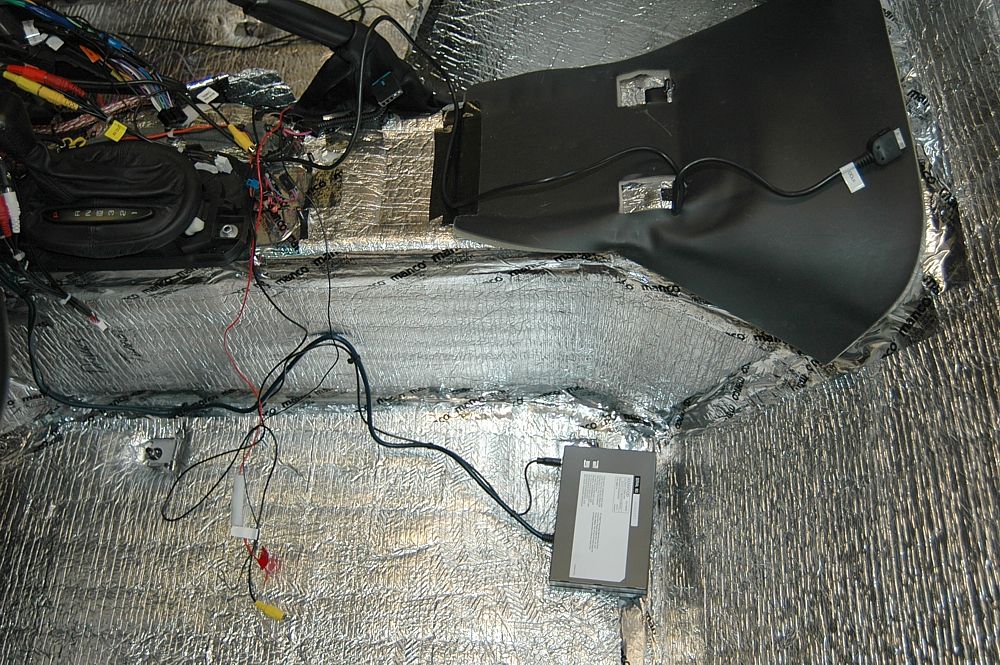
I decided to mount the Infinity amp behind the passenger seat so I bought a plank of ľ” oak and painted it black.
I used a combination of heavy-duty 3M double-stick tape and Liquid Nails to attach it to the metal panel behind the seat. Why not drill for screws, you ask? Well, I took a 15” metal ruler and went under my other C5 stored on the lift and shoved the ruler between the gas tank and other side of that metal wall to see if I had any drilling clearance there and, guess what? Zip, nada, zilch, nothing – I had to force the ruler between the two as they were kissing each other solidly. There was zero clearance there so another attachment method was required.
3M tape . . .
. . . and Liquid Nails.
I let this set up for two solid days before attaching the amp to it. I taped it up for support while it cured.
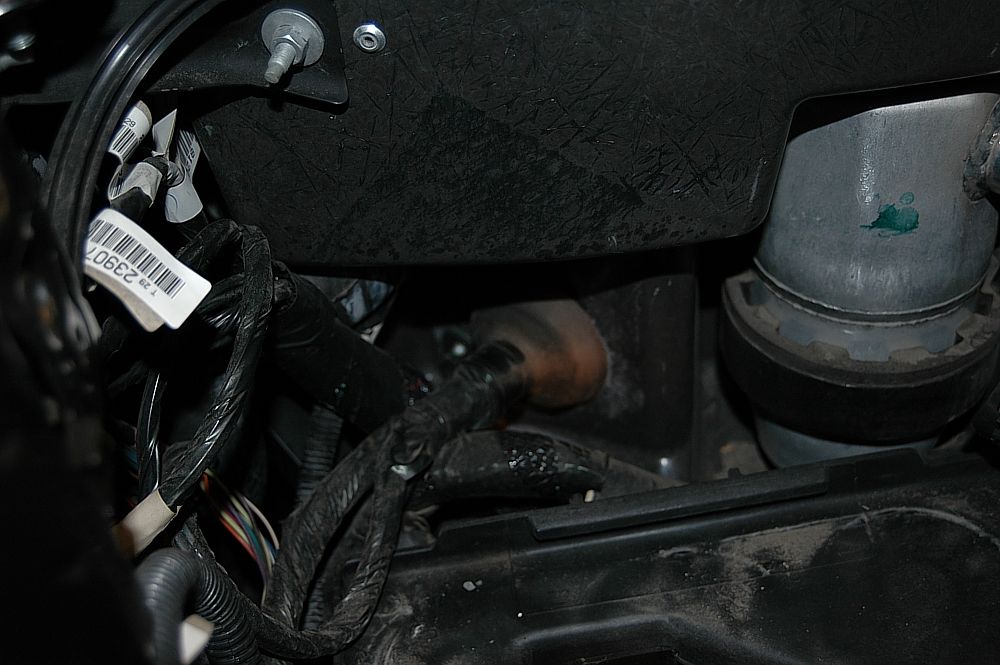
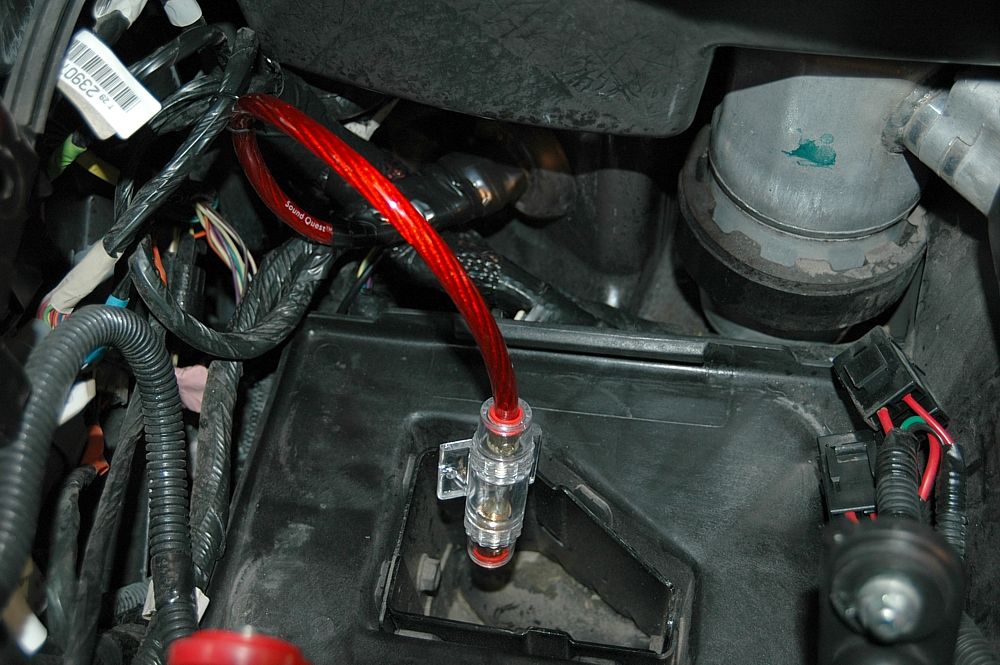
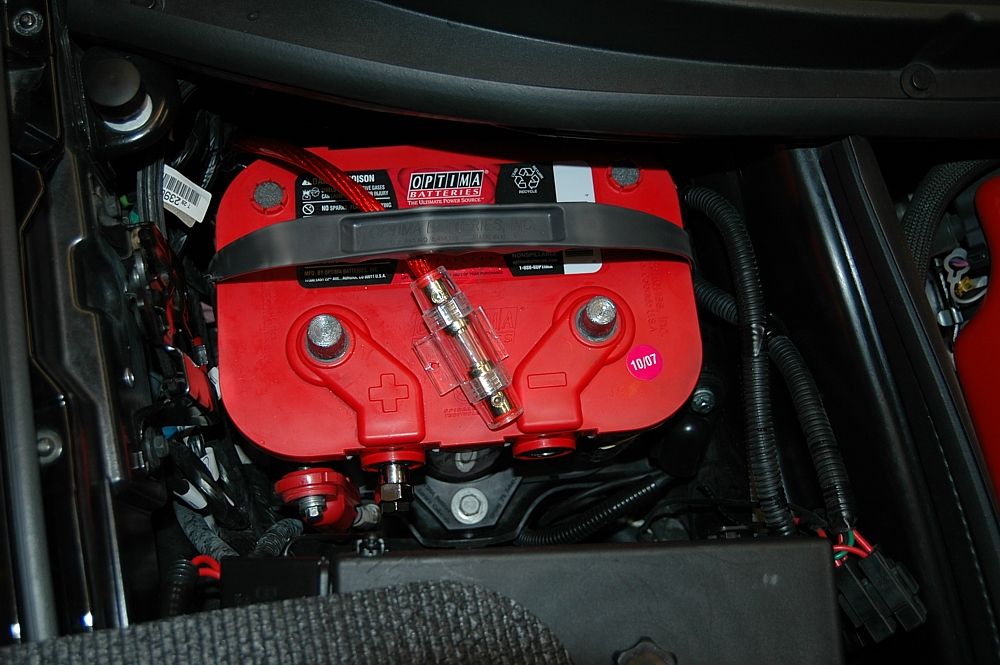
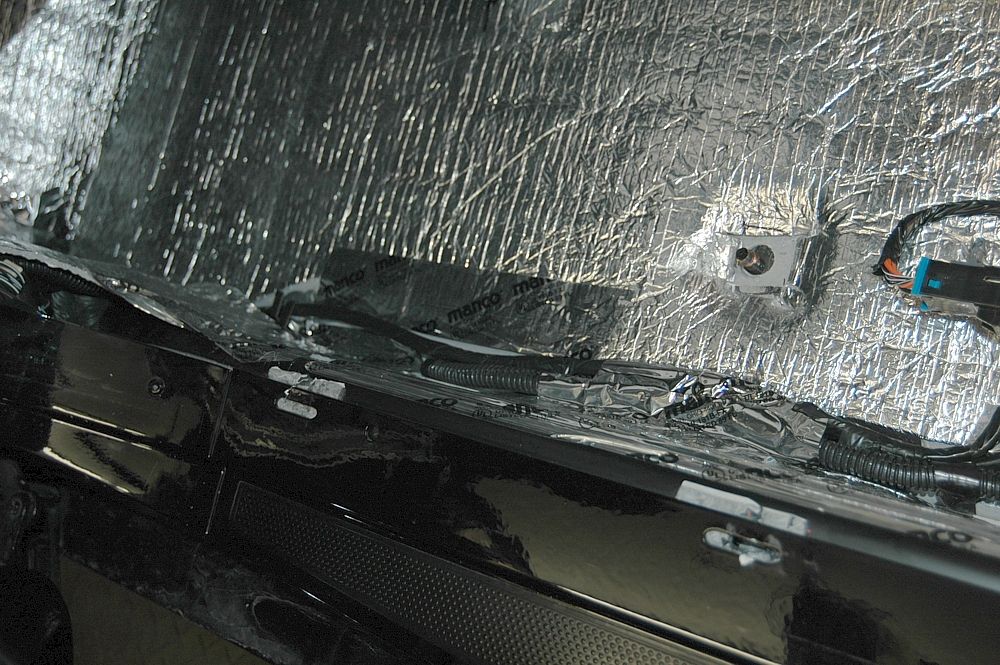
I ran the main amp power wire from the battery compartment, through the passenger-side firewall and into the cabin via a large grommet behind the battery tray.
Ran it along the outer edge of the floor.
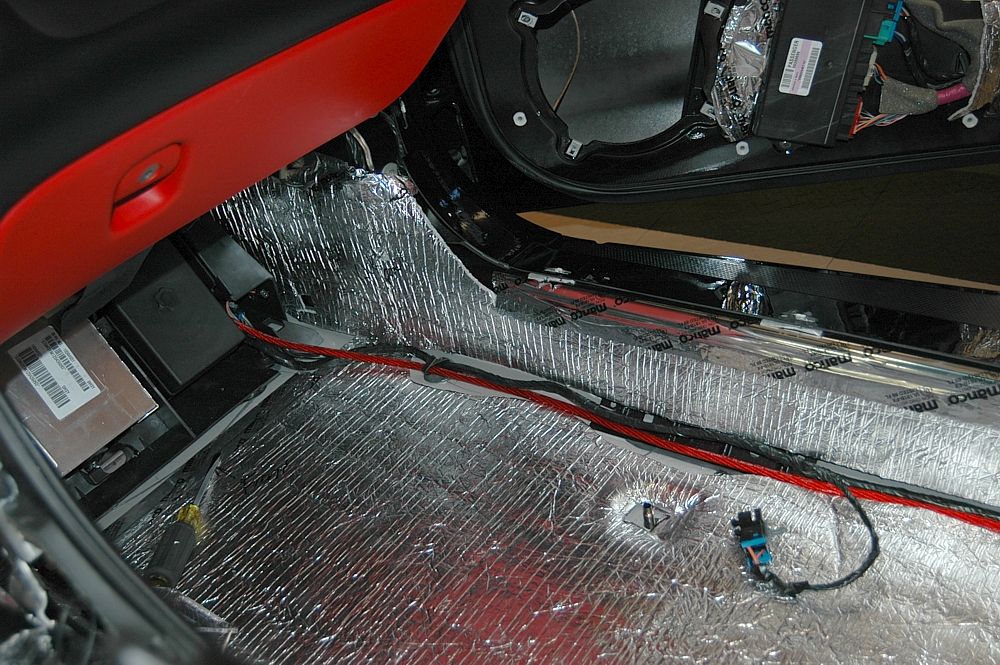
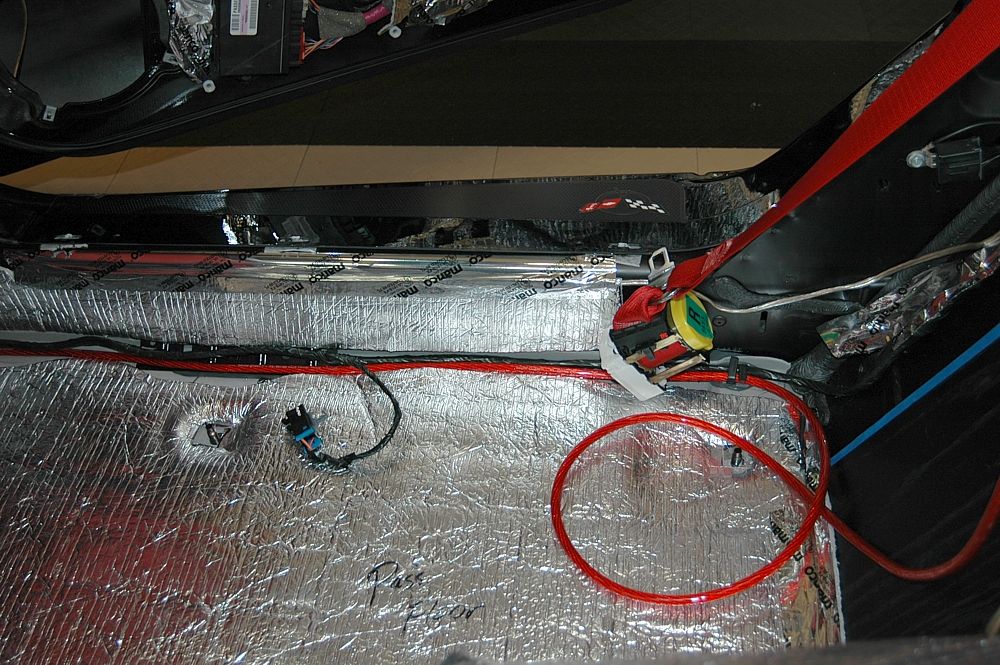
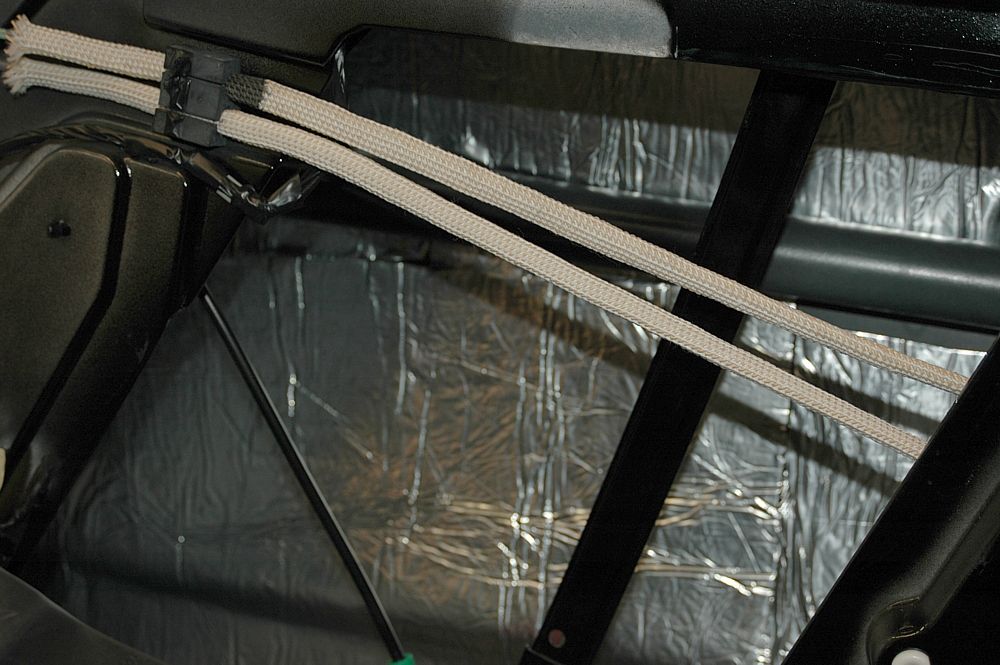
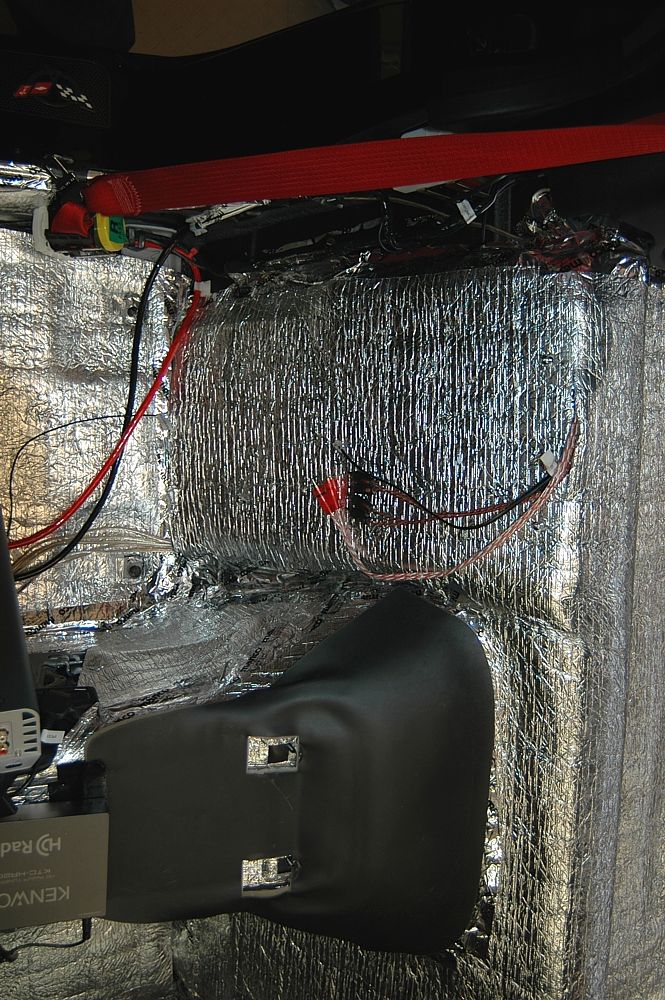
I also ran the speaker wire from the doors. On the passenger side, I made sure to route it away from the amp power wire to minimize the possibility of induced noise. On the driver side I ran it along the outer edge of the floor, up the rear seat wall and across to the amp area.
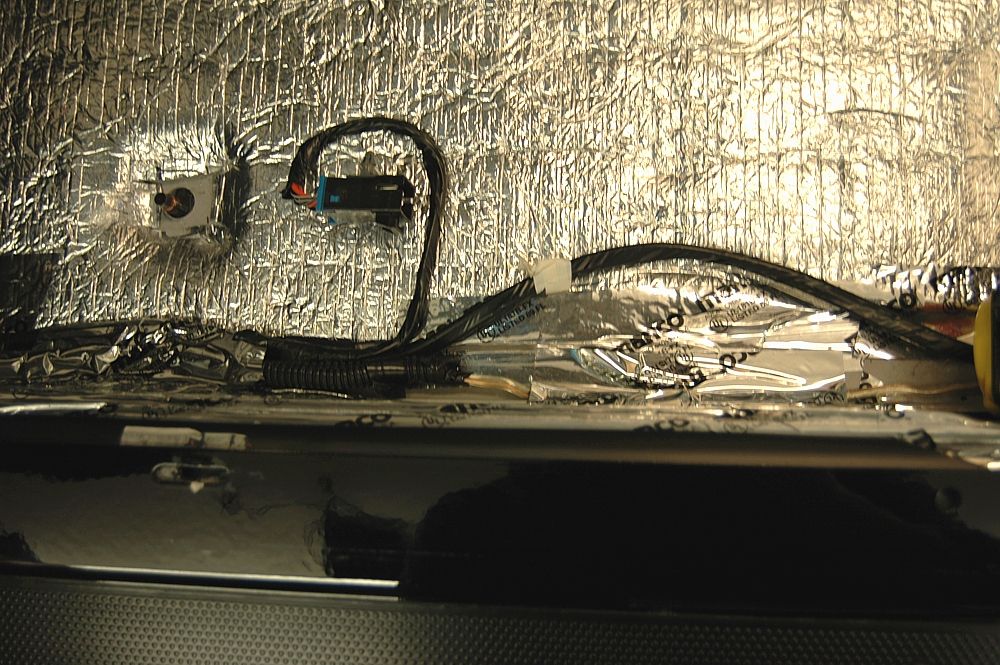
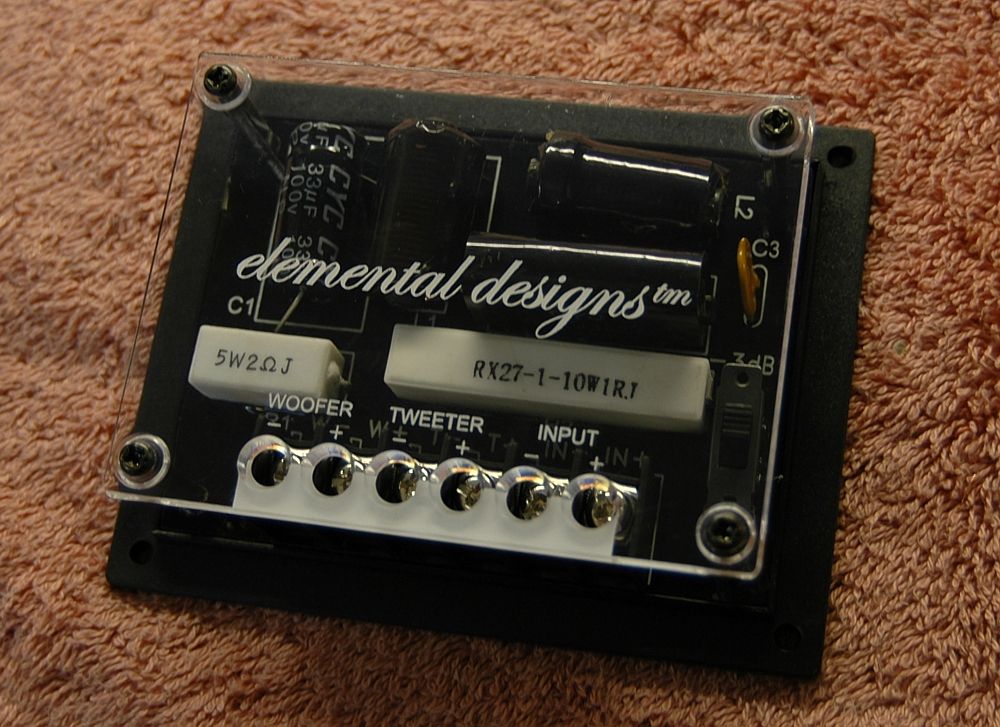
Here’s one of the ED crossovers.
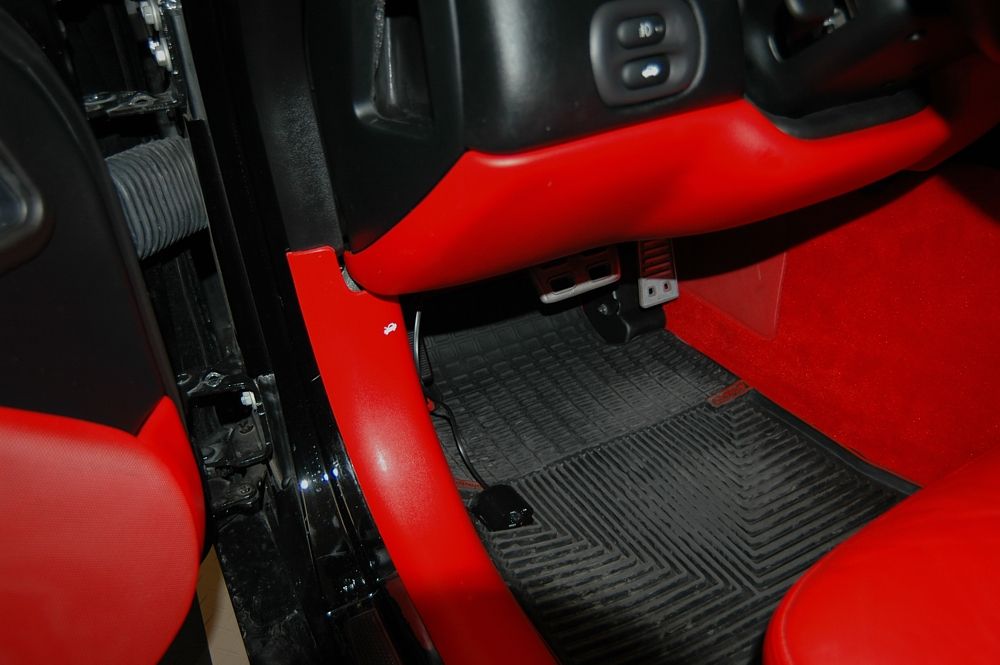
I placed the driver side crossover on the dash support, just behind the coupe hatch and fog light switches.
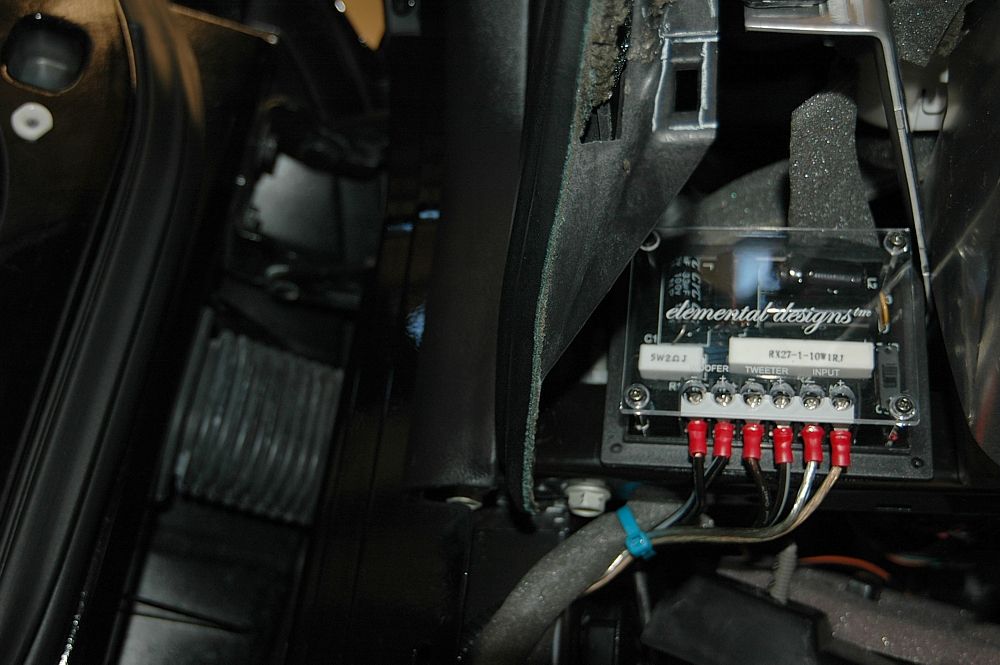
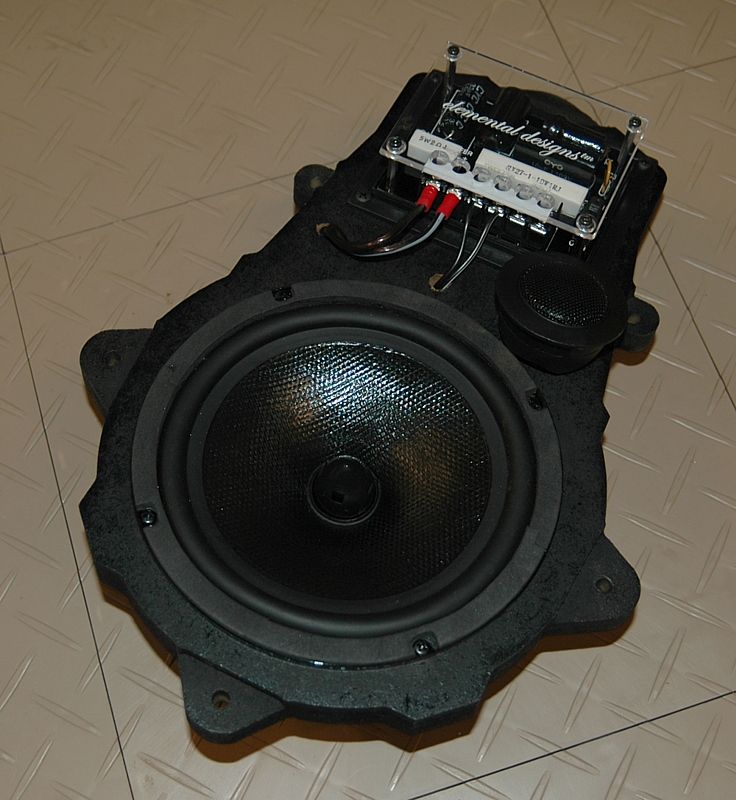
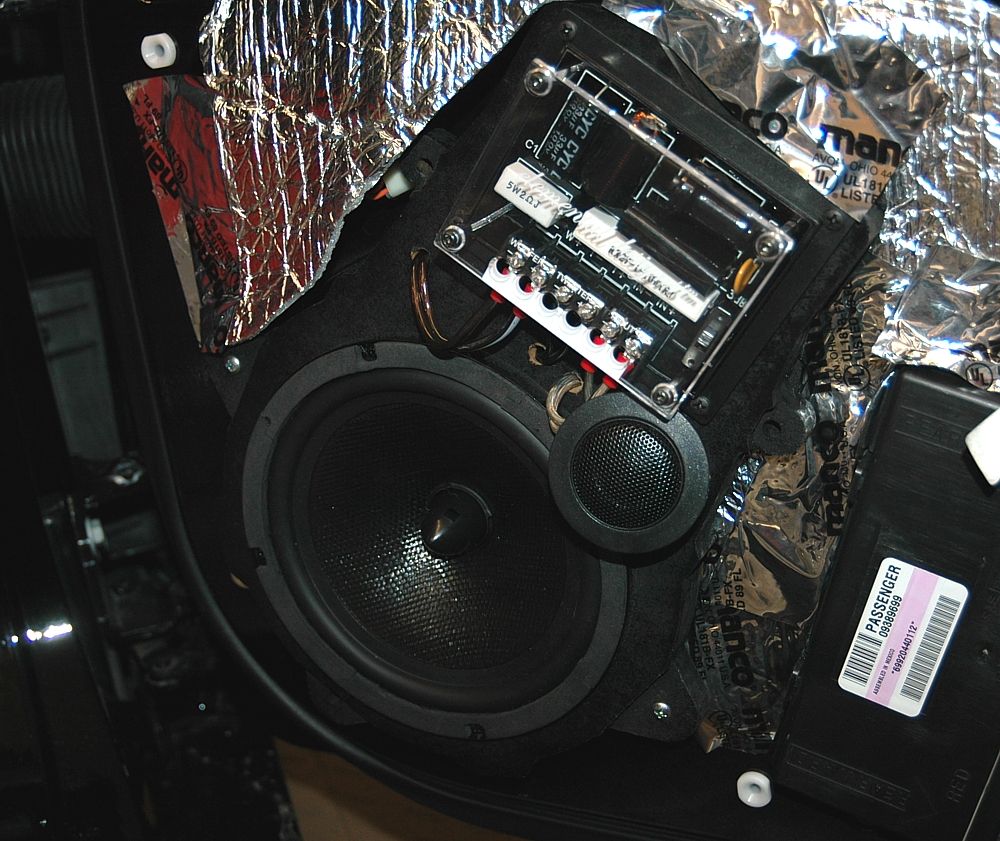
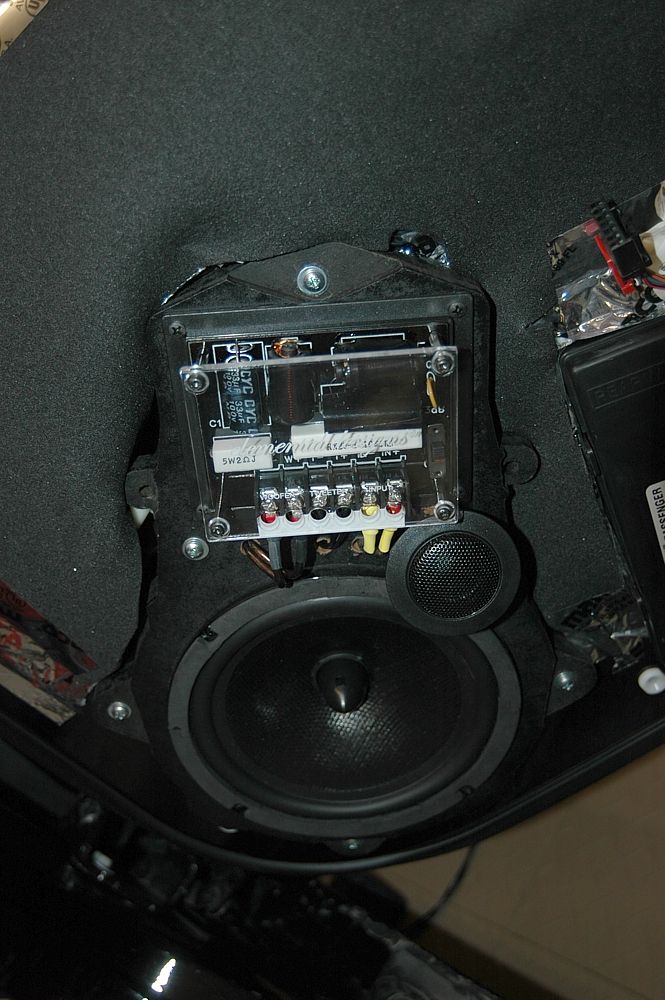
I mounted the passenger crossover directly onto the speaker mount along with the woofer and tweeter.
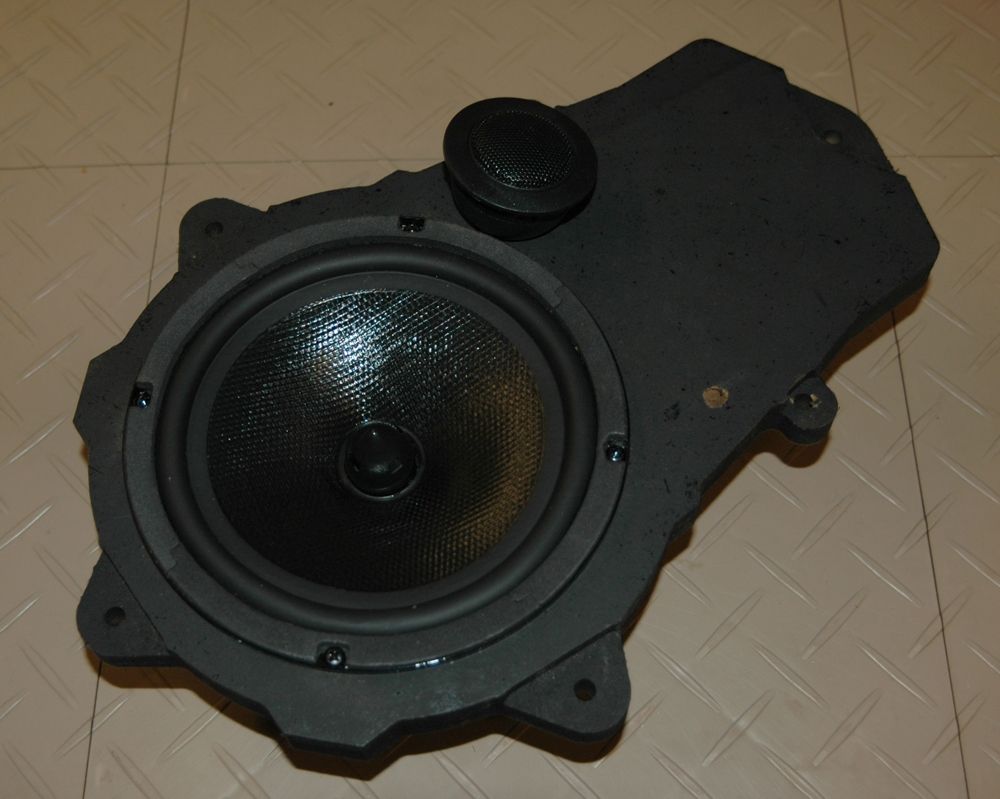
The driver side mounting had only the speakers.
I test-mounted the speakers, including the sub, to ensure everything fit correctly.
I installed the rest of the harnesses and rear speaker wiring. I added some additional audio/video inputs/outputs for future use since the HU had provisions for them.
HD radio tuner and iPod cable
Connections under passenger side dash to prep for accessory/ground hook up.
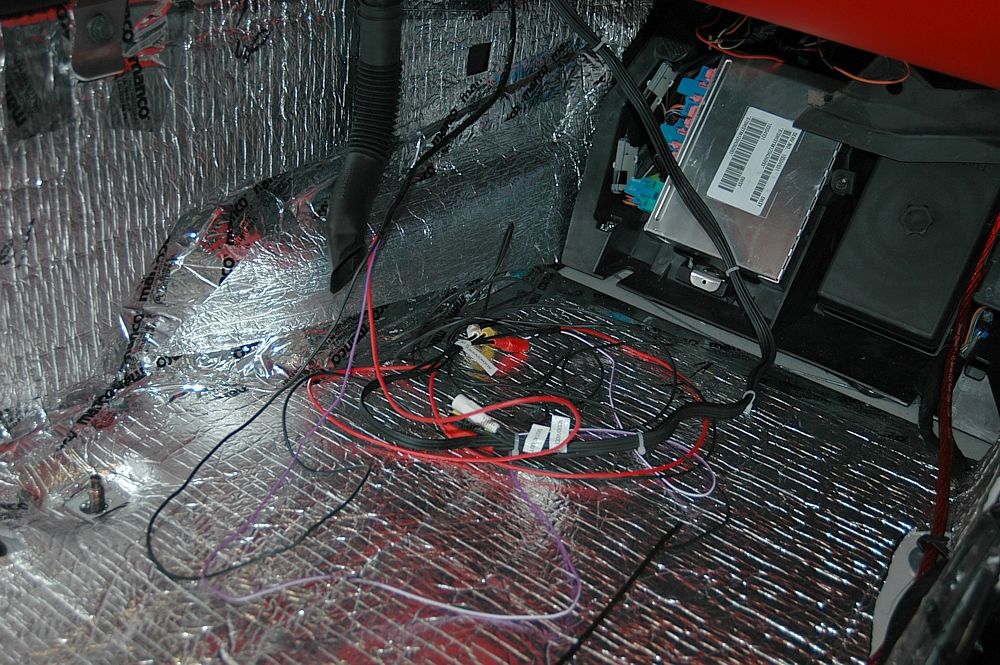
Speaker wiring.
Aux. cables hiding behind the OM in the glove.

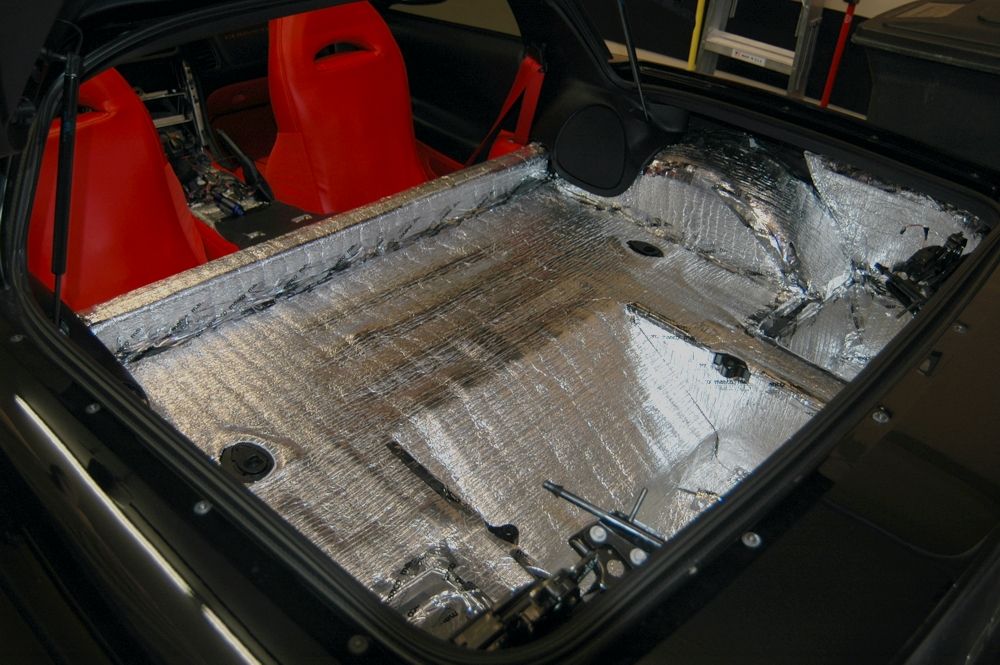
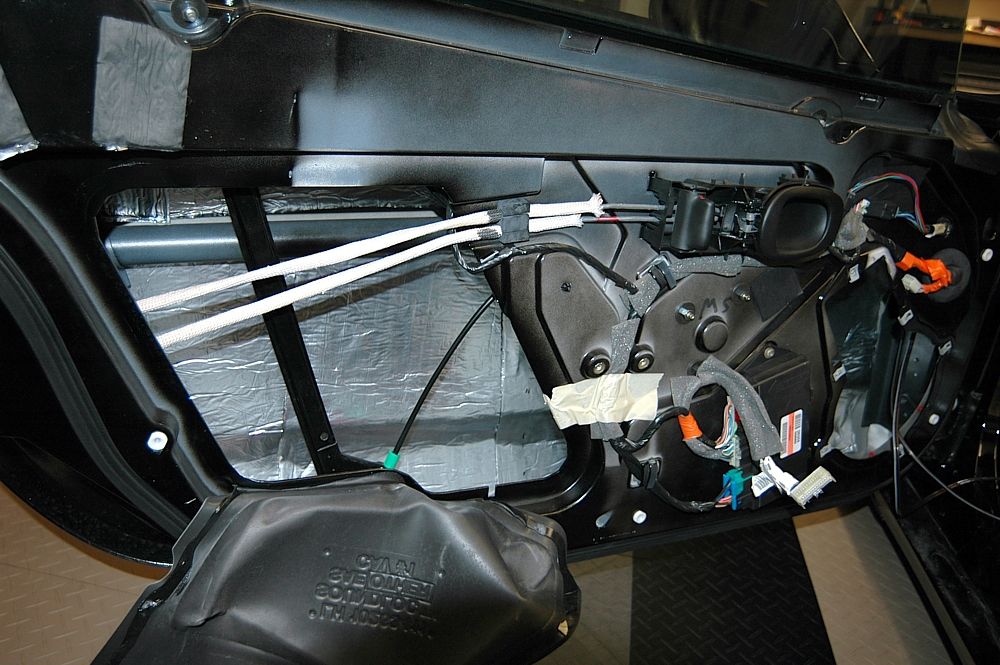
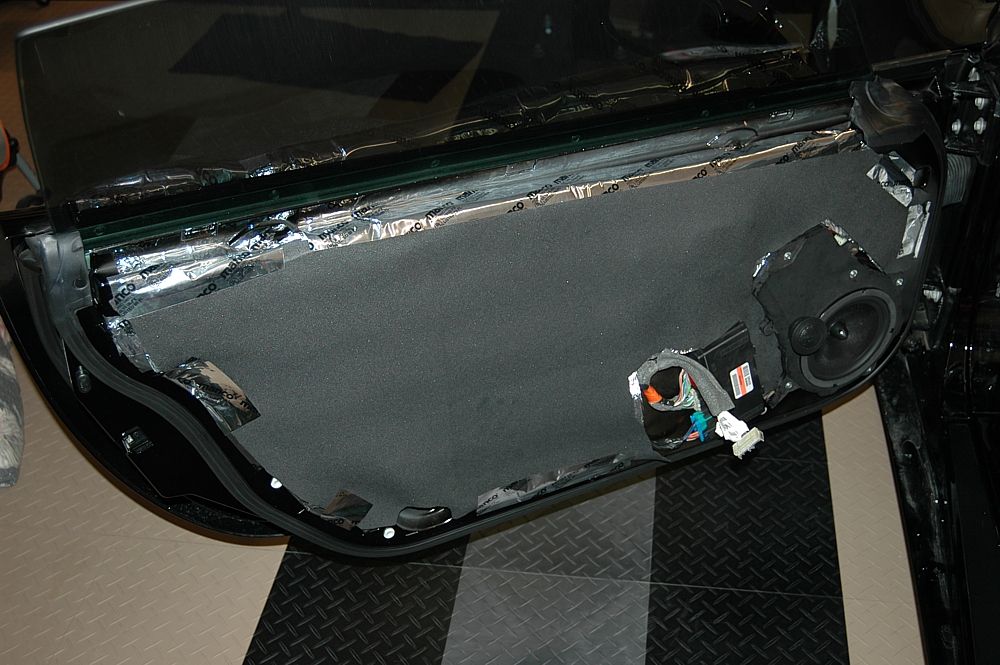
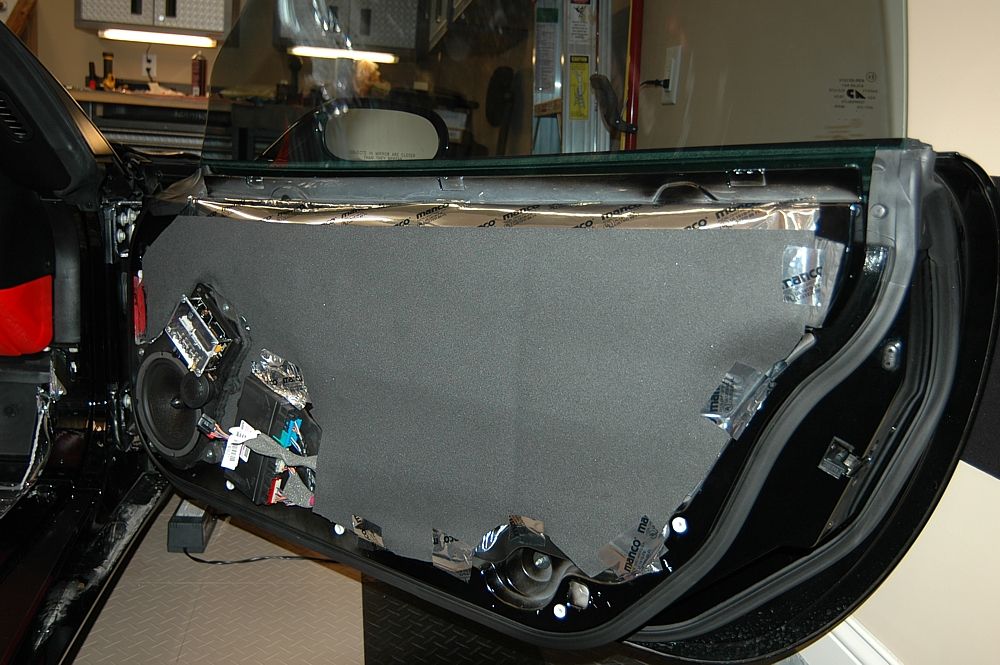
So, some of you who’ve made it this far are probably asking, “Hey, didn’t you say you were going to install additional sound-proofing?” I was procrastinating – I’ve done two insulation mods on our two C5’s and it’s never really a fun job so I waited. Anyway, I did finally get around to installing the eDead sound deadener. Not too bad really – except reaching in and doing the inside of the door skins. Yak! I did the entire insides of the doors . . .
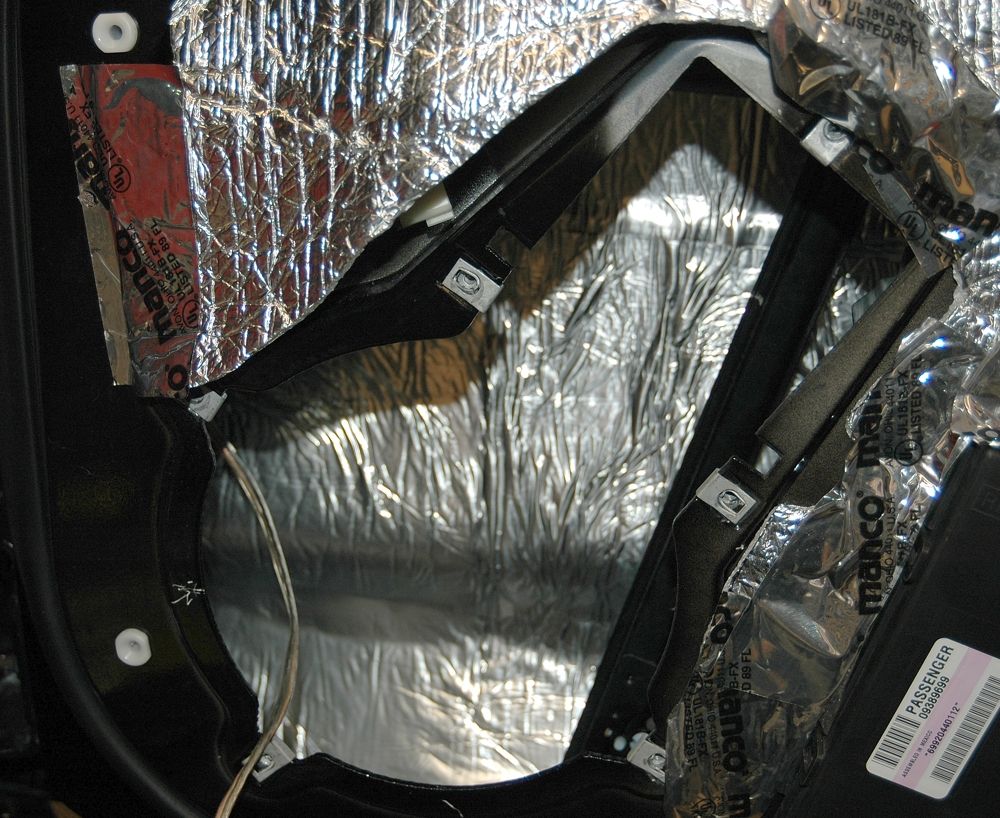

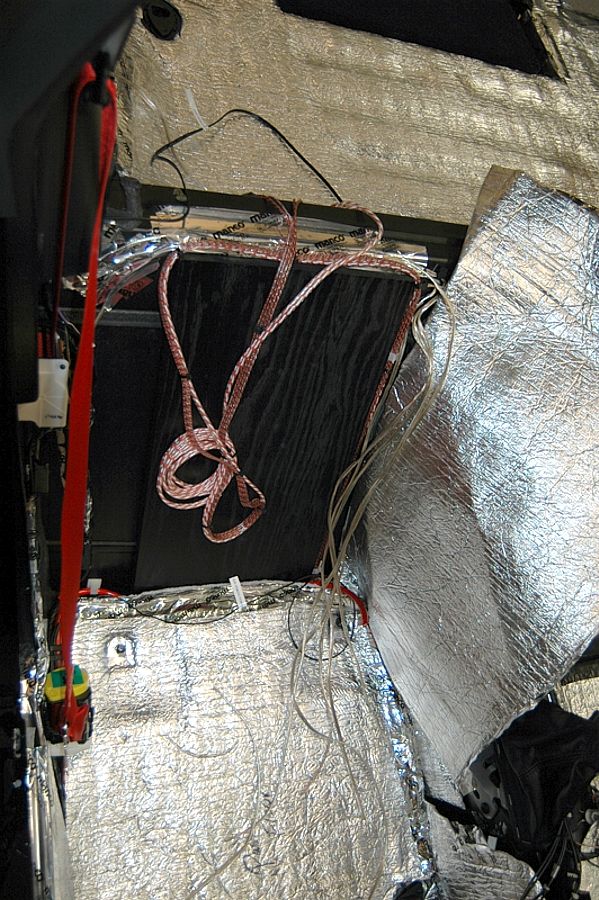
. . . inside the rear speaker cavities . . .
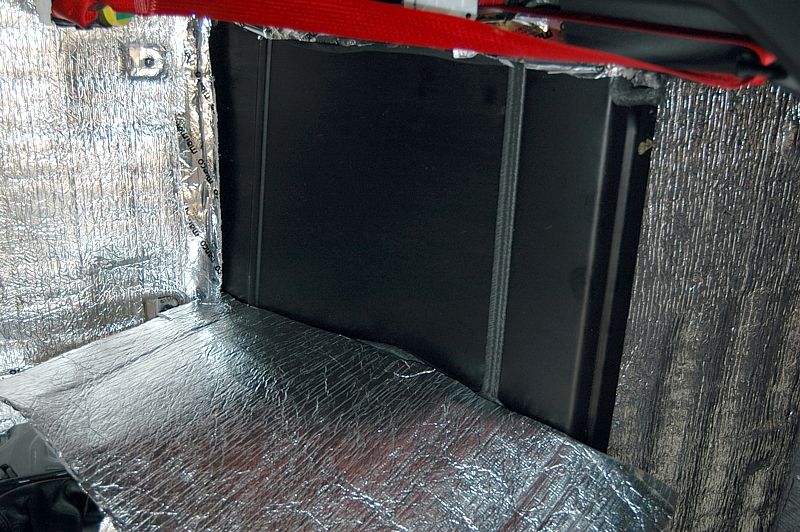
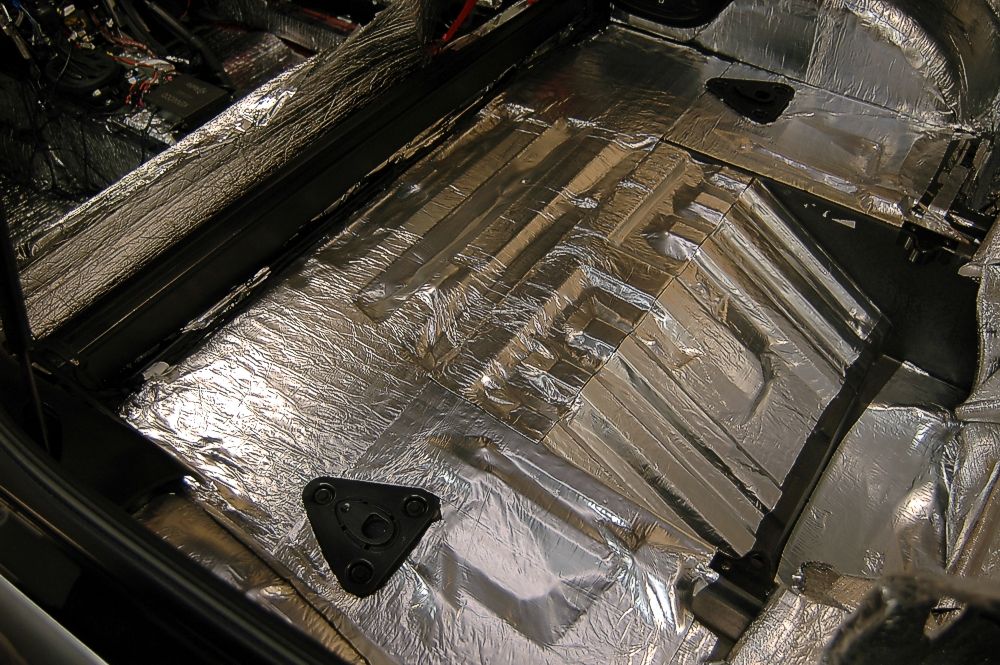
behind the driver seat (the passenger side has the amp mount) . . .
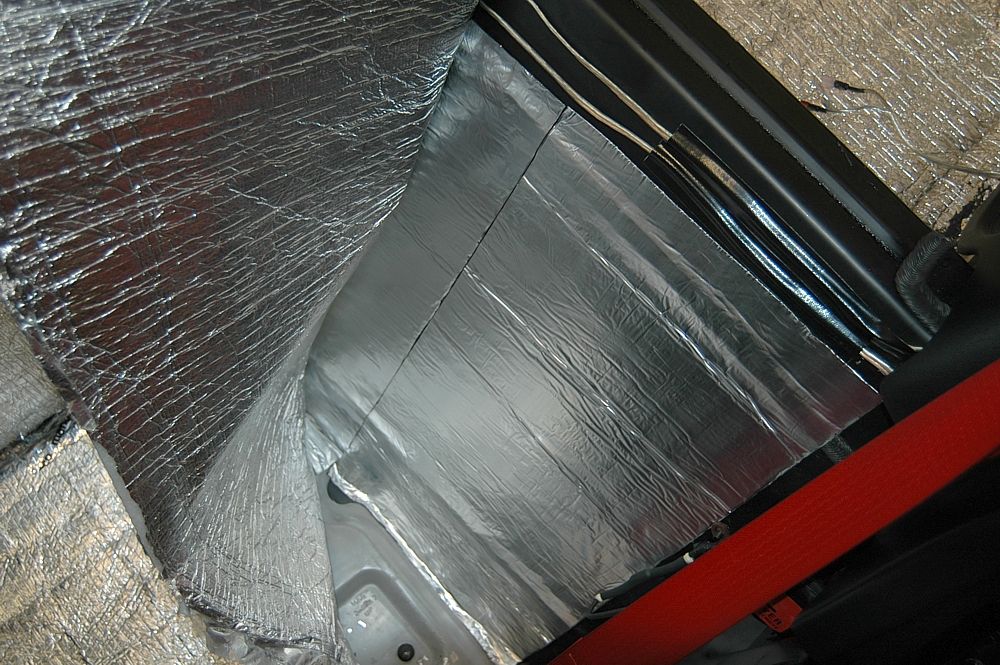
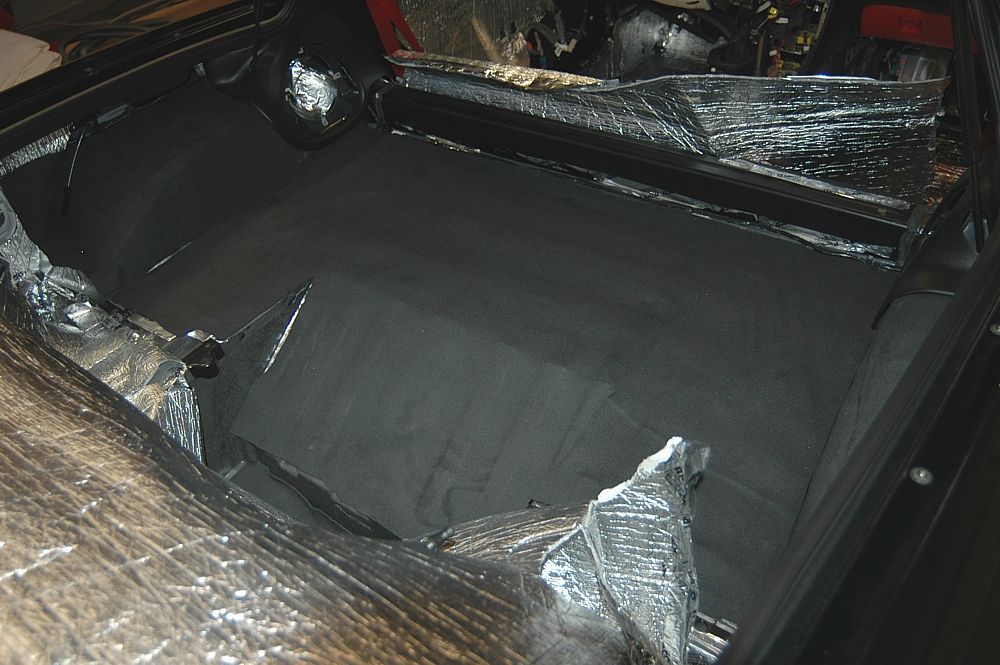
. . . and the rear tub section.
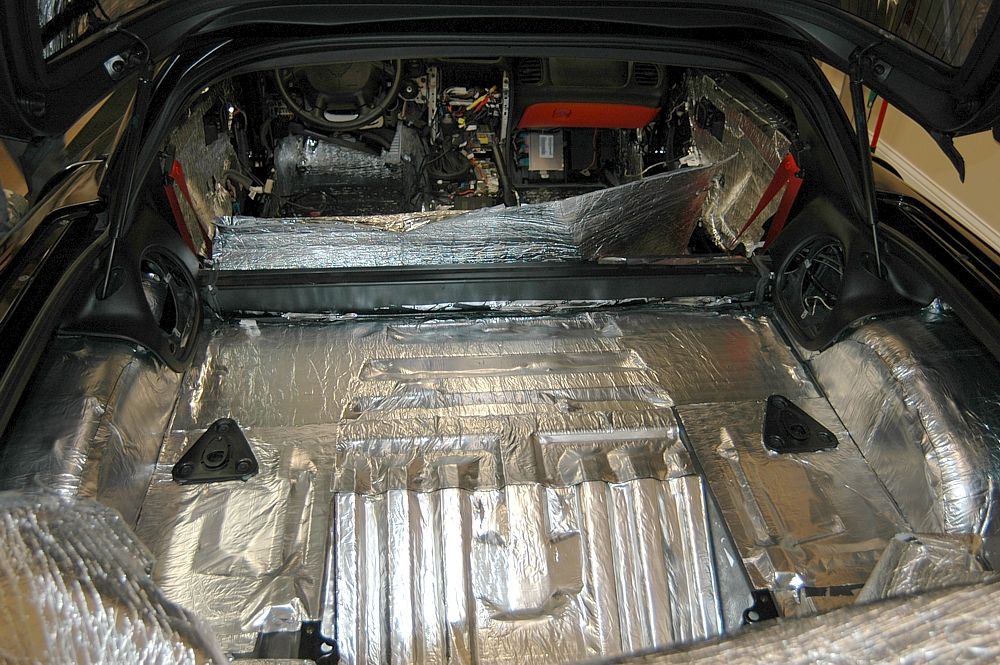
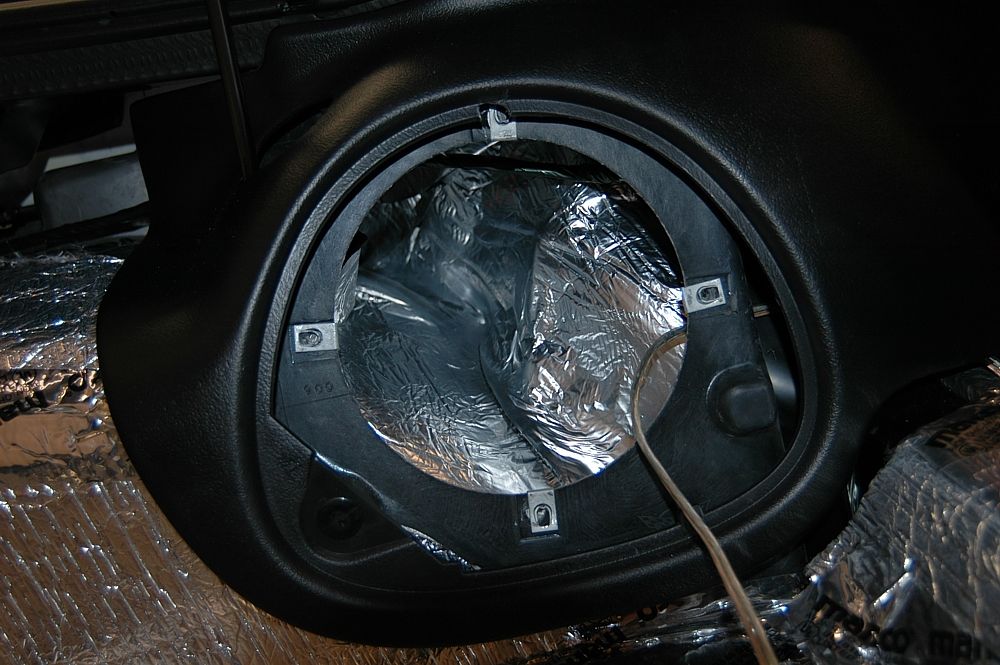
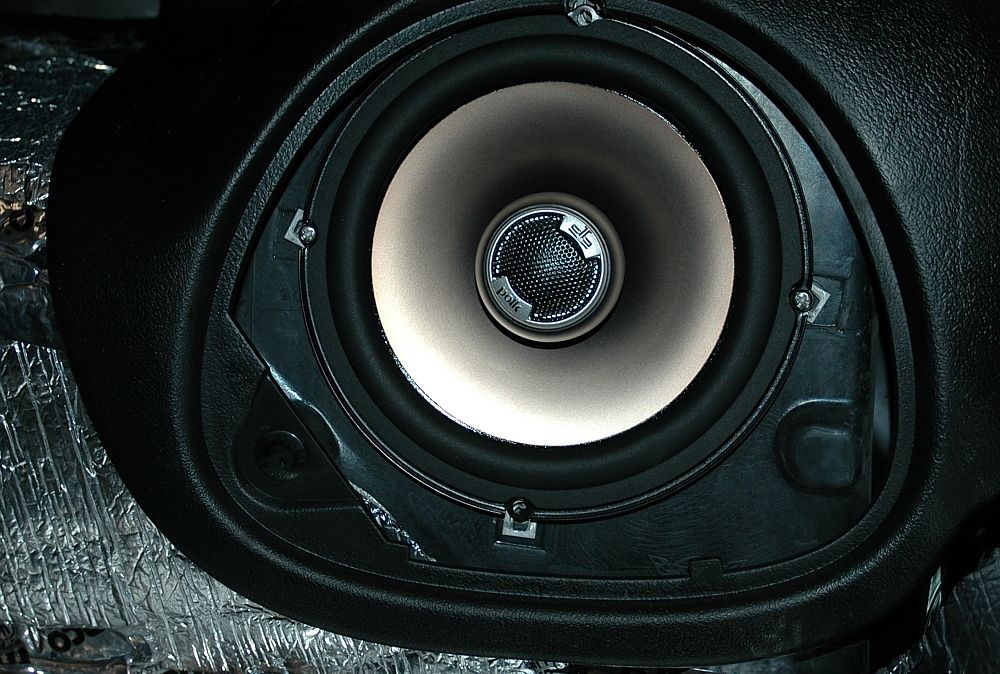
Popped in the rear speakers since the cavities were ready.
Next came a layer of Ensolite.
Then I layed the Madvette insulation back down to complete the sound insulation.
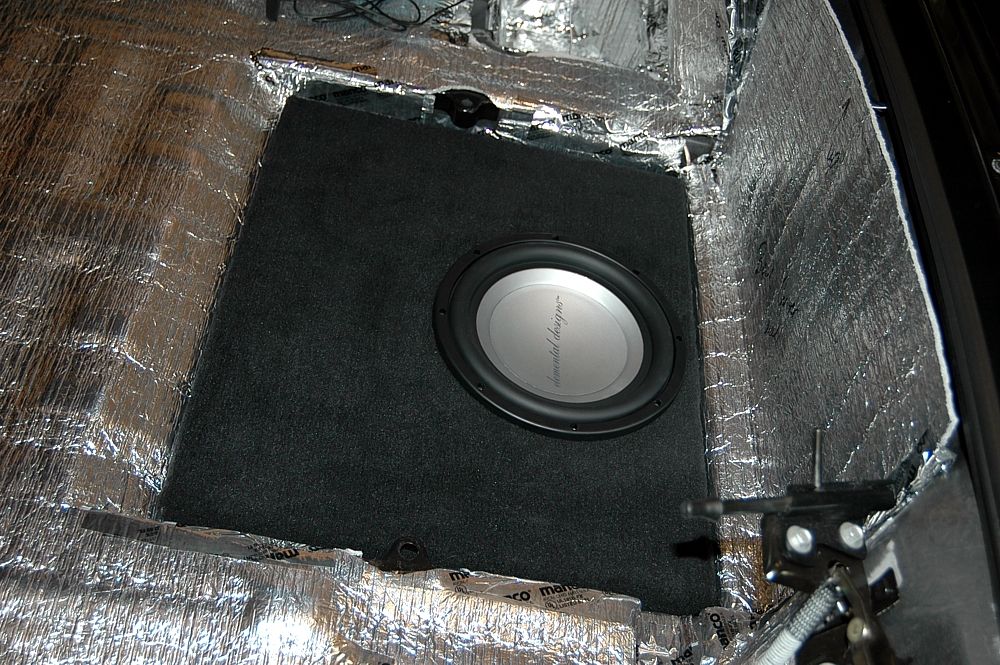
I also placed the stock batting in the rear back in and laid the stealth box and sub in. I had added enough insulation to where I had to stand on the box to press it down enough to allow the center cover to go on without contacting the sub.
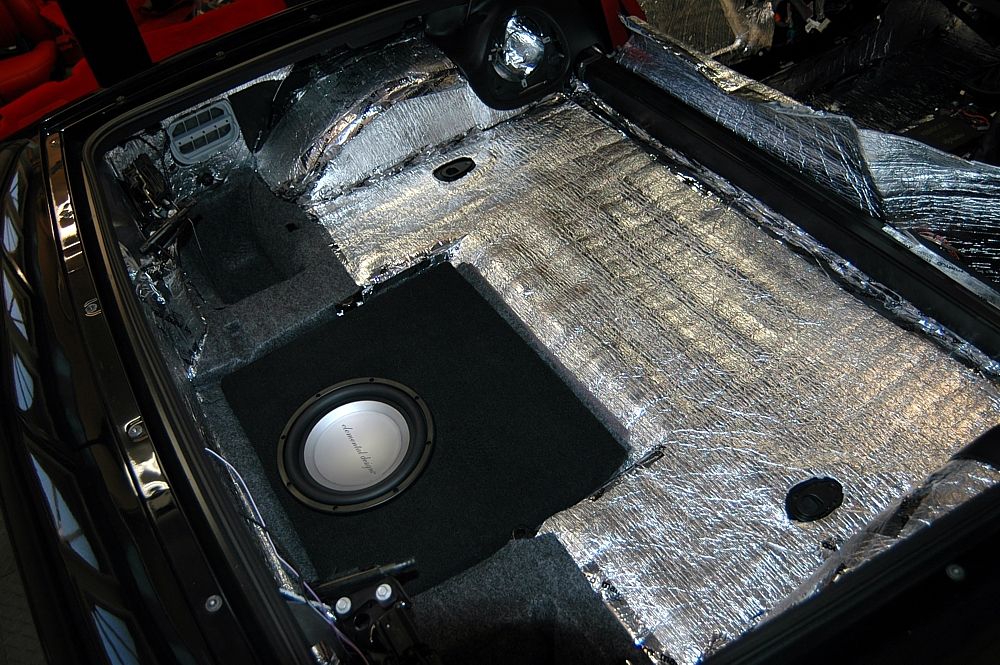
Since the back was almost done, I laid the carpeting back in as well.
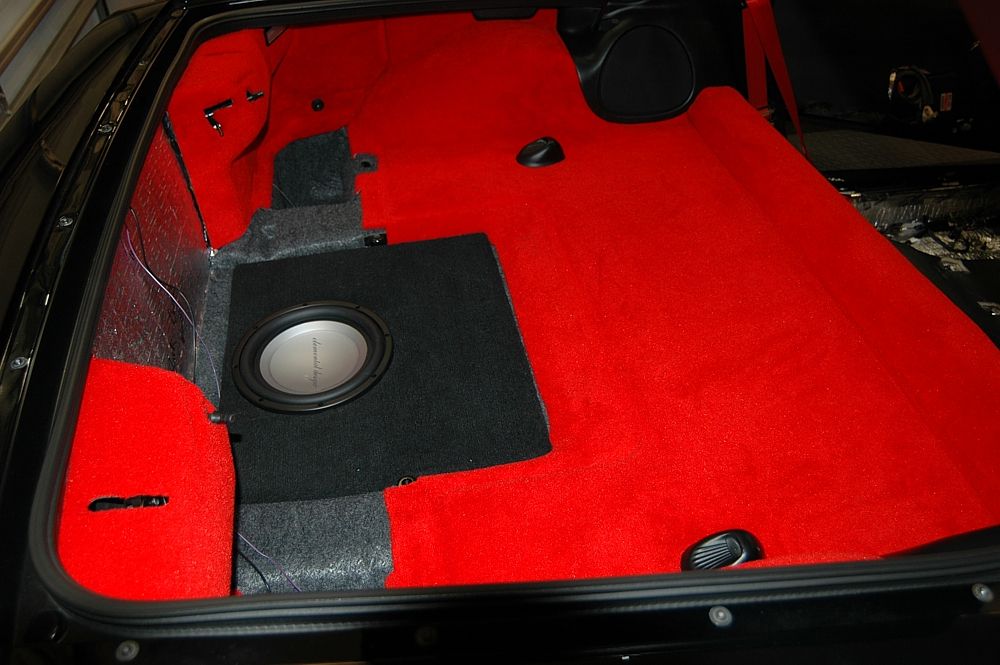
Just a nice shot of the sub.

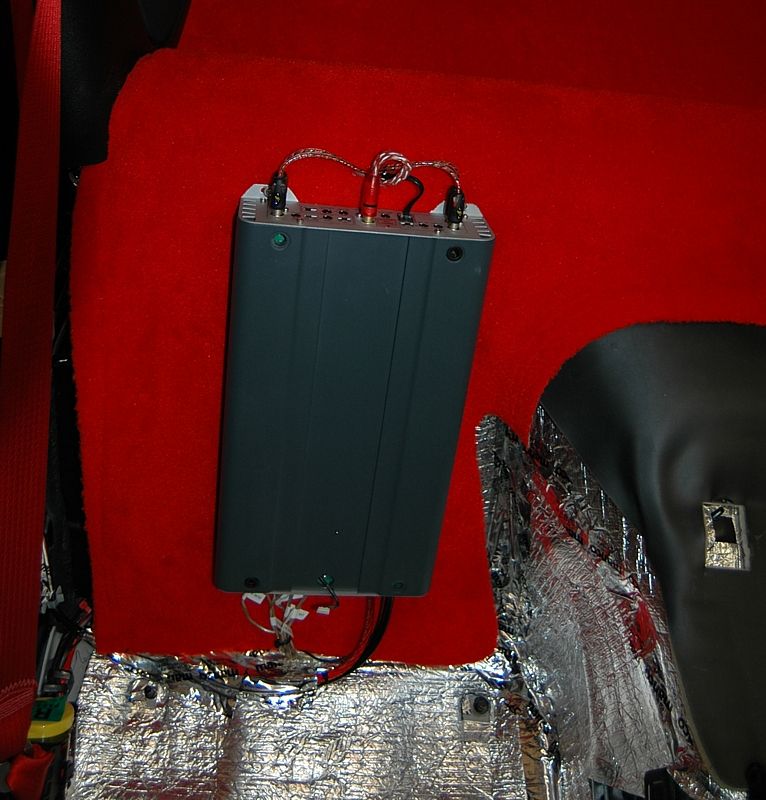
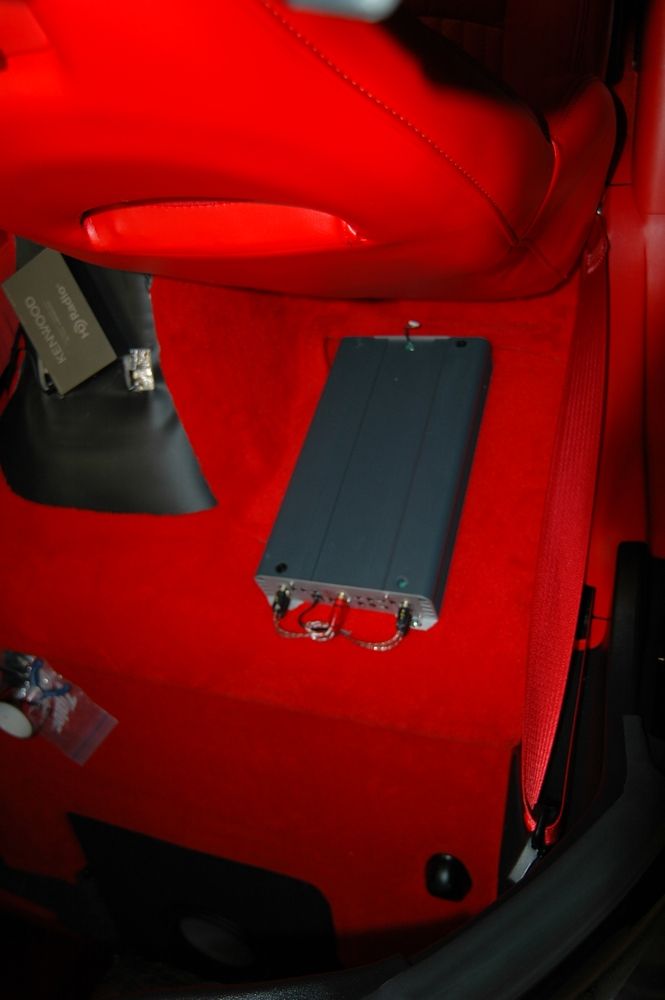
I laid in the back wall carpet and mounted the amp in place. I marked the mounting holes for the screws, placed the insulation, placed the carpet and cut access holes in the carpet for the screws and wiring. Then I mounted the amp. I left the amp cover off for two reasons – access to the wire terminals so I could hook them up and more clearance for the seat. The cover is kind of cool-looking with lights on it and it covers the wiring somewhat but it generally won’t be seen so no big deal.
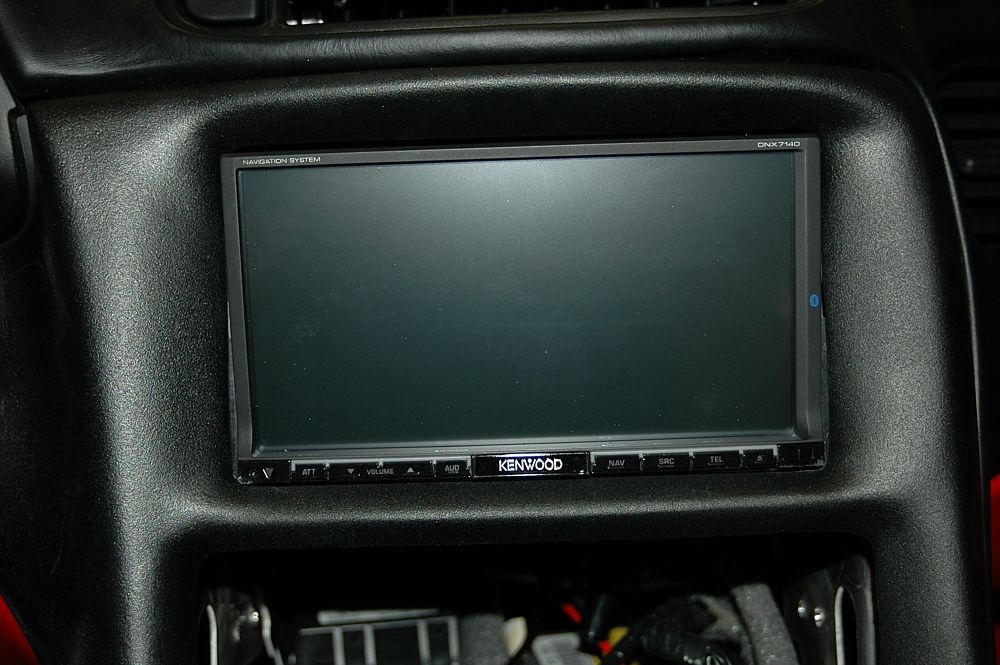
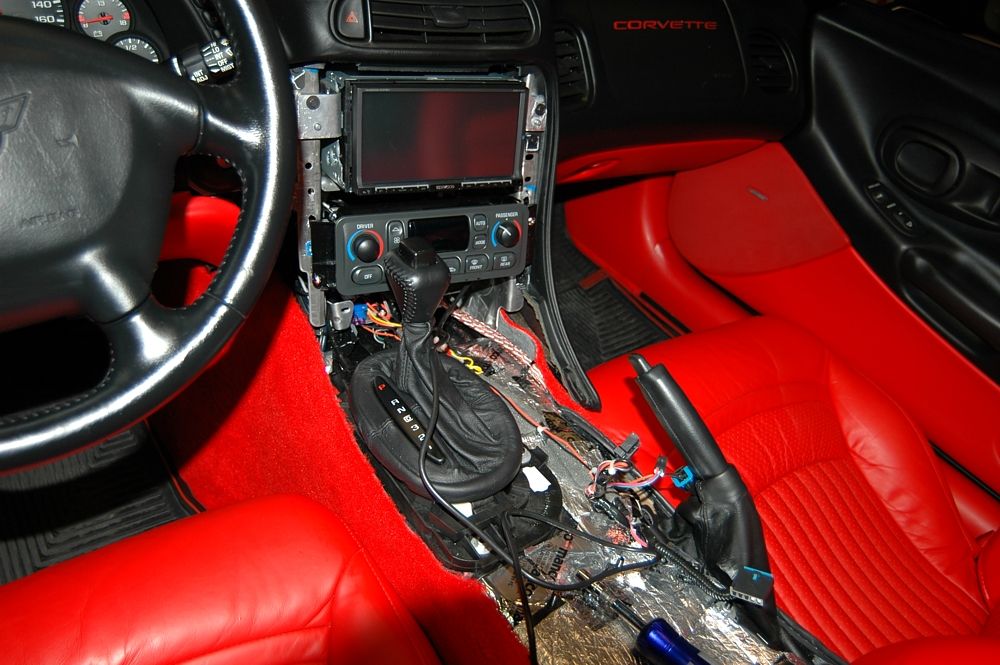
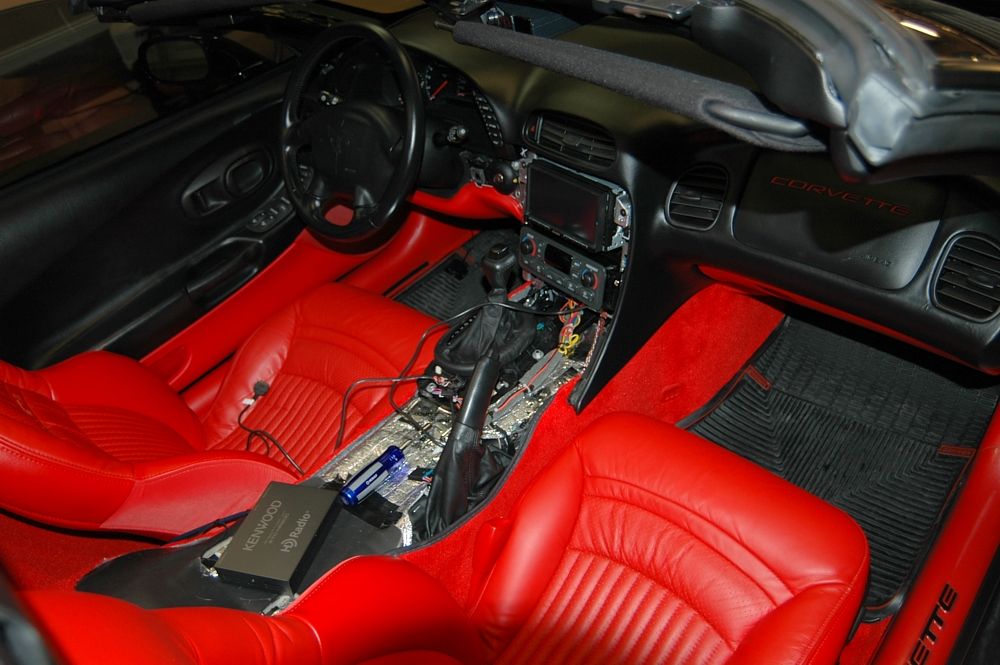
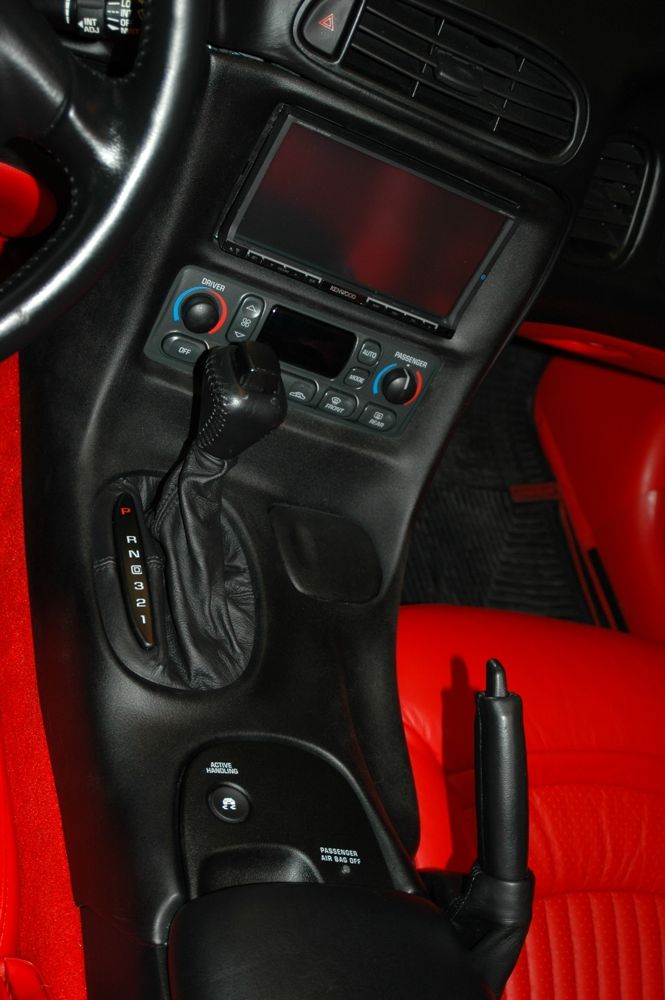
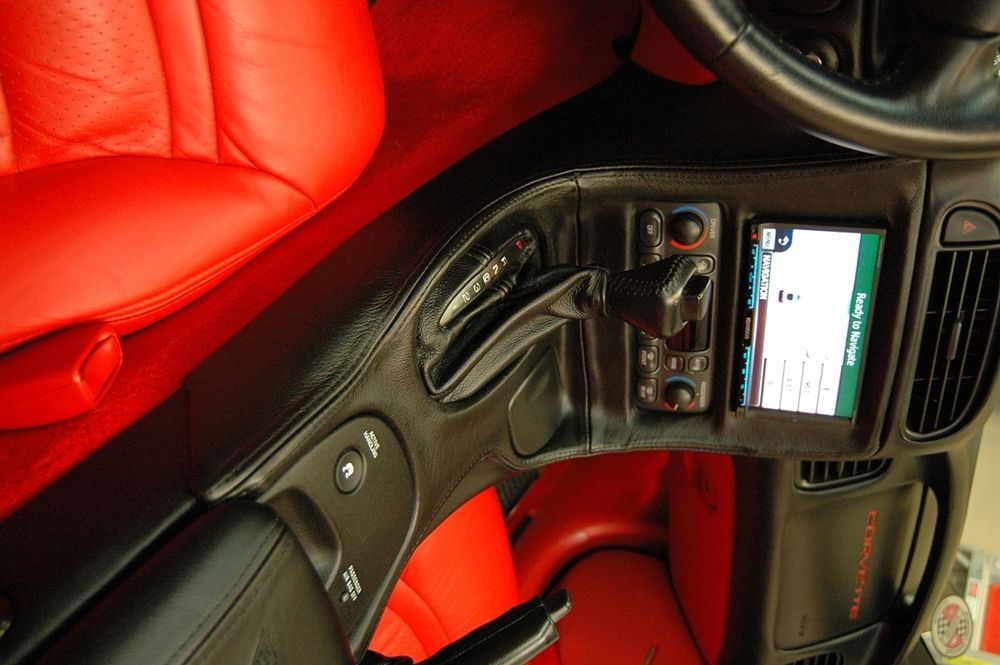
I did the final install of the HU and AC controller. Notice that I was progressively adding interior trim and seats as I went along.
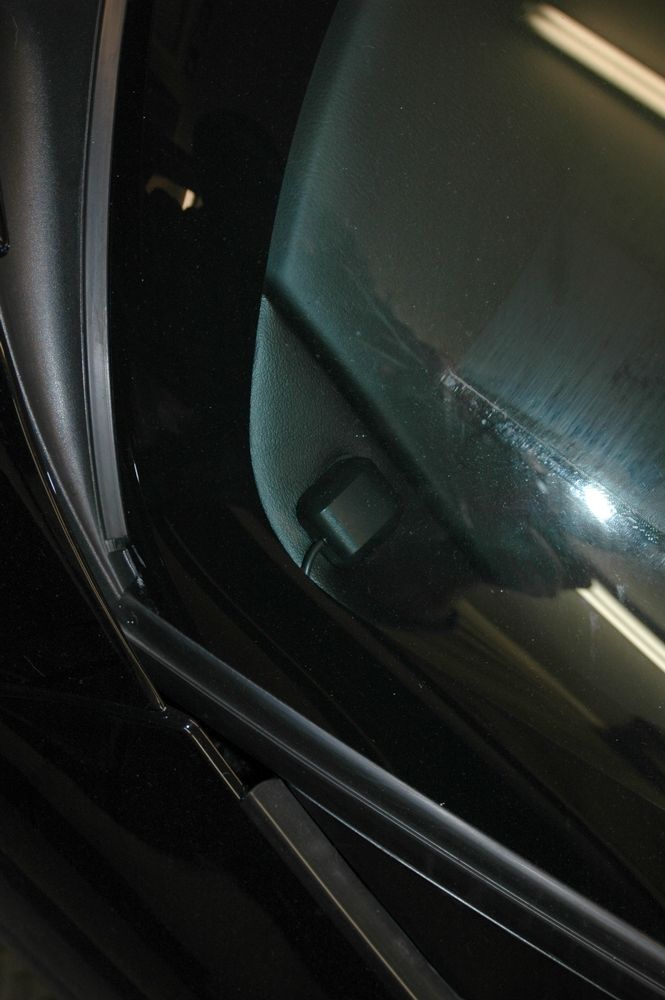
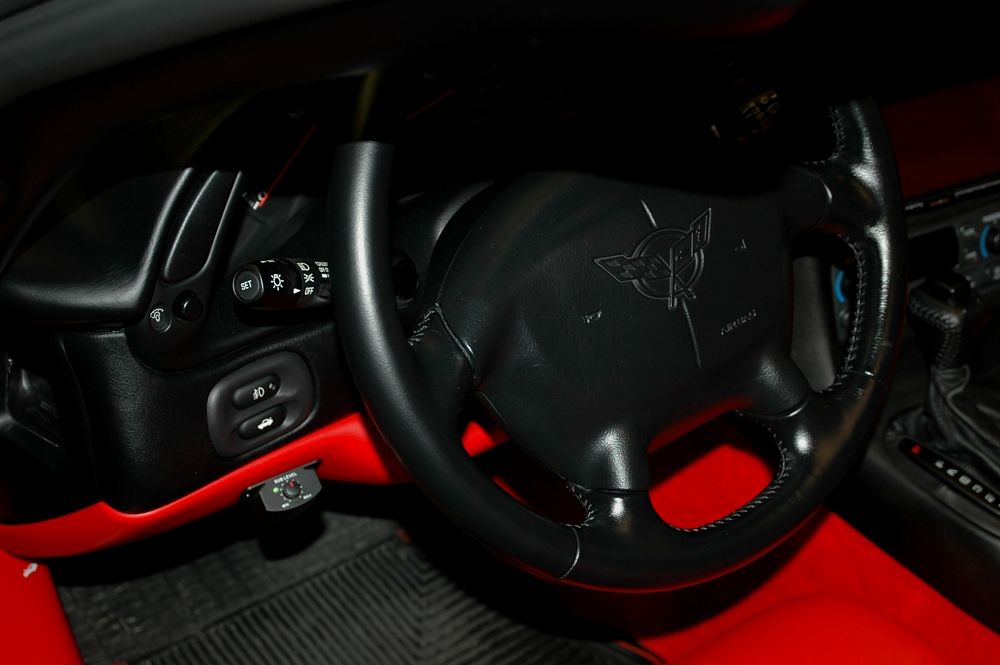
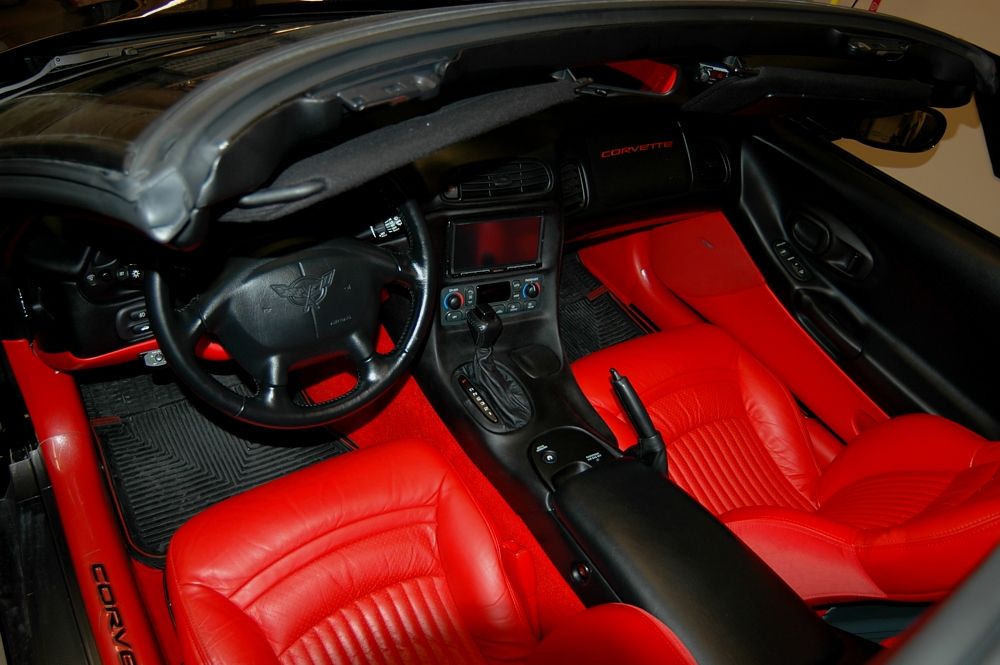
I ran the GPS receiver through the driver A-pillar and into the corner of the windshield. I debated this position for quite a while before allowing it to stay visibly exposed. Since this was the primary reason for doing this mod, I wanted to make sure Carole gets the best, most reliable reception so I put it in a spot that should serve her best.
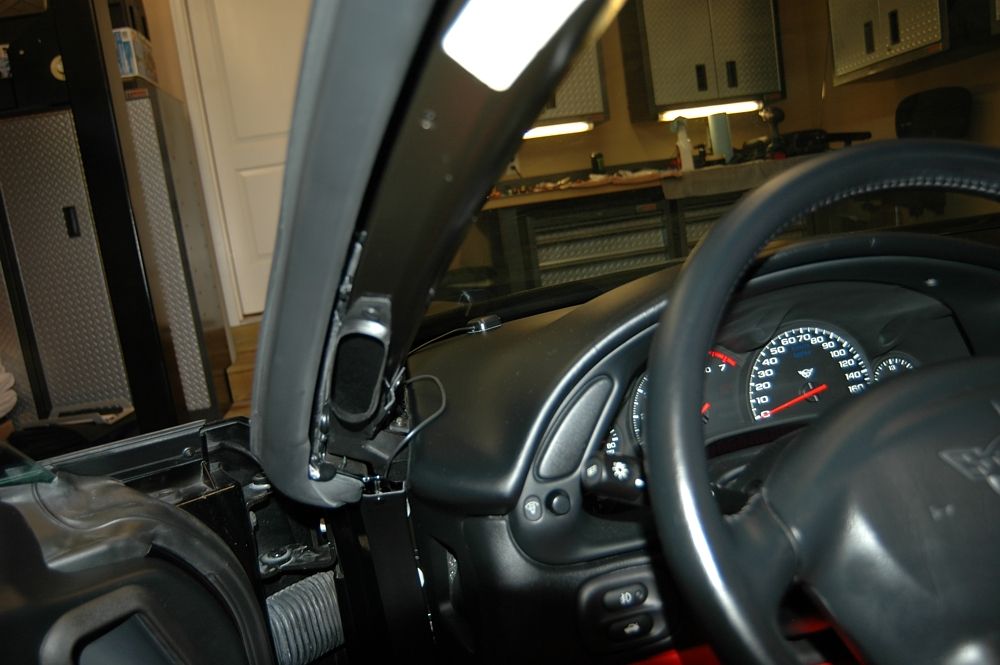
It’s barely visible and not really noticeable if you don’t know what it is.
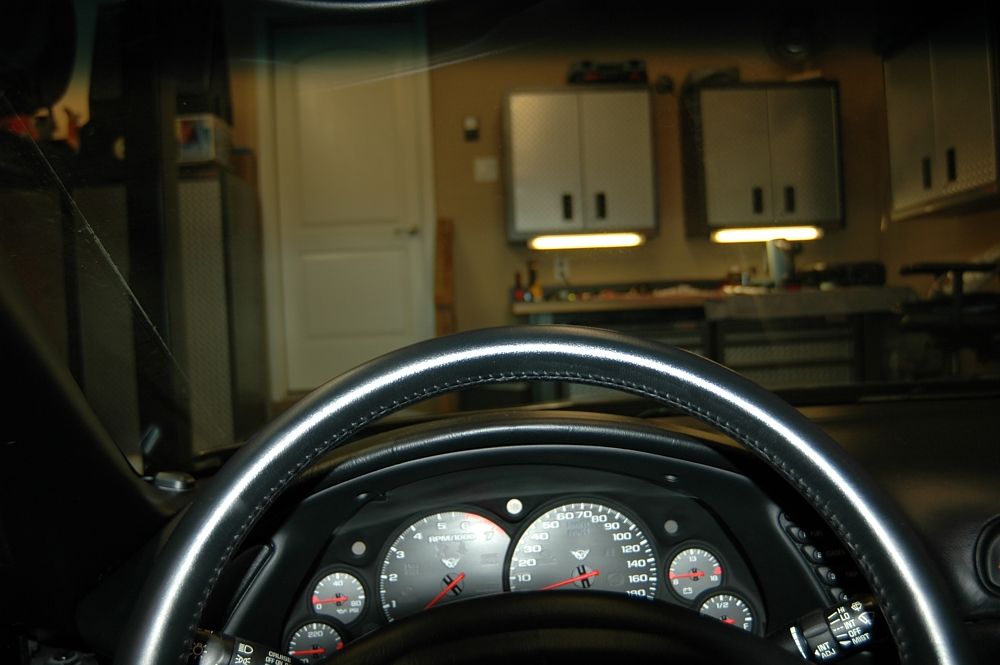
A view from the driver’s position.
The amp.
The sub level remote control dangling . . .
. . . and mounted. Not sure if I’ll leave it there but it’s convenient and I found that easy access is good in this case.
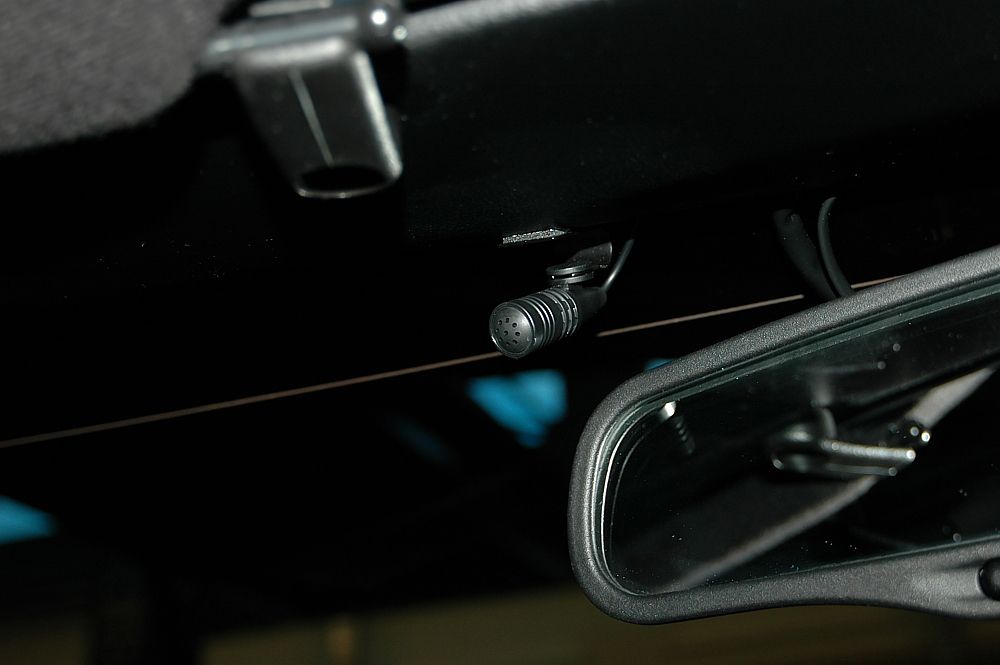
I ran the Bluetooth mic up to the rear view mirror area and mounted it there. Pretty much hidden with the visor up and so tiny it’d be hard to see anyway.
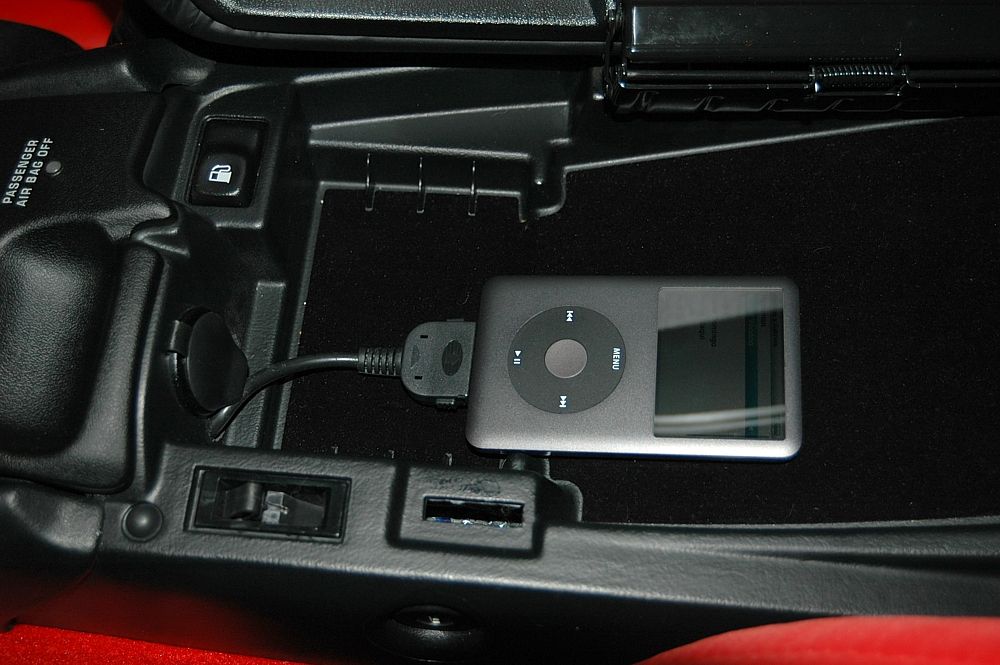
Here's the iPod hookup.
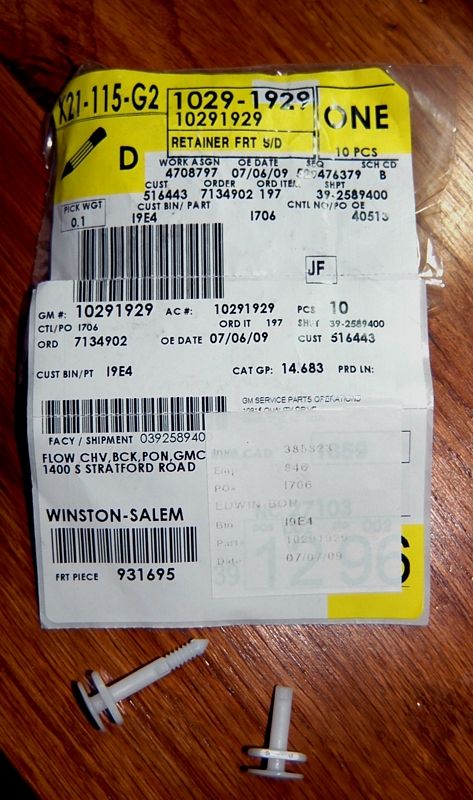
I had broken some of these door clips last time and had ordered some replacements. I took this opportunity to replace them while the panels were off.
Final shots. Obviously, I tested the system several times before buttoning it up. Everything worked great right from the get-go. I still have tuning to do and it does need to break in.
Side note: I did run all the wiring for the rear view camera but wanted to think on it a few more days before committing to the mounting position. I have a couple of ideas but want be sure before I start drilling through panels. I’ll probably get to it next weekend.
This was a lot of friggin’ work! Plus, it was cold! I have waited another year before adding heat to my garage yet I insist on doing winter mods when it’s in the teens and twenties outside. I made do with an 80,000 Btu propane heater that I fired up occasionally to keep the temperature livable. Plus, I had diverted a couple of small ducts from the central system into the garage to help keep the edge off. Next summer I’m installing a natural gas heater and insulation. No more cold winter mod sessions for me.
It was a fun project, though, and I did learn a lot. Carole absolutely loves the system although she has a lot of familiarizing to do – at least the Garmin’s the same. Thanks again to Dennis and Greg at Double D Mods. The project went smoothly because of them.
Well, back to work tomorrow.

Ed
**Update**
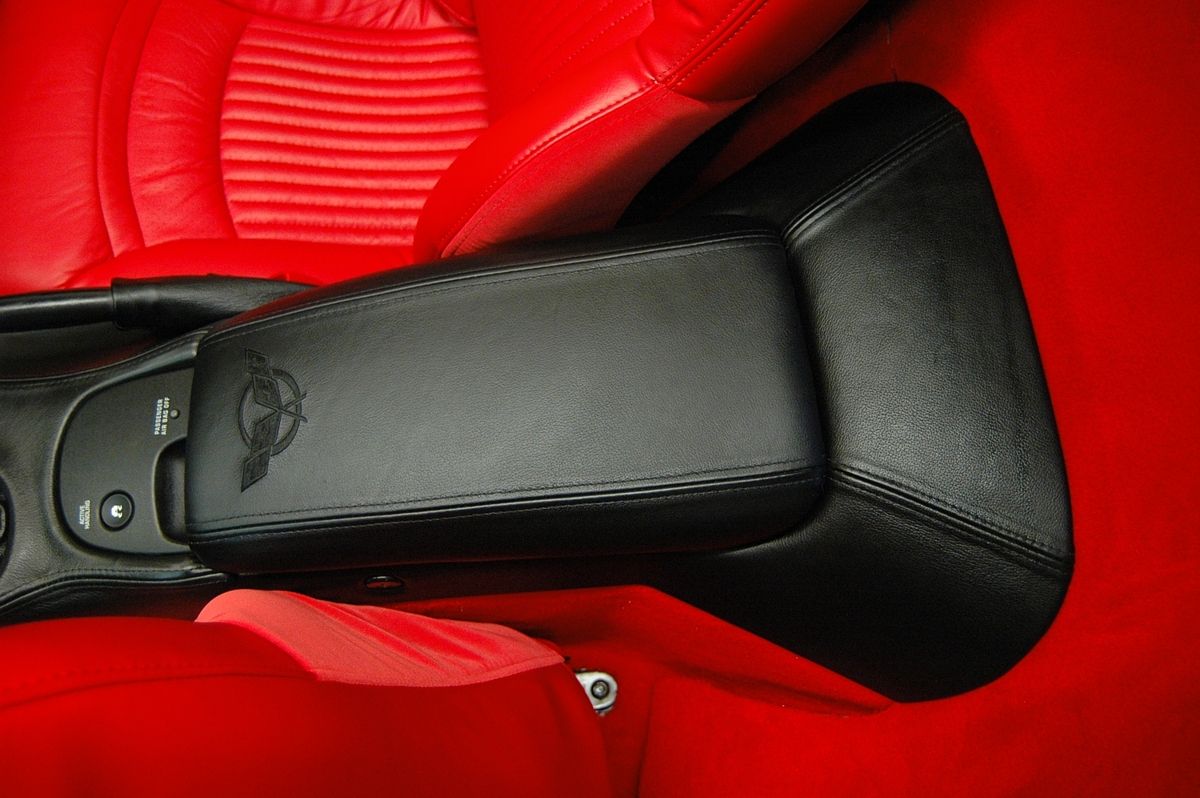
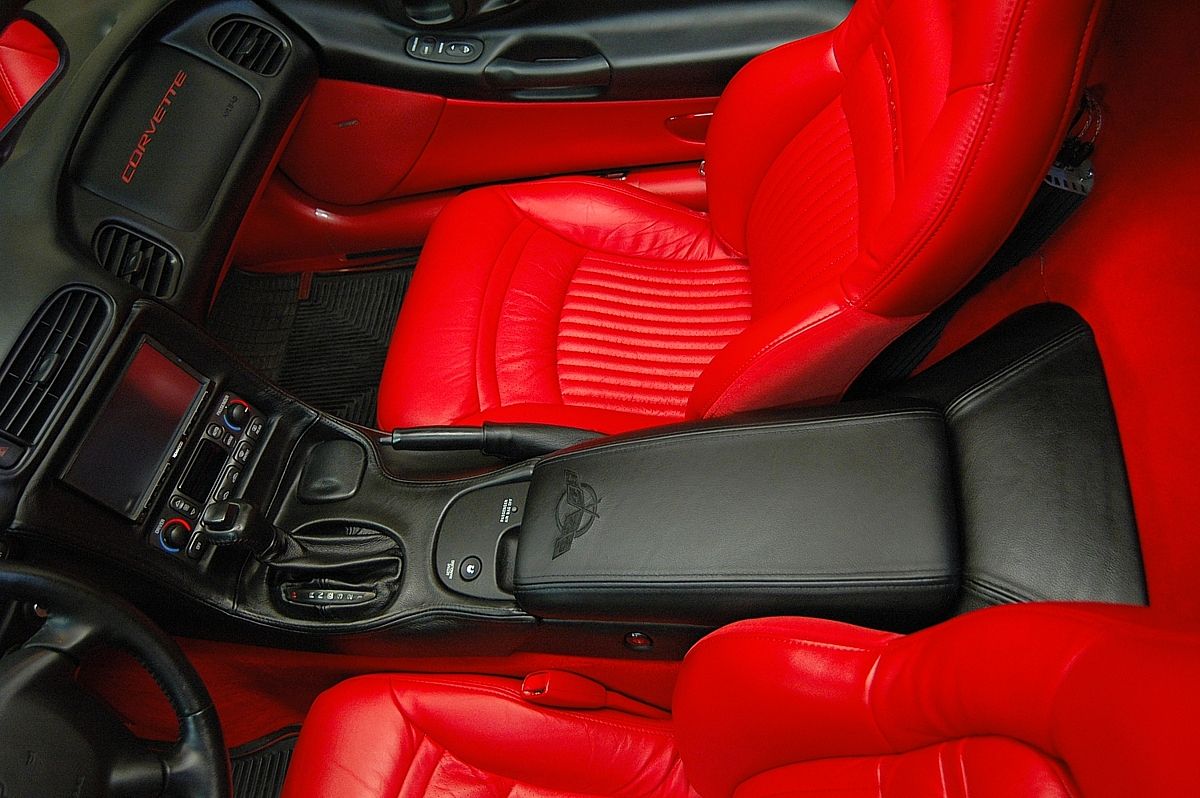
I upgraded some of the interior trim pieces to finish off the console and bezel.
Center console in leather.
Leather-wrapped bezel and new shift and E-brake boots.
The double-din bezel I won here in Double D Mod’s giveaway a couple of months ago got the ball rolling. I want to thank Dennis, c5 BearsFan, for his generosity and for his valuable advice and assistance in getting all the right components ordered for this project. His partner, Greg, pentavolvo, was also extremely helpful – and patient – in answering all my questions and steering me in the right direction as I prepped for the install. Thanks to Ray, member razor2430, as well, for his invaluable advice and pictures.
Never having done this involved of an audio install, I did some thorough research – mostly here, the vendor sites and audio forums – to make sure I didn’t run into any showstopper issues. I decided to completely rip out the stock Bose system and replace it with a modern and multifunctional double-din head unit (HU), capable front and rear component speakers and a decent single sub woofer. The important thing is that the system should remain generally invisible, as Carole is not into the blinged-out look and likes to keep the car looking pretty close to stock. That meant a stealth box for the sub and a HU that blends nicely into the dash. She was also quite specific that the nav unit be as close to the look and operation of her Nuvi – Carole hates change and she didn’t want to relearn a new nav system. Dennis and Greg came to the rescue here, recommending the Kenwood DNX series HU that is completely Garmin based/immersed. It looks exactly like the Nuvi but with a much larger screen (7”). I’ve read the Pioneer vs. Kenwood debates posted here and would have probably gone Pioneer if it had been my car. Carole wanted as close to her existing Nuvi as possible so that meant Kenwood and that is, as they say, that.
So, here was the line-up I ordered:
Head unit: Kenwood DNX7140
· In-dash Navigation Receiver with DVD, CD, MP3, WMA playback
· iPod and iPhone USB direct connectivity
· Motorized flip-down face
· Full color LCD monitor
· 6.95" Touch screen display
· Wireless remote control
· Blue button lighting
· Variable color illumination
· Selectable wallpapers and customizable backgrounds
· Multi-Language GUI menu
· Power Output:
o Peak: 50 watts x 4 channels
o RMS: 22 watts x 4 channels
· CD Text Display
· MP3 ID3 Tag Display (Title/Artist/Album)
· Bluetooth by Parrot
· Rear camera ready
· HD radio ready
Amp: Infinity 5350a
Front speakers: Elemental Designs 3.65i with custom door speaker mounting plates
Rear Speakers: Polk DB 651
Sub-woofer: Elemental Designs 11kv with custom NVTHIS hidden sub box in center well
HD Radio tuner: Kenwood KTC-HR200
Rear view camera: Kenwood CCD-2000
Misc.: eDead sound deadener and Ensolite closed-cell foam from RAAMaudio (besides the Madvette kit I had already installed); GM wiring harness/antenna adapter
On to the install . . .
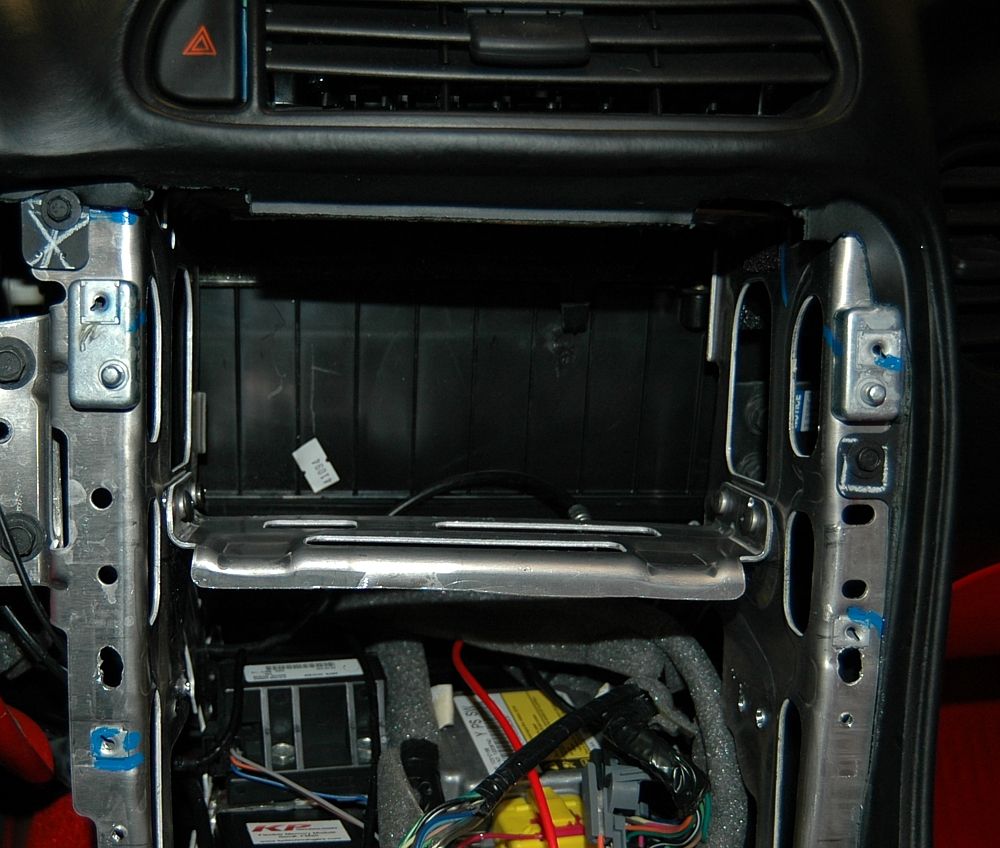
First order of business was to strip the rear interior section to the insulation and the center stack to remove the HU.
For a C5 double-din install, the two horizontal supports in the center stack that the HU and AC controller rest on must be removed by drilling out the rivets that hold them in place. It is much more difficult than one would imagine – I mean, how hard can it be to drill out eight rivets, right? Took me more than an hour and several new, hard drill bits.
Those are some hard rivets. Luckily, I was forewarned and had ordered a right-angle drill attachment and new bits. They weren’t kidding . . .Rivets and broken drill shanks.
The removed supports.
The center stack sans supports.
I set about fitting the new bezel from Double D Mods. Just for grins, here’s what it looks like placed over the stock HU.
The new HU with a set of brackets I fabbed up.
The HU temporarily placed to position it.
I decided to put one of the support brackets to work and drilled new mounting holes for it. This will help to support the weight of the HU and take some of the load off the brackets.
The AC controller needs to be repositioned as well since the HU is taller and I opted for the non-ashtray bezel. So I set about readjusting that as well.
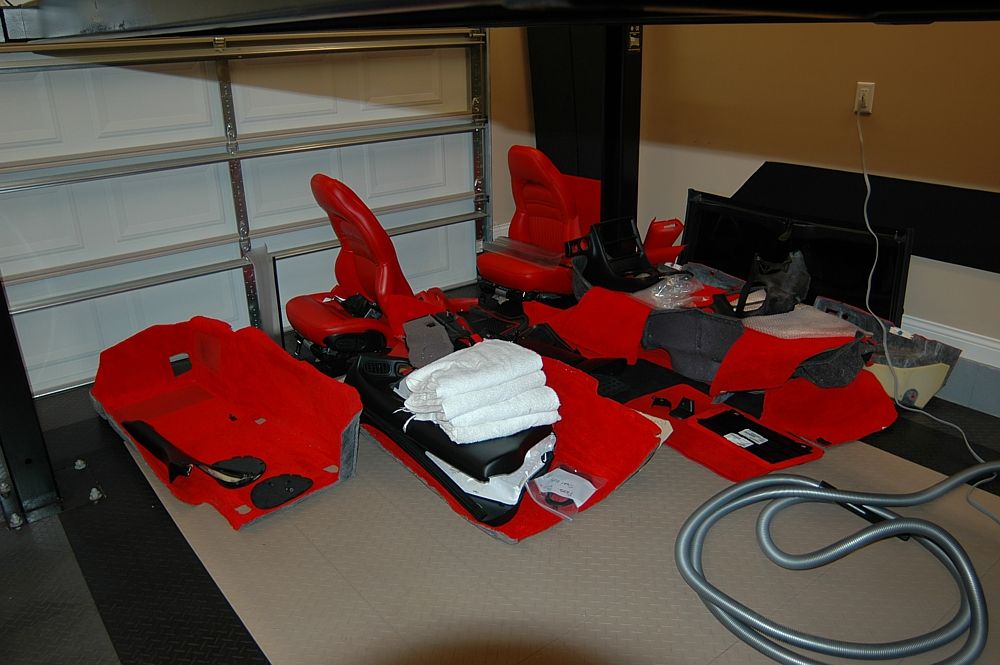
That done, I pulled the rest of the interior out and prepped for the remainder of the install.
Laid out and made up all the harnesses. Btw, I used none of the existing wiring except for the power/ground hookup on the stock HU harness connector.
I removed the rest of the stock Bose system
Front speaker mounting position
Rear speaker position
Here are the speaker mounts I ordered – I painted them to help resist any moisture that might collect on them.
I decided to mount the Infinity amp behind the passenger seat so I bought a plank of ľ” oak and painted it black.
I used a combination of heavy-duty 3M double-stick tape and Liquid Nails to attach it to the metal panel behind the seat. Why not drill for screws, you ask? Well, I took a 15” metal ruler and went under my other C5 stored on the lift and shoved the ruler between the gas tank and other side of that metal wall to see if I had any drilling clearance there and, guess what? Zip, nada, zilch, nothing – I had to force the ruler between the two as they were kissing each other solidly. There was zero clearance there so another attachment method was required.
3M tape . . .
. . . and Liquid Nails.
I let this set up for two solid days before attaching the amp to it. I taped it up for support while it cured.
I ran the main amp power wire from the battery compartment, through the passenger-side firewall and into the cabin via a large grommet behind the battery tray.
Ran it along the outer edge of the floor.
I also ran the speaker wire from the doors. On the passenger side, I made sure to route it away from the amp power wire to minimize the possibility of induced noise. On the driver side I ran it along the outer edge of the floor, up the rear seat wall and across to the amp area.
Here’s one of the ED crossovers.
I placed the driver side crossover on the dash support, just behind the coupe hatch and fog light switches.
I mounted the passenger crossover directly onto the speaker mount along with the woofer and tweeter.
The driver side mounting had only the speakers.
I test-mounted the speakers, including the sub, to ensure everything fit correctly.
I installed the rest of the harnesses and rear speaker wiring. I added some additional audio/video inputs/outputs for future use since the HU had provisions for them.
HD radio tuner and iPod cable
Connections under passenger side dash to prep for accessory/ground hook up.
Speaker wiring.
Aux. cables hiding behind the OM in the glove.
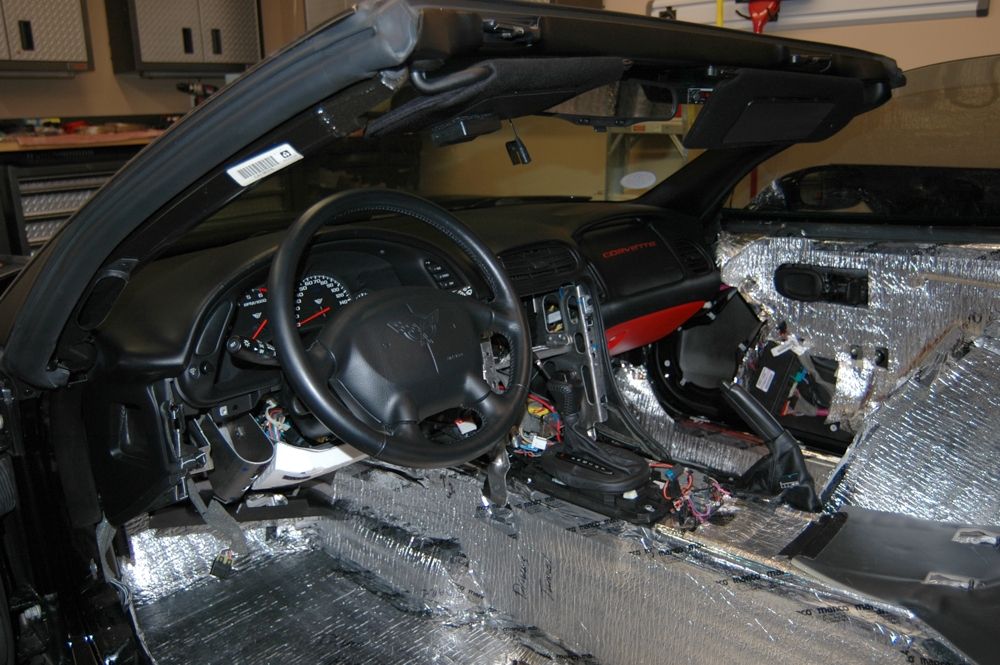
So, some of you who’ve made it this far are probably asking, “Hey, didn’t you say you were going to install additional sound-proofing?” I was procrastinating – I’ve done two insulation mods on our two C5’s and it’s never really a fun job so I waited. Anyway, I did finally get around to installing the eDead sound deadener. Not too bad really – except reaching in and doing the inside of the door skins. Yak! I did the entire insides of the doors . . .
. . . inside the rear speaker cavities . . .
behind the driver seat (the passenger side has the amp mount) . . .
. . . and the rear tub section.
Popped in the rear speakers since the cavities were ready.
Next came a layer of Ensolite.
Then I layed the Madvette insulation back down to complete the sound insulation.
I also placed the stock batting in the rear back in and laid the stealth box and sub in. I had added enough insulation to where I had to stand on the box to press it down enough to allow the center cover to go on without contacting the sub.
Since the back was almost done, I laid the carpeting back in as well.
Just a nice shot of the sub.
I laid in the back wall carpet and mounted the amp in place. I marked the mounting holes for the screws, placed the insulation, placed the carpet and cut access holes in the carpet for the screws and wiring. Then I mounted the amp. I left the amp cover off for two reasons – access to the wire terminals so I could hook them up and more clearance for the seat. The cover is kind of cool-looking with lights on it and it covers the wiring somewhat but it generally won’t be seen so no big deal.
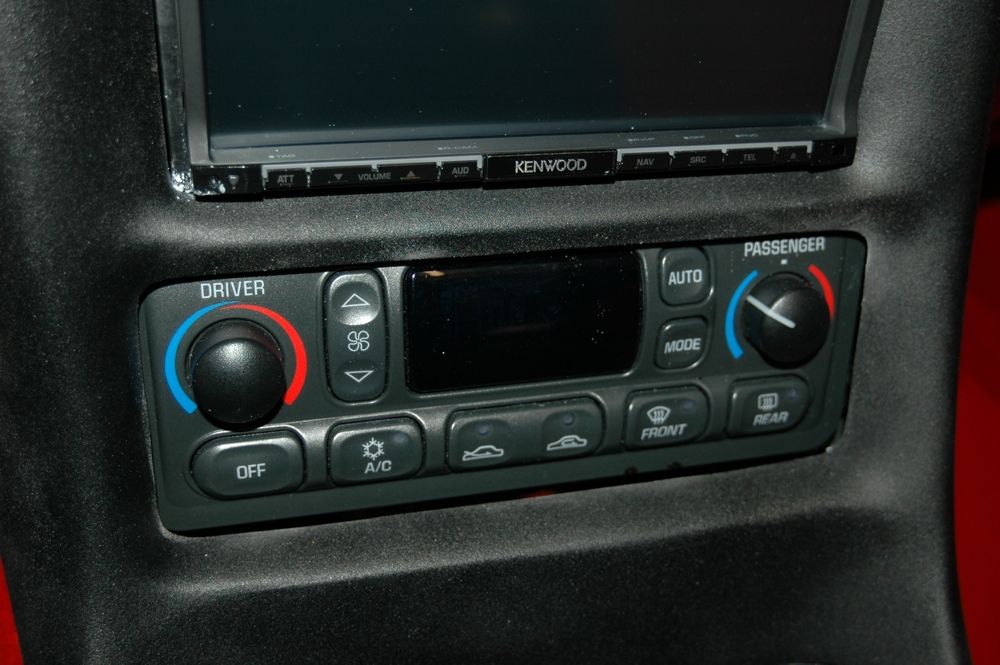
I did the final install of the HU and AC controller. Notice that I was progressively adding interior trim and seats as I went along.
I ran the GPS receiver through the driver A-pillar and into the corner of the windshield. I debated this position for quite a while before allowing it to stay visibly exposed. Since this was the primary reason for doing this mod, I wanted to make sure Carole gets the best, most reliable reception so I put it in a spot that should serve her best.
It’s barely visible and not really noticeable if you don’t know what it is.
A view from the driver’s position.
The amp.
The sub level remote control dangling . . .
. . . and mounted. Not sure if I’ll leave it there but it’s convenient and I found that easy access is good in this case.
I ran the Bluetooth mic up to the rear view mirror area and mounted it there. Pretty much hidden with the visor up and so tiny it’d be hard to see anyway.
Here's the iPod hookup.
I had broken some of these door clips last time and had ordered some replacements. I took this opportunity to replace them while the panels were off.
Final shots. Obviously, I tested the system several times before buttoning it up. Everything worked great right from the get-go. I still have tuning to do and it does need to break in.
Side note: I did run all the wiring for the rear view camera but wanted to think on it a few more days before committing to the mounting position. I have a couple of ideas but want be sure before I start drilling through panels. I’ll probably get to it next weekend.
This was a lot of friggin’ work! Plus, it was cold! I have waited another year before adding heat to my garage yet I insist on doing winter mods when it’s in the teens and twenties outside. I made do with an 80,000 Btu propane heater that I fired up occasionally to keep the temperature livable. Plus, I had diverted a couple of small ducts from the central system into the garage to help keep the edge off. Next summer I’m installing a natural gas heater and insulation. No more cold winter mod sessions for me.
It was a fun project, though, and I did learn a lot. Carole absolutely loves the system although she has a lot of familiarizing to do – at least the Garmin’s the same. Thanks again to Dennis and Greg at Double D Mods. The project went smoothly because of them.
Well, back to work tomorrow.
Ed
**Update**
I upgraded some of the interior trim pieces to finish off the console and bezel.
Center console in leather.
Leather-wrapped bezel and new shift and E-brake boots.
Last edited by Patches; 06-17-2010 at 08:28 PM.

The following 2 users liked this post by Patches:
infinisean (04-18-2018),
Martinez310 (09-10-2015)
01-03-2010, 09:12 PM
#2
Melting Slicks


Looks great Ed you did a great job you should be proud of yourslef. It is alot of work I am glad I could help let me know if you ever need any thing i will be glad to help you out.


 01-03-2010, 09:44 PM
#5

This is an awesome writeup with great pics. In the next couple of weeks, I am doing an install on my C5 that will be strikingly similar to this one.
How is the passenger seat clearance with the amp mounted there? I was going to mount mine front center of the hatch because the clearance looked sketchy behind the passenger seat.
Sramoo
How is the passenger seat clearance with the amp mounted there? I was going to mount mine front center of the hatch because the clearance looked sketchy behind the passenger seat.
Sramoo
01-03-2010, 11:26 PM
#6
Le Mans Master

Looks great Ed! Nice write up. I bet that was a tight fit on that sub box with all that insulation. I had no idea all of that was going in,lol. Congrats on a nice looking setup.
01-04-2010, 12:08 AM
#7
Le Mans Master
Looks great, you took a ton of pictures that will help alot of people. So have u powered it up yet hows it sound. My god you did an amazing job deadening

 01-04-2010, 09:38 AM
#10
Team Owner
Thread Starter
[QUOTE=razor2430;1572632665]Looks great Ed you did a great job you should be proud of yourslef. It is alot of work I am glad I could help let me know if you ever need any thing i will be glad to help you out.
QUOTE]
Thanks for the compliment from one of the audio superstars here.
Always happy to take the time. It extends the project but helps a lot down the road.
Thanks to another of the gurus here. "OCD R US" lives here - what can I say.
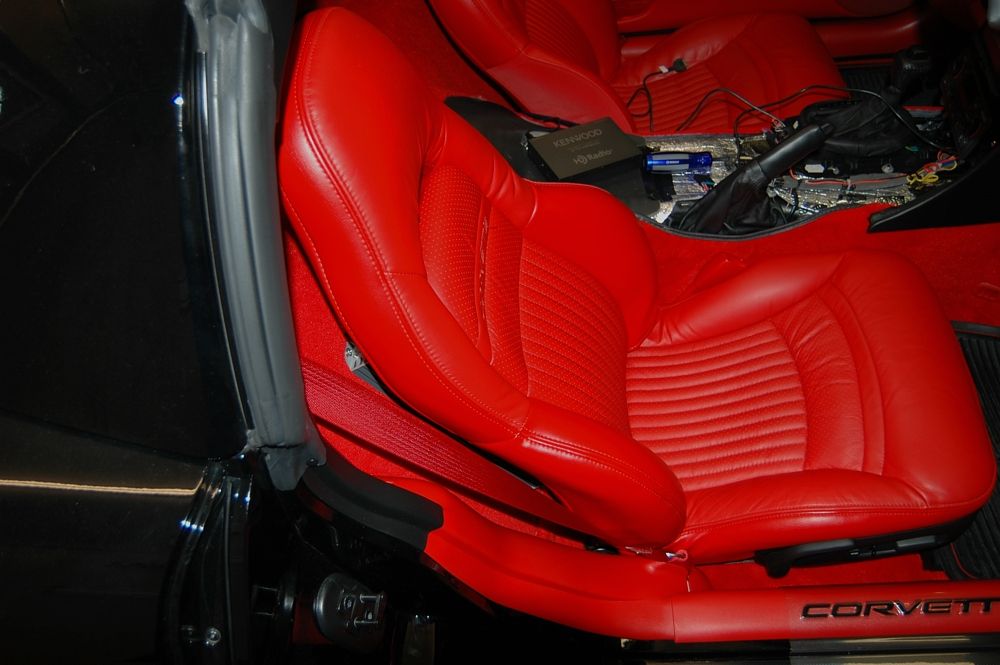
It's not bad at all. We lost maybe 1" or so of backward travel. I'm going to put a set of hard stops in the seat tracks to make sure no one reverses the seat into the amp by accident.
Jason, thanks for the great box. It still fit, even with all that insulation. It fit without it too, so it's a good design.
Thanks for answering my huge list of questions, Greg. I powered the system up early on to make sure I wouldn't be ripping the interior back out to troubleshoot. Worked nicely from the first try. Sounds really awesome!
QUOTE]
Thanks for the compliment from one of the audio superstars here.
Always happy to take the time. It extends the project but helps a lot down the road.
This is an awesome writeup with great pics. In the next couple of weeks, I am doing an install on my C5 that will be strikingly similar to this one.
How is the passenger seat clearance with the amp mounted there? I was going to mount mine front center of the hatch because the clearance looked sketchy behind the passenger seat.
Sramoo
How is the passenger seat clearance with the amp mounted there? I was going to mount mine front center of the hatch because the clearance looked sketchy behind the passenger seat.
Sramoo
01-04-2010, 10:31 AM
#11
Le Mans Master
im sure the car is prly back together already but start the car and rev it a bit, make sure u arent getting alternator wine through the speakers
 01-04-2010, 12:35 PM
#13
Racer

Member Since: Jul 2005
Location: Port Orchard WA
Posts: 252
Likes: 0
Received 0 Likes
on
0 Posts
Nice work and write up!! I am tackling this very soon. Components are in the mail. I am debating on the sub volume ****. Better having the **** then having to go into the system settings all the time. Again, very nice job!!!!
R/ Al
R/ Al
01-04-2010, 12:41 PM
#14
Safety Car

Nice write up!! Thank you!!
01-04-2010, 06:41 PM
#15
Wow, nice work Ed! Congrats on a great install. Your wife is one lucky lady.
I'm probably almost half way through my audio install too. While I'm trying not do too much all at once. Seeing your pictures makes me want to go and finish it up, especially since the HU (Pioneer Z110BT) just arrived at my door today.
I love how you keep your garage looking so clean. I'm learning to do that with my install too. With all the things I'm doing, it's easy to get the garage all disorganized and messy. Looking forward to hearing about your audio tuning experience since I've never done that either.
Also, what kind of backup camera are you thinking of? I got the license plate kind but now I'm thinking it might be safer to drill a hole in the bumper. I don't want thieves to come by and jack my camera.
Last edited by MSO4; 01-04-2010 at 07:00 PM.
01-04-2010, 07:24 PM
#16
Team Owner
Thread Starter
 01-04-2010, 07:31 PM
#17
Team Owner
Thread Starter
Wow, nice work Ed! Congrats on a great install. Your wife is one lucky lady.
I'm probably almost half way through my audio install too. While I'm trying not do too much all at once. Seeing your pictures makes me want to go and finish it up, especially since the HU (Pioneer Z110BT) just arrived at my door today.
I love how you keep your garage looking so clean. I'm learning to do that with my install too. With all the things I'm doing, it's easy to get the garage all disorganized and messy. Looking forward to hearing about your audio tuning experience since I've never done that either.
Also, what kind of backup camera are you thinking of? I got the license plate kind but now I'm thinking it might be safer to drill a hole in the bumper. I don't want thieves to come by and jack my camera.
I'm probably almost half way through my audio install too. While I'm trying not do too much all at once. Seeing your pictures makes me want to go and finish it up, especially since the HU (Pioneer Z110BT) just arrived at my door today.
I love how you keep your garage looking so clean. I'm learning to do that with my install too. With all the things I'm doing, it's easy to get the garage all disorganized and messy. Looking forward to hearing about your audio tuning experience since I've never done that either.
Also, what kind of backup camera are you thinking of? I got the license plate kind but now I'm thinking it might be safer to drill a hole in the bumper. I don't want thieves to come by and jack my camera.

Although I was leaning away from it, I ended up with the Kenwood camera because it integrates so well with my Kenwood HU and the specs are surprisingly good. What I don't like about it is the form factor - it's shaped like a cube. However, I'm almost decided to drill a small hole just large enough for lens access in the license plate/backup lamp frame and the license plate itself and have the lens peer through that. The body of the camera would be totally hidden and inaccessible to prying eyes and hands. That's my first choice so far.
01-04-2010, 09:23 PM
#18
Team Owner
Member Since: Sep 2002
Location: Bonita Springs, Florida
Posts: 21,886
Received 3,054 Likes
on
2,030 Posts

Great pictures and write up Ed. What an incredible job. I love the way it all looks factory and not like an afterthought. You always have a way of making your projects look much simpler than they actually are. Congrats on an awesome installation.

