SOUND DEADENING & STEREO INSTALL (step-by-step):
 02-03-2012, 12:07 PM
#21
Melting Slicks


Thread Starter

1) Doing the deadening in a convertible was a real pita, as access is difficult with the top either up or down. This would be SO MUCH EASIER on a coupe.
2) The install took me five weeks (Dec. 28 - Feb. 2), but if you worked non-stop you could do it in maybe three or four days depending on your preparation.
3) The three layers of deadening really puffed-up the inside. I had a tough time re-installing every piece of carpet, especially the rear wall, partition area and sill-trim (photo shows BXTII, Mamo Ensolite, RAAM Ensolite & Heat Shield). I had to remove some stock carpet padding in several places. The passenger seat has a tough time going all the way back now due to it pressing against the side-tunnel.
4) The sound deadening difference is incredible. My wife is amazed at how quiet it is now. Just shutting the doors is a noticeable improvement and has a really solid sound.
5) I broke four door-panel pins, but had a box of each type on hand.
6) The two amps fit perfectly in the passenger foot-well. This was a great location, though fitting all the wires in there was tough.
7) The two 10" subs and fiberglass sub-pods ARE NOT overkill, the lows sound nice and balanced even with the top down, but I have almost no trunk room now, not that I really need it.
8) I removed the gauge cluster so I could put the Matrix in there to the right, and route the left speaker wires behind it, but you could route them under the cluster instead.
9) I think the stereo sounds far better with the rear-speakers.
10) I switched the front & rear outs at the HU-Matrix connection, to move the chimes & bluetooth/OnStar sounds from the front left door speaker to the rear left one. Initially those sounds out of the front speaker were four times as loud due to the Matrix line-driver signal boost. Thus the HU fader control is reversed, but that's no big deal.
11) I did not need the ground-loop isolators for the signal-outs or antenna.
12) Playing the stereo at a fairly loud volume with the engine not running will kill the battery in 15 minutes, so get a battery booster if you plan to play it at shows or meets, or leave the car running!
13) I initially cut my RCA signal wires to perfect lengths and soldered on new connectors ... BAD IDEA. Three of the cables FAILED due to the fact the wires are 24 gauge or smaller, and easily break free at the solder. Be sure to buy high-quality twisted cables with molded plugs as needed.
14) I powered my Valentine-One by splicing into the heated-seat circuit (HTD SEAT/WPR RLY) which only comes on when the engine is running (I also have my NPP switch partially powered here).
15) I should have mounted the DQXS as low as possible behind the passenger seat, so there was a touch more room to move the seat all the way back & recline. I may re-mount that later ...
Last edited by Thrash; 02-06-2012 at 11:01 PM.
 02-03-2012, 03:57 PM
#22
Melting Slicks
Thread Starter
[QUOTE=RLSebring;1579906822]Those turned out sharp. The black trim rings make a hell of a difference. I think this mod to the trim rings is going places. I have a set of Velocity Yellow rings ready to install against the black bezels. I'll post of pics in the for sale and general sections when finished.
Now you tell me ... yella rings might be a cool accent
Now you tell me ... yella rings might be a cool accent
02-03-2012, 03:59 PM
#23
Melting Slicks
Thread Starter
 02-04-2012, 11:33 AM
#24
Drifting

Amazing job Thrash, very well done, enjoy the new sounds (and lack of)!

 02-04-2012, 02:53 PM
#26
Melting Slicks
Thread Starter
 But as when I did a total brake replacement (new rotors, calipers, lines and all) and had done zero mechanical stuff until then, it's all in the prep, planning, research and reference ...
The following users liked this post:
Rick2r (07-14-2020)
02-04-2012, 08:43 PM
#27
Advanced

Member Since: Jan 2012
Location: Melbourne
Posts: 68
Likes: 0
Received 0 Likes
on
0 Posts
For anyone doing this upgrade, while the seats are out you might want to consider upgrading them to 2012 seats.
Obviously this is not to everyones taste or budget, but I thought it might be worth mentioning.
I have done a how to post here
Awesome write up by the way, I know how difficult it is.
Obviously this is not to everyones taste or budget, but I thought it might be worth mentioning.
I have done a how to post here
Awesome write up by the way, I know how difficult it is.
02-04-2012, 10:29 PM
#28
Melting Slicks
Thread Starter
For anyone doing this upgrade, while the seats are out you might want to consider upgrading them to 2012 seats.
Obviously this is not to everyones taste or budget, but I thought it might be worth mentioning.
I have done a how to post here
Awesome write up by the way, I know how difficult it is.
Obviously this is not to everyones taste or budget, but I thought it might be worth mentioning.
I have done a how to post here
Awesome write up by the way, I know how difficult it is.
02-09-2012, 11:53 AM
#29
Advanced

Member Since: May 2011
Posts: 94
Likes: 0
Received 0 Likes
on
0 Posts
Amazing write up! I did sound deadening and stereo with speakers and subs when I got my coupe last year, but I think I'll be doing some upgrades like new head unit, sub enclosures, timing correction processor, etc. I'd also like to do sound deadening in the front of the cab, and I expect this guide to be extremely helpful.
Thanks!
Thanks!
03-03-2012, 01:08 PM
#31
Melting Slicks
Thread Starter
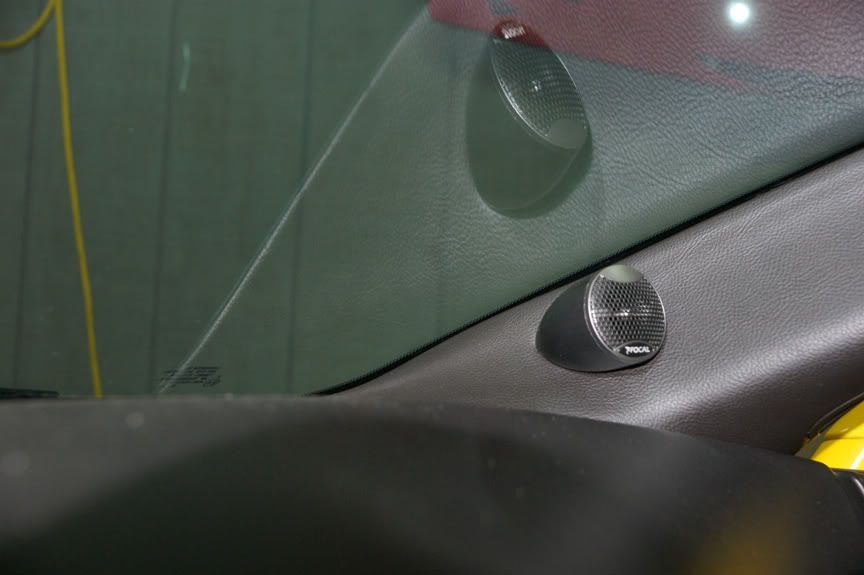
I'm now at 6 weeks after the install. I played with positioning the pillar-tweets up and down the inside A-pillar (using velcro) ... any higher past midway was too much in my face, thus after testing - the lower the better on the pillar. Pointed at the center of the cabin was better than them facing each other.
I was going to mold them and recover the pillars, but I did not like that look on any posts (too prego-bulgy looking), so I decided to use the angular pods that came with the Focal Performance components from Dennis at Double-D. It's not a perfect solution, BUT they work great. With eyes closed the sound-imaging/stage is now coming from the upper corners of the dash, slightly below the tweets - perfection as far as I can tell ...
I was going to mold them and recover the pillars, but I did not like that look on any posts (too prego-bulgy looking), so I decided to use the angular pods that came with the Focal Performance components from Dennis at Double-D. It's not a perfect solution, BUT they work great. With eyes closed the sound-imaging/stage is now coming from the upper corners of the dash, slightly below the tweets - perfection as far as I can tell ...
03-07-2012, 12:52 PM
#32
Le Mans Master

Member Since: May 2011
Location: Tampa FL (formerly Justinjor)
Posts: 5,022
Likes: 0
Received 14 Likes
on
9 Posts
Tech Contributor
St. Jude Donor '11-'12-'13-'14

Amazing job, thanks for sharing.
Do you happen to know roughly how much weight was added to the car? I know that's not highest on the priority list, but I've thought about doing some audio upgrades, but I'm always mindful of the power:weight ratio.
Do you happen to know roughly how much weight was added to the car? I know that's not highest on the priority list, but I've thought about doing some audio upgrades, but I'm always mindful of the power:weight ratio.
03-09-2012, 11:48 AM
#33
Melting Slicks
Thread Starter
I'm not racing, so not worried about the weight. I'd have to guess that with everything installed at maybe 45 lbs?
05-02-2012, 01:26 PM
#34
Melting Slicks
Thread Starter
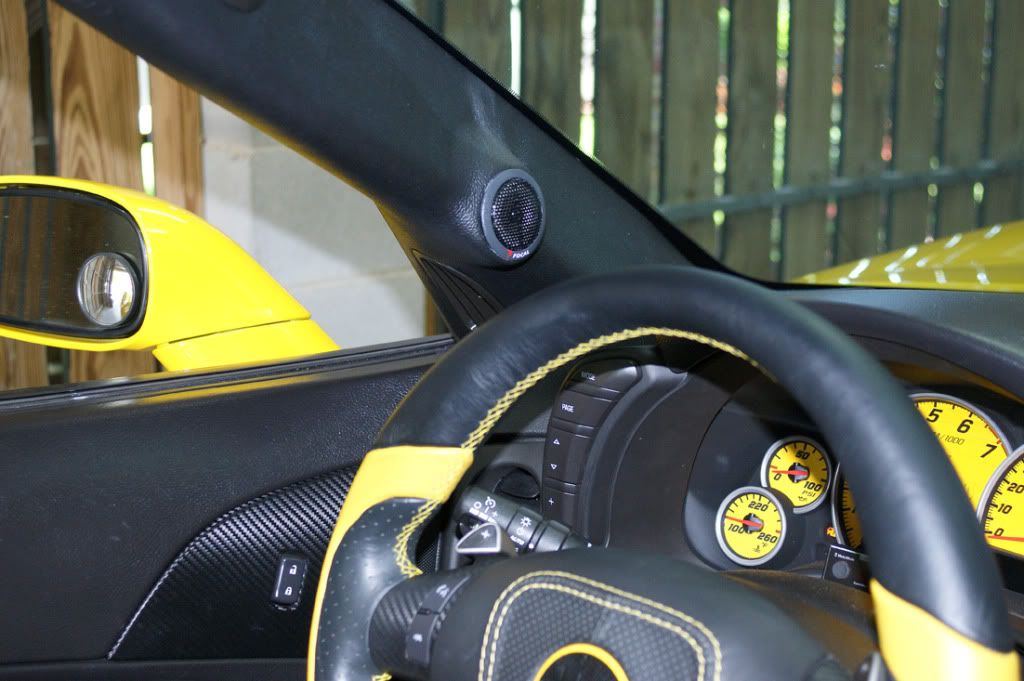
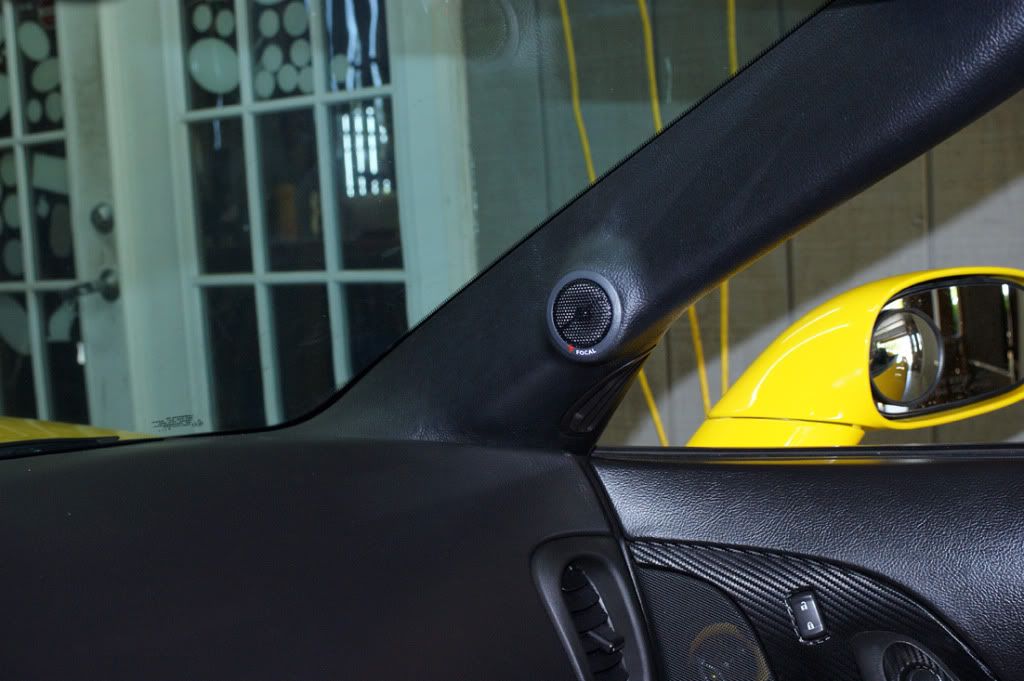
Initially I used the pods that came with the Focal Performance tweeters, where at first they were loose and I used velcro to figure their proper placement on the pillars. That experiment divulged that about 1/4 of the way up the pillar was the best mounting spot. So then I screw-mounted those pods, and that looked okay, though they pointed a bit too directly at my ears (first 2 pix). I initially wanted to do custom molded pillar tweets - but hated the bulgy ones I had seen posted. But then I saw a forum member selling a custom molded set, so I bought those and installed them (3rd & 4th pix). The balance and stage seems just right and they point more at each other, so the highs are a touch more subtle. Love it ...


 That's putting 10 pounds in a five pound bag.
05-04-2012, 01:57 PM
That's putting 10 pounds in a five pound bag.
05-04-2012, 01:57 PM
#37
Melting Slicks
Thread Starter
05-04-2012, 09:09 PM
#38
Former Vendor
 06-03-2012, 02:12 AM
#39
Intermediate

Member Since: Feb 2012
Posts: 29
Likes: 0
Received 0 Likes
on
0 Posts
I started this project a couple weekends ago in the cargo area pulling everything out completely. That was an easier way to get to everything no doubt. I decided I didn't want to cover the center console or torque tube portion with sound insulation and disassemble the console and trim there.
I only had to remove the seats and without pulling the door trim, you can pull the carpet out of the area it's tucked under the door trim sections very easily and move it out of the way enough to completely cover the floor from end to end and door trim to the center console. I did remove the dead petal and the carpet section behind the seats to ensure good coverage there. It is very easy to tuck all the carpet back in place without going through a complete removal. Just FYI for those not wanting to go to the extent on this thread.
I only had to remove the seats and without pulling the door trim, you can pull the carpet out of the area it's tucked under the door trim sections very easily and move it out of the way enough to completely cover the floor from end to end and door trim to the center console. I did remove the dead petal and the carpet section behind the seats to ensure good coverage there. It is very easy to tuck all the carpet back in place without going through a complete removal. Just FYI for those not wanting to go to the extent on this thread.