

 03-25-2015, 01:53 PM
Last edit by: IB Advertising
See related guides and technical advice from our community experts:
Browse all: Interior How-Tos
- C6 Corvette: How to Install an Android Tablet
Step by step instructions for do-it-yourselfers...
Browse all: Interior How-Tos

Android Head Unit & Backup Camera Installation
03-31-2015, 04:42 PM
#141

Gday from Australia. I really want this unit. Does anyone know if
this unit is good for a front and rear camera. ie not to record video,
but just for viewing not to hit curbs while parking. I realise there is a
a DVR input as well as a normal cam input. Can the Dvr cam input be
used for viewing in real time? Thanks, Brian
this unit is good for a front and rear camera. ie not to record video,
but just for viewing not to hit curbs while parking. I realise there is a
a DVR input as well as a normal cam input. Can the Dvr cam input be
used for viewing in real time? Thanks, Brian
 03-31-2015, 06:05 PM
#142
Disregard my question above. I have found my answer .thanks

 04-01-2015, 12:06 AM
#144
04-01-2015, 12:12 AM
#145
04-03-2015, 01:23 AM
#146
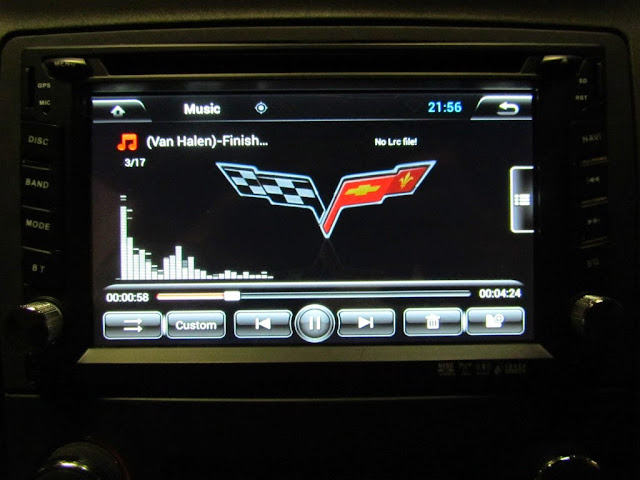
I just replaced the AM/FM, CD, GPS Touchscreen Navigation w/ NAV DVD, GM 15791220 in my 2007 Z06 2LZ with a 1.6 GHz Dual-Core Android 4.2.2 Double-Din 6.2" 800x480 Capacitive Touchscreen Navigation Head Unit with Bluetooth, Wifi, DVD, DVR, etc.: Android 4.2 2DIN Car DVD Radio GPS Stereo Wifi 3G DVR OBD2 BT 1080P 1.6GHz Unit
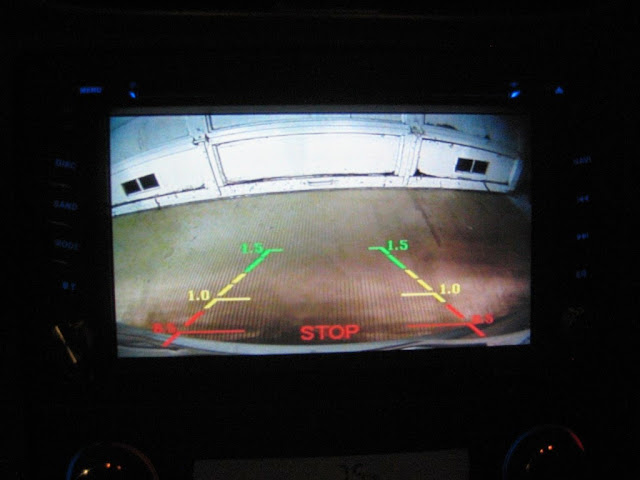
I also installed a Crimestopper SV-6819EM 170 Degree Embedded Style CMOS Color Back-up Camera with Rotating Lens. Here are a few notes and photos for others who might be interested in doing similar.
I found this Center Console and Radio Bezel Removal guide very helpful. There is no need to be intimidated!

I used the PAC Radio Pro 5 Radio Replacement Interface (RP5-GM11) for compatibility with OnStar and the Bose amp. Cut the ISO plug off of the new head unit (HU) harness and connect the wires to those of the same color from the PAC harness (I used solder and shrink tubing). There is no dedicated amplifier trigger wire, so connect the HU red ACC wire to the PAC red ACC wire and the PAC blue/white AMP wire. Use double-sided tape to adhere the GPS antenna to the top of a center vent (or use an adapter to connect the stock GPS antenna, which looks the same and is just to the left of that location). Use a screwdriver to turn down the chime speaker module volume and make sure that module ends up in an accessible location for later adjustment.
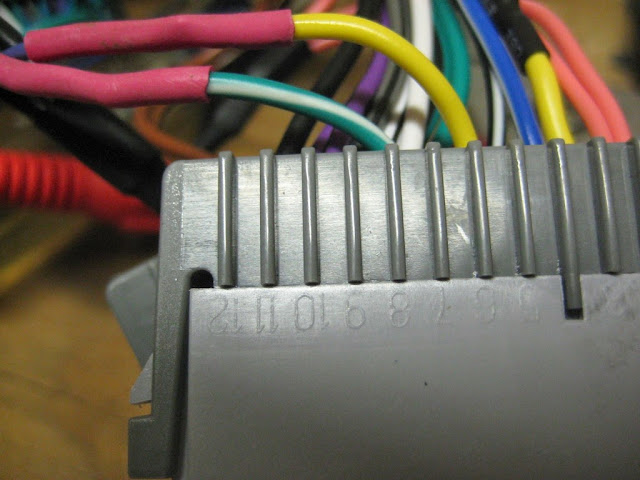
The PAC has two types of steering wheel control (SWC) connections; a mini phono jack and a single blue/yellow wire. It also has a 10-position switch that determines SWC signal compatibility with mainstream HUs. This HU has two wires labeled KEY1 and KEY2 and according to the documentation works with only resistive signals like the Corvette's (see Volume 1 of the shop service manual for schematic). I tried the single wire, and I cut off the phono jack and tried the red and white wires, and I tried all ten switch settings, but nothing worked and I couldn't make sense of the PAC SWC signals with my multimeter. I solved it by cutting the yellow and green/white wires from the PAC that correspond to the purple (6) and dark blue (7) wires from the car and connecting them to the KEY1 and GND leads from the HU. The HU immediately recognized the buttons and made it easy to map them to the desired functions (my 1-6 button now controls mute).
For the camera, connect the power and ground to the passenger-side reverse lamp wiring. Reach in from the exhaust side to twist out the bulb socket, pop the wire routing clip out for more length, remove a few screws from the under body panel behind the rear tire and pull the socket through so there is room to work on it. Drill a hole behind the inner brake light, feed the wire through and seal with silicone (or a grommet). Remember to run the RCA wire up through the center console before snapping that back in place.

The Metra 95-3304 Double DIN Installation Kit has a 173mm x 97mm opening that must be modified to fit the 178mm x 102mm HU bezel. To do this I used a caliper and masking tape to mark 3mm from each side. I then used a rotary tool with my largest cut-off wheel on medium-low speed to trim away the excess. For the bottom I used a sharp utility knife to slice through from the back at the first corner. The top I left alone. It turned out nicely.

I am really pleased with this HU. It is very high quality, integrated well with my car, and can run any Android app I want. My favorite so far is Torque, which offers real-time monitoring of my car via an OBDLink MX. I should also mention that delivery took only four business days, and the seller replied to my questions within 12 hours (I couldn't figure out the navigation volume mixing settings, so they hooked one up and took photos to show me what to do).


I also installed a Crimestopper SV-6819EM 170 Degree Embedded Style CMOS Color Back-up Camera with Rotating Lens. Here are a few notes and photos for others who might be interested in doing similar.
I found this Center Console and Radio Bezel Removal guide very helpful. There is no need to be intimidated!
I used the PAC Radio Pro 5 Radio Replacement Interface (RP5-GM11) for compatibility with OnStar and the Bose amp. Cut the ISO plug off of the new head unit (HU) harness and connect the wires to those of the same color from the PAC harness (I used solder and shrink tubing). There is no dedicated amplifier trigger wire, so connect the HU red ACC wire to the PAC red ACC wire and the PAC blue/white AMP wire. Use double-sided tape to adhere the GPS antenna to the top of a center vent (or use an adapter to connect the stock GPS antenna, which looks the same and is just to the left of that location). Use a screwdriver to turn down the chime speaker module volume and make sure that module ends up in an accessible location for later adjustment.
The PAC has two types of steering wheel control (SWC) connections; a mini phono jack and a single blue/yellow wire. It also has a 10-position switch that determines SWC signal compatibility with mainstream HUs. This HU has two wires labeled KEY1 and KEY2 and according to the documentation works with only resistive signals like the Corvette's (see Volume 1 of the shop service manual for schematic). I tried the single wire, and I cut off the phono jack and tried the red and white wires, and I tried all ten switch settings, but nothing worked and I couldn't make sense of the PAC SWC signals with my multimeter. I solved it by cutting the yellow and green/white wires from the PAC that correspond to the purple (6) and dark blue (7) wires from the car and connecting them to the KEY1 and GND leads from the HU. The HU immediately recognized the buttons and made it easy to map them to the desired functions (my 1-6 button now controls mute).
For the camera, connect the power and ground to the passenger-side reverse lamp wiring. Reach in from the exhaust side to twist out the bulb socket, pop the wire routing clip out for more length, remove a few screws from the under body panel behind the rear tire and pull the socket through so there is room to work on it. Drill a hole behind the inner brake light, feed the wire through and seal with silicone (or a grommet). Remember to run the RCA wire up through the center console before snapping that back in place.
The Metra 95-3304 Double DIN Installation Kit has a 173mm x 97mm opening that must be modified to fit the 178mm x 102mm HU bezel. To do this I used a caliper and masking tape to mark 3mm from each side. I then used a rotary tool with my largest cut-off wheel on medium-low speed to trim away the excess. For the bottom I used a sharp utility knife to slice through from the back at the first corner. The top I left alone. It turned out nicely.
I am really pleased with this HU. It is very high quality, integrated well with my car, and can run any Android app I want. My favorite so far is Torque, which offers real-time monitoring of my car via an OBDLink MX. I should also mention that delivery took only four business days, and the seller replied to my questions within 12 hours (I couldn't figure out the navigation volume mixing settings, so they hooked one up and took photos to show me what to do).
04-03-2015, 12:38 PM
#147
Pro

Thread Starter
Does this camera have embedded grid lines ? I don't want that feature for my application.
Steve R on Nov 20, 2014
Best Answer: Yes it does. But it also has two wires that can be cut. First one is for the reverse (mirror) image and the second one I assume is for the grid lines.
So you can switch both features on or off. If you need a picture let me know.
Hope this helps
Darrell M on Nov 20, 2014
Last edited by bjmsam; 04-03-2015 at 12:45 PM. Reason: added manual reference
04-03-2015, 02:50 PM
#148
Yes. I noticed this entry on the Customer Q&A tab of that page:
I don't remember seeing a second wire during installation and I don't see a second wire referenced in the installation manual on the manufacturer's page.
I don't remember seeing a second wire during installation and I don't see a second wire referenced in the installation manual on the manufacturer's page.
04-03-2015, 03:56 PM
#149
Pro
Thread Starter
Yes. From the installation manual I referenced above:
What I don't see is the second wire mentioned in the Q&A for the grid lines.
Normal and reverse image selectable
the SV-6819.EM camera has wire that can be cut reverse the image
The White wire that comes out of the side of the harness is for reverse imaging. Keep the wire connected for normal image or cut the wire in half for reverse image.
the SV-6819.EM camera has wire that can be cut reverse the image
The White wire that comes out of the side of the harness is for reverse imaging. Keep the wire connected for normal image or cut the wire in half for reverse image.
04-03-2015, 05:49 PM
#150
04-06-2015, 08:51 AM
#151
Supporting Vendor

Member Since: Sep 2007
Location: Pensacola Florida GO GATORS!!! www.rlsebring.com www.c6c7vette.com
Posts: 11,216
Received 174 Likes
on
92 Posts
St. Jude Donor '17

Well I'm confused. I have emailed Pumpkin about this unit since friday (HD Android 4.4 OS 6.95" Car Stereo DVD GPS Bluetooth Wifi 3G Double 2din Radio)
http://www.ebay.com/itm/381176674608?_trksid=p2055119.m1438.l2649&ssPageName=STRK%3AMEBIDX%3AIT
Everything was sounding really good till he told me this unit would not work with the CanBus. ??? Although I do plan on using a separate Amp, speakers, Sub I'll be plugging into the trigger wires and Steering wheel controls. I've asked him to elaborate but have gotten any other info.
Does that sound Plausible? I mean e should know but the is the first time I've heard of such.
04-06-2015, 01:35 PM
#153
Instructor


Has anyone had any issues using a USB stick... Whenever I use it, it plays for a few seconds and then I get message that the USB stick was unexpectedly disconnected. A few seconds later it plays again but does the same thing.
I have reset the unit and also formatted the stick on the HU.. Any ideas?
Keith
I have reset the unit and also formatted the stick on the HU.. Any ideas?
Keith
04-06-2015, 02:17 PM
#155
Tech Contributor
Everything was sounding really good till he told me this unit would not work with the CanBus. ??? Although I do plan on using a separate Amp, speakers, Sub I'll be plugging into the trigger wires and Steering wheel controls. I've asked him to elaborate but have gotten any other info.
Does that sound Plausible? I mean e should know but the is the first time I've heard of such.
Does that sound Plausible? I mean e should know but the is the first time I've heard of such.

The radio itself doesn't 'talk' to the car, only the interface adapter does.
04-06-2015, 04:26 PM
#156
Pro
Thread Starter
I used the PAC Radio Pro 5 Radio Replacement Interface (RP5-GM11) for compatibility with OnStar and the Bose amp.
The RP5-GM11 interface allows the replacement of a factory radio in select General Motors vehicles with Class II radios. Using this interface will retain factory features such as OnStar, steering wheel controls (SWC), warning chimes, Rear Seat Controls (RSC), Rear Seat Entertainment (RSE) and the BOSE amplifier when the original radio is removed. The RP5-GM11 also provides data bus driven outputs such as retained accessory power (RAP), vehicle speed sensor (VSS), illumination, reverse trigger and parking brake.
04-06-2015, 04:36 PM
#157
Supporting Vendor
Member Since: Sep 2007
Location: Pensacola Florida GO GATORS!!! www.rlsebring.com www.c6c7vette.com
Posts: 11,216
Received 174 Likes
on
92 Posts
St. Jude Donor '17
I'll be running separates except for the steering wheel/amp trigger, etc.
04-06-2015, 05:22 PM
#158
Burning Brakes

Ohh.. The interface. Yeah it should work for this new HU. Because the interface is not radio dedicated.
Please let us know if you get the unit you mention. I was looking at that one but since no one has gotten didn't want to venture. So I'll be in the look out for ur installation.
Please let us know if you get the unit you mention. I was looking at that one but since no one has gotten didn't want to venture. So I'll be in the look out for ur installation.
04-06-2015, 06:05 PM
#159
Tech Contributor
Thanks Mark, That's been my impression. I currently have a Jensen HU and the harness for Bose/Onstar/etc. Will that harness work or do I still need for for the specific radio? I want to say it's the GM24 but would have to check.
I'll be running separates except for the steering wheel/amp trigger, etc.
I'll be running separates except for the steering wheel/amp trigger, etc.
You MAY need a new steering wheel interface, that gizmo IS dependant on the brand of radio. You'd need to find model number of the one you have and see if it is compatible with the new one.
04-06-2015, 07:15 PM
#160
Pro
Thread Starter
The PAC has two types of steering wheel control (SWC) connections; a mini phono jack and a single blue/yellow wire. It also has a 10-position switch that determines SWC signal compatibility with mainstream HUs. This HU has two wires labeled KEY1 and KEY2 and according to the documentation works with only resistive signals like the Corvette's (see Volume 1 of the shop service manual for schematic). I tried the single wire, and I cut off the phono jack and tried the red and white wires, and I tried all ten switch settings, but nothing worked and I couldn't make sense of the PAC SWC signals with my multimeter. I solved it by cutting the yellow and green/white wires from the PAC that correspond to the purple (6) and dark blue (7) wires from the car and connecting them to the KEY1 and GND leads from the HU. The HU immediately recognized the buttons and made it easy to map them to the desired functions (my 1-6 button now controls mute).
The PAC harness brings its power in on the yellow wire and loops it back out on pin 6 to power the car SWC (purple wire on the car side of the connector). I believe yellow is constant power rather than switched, so I didn't care for that approach anyway (why energize the car SWC resistor tree when the ignition is off?). Cut that loop and connect the outbound yellow wire on pin 6 to the KEY1 wire. The SWC circuit becomes:
HU KEY1 <--> connector side PAC yellow pin 6 <--> car SWC purple pin 6 (+)
HU GND <--> connector side PAC green/white pin 7 <--> car SWC dark blue pin 7 (-)
HU KEY1 <--> connector side PAC yellow pin 6 <--> car SWC purple pin 6 (+)
HU GND <--> connector side PAC green/white pin 7 <--> car SWC dark blue pin 7 (-)