
'08 C6 Racecar buildup!!!!
 12-03-2007, 10:17 AM
#1
Intermediate

Thread Starter

Member Since: Aug 2007
Location: Montreal Quebec
Posts: 44
Likes: 0
Received 0 Likes
on
0 Posts
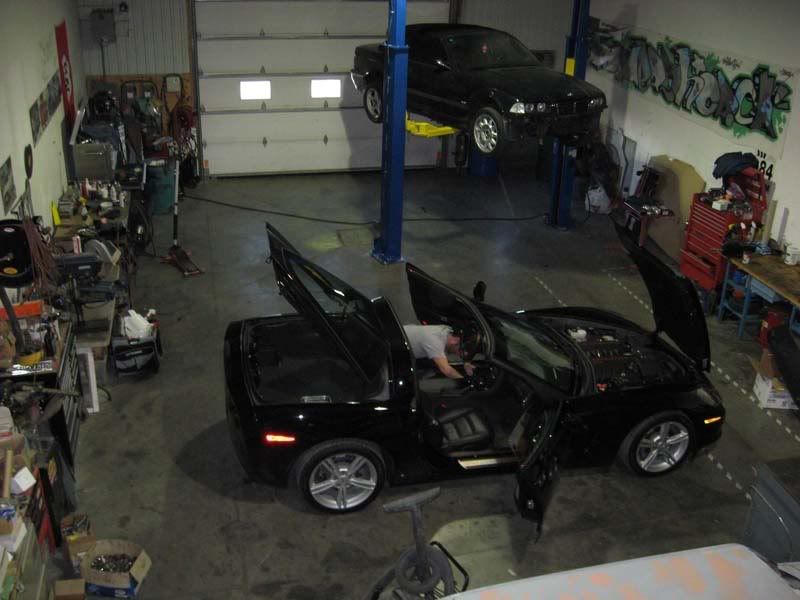
Hi to all, first I would like to introduce myself as I am new to the Corvette community and this forum, I am really impressed how nice the people are here. I'm Seb, I own a BMW shop in Montreal, we specialise in racecars, performance and cause we always need $$$ we also service the cars. BTW this is not a commercial post, I just want to share this project with the community!!
I was approched by a fellow racer to build and co-drive a road race Corvette for endurance and accepted the challenge. So we got a brand new 2008 C6 and started to build it as a racecar for the 2008 season starting with the 6 hour race at Sebring on january 16th. We officially started the build on november 19th, so we have little less than 8 weeks to complete the car. I am documenting the build as much as I can with pictures and filming the process in HD for future use.
As alway we are looking for sponsors for this build and the different races we will be doing..(A shameless plug)
Here a list of the mods we are doing to the car.
1- Full roll cage
2- All safety features inside (Race seat, Schroth belts, Fire supression, Kill switch, Left and Right side nets)
3- Aux. gauges
4- G2X datapak
5- World Challenge Body kit:
6- Wing!!!
7- Splitter
8- Big Brake Kit (Stoptech)
9- Coil over suspension (PFADT)
10- Competition Sway bars (PFADT)
11- Headers and exhaust (we have to keep the car muffled under 91dB) (LG)
12- ECU upgrade
13- Bigger radiator with oil cooler (LG)
14- Rear end cooler (Not available yet for the '08)
15- Light weight flywheel / Race clutch
16- Short shifter
17- Brand new custom wheel in 18 inch (CCW)
18- Cold Air intake
19- CTEK battery charger to keep that battery top shape in the off season
20- Air Jacks
21- JoliFilm protective shield on the chassis to protect the bodywork from stone chips and tire rubber
22- And a lot af work!!!
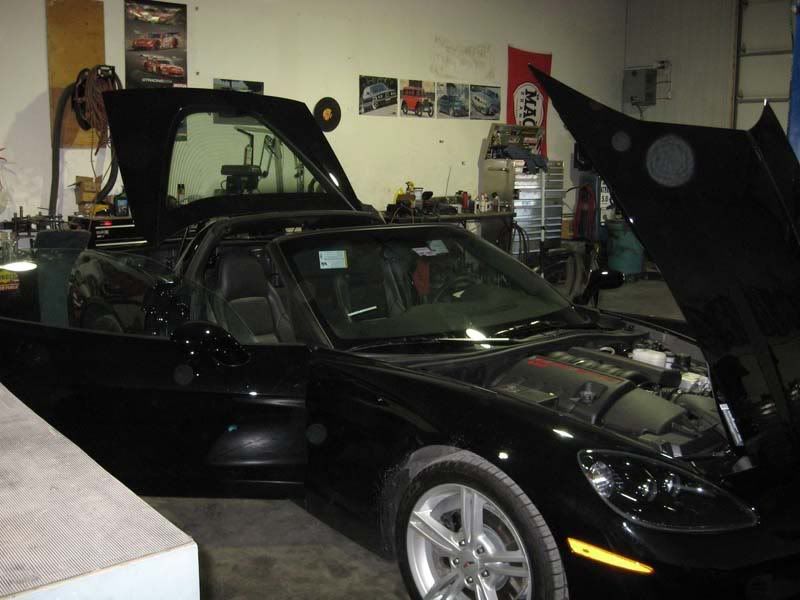
Now the car is in the shop, we are getting ready to take it appart.
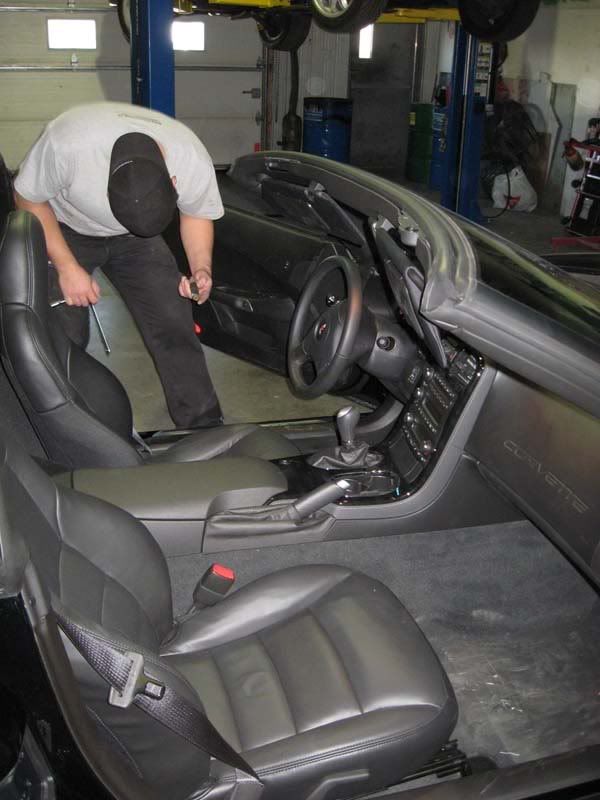
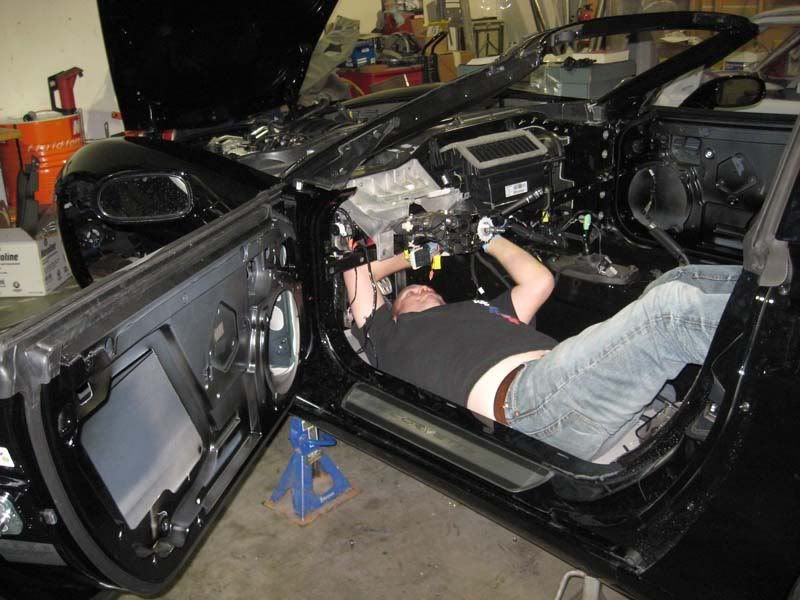
Simon at work!
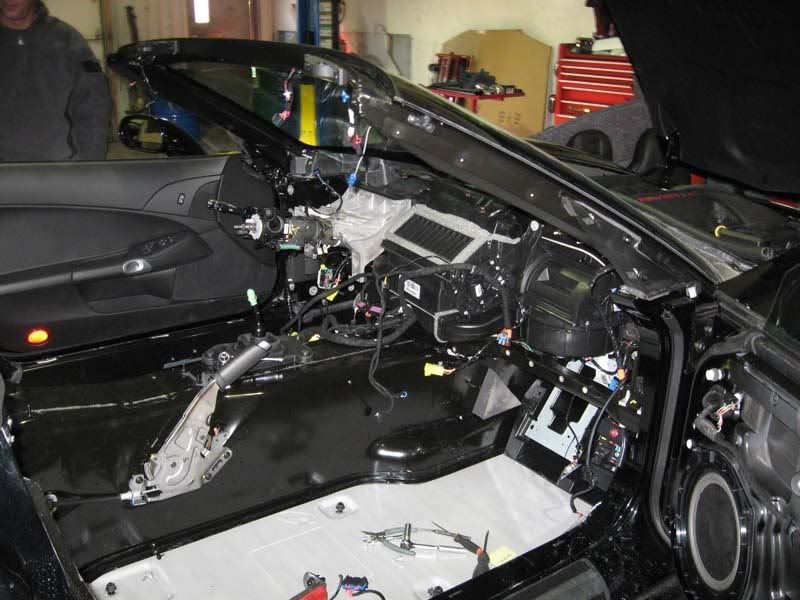
Taking out the heater blower was a pain....But Steph got it out in one piece.
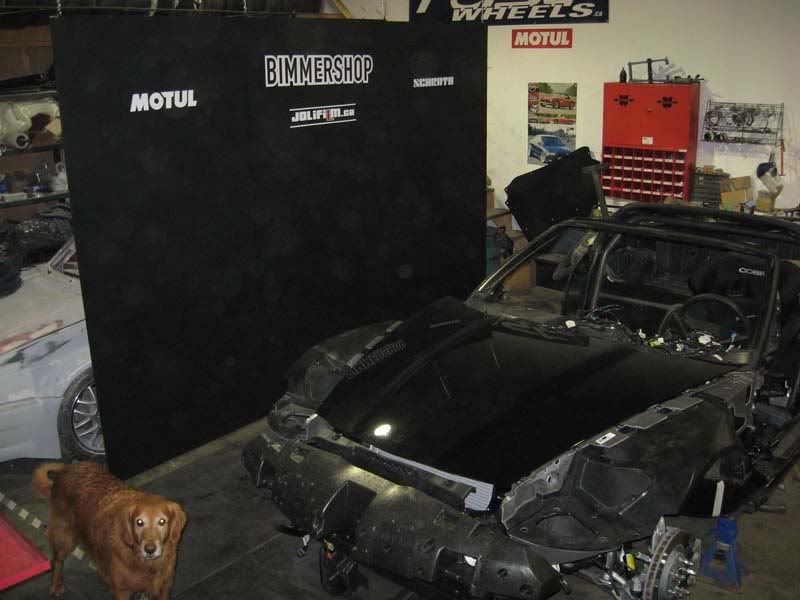
We finished taking it appart, now the cage work begins.
The plates that got to the floor.
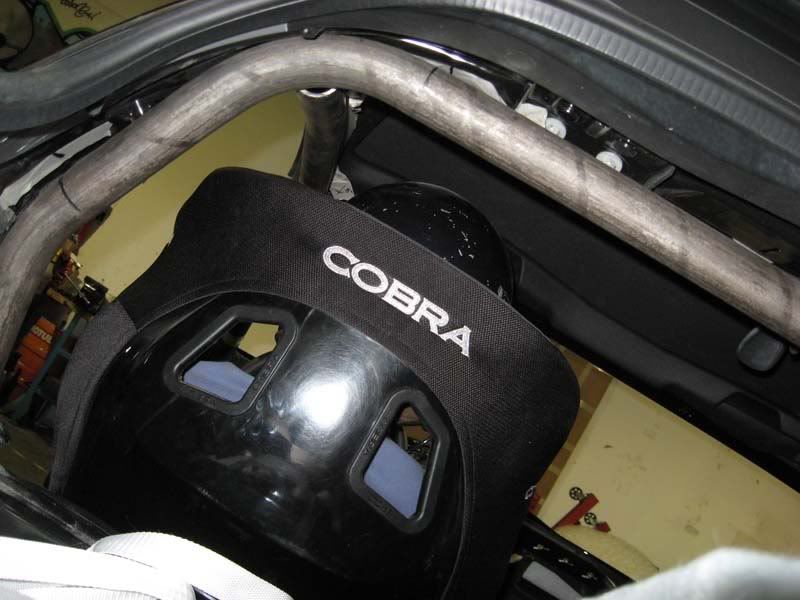
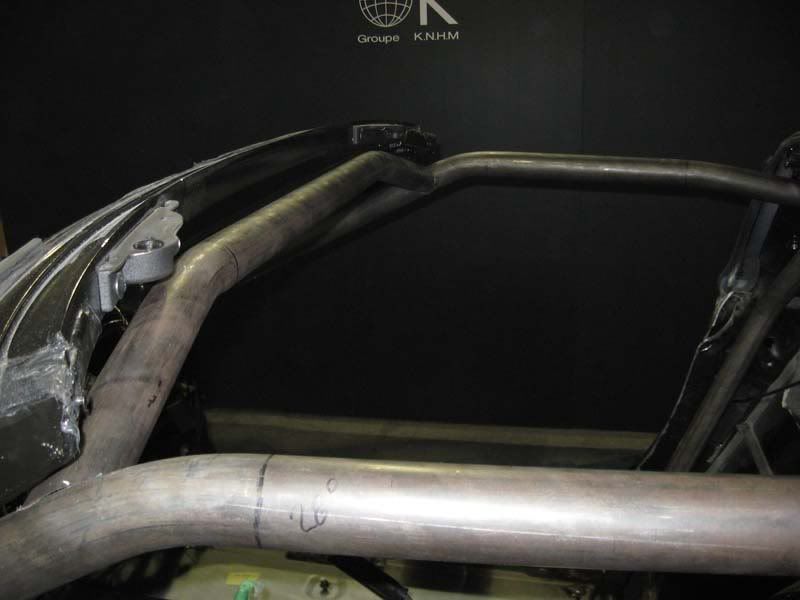
The main Hoop.
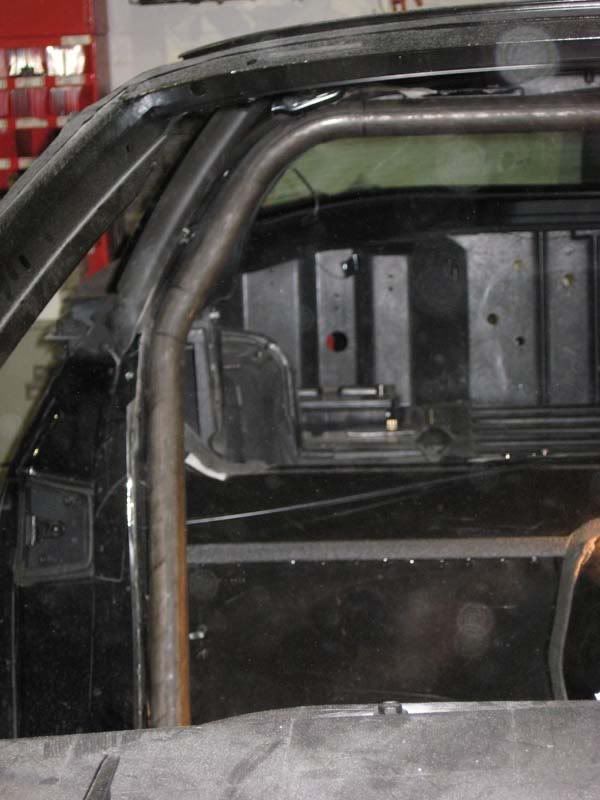
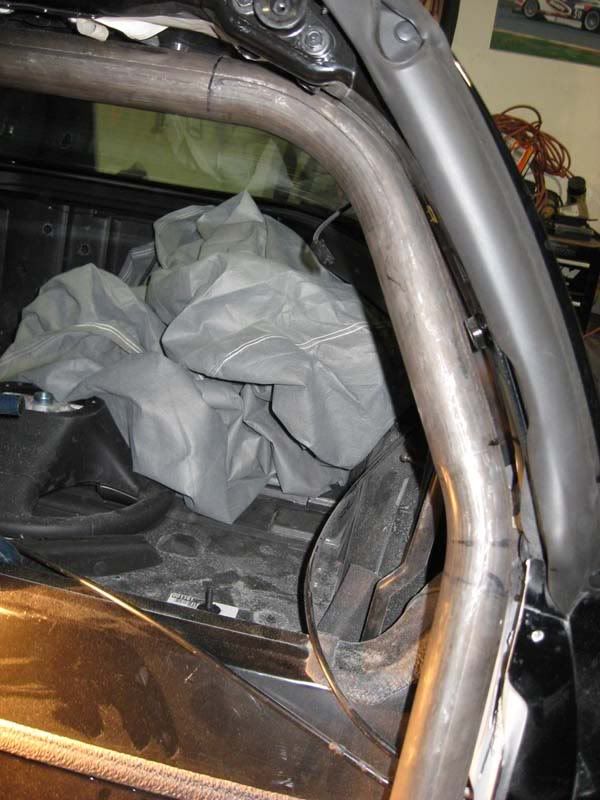
The front tubing bent, this pieces is complex as we need as much head clearance in the tiny Corvette cockpit.
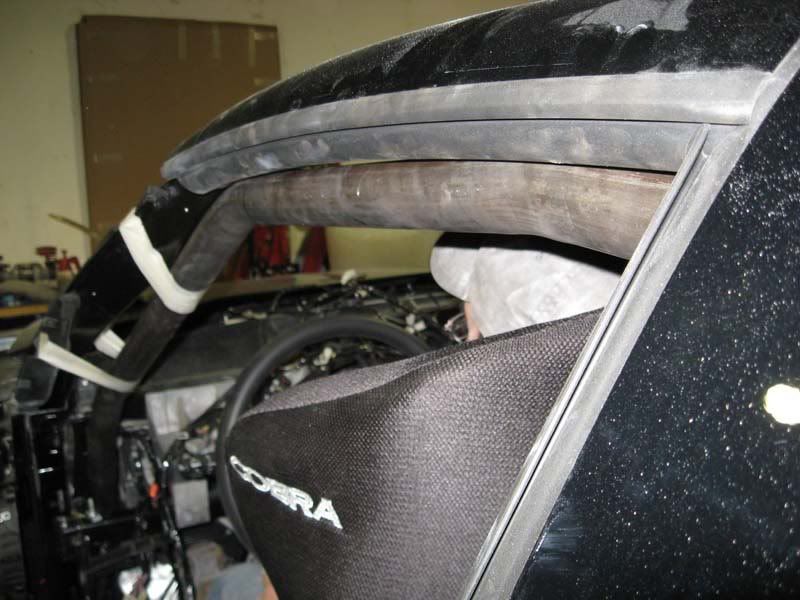
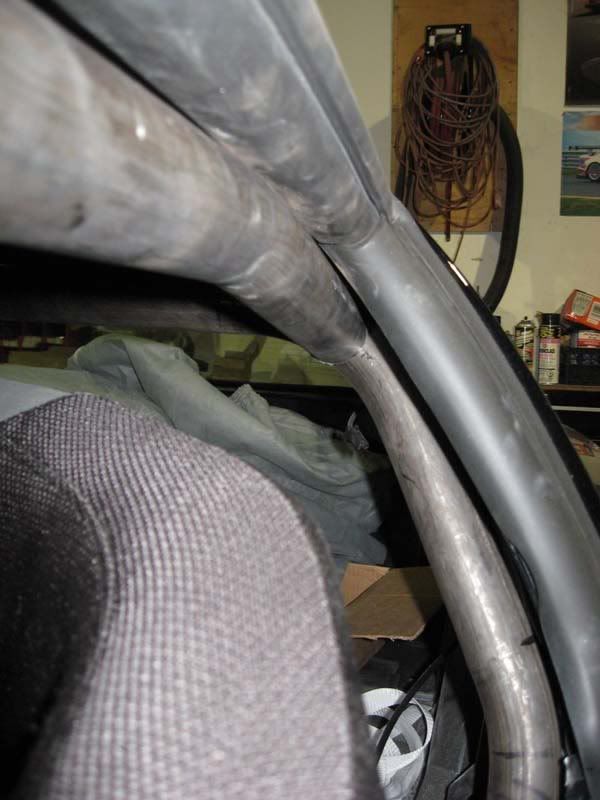
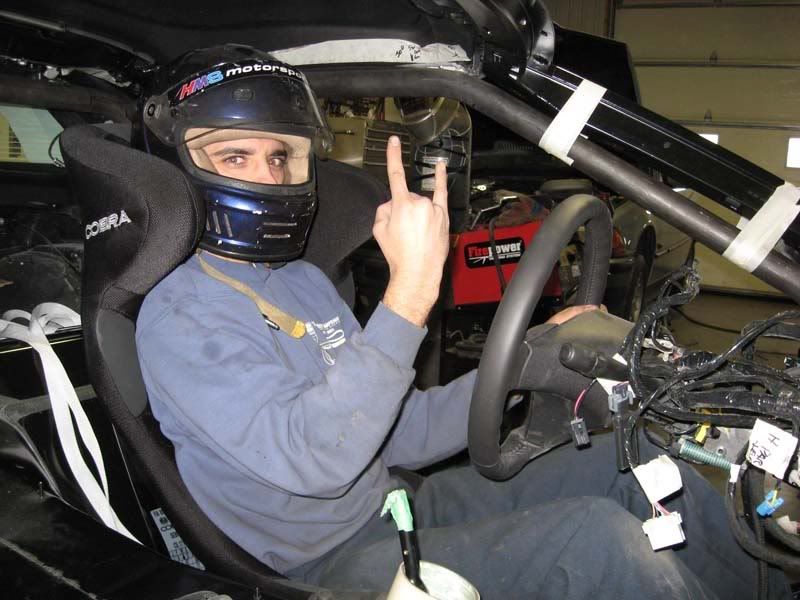
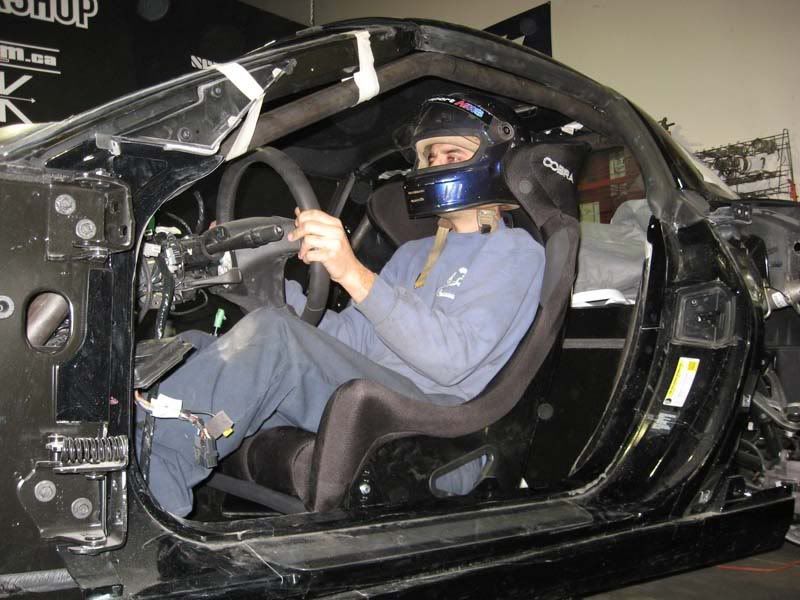
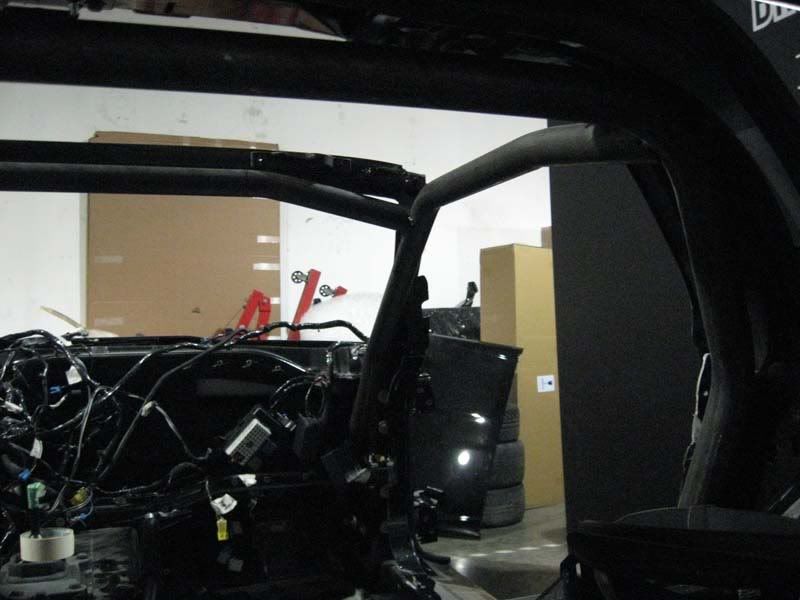
Checking the clearance with the race seat and test helmet.
Now this week I need to complete the cage and install all the hardware in the car to be able to paint it once everything is fitted.
Cheers to all.... I need a beer!
I was approched by a fellow racer to build and co-drive a road race Corvette for endurance and accepted the challenge. So we got a brand new 2008 C6 and started to build it as a racecar for the 2008 season starting with the 6 hour race at Sebring on january 16th. We officially started the build on november 19th, so we have little less than 8 weeks to complete the car. I am documenting the build as much as I can with pictures and filming the process in HD for future use.
As alway we are looking for sponsors for this build and the different races we will be doing..(A shameless plug)
Here a list of the mods we are doing to the car.
1- Full roll cage
2- All safety features inside (Race seat, Schroth belts, Fire supression, Kill switch, Left and Right side nets)
3- Aux. gauges
4- G2X datapak
5- World Challenge Body kit:
6- Wing!!!
7- Splitter
8- Big Brake Kit (Stoptech)
9- Coil over suspension (PFADT)
10- Competition Sway bars (PFADT)
11- Headers and exhaust (we have to keep the car muffled under 91dB) (LG)
12- ECU upgrade
13- Bigger radiator with oil cooler (LG)
14- Rear end cooler (Not available yet for the '08)
15- Light weight flywheel / Race clutch
16- Short shifter
17- Brand new custom wheel in 18 inch (CCW)
18- Cold Air intake
19- CTEK battery charger to keep that battery top shape in the off season
20- Air Jacks
21- JoliFilm protective shield on the chassis to protect the bodywork from stone chips and tire rubber
22- And a lot af work!!!
Now the car is in the shop, we are getting ready to take it appart.
Simon at work!
Taking out the heater blower was a pain....But Steph got it out in one piece.
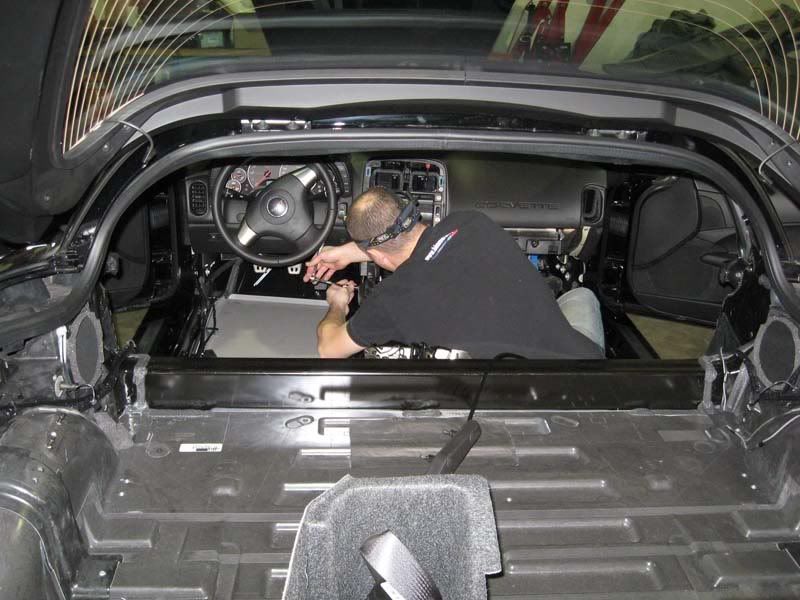
We finished taking it appart, now the cage work begins.
The plates that got to the floor.
The main Hoop.
The front tubing bent, this pieces is complex as we need as much head clearance in the tiny Corvette cockpit.
Checking the clearance with the race seat and test helmet.
Now this week I need to complete the cage and install all the hardware in the car to be able to paint it once everything is fitted.
Cheers to all.... I need a beer!
Last edited by bimmershop; 10-21-2011 at 06:43 PM.


 12-03-2007, 11:21 AM
#5
Le Mans Master


Wow! Thanks for the great story and love the pictorial!
Keep 'em coming.
Keep 'em coming.
 12-03-2007, 12:08 PM
#8
Le Mans Master
Thanks for posting.
I am anxious to watch the progress.
Let me know if you need another driver!

I am anxious to watch the progress.
Let me know if you need another driver!
12-03-2007, 02:02 PM
#10
Drifting


Thanks for posting. It looks like it will be an interesting build. Please post as many pics as you can. What type of tubing bender are you using? Those bends look like they have a nice tight radius.
Ken
Ken


 12-03-2007, 07:01 PM
#14
"AlohaC5" Senior Member


Great write up and pics! Looking forward to tracking your progress on the forum and seeing (or hearing about) the results of your efforts on the track next season.
12-04-2007, 08:50 AM
#15
Intermediate
Thread Starter
Member Since: Aug 2007
Location: Montreal Quebec
Posts: 44
Likes: 0
Received 0 Likes
on
0 Posts
Thanks for the replys, here is another update from yesterday.
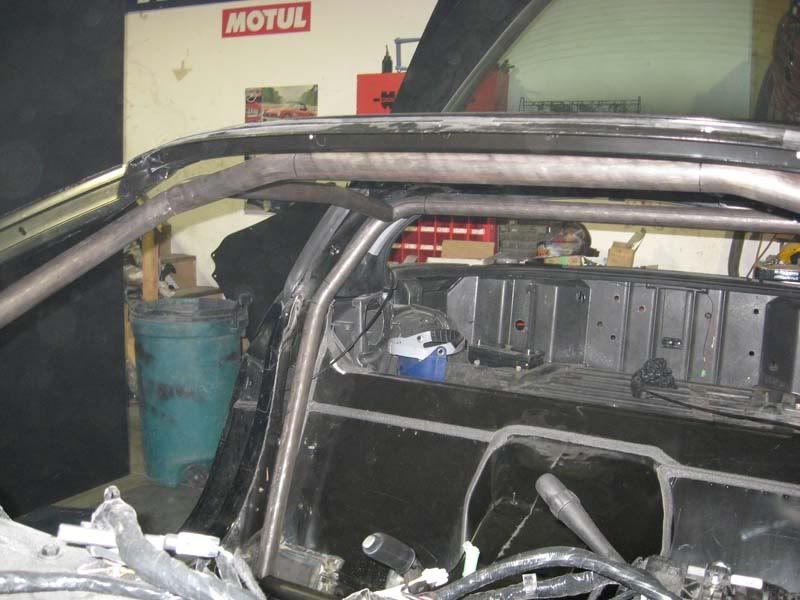
We completed the main structure of the cage.
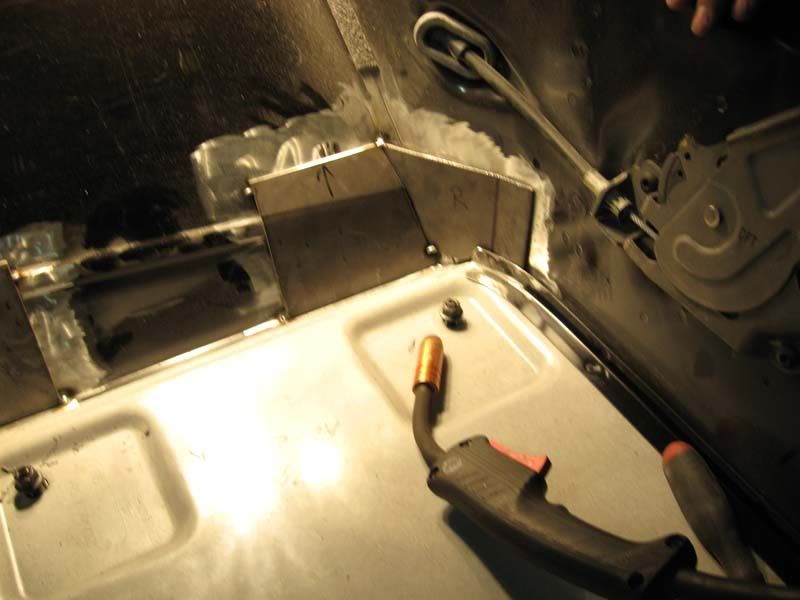
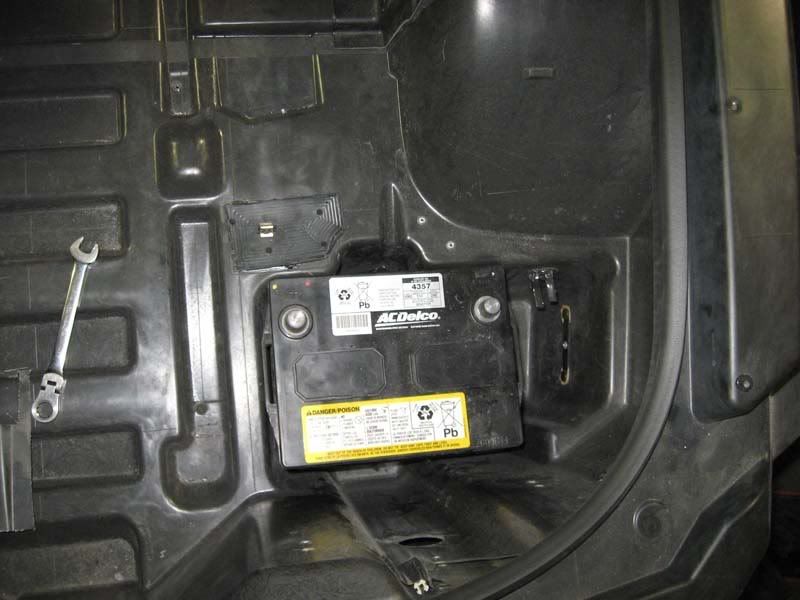
Relocated the battery in the rear into the OEM trunk compartment using the OEM bracket.
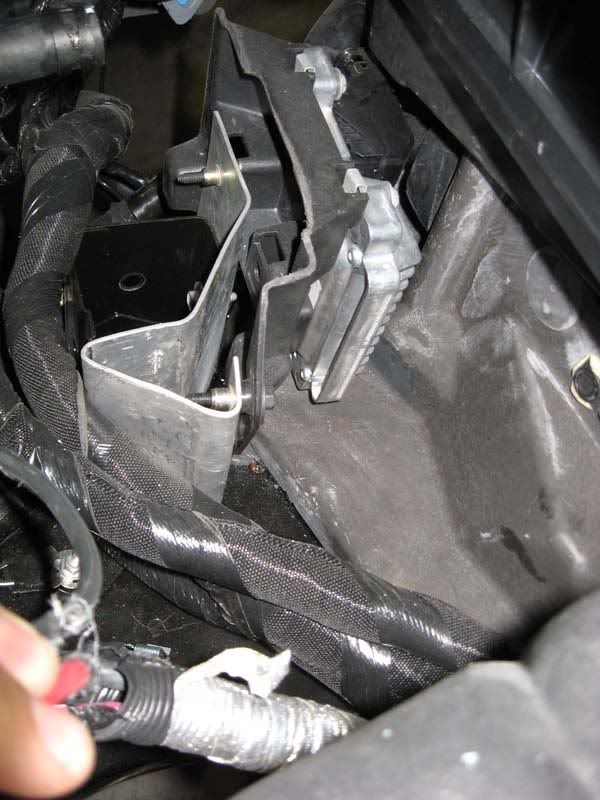
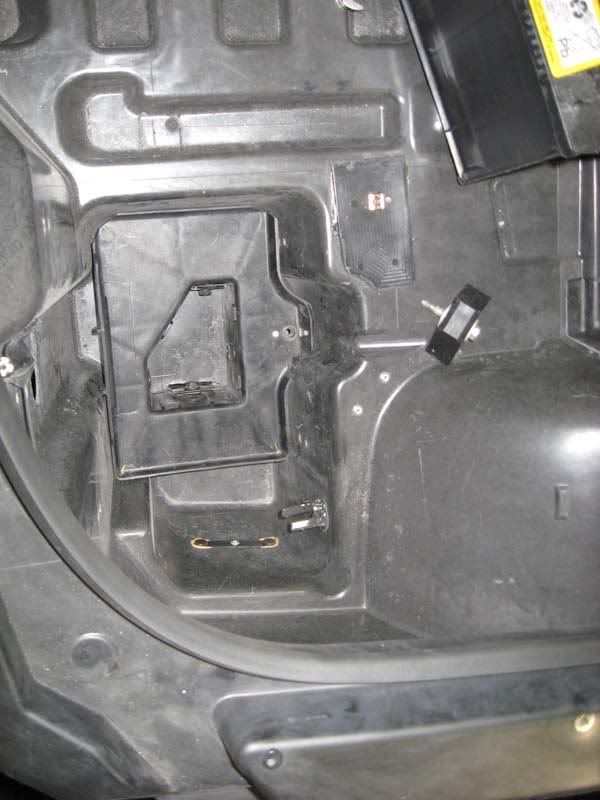
We also relocated the ECU from the lower frame on the passenger site to the old battery location.
ECU relocation with a custom bracket
Battery relocation
Cage structure
Today we are working on the cage
We completed the main structure of the cage.
Relocated the battery in the rear into the OEM trunk compartment using the OEM bracket.
We also relocated the ECU from the lower frame on the passenger site to the old battery location.
ECU relocation with a custom bracket
Battery relocation
Cage structure
Today we are working on the cage
Last edited by bimmershop; 12-04-2007 at 08:55 AM.
12-04-2007, 08:53 AM
#16
Intermediate
Thread Starter
Member Since: Aug 2007
Location: Montreal Quebec
Posts: 44
Likes: 0
Received 0 Likes
on
0 Posts
The bender is from JD Square inc. It's a popular model, the bens are very nice. Got to use a little lube on the tubing so it glides well on the dies.
Last edited by bimmershop; 12-04-2007 at 10:29 AM.
12-04-2007, 08:55 AM
#17
Intermediate
Thread Starter
Member Since: Aug 2007
Location: Montreal Quebec
Posts: 44
Likes: 0
Received 0 Likes
on
0 Posts
In january it's going to be raced with the PBOC Florida in their 6 hours night enduro and the other sprint races.
The rest of the season we will be driving at different enduro races on the east coast (NASA, SCCA etc..) and in the Quebec Touring Extreme series and possibly the Canadian Castrol Championship....
The rest of the season we will be driving at different enduro races on the east coast (NASA, SCCA etc..) and in the Quebec Touring Extreme series and possibly the Canadian Castrol Championship....
Last edited by bimmershop; 12-04-2007 at 10:29 AM.
12-04-2007, 09:52 AM
#18
Former Vendor

Seb,
Having gone through this already, my car is almost complete, I have a piece of advise. It may be too late for this since you have already bent so much tubing. If you are going world challenge body, I am assuming ACP like I used, you should use the world challenge 1 piece roof as well. This will allow you to raise your main hoop up higher. Also you can run the bars from the main hoop to the A pillar up higher, they appear to be lower than the top of your helmet. With the ACP roof you can tuck them up higher and they are not visible from outside the car. That will put them higher than the top of your helmet and also leaves more egress room should you need to get out fast, which is a concern with the seat you chose especially. I was going to use that seat as well, I like the head restraint, but changed my mind when I saw how it blocked the opening. Good luck with the build. Let me know if I can be of any assistance.
Robert
12-04-2007, 12:32 PM
#19
Le Mans Master
Seb,
Having gone through this already, my car is almost complete, I have a piece of advise. It may be too late for this since you have already bent so much tubing. If you are going world challenge body, I am assuming ACP like I used, you should use the world challenge 1 piece roof as well. This will allow you to raise your main hoop up higher. Also you can run the bars from the main hoop to the A pillar up higher, they appear to be lower than the top of your helmet. With the ACP roof you can tuck them up higher and they are not visible from outside the car. That will put them higher than the top of your helmet and also leaves more egress room should you need to get out fast, which is a concern with the seat you chose especially. I was going to use that seat as well, I like the head restraint, but changed my mind when I saw how it blocked the opening. Good luck with the build. Let me know if I can be of any assistance.
Robert
Having gone through this already, my car is almost complete, I have a piece of advise. It may be too late for this since you have already bent so much tubing. If you are going world challenge body, I am assuming ACP like I used, you should use the world challenge 1 piece roof as well. This will allow you to raise your main hoop up higher. Also you can run the bars from the main hoop to the A pillar up higher, they appear to be lower than the top of your helmet. With the ACP roof you can tuck them up higher and they are not visible from outside the car. That will put them higher than the top of your helmet and also leaves more egress room should you need to get out fast, which is a concern with the seat you chose especially. I was going to use that seat as well, I like the head restraint, but changed my mind when I saw how it blocked the opening. Good luck with the build. Let me know if I can be of any assistance.
Robert
My wife is Canadian. Does that mean I get to drive your car when it is done?
12-05-2007, 09:34 AM
#20
Intermediate
Thread Starter
Member Since: Aug 2007
Location: Montreal Quebec
Posts: 44
Likes: 0
Received 0 Likes
on
0 Posts
Seb,
Having gone through this already, my car is almost complete, I have a piece of advise. It may be too late for this since you have already bent so much tubing. If you are going world challenge body, I am assuming ACP like I used, you should use the world challenge 1 piece roof as well. This will allow you to raise your main hoop up higher. Also you can run the bars from the main hoop to the A pillar up higher, they appear to be lower than the top of your helmet. With the ACP roof you can tuck them up higher and they are not visible from outside the car. That will put them higher than the top of your helmet and also leaves more egress room should you need to get out fast, which is a concern with the seat you chose especially. I was going to use that seat as well, I like the head restraint, but changed my mind when I saw how it blocked the opening. Good luck with the build. Let me know if I can be of any assistance.
Robert
Having gone through this already, my car is almost complete, I have a piece of advise. It may be too late for this since you have already bent so much tubing. If you are going world challenge body, I am assuming ACP like I used, you should use the world challenge 1 piece roof as well. This will allow you to raise your main hoop up higher. Also you can run the bars from the main hoop to the A pillar up higher, they appear to be lower than the top of your helmet. With the ACP roof you can tuck them up higher and they are not visible from outside the car. That will put them higher than the top of your helmet and also leaves more egress room should you need to get out fast, which is a concern with the seat you chose especially. I was going to use that seat as well, I like the head restraint, but changed my mind when I saw how it blocked the opening. Good luck with the build. Let me know if I can be of any assistance.
Robert
Wish I knew this before, but now it's all bent. I still can't wait to drive this car.
Thanks for your help and advices.
Seb