
Progress pics on cage fabrication and install
 03-18-2009, 08:32 PM
#1
Team Owner


Thread Starter

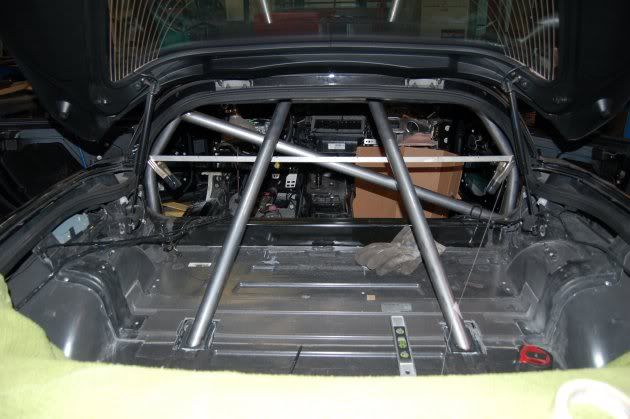
After a couple days of planning and discussing, Joe has begun fabricating the cage and test fitting certain parts.
Edit 4-1-09
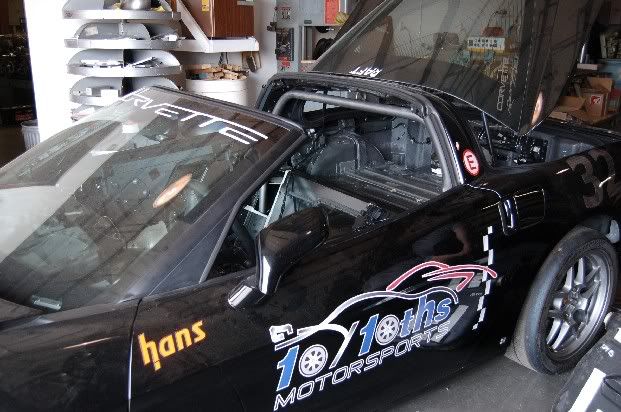
Almost done
Just need to put in the right side door bars and some vertical supports on each side under the lower door bar and then complete all the welding and painting.
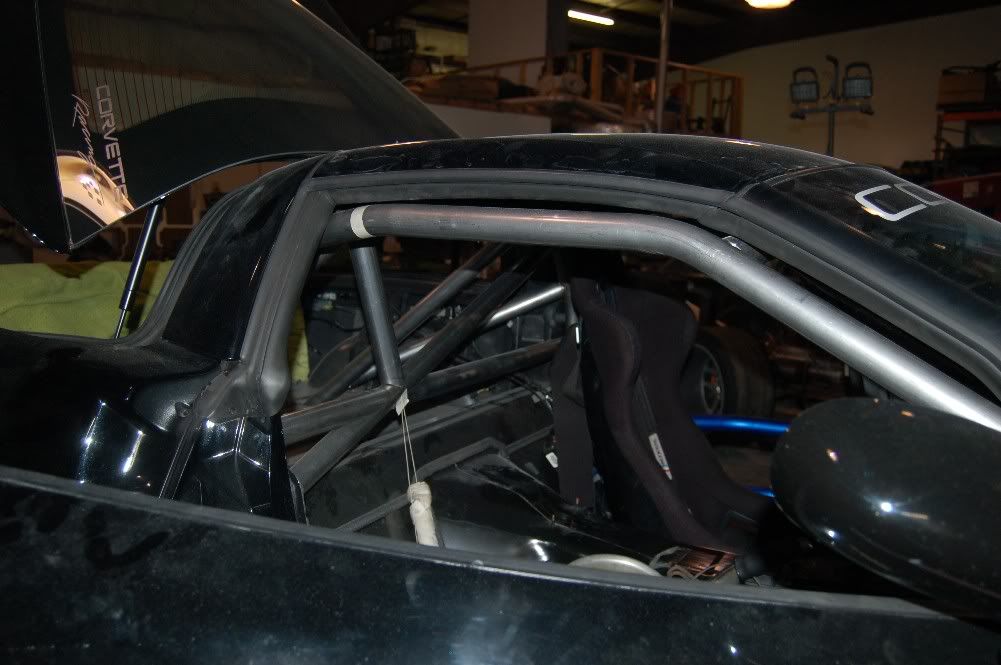
Changed the supports to the rear to be parralell with the car, better mirror view this way.
Door bars, will get the vertical supports down to the frame from the lower bar
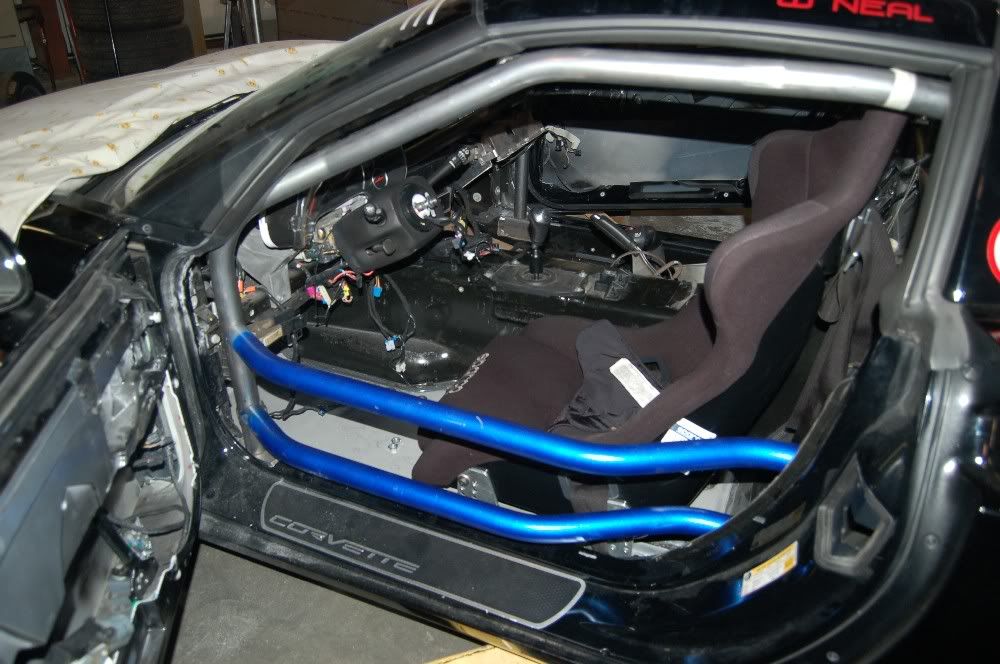
One small extra support going into the dash bar
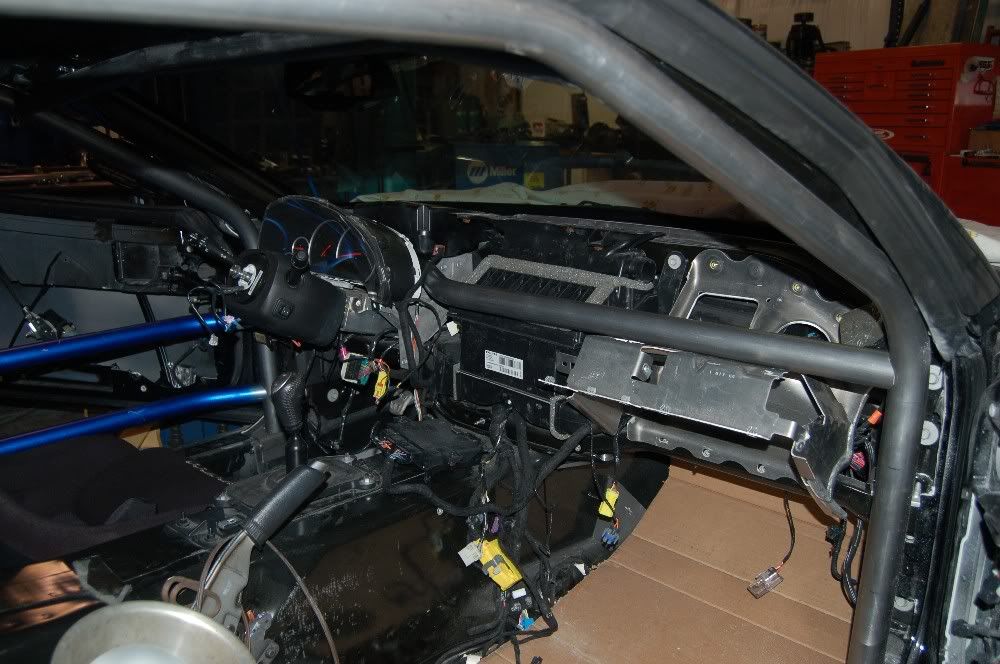
Another view
edit **************
3-24-09 Progress pics

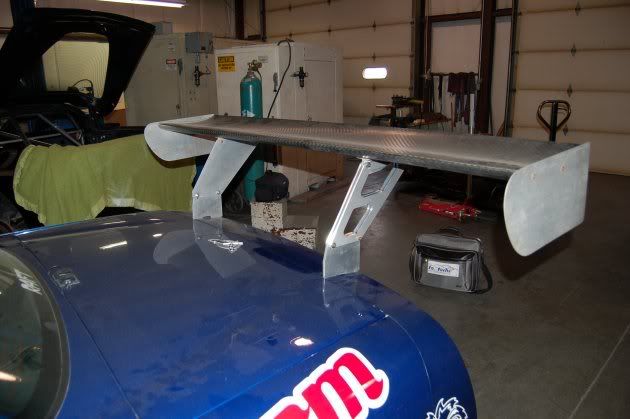
Joe also fabricated a new wing support for James's car. Will look nice with the matching set
The main hoop will be a perfect fit and very well constructed.
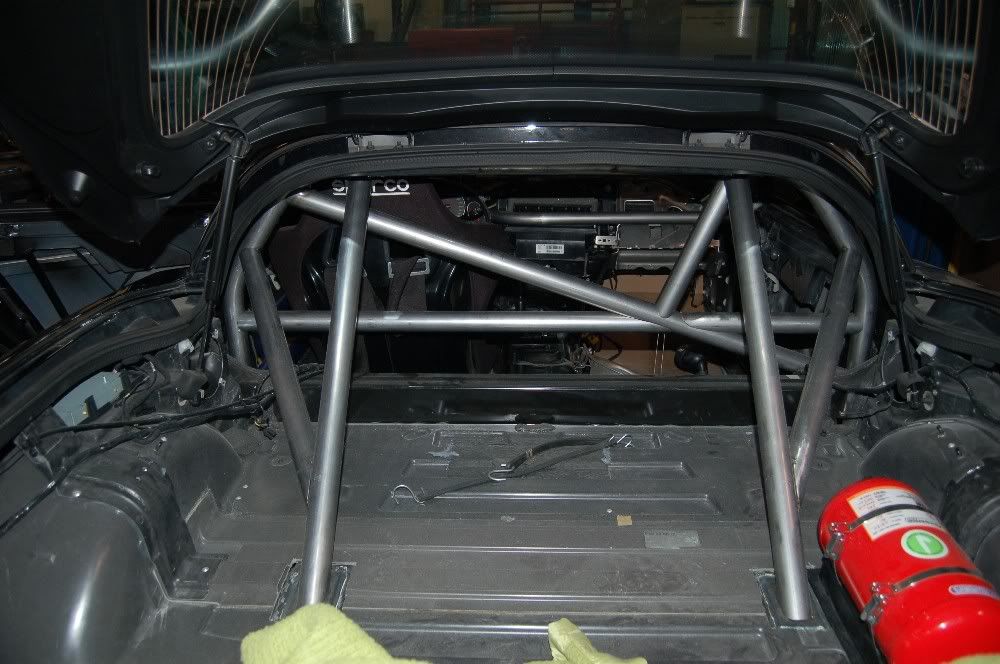
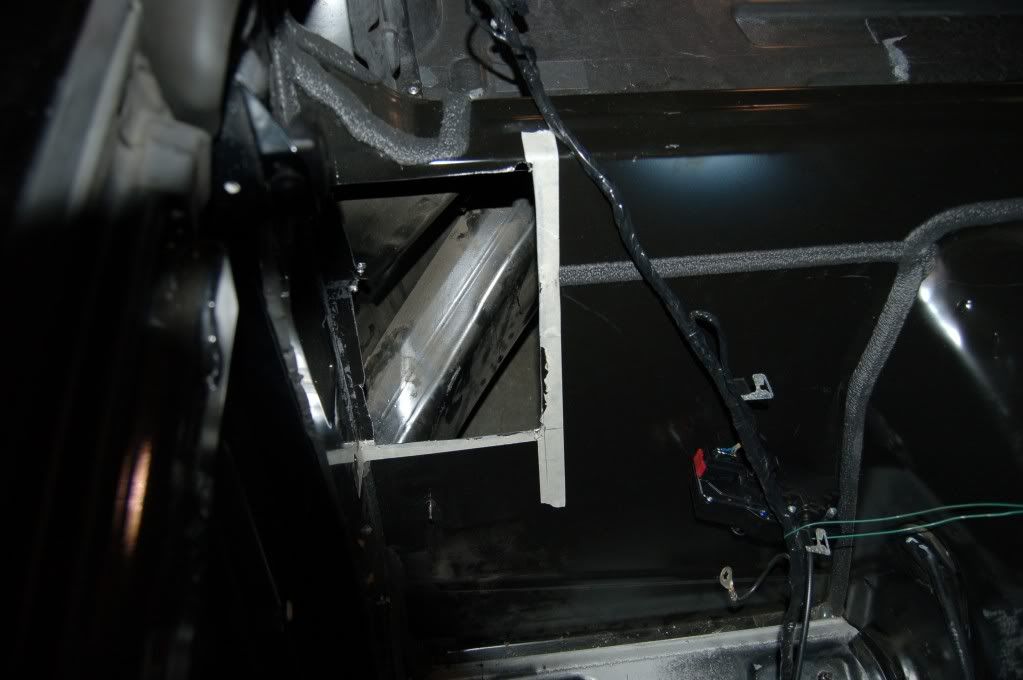
The frame has been exposed at mid car and in the rear for the initial tie ins
I should have the car back in about 10 days so Danny can put the basic needs back together.
I am looking forward to it and will post more pics as it progresses.

Edit 4-1-09
Almost done
Just need to put in the right side door bars and some vertical supports on each side under the lower door bar and then complete all the welding and painting.
Changed the supports to the rear to be parralell with the car, better mirror view this way.
Door bars, will get the vertical supports down to the frame from the lower bar
One small extra support going into the dash bar
Another view
edit **************
3-24-09 Progress pics
Joe also fabricated a new wing support for James's car. Will look nice with the matching set
The main hoop will be a perfect fit and very well constructed.
The frame has been exposed at mid car and in the rear for the initial tie ins
I should have the car back in about 10 days so Danny can put the basic needs back together.
I am looking forward to it and will post more pics as it progresses.
Last edited by WNeal; 04-01-2009 at 04:41 PM.


 03-18-2009, 11:10 PM
#4
Safety Car

I assumed it wasn't welded to the frame rails yet. :-) It's fairly common to cut out the floor to drop the hoop in so you can bring it all back up to get the main hoop as close to the roof as possible. I assume that's what's happening here since the main hoop should be as tight as possible. Doing it this way also means you can weld the tops easier...
03-19-2009, 12:02 AM
#6
1) how can you access the top of the cage rollover hoop to weld the head tubes?
2) how where do you place the diagonals on the main hoop? It seems that every time I would go through tech there would be no way for tech to inspect this area for correctness. You would have pieces of diagonal, main hoop, and door bars going through the bulkhead to close up. What a pain. I think it is the best way if you can execute it.
03-19-2009, 01:08 AM
#7
Team Owner
Thread Starter
I assumed it wasn't welded to the frame rails yet. :-) It's fairly common to cut out the floor to drop the hoop in so you can bring it all back up to get the main hoop as close to the roof as possible. I assume that's what's happening here since the main hoop should be as tight as possible. Doing it this way also means you can weld the tops easier...
The plates still need to be added and it will be up tight againt the top when finally installed.
Going a bit slower than I thought but we want to make sure everything is considered first
03-19-2009, 10:39 PM
#8
Advanced


Member Since: Apr 2008
Location: Birmingham Alabama
Posts: 61
Likes: 0
Received 0 Likes
on
0 Posts
My main hoop and door bars pass through the bulkhead and I'm happy with how it turned out. I looked at a lot of different styles, and I chose this route because I thought it would be a bit safer than those that are on top of the bulkhead. The only real downside is the diag. hits a few inches higher than what I would consider to be optimum b/c the right tank won't fit with a diag. through the bulkhead. Don't ask me how I know. 
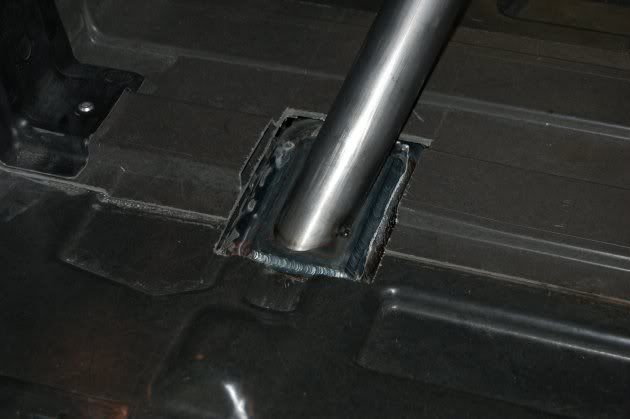
About the top and bottom of the hoop. Everything is welded all the way around, we were actually able to get about 1.5" weld of the main hoop to the factory main hoop, and then the main hoop sits on a landing plate so it won't poke through the frame rail if I ever have to use it.
Its pretty frigin rigid, thats for sure.
Check your rulebook though and make sure your within spec. The last thing you want to do is have to cut attachment points to fit the rules.
Keep the pics coming.
03-20-2009, 09:35 AM
#9
Team Owner
Thread Starter
My main hoop and door bars pass through the bulkhead and I'm happy with how it turned out. I looked at a lot of different styles, and I chose this route because I thought it would be a bit safer than those that are on top of the bulkhead. The only real downside is the diag. hits a few inches higher than what I would consider to be optimum b/c the right tank won't fit with a diag. through the bulkhead. Don't ask me how I know.
About the top and bottom of the hoop. Everything is welded all the way around, we were actually able to get about 1.5" weld of the main hoop to the factory main hoop, and then the main hoop sits on a landing plate so it won't poke through the frame rail if I ever have to use it.
Its pretty frigin rigid, thats for sure.
Check your rulebook though and make sure your within spec. The last thing you want to do is have to cut attachment points to fit the rules.
Keep the pics coming.
Will keep pics as we get them.
03-20-2009, 12:38 PM
#10
Pro


One other thing to think about with regards to the diagonal on the main roll hoop is where it crosses the "harness" bar. This may not be important to you, but putting harnesses and/or a seat back brace on the passenger's side can be extra challenging if the diagonal crosses the bar to which the harnesses attach in the "wrong" spot.
03-21-2009, 11:33 AM
#11
One other thing to think about with regards to the diagonal on the main roll hoop is where it crosses the "harness" bar. This may not be important to you, but putting harnesses and/or a seat back brace on the passenger's side can be extra challenging if the diagonal crosses the bar to which the harnesses attach in the "wrong" spot.
03-25-2009, 12:14 AM
#16
Melting Slicks


His mainhoop diagonal brace is exactly as my car is done, and is exactly how Phoenix builds their cages.......So far has passed with the SCCA and NASA.
03-25-2009, 01:09 AM
#17
Team Owner
Thread Starter
 03-25-2009, 03:14 PM
#18
Burning Brakes


Member Since: Feb 2005
Location: Up in front.... At the finish line.....
Posts: 892
Likes: 0
Received 3 Likes
on
3 Posts


Joe
03-25-2009, 04:55 PM
#19
Melting Slicks
 Cage looks just fine to me, I've seen a ton of others out there just like it! Mine passed SCCA/NASA and was built by Phoenix and is the same as the pictures above.
Looking great Bill, Hope to see ya soon!
Aaron