
Pictures of Open Trailers with Tire Racks?
 03-19-2013, 01:40 PM
#21
Drifting


No I don't ... I found that pic on a Porsche club website ... http://forums.rennlist.com/rennforum...ire-racks.html. Post #15. Best bet might be to join that site, and try and contact the original poster...


 03-19-2013, 02:48 PM
#23
Tech Contributor
Member Since: Oct 1999
Location: Charlotte, NC (formerly Endicott, NY)
Posts: 40,082
Received 8,924 Likes
on
5,330 Posts

My rack is high enough the nose of the car could tuck under the tires. The guy that built the rack pop riveted thin fiberglass panels to the front side of the rack so the car was protected from road debris thrown from the tow vehicle's tires. The setup has worked very well for 20 seasons.
Bill
Bill
 03-19-2013, 05:07 PM
#24
Drifting

 03-19-2013, 06:18 PM
#28
Safety Car

I made the wheel stops myself out of some 0.125 Tread Plate cut to
12"X19" and bent on my press brake.
03-19-2013, 06:25 PM
#29
Safety Car
The pulley went up right after I lost control of a wheel while going up a step ladder. The wheel/tire dropped, bounced clear over the convertable, just missed the pickup and Z06, and ended up on the other side of the shop luckily without doing any damage.
 You're the only one who knows I did this so don't tell anybody else.
  03-19-2013, 07:09 PM
#30


Last C5
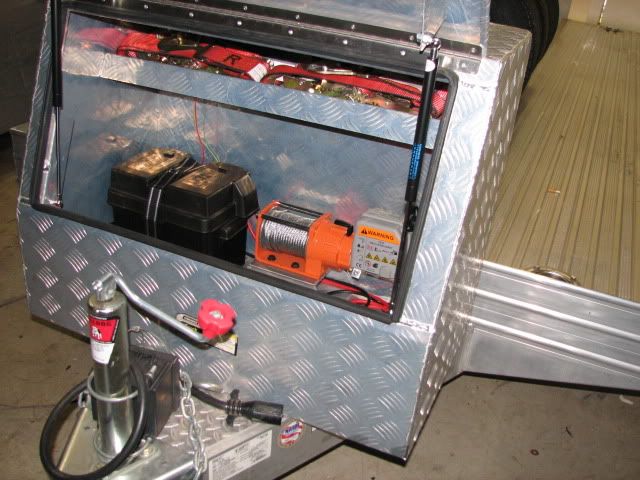
Great setup, especially the toolbox (slash) winch holder with external fairlaid. This is exactly how I'd like to install/store a winch on my trailer. If I may ask can I get or can you post a couple of up close of your toolbox. Maybe one of the fairlaid and hook and a inside picture of the winch and cable.
Thanks.
03-19-2013, 07:56 PM
#31
Safety Car
Last C5
Great setup, especially the toolbox (slash) winch holder with external fairlaid. This is exactly how I'd like to install/store a winch on my trailer. If I may ask can I get or can you post a couple of up close of your toolbox. Maybe one of the fairlaid and hook and a inside picture of the winch and cable.
Thanks.
Here is the fairlaid
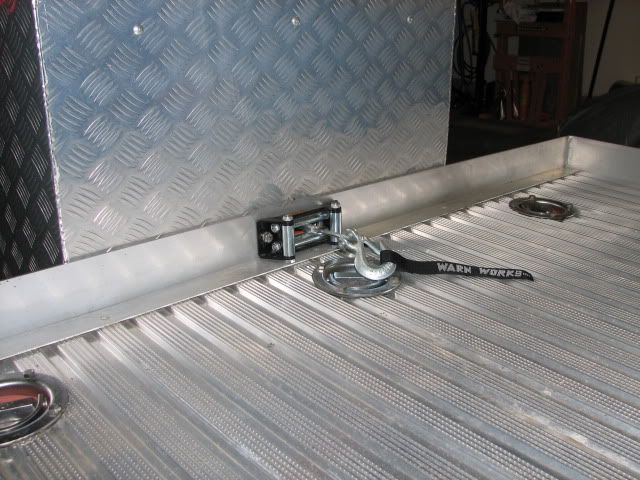
And here is the inside mount. The winch is setting on a piece of 3"X6" rectangular aluminum tubing cut at 45 deg at both ends. This raises it to correct level to come directly through the front verticle on the Featherlite trailer. (Other trailers will probably require different platforms).
 03-20-2013, 06:31 PM
#33
Drifting
I don't have pics but a buddy of mine was talking to a Truck Outfitters shop in DE and what they have done is weld a hitch receiver onto the front of the trailer and mount the winch on a draw bar. You attach the bar to the receiver when you want to winch something. Also wire a harness using the truck's battery instead of having to mount and maintain a battery on the trailer. You can remove the winch easily and store inside when not using the trailer. Could also just mount it to your truck for other uses assuming the same size receiver. I may pursue that idea when I get around to it.
Last edited by RDnomorecobra; 03-20-2013 at 09:23 PM.
03-20-2013, 07:27 PM
#34
Drifting

Sure,
Here is the fairlaid
And here is the inside mount. The winch is setting on a piece of 3"X6" rectangular aluminum tubing cut at 45 deg at both ends. This raises it to correct level to come directly through the front verticle on the Featherlite trailer. (Other trailers will probably require different platforms).
03-21-2013, 04:36 PM
#35
Safety Car
Nice set up with the winch that you have there! I just picked up a tongue mount tool box and winch to do the same thing on my featherlite trailer. I was however thinking that I would have to raise the tool box/winch 6"-12" to stop the winch cable dragging on (and possibly cutting into) the end of the trailer when trying to winch the car up the ramps because my trailer sits about level when hooked up to the truck. Are you not having any problems with that or are you jacking up the front of the trailer when you winch your car on to alter the angle?
03-21-2013, 06:07 PM
#36
Drifting
Awesome! Saves me the hassle of trying to figure out how to build a structure to elevate the tool box. Really, really appreciate your posting the info and those pictures 
03-23-2013, 11:24 PM
#37
Burning Brakes

Thread Starter
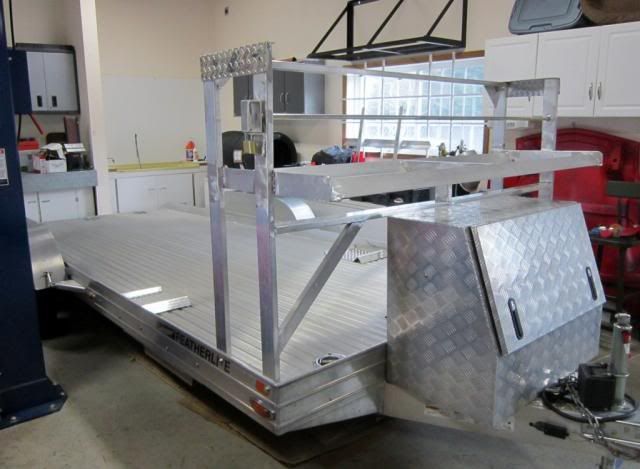
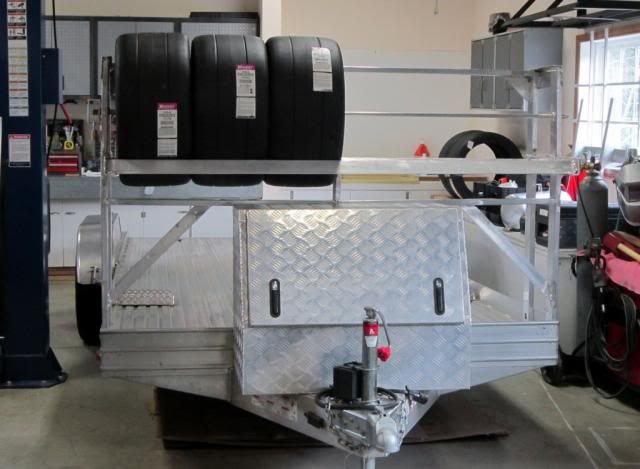
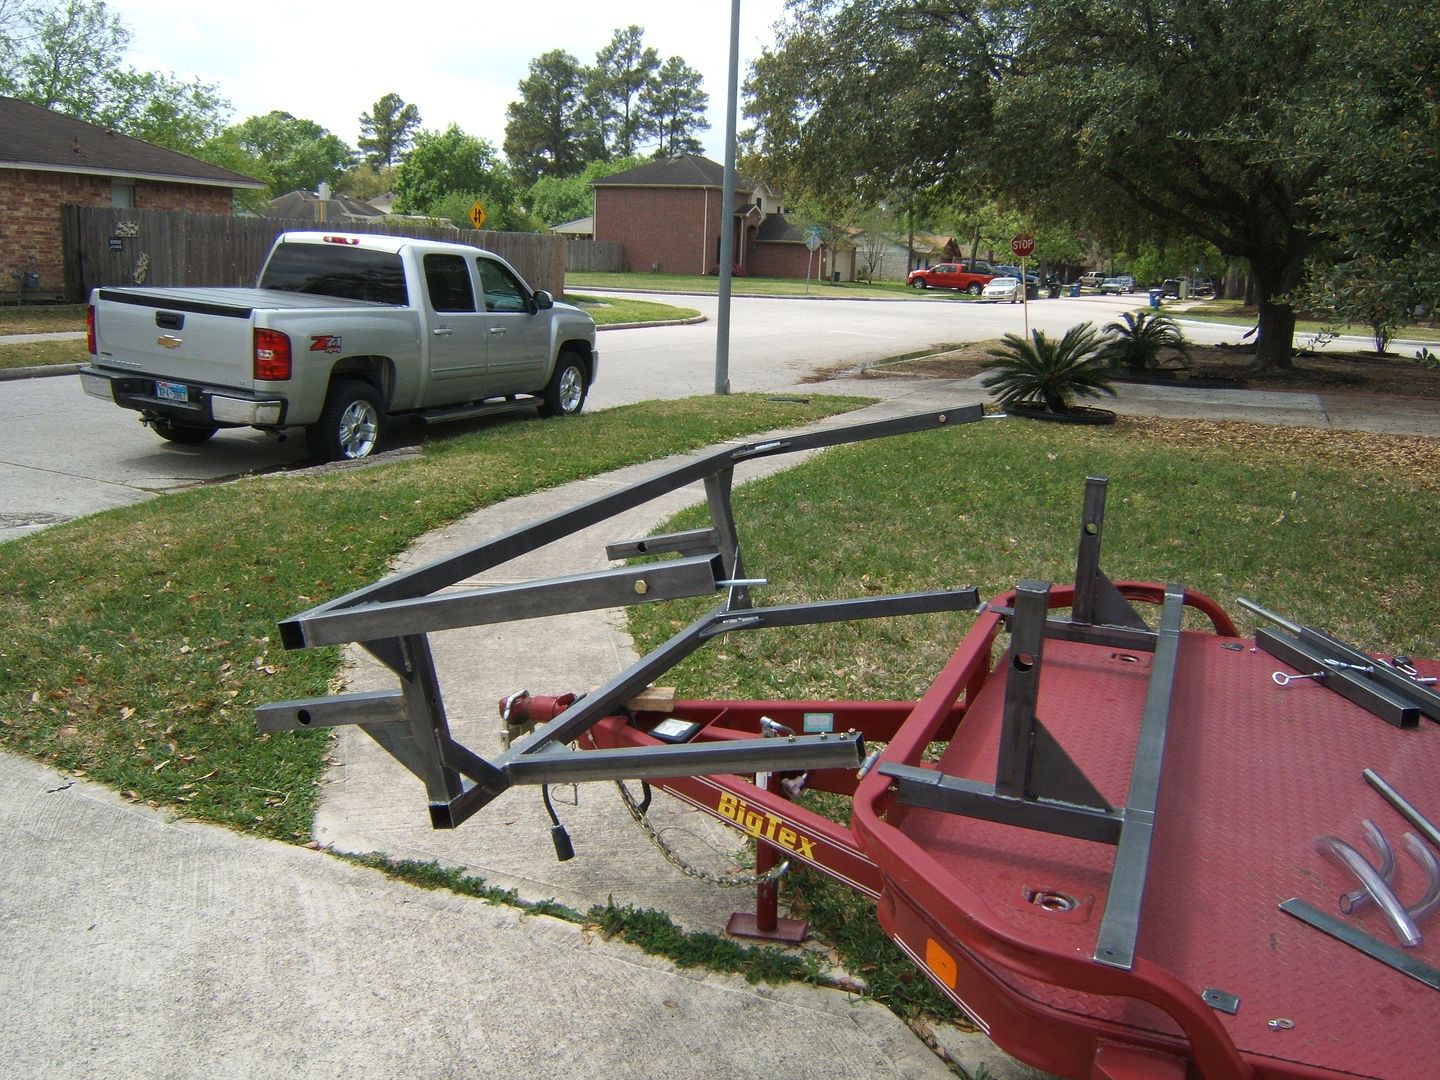
Ok, so as promised here is what I came up with. Keep in mind that these photos are after final mock-up prior to paint, hence some hardware is loose or missing. Also the single fuel container on the bottom rack is just being used as an example.
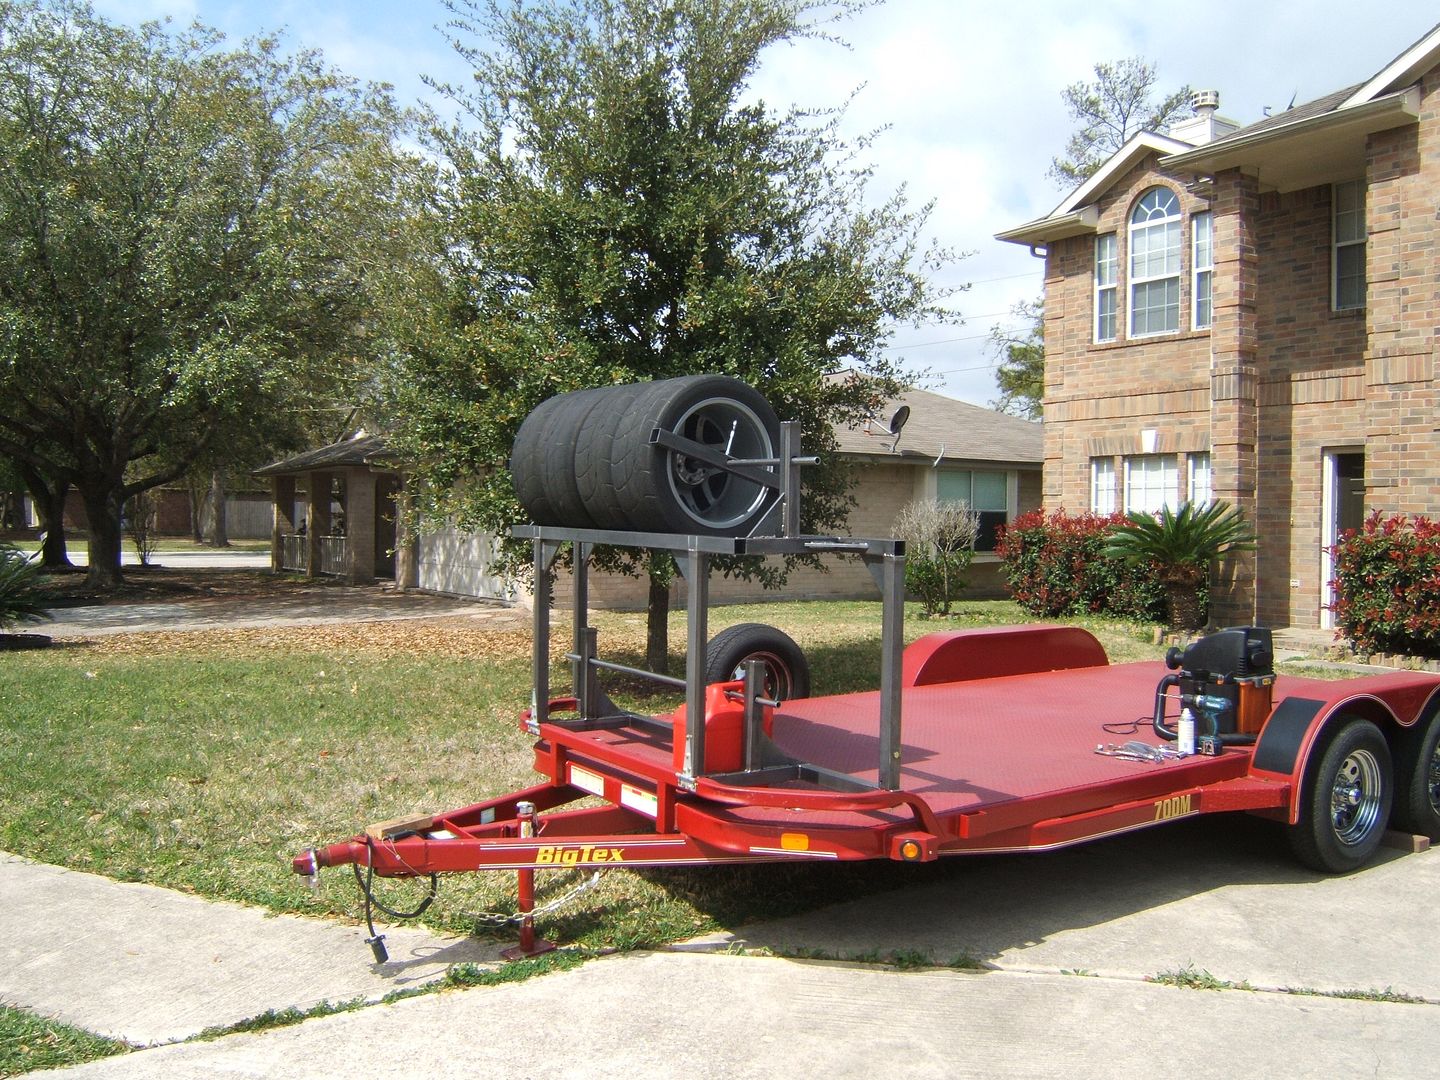
The entire structure is made of 2" 14 gauge (.083") square tubing.
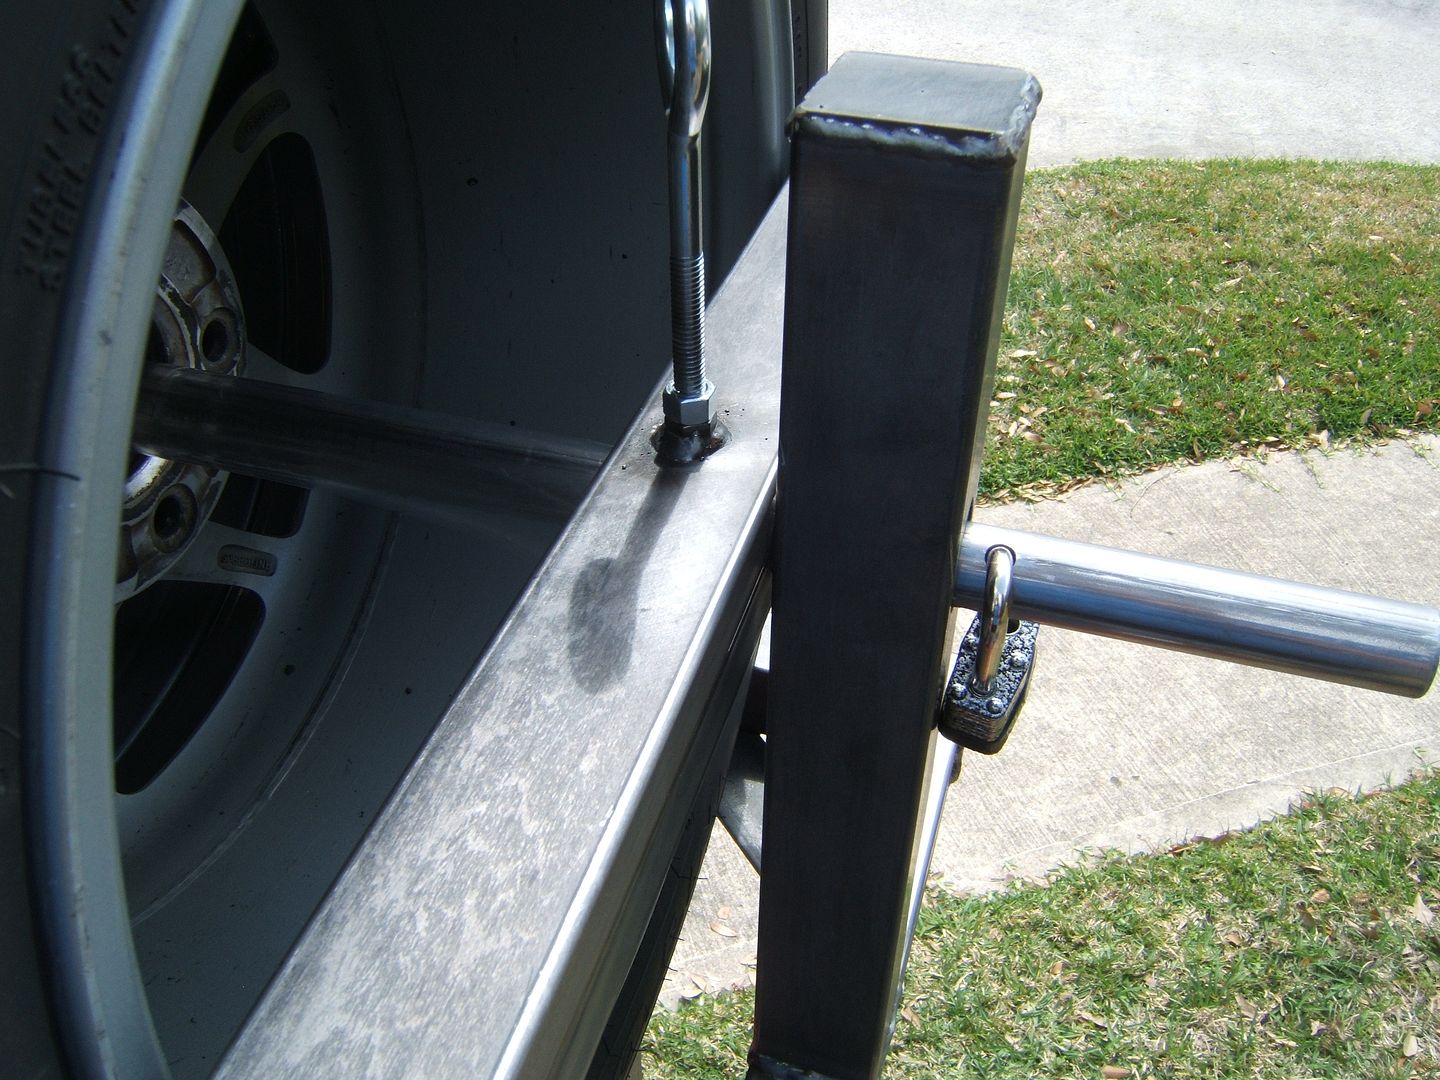
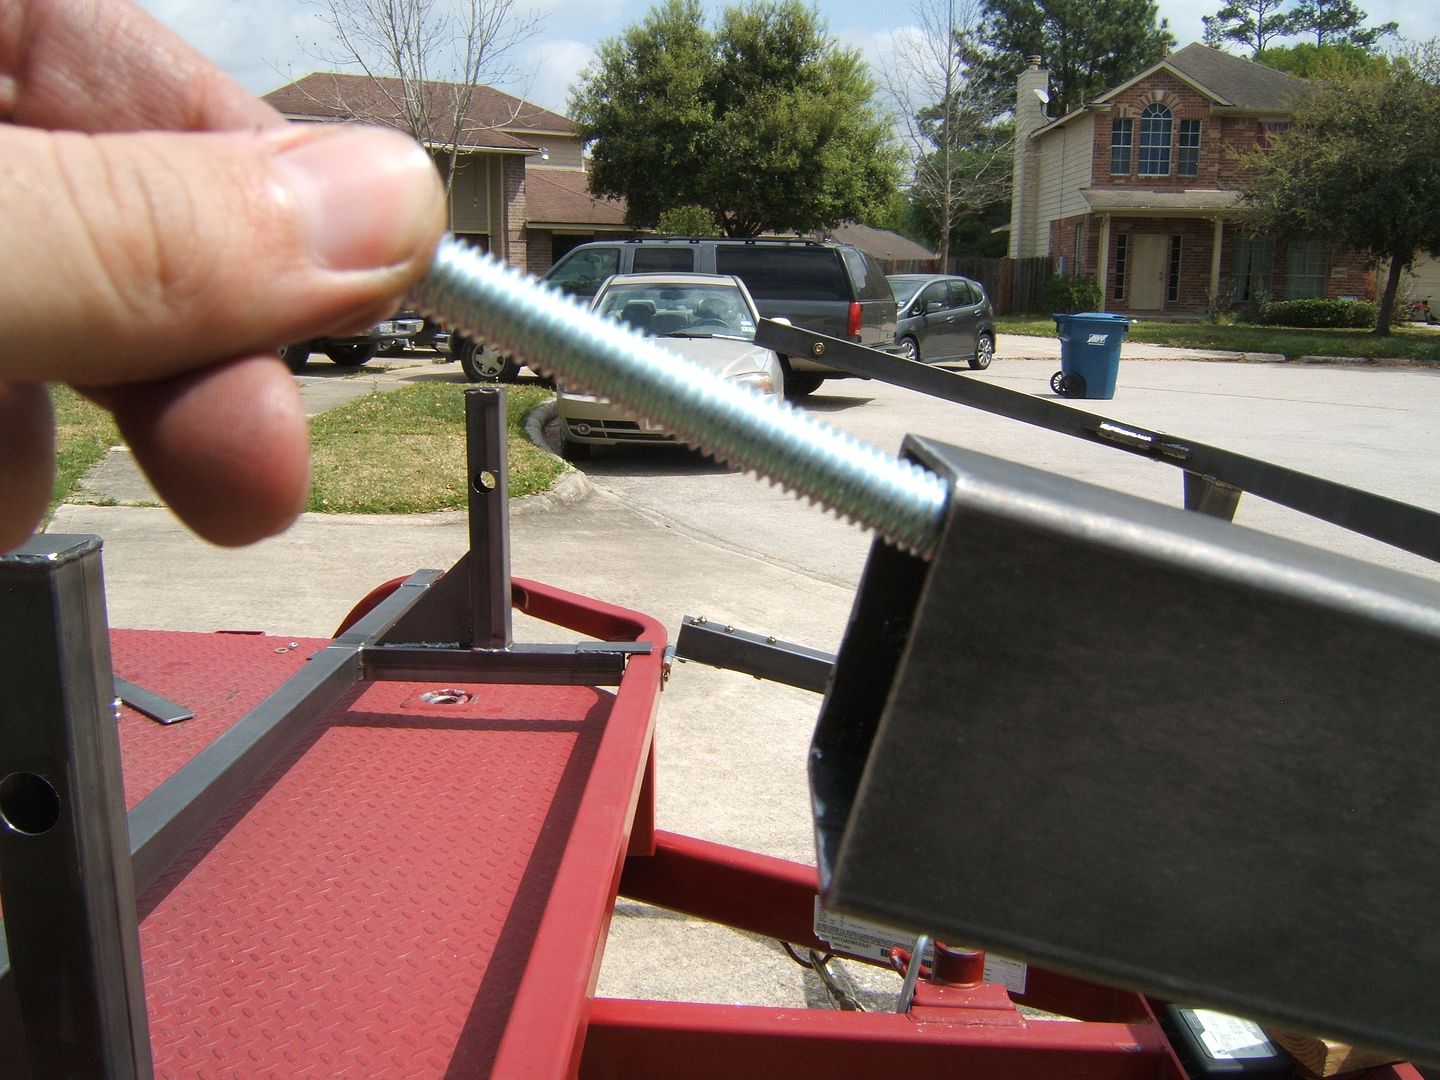
I used a 1" .120" wall thickness steel round tubing to go through the wheels. I also bought some rubber hose to slide over the tubing to protect the inside of the wheels.

Simple locking system like everyone uses.
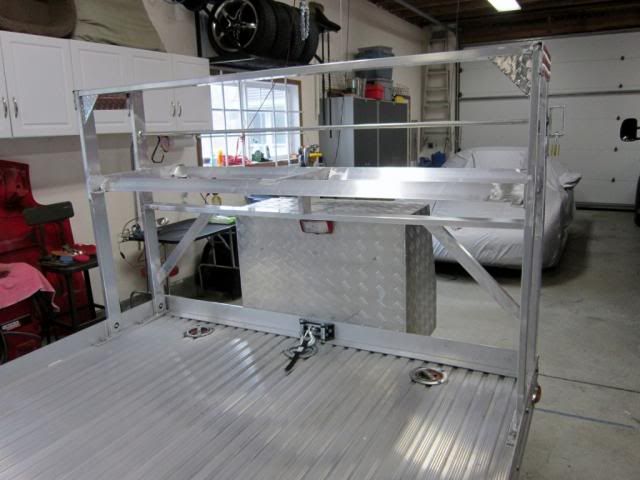
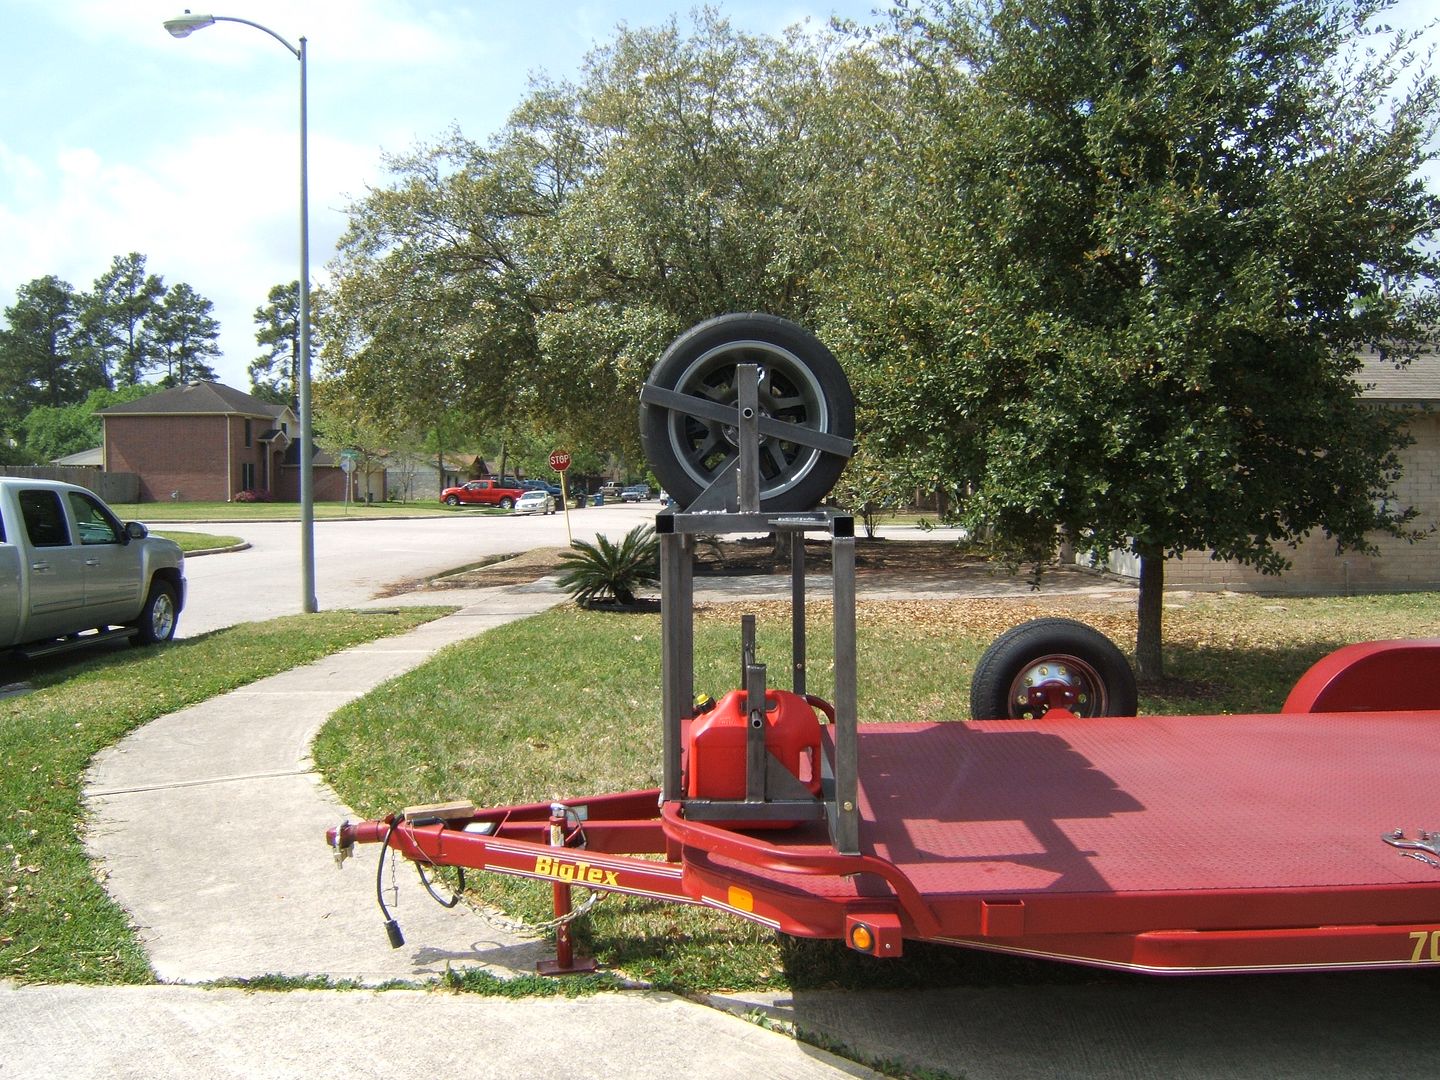
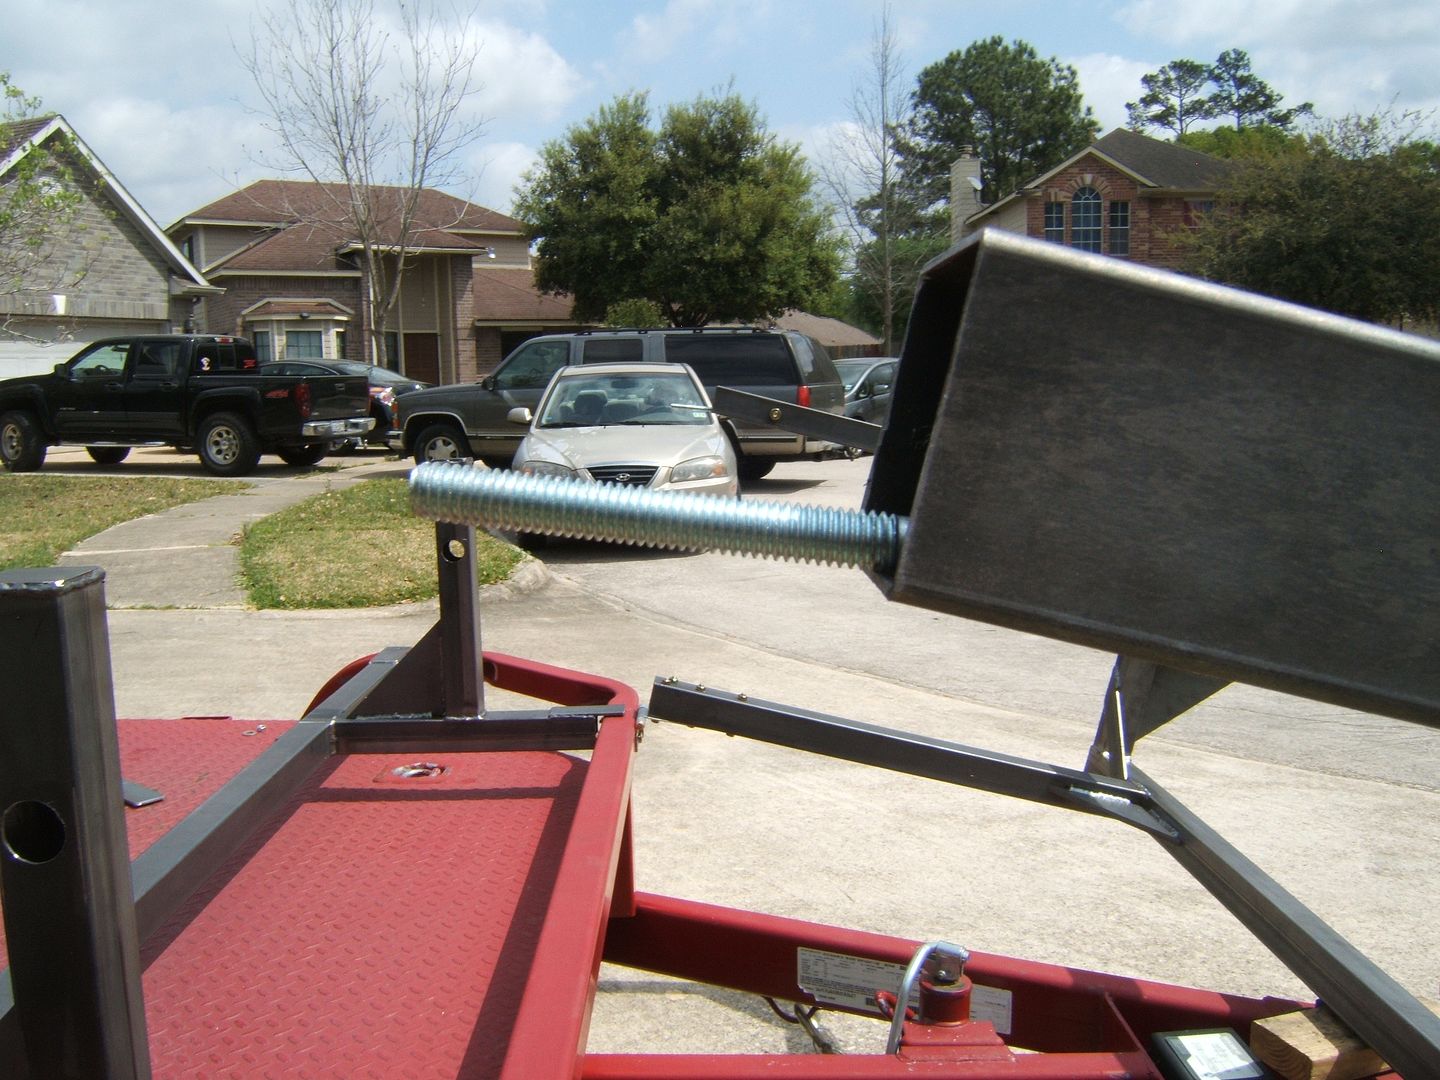
In order to help keep the system flexible, especially when loading longer cars that may need extra space at the front of the trailer while loading, I wanted and easy way to move the rack out of the way, I decided to place it on hinges.
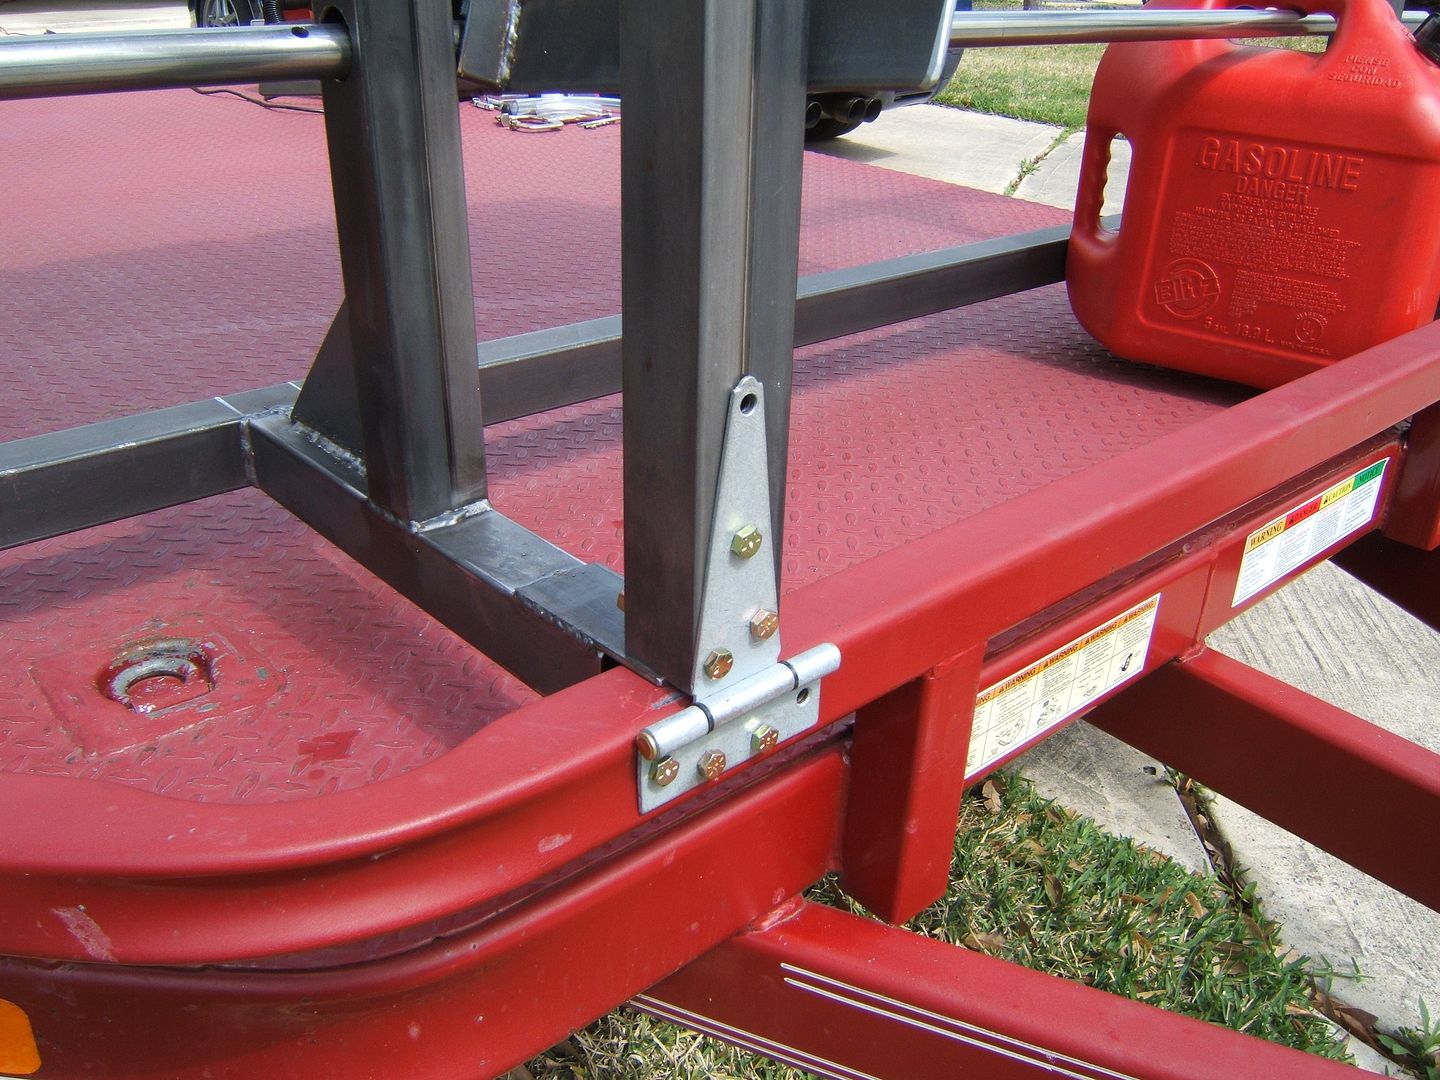
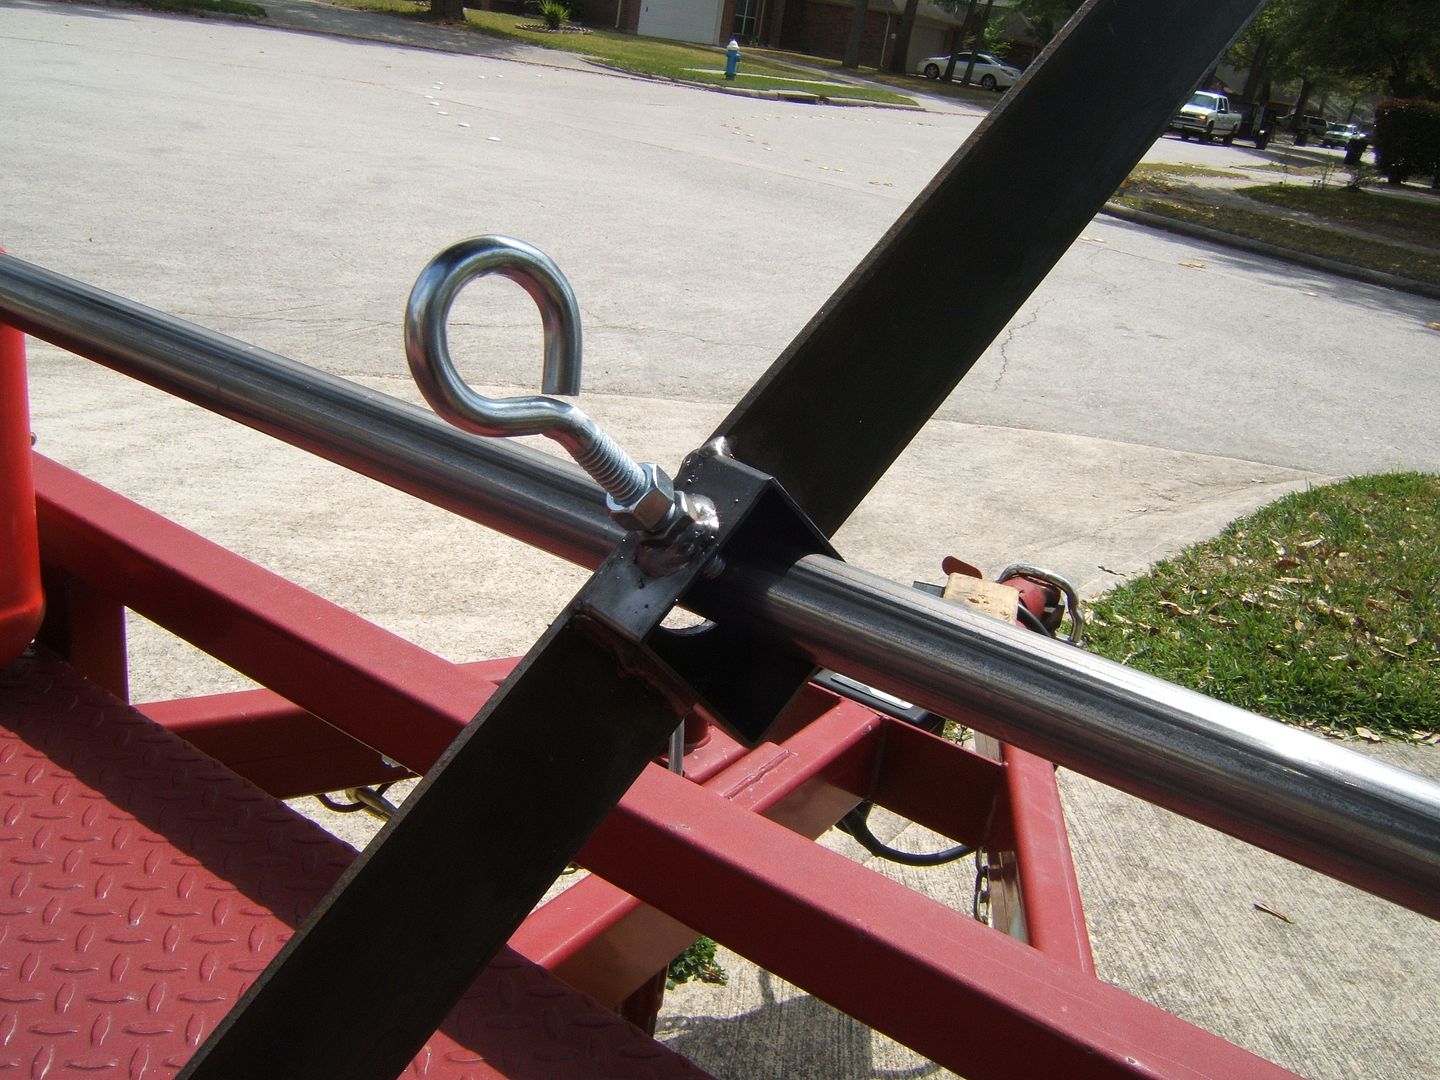
The backside if held down by a simple pivoting eye bolt to aid in hole alignment. There is also and external piece of angle iron for additonal support (not shown).
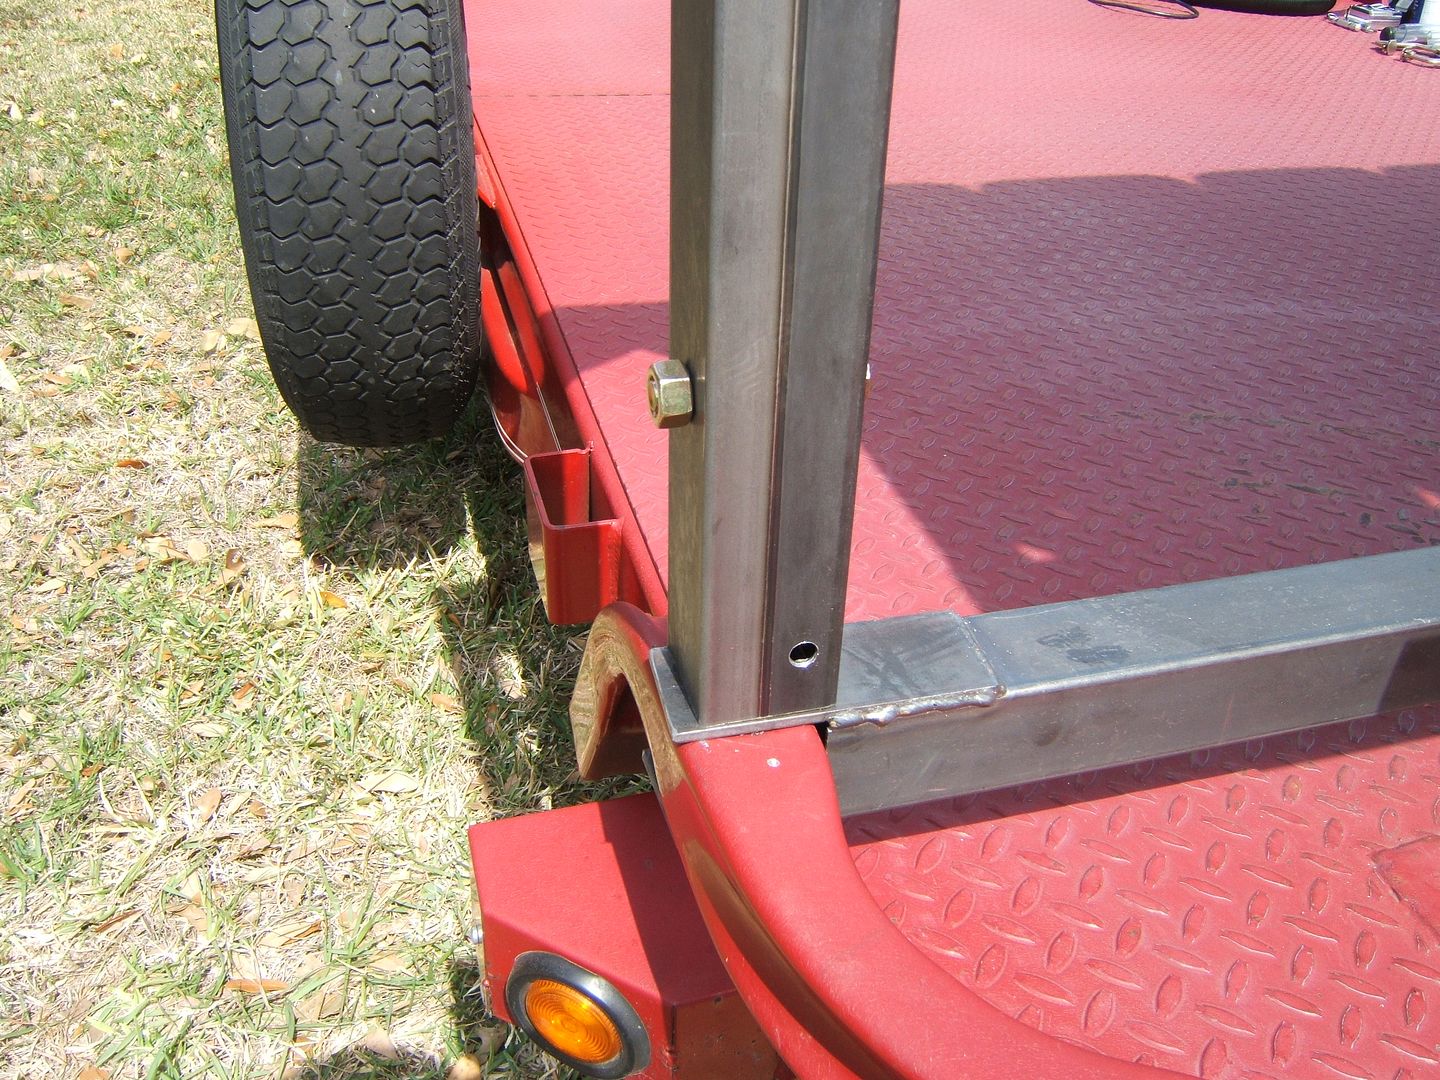
The bottom rack is easily removable when the top rack is hinged out of the way. These allows me to store tires on the top and bottom rack, top or bottom only, or tires on the top and fuel jugs or tool storage on the bottom.
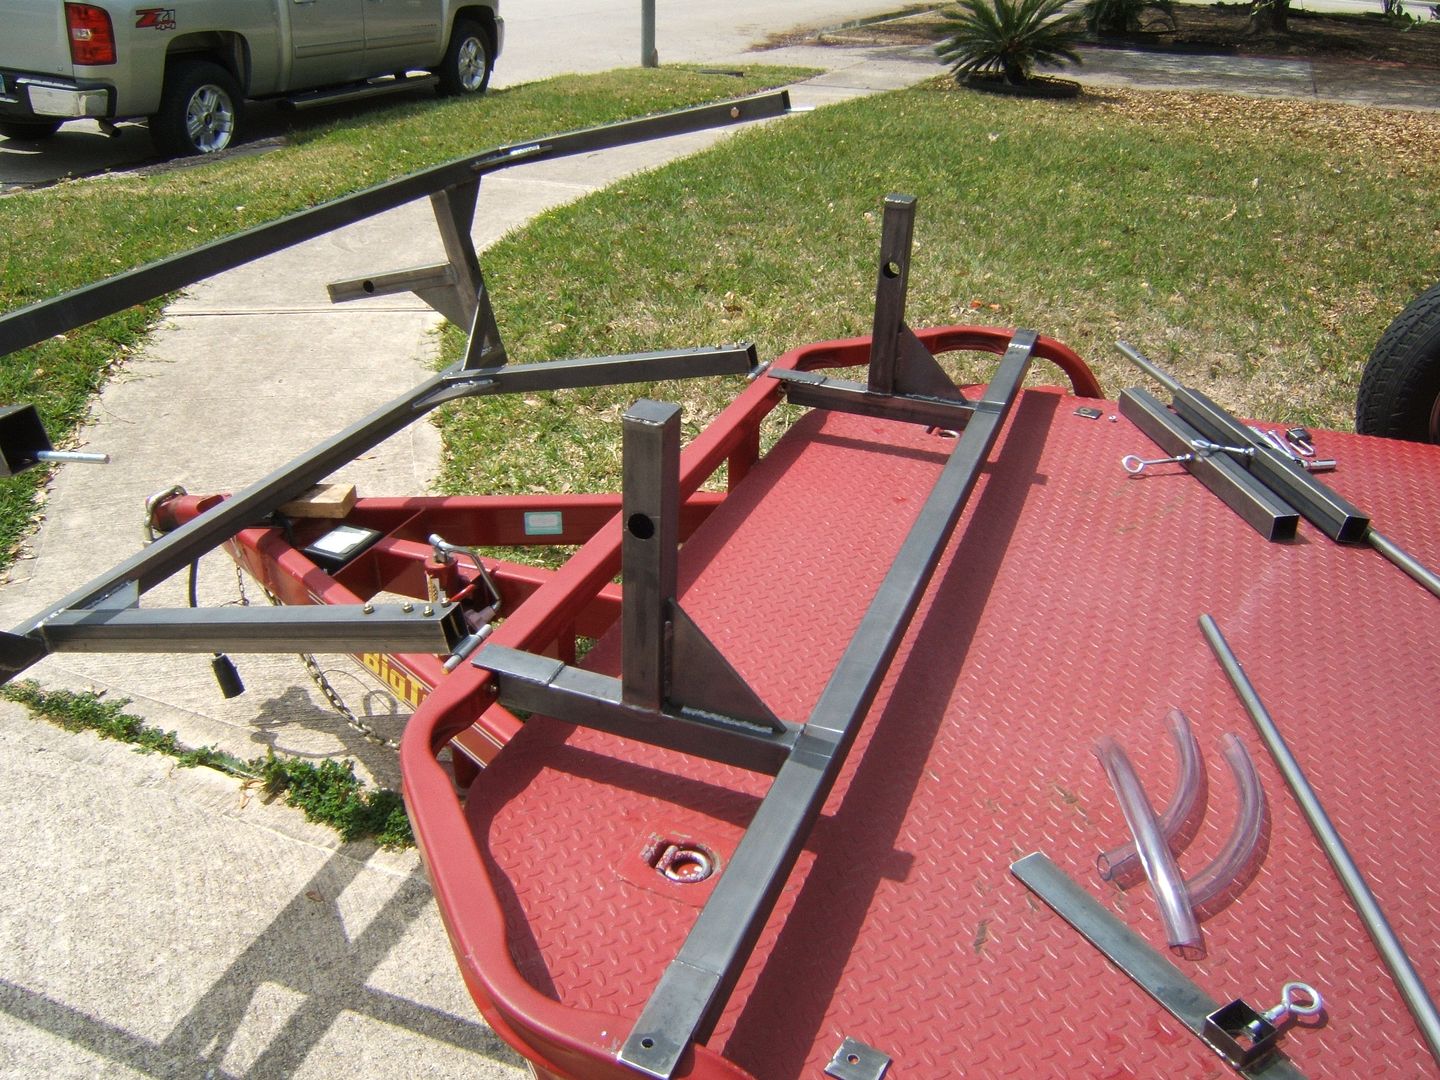
That is basically it. I wanted a simple, yet flexible design. I also may ad a rock guard to the font of the rack in the future. Total materials with hardware cost ~$250. I assembled and welded it myself. I am not a welder, or a metal worker so it took me ~20 hours including painting time. Hopefully this will add some ideas to others in the future.
The entire structure is made of 2" 14 gauge (.083") square tubing.
I used a 1" .120" wall thickness steel round tubing to go through the wheels. I also bought some rubber hose to slide over the tubing to protect the inside of the wheels.
Simple locking system like everyone uses.
In order to help keep the system flexible, especially when loading longer cars that may need extra space at the front of the trailer while loading, I wanted and easy way to move the rack out of the way, I decided to place it on hinges.
The backside if held down by a simple pivoting eye bolt to aid in hole alignment. There is also and external piece of angle iron for additonal support (not shown).
The bottom rack is easily removable when the top rack is hinged out of the way. These allows me to store tires on the top and bottom rack, top or bottom only, or tires on the top and fuel jugs or tool storage on the bottom.
That is basically it. I wanted a simple, yet flexible design. I also may ad a rock guard to the font of the rack in the future. Total materials with hardware cost ~$250. I assembled and welded it myself. I am not a welder, or a metal worker so it took me ~20 hours including painting time. Hopefully this will add some ideas to others in the future.
03-23-2013, 11:31 PM
#38
Burning Brakes
Thread Starter
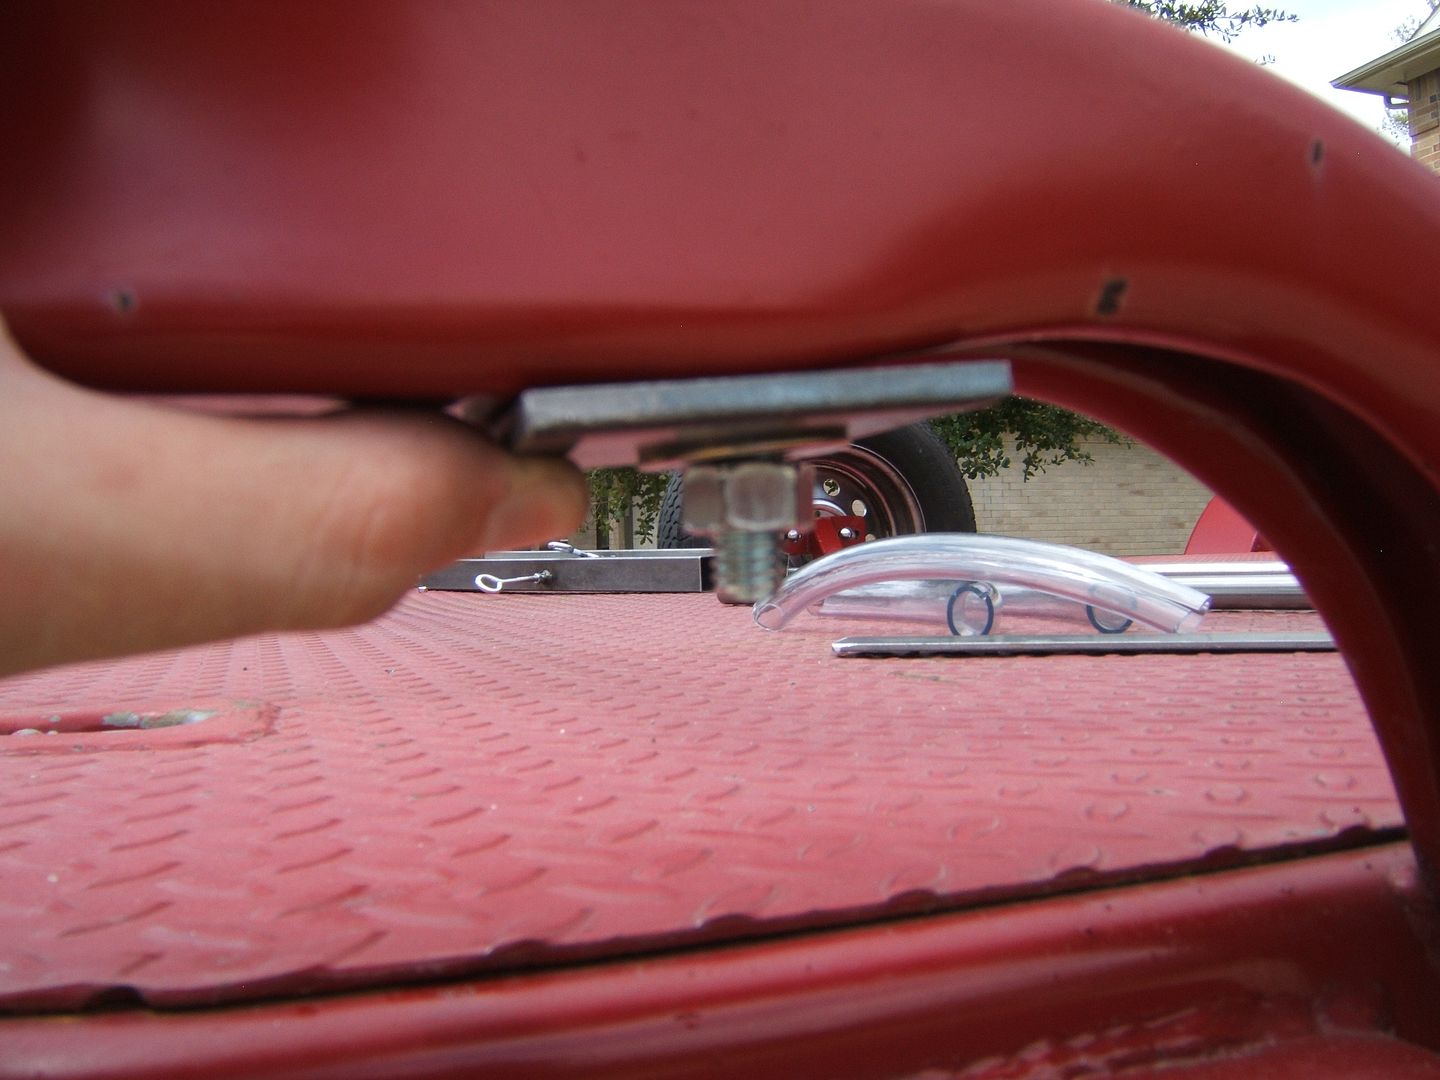
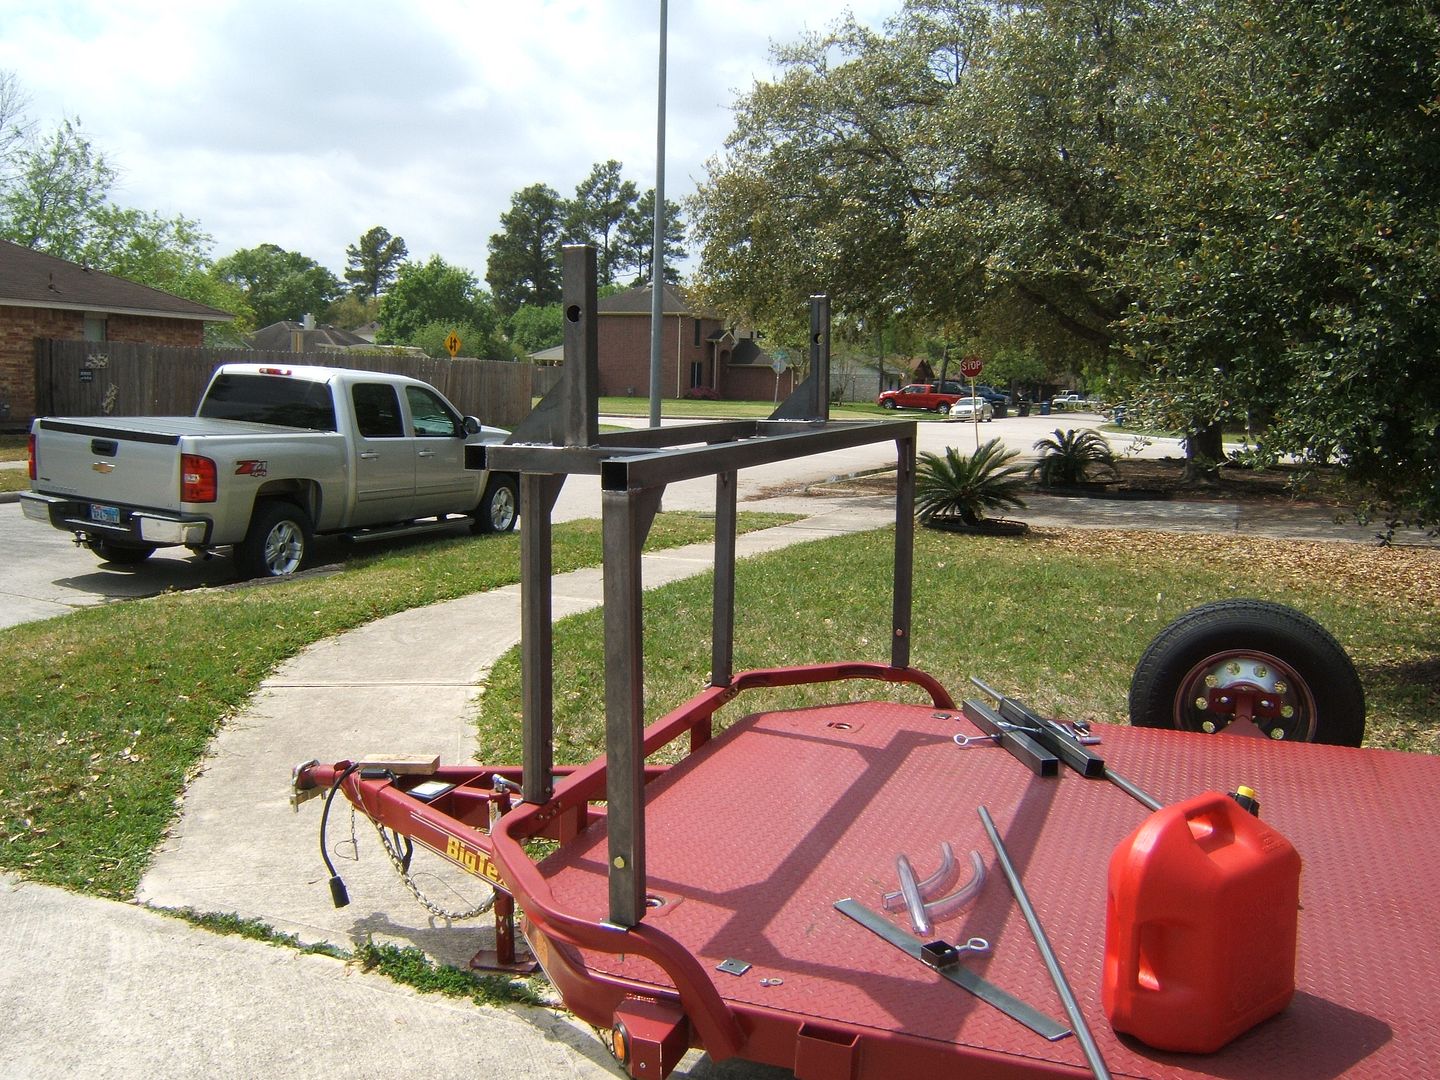
Also, to help keep the wheels bunched together I used a piece of 2" square tubing with holes drilled through (to match the bar size that runs through the wheels) and welded a 3/8" nut to it. I then simple slide one of these assemblies on either side of the wheels and tighten the pictured eye bolt to secure it in place. Seems to work really well.
I also made a "lower profile" version for the lower rack.
I also made a "lower profile" version for the lower rack.
03-24-2013, 01:24 AM
#39
Safety Car
Ya know if you stuck 1 more beam in there you could be a lazy *** and swing that upper rack down to load wheels nice and low, then hinge it back up for transport. That is a cool fudgin design nonetheless.