
C4 Brake Duct Installation With Photos
 06-09-2013, 01:47 AM
#1
Instructor

Thread Starter


OK, so I had a heck of a time finding a really well documented brake duct install. So now that I have finished mine I will try and document here.
First of all, trying to make a C4 brake duct install that provides really good cooling and does not negate functionality of the car, i.e. headlight actuation with no interference or cutting down the turning radius is almost a hell of a challenge! The method that I have used here does accomplish that. Here are the parts I used:
Quantum cooling ducts - purchased from Lambert
3" Hose - 11 foot section purchased from Racer Parts Wholesale for like $77 - you will never be able to complete this type of an install with the cheaper 3" stuff as it is not as flexible. This hose is REALLY GOOD stuff and worth every penny while trying to do this install.
2 NACA ducts from RPW as well, part # SPA-D107 on their website
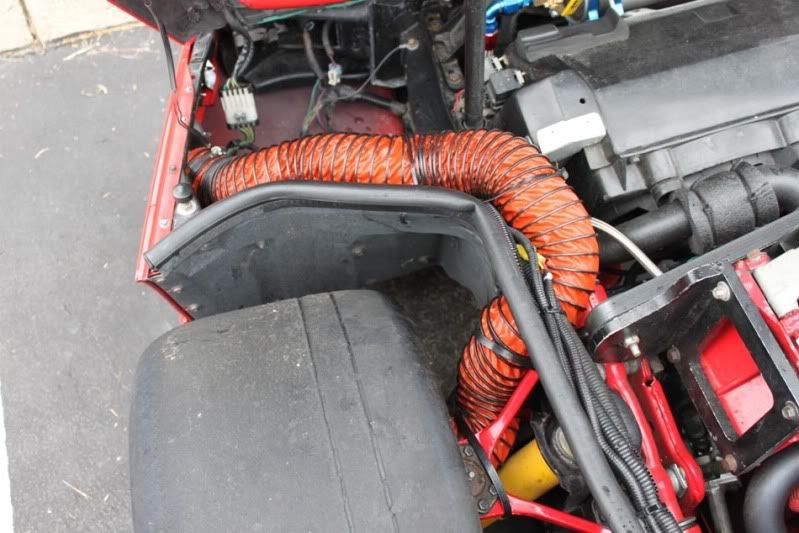
I had already removed the AC condenser previously, which is a must for this install technique. Just so you understand the general idea, this technique takes air from the very sides of the radiator opening, runs the hose through holes cut in the side of the radiator support, and then into the wheel well. It really is a pretty straight path for the air and produces good results when I have my leaf blower moving air about 3 feet in front of the car, even when it is aimed at the bumper and not directly into the ducts.
On both sides it is a necessity to either unbolt or cut up the front part of the extra plastic shield that forms the upper part of the wheel well with the A-arm underneath. I chose to just take mine off. I may make a plastic brace to connect the front and back half of the wheel wells, but not really a necessity as they are plenty strong. Next, you will have to "notch" the back of the front part of the wheel wells so the hose can fit better between the end of the A-arm and the wheel well plastic.
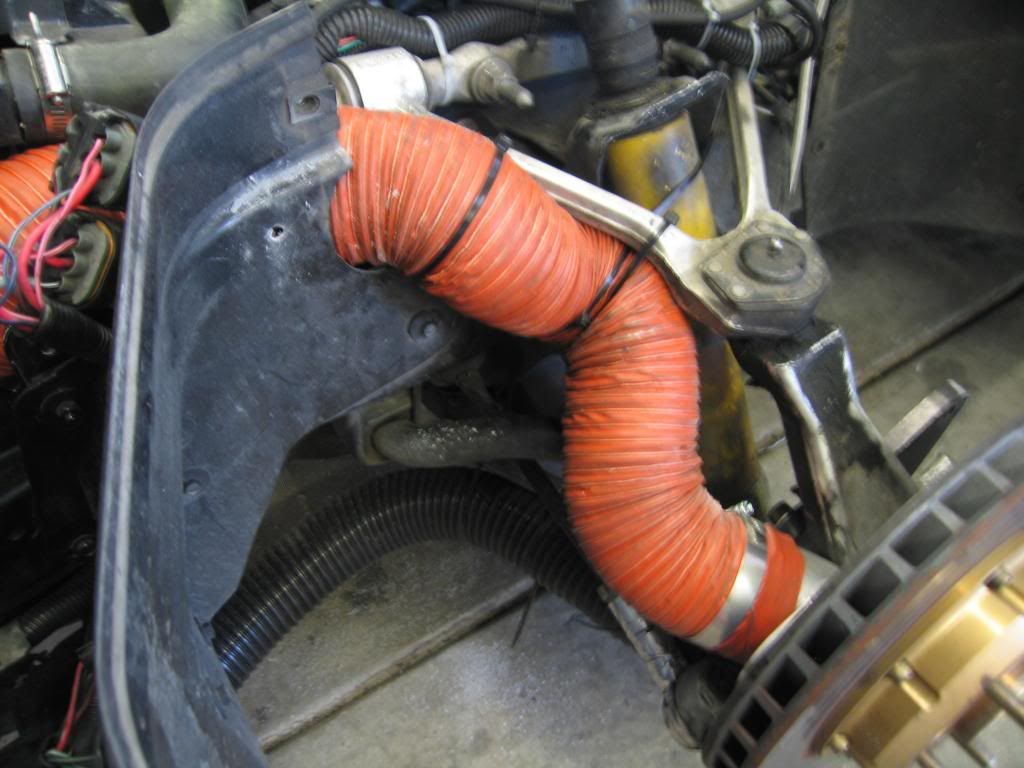
On the passenger side the hose will run very easily. You will have to cut out a circular hole in the radiator shroud. You can do this by using the opening that was originally there for the AC condenser and just "rounding it out" in a certain portion if you will, right above the frame rail. You will really need to keep this hose snug up against the side of the radiator support or else it will interfere with the headlight opening. It will have to be "ovalized" somewhat with some wire ties so you can keep it from clipping the headlight trim as the headlight rotates around to open. That was the easy side!
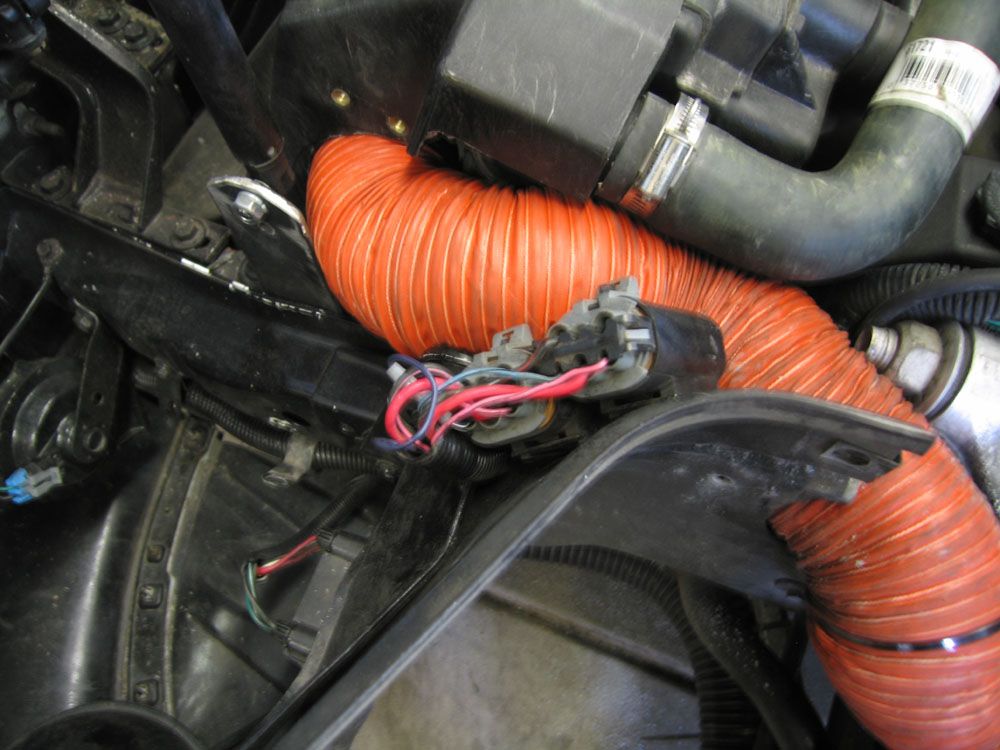
The drivers side is a bear! So the first thing you will notice is that you will need to relocate the hood prop. I moved it forward a few inches and made a right angle bracket out of 3/16" steel that bolted down to the frame rail using ine of the radiator shroud bolts. The bracket can only be about 1.8" wide and still fit well. I just used a 2" wide piece of steel I bought from Home Depot and trimmed it. I then drilled a hole about 4.25" up and re-used the ball mount that the hood strut attaches to. This makes the hood open wider, but the extra height is needed in order to clear the hose and not crimp it too bad when you close the hood. In order to make room for the hose you have to cut away at the radiator shroud quite a bit on this side. We started below the upper radiator hose and went down basically to just above the frame rail. The right angle bracket that bolts to the top of the frame rail and the radiator shroud that has two bolts, one on top of the other, got shaved to where there is now only one bolt. All this shaving also necessitated moving the relays for the fans. I moved them to just above the final position of the hose which was about the only place I could find that they did not interfere with the headlights or something else.
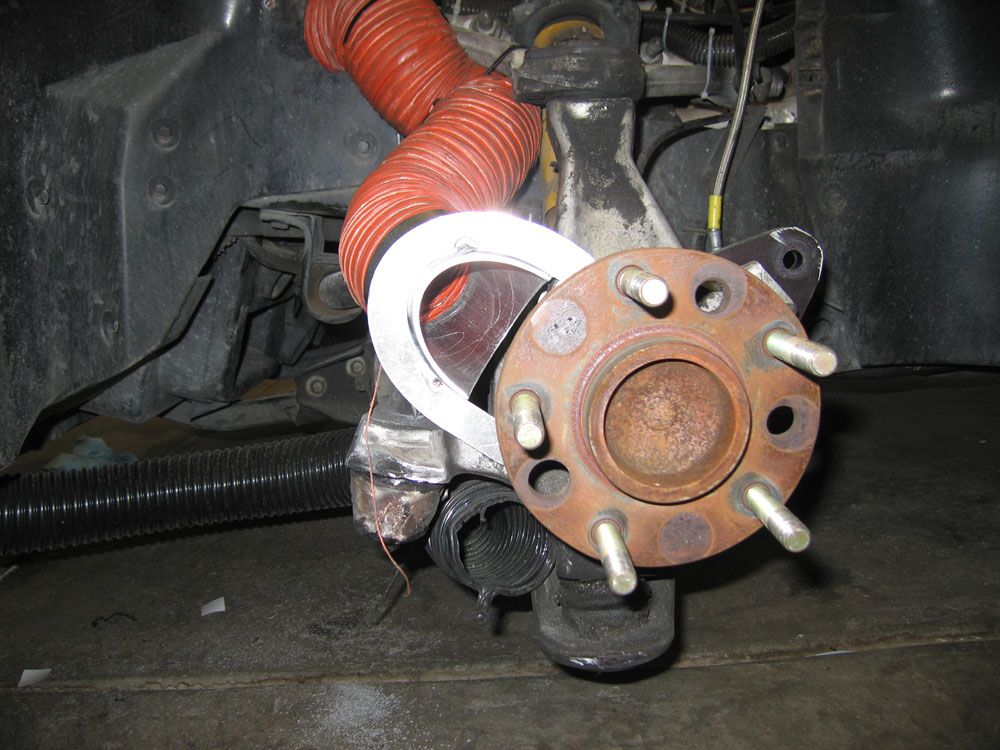
The routing of the hose at the wheels is pretty straight forward, basically a few wire ties to hold it close and tight to the A-arm. Before you really snug it down, make sure that you have enough slack to allow it to go outboard lock, and that you have enough room for the compression toward inboard lock.
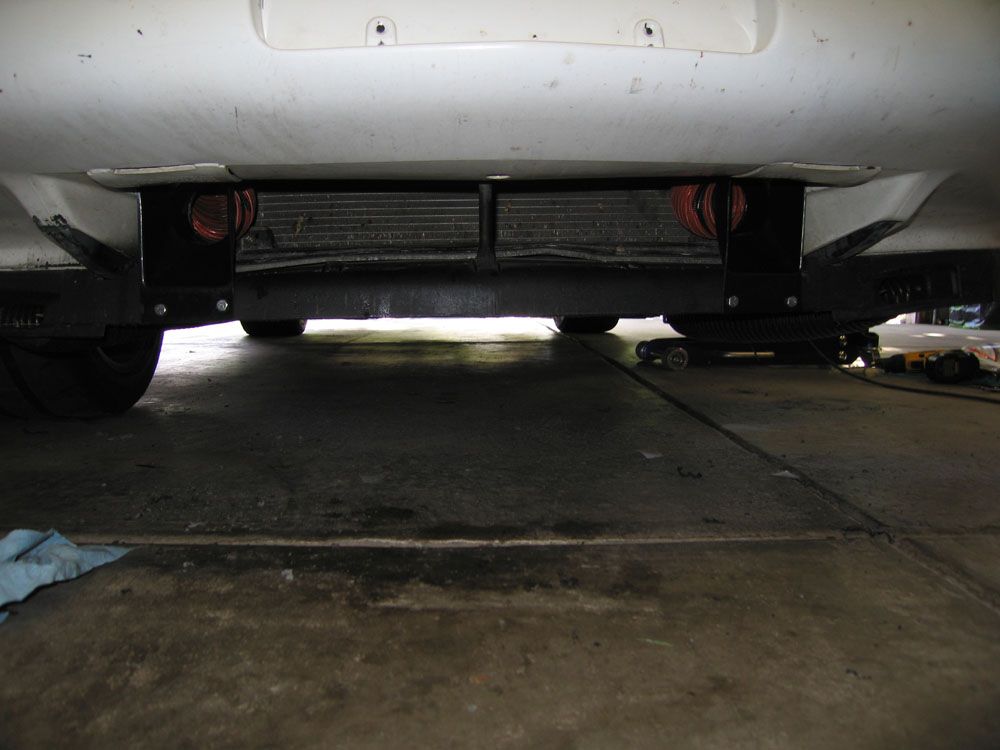
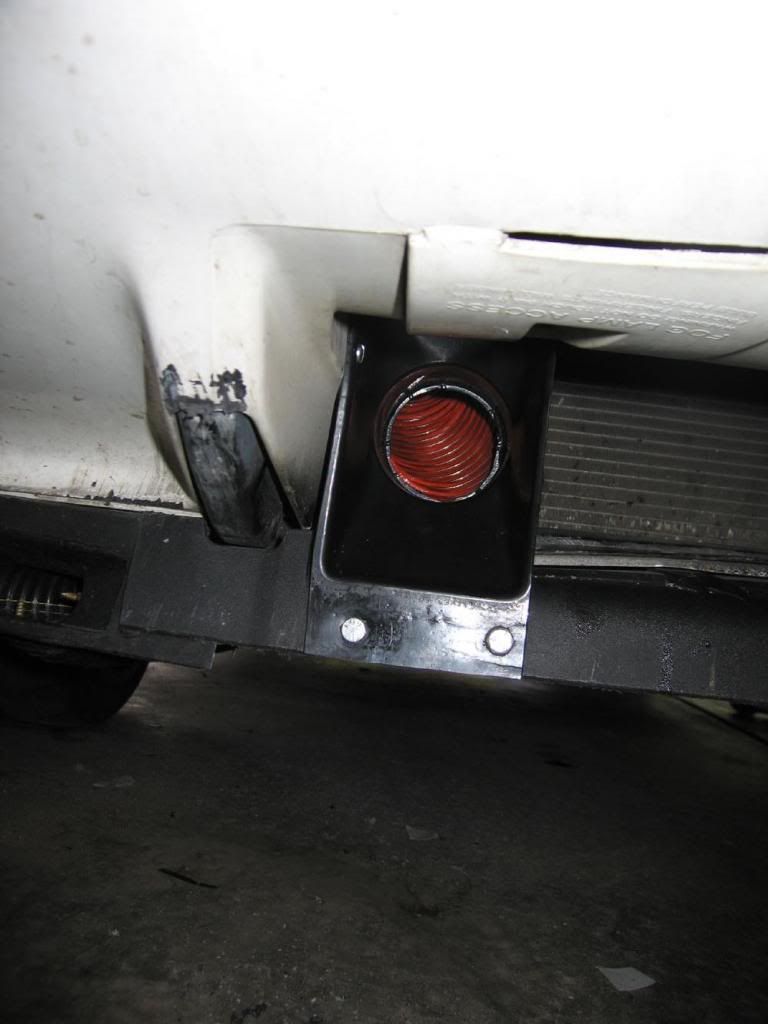
The NACA ducts below had 3 of the side tabs shaved completely off. So I could conserve as much radiator opening as possible, I turned them vertical. The remaining tab got tow 1/4" bolts through it holding it to the spoiler and then I put one screw in the side of the duct holding it to the fiberglass "bumper ridge." It seems very sturdy and it does not hang down really low and become a ripping off hazard during any agricultural excursions at the track
All the pictures are attached below. I hope this helps somebody, as the previous pictures and install info seemed to be a little lacking for the C4 guys.
--Calvin


First of all, trying to make a C4 brake duct install that provides really good cooling and does not negate functionality of the car, i.e. headlight actuation with no interference or cutting down the turning radius is almost a hell of a challenge! The method that I have used here does accomplish that. Here are the parts I used:
Quantum cooling ducts - purchased from Lambert
3" Hose - 11 foot section purchased from Racer Parts Wholesale for like $77 - you will never be able to complete this type of an install with the cheaper 3" stuff as it is not as flexible. This hose is REALLY GOOD stuff and worth every penny while trying to do this install.
2 NACA ducts from RPW as well, part # SPA-D107 on their website
I had already removed the AC condenser previously, which is a must for this install technique. Just so you understand the general idea, this technique takes air from the very sides of the radiator opening, runs the hose through holes cut in the side of the radiator support, and then into the wheel well. It really is a pretty straight path for the air and produces good results when I have my leaf blower moving air about 3 feet in front of the car, even when it is aimed at the bumper and not directly into the ducts.
On both sides it is a necessity to either unbolt or cut up the front part of the extra plastic shield that forms the upper part of the wheel well with the A-arm underneath. I chose to just take mine off. I may make a plastic brace to connect the front and back half of the wheel wells, but not really a necessity as they are plenty strong. Next, you will have to "notch" the back of the front part of the wheel wells so the hose can fit better between the end of the A-arm and the wheel well plastic.
On the passenger side the hose will run very easily. You will have to cut out a circular hole in the radiator shroud. You can do this by using the opening that was originally there for the AC condenser and just "rounding it out" in a certain portion if you will, right above the frame rail. You will really need to keep this hose snug up against the side of the radiator support or else it will interfere with the headlight opening. It will have to be "ovalized" somewhat with some wire ties so you can keep it from clipping the headlight trim as the headlight rotates around to open. That was the easy side!
The drivers side is a bear! So the first thing you will notice is that you will need to relocate the hood prop. I moved it forward a few inches and made a right angle bracket out of 3/16" steel that bolted down to the frame rail using ine of the radiator shroud bolts. The bracket can only be about 1.8" wide and still fit well. I just used a 2" wide piece of steel I bought from Home Depot and trimmed it. I then drilled a hole about 4.25" up and re-used the ball mount that the hood strut attaches to. This makes the hood open wider, but the extra height is needed in order to clear the hose and not crimp it too bad when you close the hood. In order to make room for the hose you have to cut away at the radiator shroud quite a bit on this side. We started below the upper radiator hose and went down basically to just above the frame rail. The right angle bracket that bolts to the top of the frame rail and the radiator shroud that has two bolts, one on top of the other, got shaved to where there is now only one bolt. All this shaving also necessitated moving the relays for the fans. I moved them to just above the final position of the hose which was about the only place I could find that they did not interfere with the headlights or something else.
The routing of the hose at the wheels is pretty straight forward, basically a few wire ties to hold it close and tight to the A-arm. Before you really snug it down, make sure that you have enough slack to allow it to go outboard lock, and that you have enough room for the compression toward inboard lock.
The NACA ducts below had 3 of the side tabs shaved completely off. So I could conserve as much radiator opening as possible, I turned them vertical. The remaining tab got tow 1/4" bolts through it holding it to the spoiler and then I put one screw in the side of the duct holding it to the fiberglass "bumper ridge." It seems very sturdy and it does not hang down really low and become a ripping off hazard during any agricultural excursions at the track
All the pictures are attached below. I hope this helps somebody, as the previous pictures and install info seemed to be a little lacking for the C4 guys.
--Calvin


 06-09-2013, 03:02 AM
#2
Le Mans Master


WOW! That's some serious routing. I wouldn't have thought that you could put 3" tubes through there like that.
Thanks for the idea - now I have another thing to add to my "to do" list".
Thanks for the idea - now I have another thing to add to my "to do" list".
06-09-2013, 08:12 AM
#3
Safety Car


Just an observation, but if you've removed the A/C condenser why do you still have the compressor?
It's a great install on the ducts...but ditching the compressor will drop another 15 lbs or so.
BTW: GREAT color on that C4!
It's a great install on the ducts...but ditching the compressor will drop another 15 lbs or so.
BTW: GREAT color on that C4!
Last edited by 1991Z07; 06-09-2013 at 09:14 AM.
 06-09-2013, 09:32 AM
#5
Le Mans Master
File -> Print -> put in FSM stack for when I can get the engine put in
This is beautiful, great write up!
Thank You!
This is beautiful, great write up!
Thank You!
06-09-2013, 10:11 AM
#6
Safety Car
I loved the comment about the compressor. I have no A/C system but I still have the compressor. Anyone know of a bracket that will allow us to get rid of the compressor?
Richard Newton
Car Tech Stuff
Richard Newton
Car Tech Stuff
06-09-2013, 10:54 AM
#7
Safety Car
I loved the comment about the compressor. I have no A/C system but I still have the compressor. Anyone know of a bracket that will allow us to get rid of the compressor?
Richard Newton
Car Tech Stuff
Richard Newton
Car Tech Stuff
I'd contact http://www.ebay.com/itm/85-87-L98-TPI-Corvette-AC-A-C-Delete-Bypass-Pulley-Bracket-AFM-/130875204884?nma=true&si=3Z%252BfWAw0YtjmO443t%252FAekP20Tkg%253D&orig_cvip=true&rt=nc&_trksid=p2047675.l2557 on Fleabay...
You could also dump the hoses and the evaporator...not much but every ounce counts.
Last edited by 1991Z07; 06-09-2013 at 10:57 AM.
06-09-2013, 11:18 AM
#8
Race Director


Looks good. 
I had basically the same routing through the inner fender on my C4 and even with big 315s up front, I never had a rub issue. It would barely hit the tire itself (not the wheel) right where the hose came through the fender if you were turned all the way to the lock but was completely fine otherwise.
Looking at his, he cut a little farther and went under the A-arm as opposed to mine which were on top of it. Looks to me like it would be even less of an issue than I had.

Looking at his, he cut a little farther and went under the A-arm as opposed to mine which were on top of it. Looks to me like it would be even less of an issue than I had.
06-09-2013, 02:57 PM
#9
Instructor
Thread Starter
06-09-2013, 03:00 PM
#10
Instructor
Thread Starter
06-10-2013, 11:57 PM
#11
Burning Brakes

I loved the comment about the compressor. I have no A/C system but I still have the compressor. Anyone know of a bracket that will allow us to get rid of the compressor?
Richard Newton
Car Tech Stuff
Richard Newton
Car Tech Stuff