When you click on links to various merchants on this site and make a purchase, this can result in this site earning a commission. Affiliate programs and affiliations include, but are not limited to, the eBay Partner Network.
The day is finally here! Hi guys, this is Lane Borg (ltborg on the forum) and at last I can announce why I have waited so long to post a build thread on my STU car. As you can see, I am posting as Borg Motorsports and as of yesterday, I am officially a proud Supporting Vendor! I’ve been on the forums for over a decade under the ltborg handle and will still be active as a private member, however I am extremely excited to also be here a vendor!!!
In the search for the perfect parts for my STU car, I found no one was really doing what I needed. When I looked at getting parts made, the costs were prohibitively expensive. At one point I caught myself saying, "I can probably buy a CNC for what this will cost me." Little did I know where that off-hand comment would take me. Eight months later, I am officially opening the doors of Borg Motorsports. As many of you know, I have been a forum member here for over a decade. Hopefully you have read my B-Street Build Thread about my car's journey to the first B-Street Solo National Championship in 2014. If not, check it out!
As an engineer whose thesis covered suspension modeling of a race car and who specialized in mechanics of materials, I plan to bring this knowledge to the Corvette community by offering the products I have always wanted to see in the marketplace. I have (and still do) work as a test driver/engineer for the Goodyear Tire & Rubber Co. where I work on both internal projects as well as supporting OEM programs. I plan to use this automotive testing experience as well as my detail oriented design philosophy to improve the performance of our Corvettes through modern day American manufacturing and design.
Please bear with us as we get our website up and running. I'm primarily working on ramping up production of our first products at the time as well as planning the second (and third and fourth) in preparation for the 2015 Solo Nationals, but I have others working on the site, photos, etc. I plan on writing all content myself and am the only person that will be posting under the Borg Motorsports handle, so a little patience in the early days would be appreciated. I strongly feel doing this will provide the highest quality information and products to the Corvette community. I hope to prove to be as good a vendor to the forum as I have been a member, thanks for having me.
This thread will be about the design and development of the Borg Motorsports STU car. I ask in the interest of keeping the thread on point that you post questions specific to this car or our products here, while posting general STU build questions in the already existing STU Build Thread. With that, let's move on to the build!
____________________
Introduction
ST classes are simply too cool to pass up. High class participation, high driver talent, and just the right amount of mods to blame the car when you lose. I’ve wanted an ST class for Corvettes since I started autocrossing semi-seriously in 2005. In 2014, my wish was granted and the C5 was allowed into STU. While I had committed to B-Street already, I was excited at the prospect of running STU in 2015. I thought about it for most of the 2014 season, and while the yellow beast did well in the newly created Street class, it just wasn’t quite right; in a lot of ways, it wasn’t quite right in A-Stock either. There was just something missing. I wanted my car to be a C5Z; something that was more than the sum of its parts, something more fun than it looks, and something that would challenge me more than a Street car in terms of setup, car design, and driving abilities. STU looked like a pretty good solution.
Shortly after winning the first B-Street National Championship (and after a long talk with Sam Strano having him check for ID10T errors), I decided I had to build my car for STU.
While excited, I still had lingering concerns about a potential lack of competition with the reigning champion (Brian Peters) leaving the class. I figured that would allow me to ease into the world of national level non-stock autocross cars. Little did I know what sort of field was about to unfold in the class for 2015. Apparently, my talk with Sam about the C5 was enough for him to think it was a good idea too and he bought a former AS car (albeit not for his regular National events). While Peters left the class, he filled me in that his car was sold to, “some guy out west.” Well that guy turns out to be Bryan Heitkotter, contract driver for Nissan. If that wasn’t enough, the 2014 C-Street winner, Jeff Stuart, bought a 350Z to run in STU. Lastly, Jon Lugod of OS Giken announced that he would be developing the factory OS Giken C5 for STU. John Hale is back in the picture in a WRX and there are already potent competitors running in the AWD crew like 2014 Nationals runner up Mark Hill and Robert Pendergest. So much for easing into things…
I’ve already posted a B-Street Build Thread that has all the information on that version of my car as well as some of my background and experiences. Take a look if you want to get up to speed.
All of that leads me to the point I’m at now, building a no holds barred STU C5. I want it to be easy and comfortable to drive, it should be a track day rockstar, but first and foremost it will be built to the ragged edge of the ST rules. If something on the car can be made better, I will make it happen. Time to turn things up to 11.
____________________
The Plan
As I mentioned before, the build is meant to create a car that is an all out STU build, with strong track day and time trial performance. The build plan starts with the car’s strengths and weaknesses in BS trim.
The Good
Lots of torque
Good suspension geometry
Can easily max tire/wheel rules
Wide track for good mechanical grip in sweepers
The Bad
The stock seats
Resistance to heat buildup
Wide track means slower slaloms
Soft suspension means slower transient maneuvers
Poor gearing for autocross courses
In order for the build to succeed, I would need to capitalize on the good aspects of the car, and minimize the effects of the bad. Generally I have found maximizing a strength to be better than minimizing a weakness, but if you can do both, all the better.
With the project goals in mind, I set some objective performance targets for the car:
Under 3000 lb race weight
Minimum 400 RWTQ
Capable of 20 lap stints on a road course in 100 F heat (I do live in Texas)
As well as some subjective goals:
Maximize torque under 4500 RPM (even at the expense of peak power)
Perform a professional racing analysis on as many parts as possible with a quantifiable performance gain
Subjective driving feel similar to "special" cars (C5Z, FR-S, 911, modern Z28, etc.)
With those goals in mind, let's start looking at specifics.
____________________
Wheels and Tires
ST is essentially a spec tire class. For all the talk of which tire is fastest, once the fast tire is found, everyone runs it since tire size is mandated by the rules. With everyone (presumably) on the same tire, the design objective is to maximize the mechanical grip of the tire. This means the tire must be properly supported by the rim and properly oriented to the road surface in a dynamic condition. These items will allow the tire to be run at a much lower pressure than normal, maximizing mechanical grip. At some point, a lack of pressure will cause the center of the footprint to collapse into the tire cavity, reducing the total footprint area or, at a minimum, making the pressure distribution within the footprint less optimal.
The first item is to make sure the tire is well supported by the rim. A wider rim provides a given tire with more grip due to the increased rim support. Obviously a tire intended for a 6.5" wide rim won't fit on a 13" wide rim, but going to the larger side of manufacturer recommended widths is certainly advisable. The tire size limit in STU is a section width of 285. Nearly all manufacturers of 200 treadwear tires only offer this sort of width in an 18" tire. TR&A guidelines for a 285/35R18 (the most common 285 size available in the selected tires) advise a rim width up to 11". For the current iteration of the car, I decided to go with 10.5" wide wheels. This size wheel does two things for me. First, it significantly decreases the cost of a set of wheels which greatly helps the budget. Second, it allows for 275/35R18 tires to be run as the TR&A specifications for that size are a maximum rim width of 10.5". This give me more options of tire manufacturers. Pressures will be determined through tire temperatures during testing as well as subjective feedback of vehicle performance. More on this in the testing section.
I selected TSW Nurburgring wheels that measure 18x10.5 with a 65mm offset. The extra offset allows me to play with different track widths and keeps the big tires well under the stock fenders, which I am not allowed to change (you can roll stock fenders in ST, but that doesn’t work so well on fiberglass…).
Due to avoiding any possible conflicts of interest, I will not be posting my tire test results. That said, I will make sure you know what I am running. I know this might upset some people, and I am sorry for that, however I enjoy my day job and Goodyear as a company and I will not be compromising that position.
So far in 2015, I have been running the Bridgestone RE-71R’s in 275/35R18. I think the current National results have shown why I am running this tire. With stock bushings and aftermarket springs, I ran 30 psi front and 28 psi rear. Current pressures with the prototype offset bushings are 28 psi front and 25 psi rear. 24 psi in the rear resulted in less than progressive slides and reduced sliding grip, but more on that in the bushings section.
____________________
Differential
Now that the wheels and tires are sorted, it’s time to look at the center of the vehicle design. In the case of ST, that means the differential. A differential can have a HUGE effect on the handling of the vehicle. For this reason, it is important to get the diff sorted out first and tune the rest of the car around it. I have chosen a gear type differential for the car. At this time, I am not willing to share what version it is as I don’t want anyone to run out and get one, just to find out that there are durability or performance issues. I don’t release my products until I am VERY comfortable with their performance, and likewise I don’t want to endorse a product until I am 100% confident in it. I will however explain why I chose a gear diff over a clutch type.
This is where some real engineering comes in. Please keep in mind that my design philosophy isn’t always centered around what feels good. If it gets me a faster lap time at the expense of feeling good, I’ll take it. Let’s start by looking at how a locked axle and an open differential work.
On corner entry, an open diff allows a differential in rotational speeds of the rear tires. This means there is no resistance to rotation when entering a corner, creating a balance more towards oversteer (or less understeer). Due to this lack of resistance, there can sometimes be some instability during braking. A locked differential on the other hand prevents the wheels from rotating at different rates and creates a resistance to vehicle rotation, thus the vehicle is more balanced to understeer on entry. A byproduct of this is increased braking stability.
On corner exit, an open differential applies torque evenly to both tires until the inside tire’s traction limit is reached. At this point, no additional power can be put to the ground as the power takes the path of least resistance (the inside spinning tire). This limits the forward thrust to the amount of longitudinal grip of the inside rear tire, which is more lightly loaded than the outside tire (often significantly so). In a locked differential, both tires are forced to spin at the same speed and the power application is limited by the grip of the outside rear tire. This is a large advantage over the open differential as the outside tire will have much more load than the inside tire and thus, will have much higher longitudinal capacity, resulting in a higher forward thrust than the open diff. So at this point, you might be thinking that we need a locked diff (clutch type), but let’s look more closely at the situation on corner exit.
A locked differential may have a higher capacity for forward traction than an open differential, but the force applied will generally be fairly equal on both rear tires. This is a great thing for straight line acceleration, but we are exiting a corner in this situation. By having equal forward forces on the rear tires, the forward thrust is creating a resistive moment to the vehicle rotation, ie. the acceleration is helping to prevent vehicle rotation. Again, this is great in a straight line, but it is not what we want in the tight confines of an autocross course. When I hit the power, I want the car to be able to put power down AND rotate. Please note that rotate and oversteer are not one and the same. Oversteer (rear axle sliding) by definition contains rotation; it is an over rotation of the vehicle. Yaw rotation however does not necessarily mean oversteer, it simply means the vehicle is turning (not necessarily sliding). Enter the gear diff.
The geared differential, know commonly by the brand name Torsen, is a differential that splits the input torque to the wheels based on a bias ratio. The bias ratio determines how much more torque is applied to the wheel with more grip. If a differential has a bias ratio of 3:1, the outside tire will receive three times the torque of the inside wheel. The bias ratio is determined by the internal gears and is generally not something that is easily tuned once the diff is built. So long as the inside wheel is not being lifted off the surface (which it shouldn’t be in a RWD car), the inside tire will get a certain amount of torque and the outside wheel will get three times that in our example. This situation results in a greater thrust force on the outside of the car than the inside of the car. When this happens, the car pulls to one side, in this case, the direction of the turn. This ADDS to the rotation of the car and allows the driver to get on the power sooner and turn the car with the throttle, not by sliding the rear, but by pushing the car forward, exactly what we want to be doing. So in theory, the gear diff is what we want, but what about in practice?
Examples of cars that use Torsens (or equivalent) today include the critically acclaimed 2015 Z/28 Camaro, the ever popular FR-S/BRZ, and reigning STU National Champion Brian Peter’s 350Z. In his book recalling the many stories of his lengthly racing career, Corvette crew chief Dan Binks discusses how the Torsen differentials were always faster for his cars, but they were not up to the task of an endurance race due to the heat build up from the internal friction inherent in these designs. Luckily for us, autocross competition doesn’t involve the long runs that endurance racing requires.
For all these reasons, I chose a geared differential for the car. For those of you worried about what happens when the inside tire lifts:
1 - There is no reason for a Corvette to lift a rear wheel in ST trim. If it does, something is very wrong with the car or the setup.
2 - Most gear differentials manufactured today have devices that allow some lock at low inside tire loads.
Now that the differential is in the car, it’s time to get the balance correct.
____________________
Springs and ARBs
Sadly, ST rules do not allow the use of coil overs on cars not originally equipped with coil over shock configurations. This limits us to the use of leaf springs. Only two companies currently make aftermarket leaf springs, VB&P and Hyperco. I have tested both and settled on VB&P springs. Let’s talk about target spring rates and how leaf springs differ from coil springs in terms of setup before getting into the specifics.
Leaf springs get a bad rep. Yes, technically speaking a form of leaf spring was used on Vietnamese ox carts as a famous presenter once pointed out, however traditional leaf springs are very different form those used on the Corvette. In addition to the mono-leaf design which virtually eliminates internal friction, the Corvette mounts the leaves transversely. This mounting method means that the leaf spring will be slightly softer in ride than in roll. In other words, the spring acts as a spring AND an anti-roll bar. This allows the ARB’s on the vehicle to be smaller and lighter than they would be on a car with traditional coil springs. The result is a very light setup, but a slightly more difficult setup to tune. The stock Corvette leaf springs have a constant profile. The Hyperco springs have a constant profile. VB&P rear springs do NOT have a constant cross-section. This gives the VB&P rear spring a larger difference in ride and roll rates. Until I make a test rig that can measure ride and roll rates (which is on the to do list), testing and tuning will be the only decent option to determine the effect of the different springs. For a fairly good explanation of how the Corvette leaf springs create different rates in ride and roll, please see the Wikipedia page on leaf springs; the section on leaf springs as an anti-roll bar is very good.
Moving on to the testing of these springs, people always complain that VB&P springs are “too stiff” without any data to back up this claim. Sure saying, “I run 1200 lb springs on my car” sounds stiff, but is it? We all know the spring manufacturers measure their springs differently and that can lead to different values of spring rates for what should be the same springs and vice versa. What people forget to talk about is that one spring on the Corvette controls TWO wheels, not one. Suddenly, that 1200 lb spring is split over two wheels and you aren’t nearly as stiff as you thought. I wanted to confirm this with real numbers, so I have measured every spring I own on my car and measured actual ride rates. Please note that the roll rate will be different for the reasons discussed above. The table below shows the claimed spring rate, the measured spring rate, and the measured wheel rate. I have included coil spring calculated examples from coilover kits in the wheel rates as well as a point of comparison (all measurements in lbs/in).
As you can see, a “super extreme” 1500 lb/in front leaf spring is barely stiffer than a 500 lb/in coilover setup. Lots and lots of people run 500 lb/in coil springs on coilovers, with many of the track only guys running even stiffer than that. The spring may be very stiff in roll, but that is simply adding more ARB to the car, something we want anyway.
I have tested the following combinations of springs on the car with STU tires:
Hyperco HPT front/HPS rear, stock diff - Good balance
VB&P 1500 front/900 rear, gear diff - Loose balance
VB&P 1500 front/770 rear, gear diff - Good balance
Currently the car runs the 1500 lb/in spring in the front with the 770 lb/in spring in the rear.
I haven’t done a lot of testing on ARBs, but currently I have Strano Parts 33mm hollow front and Strano Parts thin walled adjustable rear bar. The rear bar is supposedly close to stock in rate, but adds adjustability. I run the front bar full stiff and the rear bar full soft. Once I develop my own bars (third product on the list), I should get things dialed in even more.
For a cheap, but easy to drive setup use a Hyperco HPT front and the Strano 33mm hollow front bar with the stock rear bar and spring. I think that will get you 70-80% of the way there at a much lower price point than an all out build. If you like your cars to be slightly on the loose side, use the HPS rear spring with the above combination. Equivalent VB&P setups would work as well.
I’d love to go stiffer, but have physically run out of room due to the thickness of the front spring. Long term, I may work on a solution for that, but for the foreseeable future, I’ll be running the above VB&P springs.
For those of you wondering about how low the car is, the car sat higher in STU trim with this stiff front spring than it did in BS trim, even with the stock adjusters. I created some new low-profile adjusted for the VB&P springs that use a thin Delrin AF pad to replace the stock ones. This allowed the car to sit nearly a quarter inch lower than with the VB&P adjusters and got me back to slightly below stock ride height. I then thinned the spring pads on the top of the front spring, lowering the car further to the front ride height target. The rear ride height is extremely easy to adjust by changing the length of the bolt. The rear spring has Delrin mounting pads as well to replace the stock rubber ones.
____________________
Shocks
This section is here just to cover any questions. I am still running MCS 2-way dampers, just as I did in BS. They are set to 3/9 front and 2/9 rear (compression/rebound). I have not done any tuning with these on the car yet. I looked at the shock plots and took an educated guess at about where they should be, then left the car as is. I will update this section as time goes on.
____________________
Bushings
We all know the stock Corvette suspension bushings leave something to be desired. While the late-03 and 04 bushings are better, they are still not the greatest. With that in mind (and as a means of testing the manufacturing equipment), I designed my own set of Delrin bushings. Knowing I wanted the best possible materials, I used Delrin AF which is a Teflon fiber impregnated Delrin, giving the material self lubricating properties and virtually eliminating maintenance. Given that Delrin has a very low yield strength compared to aluminum, I wanted to use as much metal as allowed in the bushings to spread the loads in the Delrin over as large an area as possible. All of the stock bushings were measured and metal percentages were calculated. I used this information to standardize a center metal sleeve for all the bushings. In non-adjustable locations, 6061 aluminum met the structural targets while also reducing costs. In the eccentric locations, I wanted to ensure added strength, thus the performance targets mandated 7075. I felt the increase in cost was warranted as a means to make the car as reliable as possible. 7075 was also used for the upper dog bones, allowing me to built in a significant offset into the mounting location of the a-arms themselves.
In addition to offsetting the dog bone mounting offset, I offset all bushings on the car. The reason for this is that the maximum camber I could achieve on the car was -2.2 in the front and -1.4 in the rear. Knowing I would want to optimize the tires as much as possible, I set targets of -5 in the front and -3 in the rear to give me the range of adjustability needed to test and optimize the tires engagement with the road surface. I was able to hit -4.7 in the front and -3 in the rear on my specific car.
These bushings have proved to be a HUGE improvement in the feel of the car. Slides are more progressive and steering response has improved. Despite zero alignment tuning of the car, I would have placed fifth and third in top PAX (minus those pesky cones from my lack of sleep) at the two National events I have attended since installing the bushings.
Many people will ask how the eccentrics are dealt with in a Delrin bushing design. I took great care to measure all the factory tolerances and determined that matching them would allow just enough movement of the bushings to allow the eccentrics to work. Prototype bushing sets were used to validate these calculations. After making some minor adjustments, the tolerances of the sleeve to Delrin interface, along with the tolerances of the bolt to the sleeve, allow the eccentrics to be adjusted through the majority of their range without any issues. Towards the extreme end of the adjustment range, the adjustment requires more force (ie. the adjusters feel very tight), but the bushings will still allow adjustment to the full extent of the range.
With that, allow me to introduce the first Borg Motorsports products!
Our Delrin bushings are available in three forms. For the cost conscious consumer, we have a steel, aluminum, and standard Delrin set of bushings. These bushing give you all the stiffness your suspension needs for precise and predictable handling characteristics. Standard Delrin may require occasional lubrication and the steel dog bones mean the weight of the system will be slightly more than stock.
The second set is a top-tier version of the bushings using premium materials. Standard Delrin is replaced with Delrin AF Teflon fiber impregnated Delrin. Do not confuse this with the Teflon powder version of this material. Teflon (PTFE) fiber offers improved lubricity and durability over PTFE powder filled acetal resins and non-filled acetal resins (Delrin). This kit also replaces the steel components with high strength aluminum to maximize weight reduction.
As of June 20, 2015, Standard and Premium kits will begin shipping on or before July 31, 2015. Offset kits will begin shipping in August. Pre-orders are available now at borgmotorsports.com. Pre-orders are shipped in the order received. All pre-orders include a free Borg Motorsports t-shirt (black shirt with white single color logo, please enter your size in the comments section of the order).
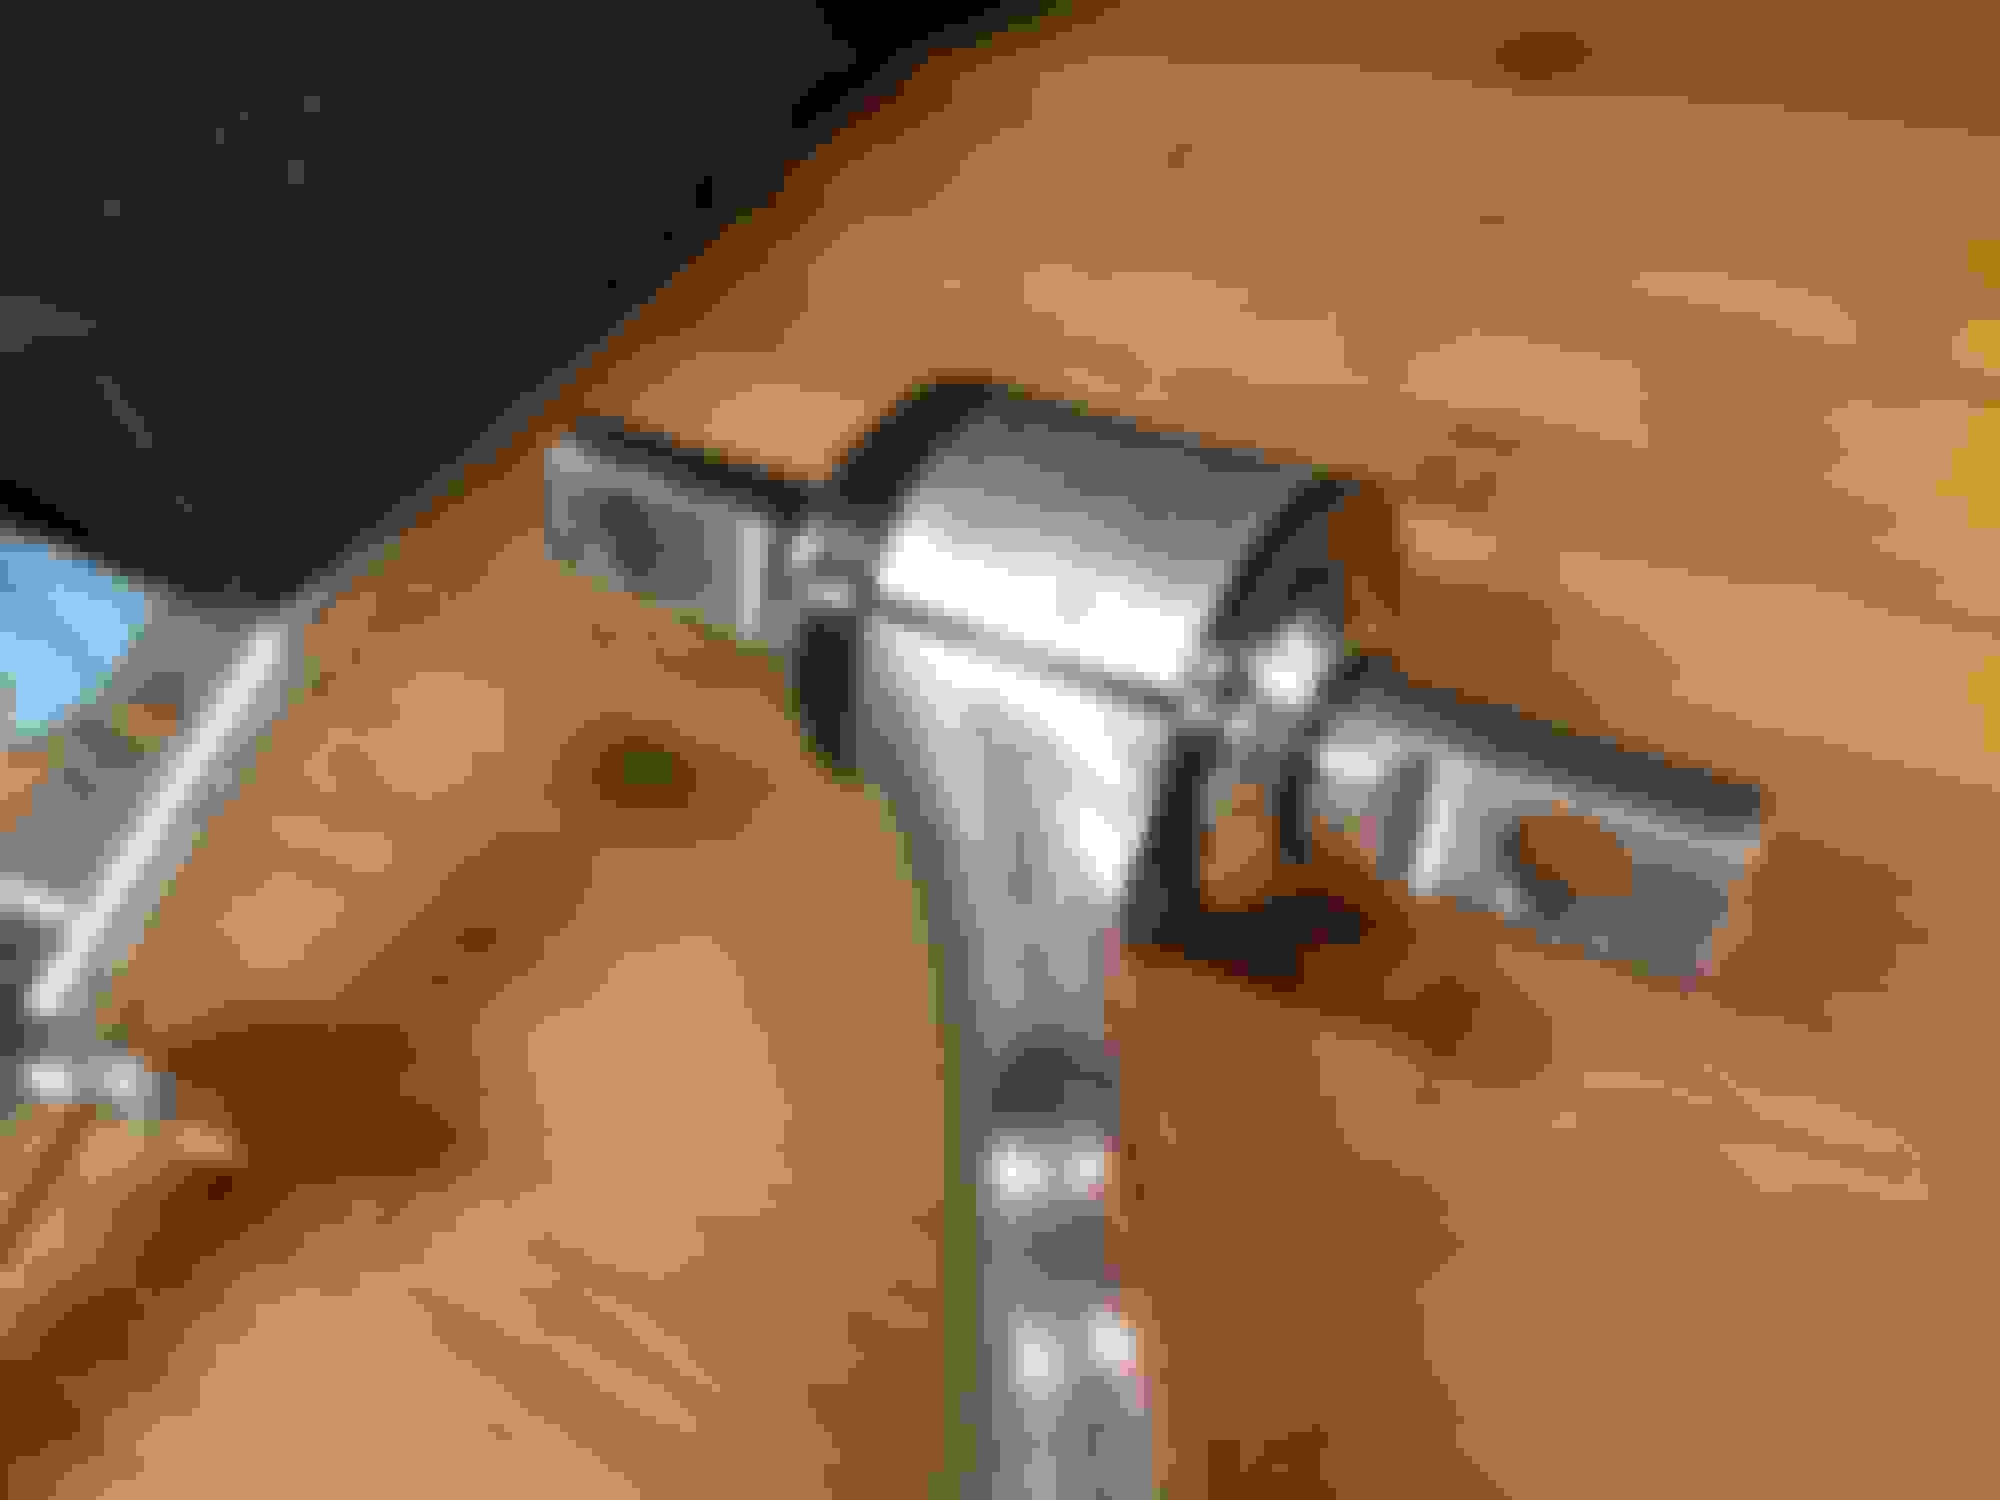
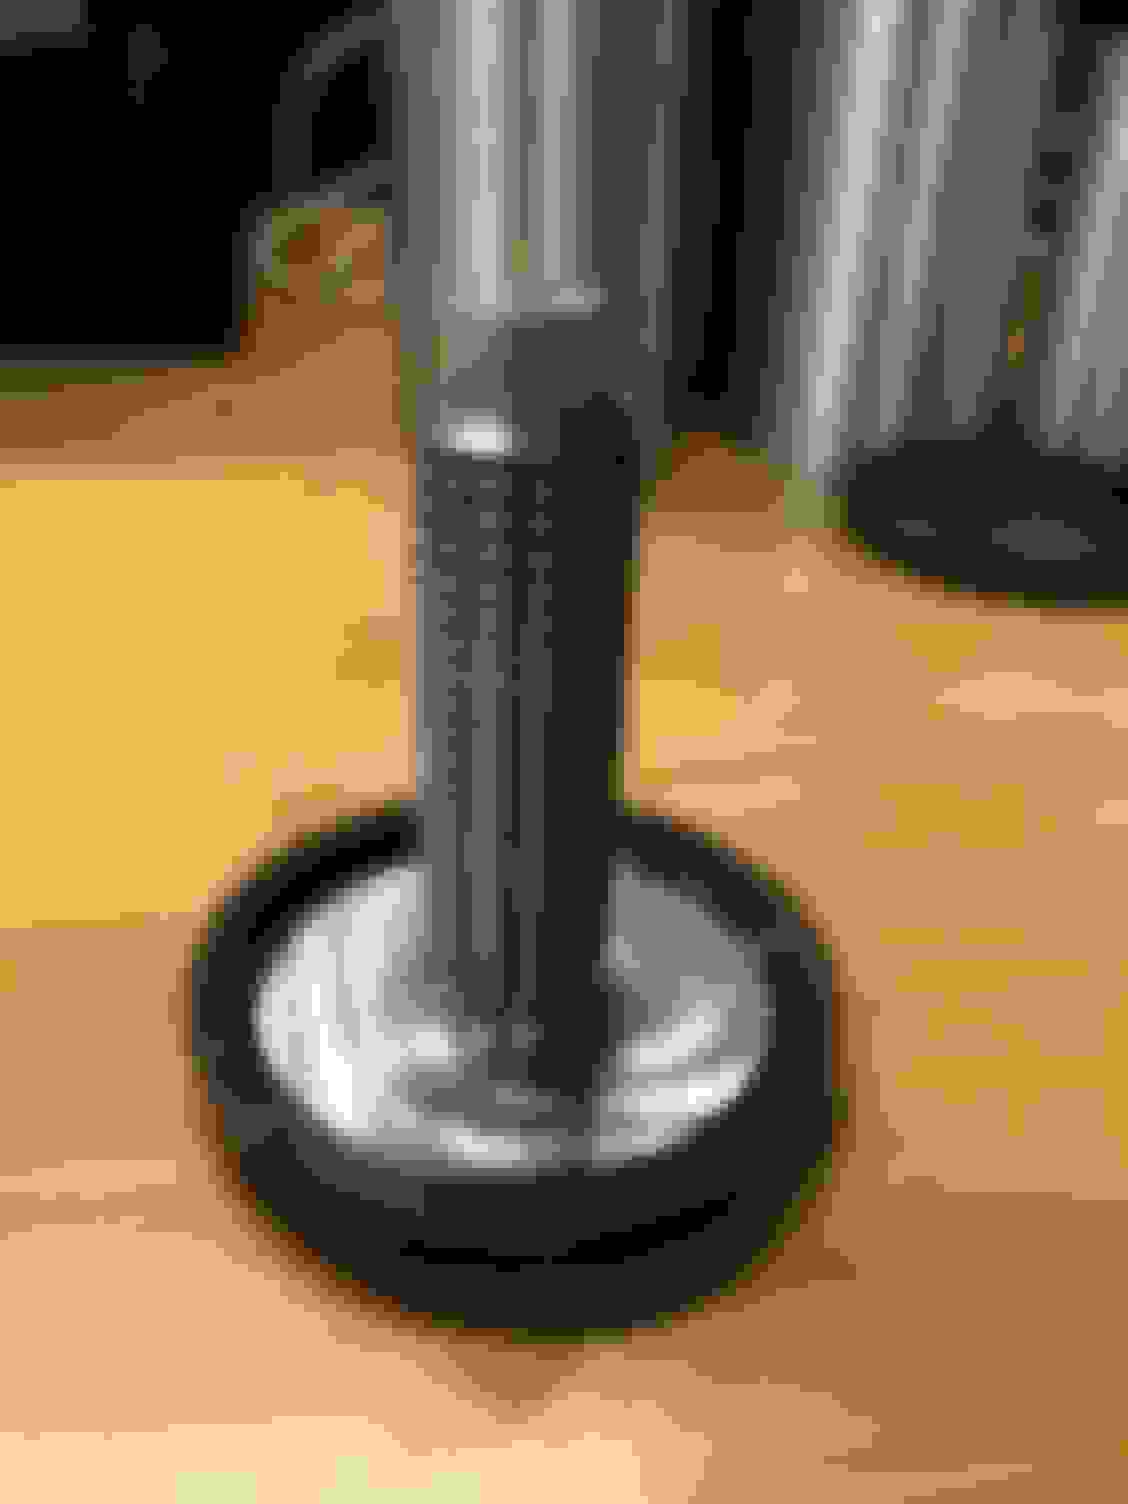
All kits are available for the C5, C5Z, and C6 (steel frame). C6Z kits are in development. Once inventory is built up, these will be stocked on a regular basis. The product information of the website will be updated for each kit when this occurs. Borg Motorsports products will be available directly from us or through our partner (and fellow Supporting Vendor) Strano Parts. Professional pictures of the kit are being worked on and will be posted as soon as they are complete. For now, enjoy the photos of the prototype kits in various stages of production.
Prototype Photos
____________________
Alignment
As mentioned above, I have not done very much in the way of alignment testing. This section will be added to over time. Currently the alignment is as follows:
Front
Camber: -4.5
Caster: 7.1
Toe: 3/16” out
Rear
Camber: -2.5
Toe: 1/8” in
The car has a reasonable balance at high speeds (although slightly loose), but has a mild low-speed push, beyond what would be expected, at lower speeds. My current plan is to adjust the caster to compensate for this. The rear still needs more camber judging by various competition pictures and the accelerated outside shoulder wear. Front tire wear is extremely good. Please note at these camber levels in the front, I did have to add spacers to prevent rubbing of the inside shoulder against a portion of the inner fender on the driver side of the car.
____________________
Engine
The engine has had minimal work done to it at this time. The major bolt ons have been completed, but no tune has been performed and I have no idea what the power output is at this time. Currently the car is running Jethot coated American Racing Headers (1-3/4” primaries with 2.5” exhaust) going into the Corsa Titanium system I used in BS. The Corsa mufflers were very close to the sound limit so I removed those and added Magnaflow 10416 mufflers in front of the transmission. They just fit in the tunnel and I was consistently low to mid 90’s on the sound meter with that setup (highest reading of 93.7 dB). I have a Halltech CAI and an ATI 25% under drive pulley. All parts were sourced from Strano Parts. Tuning is planned for this summer at LGM in Plano, TX (same dyno used to measure A-Stock and B-Street cars).
Update 7/19/2015
The car made 359 HP and 362 ft-lbs on the chassis dyno at LG Motorsports. This was after the tune. For reference, the best the car did in AS/BS trim was 331 RWHP and 341 RWTQ.
. It weighs about 3.5 lbs and starts the car RIGHT up.
I have Cobra Suzuka GT's waiting to go in the car as soon as I machine some seat rails for them. Should be right at 25-26lbs with sliders. My stock seats (full power, lumbar, etc.) are 45.0 each.
____________________
Current Summary
As of June 20, 2015, the car is undefeated in National competition and regularly placing top 5 in PAX. I plan on running alignment and shock tuning prior to Nationals. I will also be installing some weight reducing items as well as the all important race seats. Thanks for reading, stay tuned for more!
Last edited by Borg Motorsports; 07-19-2015 at 03:06 PM.
Halltech Venom CAI
American Racing 1.75" Headers
Magnaflow 14" round mufflers
Corsa Ti Catback Exhaust (modified)
ATI 25% Reduction SuperDamper
Brisk Racing GOR15LGS spark plugs
Granatelli Spark Plug Wires
Suspension
MCS 2-Way Remote Reservoir Dampers
VB&P Xtreme Custom 1500 lb/in front spring
VB&P Xtreme 990 lb/in rear spring
Strano Parts 33mm front ARB (full stiff)
Strano Parts adjustable rear ARB (mid)
Borg Motorsports Offset Delrin Bushings
Prototype spring adjusters front and rear
Delrin Steering Rack Bushing
Undisclosed gear diff (Torsen style)
Cobra Suzuka GT racing seats
Prototype seat mounts (slides on driver side only)
Battery Tender Li-Ion battery
Alignment
Front Camber: -4.6
Front Caster: +6.2
Front Toe: 1/8" out
Rear Camber: -3.1
Rear Toe: 1/8" in
Competition Weight - 3060 (1/8 tank)
______________________________
2016
Updated 2 June 2016 - high grip setup still under development
* indicates high grip setup only
Engine
Halltech Venom CAI
American Racing 1.75" Headers
Magnaflow 14" round mufflers
Corsa Ti Catback Exhaust (modified)
ATI 25% Reduction SuperDamper
Brisk Racing GOR15LGS spark plugs
Granatelli Spark Plug Wires
Suspension
Borg Motorsports/Whitener Racing Shocks custom Bilsteins
VB&P Xtreme 1000 lb/in front spring
Hyperco HPT 850 lb/in rear spring
Strano Parts 35mm front ARB (full stiff)
Strano adjustable rear ARB (full stiff)*
Borg Motorsports Offset Delrin Bushings
Delrin Steering Rack Bushing
Great read. I think the Z/28 is a good dynamic target and coincidentally I had the same car in mind.
I have some thoughts and questions on the leaf springs.
1. Is 1500 lb/in the stiffest VB&P will make for the front?
2. I've thought a lot about how they behave in heave vs. roll. Heave/ride behavior is straight forward and what one can measure ride rates for, like you have... For roll however, I still struggle to understand...
I recently did an imperfect test in the garage where I disconnected the front swaybar, jacked the front end up, and set the car down with one tire on a stack of 5x 2" blocks. I set the car down until "just before" the other tire touched the garage floor (slight air gap) and reached into the corner in droop to get a feel for where the spring adjuster was relative to the LCA and compared to the position when I jacked the car back up so that both corners were in full droop. It didn't change much... I noticed a very slight amount more air gap at the spring adjuster when I put the car back up in the air when compared to set down with the other
As I increased front spring rate (also VBP) from 975 to 1200, it seems to me that the balance of the car was not effected as much as I expected. So, with that and my backwoods experiment, I tend to believe that the leafsprings (at least the one up front) don't really resist roll as much as one might expect or hear talked about. I understand I didn't exactly put the car on a 7 post shaker and there are shortcomings to my tests. But, do you offer any insight that goes against my conclusion?
3. Damn it. Honestly from my data and from watching videos from you and Lugod (all of our cars seem to be loose during a brake in turn maneuver), my next idea was to call up VB&P and ask "Just how stiff of a front C5 spring do you offer?" I guess my idea wasn't as crazy as I thought.
With how much I bother you on here, I'm definitely going to get a set of bushings.
1. Is 1500 lb/in the stiffest VB&P will make for the front?
They will make whatever you want, but my understanding is that mine is unusually stiff. I asked about 1800 and 2000 and they said they could, but haven't ever done it. Based on how high my car was on a 1500, I do not think it would be advisable. My dive is under control. If you want more stiffness, it should come through bars.
Originally Posted by Ramo7769
I set the car down until "just before" the other tire touched the garage floor (slight air gap) and reached into the corner in droop to get a feel for where the spring adjuster was relative to the LCA and compared to the position when I jacked the car back up so that both corners were in full droop.
I think you answered your own question here. If the spring is only contacting one a-arm, it can't act as an ARB. Same thing if you disconnect one side of the ARB so it doesn't "touch" the a-arm; it doesn't work.
Originally Posted by Ramo7769
3. Damn it. Honestly from my data and from watching videos from you and Lugod (all of our cars seem to be loose during a brake in turn maneuver), my next idea was to call up VB&P and ask "Just how stiff of a front C5 spring do you offer?" I guess my idea wasn't as crazy as I thought.
Honestly, my car (to me) looks tight in the videos. What makes you say it looks loose on entry? I really like the setup as it is. If I want more rotation, I can brake a little more and the rear steps out. If I want less, I can back off the brakes and the rear settles in. It's my humble opinion that most people (especially for autocross) set their cars up too tight. Remember, loose is fast...
Originally Posted by Ramo7769
With how much I bother you on here, I'm definitely going to get a set of bushings.
They will make whatever you want, but my understanding is that mine is unusually stiff. I asked about 1800 and 2000 and they said they could, but haven't ever done it. Based on how high my car was on a 1500, I do not think it would be advisable.
Honestly, my car (to me) looks tight in the videos. What makes you say it looks loose on entry? I really like the setup as it is. If I want more rotation, I can brake a little more and the rear steps out. If I want less, I can back off the brakes and the rear settles in. It's my humble opinion that most people (especially for autocross) set their cars up too tight. Remember, loose is fast...
I'm surprised that you had issues with the front riding too high since the VBP front springs are flat. I've got more room to go lower with their own unmodified adjusters. But my 1200 lb/in front is considerably lower...
I've been dialing all the oversteer tendency out of my car... slowly increasing front spring and sway bar. With VBP springs now at 1200/800, Strano 33 up front and hotchkis at full soft in the rear, I can finally aggressively drive a slalom. For a while I was sideways everywhere.
OUTSTANDING write up. I think I need to read through it a few more times simply to absorb all the information you provided. I'm a numbers guy and love real-world data. It seems you have a very solid understanding (and open mind) to every topic discussed.
I look forward to your updates and I definitely plan on replacing my Poly bushings with your Delrin setup!
Thanks, much appreciated! As I move into the summer test session (pre-Nats), there will be much more numbers based, real world data for you. Take your time reading and feel free to ask questions, that's what this thread is for
I'm surprised that you had issues with the front riding too high since the VBP front springs are flat. I've got more room to go lower with their own unmodified adjusters. But my 1200 lb/in front is considerably lower...
The springs will be the same material between the 1200 and 1500 (or fairly close from my understanding of their manufacturing process). If the material is the same, the only way to increase rate 25% like I have compared to yours is to increase a dimension, in this case, the only dimension left to modify is thickness. So not only does the spring compress less under the weight of the car, but it is also SUBSTANTIALLY thicker (especially compared to the 1000 lb spring I also have). Added thickness moves the initial point of spring contact with the a-arm to a point with less jounce travel than your spring's first contact AND it compressed less from the higher rate (and there is potential if my car is lighter, it would ride higher on the same spring rate). Hope that clears things up.
By more than doubling the spring rate do you make "street touring" pretty painful in the car? That's something I've been wondering about on mine - I already have (phoenix) delrins and decent shocks and the street ride is poor but acceptable on stock c5z springs (same front spring as your z51, slightly stiffer rear). I'd like to try a stiffer front spring but don't want to spend the time and money only to find out that the car is just terrible on the street.
By more than doubling the spring rate do you make "street touring" pretty painful in the car? That's something I've been wondering about on mine - I already have (phoenix) delrins and decent shocks and the street ride is poor but acceptable on stock c5z springs (same front spring as your z51, slightly stiffer rear). I'd like to try a stiffer front spring but don't want to spend the time and money only to find out that the car is just terrible on the street.
For me, it was only terrible when I was driving around with the shocks at full stiff compression instead of full soft (oops). Remember though, ride quality is a subjective thing and everyone will have a different opinion of acceptable. I don't think it's bad at all, but I know I like stiffer riding cars. Given how far back you sit in the car, I think a stiffer front spring will have much less of an effect on your perception of ride than a stiffer rear spring.
That makes sense. I'll probably do it eventually, all it takes is more money like everything else.
Any plans to sell the delrin spring pads? AFAIK that's something that no one is already selling. In theory I could make my own but in practice I'm a terrible machinist and my dad's lathe/mill are 6 hours away.
Bushing questions: Comment first. I have my front camber maxed out and I'm still wearing the outside of the tire more at events. So I'm interested in going all in with your up and coming offset bushings.
Have you run into any binding issues when adjusting caster for example? Just wondering if you have issues when you shim one side of the upper wishbone more than the other to move the upper ball joint rearward? Rubber bushings I see that not really mattering very much.
Also, I'm a little confused about installation specifics for the offset bushings. But, if you plan on addressing that later, feel free to gloss over this for now. I won't be installing til next spring, most likely. Just curious.
The springs will be the same material between the 1200 and 1500 (or fairly close from my understanding of their manufacturing process). If the material is the same, the only way to increase rate 25% like I have compared to yours is to increase a dimension, in this case, the only dimension left to modify is thickness. So not only does the spring compress less under the weight of the car, but it is also SUBSTANTIALLY thicker (especially compared to the 1000 lb spring I also have). Added thickness moves the initial point of spring contact with the a-arm to a point with less jounce travel than your spring's first contact AND it compressed less from the higher rate (and there is potential if my car is lighter, it would ride higher on the same spring rate). Hope that clears things up.
A dimension that I noticed changed going from a 975 lb/in spring to a 1200 was the width of the spring ends. From the bushing to the adjuster holes, my higher rate spring is wider. I'm sure your spring is also thicker. Just wanted to point that out additionally.
No binding issues as far as I can tell. From the bushing section of the original post:
Many people will ask how the eccentrics are dealt with in a Delrin bushing design. I took great care to measure all the factory tolerances and determined that matching them would allow just enough movement of the bushings to allow the eccentrics to work. Prototype bushing sets were used to validate these calculations. After making some minor adjustments, the tolerances of the sleeve to Delrin interface, along with the tolerances of the bolt to the sleeve, allow the eccentrics to be adjusted through the majority of their range without any issues. Towards the extreme end of the adjustment range, the adjustment requires more force (ie. the adjusters feel very tight), but the bushings will still allow adjustment to the full extent of the range.
Originally Posted by Ramo7769
Also, I'm a little confused about installation specifics for the offset bushings. But, if you plan on addressing that later, feel free to gloss over this for now. I won't be installing til next spring, most likely. Just curious.
Do you have a way to appropriately locate the offset bushing in the control arm? I understand it's held in place by the set screw, but I'm wondering how you pick the right location to begin with. My understanding is that you'd want the ID of the bushing as outboard as possible in the vehicle statically. I'm concerned with locating it correctly on install to make sure this happens in the vehicle.
Also would you consider selling a mixed and matched setup? Offset uppers and non-offset lowers for example? I'd also see potential at tuning rear caster with these if you for example changed only one of the lower control arm bushings to an offset bushing. Alignment settings in the rear are a bit lacking in the rear of the C5.
Once you had the bushings right, how long would you say the install took you? Thanks!
Do you have a way to appropriately locate the offset bushing in the control arm?
You can position it any way you would like, but I will be engraving a marking line on it to line up with the mold seam on the a-arms. That seems to be the easiest thing for people to do themselves. That said, it's really not that critical and you can just eyeball it. Even if you are off by 20 degrees either way, it's barely a 0.010" difference laterally on the car.
Originally Posted by Ramo7769
I understand it's held in place by the set screw, but I'm wondering how you pick the right location to begin with. My understanding is that you'd want the ID of the bushing as outboard as possible in the vehicle statically.
Only on the uppers. On the lowers, you want the bolt as far INBOARD on the a-arm as possible.
Originally Posted by Ramo7769
Also would you consider selling a mixed and matched setup?
A couple people have asked so I am looking into it.
Originally Posted by Ramo7769
Once you had the bushings right, how long would you say the install took you? Thanks!
Maybe a day, and most of that was drilling the old bushings out.

 06-20-2015, 07:29 PM