DIY Alignment Tools
#1
Instructor


Thread Starter
Anyone use Quicktrick Alignment tools
Are you able to do your own alignment to allow changes for track and street.
http://www.quicktrickalignment.com
http://www.summitracing.com/int/parts/qta-90097
Any other recommendations?
Are you able to do your own alignment to allow changes for track and street.
http://www.quicktrickalignment.com
http://www.summitracing.com/int/parts/qta-90097
Any other recommendations?
The following users liked this post:
ROBMARZ (12-22-2015)
#4
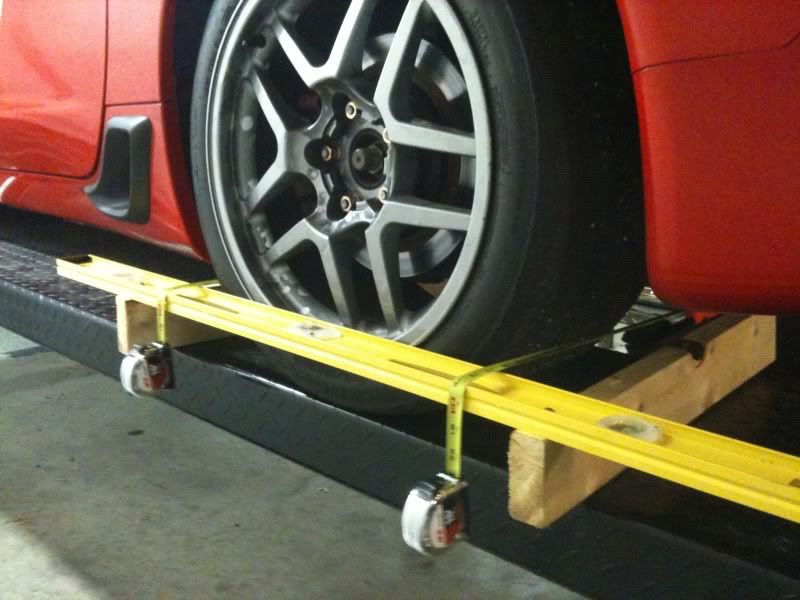
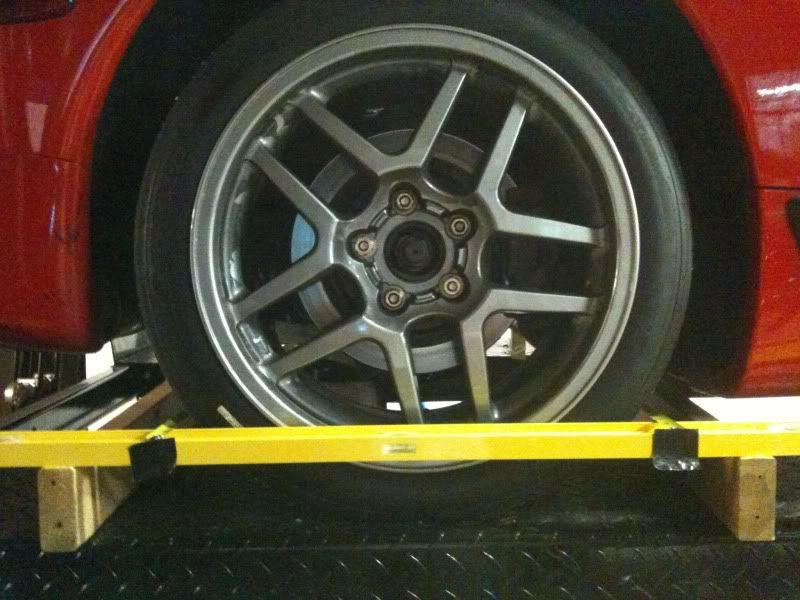
 Sperkins method is the same thing I, and others do. I use known straight 3" aluminum 90 stock with slots to hold the tape measures; just need something about 2 ft long that is straight.
Cheap harbor freight tape measures are perfect...just be sure you get two that measure the same at about 72".
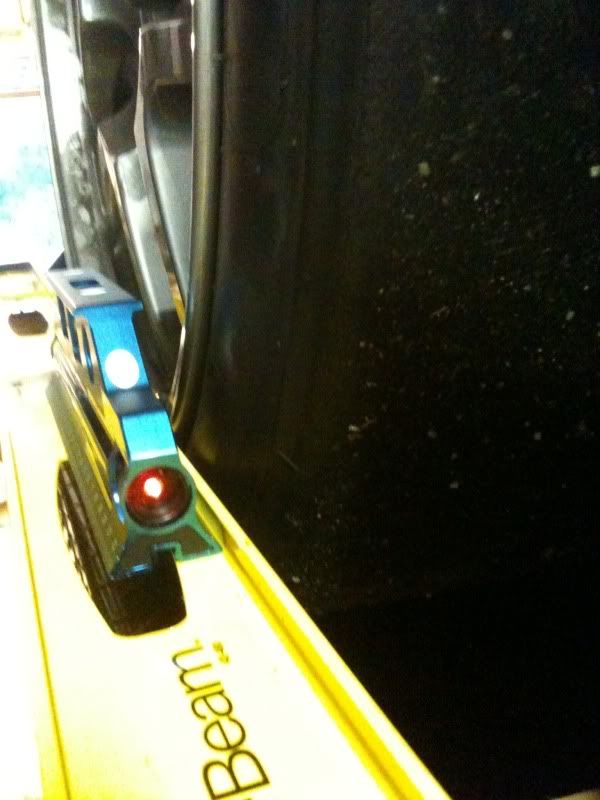
The angle stock is easy to use with the laser when setting the thrust line. Again, there are many ways to do thrust line after finding something that is straight.
#5
Melting Slicks


Also get some freezer bags and spray wd-40 in the bags and seal them up. Roll the tires on to the bags and it will let the suspension take the adjustments and you won't have to keep moving the suspension to get it to settle. Just a trick a old timer showed me.
#6
Tech Contributor
Member Since: Oct 1999
Location: Charlotte, NC (formerly Endicott, NY)
Posts: 40,085
Received 8,926 Likes
on
5,332 Posts

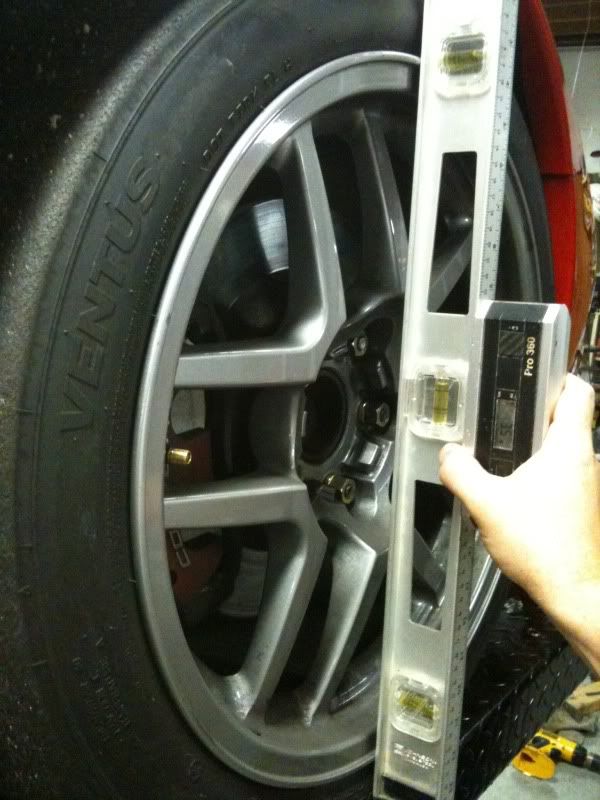
I started with a 2 ft long Sears Digital Laser Level and a set of Toe Plates that I purchased off eBay. The laser level can be used to read camber, front caster, measure thrust angle and to center the steering wheel. The toe plates are used to measure front and rear toe and to set thrust/steering wheel angle in conjunction with the laser level. To measure camber I place the level against the tire in front of the hub and in back of the hub to get two measurements (sort of a self check) while avoiding the tire bulge at the bottom. To measure caster turn the steering wheel one half turn to the left, measure camber at the left front wheel, then turn the steering wheel one complete turn from that position to the right and measure camber again. Then I use David Farmer's formula for calculating caster. Then I repeat the process for the right front. These two can be done at the same time if you make sure you note your readings correctly. Setting toe with the toe plates is obvious, setting thrust is a little less obvious. I set the toe plates on the rear wheels and then place the digital laser level on top of them laying on its side. Since it has a magnetic base I can take a couple of long box wrenches and attach then to the magnets and they sort of clamp the level to the toe plate. The laser is pointed to the front and I use a jack stand with a thin measuring stick taped to it to measure where the laser light hits the stick. The stick is inserted into the wheel hub so it is against the far end of the recessed part of the hub. Once I know the measurement I switch the jack stand and the laser to the opposite side of the car and repeat the measurement there. If there is a difference in distance from the hub from one side or the other I adjust the rear toe on each side of the car to make the measurements equal or within an 1/8 in of each other. 1/8 inch across a 100+ inch wheel base is a negligible error. Once that is done I switch the plates to the front and do the same thing with the lasers pointing to the rear and the jack stand set up with the measuring stick touching the axle ends. Then I adjust the front toe so the steering wheel is straight.
I upgraded my components last year and added a Longacre Digital Caster Camber gauge with a magnetic adapter that would fit through my stock C6 wheels so the adapter was flush against the hub. It could also attach to the brake rotor through the spokes. Then I added Smart Strings to set toe, thrust and steering wheel. This worked well and saved me some time, however, I upgraded to a C7 Z06/Z07 and the stock wheels have a smaller diameter where the cap is installed so the magnetic adapter on the C/C gauge can't reach the hub and it will not attach to CCM brake rotors. So I am relegated to holding it against the brake rotor and measuring caster/camber. With the correct adapter it is the only gauge that I have that will let me measure rear caster. The smart strings won't fit over the rear spoiler so I am back to using the toe plates to set toe/thrust/steering wheel angle.
A couple of things you should be aware of. Not all garage floors are as smooth as the floor in that video. You can't be sure you are zeroing a gauge by placing it on the floor next to the tire. My previous garage floor had dips that were at least an 1/8 inch deep all over the floor. I could see them easily when I cleaned the floor and watched where the water puddled. The tire could be setting on a high spot and the gauge I was trying to zero could be sitting at a different angle in one of the low spots.
I don't try to keep the car level from front to rear only from side to side. That makes it easier to find a spot you can get the car level enough to make your measurements. Otherwise, it is like trying to get a 4 legged chair to stop rocking.
Adjusting camber/caster and front toe requires getting the wheels in the air unless you have a $12K alignment lift so be prepared to drive the car around the block to settle the suspension between adjustments and measuring the results of the adjustments. Rear toe can be set with the tires on the ground if your car isn't lowered or you aren't too big. If you have the tires on something that will slip when you turn the tie rod adjusters you don't need to drive the car after making an adjustment.
Some people place their tires on stuff that will slip when they lower the car but the suspension will not settle enough. On my C6Z I could see a fairly large difference in camber between bouncing the car and driving it a half mile.
Bill
#7
I use toe plates, digital level for camber, and string tied to jack stands set at the height of the middle of the wheels to get the rear toe equal. I have used the laser method but prefer using strings. Depending on how much toe I have in the back sometime I need a spacer under the string to move the string out from the tire. I put the spacer between the back of the back wheel and string and then make sure I get the same measurements from the string to the front of the rear wheel on each side. I use calipers to measure the distance but any stiff ruler should work.
I mostly just change the toe settings and leave the camber/caster alone. I think that toe has the biggest effect on handling and tire wear and the easiest to change. On my C5 ZO6 ¼ turn per side = about 1/8in. total tow change in the rear.
With practice it’s pretty easy to +/- a little toe, just turn the adjusters the same amount on both sides.
The following users liked this post:
ROBMARZ (12-22-2015)
#8
Burning Brakes


That quicktrick looks pretty slick. Recently the only alignment tool I bought was $60 camber/caster gauge from maximum performance to replace straight edge, level, and tape measure. For toe I use string and jack stands... I can adjust front toe without lifting car (C5) by reaching under.
I've marked 4 points of the garage after measuring with a bucket of water and just drive up on combination of 1/8" tiles, which plastic bags work well for caster (turning wheels), but the zip locks with wd40 mentioned above seems better. I also find driving the car is necessary for camber/caster, but you can get close bouncing and then drive for final adjust/check.
I haven't done thrust measure yet and seems laser is necessary.
The following users liked this post:
ROBMARZ (12-22-2015)
The following users liked this post:
ROBMARZ (12-24-2015)
#11
Another tip is to do one end at a time. Assuming that you have a good alignment to start and the steering wheel is centered. Tests drive the car after doing the rear and if the steering wheel is no longer centered then you know something is off, or you did not start with a good alignment.
The last alignment I paid for was terrible with number all over the place, decided that I could do better in my driveway. Tech was either an idiot or just did not care.
The last alignment I paid for was terrible with number all over the place, decided that I could do better in my driveway. Tech was either an idiot or just did not care.
#12
Tech Contributor
Member Since: Oct 1999
Location: Charlotte, NC (formerly Endicott, NY)
Posts: 40,085
Received 8,926 Likes
on
5,332 Posts

Another tip is to do one end at a time. Assuming that you have a good alignment to start and the steering wheel is centered. Tests drive the car after doing the rear and if the steering wheel is no longer centered then you know something is off, or you did not start with a good alignment.
The last alignment I paid for was terrible with number all over the place, decided that I could do better in my driveway. Tech was either an idiot or just did not care.
The last alignment I paid for was terrible with number all over the place, decided that I could do better in my driveway. Tech was either an idiot or just did not care.
Bill
#13
Instructor


Thread Starter
#14
Safety Car


Anyone use Quicktrick Alignment tools
Are you able to do your own alignment to allow changes for track and street.
http://www.quicktrickalignment.com
http://www.summitracing.com/int/parts/qta-90097
Any other recommendations?
Are you able to do your own alignment to allow changes for track and street.
http://www.quicktrickalignment.com
http://www.summitracing.com/int/parts/qta-90097
Any other recommendations?
#15
I upgraded to a C7 Z06/Z07 and the stock wheels have a smaller diameter where the cap is installed so the magnetic adapter on the C/C gauge can't reach the hub and it will not attach to CCM brake rotors. So I am relegated to holding it against the brake rotor and measuring caster/camber. With the correct adapter it is the only gauge that I have that will let me measure rear caster. The smart strings won't fit over the rear spoiler so I am back to using the toe plates to set toe/thrust/steering wheel angle.
Bill
Bill
Did you find a way to make the smart strings work on the C7Z? Would removing the center wicker help?
#16
Safety Car


After hearing some horror stories about how badly calibrated most dealer and shop alignment racks were I've starting looking in to DIY alignments for my C7Z. I was about to buy a set of smart strings and stumbled across your comment above.
Did you find a way to make the smart strings work on the C7Z? Would removing the center wicker help?
Did you find a way to make the smart strings work on the C7Z? Would removing the center wicker help?
I have a C6 with the full race rear spoiler and have not tried it yet but something like that is what I'll need to do as the hooks on the top strings bracket is too short to hook over everything like a base or Z06 car

#17
Tech Contributor
Member Since: Oct 1999
Location: Charlotte, NC (formerly Endicott, NY)
Posts: 40,085
Received 8,926 Likes
on
5,332 Posts

After hearing some horror stories about how badly calibrated most dealer and shop alignment racks were I've starting looking in to DIY alignments for my C7Z. I was about to buy a set of smart strings and stumbled across your comment above.
Did you find a way to make the smart strings work on the C7Z? Would removing the center wicker help?
Did you find a way to make the smart strings work on the C7Z? Would removing the center wicker help?
I haven't had my Vette wheels aligned at the local dealer yet but the dealer's shop in Endicott, NY did a very good job. In fact the Corvette mechanic there showed me how to do my own alignments after I had my 97 into them several times getting it set up for the track. He said this is obviously getting expensive. Let me show you how to do it and he recommended some tools I could purchase at the local home store that would do the job.
Bill
Last edited by Bill Dearborn; 02-13-2016 at 03:22 PM.
The following users liked this post:
mikeCsix (02-14-2016)
The following users liked this post:
mikeCsix (02-14-2016)
#19
The following users liked this post:
mikeCsix (02-14-2016)


