Carter AFB Rebuild: Detailed Questions
 10-15-2007, 08:20 AM
#1
Drifting

Thread Starter

I've been working on rebuilding the original Carter AFB from my '64 (300HP, mt) this weekend, and as I dug into it I realised that it's been over 15 years since I've rebuilt a carb, and even then they were all Quadrajets. And, as I was putting it back together I came across a couple of things I couldn't figre out after several hours of gas vapours and carb cleaner...

The kit is a Niehoff CK89A and I've bought new Niehoff FS572 floats from the local Lordco. The kit number checked out with the numbers on the carb (3721SA) according to the Lordco catalogue, as did the numbers on the carb with the Black Book. The carb has obviously been apart at least once over the last 43 years.
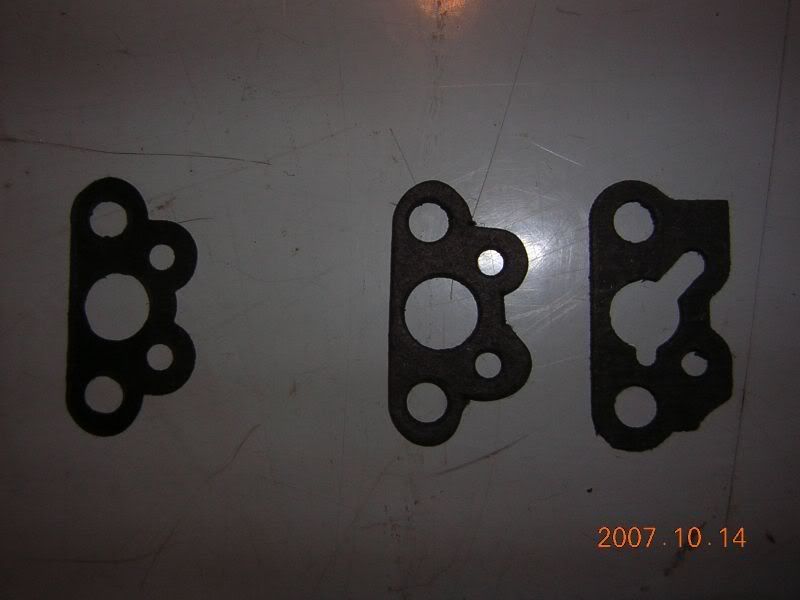
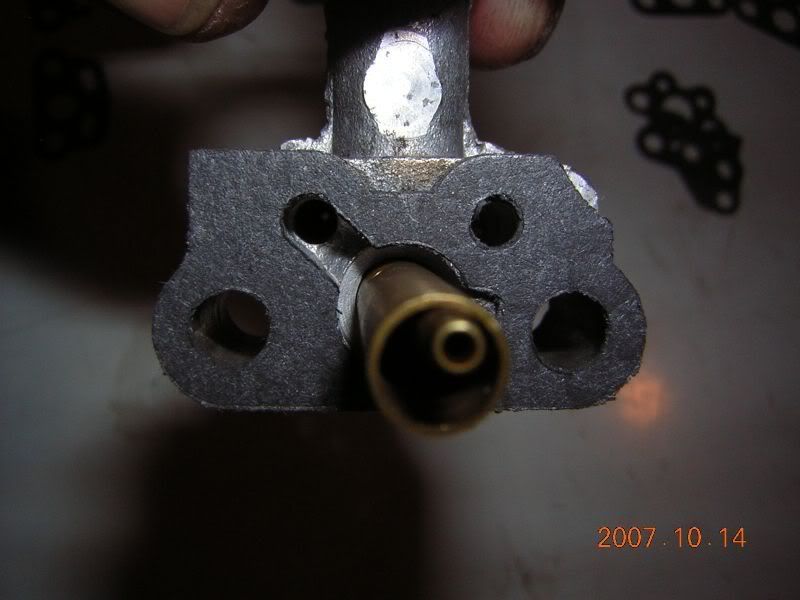
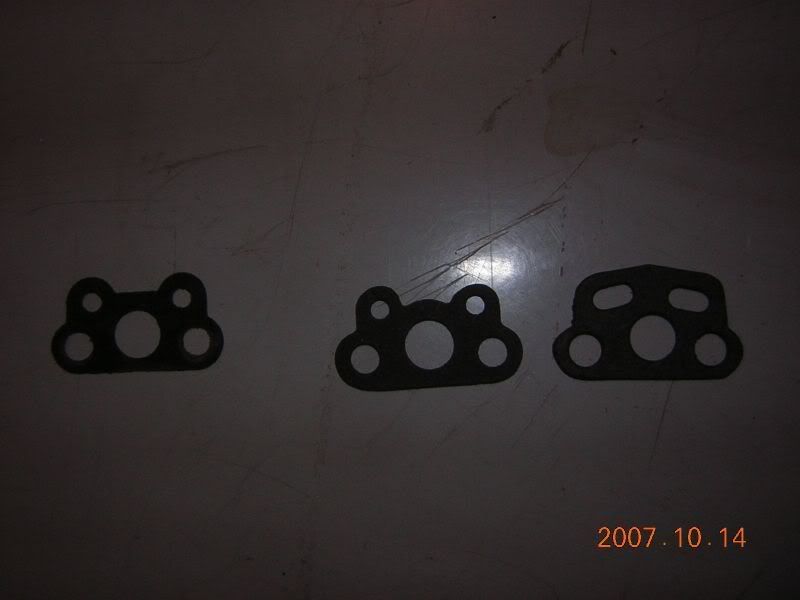
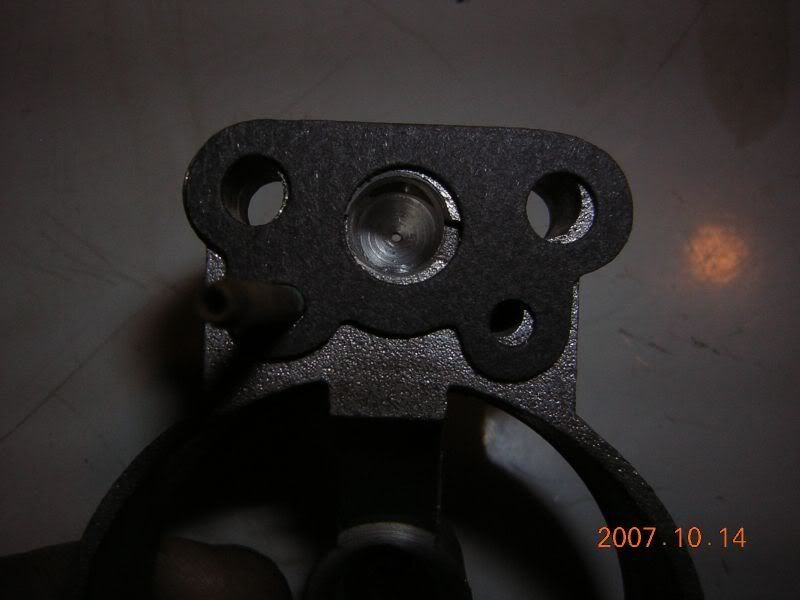
The first question is about the venturi gaskets. There are two sets of gaskets in the kit each for the primaries and secondaries. One set (without 'cutouts') matches what was in the carb when I took it apart. The other set has 'cutouts' that either correspond to the machining on the venturis (primaries), or appear to make the holes line up better (secondaries). Considering I know someone has been in there before, do I go with what was there before (carb ran well until I developed a flooding problem), or with what appears to match the machining? A good friend and long time 'carb guy' reccommended going with what was in there, as it worked before the flooding problem developed.
Primary Gaskets:
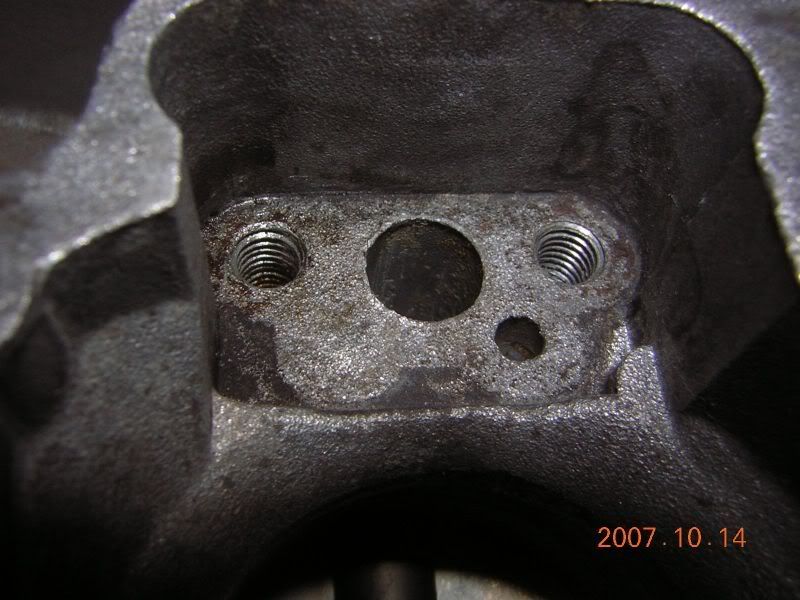
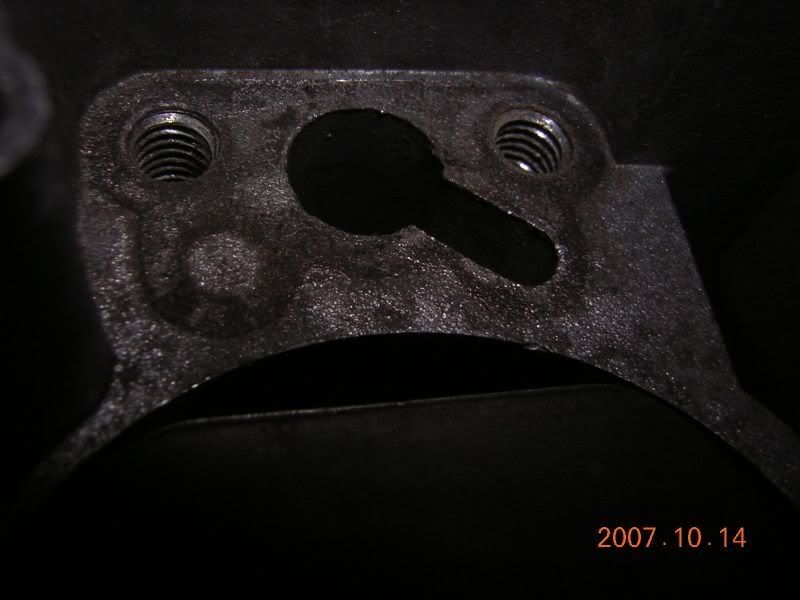
Primary Venturi Seat:
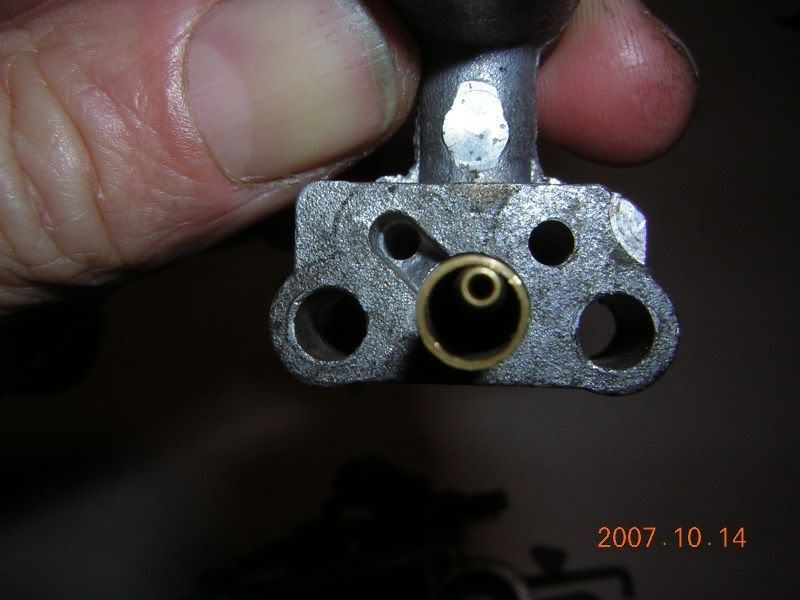
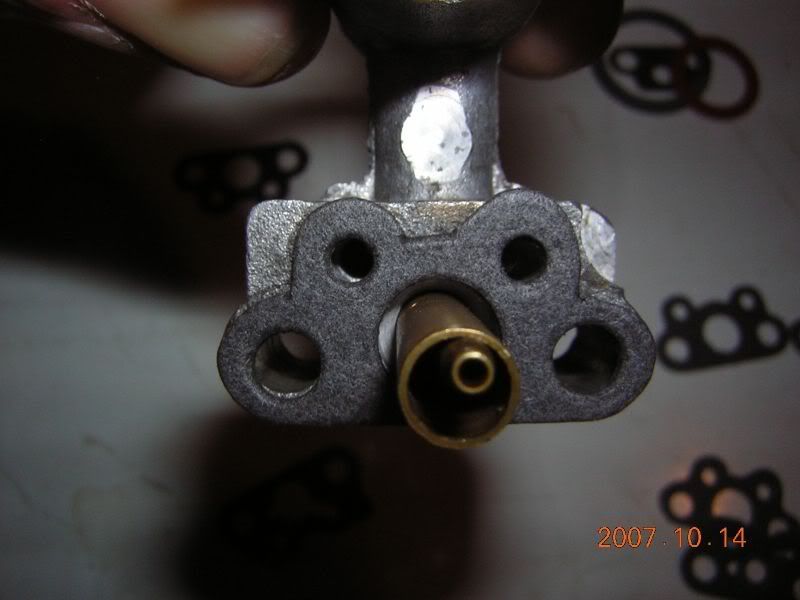
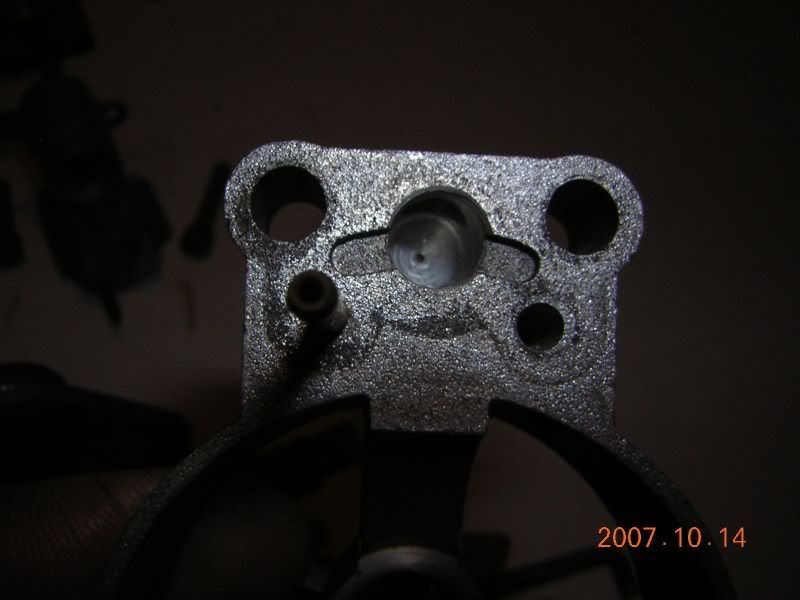
Primary Venturi Face:
Primary Venturi Same Gasket:
Primary Venturi Different Gasket:
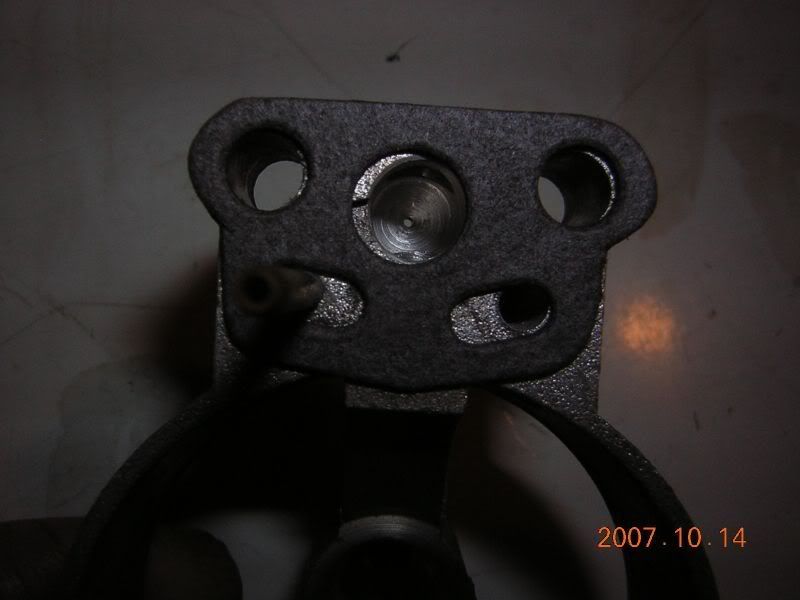
Secondary Venturi Gaskets:
Secondary Venturi Seat:
Secondary Venturi Face:
Secondary Venturi Same Gasket:
Secondary Venturi Different Gasket:
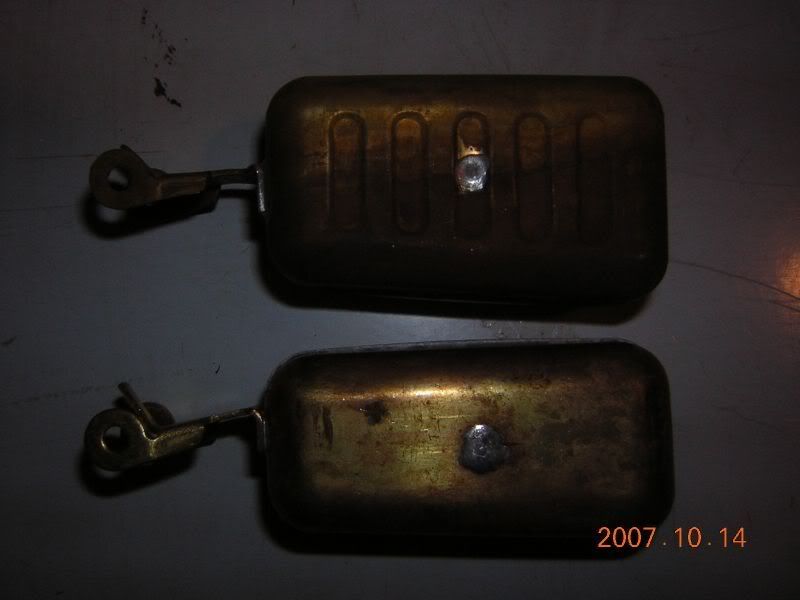
The next question was regarding the floats. The new floats don't look like the old ones. They appear to be the correct length, but are not as tall. Again, my carb guy buddy reccommended going with what was in there unless there is evidence that they're pitted or otherwise leaking - that they don't usually fail. As I had the flooding problem, I figured better safe than going into the carb again. However, the old ones look more like the ones in the 63 Shop Manual. Which to use?
Float Height:
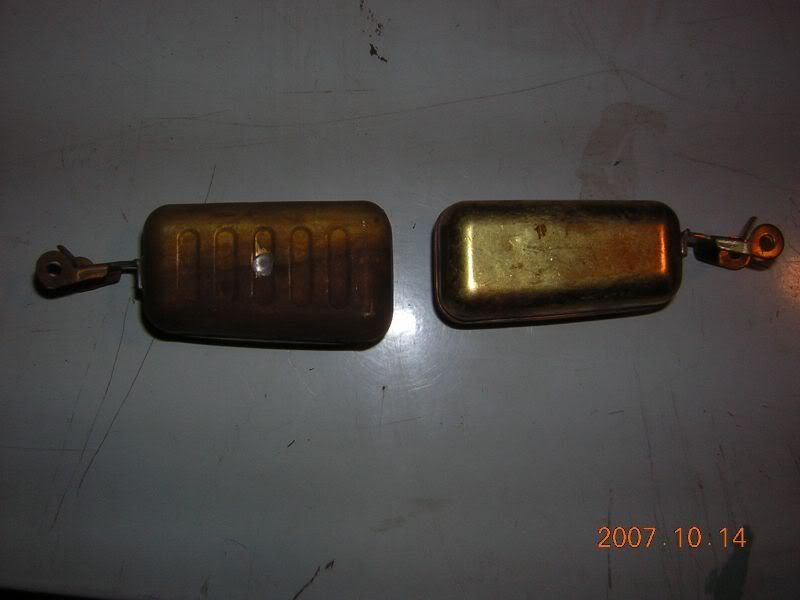
Float Length:
And, I have a few adjustment questions. The 63 Shop Manual (6M-5) has float levels and drops as 5/16" and 3/4" respectively, but the kit instructions have 7/32" and 23/32". For a difference of 3/32" more clearance on the GM float level spec, and 1/32" more clearance on the GM float drop spec. I've been advised that the level is the critical adjustment, less so for the drop. I'm assuming I go with GM's spec.
Finally, the manual (6M-7) has two different values for the choke valve clearance when adjusting the unloader: 3/16" in the text and 1/4" in fig 15. Which is correct, or is it that critical?
My carb buddy is going to come by after work today to help me out, but I wanted to get some Corvette specific advice. Thanks in advance for any help that you can offer.

The kit is a Niehoff CK89A and I've bought new Niehoff FS572 floats from the local Lordco. The kit number checked out with the numbers on the carb (3721SA) according to the Lordco catalogue, as did the numbers on the carb with the Black Book. The carb has obviously been apart at least once over the last 43 years.
The first question is about the venturi gaskets. There are two sets of gaskets in the kit each for the primaries and secondaries. One set (without 'cutouts') matches what was in the carb when I took it apart. The other set has 'cutouts' that either correspond to the machining on the venturis (primaries), or appear to make the holes line up better (secondaries). Considering I know someone has been in there before, do I go with what was there before (carb ran well until I developed a flooding problem), or with what appears to match the machining? A good friend and long time 'carb guy' reccommended going with what was in there, as it worked before the flooding problem developed.
Primary Gaskets:
Primary Venturi Seat:
Primary Venturi Face:
Primary Venturi Same Gasket:
Primary Venturi Different Gasket:
Secondary Venturi Gaskets:
Secondary Venturi Seat:
Secondary Venturi Face:
Secondary Venturi Same Gasket:
Secondary Venturi Different Gasket:
The next question was regarding the floats. The new floats don't look like the old ones. They appear to be the correct length, but are not as tall. Again, my carb guy buddy reccommended going with what was in there unless there is evidence that they're pitted or otherwise leaking - that they don't usually fail. As I had the flooding problem, I figured better safe than going into the carb again. However, the old ones look more like the ones in the 63 Shop Manual. Which to use?
Float Height:
Float Length:
And, I have a few adjustment questions. The 63 Shop Manual (6M-5) has float levels and drops as 5/16" and 3/4" respectively, but the kit instructions have 7/32" and 23/32". For a difference of 3/32" more clearance on the GM float level spec, and 1/32" more clearance on the GM float drop spec. I've been advised that the level is the critical adjustment, less so for the drop. I'm assuming I go with GM's spec.
Finally, the manual (6M-7) has two different values for the choke valve clearance when adjusting the unloader: 3/16" in the text and 1/4" in fig 15. Which is correct, or is it that critical?
My carb buddy is going to come by after work today to help me out, but I wanted to get some Corvette specific advice. Thanks in advance for any help that you can offer.
 10-15-2007, 08:27 PM
#4
Tech Contributor

Well, since the response rate is pretty thin, I'll throw my 2 cents in although I'm no carburetor expert.
When rebuilding the 3269S AFB on my 62, I always use this one
and this one, because those are what I pulled off the carb when I rebuilt it the first time in 1981.
I can't help you on the float
When rebuilding the 3269S AFB on my 62, I always use this one
and this one, because those are what I pulled off the carb when I rebuilt it the first time in 1981.
I can't help you on the float
10-15-2007, 11:18 PM
#5


Why replace the floats it the old ones are still good?
Why not test the old ones for leaks...if none then just reuse them.
As for the gaskets.. its been a while since I rebuilt my Carter so I dont remember. I will have to look for my Carter book and get back with you.
Good Luck.
Why not test the old ones for leaks...if none then just reuse them.
As for the gaskets.. its been a while since I rebuilt my Carter so I dont remember. I will have to look for my Carter book and get back with you.
Good Luck.


 Check for gas inside the old floats and go from there.
10-16-2007, 06:00 PM
Check for gas inside the old floats and go from there.
10-16-2007, 06:00 PM
#7
Drifting
Thread Starter
Thanks for the feedback guys.
62Jeff's suggestion on which gaskets to use was the same as my carb buddy's instinct: go with what was in there. He came by last night and we sorted it out. Instinct was correct.
For the record, and for the next guy to tear one of these apart, here's why:
On the primaries, the gaskets with the cutout slots that match the machining on the face, also have a notch for the small pick-up tube (my terminology is likely off) - for primaries that have the small pickup tube outside the larger brass tube. As these have the small tube inside the larger one, there was no need for the notch. Also, the other style of primaries needs the cutout slot as the machining on the face is different.
On the secondaries, the gaskets with the cutout slots are also slightly deeper - enough that when placed into the seat they protrude slightly into the path of the airway under the venturi (hard to notice these things in the wee hours sometimes). So, these would go with a carb that had different machining as well.
As for the floats, al329 and Plasticman, your suggestions were the same as my carb buddy's. He said that in all his years rebuilding carbs, he has never seen one that had sunk that didn't still have fuel in it. That even after weeks, you could shake them and still feel fuel in them. He said we could test them, but that they looked perfect to him. And with the new ones that appeared different, he said, "Well, you *$%# with them and make them work, but why bother?"
And after exactly one beer each, we'd sorted out the gasket issues, set the old floats with new needles and seats, compared notes on a few adjustment details, and talked about the whole old car thing a bit.
10-16-2007, 08:27 PM
#8
Le Mans Master

Member Since: Nov 2000
Location: Going too fast over the hill. Iowa
Posts: 7,246
Likes: 0
Received 18 Likes
on
16 Posts

Anytime you want to test brass floats: using pliers, submerge them in a pot of boiling water. If the float has cracks, you will see bubbles.
Turn on the exhaust fan over the range or the house will smell like gasoline
Turn on the exhaust fan over the range or the house will smell like gasoline
10-16-2007, 08:51 PM
#9
Drifting
From the seat and face the original type you took off seems to be required.
If the float didn't have gas it it then most likly still good since brass. Magicv8 gave a good method to test.
If the float didn't have gas it it then most likly still good since brass. Magicv8 gave a good method to test.
10-16-2007, 10:56 PM
#10
Drifting
Thread Starter
Thanks for the float testing feedback.
I put the carb on today during my lunch-break - when there was a brief pause in the driving rain. The car's sat outside in the parking lot at work since Friday afternoon, at least now I know that the window and door seals are good...
After work I splashed a bit of fuel down the carb (in the pouring rain) and cranked it over. And it came to life, off fast idle, and got me home without incident.