1coolC2 exhaust build
 08-26-2008, 11:11 AM
#1
Drifting

Thread Starter

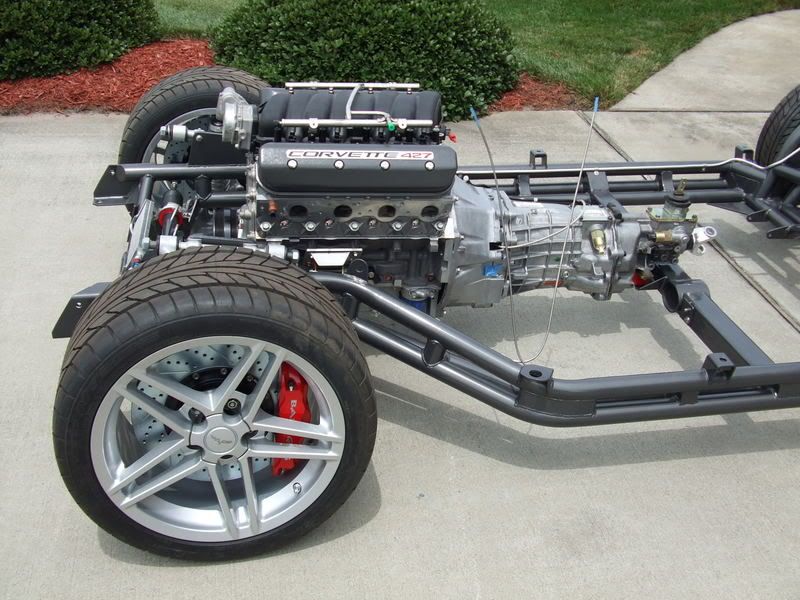
It's been awhile since I posted any pictures or info on how the build was coming along. We recently "almost" finished things up and have the car up and running and moving under its own power.
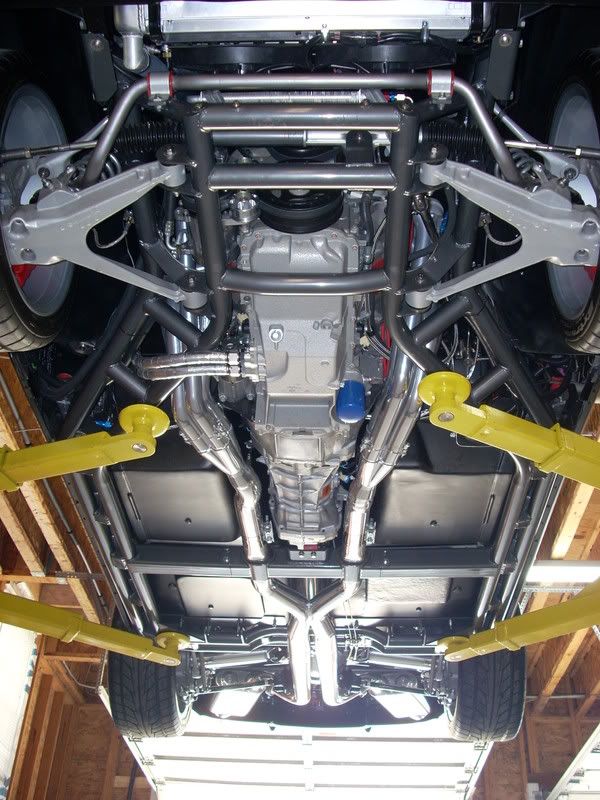
One of the major projects in this build was the under car exhaust system for the modified LS7/427. My goal was to achieve as much power from the engine, while still keeping it quiet enough to take long trips without going deaf. Let's start by saying "I love the look of a midyear with side pipes!!!" and it would have been MUCH easier for me to go that route, however as stated above....I wanted to make the most power and keep the noise out back. I decided to use stainless for the entire system as well as ceramic coat the entire system to maintain a thermal barrier.
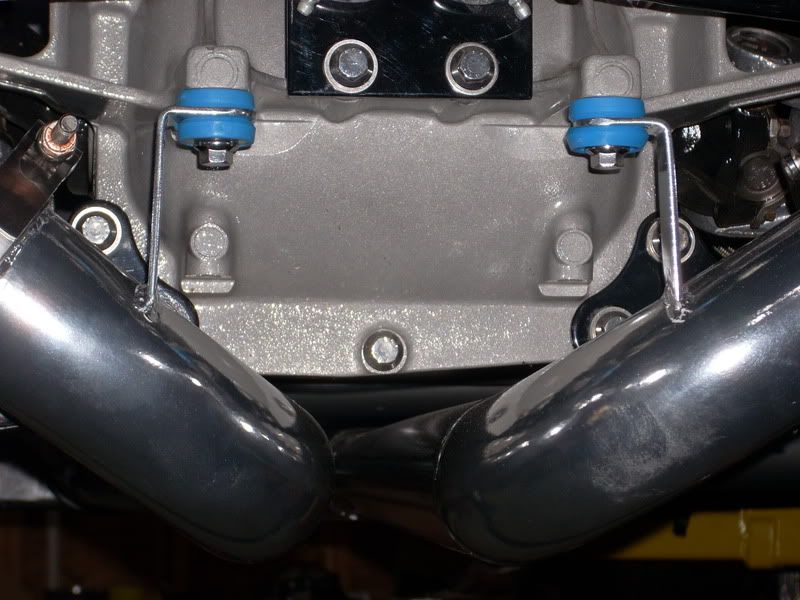
When I had Mike at SRIII build my chassis, I had him install 4" openings in the trans cross member to accommodate a 3" exhaust system. To make it fit and maintain adequate ground clearance he pressed them into ovals. You can see them in these photos�
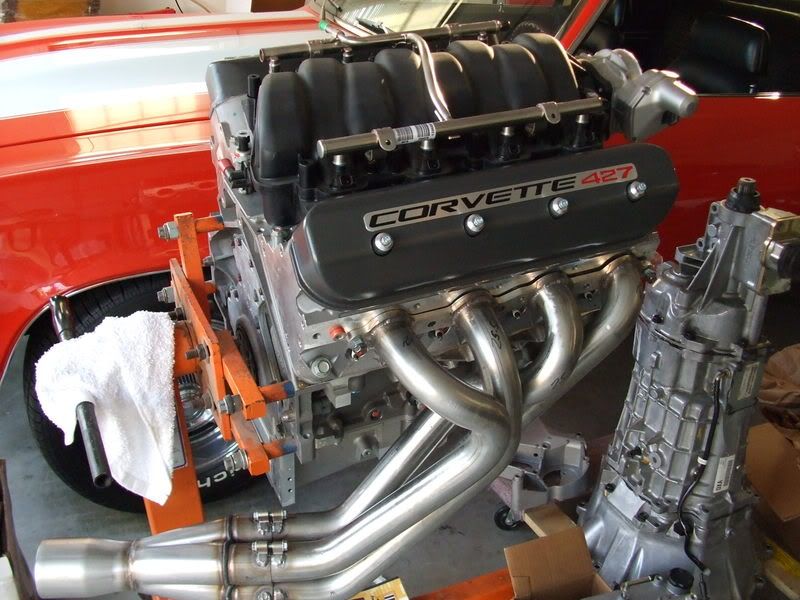
Once I had the engine mocked up on the frame, a good friend and fabricator John Walsh and I used a complete donor firewall section which included the floor back to the shifter that I borrowed from Cannons Corvettes, this made the job much easier because we could lift it on and off when needed much easier than the entire body. John then built the custom long tube 1 7/8" primary tube headers using 3" merge collectors. Here�s a pic of the completed headers on the engine..
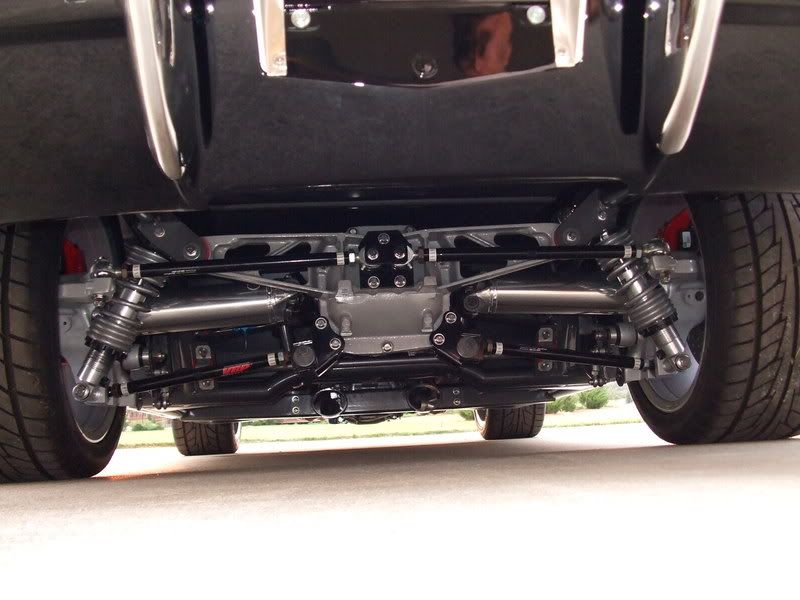
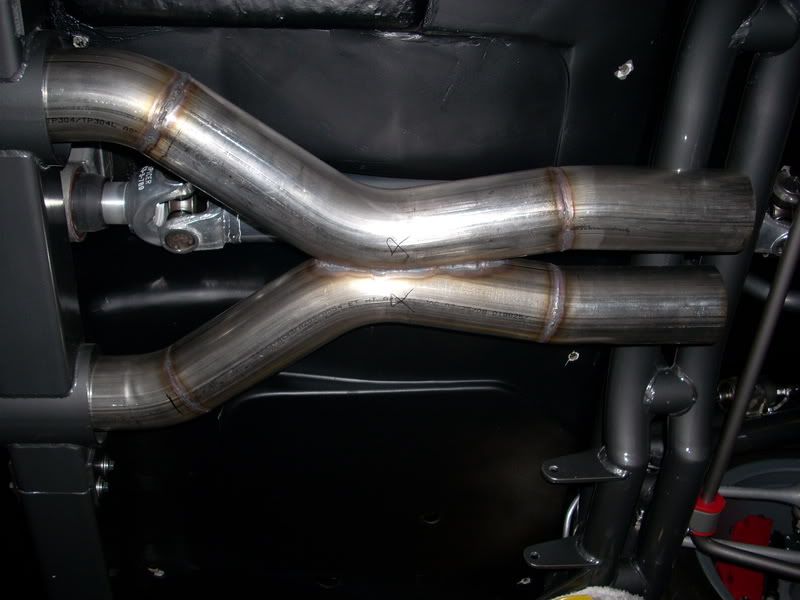
Thinking that the hard part was over �once the car was assembled we started on the under car portion. Fitting the 3" system with an X-pipe (made with two 45 degree bends that were cut at the radius, fitted and tig welded) and large mufflers was a trick. We had to press 2 sections into oval shape to clear the X-member and to pass under the main frame hoop towards the back of the car.

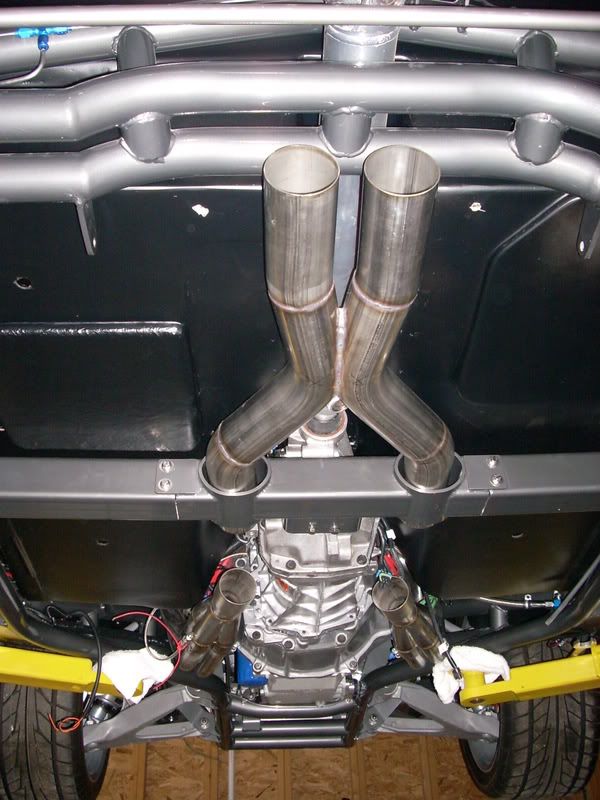
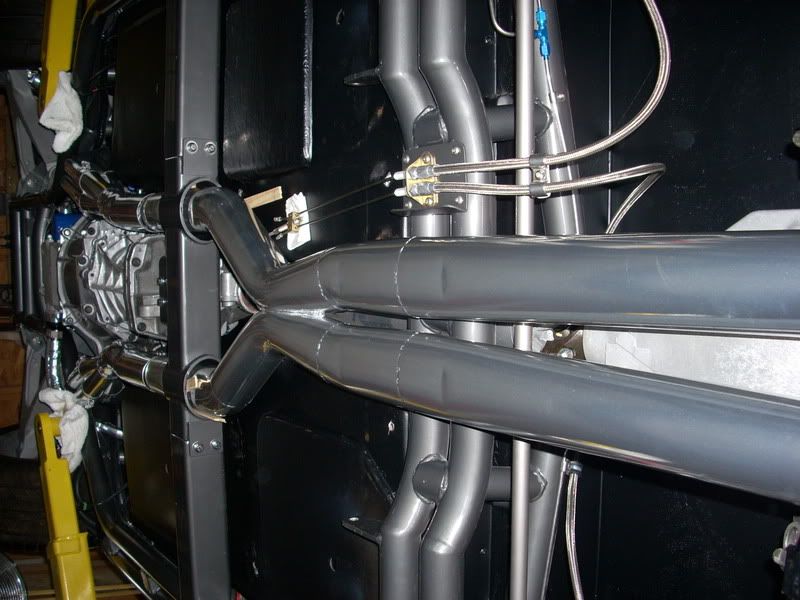
I wanted to keep the large 50 series Flowmaster mufflers out of sight and provide room for a compact tool/storage box that we plan to build to house a jack, tools and misc in place of the spare tire carrier. We were able to make nice sweeps up and outward to align the mufflers for the tail pipes. We used V band clamps and flanges to attach the mufflers to the main X pipe section, this allows for easy removal of the system if necessary. These clamps are available from Stainless works and are really nice (and not cheap).
One of the major projects in this build was the under car exhaust system for the modified LS7/427. My goal was to achieve as much power from the engine, while still keeping it quiet enough to take long trips without going deaf. Let's start by saying "I love the look of a midyear with side pipes!!!" and it would have been MUCH easier for me to go that route, however as stated above....I wanted to make the most power and keep the noise out back. I decided to use stainless for the entire system as well as ceramic coat the entire system to maintain a thermal barrier.
When I had Mike at SRIII build my chassis, I had him install 4" openings in the trans cross member to accommodate a 3" exhaust system. To make it fit and maintain adequate ground clearance he pressed them into ovals. You can see them in these photos�
Once I had the engine mocked up on the frame, a good friend and fabricator John Walsh and I used a complete donor firewall section which included the floor back to the shifter that I borrowed from Cannons Corvettes, this made the job much easier because we could lift it on and off when needed much easier than the entire body. John then built the custom long tube 1 7/8" primary tube headers using 3" merge collectors. Here�s a pic of the completed headers on the engine..
Thinking that the hard part was over
�once the car was assembled we started on the under car portion. Fitting the 3" system with an X-pipe (made with two 45 degree bends that were cut at the radius, fitted and tig welded) and large mufflers was a trick. We had to press 2 sections into oval shape to clear the X-member and to pass under the main frame hoop towards the back of the car. I wanted to keep the large 50 series Flowmaster mufflers out of sight and provide room for a compact tool/storage box that we plan to build to house a jack, tools and misc in place of the spare tire carrier. We were able to make nice sweeps up and outward to align the mufflers for the tail pipes. We used V band clamps and flanges to attach the mufflers to the main X pipe section, this allows for easy removal of the system if necessary. These clamps are available from Stainless works and are really nice (and not cheap).
 08-26-2008, 11:12 AM
#2
Drifting
Thread Starter
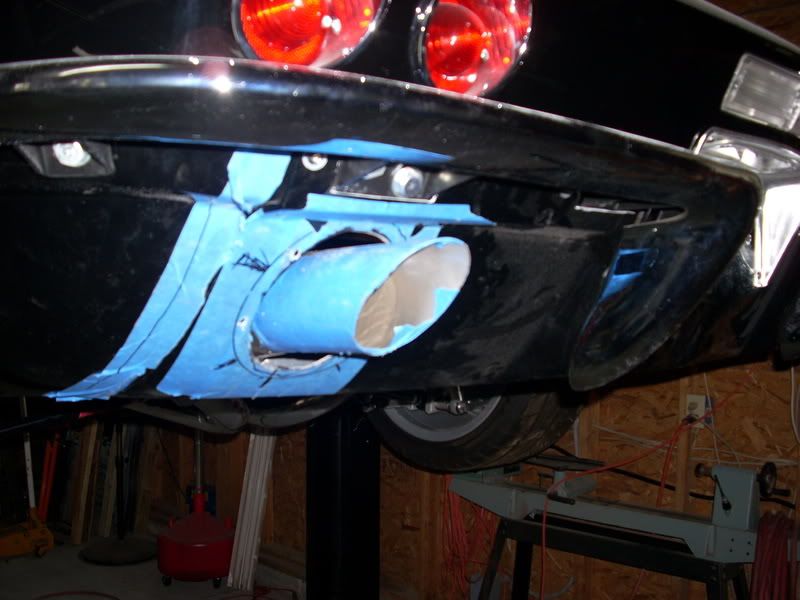
Knowing the 3" pipes would not fit with adequate clearance through the factory rear panel bezels, I purchased a panel with no holes so we could build our own bezels. Once we got the mufflers in position and mounts installed, we slipped a section of pipe into the back of the muffler and scribed the marks to the back side of the panel and cut them out with a air recip saw. We then made up the tail pipes and slid a piece of 4" stainless over the tail pipe and marked/cut the pipe to reflect the shape needed for the inside diameter of the bezel ring.
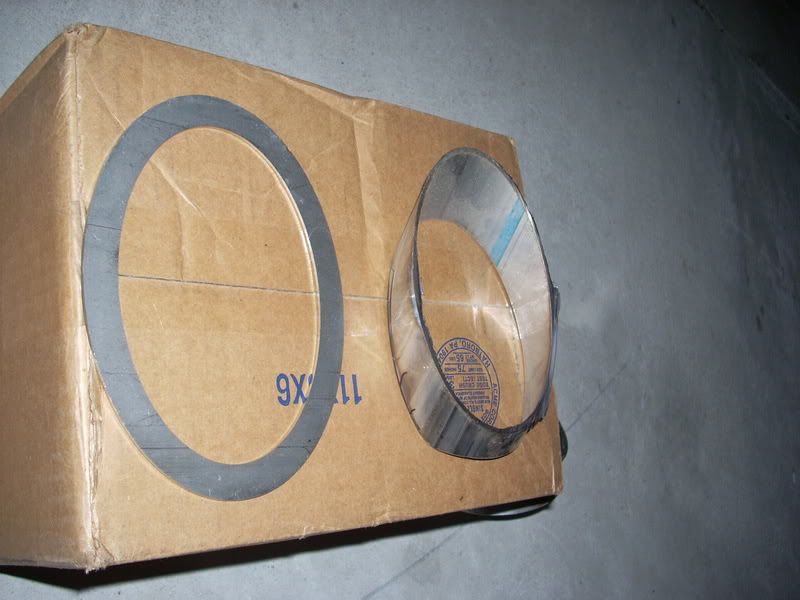
I provided the template to Rich Merce (BADBIRDCAGE) who had a friend laser cut a set of rings that we then tig welded to the 4" sections. We also welded studs to the back side of the rings to accommodate mounting them to the rear panel. After some grinding and polishing they look amazing close to the factory pieces!! (only bigger!!)
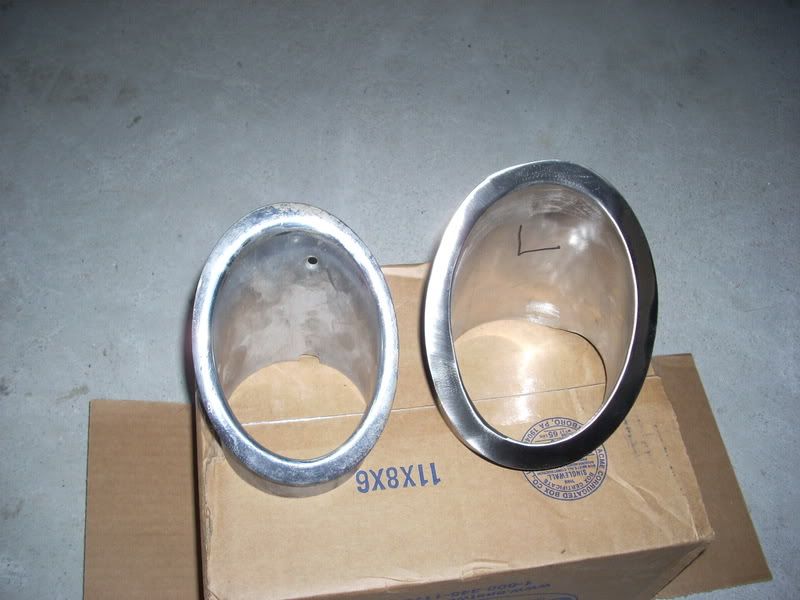
Here is a pic next to original bezel
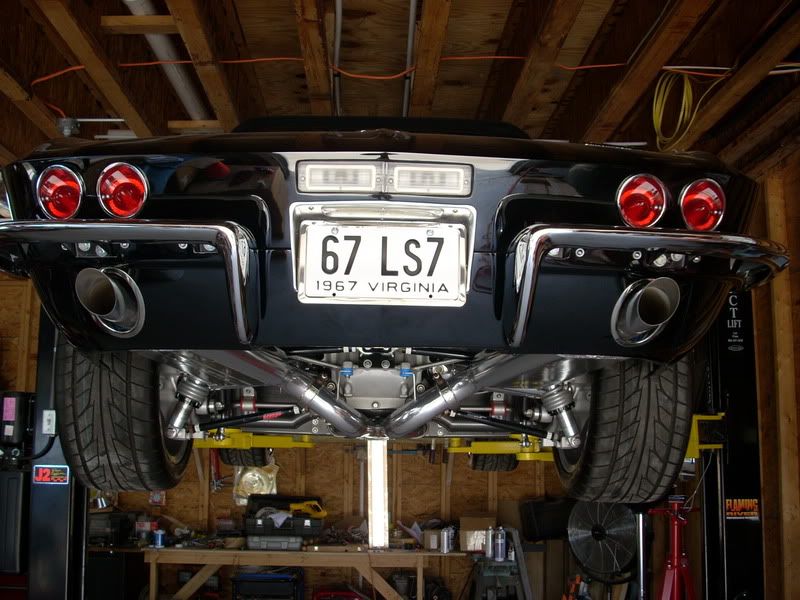
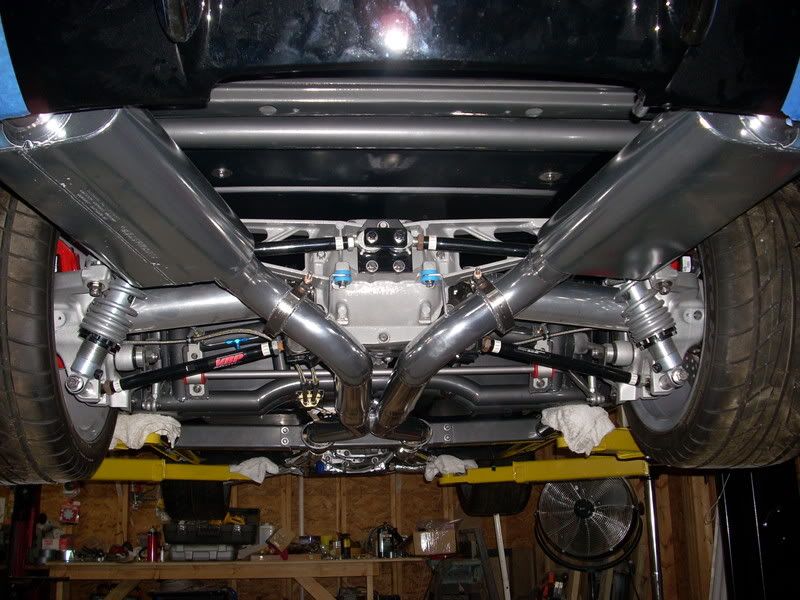
Here is the completed system
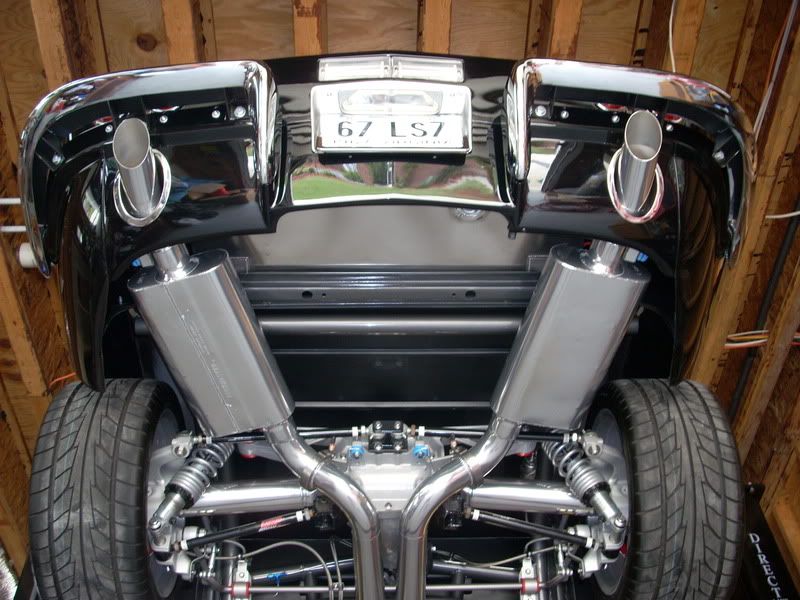
The system sounds AWESOME and I could not be happier with the final results. If you’re considering a similar system I hope this info helps you out.
R/
Jeff
I provided the template to Rich Merce (BADBIRDCAGE) who had a friend laser cut a set of rings that we then tig welded to the 4" sections. We also welded studs to the back side of the rings to accommodate mounting them to the rear panel. After some grinding and polishing they look amazing close to the factory pieces!! (only bigger!!)
Here is a pic next to original bezel
Here is the completed system
The system sounds AWESOME and I could not be happier with the final results. If you’re considering a similar system I hope this info helps you out.
R/
Jeff
Last edited by 1coolC2; 08-26-2008 at 11:18 AM.


 08-26-2008, 12:12 PM
#4
Melting Slicks


Jeff,
Great information on a super looking - and sounding - car!
It was great to see it completed and we enjoyed the entire week in Carlisle especially seeing you again and Diana and all the friends there.
Rich & Barb
Great information on a super looking - and sounding - car!
It was great to see it completed and we enjoyed the entire week in Carlisle especially seeing you again and Diana and all the friends there.
Rich & Barb

 08-26-2008, 08:42 PM
#8
Race Director


Looks great!! Then again with everything that I have seen from you I expect no less. You have set the bar high. The next question is when are we going to see this monster in action??????
 :
:
Dave
:Dave
 08-26-2008, 09:11 PM
#10
Drifting
Thread Starter
Still shaking out a few things but I can tell you this.....I took it for a short ride today and stabbed the throttle in second gear......
 It felt like someone hit me in the forehead with a sledge hammer...this thing is stupid powerful and will flat crush you in the seat!!! I gotta admit, I knew it would be quick but I never expected it would be this strong. The cam, tune and light weight clutch make this thing just explode like it's REALLY angry and wants to kick some azz!!You need to come on up and check it out. I will try and post some video soon.
Gordon,
Thanks for helping me carve up the car...It certainly was an interesting Thanksgiving a few years back when we cut up the car and a turkey!!!
08-26-2008, 09:14 PM
#11
Le Mans Master

Member Since: Mar 2005
Location: Rocklin California
Posts: 7,631
Likes: 0
Received 11 Likes
on
11 Posts
Dave,
Still shaking out a few things but I can tell you this.....I took it for a short ride today and stabbed the throttle in second gear...... It felt like someone hit me in the forehead with a sledge hammer...this thing is stupid powerful and will flat crush you in the seat!!! I gotta admit, I knew it would be quick but I never expected it would be this strong. The cam, tune and light weight clutch make this thing just explode like it's REALLY angry and wants to kick some azz!!You need to come on up and check it out. I will try and post some video soon.
Gordon,
Thanks for helping me carve up the car...It certainly was an interesting Thanksgiving a few years back when we cut up the car and a turkey!!!
Still shaking out a few things but I can tell you this.....I took it for a short ride today and stabbed the throttle in second gear......
It felt like someone hit me in the forehead with a sledge hammer...this thing is stupid powerful and will flat crush you in the seat!!! I gotta admit, I knew it would be quick but I never expected it would be this strong. The cam, tune and light weight clutch make this thing just explode like it's REALLY angry and wants to kick some azz!!You need to come on up and check it out. I will try and post some video soon.Gordon,
Thanks for helping me carve up the car...It certainly was an interesting Thanksgiving a few years back when we cut up the car and a turkey!!!
08-26-2008, 09:50 PM
#12
Race Director

Seems like yesterday we picked up the frame and cut the body up.


 08-26-2008, 10:55 PM
#14
Race Director
Dave,
Still shaking out a few things but I can tell you this.....I took it for a short ride today and stabbed the throttle in second gear...... It felt like someone hit me in the forehead with a sledge hammer...this thing is stupid powerful and will flat crush you in the seat!!!
Still shaking out a few things but I can tell you this.....I took it for a short ride today and stabbed the throttle in second gear......
It felt like someone hit me in the forehead with a sledge hammer...this thing is stupid powerful and will flat crush you in the seat!!!  12-29-2011, 09:44 AM
#20
Drifting
Thread Starter
You can also Google Jeff Cleary + Corvette and get allot of articles and magazine/event coverage.Valve covers are from Katech, talk to Jason and he will fix you up...beware, they are not cheap
R/
Jeff