Cuting the excess off of the dash pad
 03-03-2010, 01:46 PM
#1
Le Mans Master

Thread Starter
Member Since: Feb 2004
Location: Norcal CA
Posts: 6,717
Received 551 Likes
on
444 Posts
2018 C1 of Year Finalist

I am starting to get to the point where I can remove the excess dash pad material underneath and on the sides of the dash pad. I do not have the original dash pad to compare to.
How much material do I cut around the dash end cap? Same goes for the lower front above or underneath the top console moulding?
Thanks!
How much material do I cut around the dash end cap? Same goes for the lower front above or underneath the top console moulding?
Thanks!
 03-03-2010, 04:04 PM
#2
Safety Car


You'll want to cut off "ALL" of the foam where the dash pod fits to the dash. Also, "ALL" of the foam where the crescent fits to the dash. Take the foam out from the very end of the dash pad (at the caps), if you're doing an early car. If you're planning on using the full metal caps, just cut the vinyl out at the ends.
Mike Coletta
Mike Coletta
03-03-2010, 04:11 PM
#3
Le Mans Master
Thread Starter
Member Since: Feb 2004
Location: Norcal CA
Posts: 6,717
Received 551 Likes
on
444 Posts
2018 C1 of Year Finalist
You'll want to cut off "ALL" of the foam where the dash pod fits to the dash. Also, "ALL" of the foam where the crescent fits to the dash. Take the foam out from the very end of the dash pad (at the caps), if you're doing an early car. If you're planning on using the full metal caps, just cut the vinyl out at the ends.
Mike Coletta
Mike Coletta
Mike,
I did the inside foam removal. Now, just wondering how much to cut the vinyl. So I can remove the vinyl at the ends. (62)
What about the radio area? Does the upper console trim go over the pad?
Thanks again!
PS your work is awesome. I still drool over the C1 on the cover in corvette fever!
03-03-2010, 04:19 PM
#5
Le Mans Master
Thread Starter
Member Since: Feb 2004
Location: Norcal CA
Posts: 6,717
Received 551 Likes
on
444 Posts
2018 C1 of Year Finalist
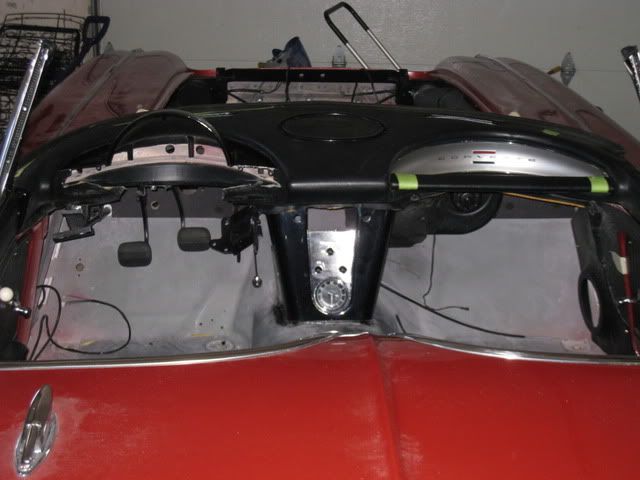
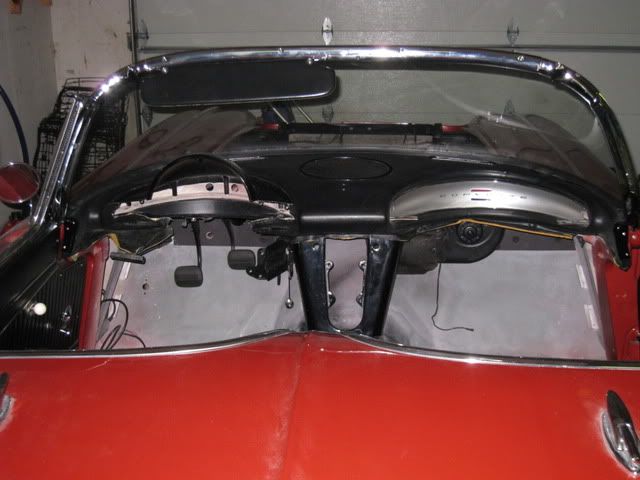
I did the major trimming and fitting on the pad about 4 months ago then stopped since I had to finish up some other things. Plus, I still had to paint the console and dash parts. Now, the parts are painted so I can get back onto the dash pad. The dash insert, dash end caps and grab bar brackets are installed. Tonight, I plan on installing the defroster bezels and speaker bezel including the top gauge housing. I want to the dash pad as far back as it can go.
03-03-2010, 07:22 PM
#7
Tech Contributor


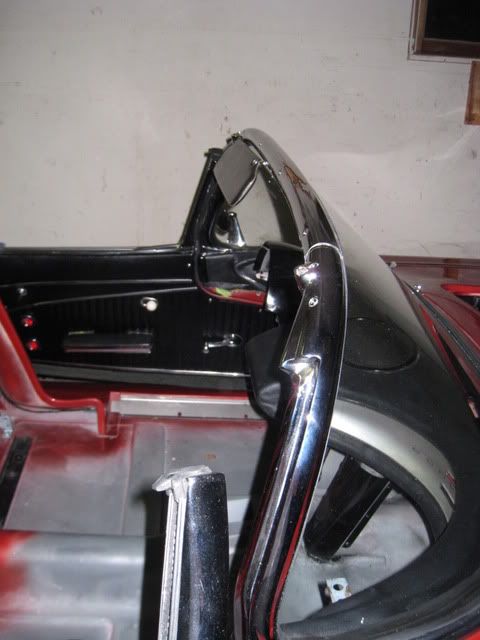
Any time I do a pad on a 58-62, I let the radio speaker hole center the pad on the dash skeleton. I also leave enough of the dash "lip" to fold over the edge of the dash and then under the windshield trim. If you trim too much padding, then at some point in the future (ask me how I know) the vinyl will start lifting out from under the windshield rubber.
03-03-2010, 11:15 PM
#9
Team Owner


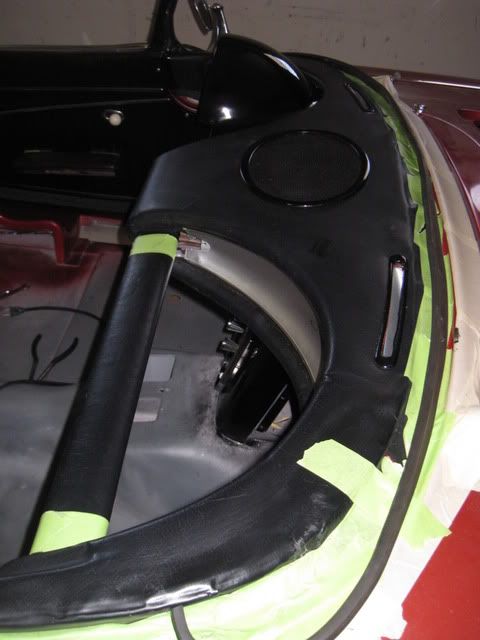
Once you have the pad 'indexed' into the proper position via the radio speaker hole then I secured the area over the center console by installing the interior light (see pic). I didn't trim anything under the dash until all the top side work was done.
As you can see by having the interior light securing the pad you can hold the upper console trim up and mark a line along its bottom with a piece of seamstress chalk or the like to position your cut. I cut it there then secured the chrome piece (use a scratch awl to locate the mounting holes) but still had a tad of vinyl protruding along the bottom. I took a SHARP eXacto knife and cut along the bottom of the chrome trim and that did the trick.
As you can see by having the interior light securing the pad you can hold the upper console trim up and mark a line along its bottom with a piece of seamstress chalk or the like to position your cut. I cut it there then secured the chrome piece (use a scratch awl to locate the mounting holes) but still had a tad of vinyl protruding along the bottom. I took a SHARP eXacto knife and cut along the bottom of the chrome trim and that did the trick.
03-04-2010, 10:36 AM
#10
Le Mans Master
Thread Starter
Member Since: Feb 2004
Location: Norcal CA
Posts: 6,717
Received 551 Likes
on
444 Posts
2018 C1 of Year Finalist
Once you have the pad 'indexed' into the proper position via the radio speaker hole then I secured the area over the center console by installing the interior light (see pic). I didn't trim anything under the dash until all the top side work was done.
As you can see by having the interior light securing the pad you can hold the upper console trim up and mark a line along its bottom with a piece of seamstress chalk or the like to position your cut. I cut it there then secured the chrome piece (use a scratch awl to locate the mounting holes) but still had a tad of vinyl protruding along the bottom. I took a SHARP eXacto knife and cut along the bottom of the chrome trim and that did the trick.
As you can see by having the interior light securing the pad you can hold the upper console trim up and mark a line along its bottom with a piece of seamstress chalk or the like to position your cut. I cut it there then secured the chrome piece (use a scratch awl to locate the mounting holes) but still had a tad of vinyl protruding along the bottom. I took a SHARP eXacto knife and cut along the bottom of the chrome trim and that did the trick.
Okay! I cut one of the defroster holes and the speaker holes. I ran out of time since my wife told me to get inside and spend some family time. Tonight, i will finish the right side.
Also, does it make sense to glue down some of the dash pad below the windshield? I left enough material around the front of the dash.
03-04-2010, 12:16 PM
#11
Team Owner
Make small slits in the edge of the dash pad to negotiate the curves at both ends of the dash pad (see picture). Make your cuts SMALLER than those shown in the picture....I got carried away and they almost show under the windshield rubber but are barely hidden.
You can refer to this thread for plenty of tips and pictures:
http://forums.corvetteforum.com/c1-a...nally-out.html
Last edited by Frankie the Fink; 03-04-2010 at 12:20 PM.
03-05-2010, 10:24 AM
#12
Le Mans Master
Thread Starter
Member Since: Feb 2004
Location: Norcal CA
Posts: 6,717
Received 551 Likes
on
444 Posts
2018 C1 of Year Finalist
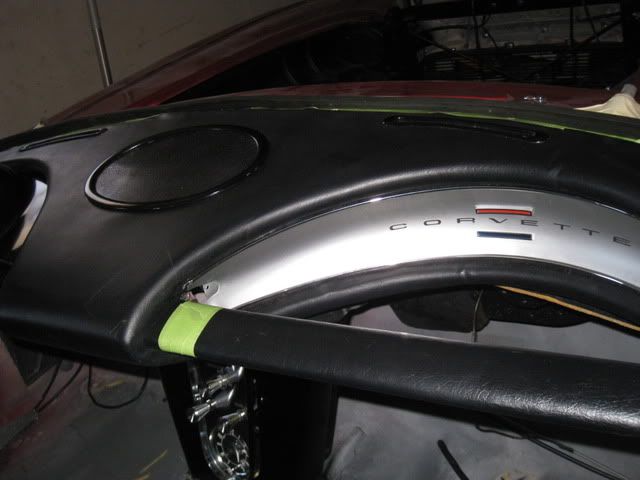
Update... Speaker and defroster bezels are installed. I really do not like this dash pad since it has some flaws (see in front of the dash insert). i cannot afford a new one so I have to live with it for now. I still have to keep glueing down the front of the dash pad. Plus, the pad is not cleaned up.
03-05-2010, 11:03 AM
#13
Le Mans Master
Jim, is this an Al Knock's pad?? They do have a lot of stiff foam to trim (installed a few of these over the years  ). I was looking at the new Corvette America version of the 58-62 dash pads at Carlisle (which have a thin rubber foam backing and looked a lot like the pads that were available direct from GM in the late 70's with black rubber on the back) that CA claims eliminates much of the trim and fit work associated with the Al Knock pads. I was wondering if anyone here on the forum has any personal installation experience with one of those new pads and what were the results. Sorry did not mean to hijack Jim, but I thought this was worth mentioning.
  Pilot Dan
). I was looking at the new Corvette America version of the 58-62 dash pads at Carlisle (which have a thin rubber foam backing and looked a lot like the pads that were available direct from GM in the late 70's with black rubber on the back) that CA claims eliminates much of the trim and fit work associated with the Al Knock pads. I was wondering if anyone here on the forum has any personal installation experience with one of those new pads and what were the results. Sorry did not mean to hijack Jim, but I thought this was worth mentioning. Pilot Dan
03-05-2010, 11:09 AM
#14
Le Mans Master
Thread Starter
Member Since: Feb 2004
Location: Norcal CA
Posts: 6,717
Received 551 Likes
on
444 Posts
2018 C1 of Year Finalist
No problem! I bought this pad from someone in the Midwest who did not use it. It was shipped and stored in California for a few years before I could install it. The creases were the results from moving from California. I think this is a al knoch pad. There is alot of extra material though not a problem to remove. I would rather have extra padding than not enough.
03-08-2010, 10:31 AM
#15
Le Mans Master
Thread Starter
Member Since: Feb 2004
Location: Norcal CA
Posts: 6,717
Received 551 Likes
on
444 Posts
2018 C1 of Year Finalist
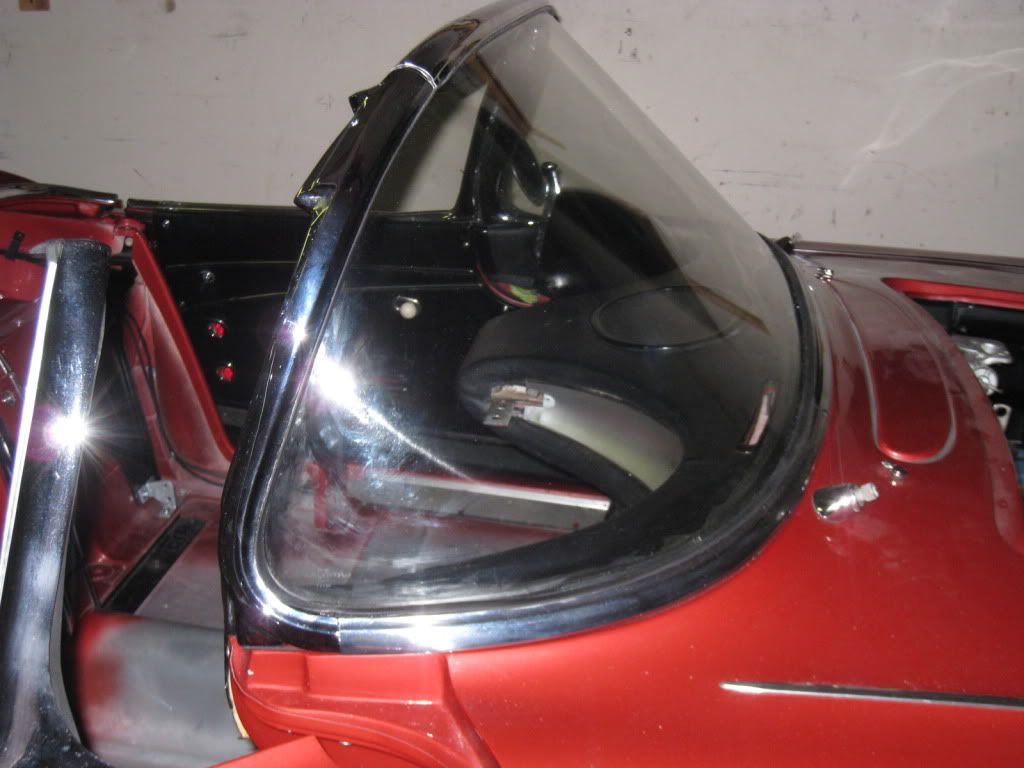
This weekend, I installed the windshield assembly onto the body. I still have one more bolt to tighten down. Some clean up on the window frame and glass (remove excess weatherstripping). Some parts from CC are coming in this today so I can finish up the lower part of the dash pad.
03-08-2010, 11:32 AM
#16
Team Owner
Nice job James....your end cap areas appear to have come out much nicer than mine..be careful putting the chrome end brackets back on the grab bar...if you tighten them down too much they'll ding your insert. Don't sweat the small imperfections...some of those 'settle out' in time and when you stand back and look at the entire job they basically disappear. I had some 'nits' that drove me crazy and I still know where they are but not one person has said a thing about them including show car judges...
The truth is (as 1Snake will attest) that the quality of repro pad you get now is light years ahead of the replacements of years back...
The truth is (as 1Snake will attest) that the quality of repro pad you get now is light years ahead of the replacements of years back...
03-08-2010, 11:47 AM
#17
Le Mans Master
Thread Starter
Member Since: Feb 2004
Location: Norcal CA
Posts: 6,717
Received 551 Likes
on
444 Posts
2018 C1 of Year Finalist
Nice job James....your end cap areas appear to have come out much nicer than mine..be careful putting the chrome end brackets back on the grab bar...if you tighten them down too much they'll ding your insert. Don't sweat the small imperfections...some of those 'settle out' in time and when you stand back and look at the entire job they basically disappear. I had some 'nits' that drove me crazy and I still know where they are but not one person has said a thing about them including show car judges...
The truth is (as 1Snake will attest) that the quality of repro pad you get now is light years ahead of the replacements of years back...
The truth is (as 1Snake will attest) that the quality of repro pad you get now is light years ahead of the replacements of years back...
03-08-2010, 11:55 AM
#19
Team Owner
There is no left and right as far as I know ... you should be able to use the screw holes in the pieces to orient them properly...
If you click on the pic of this CC pair they appear identical: http://www.parts123.com/parts123/yb....5Z5Z50000050x#
If you click on the pic of this CC pair they appear identical: http://www.parts123.com/parts123/yb....5Z5Z50000050x#
03-08-2010, 12:29 PM
#20
Melting Slicks


Member Since: Jul 2003
Location: wilton ct.
Posts: 2,166
Likes: 0
Received 0 Likes
on
0 Posts
Looks like you are doing a fine job......mine is about 90% fitted,and I did also move on to something else and now am ready to attack the monster.....I have temporarily put the windshield frame on the car,but it's just sitting there...a little bit of the dash pad goes under the ws frame....cant wait to put the gauges back in and maybe take her for a ride......