1965 restoration
 01-17-2011, 08:40 AM
#21
Safety Car


If you have an old, junk carpet, or can buy a cheap remnant or damaged piece to cover your work area, you won't be sorry! Just use shop vac on it every so often, and stay warm and comfortable. When the project is finished, roll it up and throw it away.
 01-17-2011, 09:49 AM
#22
Safety Car
 Done this many times! Works great.
  01-17-2011, 11:21 AM
#23
Le Mans Master

Good idea to get rid of as much stuff as possible before starting the restoration. Once you get the car apart, you won't believe how much more space all the parts will take up. Could easily fill another garage when all spread out. Not to mention allowing yourself some room to work. You might want to consider an outside shed for all the other junk (bikes, tools hanging on the walls too close car ect...) to free up some more space and better protect the car.  Pilot Dan
ps. To answer your original question, I put down a Race deck floor over the new cement and am Very pleased with it. Gas, Oil, antifreeze, all clean up easily with no damage to the floor.
Pilot Danps. To answer your original question, I put down a Race deck floor over the new cement and am Very pleased with it. Gas, Oil, antifreeze, all clean up easily with no damage to the floor.
Last edited by Pilot Dan; 01-17-2011 at 11:26 AM.
01-17-2011, 01:01 PM
#24
Drifting

Thread Starter
Member Since: Jun 2010
Location: Ball Ground Georgia
Posts: 1,324
Likes: 0
Received 1 Like
on
1 Post
Good idea to get rid of as much stuff as possible before starting the restoration. Once you get the car apart, you won't believe how much more space all the parts will take up. Could easily fill another garage when all spread out. Not to mention allowing yourself some room to work. You might want to consider an outside shed for all the other junk (bikes, tools hanging on the walls too close car ect...) to free up some more space and better protect the car. Pilot Dan
ps. To answer your original question, I put down a Race deck floor over the new cement and am Very pleased with it. Gas, Oil, antifreeze, all clean up easily with no damage to the floor.
Pilot Danps. To answer your original question, I put down a Race deck floor over the new cement and am Very pleased with it. Gas, Oil, antifreeze, all clean up easily with no damage to the floor.
Yep, everything is going to be out of there except items needed to support the restore. Plan on getting a number of shelves and a workbench. Extra lighting and some extra power outlets around the shop perimeter.
I have decided to go with a floor (like racedeck or motofloor) instead of the epoxy. The cost delta is not that much and if i damage any tiles they can easily be replaced.
Anyone have any feedback on the costco flooring vs the racedeck stuff?
04-24-2011, 11:35 AM
#25
Drifting
Thread Starter
Member Since: Jun 2010
Location: Ball Ground Georgia
Posts: 1,324
Likes: 0
Received 1 Like
on
1 Post
ok, after a short absence I am back at the restoration. I got sidetracked with a jeep for my father.
http://forums.corvetteforum.com/c1-a...-my-resto.html
I am still getting the shop in order. I have moved my tools and such over out of the main house garage. I have not raised the water heater but I will do that project at the same time I install the mud sink since I will be doing plumbing work for both. Parents are gone back north so I just have the water heater shut off for now, it won't be in use again until they return next January.
Getting some order to the former chaos...
04-24-2011, 04:48 PM
#26
Instructor


Member Since: Jul 2010
Location: Vermont
Posts: 162
Likes: 0
Received 0 Likes
on
0 Posts
Looks much better! I liked the suggestions for the carpet as I am getting too old for the hard, cold cement. I had to do some work this winter and called a carpet installer who was happy to give me as much old carpet as I wanted that he ripped up for free. The piece I got for my garage was nicer than whats in the house! When I was done, I rolled it up and it went to the dump. So if anyone is thinking of this, call a carpet installer for free carpet rather than buying it.
04-25-2011, 04:45 AM
#27
Racer

Member Since: Sep 2004
Location: Hutchinson Kansas
Posts: 291
Likes: 0
Received 0 Likes
on
0 Posts
If you really want the floor done, then I would do it first. Afterwards you will have more grease and oil spots to get cleaned up. It has to be clean for a new surface to stick unless to go to the tile like floor covering.
04-25-2011, 09:16 AM
#28
Drifting
Thread Starter
Member Since: Jun 2010
Location: Ball Ground Georgia
Posts: 1,324
Likes: 0
Received 1 Like
on
1 Post
The floor already had some oil spots from the prior owner so I have pretty much decided to go with the tile flooring (racedeck or equivelent). That way I can just do a minimal clean and put the floor down over it...
12-02-2012, 10:49 AM
#29
Drifting
Thread Starter
Member Since: Jun 2010
Location: Ball Ground Georgia
Posts: 1,324
Likes: 0
Received 1 Like
on
1 Post
So I have to apologize and play a bit of catch up. I found this original thread and will just build off of it for continuity. My second sidetrack was a bit more serious as the doctors scared the heck out of me with a concern of the "C" word. Thankfully it turned out to be a condition called sarcoidosis, can be serious but they found this real early and I don't even need treatment and may never need it...just monitoring on an annual basis.
So anyway, I'll post some catch up information as I am "all in" on the restoration at this point.
Shop is pretty well set and work has begun in earnest. Here are a couple of photos. We remodeled the kitchen recently and one of the old counter tops make a great hinged workbench. can swing up and latch out of the way when not in use.
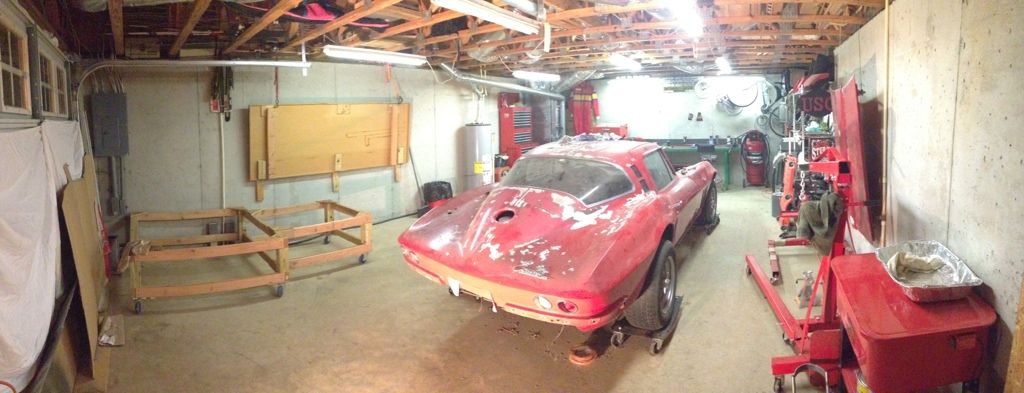

Per one of the earlier suggestions I found a really nice workbench. It is 10 ft long, steel...so heavy had to move it in with the engine hoist. Also had a vice on it. Got it for $120...best buy I think I ever made.
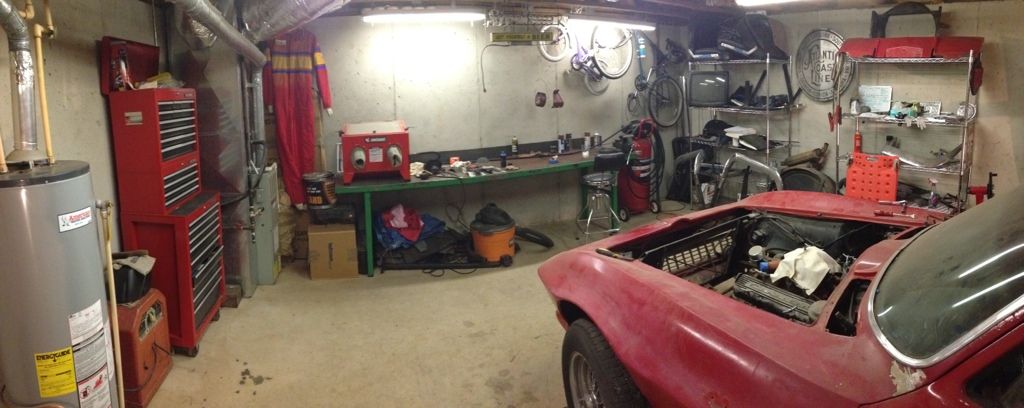
oh, I still have not done anything with the water heater but since this is the "guest house" and no one is there it is turned off. I have a portable heater that is one of those electric/oil radiators and I will use that if working with any vapors.
So anyway, I'll post some catch up information as I am "all in" on the restoration at this point.
Shop is pretty well set and work has begun in earnest. Here are a couple of photos. We remodeled the kitchen recently and one of the old counter tops make a great hinged workbench. can swing up and latch out of the way when not in use.
Per one of the earlier suggestions I found a really nice workbench. It is 10 ft long, steel...so heavy had to move it in with the engine hoist. Also had a vice on it. Got it for $120...best buy I think I ever made.
oh, I still have not done anything with the water heater but since this is the "guest house" and no one is there it is turned off. I have a portable heater that is one of those electric/oil radiators and I will use that if working with any vapors.
Last edited by steveale; 12-02-2012 at 10:54 AM.
12-02-2012, 11:07 AM
#30
Drifting
Thread Starter
Member Since: Jun 2010
Location: Ball Ground Georgia
Posts: 1,324
Likes: 0
Received 1 Like
on
1 Post
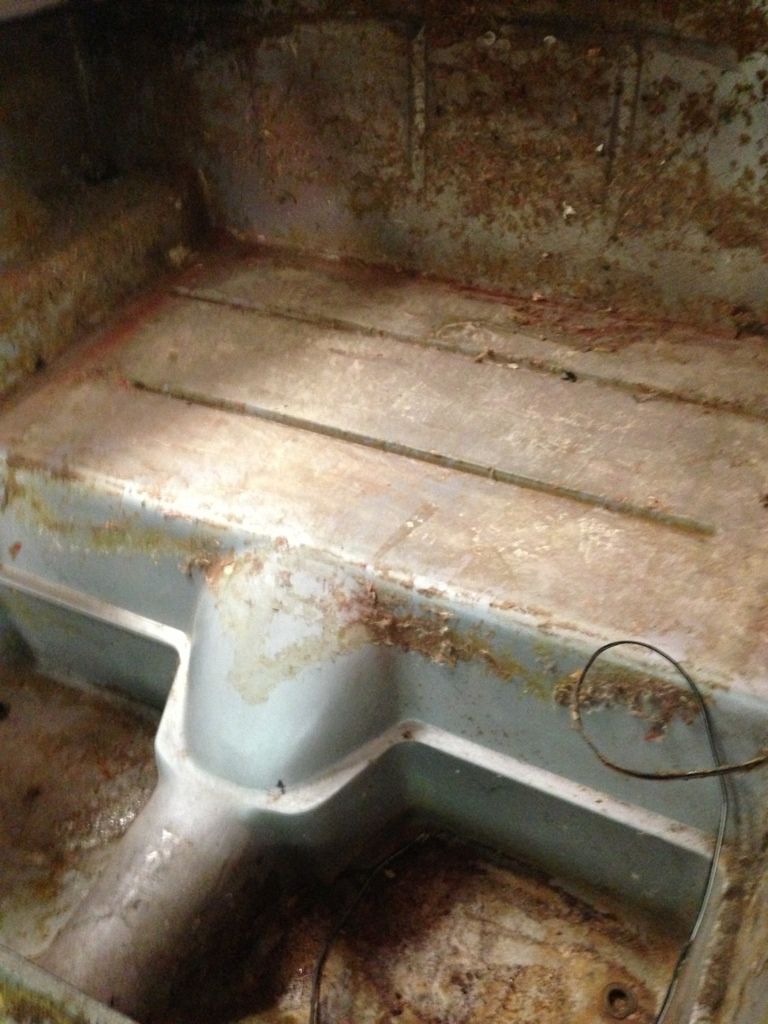
gutting interior, only dash/cluster and rear vent motor left. Steering column is also removed now.
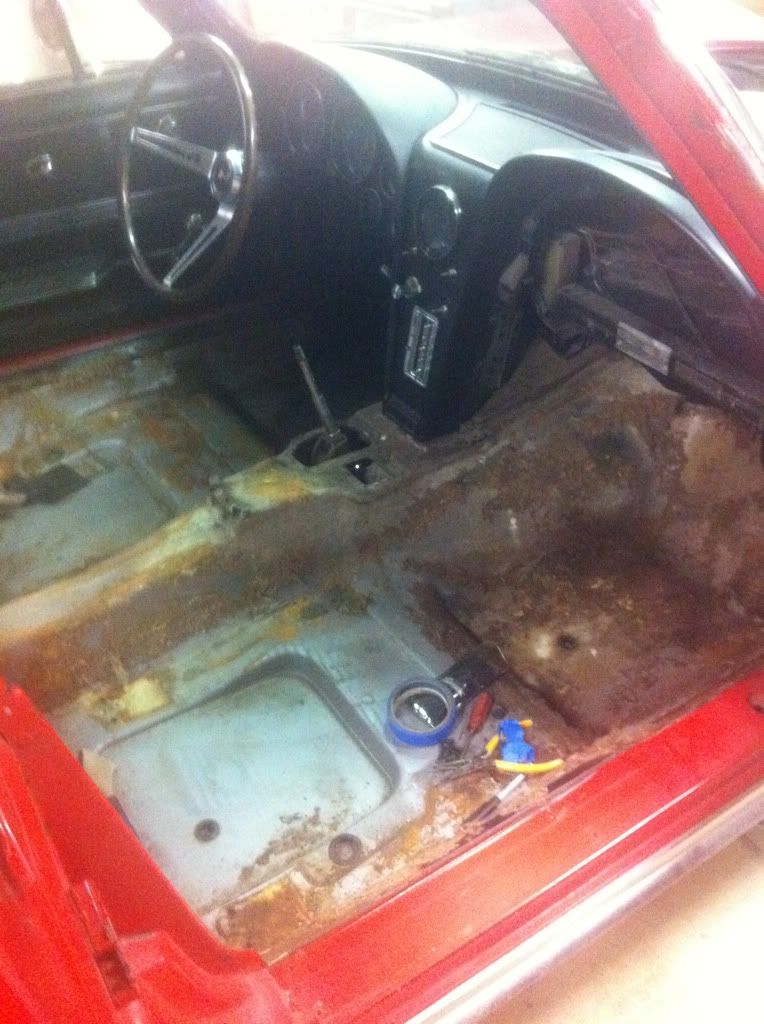
Jute removal is a PITA...found that razor blade seemed to work best on flat areas. Goo gone gel does not seem to be doing anything to the glue residue. Looks like sanding will be the solution.
Jute removal is a PITA...found that razor blade seemed to work best on flat areas. Goo gone gel does not seem to be doing anything to the glue residue. Looks like sanding will be the solution.
12-02-2012, 11:16 AM
#31
Drifting
Thread Starter
Member Since: Jun 2010
Location: Ball Ground Georgia
Posts: 1,324
Likes: 0
Received 1 Like
on
1 Post
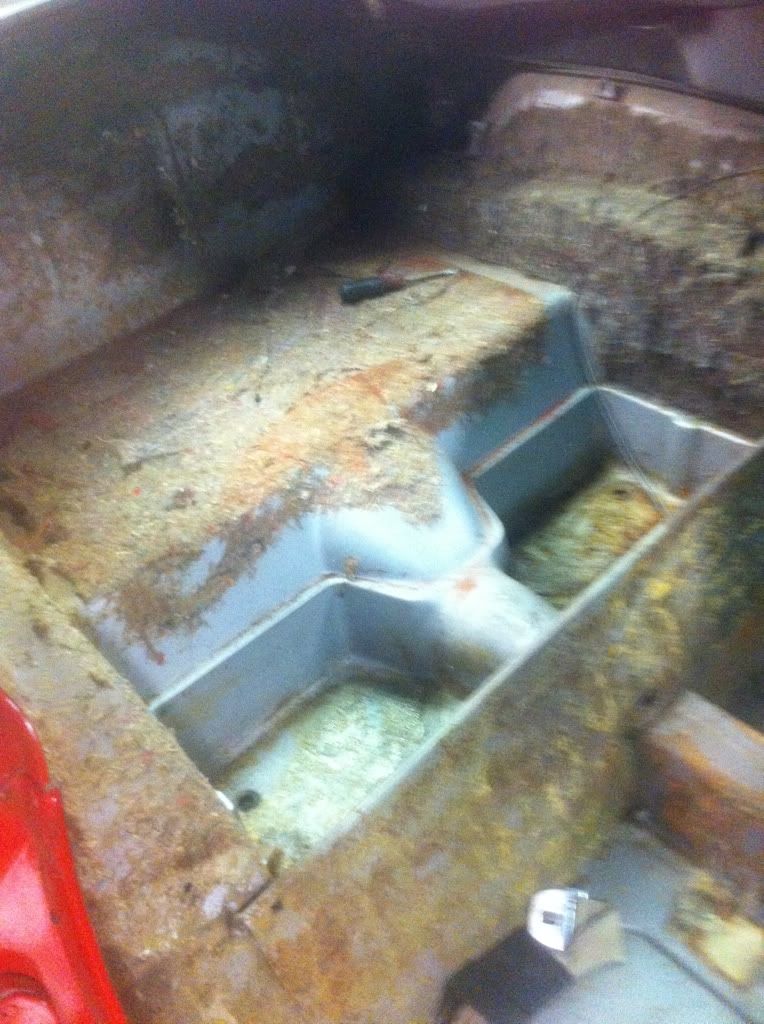
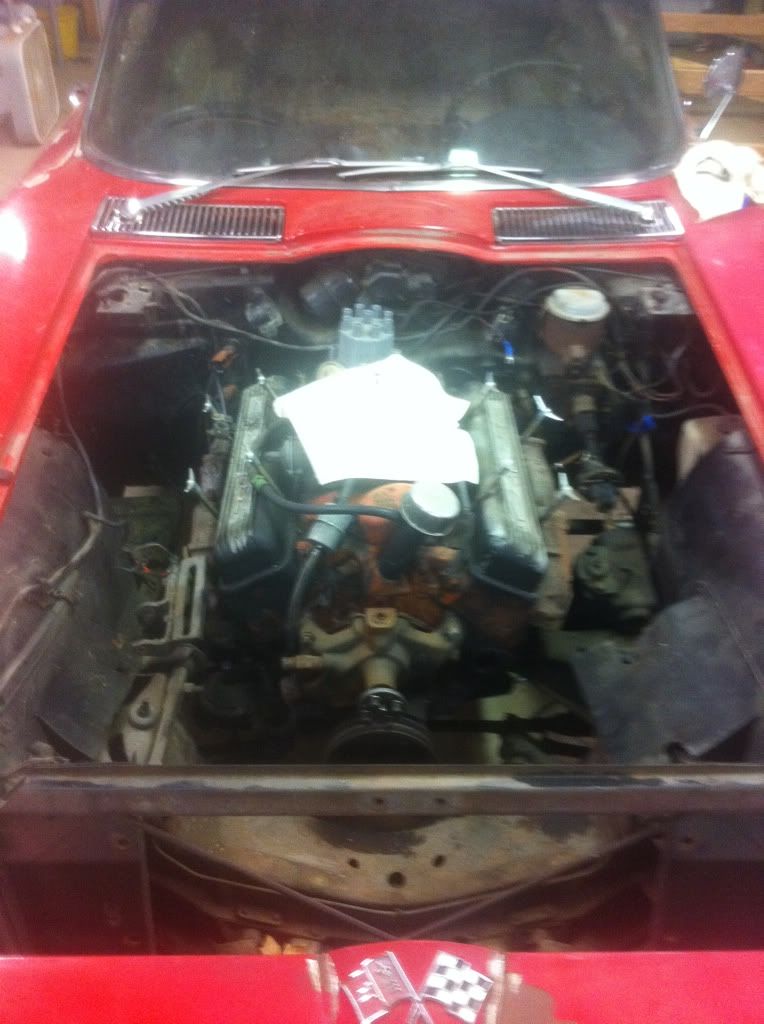
View of engine bay with several items removed. have all but the body mounts removed per the body removal checklist. been soaking the bolts about 4 days with PB blaster. Heading to the shop, more catch up posts later.
 12-02-2012, 01:53 PM
#34
Drifting
Thread Starter
Member Since: Jun 2010
Location: Ball Ground Georgia
Posts: 1,324
Likes: 0
Received 1 Like
on
1 Post
The garage is drive under, those are the floor joists for the living space above the garage. The walls you see are poured concrete 6 in thick with rebar. It is ~20ft wide by 30ft long.
oh, I reread and got what you are saying. Live in the country, no code for finished ceiling in a garage.
12-02-2012, 01:56 PM
#35
Drifting
Thread Starter
Member Since: Jun 2010
Location: Ball Ground Georgia
Posts: 1,324
Likes: 0
Received 1 Like
on
1 Post
that is from the nolan adams plan. I am going to build a rotisserie though, the dolly is just for setting the body off the frame. Too hard to work on the undersides of the body with that style dolly from what I have read.
12-02-2012, 01:59 PM
#36
Drifting
Thread Starter
Member Since: Jun 2010
Location: Ball Ground Georgia
Posts: 1,324
Likes: 0
Received 1 Like
on
1 Post
Thanks Mike, there are a couple of other guys from Woodstock on the forum. We just did a cruise yesterday in the mountains above Jasper. Is your 67 drivable or are you restoring? Watch the events section of the forum, we will plan another outing in the spring.
12-02-2012, 02:05 PM
#37
Drifting
Thread Starter
Member Since: Jun 2010
Location: Ball Ground Georgia
Posts: 1,324
Likes: 0
Received 1 Like
on
1 Post
had to take a break, driver rear body mount kicking my butt. Have all the rest loose or off (had one at the driver firewall twist off but the body should still pull). The driver rear seems like the square nut receptacle inside the cargo area is turning. Rear blower motor is in the way and will need to be removed. I was going to have to remove it anyway.
Going to drive off some frustration by running up and getting threaded rod for the instrument cluster removal and straps for pulling the body.
I wanted to get the body off this am so I could roll it out and do some stripping since the weather is mild and near 70 today. Oh well, nothing tends to go to plan with these things...
12-02-2012, 05:27 PM
#39
Racer
I'd love to go on some cruises and car shows.
12-02-2012, 09:07 PM
#40
Drifting
Thread Starter
Member Since: Jun 2010
Location: Ball Ground Georgia
Posts: 1,324
Likes: 0
Received 1 Like
on
1 Post
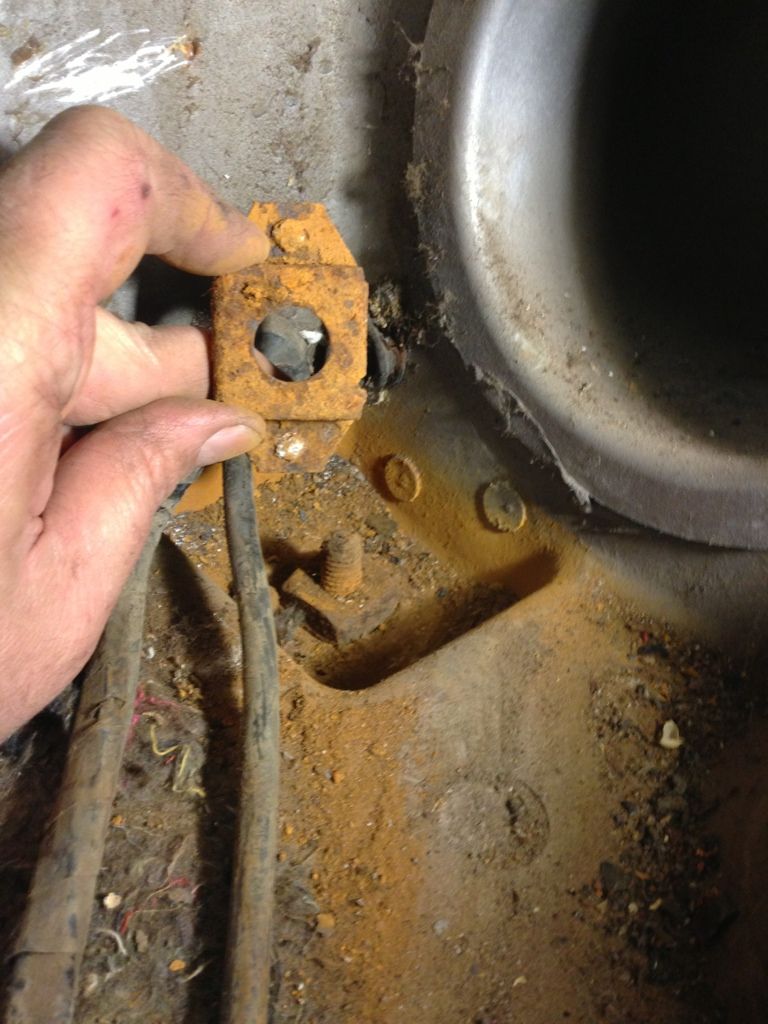
Well, I got the cargo driver side body mount out. Knew something was "turning" up above when trying to take the bolt out from underneath. Here was the culprit...the holder housing over the square nut had come loose allowing the nut to spin.
In the above pic the rear blower unit has been removed (that was no easy task)...it needed removed anyway, this just became the forcing function.
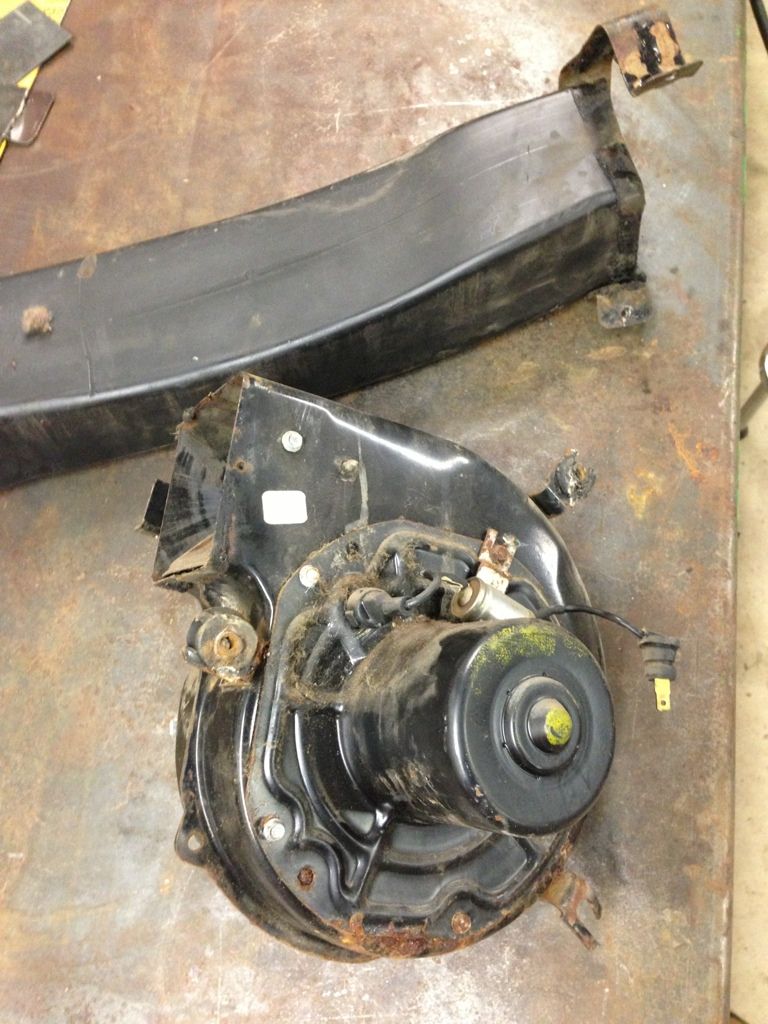
blower before removing as my reference pic.
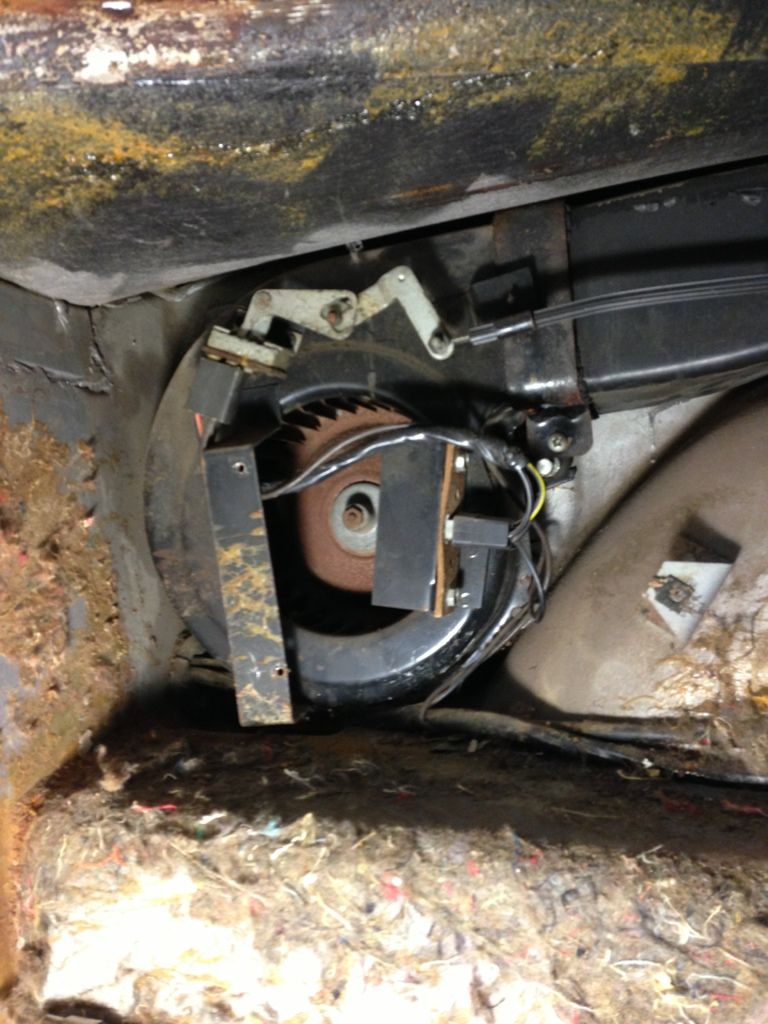
Here is the blower after removal...original yellow inspection paint.
Got my "helper" to crawl up in the cargo area (I was tired of being a pretzel) and she held the wrench on the nut while I successfully got that body mount out.
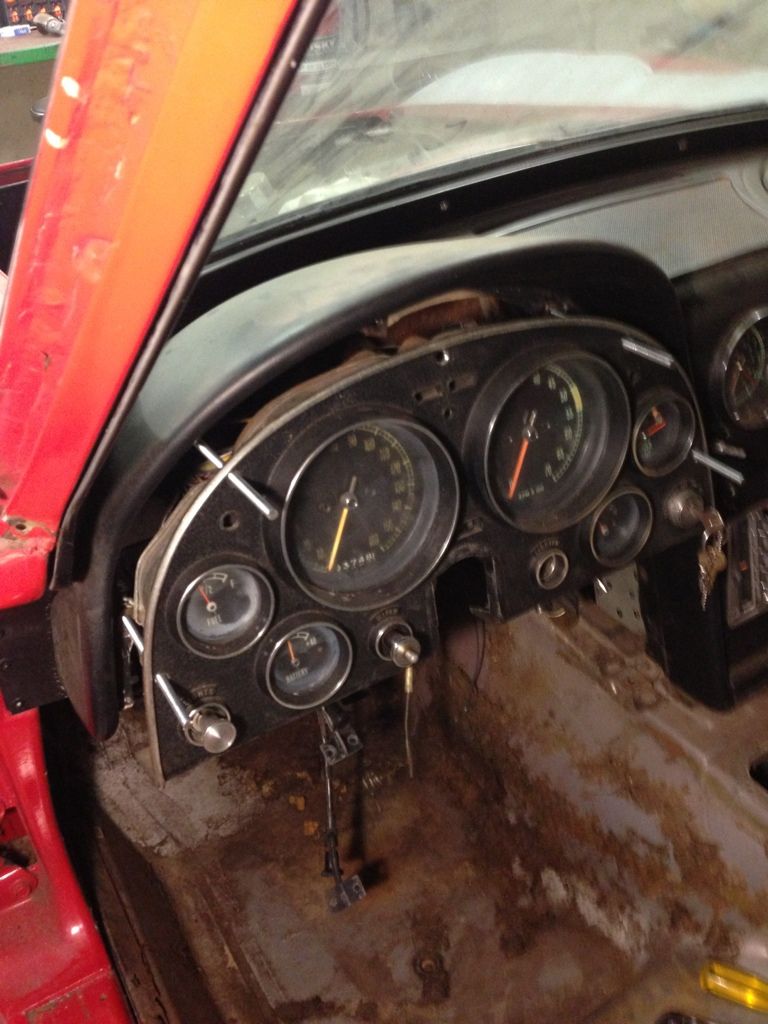
Last activity of the night was to cut the heads off some #20 bolts and put them in place of the retaining screws in prep for the cluster pull tomorrow night. I was able to immediately get the cluster out about 3-4". Tomorrow I'll label everything and hopefully get the cluster out.
In the above pic the rear blower unit has been removed (that was no easy task)...it needed removed anyway, this just became the forcing function.
blower before removing as my reference pic.
Here is the blower after removal...original yellow inspection paint.
Got my "helper" to crawl up in the cargo area (I was tired of being a pretzel) and she held the wrench on the nut while I successfully got that body mount out.
Last activity of the night was to cut the heads off some #20 bolts and put them in place of the retaining screws in prep for the cluster pull tomorrow night. I was able to immediately get the cluster out about 3-4". Tomorrow I'll label everything and hopefully get the cluster out.