Project "Peer Pressure"
 01-02-2012, 07:39 PM
#21
Le Mans Master

Thread Starter

Guys I have a question. See that totally b!tchin' Accel coil in the third pic from the top? The genius the bolted it to the firewall drilled all the way into the wiper bucket on the passenger side. Obviously the holes will have to be plugged and my question is what is the best way. I get the feeling that if I use filler I'll still see the outlines of the holes sooner or later. Any tips are appreciated.
 01-04-2012, 09:23 PM
#22
Intermediate


Member Since: Jan 2012
Posts: 25
Likes: 0
Received 0 Likes
on
0 Posts
I would sand it, then use some fiberglass filler to plug the holes. Then you'll just have to do normal body work on it, i.e. prime, block sand, prime, block sand, until the repairs are invisible.
01-10-2012, 11:00 PM
#23
Le Mans Master
Thread Starter
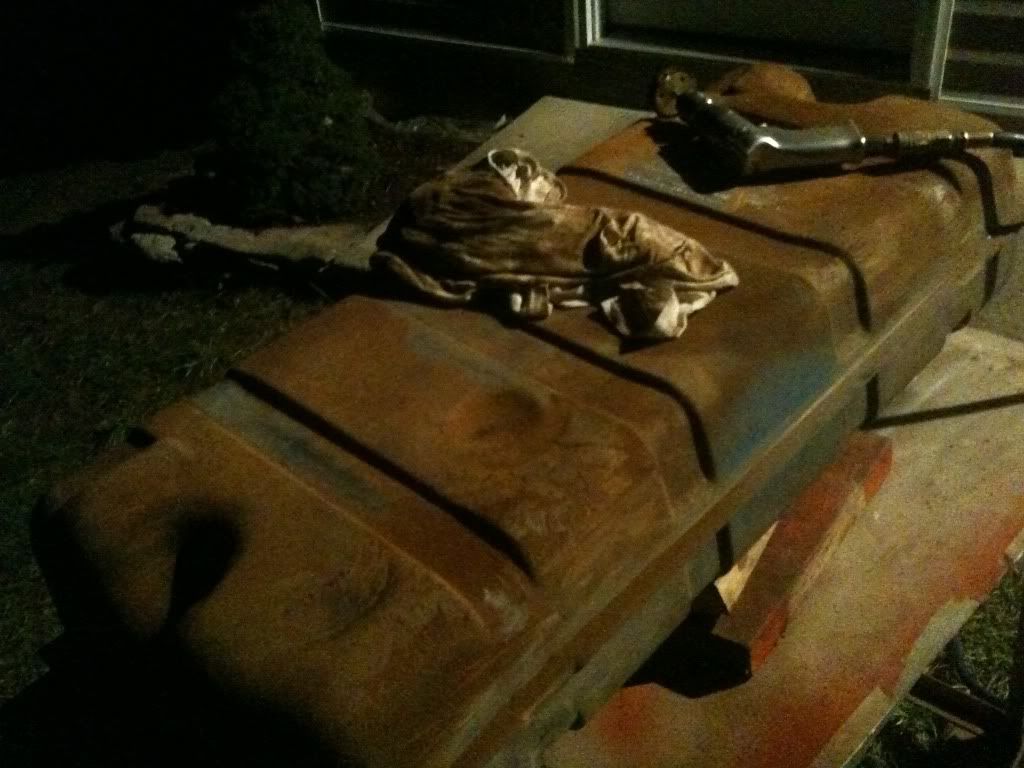
I realize that gas tanks, once installed, will rarely be seen again but for some reason I saw fit to make mine look as good as I could with my limited skills and tools. Though the tank is not perfect I made the best use of my die-grinders and my angle grinder that I could. Here's what I started with:
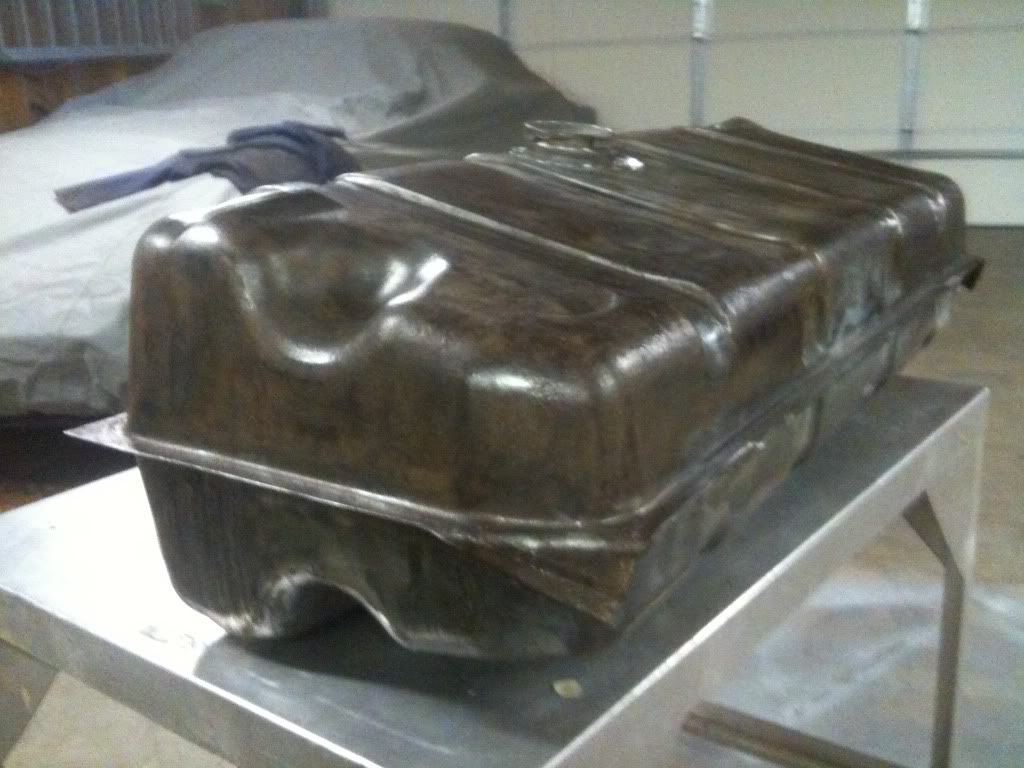
Here is the tank all ground down ready for primer:
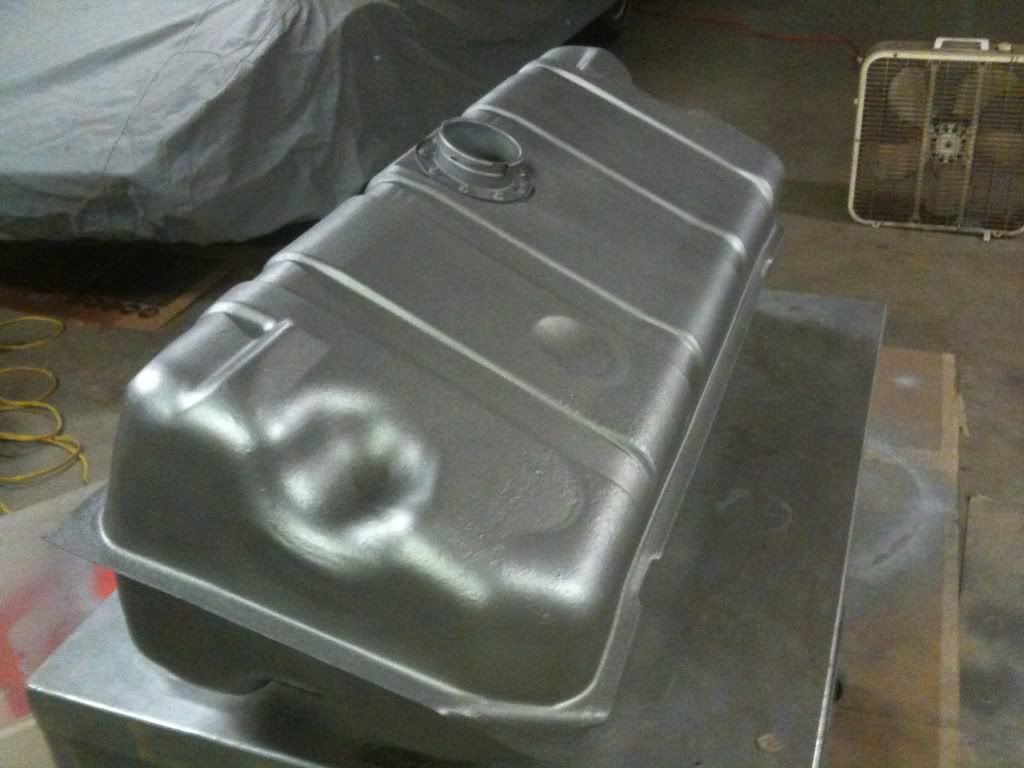
Here is the tank painted:
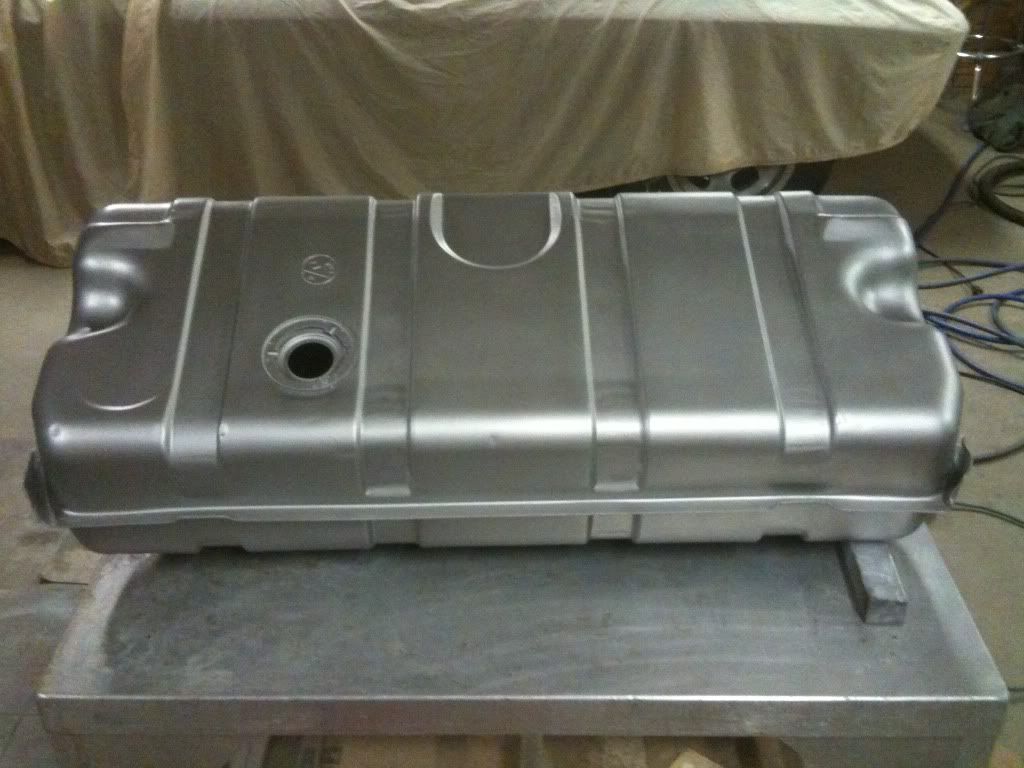
I searched the internet for an acceptable color and found that I had an acceptable color in my extensive collection of rattle can. I know that Eastwood sells "Tank Tone" but I hate order stuff and paying all that shipping. The color I used was Plasti-Kote's #618 steel wheel paint. I did run out of paint while finishing up the top and had to buy a new can that was marginally a different color. The good news is no one will ever be viewing both sides of the tank at one time.
Here is the tank all ground down ready for primer:
Here is the tank painted:
I searched the internet for an acceptable color and found that I had an acceptable color in my extensive collection of rattle can. I know that Eastwood sells "Tank Tone" but I hate order stuff and paying all that shipping. The color I used was Plasti-Kote's #618 steel wheel paint. I did run out of paint while finishing up the top and had to buy a new can that was marginally a different color. The good news is no one will ever be viewing both sides of the tank at one time.
 01-11-2012, 12:17 PM
#25
Le Mans Master
Thread Starter
I will add that it took me about 8 hours and probably $30 worth of materials. Had I been able to implement my new angle grinder right off the get go I could have saved quite a bit of time. Compared to air powered grinders that angle grinder kicks some serious, well, you know what I mean.
Thanks for the complement.
Thanks for the complement.
01-11-2012, 01:15 PM
#26
Safety Car

The tank looks very nice, but if it was that rusty on the outside, did you check the inside?
Rust inside is a very common issue on any old car, a new tank is about $125.
Also be very careful filling, I'm betting that that paint is not resistant to fuel like an epoxy would be.

Paul
Rust inside is a very common issue on any old car, a new tank is about $125.
Also be very careful filling, I'm betting that that paint is not resistant to fuel like an epoxy would be.
Paul
01-11-2012, 04:57 PM
#27
Le Mans Master
Thread Starter
The tank looks very nice, but if it was that rusty on the outside, did you check the inside?
Rust inside is a very common issue on any old car, a new tank is about $125.
Also be very careful filling, I'm betting that that paint is not resistant to fuel like an epoxy would be.
Paul
Rust inside is a very common issue on any old car, a new tank is about $125.
Also be very careful filling, I'm betting that that paint is not resistant to fuel like an epoxy would be.
Paul
01-28-2012, 01:35 PM
#28
Le Mans Master
Thread Starter
One pedal assembly:
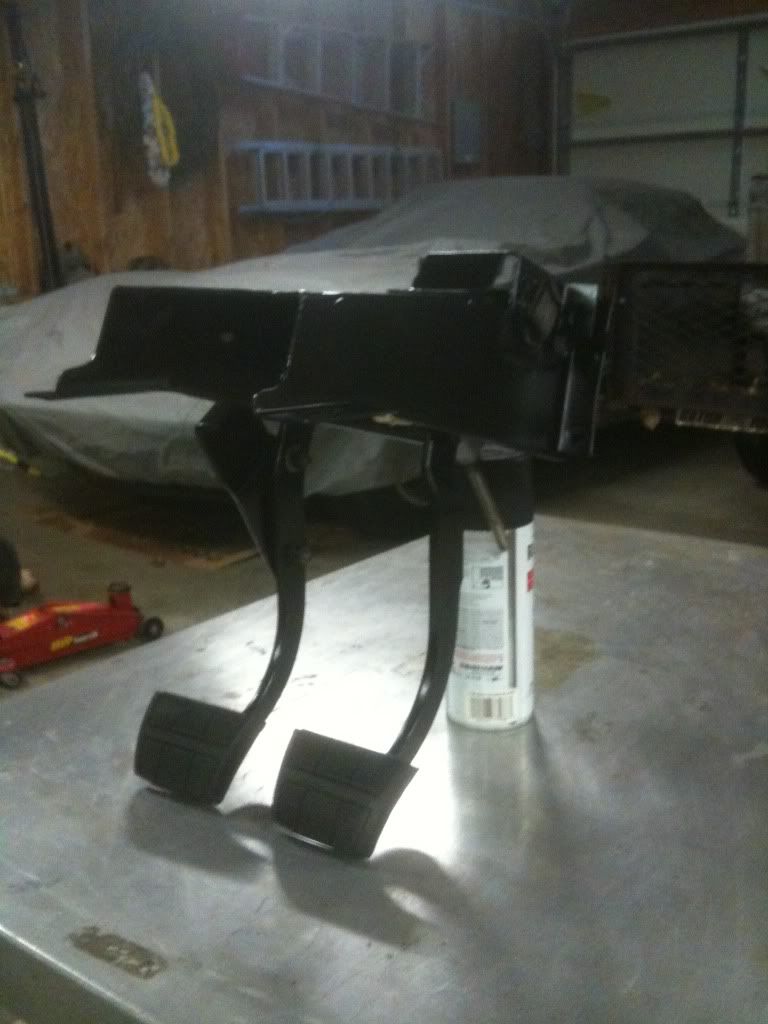
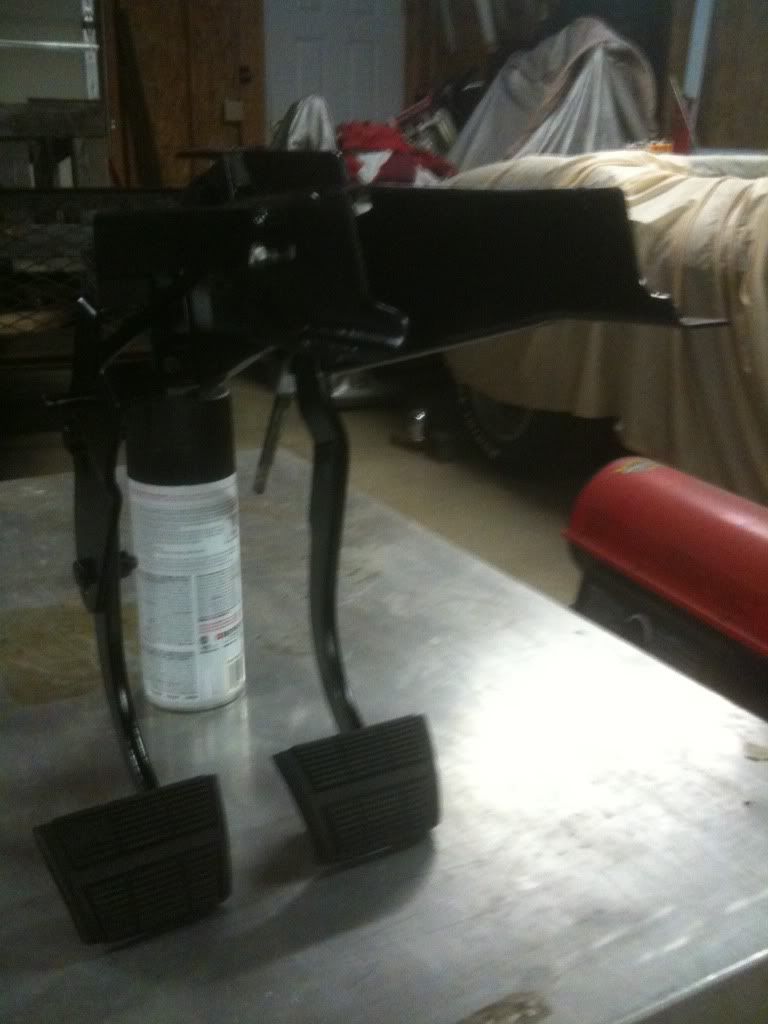
Remember that bracket with the pin I was complaining about? Gearbanger done hooked me up:
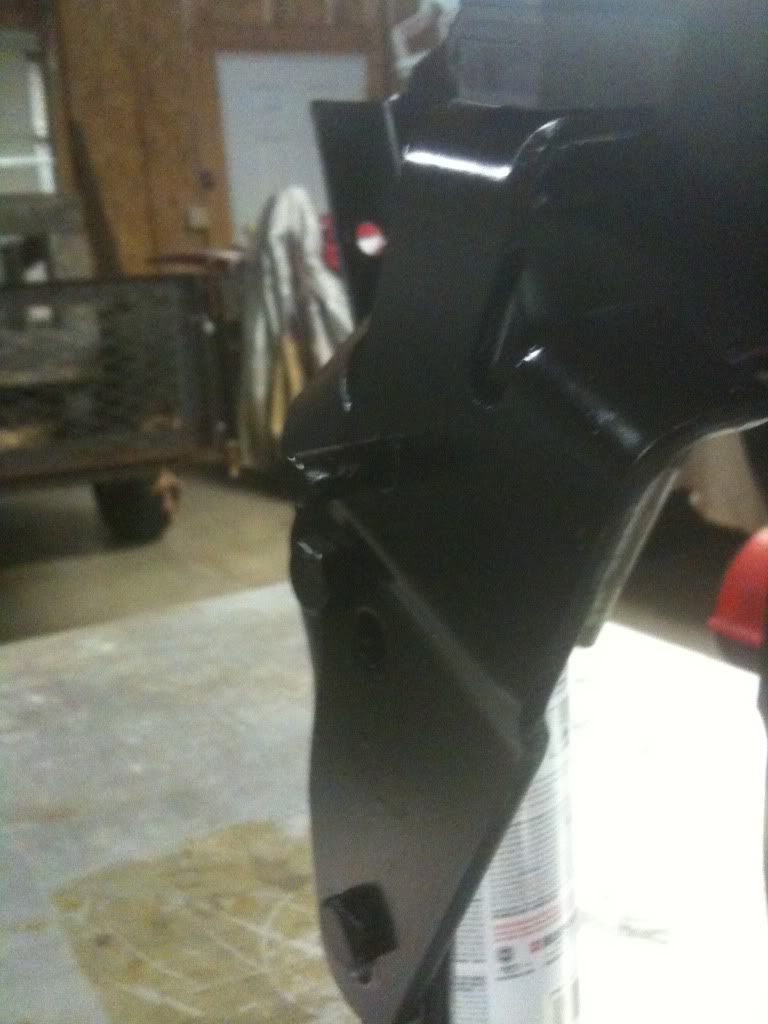
I don't think you can tell from the pic but Gearbanger welded the pin up and ground it down and it's as good as new.
Remember that bracket with the pin I was complaining about? Gearbanger done hooked me up:
I don't think you can tell from the pic but Gearbanger welded the pin up and ground it down and it's as good as new.
 01-28-2012, 03:12 PM
#30
Intermediate
Member Since: Jan 2012
Posts: 25
Likes: 0
Received 0 Likes
on
0 Posts
01-28-2012, 04:50 PM
#31
Le Mans Master
Thread Starter
It really is funny how I get so many comments on the slots. I do think they look cool and who ever put all those washers on the rear spring got the stance perfect. However, I am still dreaming about a set of '65 or '66 bolt-on knock-offs. I'm not a fan of the natural finish on the '64 knock-offs. Perhaps I'll get myself a new set of T/As and change the wheels out ever so often so I can the best of both worlds.
01-28-2012, 05:00 PM
#32
Le Mans Master
Thread Starter
Dude! The bracket you welded on the pedal assembly works perfect! The assembly went back togethor suprisingly easy. Now if I/we can make the other 10 million parts associated with the car look and operate this good I'll be home free.
Last edited by mudbone64; 01-28-2012 at 05:08 PM. Reason: I wanted to.
01-28-2012, 05:02 PM
#33
Le Mans Master
Thread Starter
Does anybody have a good pic of a wiper motor? Mine was all black but maybe it was a replacement. I've nearly got it all scrubbed down but I'd like to know the proper color before I go to painting.
01-28-2012, 05:15 PM
#34
Team Owner


Member Since: Oct 2000
Location: Washington Michigan
Posts: 38,899
Received 1,856 Likes
on
1,099 Posts

The wiper motor originally looked like this. 
 01-28-2012, 05:22 PM
#36
Le Mans Master
Thread Starter
01-29-2012, 08:12 PM
#37
Live Free or Die
01-29-2012, 08:40 PM
#38
Race Director

Member Since: Jan 2000
Location: Corsicana, Tx
Posts: 12,603
Received 1,874 Likes
on
912 Posts
2020 C2 of the Year - Modified Winner
2020 Corvette of the Year (performance mods)
C2 of Year Winner (performance mods) 2019
2017 C2 of Year Finalist
Polish up those slots! Gets boring seeing the same old assy line stuff! Or maybe some Cragars!
JIM
JIM
01-30-2012, 06:35 PM
#40
Le Mans Master
Thread Starter