C1 Dash Pad Installation Tips Needed
 01-19-2012, 05:55 PM
#1
Racer

Thread Starter
Member Since: Feb 2004
Location: Bedford Va.
Posts: 320
Likes: 0
Received 0 Likes
on
0 Posts

I have a new Al Knoch pad that I don't want to screw up. What is the best adhesive to use and should this be a two man job or can I handle it alone? I was talking to a resto shop a couple of years back and was told they install theirs without trimming the front edge and that bolting the windshield over the edge (lip) keeps the pad from curling around the edge over time.
 01-19-2012, 06:01 PM
#2
Le Mans Master


I've installed several of them and use 3M "yellow death" W/S adhesive. No problem doing it as a 1 man job, actually, I think a helper would just get in the way. Definitely DO NOT trim the front edge. The shop is correct, use the windshield to help hold it from retreating. Take your time and you'll be fine.
Jim
Jim
01-19-2012, 06:11 PM
#3
Team Owner


There are a ton of old posts about how to do this job and here is just one of them (which I did); I share my trials and tribulations (and tips)...
http://forums.corvetteforum.com/c1-a...nally-out.html
Jim is correct do NOT trim the front edge...every millimeter that the dash pad sticks under the windshield is critical to keep it from shrinking back and causing an ugly gap at the front after a few years or exposure. Its tedious work and a mistake with a razor blade will ruin the pad; but there is nothing complicated about it...just take care and you'll do fine.
Last edited by Frankie the Fink; 01-20-2012 at 09:55 AM.
01-19-2012, 07:55 PM
#4
Drifting


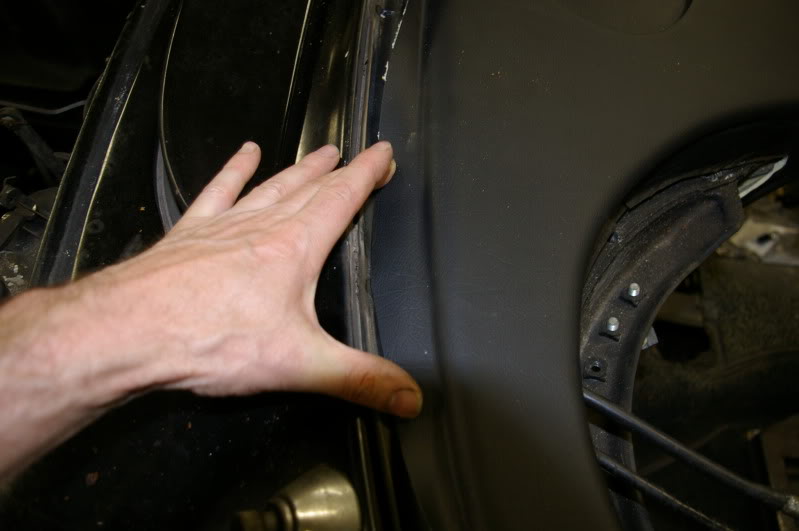
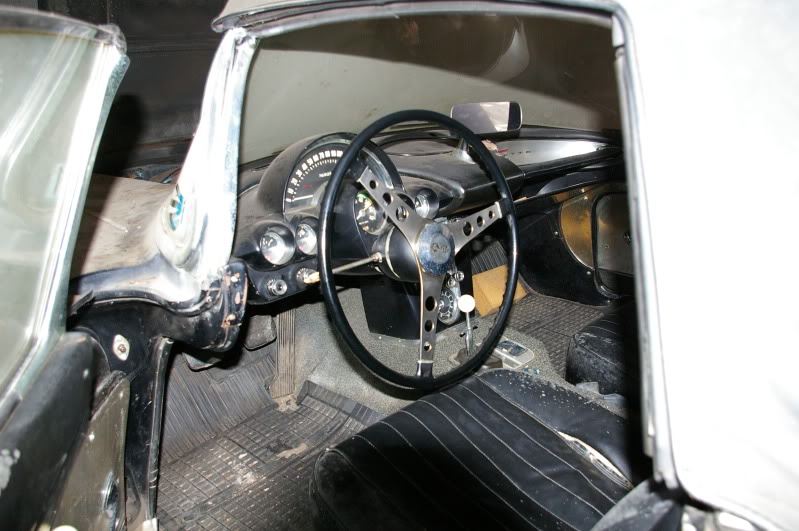
As these guys have said, take your time and leave as much under the windshield as you can. (1st picture)
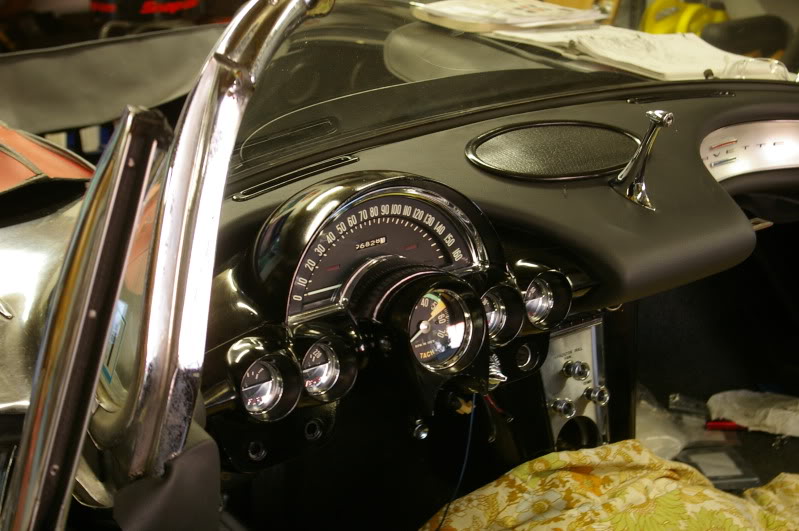
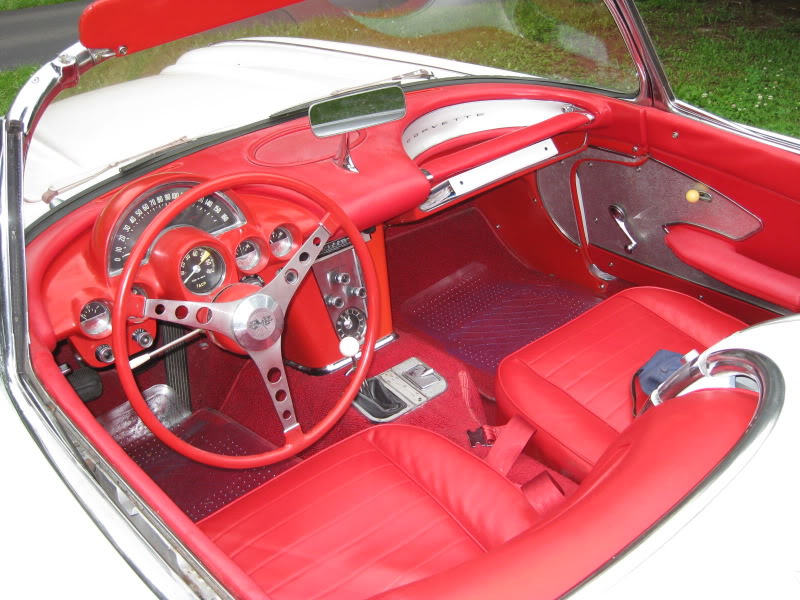
You also will need to remove a considerable amount of foam in order to get things to fit. Two big areas are the gauge cluster and along the windshield are. Be careful along the windshield area as in a few spots I removed a bit too much and it has a bumpy look in a few areas, most is covered by the windshielad frame rubber trim, but if you look real hard (like I do) you can see it. (2nd picture near the center)
Overall I thought it went real well and it was easier then I expected, except for the foam removal..............
Post some pics of your progress and have fun!
Before
01-19-2012, 10:09 PM
#6
A lot of the upholstery shops use a new style adhesive that is heat activated. This allows you to position the pad as much as you want before using a heat gun to activate the adhesive. A huge bonus when installing a C1 Dash Pad.
01-20-2012, 08:00 AM
#7
Drifting
I used adhesive only under the windshield area to get the pad to lay down. I figured with the windshield, defroster vents, inside trim, mirror, speaker grill, etc.holding the pad down no more glue would be necessary.
Last edited by Steve59; 01-20-2012 at 08:03 AM.
01-20-2012, 08:10 AM
#8
Team Owner
A heat gun applied too enthusiastically to the dash pad material will melt the Sierra grain out of it and it'll be ruined.....personally I wouldn't do it.
01-20-2012, 08:54 AM
#9
Melting Slicks


I watched an old timer do this job. He used minimal glue. Glue isn't all that necessary with all the other things holding the pad in place. Don't use spray glue. Hard to control and it lifts paint.
It's a 2 person job to get the passenger cove in. You need to cut some foam to get the passenger cove and the driver's side instrument coves to fit. Problem is, you don't know how much, and once you cut it, you can't put it back. So you should err on the side of cutting too little and leaving too much foam in place, which makes it hard to install these 2 coves. With the passenger cove, you'll need someone sitting on the seat or the floor pushing the cove in with their feet. You'll be under the dash, trying to get the nuts on the studs.
Don't have your wife do this job. These things always end up in a big fight, and then you have to take her to an expensive dinner afterwards.
01-20-2012, 08:59 AM
#10
Team Owner
I had the Romeo Engineering pad (prob not the best choice) but I did very little cutting of foam...almost none IIRC. The "CORVETTE" dash insert went in with minimal issues and I certainly didn't have to push it in with two feet and installed it myself with no damage....that thing is incredibly fragile and a thumb can make a dent in it. I'd push as little as necessary.
Wife was not involved......life is too short....
Wife was not involved......life is too short....
01-20-2012, 09:17 AM
#11
Race Director

Don't get too confident, this job is a bear, but very doable. be very careful once the glue sets up, you have one shot to get it right. Test fit, test fit, and test fit again. Warm weather helps.
01-20-2012, 09:25 AM
#12
Melting Slicks

Do not, under any circumstance, believe that the weight and pressure of the windshield negates the need for pad adhesive......
or so I've been told (1987)
Installing the windshield is a lot easier with two people.
or so I've been told (1987)
Installing the windshield is a lot easier with two people.
01-20-2012, 09:57 AM
#13
Team Owner
If I had it to do over again (and I might some day) I wouldn't put any sealant in that lower windshield channel. I put black butyl in there and it was a huge mess. Got all over the car, me, my neighbor and his brother-in-law. I don't get invited over for barbeque anymore...
01-20-2012, 01:00 PM
#15
Melting Slicks
 01-20-2012, 02:42 PM
#16
Le Mans Master

Member Since: Sep 2003
Location: Norwalk ohio
Posts: 8,927
Received 640 Likes
on
358 Posts
2019 Corvette of the Year Winner
St. Jude Donor '15

If I had it to do over again (and I might some day) I wouldn't put any sealant in that lower windshield channel. I put black butyl in there and it was a huge mess. Got all over the car, me, my neighbor and his brother-in-law. I don't get invited over for barbeque anymore...
I plan on taking the windshield back off and getting that little issue fixed as well as a couple other things that bug me.
For adhesive to hold down the dash pad, I used contact cement that is for holding down countertop laminate. That sticks that pad in place. Also, IMO, when it comes to joints where the pad is at and something else lays over it in that area, IMO you can't take off enough padding material. Take your pick, any of those joints.
01-20-2012, 05:28 PM
#17
Team Owner
If you watch the Al Knoch dash pad installation video the Latino gentlemen (who I've met at Kissimmee) in the film changes out the dash pad by just pulling the gauge cluster forward and not removing it totally. Never tried it that way but I guess its possible.
01-20-2012, 07:01 PM
#19
Racer
I installed my AK pad in my 50-Niner in 1980 pretty much as Steve said....one man job...still looks great after 31 years...
 01-20-2012, 07:12 PM
#20
Melting Slicks
If you go to youtube put in paragon dash pad install and you should see a video of a 60 dash pad being installed.Bob W