Hood issuses Bummed out! HELP
 05-11-2012, 09:59 AM
#1
Pro

Thread Starter
Hello Gang
Well the 66 Coupe is days away from a 31/2 year restoration I removed the hood 4 weeks ago to install the new Vintage Air unit and got all the plumbing in the engine bay and did all my initial marking being careful to identify the location of the hinges and bolts by using tape and marking pen prior to taking the hood off. I reinstalled the hood this past weekend everything lined up perfectly but it may be my imagination the hood seems to have warped in the center bowing up above the fender line on each side Could it happen that quickly I laid the hood on the roof of another project for the 4 weeks (only working on car on weekends) it seem too short of a time frame to get warped/ Now I need advice how I can get the hood back flat. I guess I can lay some weight on the center and hope it will straighten out anyone else have this issue?
Any advice would be greatly appreciated
BuffaloBill
 05-11-2012, 10:08 AM
#2
Dr. Detroit

Member Since: Mar 2012
Location: New Braunfels Texas
Posts: 9,963
Received 3,892 Likes
on
2,564 Posts

Hello Gang
Well the 66 Coupe is days away from a 31/2 year restoration I removed the hood 4 weeks ago to install the new Vintage Air unit and got all the plumbing in the engine bay and did all my initial marking being careful to identify the location of the hinges and bolts by using tape and marking pen prior to taking the hood off. I reinstalled the hood this past weekend everything lined up perfectly but it may be my imagination the hood seems to have warped in the center bowing up above the fender line on each side Could it happen that quickly I laid the hood on the roof of another project for the 4 weeks (only working on car on weekends) it seem too short of a time frame to get warped/ Now I need advice how I can get the hood back flat. I guess I can lay some weight on the center and hope it will straighten out anyone else have this issue?
Any advice would be greatly appreciated
BuffaloBill
Well the 66 Coupe is days away from a 31/2 year restoration I removed the hood 4 weeks ago to install the new Vintage Air unit and got all the plumbing in the engine bay and did all my initial marking being careful to identify the location of the hinges and bolts by using tape and marking pen prior to taking the hood off. I reinstalled the hood this past weekend everything lined up perfectly but it may be my imagination the hood seems to have warped in the center bowing up above the fender line on each side Could it happen that quickly I laid the hood on the roof of another project for the 4 weeks (only working on car on weekends) it seem too short of a time frame to get warped/ Now I need advice how I can get the hood back flat. I guess I can lay some weight on the center and hope it will straighten out anyone else have this issue?
Any advice would be greatly appreciated
BuffaloBill
I have seen this on Glass Street Rods I have built in the past.....heat is what does it.....but it hasn't been that warm has it?
Usually the opposite is true....the hood is flat and the fenders bow somewhat...very strange....
How was the hood stored? (How hot....how round was the project cars roof..etc.?)
This is going to sound very crude.....but the hot Texas sun....some cotton cloths....and some plastic coated gym weights place stratagically may bring it back....
Nothing hotter than this sun!
Jebby
05-11-2012, 10:20 AM
#3
Melting Slicks


Bill,
A hood won't warp in 4 weeks. It's one of those anomalies that gets by us all......most likely like this before removal. No way to fix, get best fit and move on.
Curious......small or big block car? If big block it is not uncommon for the hood to be warped through the center. Mine is (more so drivers side) as I've seen other BB '66's with the same issue. Numerous posts on this.
Last edited by RestoMike; 05-11-2012 at 12:57 PM.
05-11-2012, 11:33 AM
#4
Pro
Thread Starter
Bill,
A hood won't warp in 4 weeks. It's one of those annomolies that most likely gets by us all......most likely like this before removal. No way to fix, get best fit and move on.
Curious......small or big block car? If big block it is not uncommon for the hood to be warped through the center. Mine is (more so drivers side) as I've seen other BB '66's with the same issue. Numerous posts on this.
It is a L79 327 SB After I get it back from SW allignment I will take it to the Body shop where it was painted to get their input
Thanks for your advice
Bill
05-11-2012, 12:23 PM
#5
Melting Slicks
Bill:
My first '65 SB coupe had that issue on the passenger side, which seems to occur more often than the driver's side for some reason.
It looked like the hood was bowed up, but in fact the hood surround was sagging low.
Really bugged me. OK, but how to fix it without major surgery??
The fix is to undo the bond to the inner fender panel, just below the drip channel, shim up the hood surround to match the hood curvature, and then "tack bond" in several spots. Let cure, pull the shims and complete the bond line.
This can be done without touching the body paint. I drilled thru the bond line about every 1/2" and then cut thru the adhesive using a carborundum rod saw. Same type we used to cut Coke bottles with.
Tedious, but I wasn't comfortable with using a knife & hammer to split the joint.
Once you've got the bond unstuck, use a paint stick with 36 grit wrapped around it to remove the old bond adhesive.
Pretty much a no-risk process if you take your time with the drilling and sawing.
Hope things work out and you get that hood matching the surround!
Mike
Last edited by Mike Geary; 05-12-2012 at 11:46 AM.
05-11-2012, 12:52 PM
#6
Le Mans Master

Member Since: Feb 2004
Location: Norcal CA
Posts: 6,717
Received 551 Likes
on
444 Posts
2018 C1 of Year Finalist

A person who does alot of bodywork for C2s had a similar problem though it was with a new hand laid hood and not an original or press molded hood. He said he would work on the lines surrounding the hood in the morning. By the end of the hot day it would bow and expand slightly. He said it did this for about 6 months then finally stopped due to the winter months. He told the owner he should replace the hood with an original hood since he was not sure if would stay that way during the summer months. Instead the owner decided to keep the hood. So one big sheet of glass can still shrink and expand.
05-11-2012, 01:18 PM
#7
Dr. Detroit
Member Since: Mar 2012
Location: New Braunfels Texas
Posts: 9,963
Received 3,892 Likes
on
2,564 Posts
A person who does alot of bodywork for C2s had a similar problem though it was with a new hand laid hood and not an original or press molded hood. He said he would work on the lines surrounding the hood in the morning. By the end of the hot day it would bow and expand slightly. He said it did this for about 6 months then finally stopped due to the winter months. He told the owner he should replace the hood with an original hood since he was not sure if would stay that way during the summer months. Instead the owner decided to keep the hood. So one big sheet of glass can still shrink and expand.
I had a 32' Ford glass body that sat in rafters at a Hot Rod shop for three years before purchase.....it was set uneven all that time...
When i mocked it up on the frame....it was obvious that it had twisted corkscrew like....
I bolted it down and set it outside in the hot sun for two days and it flattened out!
My tip may sound crude.....but remember...it is just resin after all....
Jebby
05-11-2012, 01:27 PM
#8
Race Director

Bill:
My first '65 SB coupe has that issue on the passenger side, which seems to occur more often than the driver's side for some reason.
It looked like the hood was bowed up, but in fact the hood surround was sagging low.
Really bugged me. OK, but how to fix it without major surgery??
The fix is to undo the bond to the inner fender panel, just below the drip channel, shim up the hood surround to match the hood curvature, and then "tack bond" in several spots. Let cure, pull the shims and complete the bond line.
This can be done without touching the body paint. I drilled thru the bond line about every 1/2" and then cut thru the adhesive using a carborundum rod saw. Same type we used to cut Coke bottles with.
Tedious, but I wasn't comfortable with using a knife & hammer to split the joint.
Once you've got the bond unstuck, use a paint stick with 36 grit wrapped around it to remove the old bond adhesive.
Pretty much a no-risk process if you take your time with the drilling and sawing.
Hope things work out and you get that hood matching the surround!
Mike
I agree the above is the ultimate and proper fix. However, if you think it was flatter before - prior to doing the above I would install it, park it out in the sun on a couple weekends with weights in the middle on towels and see what that does. I had to re-contour a trunk lid for my Cobra replica and I did it by wrapping a tie-down strap around it, cinching it tight to pull more curve into it, hit it with a heat gun for awhile and then left it out in the sun for several days with the strap still on it. Worked like a charm and almost two years later it has not lost it's curve (so far so good).
 05-11-2012, 01:30 PM
#9
Dr. Detroit
Member Since: Mar 2012
Location: New Braunfels Texas
Posts: 9,963
Received 3,892 Likes
on
2,564 Posts
I agree the above is the ultimate and proper fix. However, if you think it was flatter before - prior to doing the above I would install it, park it out in the sun on a couple weekends with weights in the middle on towels and see what that does. I had to re-contour a trunk lid for my Cobra replica and I did it by wrapping a tie-down strap around it, cinching it tight to pull more curve into it, hit it with a heat gun for awhile and then left it out in the sun for several days with the strap still on it. Worked like a charm and almost two years later it has not lost it's curve (so far so good).

It works!!!!
Jebby
05-11-2012, 02:35 PM
#10
Melting Slicks
I agree the above is the ultimate and proper fix. However, if you think it was flatter before - prior to doing the above I would install it, park it out in the sun on a couple weekends with weights in the middle on towels and see what that does. I had to re-contour a trunk lid for my Cobra replica and I did it by wrapping a tie-down strap around it, cinching it tight to pull more curve into it, hit it with a heat gun for awhile and then left it out in the sun for several days with the strap still on it. Worked like a charm and almost two years later it has not lost it's curve (so far so good).

 05-11-2012, 02:39 PM
#11
Dr. Detroit
Member Since: Mar 2012
Location: New Braunfels Texas
Posts: 9,963
Received 3,892 Likes
on
2,564 Posts
It is not really the amount of weight so much as it is the amount of time it is on there.
It wouldn't take much to preload the effected area.
One big problem would be overshooting it.....
Jebby
05-11-2012, 07:52 PM
#12
Race Director
Possibly some elaboration is in order - I'm talking about a couple 15 or 20 lb weights one on each side, about half way back on the hood. And - it would be a good idea to put a piece of plywood under them to spread the load slightly. Other than that - I don't see a problem. That's enough weight that if it is warped temporarily it will help it seek it's original contour - but not enough in my opinion, to distort it's natural, at rest, contour. I would do it to my 46 year old car or my 2-year old fiberglass replica.
05-12-2012, 07:55 AM
#13
Melting Slicks

You say that the hood was off to install the air conditioner. Did you by chance pull the radiator support/surround? It is the forward body mount and if improperly reinstalled will bow the body somewhat and could create the condition you're seeing. I.e. It may be the body not the hood. Check shims to the nose of the frame rails and fasteners to the inner fenders.
Harry
Edit, I think it's really unlikely that the hood could have warped from heat in your garage. We park these things in the sun on 100 degree days all the time with no issues. Temps of dark colored cars can reach 160+ degree in the southwestern sun.
Harry
Edit, I think it's really unlikely that the hood could have warped from heat in your garage. We park these things in the sun on 100 degree days all the time with no issues. Temps of dark colored cars can reach 160+ degree in the southwestern sun.
Last edited by 66since71; 05-12-2012 at 08:02 AM.
05-12-2012, 09:58 AM
#14
Safety Car

I'm sure your hood didn't warp in that short a period of time, you either never looked at it that closely in the past, or it's sitting a bit diffidently than before you removed it.

Paul
Paul
05-12-2012, 10:21 AM
#15
Safety Car


 05-12-2012, 04:00 PM
#17
Drifting

Hello Gang
Well the 66 Coupe is days away from a 31/2 year restoration I removed the hood 4 weeks ago to install the new Vintage Air unit and got all the plumbing in the engine bay and did all my initial marking being careful to identify the location of the hinges and bolts by using tape and marking pen prior to taking the hood off. I reinstalled the hood this past weekend everything lined up perfectly but it may be my imagination the hood seems to have warped in the center bowing up above the fender line on each side Could it happen that quickly I laid the hood on the roof of another project for the 4 weeks (only working on car on weekends) it seem too short of a time frame to get warped/ Now I need advice how I can get the hood back flat. I guess I can lay some weight on the center and hope it will straighten out anyone else have this issue?
Any advice would be greatly appreciated
BuffaloBill
Well the 66 Coupe is days away from a 31/2 year restoration I removed the hood 4 weeks ago to install the new Vintage Air unit and got all the plumbing in the engine bay and did all my initial marking being careful to identify the location of the hinges and bolts by using tape and marking pen prior to taking the hood off. I reinstalled the hood this past weekend everything lined up perfectly but it may be my imagination the hood seems to have warped in the center bowing up above the fender line on each side Could it happen that quickly I laid the hood on the roof of another project for the 4 weeks (only working on car on weekends) it seem too short of a time frame to get warped/ Now I need advice how I can get the hood back flat. I guess I can lay some weight on the center and hope it will straighten out anyone else have this issue?
Any advice would be greatly appreciated
BuffaloBill
05-12-2012, 05:07 PM
#18
Tech Contributor

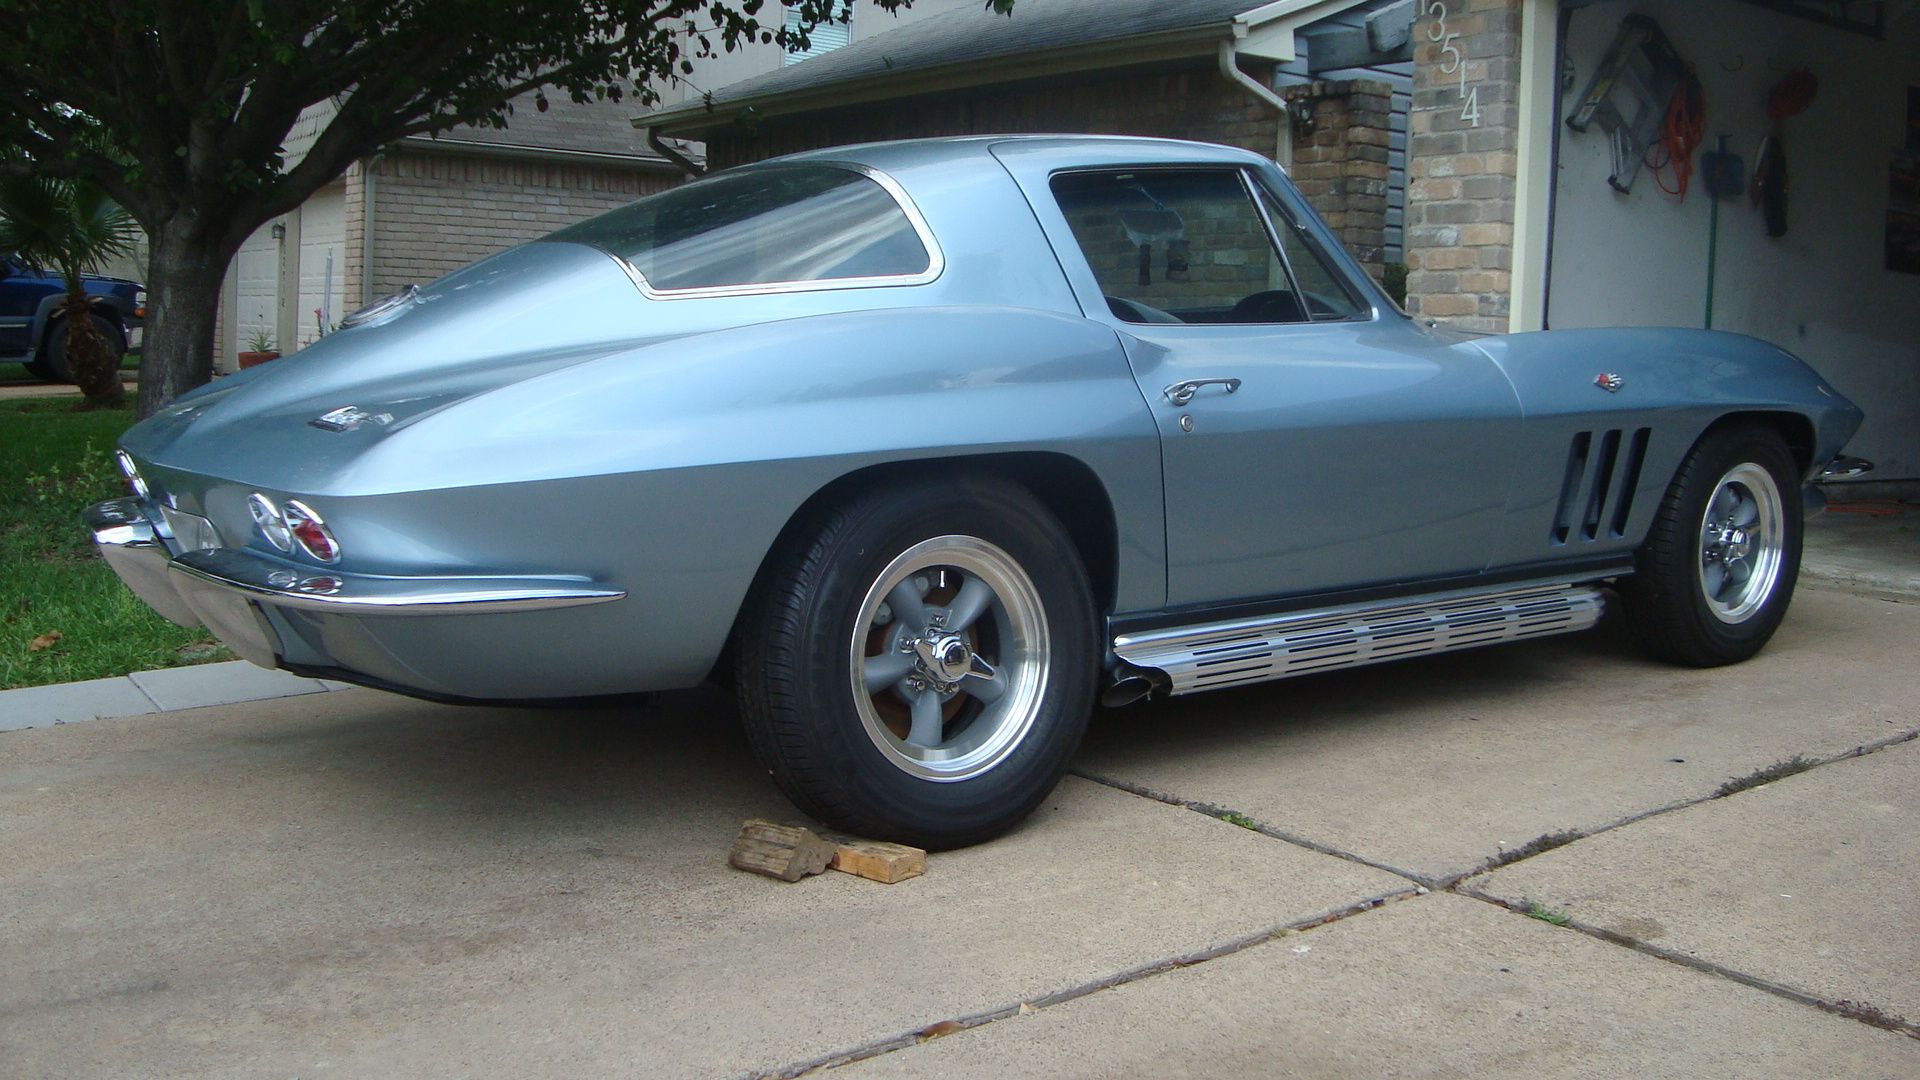
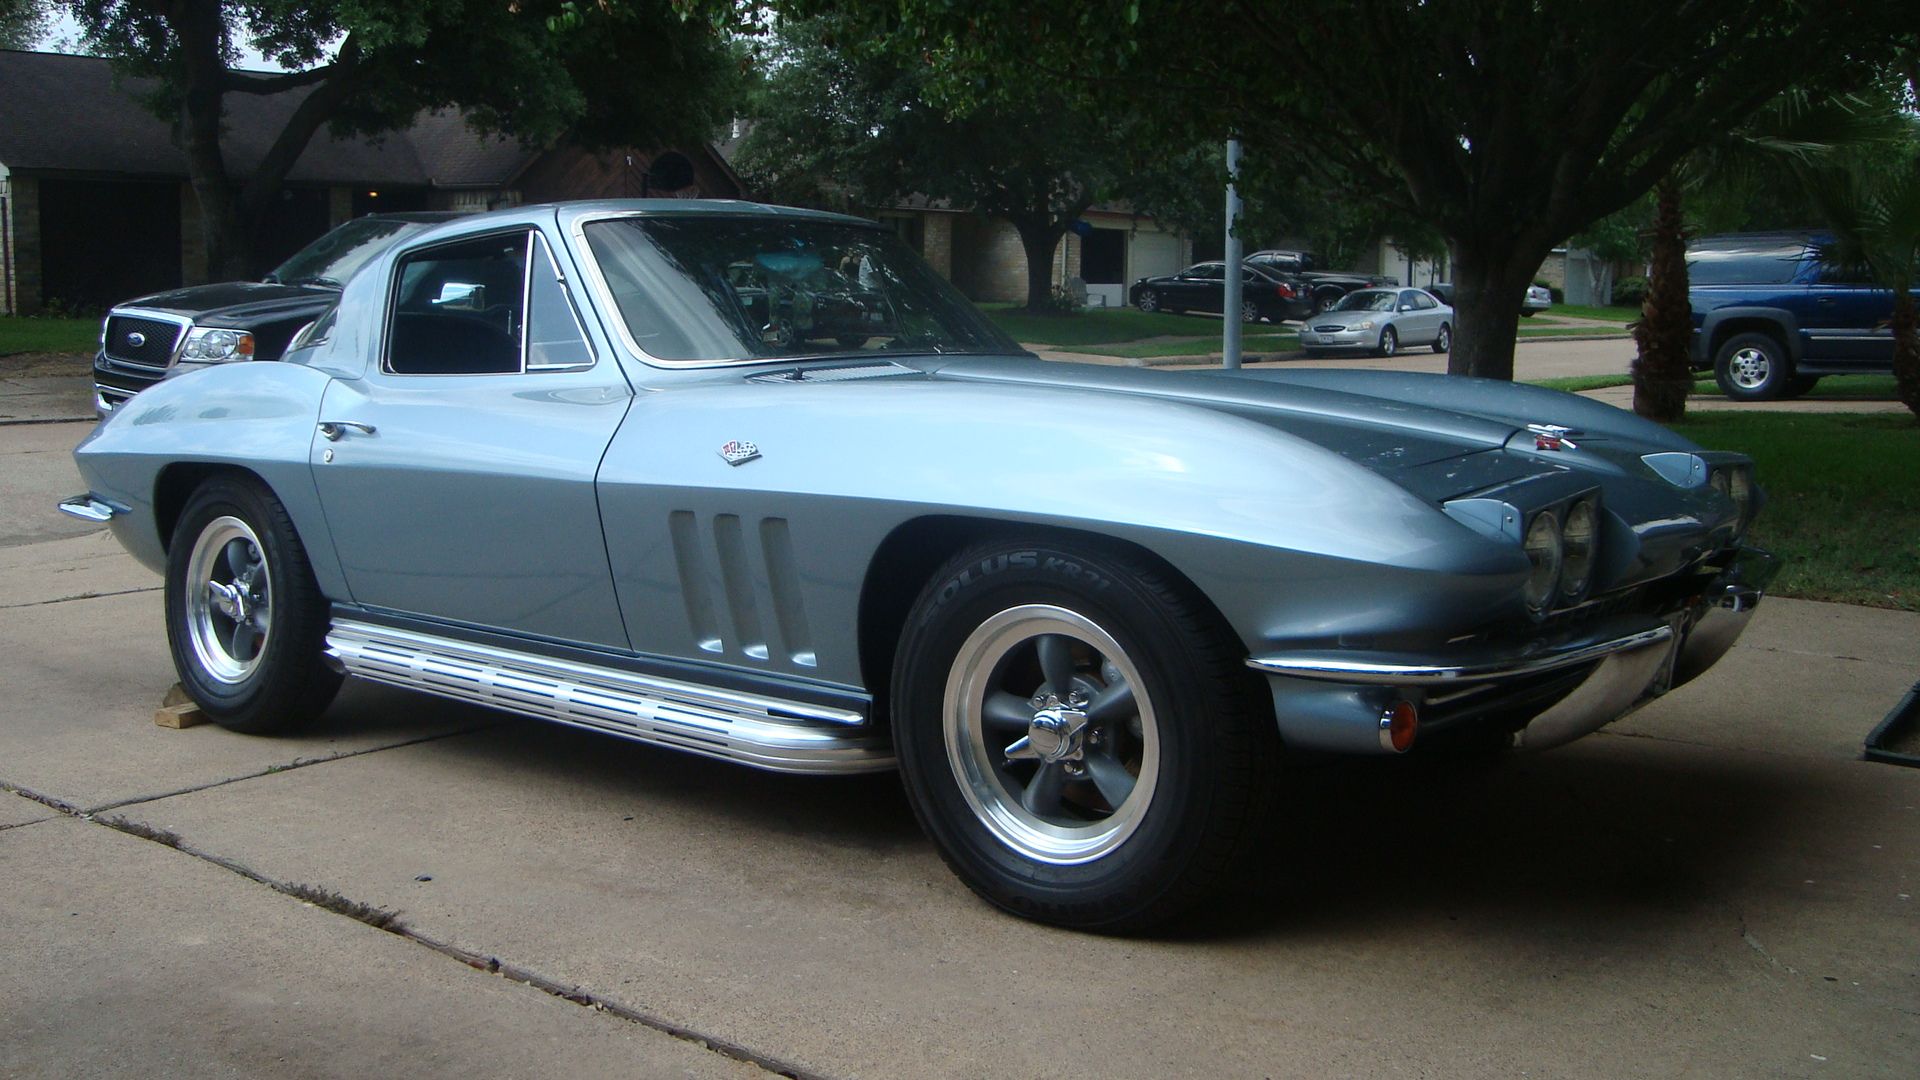
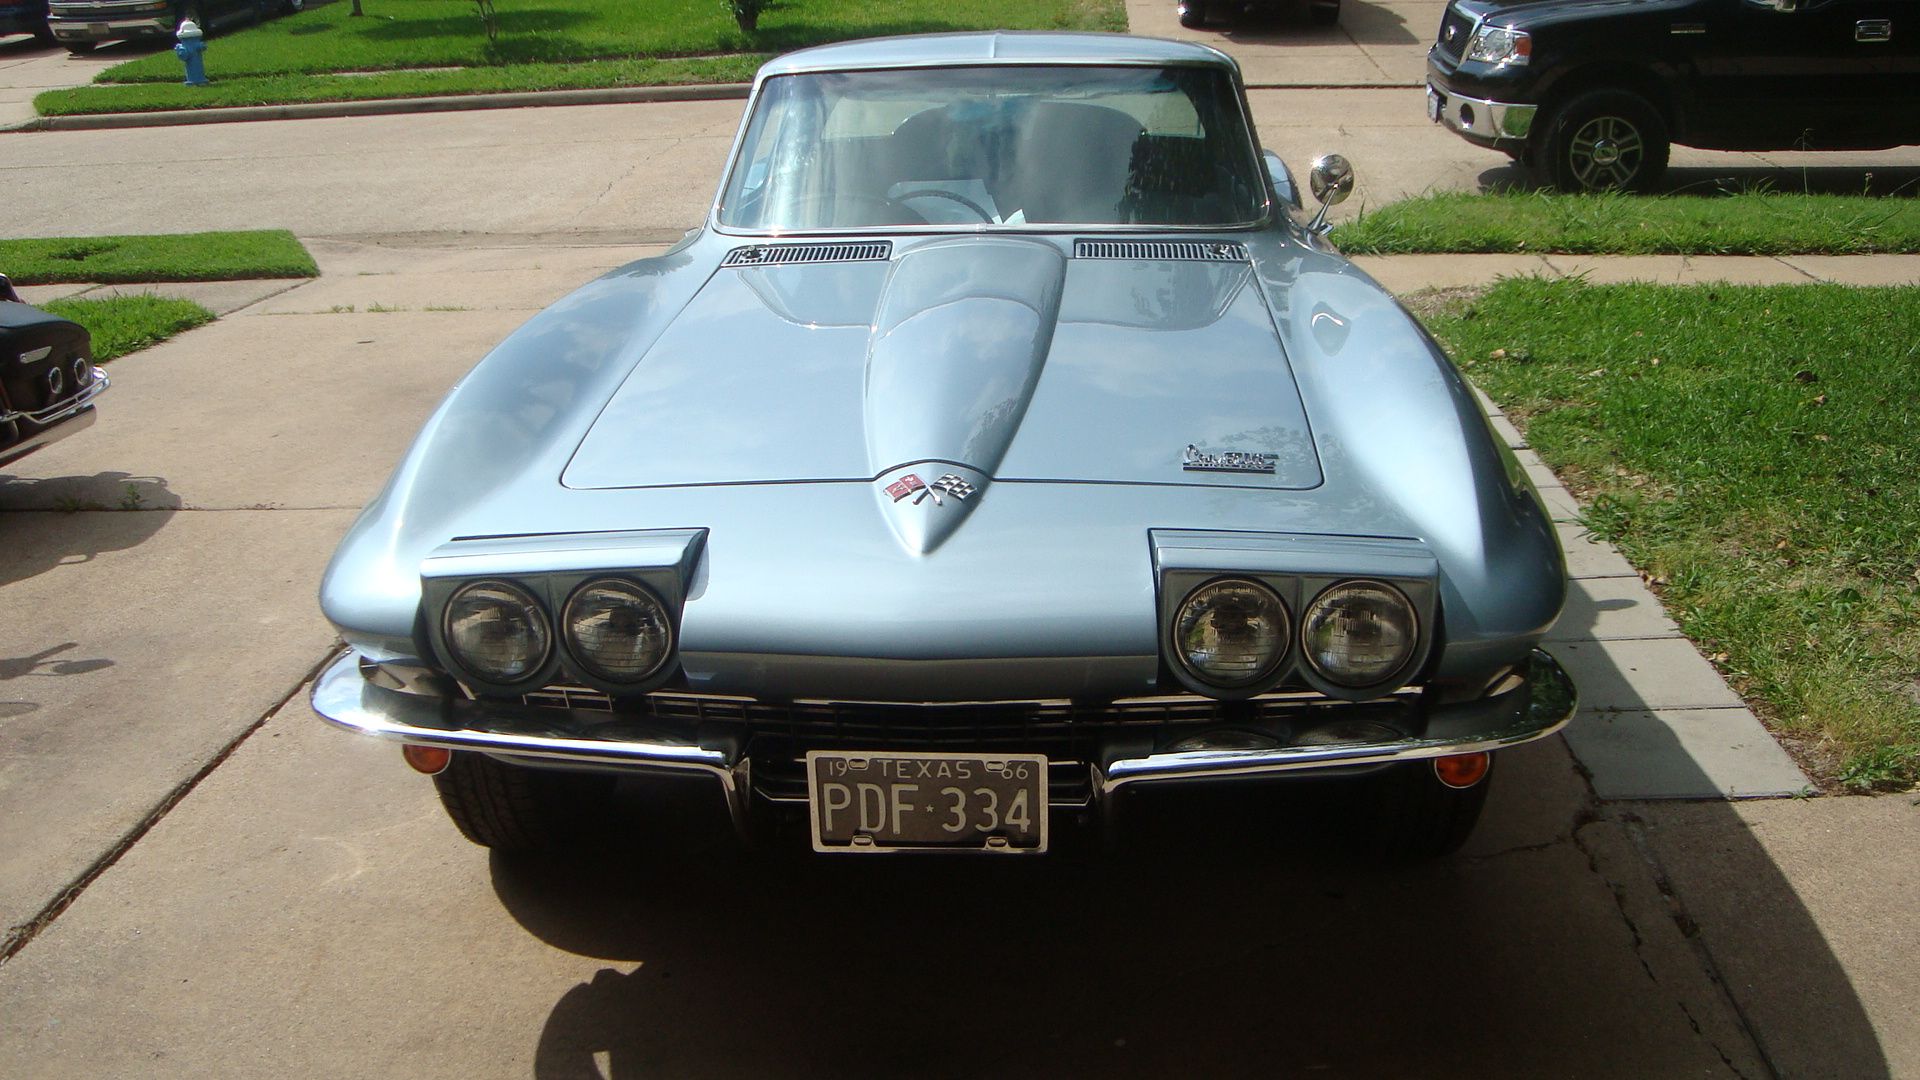
Here are pictures of Bill's car that he asked me to post for him. These photos are from April, BEFORE he removed the hood for the VA install.

05-13-2012, 04:17 PM
#20
Pro
Thread Starter
The New Vintage air is simple to install under the hood However I did have to fabricate the holes (widen them to get the pluming to route properly
The interior compartment is another story Behind the dash getting the unit to fit between the Birdcage took 2 of us 2 hours then the real fun begins with running the duct work I would like to post photos of the install but have issues downloading from my PC to the forum Jeff 2 has alway come thru for me to get some photos unto the site
The interior compartment is another story Behind the dash getting the unit to fit between the Birdcage took 2 of us 2 hours then the real fun begins with running the duct work I would like to post photos of the install but have issues downloading from my PC to the forum Jeff 2 has alway come thru for me to get some photos unto the site