Acceptable gaps
 12-19-2012, 11:02 AM
#1
Intermediate

Thread Starter

Member Since: Jul 2010
Location: hartleton pa
Posts: 30
Likes: 0
Received 0 Likes
on
0 Posts
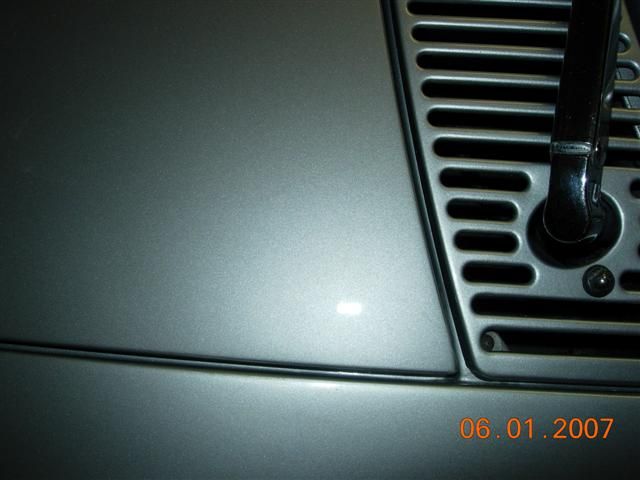
Here are a couple pics of a 67 we finished for a customer. This car was not built to be a show car in any way. It was built to be driven and used.
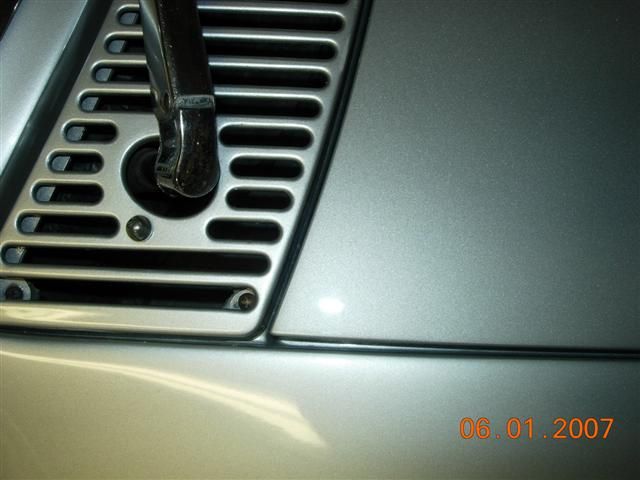
First is the back edge of the hood. We had to install a new front clip that was spliced in. The customer did not want to spend the money on an entire new front clip so we found a used one and pieced it back together. The hood opening is square and the front edge gap is even from left to right.
When measured the right edge measures 1/4" and the left measures 7/16"
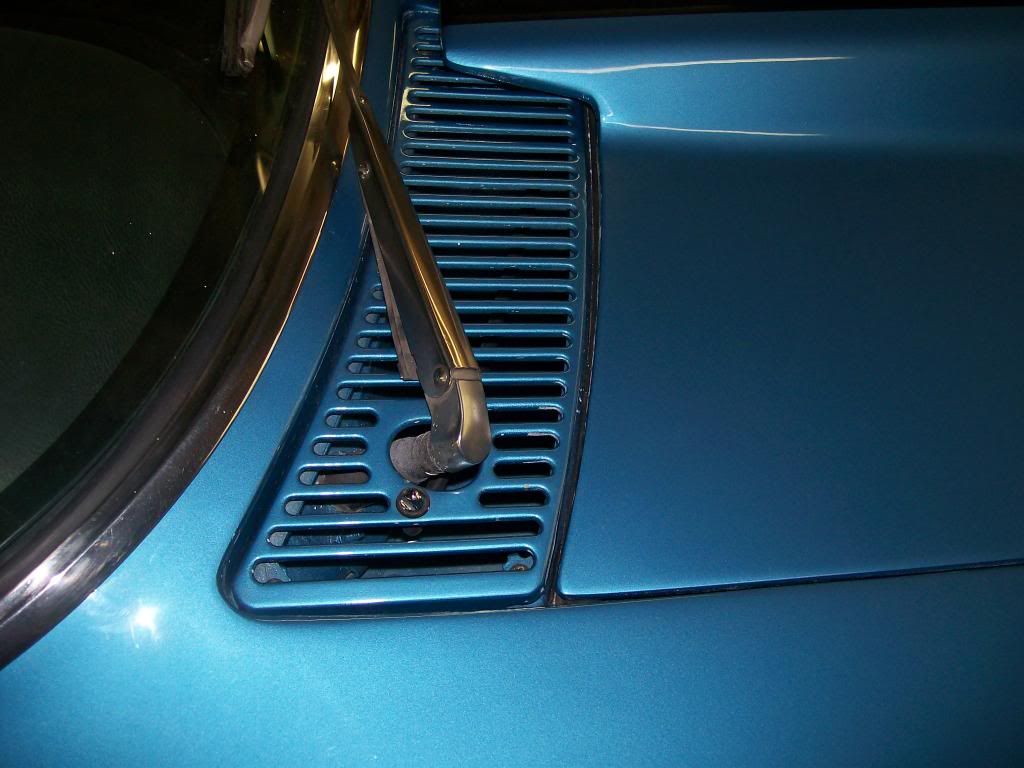
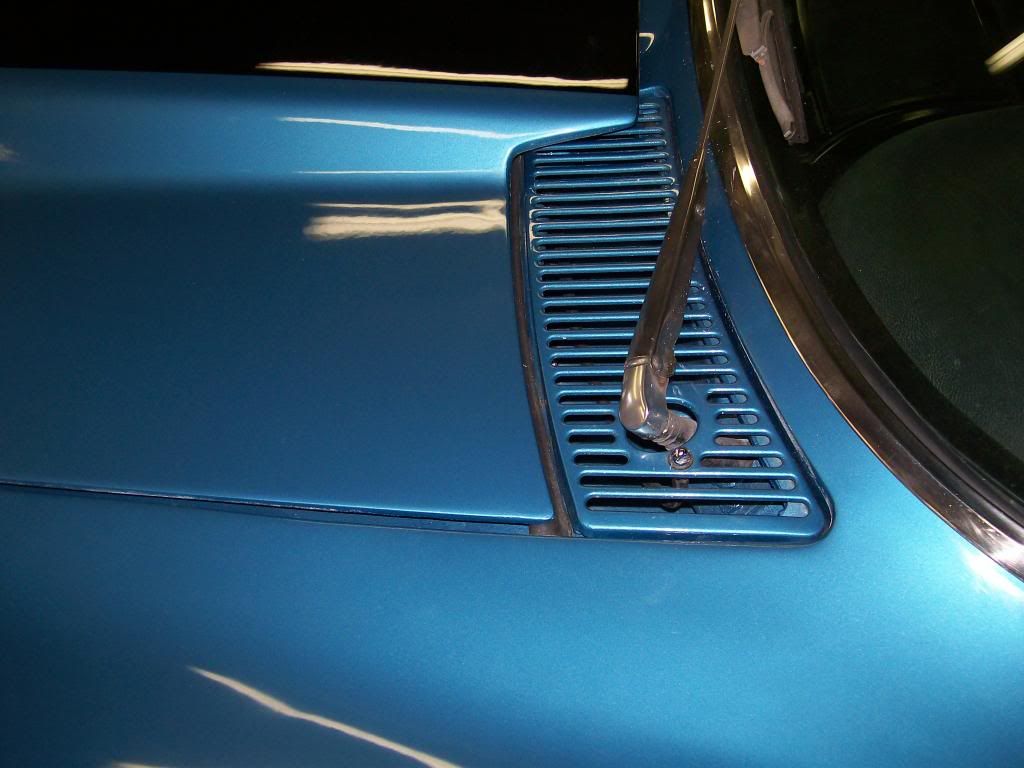
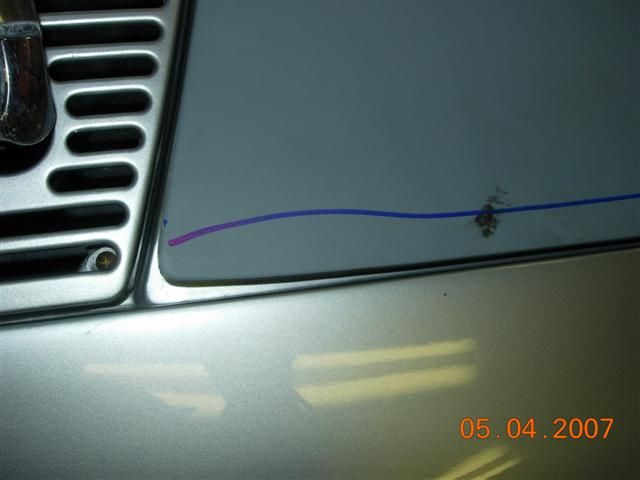
The other issue is the front upper edge of the drivers door. Again the rear gap of the door is even from top to bottom along with the bottom gap to the rocker. We did not move the upper section of the fender or do any work on the front edge of the door. This gap is about an 1/8" wider than the corresponding gap on the passenger side
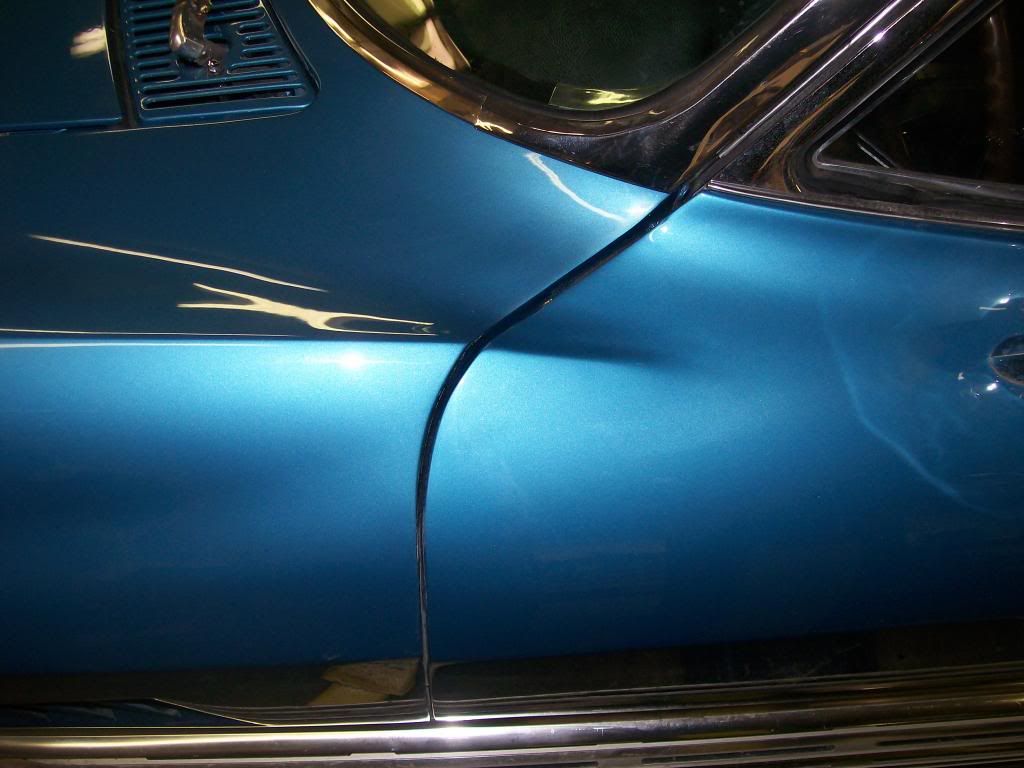
This is the first corvette we have done this level of work on. The car had been in accident at one point in time and had diamonded the frame 1 1/2" and pushed the right front down almost 2". We installed a used front clip, one used quarter panel and one new quarter panel. I know from reading the forum and from experience on other cars that factory gaps were not always uniform. I just wanted to find what was an acceptable. I have no problem repairing mistakes we may have made.Thanks in advance.
First is the back edge of the hood. We had to install a new front clip that was spliced in. The customer did not want to spend the money on an entire new front clip so we found a used one and pieced it back together. The hood opening is square and the front edge gap is even from left to right.
When measured the right edge measures 1/4" and the left measures 7/16"
The other issue is the front upper edge of the drivers door. Again the rear gap of the door is even from top to bottom along with the bottom gap to the rocker. We did not move the upper section of the fender or do any work on the front edge of the door. This gap is about an 1/8" wider than the corresponding gap on the passenger side
This is the first corvette we have done this level of work on. The car had been in accident at one point in time and had diamonded the frame 1 1/2" and pushed the right front down almost 2". We installed a used front clip, one used quarter panel and one new quarter panel. I know from reading the forum and from experience on other cars that factory gaps were not always uniform. I just wanted to find what was an acceptable. I have no problem repairing mistakes we may have made.Thanks in advance.
 12-19-2012, 11:07 AM
#2
Team Owner

Member Since: Feb 2003
Location: Sitting in his Nowhere land Hanover Pa
Posts: 49,008
Received 6,943 Likes
on
4,782 Posts
2015 C2 of Year Finalist

Where did you splice the front end. What did it look like before you started. Did you check the frame against the factory measurements? To me it looks like poor workmen ship when the put the upper sounded, fenders, and doors were all fitted.
12-19-2012, 11:09 AM
#3
Burning Brakes

If you look at the corvette assembly manual you will see how loose the tolerances were back then. Most C2 corvettes that have been painted and restored have much better fit and finish then the 1st day they came off the line. What is happening now is that people see these restored cars and think that this is how they were first built and that simply isn't the case. Now combine this with the ower not wanting to do it right and use a complete new front end on a car that has been hit and damaged. There is only so much makeup you can put on a pig and when you are done you still have a pig. This is the reason on my 66 I am doing a complete new front nose. The gaps in the photos while not being 100 point show car perfect aren't that bad, I have seen a ton worse.
12-19-2012, 11:12 AM
#4
Intermediate
Thread Starter
Member Since: Jul 2010
Location: hartleton pa
Posts: 30
Likes: 0
Received 0 Likes
on
0 Posts
The splice was made behind were the inner fender drops down. The frame was sent to another shop with a frame rack to be straightened. It was known that they did the best they could to get it back to square.
12-19-2012, 11:14 AM
#5
Intermediate
Thread Starter
Member Since: Jul 2010
Location: hartleton pa
Posts: 30
Likes: 0
Received 0 Likes
on
0 Posts
Here is a link to a couple pics I had posted during the restoration.
http://forums.corvetteforum.com/c1-a...oration-3.html
http://forums.corvetteforum.com/c1-a...oration-3.html
12-19-2012, 12:10 PM
#6
Drifting

Member Since: Jun 2010
Location: Ball Ground Georgia
Posts: 1,324
Likes: 0
Received 1 Like
on
1 Post
The door looks like a hinge adjustment might help correct the gap...but what does the back edge look like. You might have to split the difference if the back gap looks good. Edit: sorry just re-read where the back gap looks good. Something must still be bent in the chassis or birdcage based on those gaps.
Same for the hood. The inner fenders are the biggest part of hood alignment. can you make some inner fender adjustments to split the difference on your hood gaps.
I am replacing a bunch of front end stuff due to flares, so this is a topic of interest for me.
Same for the hood. The inner fenders are the biggest part of hood alignment. can you make some inner fender adjustments to split the difference on your hood gaps.
I am replacing a bunch of front end stuff due to flares, so this is a topic of interest for me.
Last edited by steveale; 12-19-2012 at 12:14 PM.
12-19-2012, 02:42 PM
#7
Le Mans Master


It is what it is. Worrying about it now after paint is like closing the barn door after the cows are gone. Fitting up the panels needs to be done early in the body work process, not after paint. Chalk it up to experience and do better next time.
12-19-2012, 02:59 PM
#8
Le Mans Master

im' certainly not here to criticize gaps on these cars....most were terrible from the factory.
having said that, the hood gap is really awful by the drivers cowl
you could possibly remove the front hinge on that side and elongate the bolt holes , maybe for a better fit
looks like you did a good job for what you started with especially on your first c2
jmo...good luck....
having said that, the hood gap is really awful by the drivers cowl
you could possibly remove the front hinge on that side and elongate the bolt holes , maybe for a better fit
looks like you did a good job for what you started with especially on your first c2
jmo...good luck....
12-19-2012, 07:37 PM
#9
Race Director


Why are you asking this question at this stage? Has the owner complained about the panel gaps? Considering the amount of work you did on the car I don't quite understand why you didn't spend a little more effort on evening up the gaps before painting. Of course it would greatly depend on what the owner instructed you to do and was willing to pay for. But to take a car down to that level and build it back up - even for a driver - I would have at least addressed the worse of the gap issues even if I didn't try to make them a razor sharp 3/16 inch exact gap all the way around. But yeah - if you want originality, they were pretty terrible from GM in most cases.
I guess in fairness I should note it's a convertible and depending on who re-mounted it on the chassis, the gaps could have been made worse by the shimming done (or not done).
I guess in fairness I should note it's a convertible and depending on who re-mounted it on the chassis, the gaps could have been made worse by the shimming done (or not done).
12-19-2012, 09:41 PM
#10
Racer
Member Since: Nov 2011
Location: Edwards AFB, Palmdale CA
Posts: 264
Likes: 0
Received 42 Likes
on
21 Posts

Ha. So, I'm not the only one having problems with gaps! I feel your pain. I figure on just cheating the gaps, split the differences and fill and fare the rest until it looks good to the naked eye.
Ken
Ken
12-19-2012, 10:30 PM
#11
Melting Slicks


I would drive that in a heartbeat and not feel like I had been shorted in the least... if I had seen the gaps and signed off on them pre-paint. Back when I did bodywork for a living if we took on a project such as this we always had the owner come inspect his car at regular intervals and actually sign a statement of satisfaction... post disassembly, post mechanical, pre paint, post paint and post interior, reassembly and final OK. It kept the BS to a bare minimum since all parties were clear as to expectations; and the shop's meeting of those expectations. I hope your customer was involved with inspections along the way and his displeasure is not being expressed at this late date.
12-19-2012, 11:06 PM
#12
Drifting

The GM assembly manual states the following for gaps:
Front of hood to nose panel: .120-.200
Side of hood to fender: .060-.200
Front of door to fender: .120-.210
I see no specific measurement for the rear of hood to cowl. But I think the ones in your photos, especially the drivers side, are excessive.
All measurements are in inches.
Boyan
Front of hood to nose panel: .120-.200
Side of hood to fender: .060-.200
Front of door to fender: .120-.210
I see no specific measurement for the rear of hood to cowl. But I think the ones in your photos, especially the drivers side, are excessive.
All measurements are in inches.
Boyan
12-19-2012, 11:08 PM
#13
Race Director
I agree with others stating it should have been caught before paint and repaired....but by being fresh painted it could still be straighten out and then re-painted in the effected areas
12-20-2012, 11:08 AM
#14
Intermediate
Thread Starter
Member Since: Jul 2010
Location: hartleton pa
Posts: 30
Likes: 0
Received 0 Likes
on
0 Posts
Ok this were we are at. The customer ok'd the gaps before paint, but the car was mounted on a rolling jig not the chassis. Although he has seen the car multiple times since its been on the chassis and painted. Is it possible to move the left door gap with the shims on the cowl body mount?
12-20-2012, 11:47 AM
#15
Melting Slicks
One would ask what would a reasonable man expect? Since the Owner was obviously keeping to a budget, the car was previously crashed (sounds pretty significant) that demanding over-restoration quality is not consistent with the budget constraints. Put some effort into fiddling with the adjustments and try and split the difference in the gaps. Its difficult dealing with Obsessive customers, They focus on the smallest things and cant see the forest for the trees. That car looks great. I hope he is not holding payment from you
12-20-2012, 11:54 AM
#16
Intermediate
Thread Starter
Member Since: Jul 2010
Location: hartleton pa
Posts: 30
Likes: 0
Received 0 Likes
on
0 Posts
One would ask what would a reasonable man expect? Since the Owner was obviously keeping to a budget, the car was previously crashed (sounds pretty significant) that demanding over-restoration quality is not consistent with the budget constraints. Put some effort into fiddling with the adjustments and try and split the difference in the gaps. Its difficult dealing with Obsessive customers, They focus on the smallest things and cant see the forest for the trees. That car looks great. I hope he is not holding payment from you
12-20-2012, 12:04 PM
#17
Le Mans Master
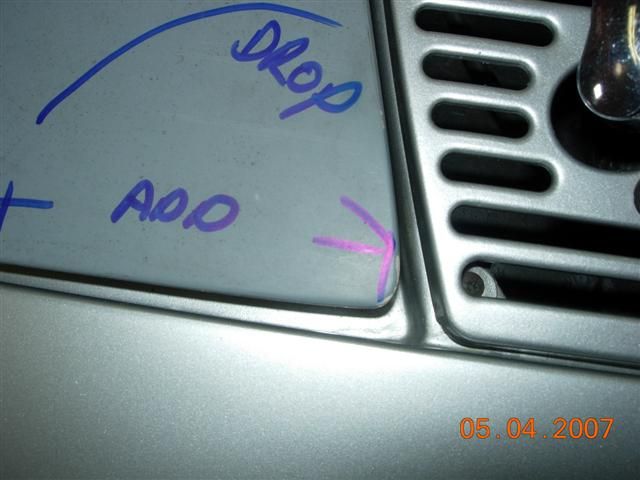
It certainly nothing lost to try playing with the shims. It is easy enough to take out one or two shims from the # 1 cowl mount, or try lifting the rad support on the right side. Remember if you lower the #1 cowl mount, the birdcage should already be firm against the #2 mount under the forward door area, so you might have to remove a shim there in order drop that forward door gap. Just loosen up all the mounts all around the car and jack up the right side up enough to play with the shims.
12-20-2012, 01:07 PM
#18
Safety Car

Here are a couple pics of a 67 we finished for a customer. This car was not built to be a show car in any way. It was built to be driven and used.
First is the back edge of the hood. We had to install a new front clip that was spliced in. The customer did not want to spend the money on an entire new front clip so we found a used one and pieced it back together. The hood opening is square and the front edge gap is even from left to right.
When measured the right edge measures 1/4" and the left measures 7/16"
The other issue is the front upper edge of the drivers door. Again the rear gap of the door is even from top to bottom along with the bottom gap to the rocker. We did not move the upper section of the fender or do any work on the front edge of the door. This gap is about an 1/8" wider than the corresponding gap on the passenger side
This is the first corvette we have done this level of work on. The car had been in accident at one point in time and had diamonded the frame 1 1/2" and pushed the right front down almost 2". We installed a used front clip, one used quarter panel and one new quarter panel. I know from reading the forum and from experience on other cars that factory gaps were not always uniform. I just wanted to find what was an acceptable. I have no problem repairing mistakes we may have made.Thanks in advance.
I went through the hood fit debacle a few years ago and it can be frustrating to say the least.
 12-20-2012, 01:22 PM
#19
Race Director