1958 RestoMod – 52 week build
 02-06-2016, 12:57 PM
#41
2nd Gear

Member Since: Feb 2016
Location: Mobile AL
Posts: 2
Likes: 0
Received 0 Likes
on
0 Posts
All signed up so I can watch one of my favorite body style Vettes come to life. Man, before I did the 5.3 wiring/computer for the '59 Truck, I am not sure there was a more terrifying photo than than the one you have that shows the explosion wires laid across the top of the engine. All just a good memory now. It's all about the schematics and triple labeling every wire/circuit before it is removed. Thanks for cheering me on through the process.
 03-20-2016, 06:02 PM
#42
Safety Car


Subscribed!! 
05-09-2016, 10:34 AM
#43
Melting Slicks

When I purchased the frame from Corvette Correction, I was told the 4L60e tranny would fit with no modifications because the engine sits approximately 2 inches lower in the Corvette Correction chassis vs a stock one. I did not ask about fitment for a T56 at that time, so I can't help you there.
Of course the Street Shop frame is probably slightly different, and I would call Trey (Street Shop owner) and ask him. I really like the Street Shop chassis for a C2/C3 using C5/6 components. I hope I have the cash to use that frame when I do a 71 roadster that I have.
Of course the Street Shop frame is probably slightly different, and I would call Trey (Street Shop owner) and ask him. I really like the Street Shop chassis for a C2/C3 using C5/6 components. I hope I have the cash to use that frame when I do a 71 roadster that I have.
Thanks
05-09-2016, 04:20 PM
#45
Melting Slicks
Member Since: Jul 2010
Location: Between Tally and Gatorville ,Florida
Posts: 3,454
Received 83 Likes
on
69 Posts

When I mounted my body to the chassis, I ended up putting together my own kit. I made 1/4 thick rubber cushion washers, used an old tire and cut them with a hole saw then drilled them for the size of the bolt. I used same size stainless washers as shims, Grade 8 bolts with self locking nuts. Remember that those body mount kits available are design for the stock chassis.
05-10-2016, 08:00 AM
#46
Racer
Thread Starter

Work, and the rest of life, has kept me from ANY of my projects since Christmas. I did manage to complete the "rough" engine wiring and fire the engine up on the chassis in January, but nothing else. I bought body shims from Billy Dawson at Corvette Correction, and have sourced grade eight bolts and self locking nuts. I need to complete the exhaust system and run the brake lines and then the body is ready to move over. I have a week of vacation scheduled for mid June that I plan to spend working on this car. Hopefully I will have pictures of some real progress at that time!
As always, there is more to come.
Ricky
As always, there is more to come.
Ricky
05-10-2016, 09:24 AM
#47
Melting Slicks
Member Since: Jul 2010
Location: Between Tally and Gatorville ,Florida
Posts: 3,454
Received 83 Likes
on
69 Posts
Work, and the rest of life, has kept me from ANY of my projects since Christmas. I did manage to complete the "rough" engine wiring and fire the engine up on the chassis in January, but nothing else. I bought body shims from Billy Dawson at Corvette Correction, and have sourced grade eight bolts and self locking nuts. I need to complete the exhaust system and run the brake lines and then the body is ready to move over. I have a week of vacation scheduled for mid June that I plan to spend working on this car. Hopefully I will have pictures of some real progress at that time!
As always, there is more to come.
Ricky
As always, there is more to come.
Ricky
10-11-2016, 11:04 AM
#48
Safety Car

Hello guys, I'm Robert from Mississippi, I happened across this build researching Corvette Corrections chassis. I've read Charlie's posts about his 62 and 59 at Carols62.com. Then I come across Rick's build. I live maybe 35 miles from Rick haven't met him yet. Like Rick I have a 94 c4, a 61 c1 that I'm about to start on, and a 66 GTO clone. I did the LS1 4l60e swap on it during a frame off restoration. I though wow here's two guys 35 miles apart with 3 very similar cars. I've read and reread bot Rick and Charlie's threads. So many questions. I'm waiting to here what pulley system you ended up with. I used the c5 stuff on the driver side and the Holley mount for the AC compressor. Would anyone care to post what mods have to be done to the c4 crossmember to install it in the CC frame. Can't wait for future updates on your project.
10-12-2016, 08:48 AM
#49
Melting Slicks
Member Since: Jul 2010
Location: Between Tally and Gatorville ,Florida
Posts: 3,454
Received 83 Likes
on
69 Posts
[ Would anyone care to post what mods have to be done to the c4 crossmember to install it in the CC frame. )
The mount tabs get cut off the C4 crossmember. When I purchased my frame from Billy at CC he exchanges a crossmember that already had the tabs cut off and was power coated to match the frame.
You can also send your crossmember to cc and they will get yours done. its included with the cost of the frame or use to be. Call Billy.
10-12-2016, 10:39 AM
#50
Safety Car
Thanks Dale002
10-12-2016, 11:08 PM
#51
Racer
Thread Starter
Robert,
I would love to catch up with you and talk cars. I would love to see your GTO. Ours is a 6 liter/T56 that is an absolute blast to drive - and we have put almost 40,000 miles on it so far. I have finally been able to work on the 1958 in the last two weeks after many months of other issues. I used the holly setup on both sides - one plus for using the holly bracket is you can use a truck alternator vs. the high dollar, and usually unavailable, corvette alternator. I will post pictures and an update this weekend. Our house projects will be drawing to a close (hopefully) by next weekend and then its all on on the corvette until Christmas.
Ricky
Last edited by ricott; 10-12-2016 at 11:14 PM.
10-13-2016, 10:29 AM
#52
Safety Car
Robert,
I would love to catch up with you and talk cars. I would love to see your GTO. Ours is a 6 liter/T56 that is an absolute blast to drive - and we have put almost 40,000 miles on it so far. I have finally been able to work on the 1958 in the last two weeks after many months of other issues. I used the holly setup on both sides - one plus for using the holly bracket is you can use a truck alternator vs. the high dollar, and usually unavailable, corvette alternator. I will post pictures and an update this weekend. Our house projects will be drawing to a close (hopefully) by next weekend and then its all on on the corvette until Christmas.
Ricky
I would love to catch up with you and talk cars. I would love to see your GTO. Ours is a 6 liter/T56 that is an absolute blast to drive - and we have put almost 40,000 miles on it so far. I have finally been able to work on the 1958 in the last two weeks after many months of other issues. I used the holly setup on both sides - one plus for using the holly bracket is you can use a truck alternator vs. the high dollar, and usually unavailable, corvette alternator. I will post pictures and an update this weekend. Our house projects will be drawing to a close (hopefully) by next weekend and then its all on on the corvette until Christmas.
Ricky
The following users liked this post:
ptjsk (10-30-2016)
10-13-2016, 10:26 PM
#53
Racer
Thread Starter
After many months of looking at the car with no progress, I now have a block of time (until Christmas) to work on the Corvette again. We are finishing up a major project at our home, but I have been able to work a few nights on the car and have am looking forward to making some serious headway by Christmas. The first order of business was to make some wooden wheel stands to raise the car 12 inches off the floor. Two weeks ago I spent most of the weekend building a set of 12 inch and 6 inch wooden stands, and a 6 inch stand for my floor jack. I can now raise the car either 6 inches or 12 inches in less than 10 minutes. I wish I had built these stands YEARS ago!
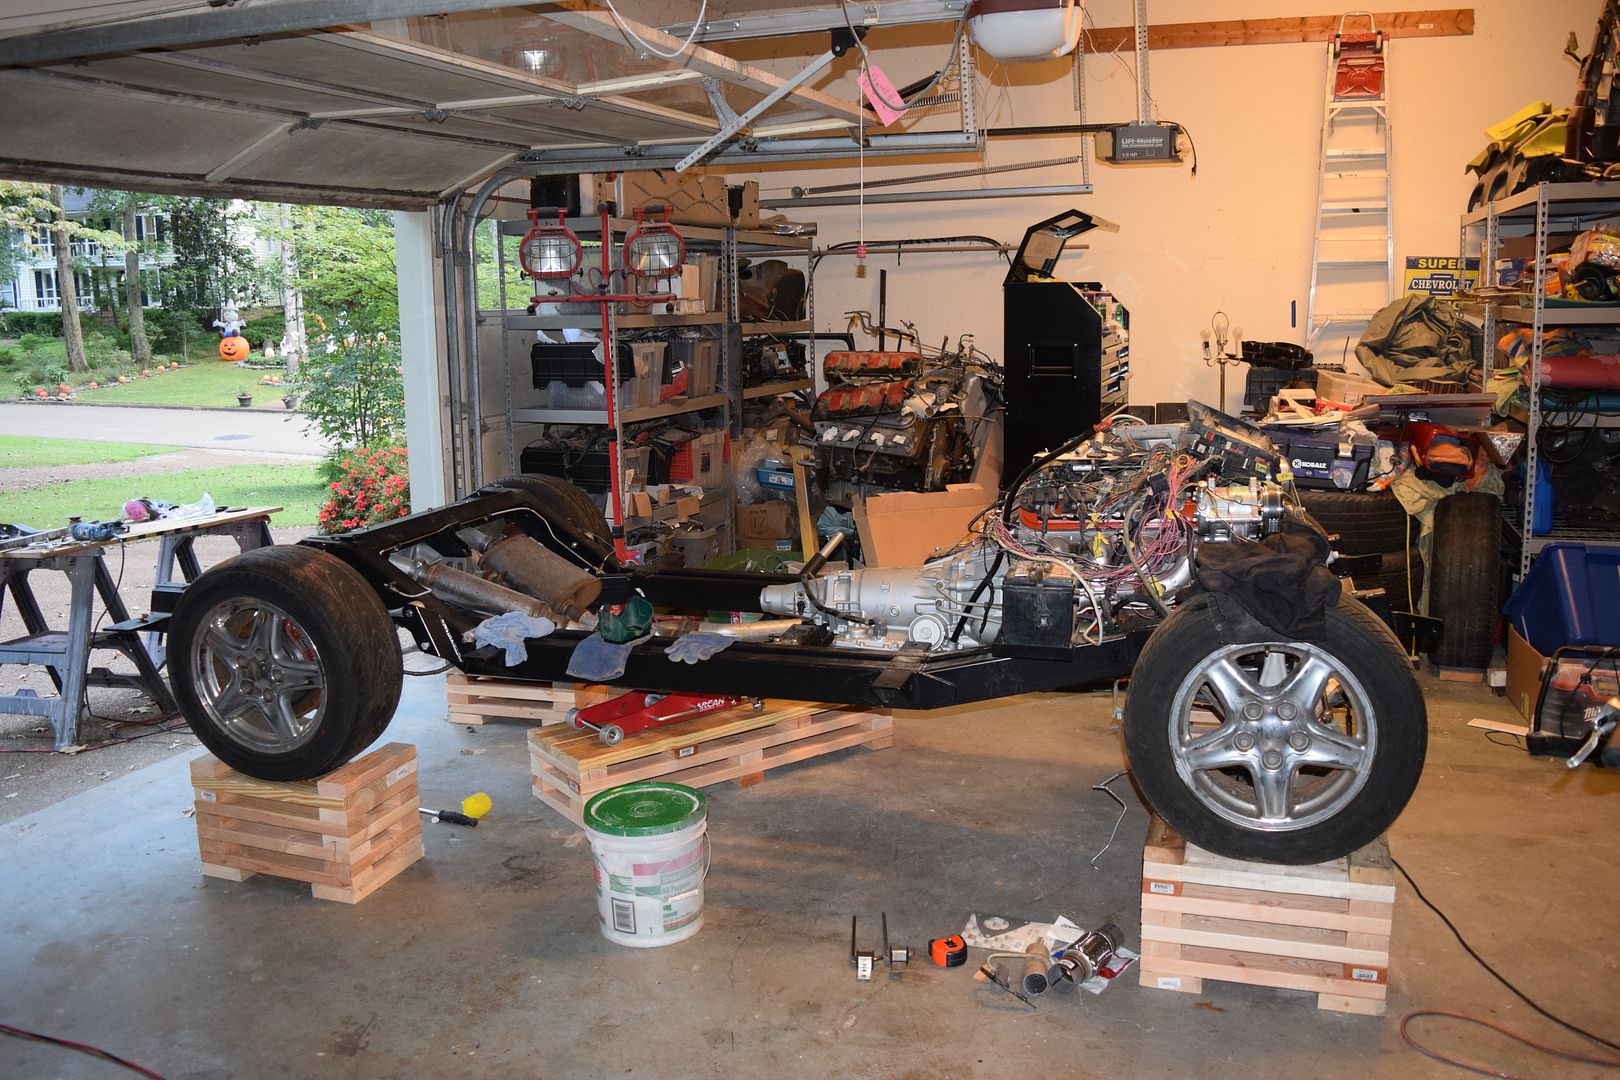
With the car at a great working height, I first ran the brake lines. I purchased the pre-bent lines from Corvette Correction when I bought the frame, and the lines installed without any drama. I also changed out the rear end from a 2:59 to a 3:08.
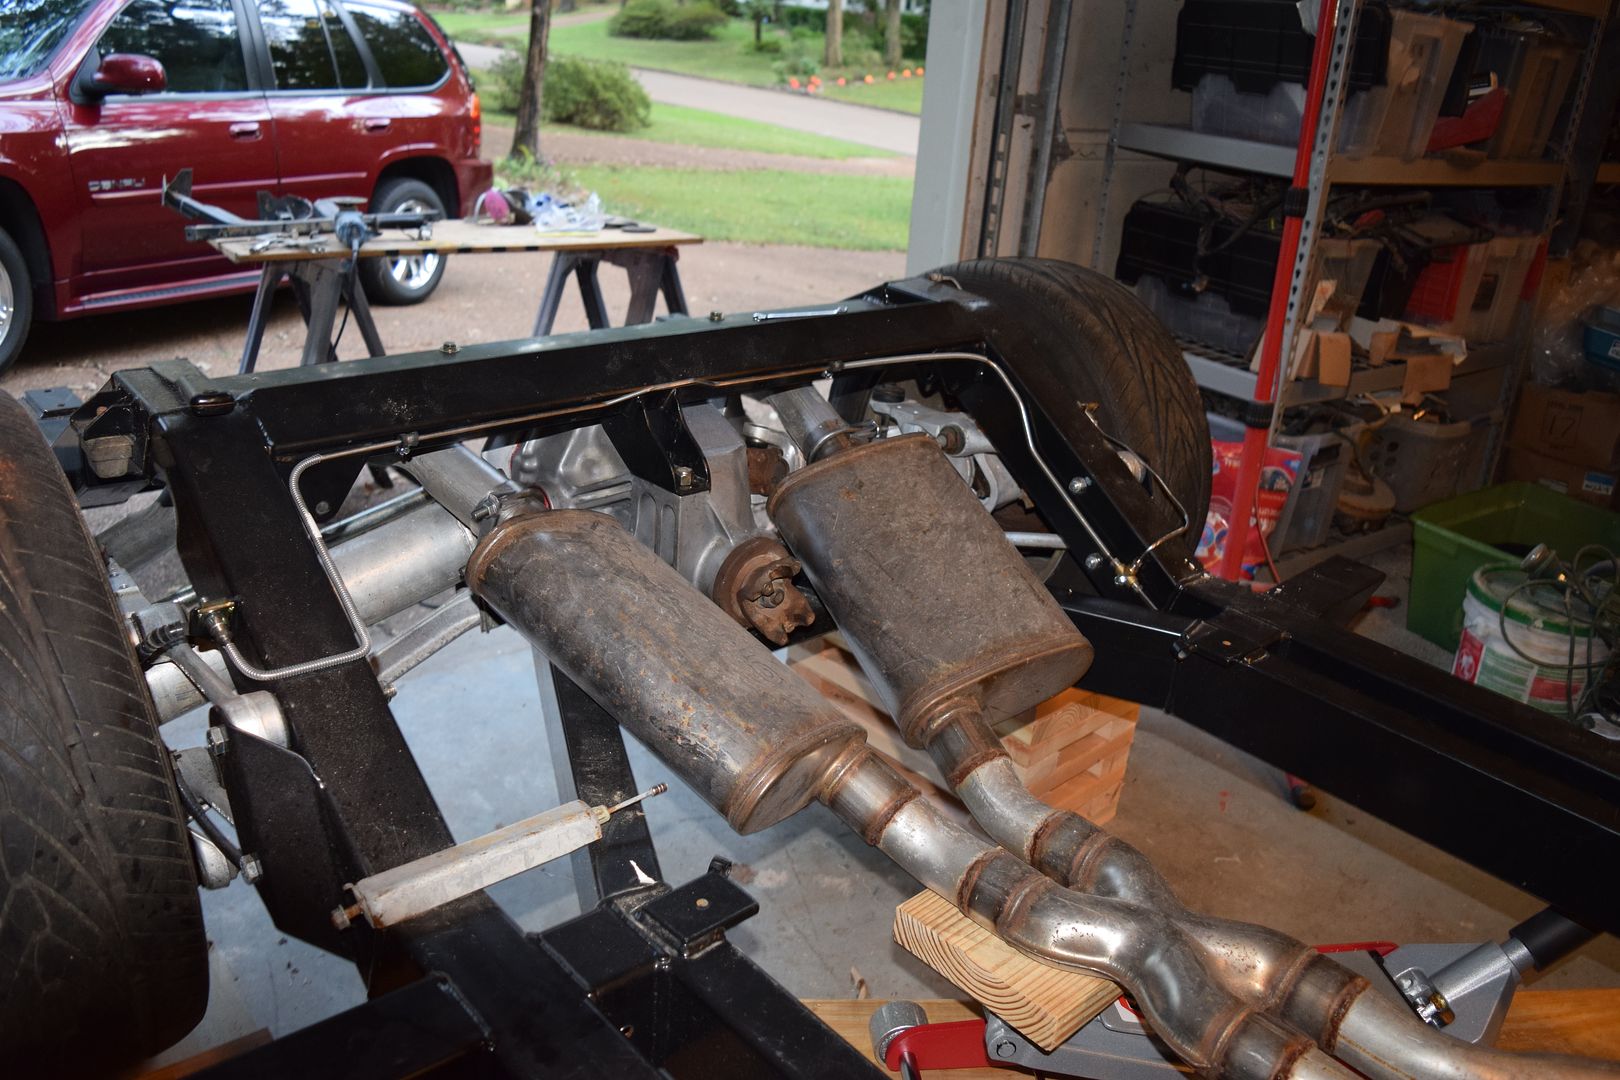
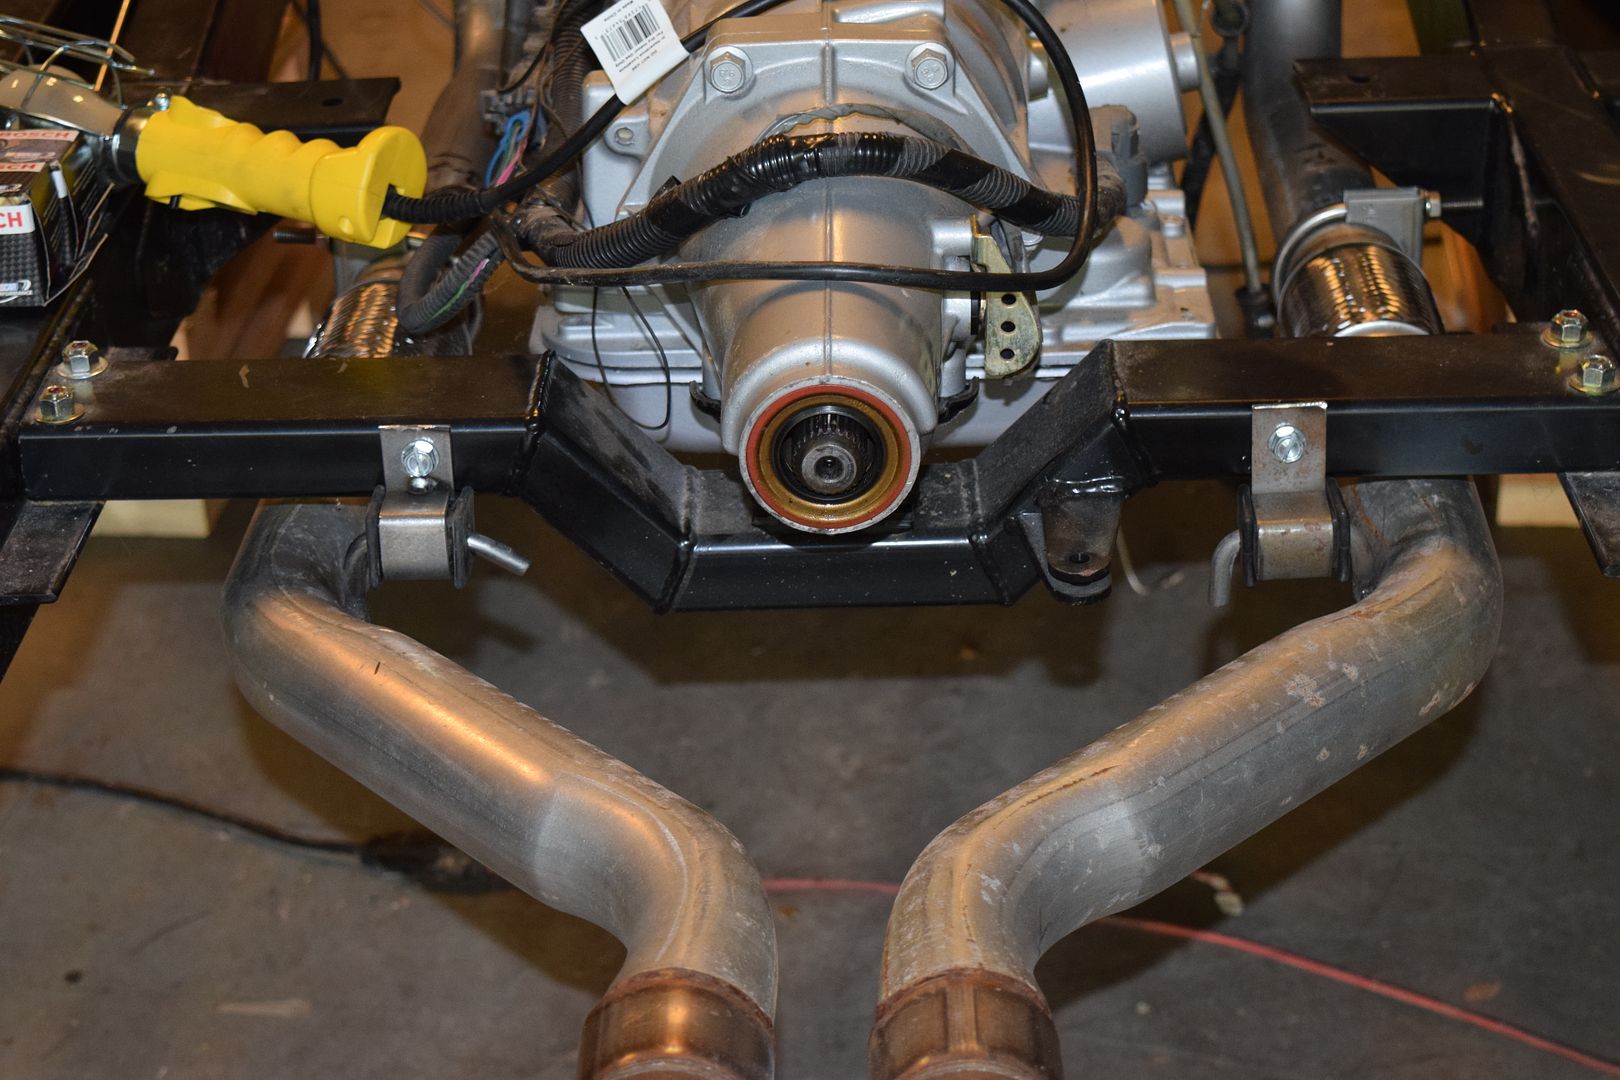
Last weekend I began installing the exhaust system that I also purchased from Corvette Correction when I bought the frame. As designed, it has exhaust hangers toward the rear of the frame, and the front is supported by bolting to the exhaust manifolds. While I basically did the same thing on my GTO, I wanted to take some of the stress off of the exhaust manifolds on this car. I cut the exhaust pipes just behind the bell housing and added flexible couplings at that point. I then attached two more exhaust hangers to the rear cross member. As installed, this system is super rigid, and has virtually no weight on the exhaust manifolds.
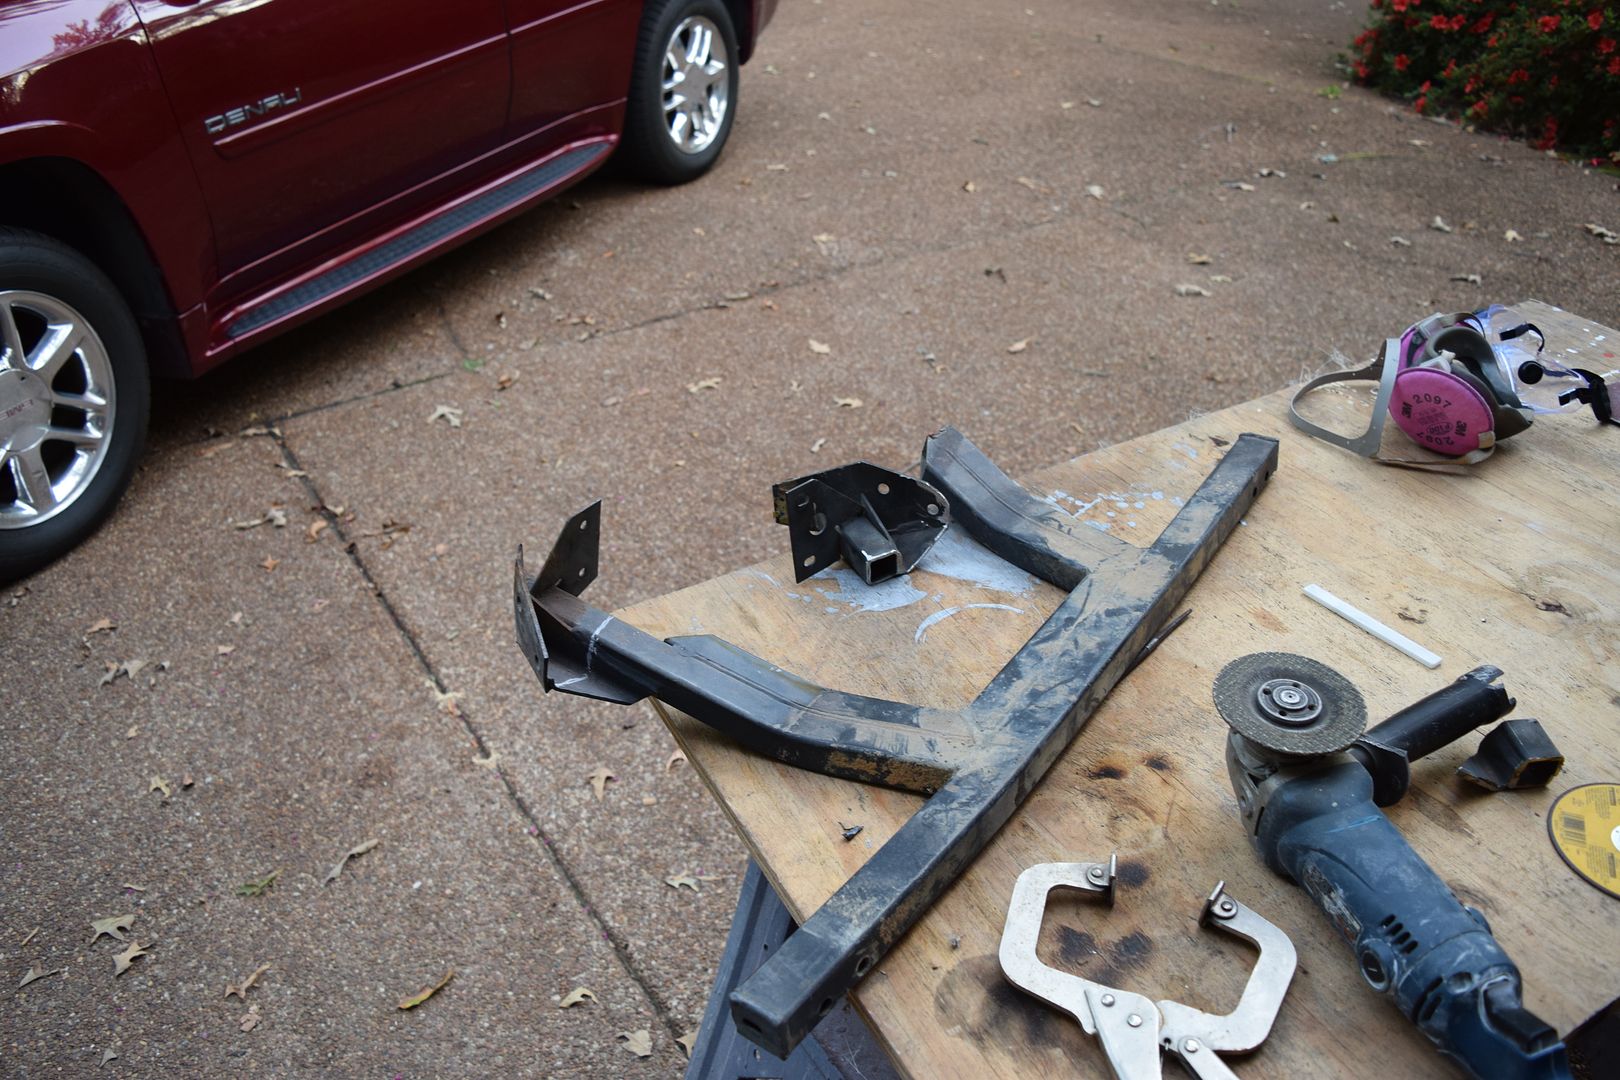
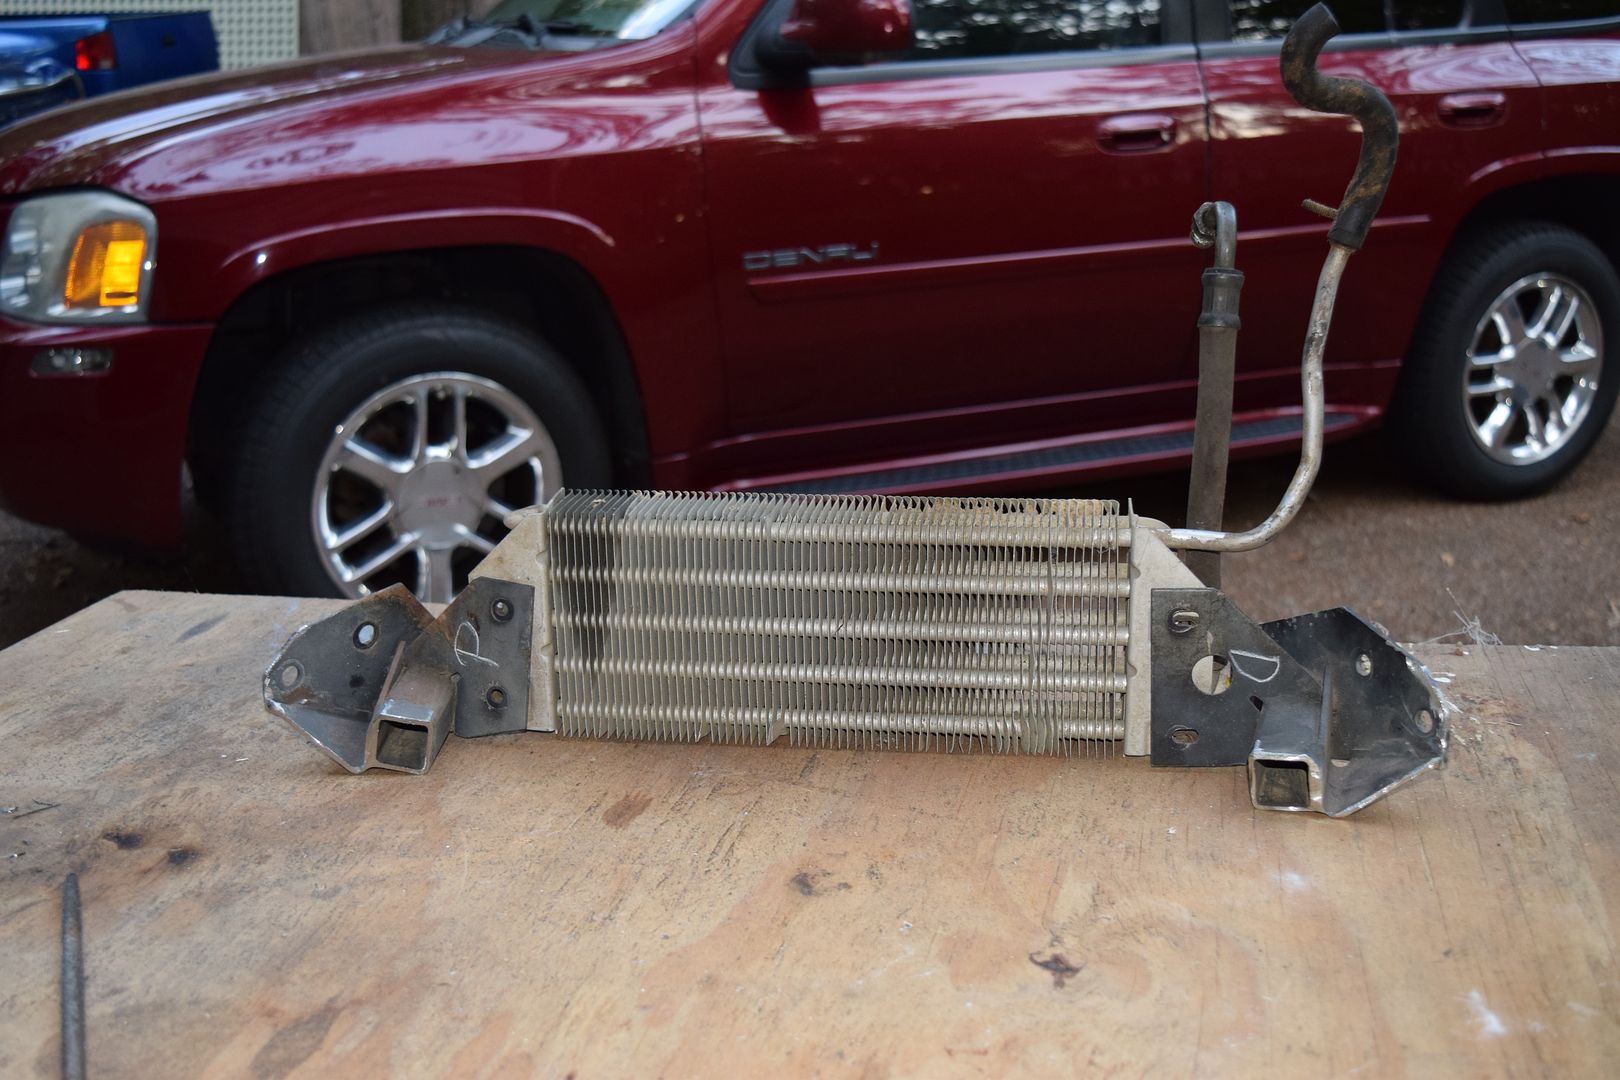
Finally, I’m currently working on installing the stock C4 power steering cooler on the Corvette Correction frame. I cut the cooler brackets from a scrap corvette front end, and then modified them to bolt in the “stock” position. I used the 2000 corvette pressure line to connect the Power Steering Pump to the Rack, and it works perfectly.
I only have a couple of things to compete before moving the body to the Corvette Correction frame.
As always, there is more to come.
Ricky

With the car at a great working height, I first ran the brake lines. I purchased the pre-bent lines from Corvette Correction when I bought the frame, and the lines installed without any drama. I also changed out the rear end from a 2:59 to a 3:08.

Last weekend I began installing the exhaust system that I also purchased from Corvette Correction when I bought the frame. As designed, it has exhaust hangers toward the rear of the frame, and the front is supported by bolting to the exhaust manifolds. While I basically did the same thing on my GTO, I wanted to take some of the stress off of the exhaust manifolds on this car. I cut the exhaust pipes just behind the bell housing and added flexible couplings at that point. I then attached two more exhaust hangers to the rear cross member. As installed, this system is super rigid, and has virtually no weight on the exhaust manifolds.

Finally, I’m currently working on installing the stock C4 power steering cooler on the Corvette Correction frame. I cut the cooler brackets from a scrap corvette front end, and then modified them to bolt in the “stock” position. I used the 2000 corvette pressure line to connect the Power Steering Pump to the Rack, and it works perfectly.


I only have a couple of things to compete before moving the body to the Corvette Correction frame.
As always, there is more to come.
Ricky
Last edited by ricott; 10-13-2016 at 10:34 PM.
10-15-2016, 11:41 PM
#54
Melting Slicks
Member Since: Jul 2010
Location: Between Tally and Gatorville ,Florida
Posts: 3,454
Received 83 Likes
on
69 Posts
[QUOTE=ricott;1593251302]After many months of looking at the car with no progress, I now have a block of time (until Christmas) to work on the Corvette again. We are finishing up a major project at our home, but I have been able to work a few nights on the car and have am looking forward to making some serious headway by Christmas. The first order of business was to make some wooden wheel stands to raise the car 12 inches off the floor. Two weeks ago I spent most of the weekend building a set of 12 inch and 6 inch wooden stands, and a 6 inch stand for my floor jack. I can now raise the car either 6 inches or 12 inches in less than 10 minutes. I wish I had built these stands YEARS ago!
I just started working on mine again after a four month break.
I just started working on mine again after a four month break.
10-17-2016, 09:43 AM
#55
Safety Car
Met up with Rick this weekend, he let me take some measurements from his car. I can't say thank you enough times! Thank you. His car is coming along very well. Only wish I was anywhere near that far.
10-21-2016, 09:09 PM
#56
Racer
Thread Starter
It was great meeting Robert earlier this week. I'm looking forward to seeing the progress on his 61.
Dale - you need to post some progress pictures of your build also.
With the frame almost complete, and the body move targeted for this Sunday (October 23), I went on a parts buying binge. I want to get the car to a “yard driver” state as soon as possible – and would love to be able to drive it around the block during the Christmas holidays – so I have purchased all of the large custom parts to make it happen.
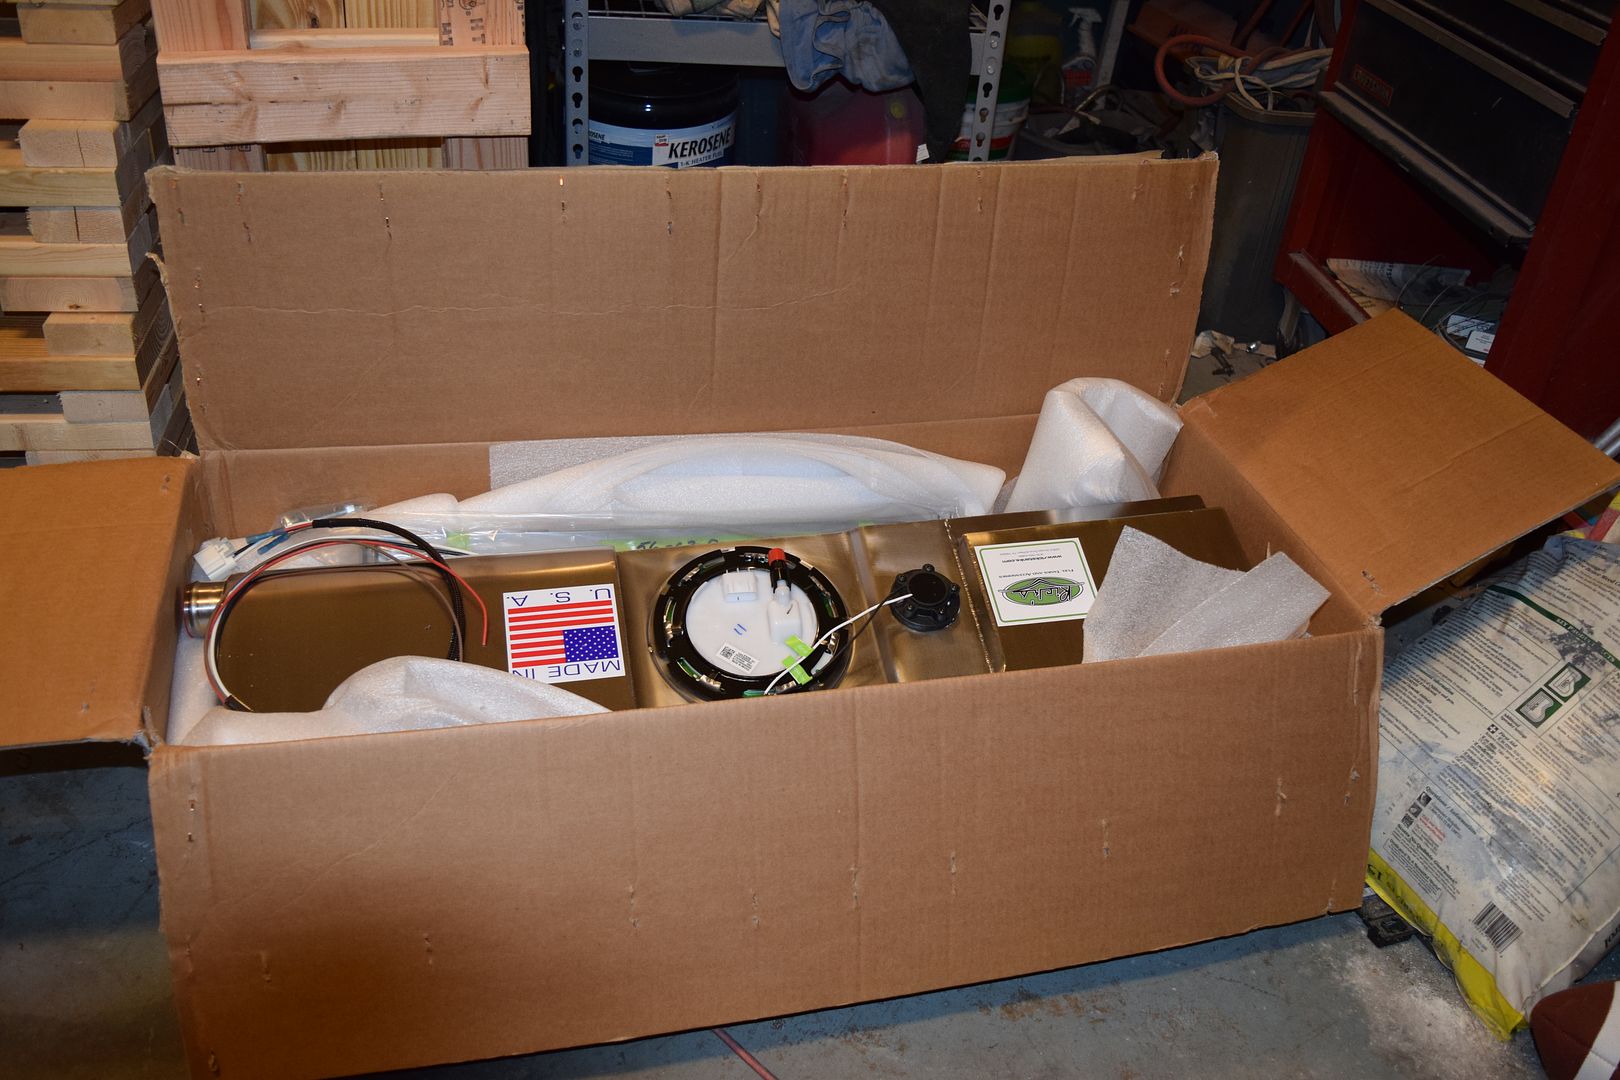
Here is the fuel tank – I went with Rick’s Stainless Steel tank with a 2011 Camaro SS fuel pump installed. It was pricy, but when we built the GTO, I used what was available at the time (Specter tank with very little baffling), and have been disappointed with its shortcomings (noisy & fuel starvation problems in hard cornering). I’m sure the GM fuel pump setup will be a much better solution.
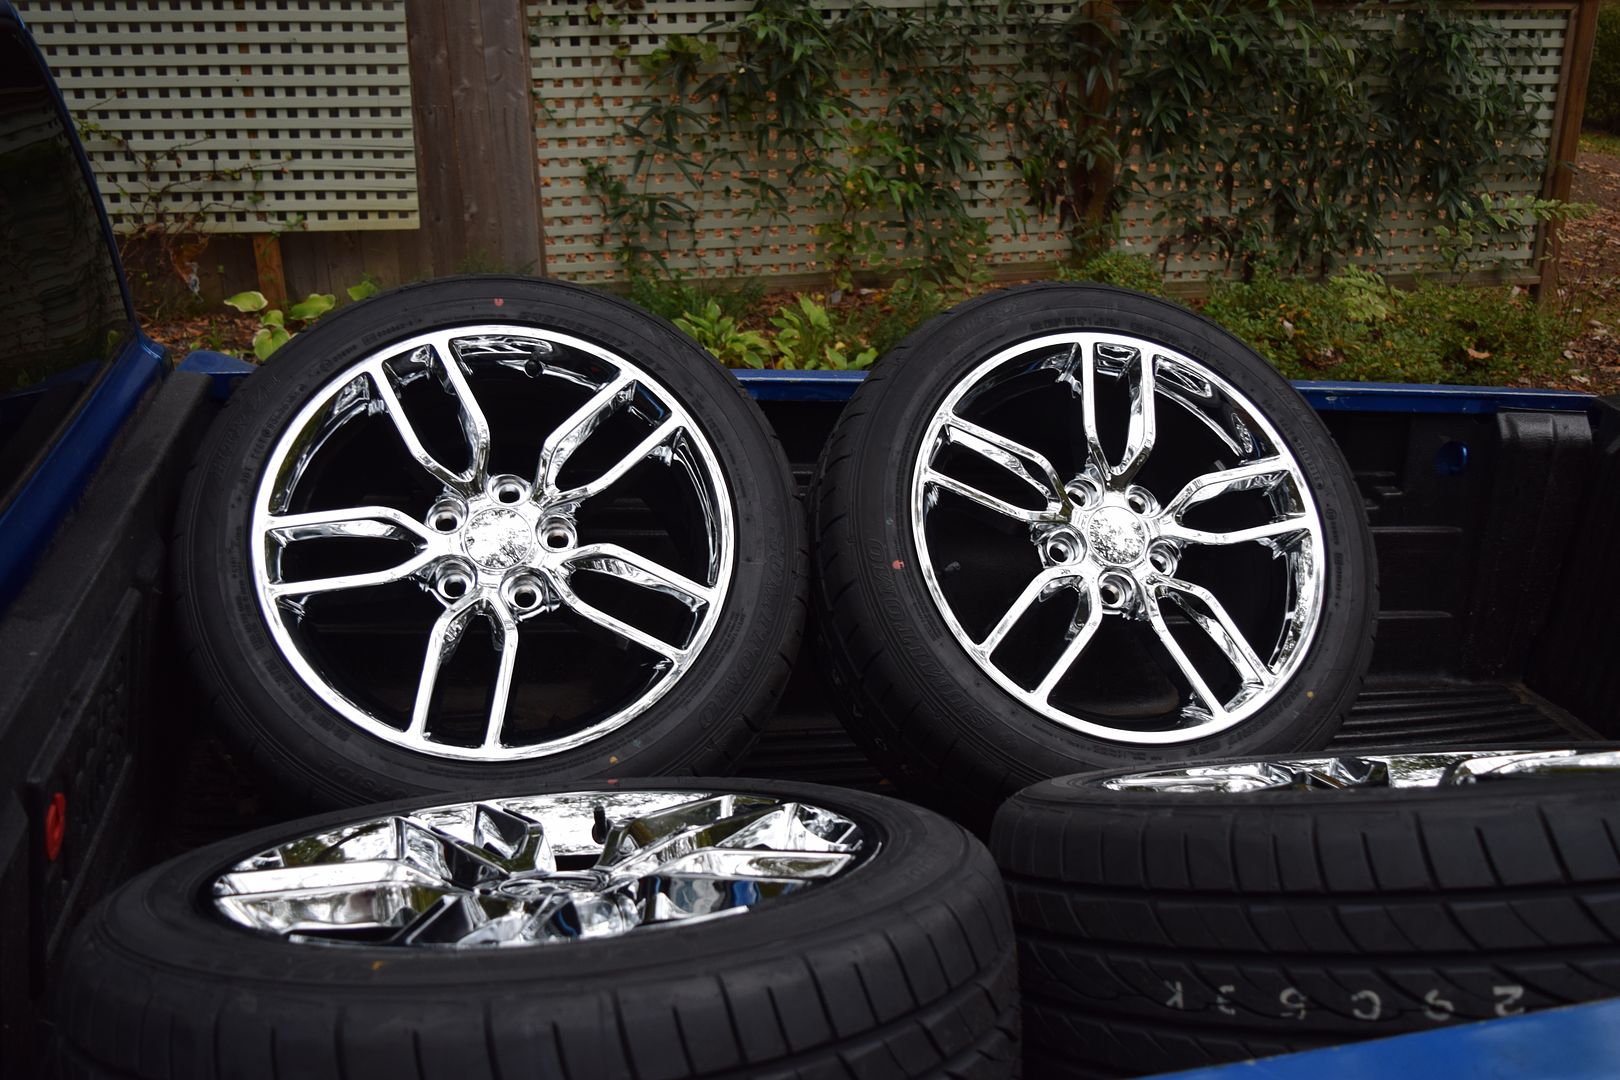
I also bought rims from Factory Reproductions. The rims are the 2015 Corvette style (sans the corvette logo) with 245/45/ZR17 tires.
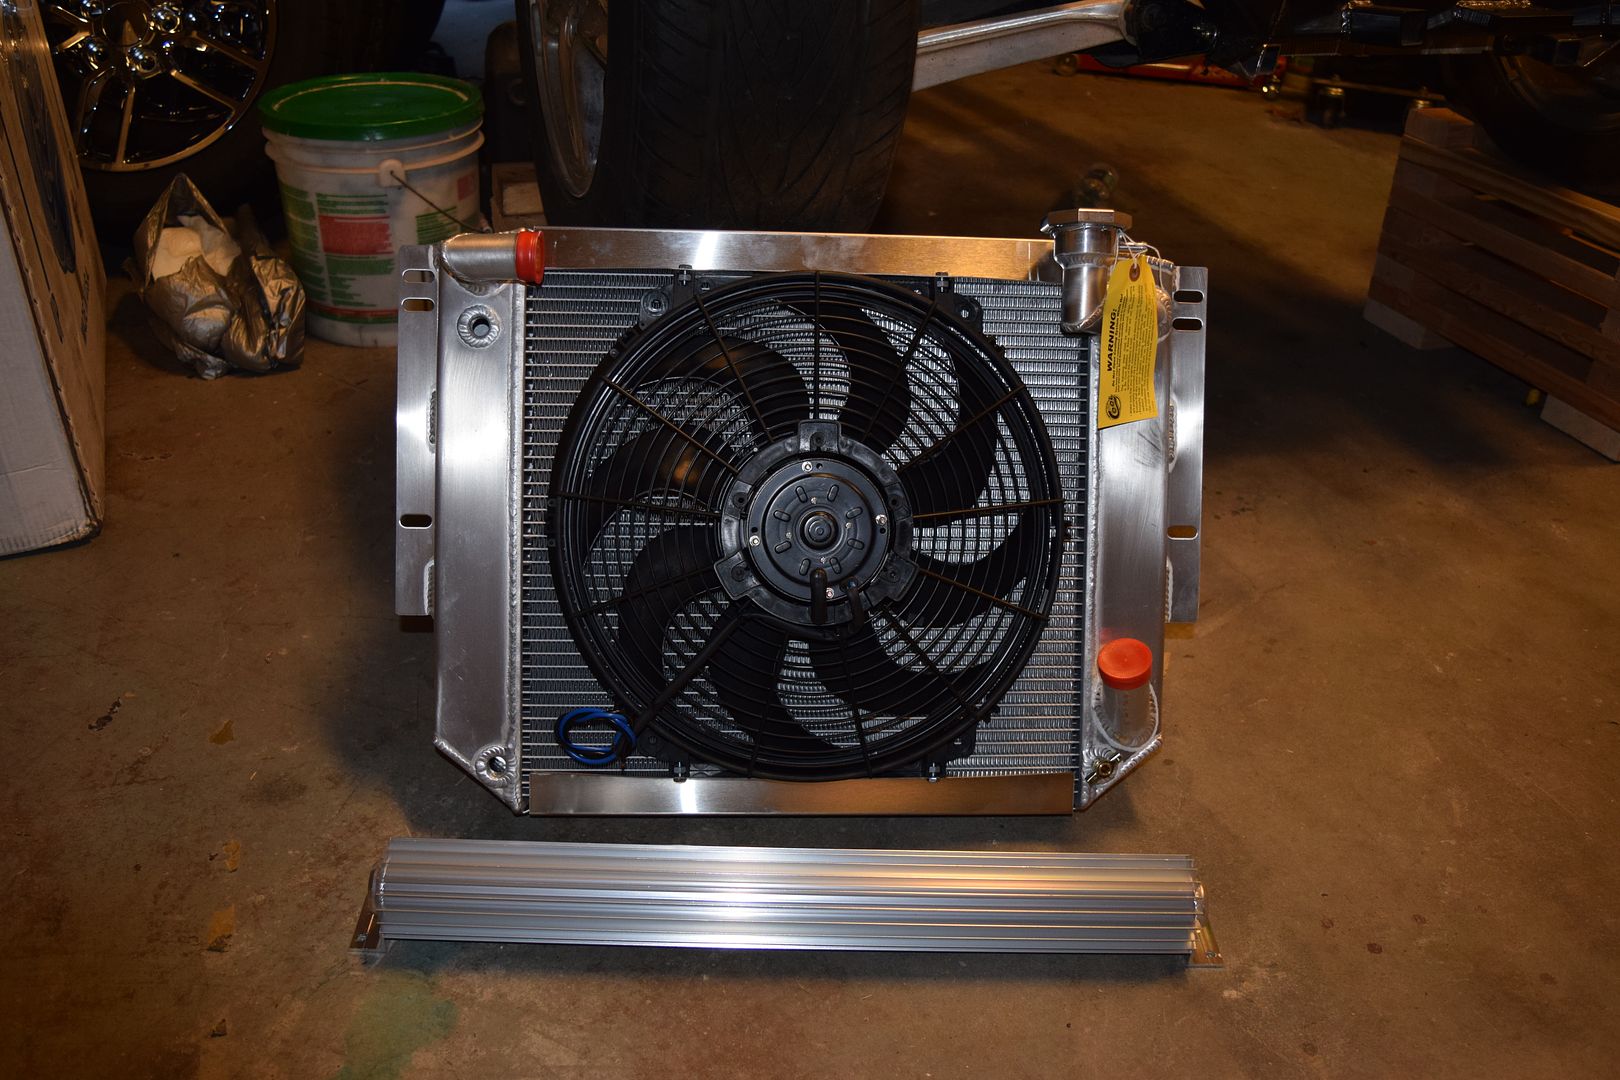
I also purchased the BeCool radiator and fan set up for the LS style engine.
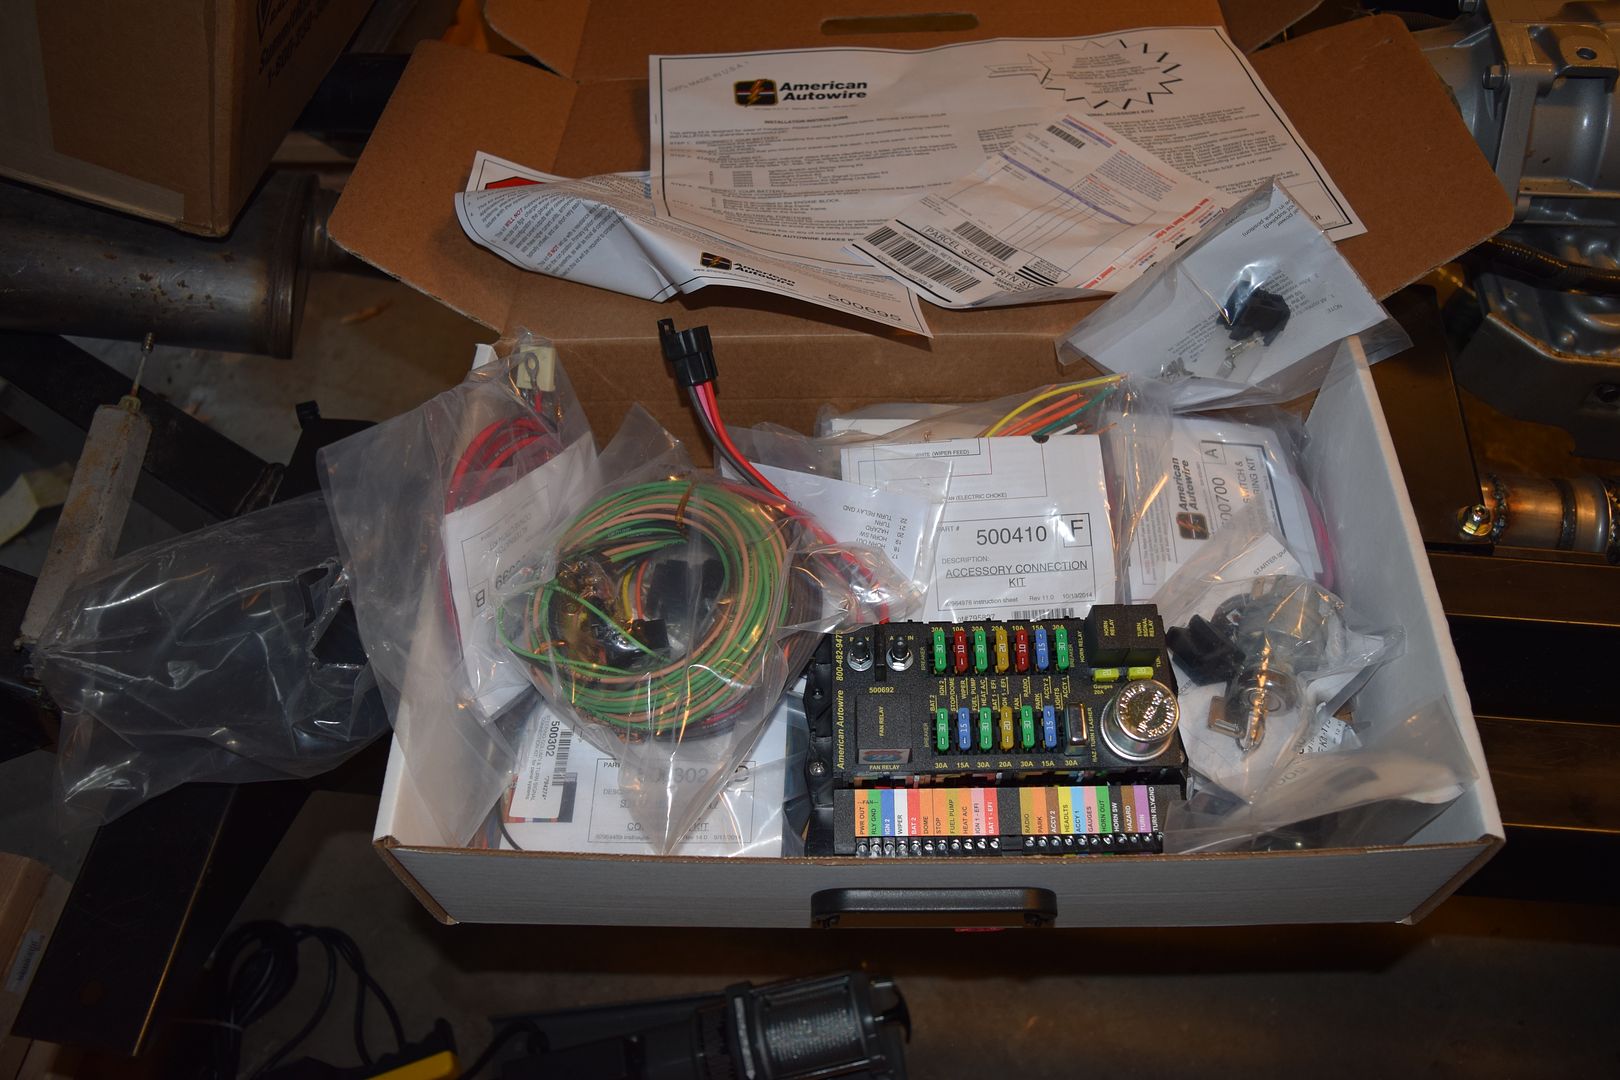
Finally, I purchased an American Autowire Trunk mount wiring harness.
I hope to be posting picture of the frame swap early next week! As always, there is more to come.
Ricky
Dale - you need to post some progress pictures of your build also.
With the frame almost complete, and the body move targeted for this Sunday (October 23), I went on a parts buying binge. I want to get the car to a “yard driver” state as soon as possible – and would love to be able to drive it around the block during the Christmas holidays – so I have purchased all of the large custom parts to make it happen.
Here is the fuel tank – I went with Rick’s Stainless Steel tank with a 2011 Camaro SS fuel pump installed. It was pricy, but when we built the GTO, I used what was available at the time (Specter tank with very little baffling), and have been disappointed with its shortcomings (noisy & fuel starvation problems in hard cornering). I’m sure the GM fuel pump setup will be a much better solution.

I also bought rims from Factory Reproductions. The rims are the 2015 Corvette style (sans the corvette logo) with 245/45/ZR17 tires.

I also purchased the BeCool radiator and fan set up for the LS style engine.

Finally, I purchased an American Autowire Trunk mount wiring harness.

I hope to be posting picture of the frame swap early next week! As always, there is more to come.
Ricky
10-30-2016, 10:22 AM
#57
Racer
Thread Starter
Last Sunday afternoon (October 23) two of my neighbors helped me move the 58 body over to the Corvette Correction frame. Out with the old:
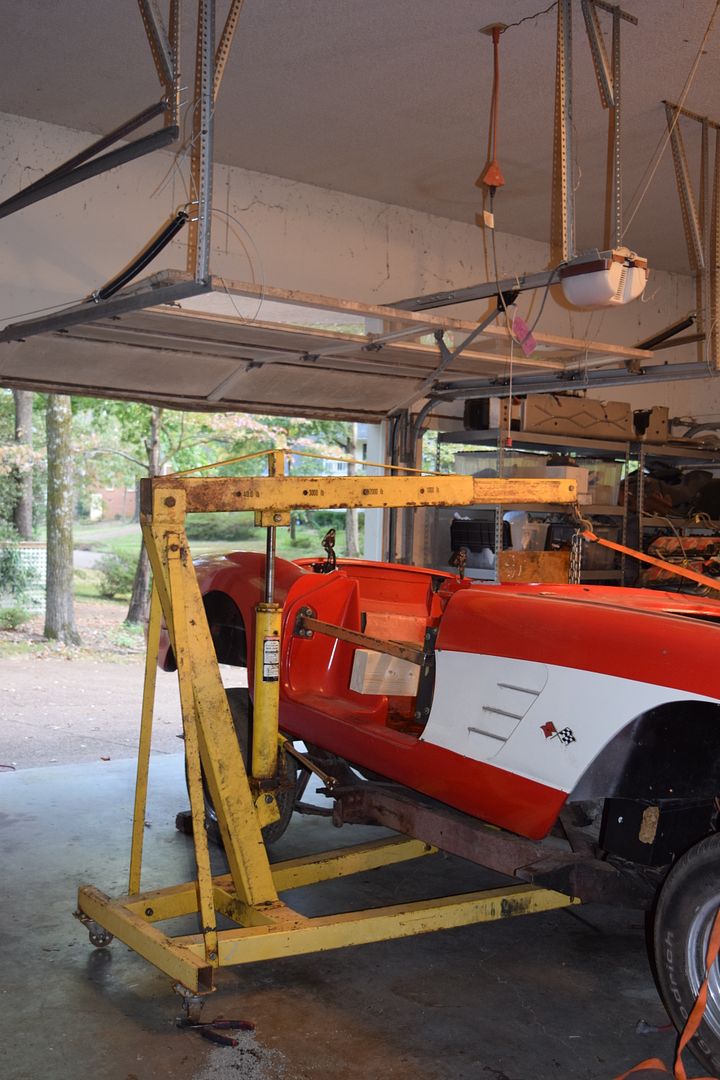
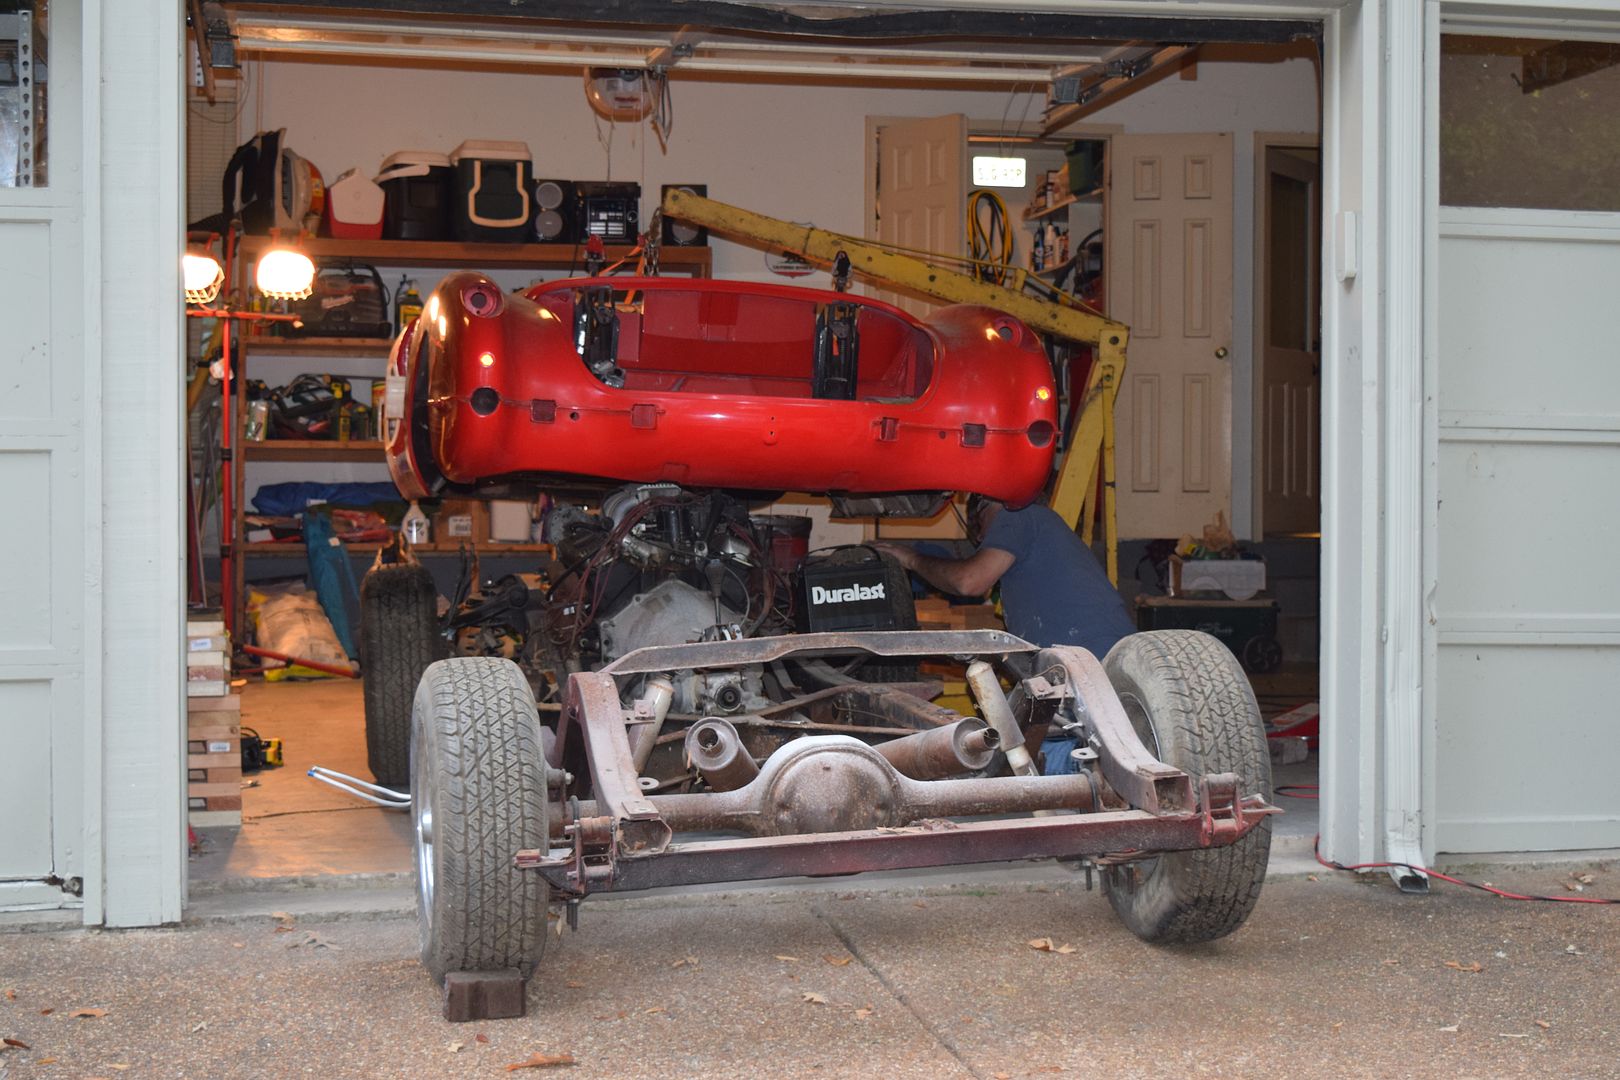
The old frame/new frame side by side:

putting the body on the new frame:
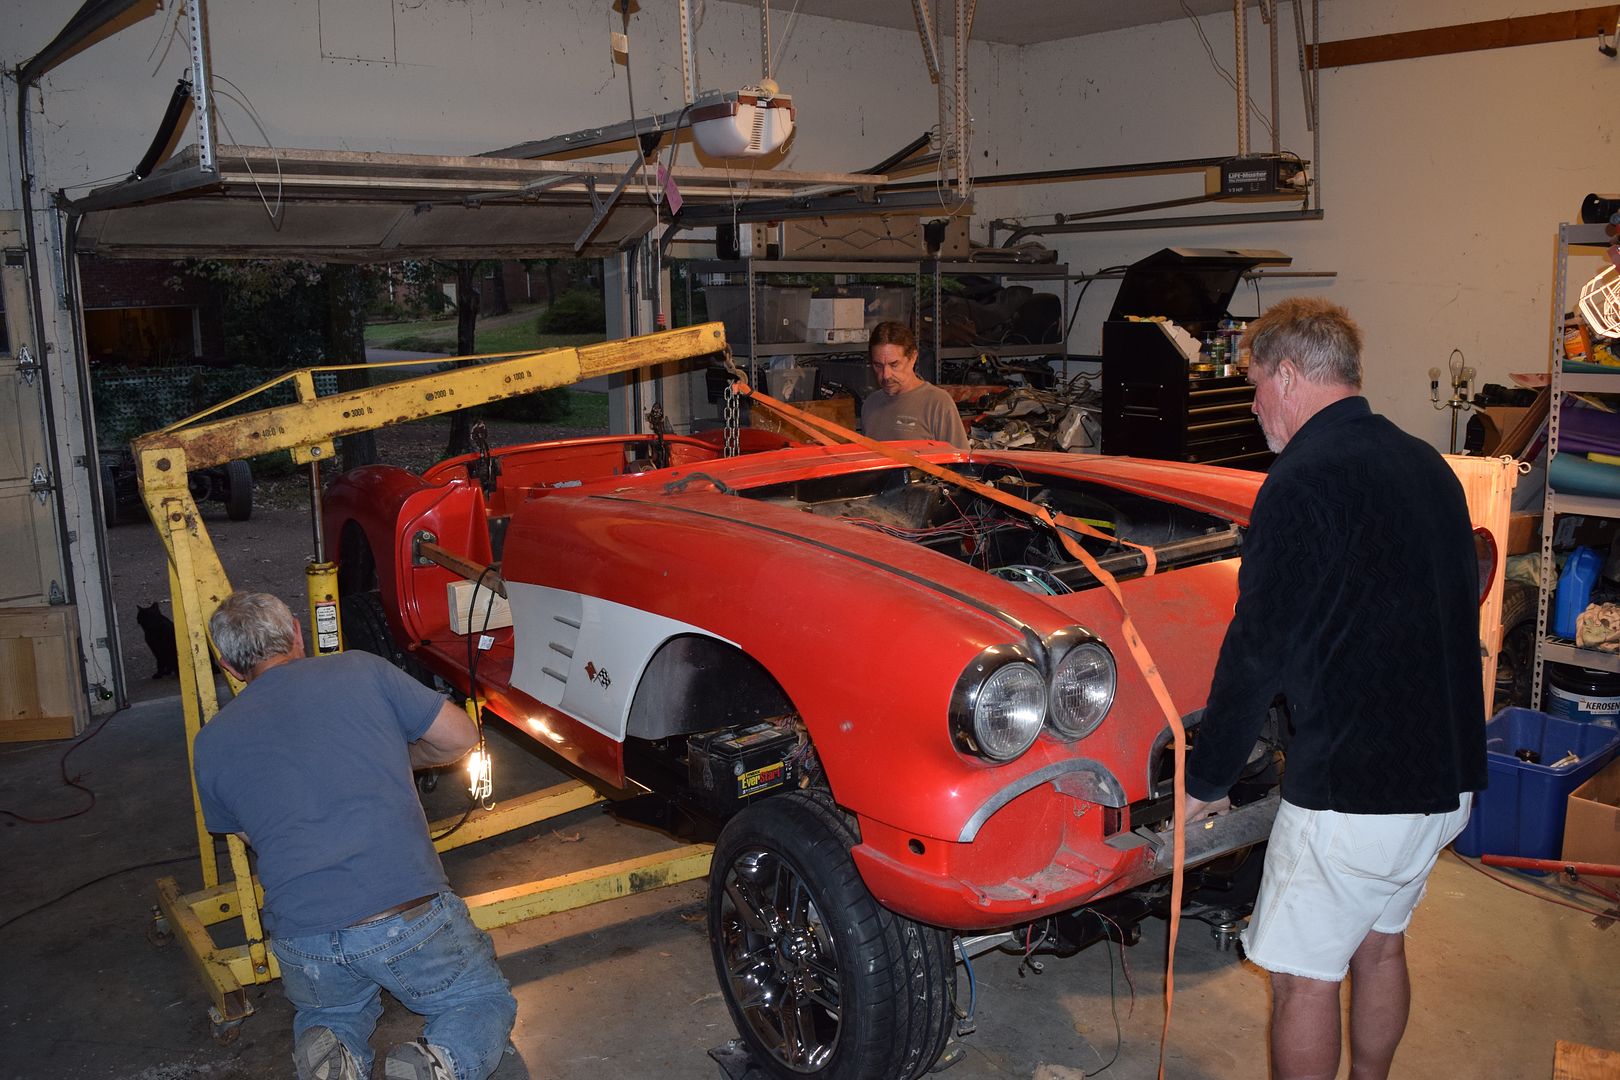
Back on the stands:
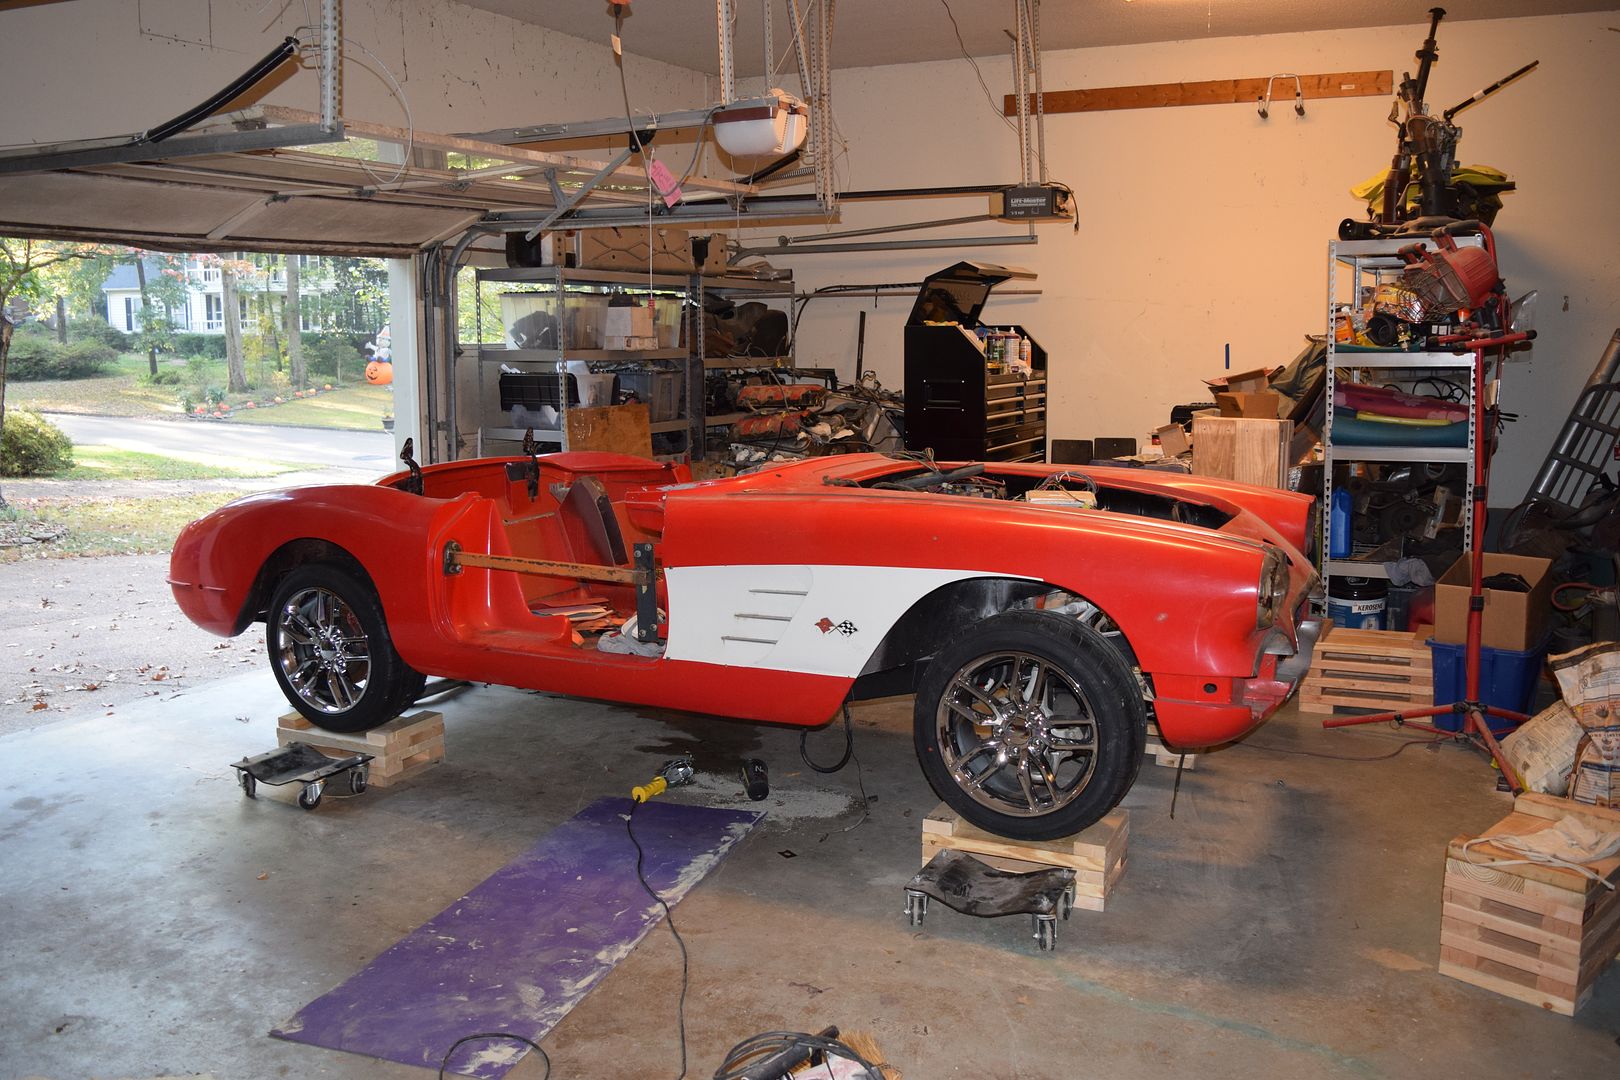
The swap was uneventful, but fixing the body mounts before I can bolt it down looks to be a lot bigger project that I thought it would be - more on that in my next update. As always, there is more to come.
Ricky
 10-30-2016, 11:44 PM
#59
Safety Car
Good to hear the swap went well. I guess here were no issues with the A/C or power steering clearing?
10-31-2016, 12:26 AM
#60
Melting Slicks
Member Since: Jul 2010
Location: Between Tally and Gatorville ,Florida
Posts: 3,454
Received 83 Likes
on
69 Posts
You may already know this but,I wished someone had mention it to me.Install the rear bumper brackets before you secure the body to the frame.Much easier to install first.
What back spacing did you get the rims in?
I'll get some picture together soon. I'm painting the body installed to the chassis. If I don't, I would have to repaint it after I'm finished putting it together. Hope to be finish by summer 2017
What back spacing did you get the rims in?
I'll get some picture together soon. I'm painting the body installed to the chassis. If I don't, I would have to repaint it after I'm finished putting it together. Hope to be finish by summer 2017
Last edited by Dale002; 10-31-2016 at 12:42 AM.