When you click on links to various merchants on this site and make a purchase, this can result in this site earning a commission. Affiliate programs and affiliations include, but are not limited to, the eBay Partner Network.
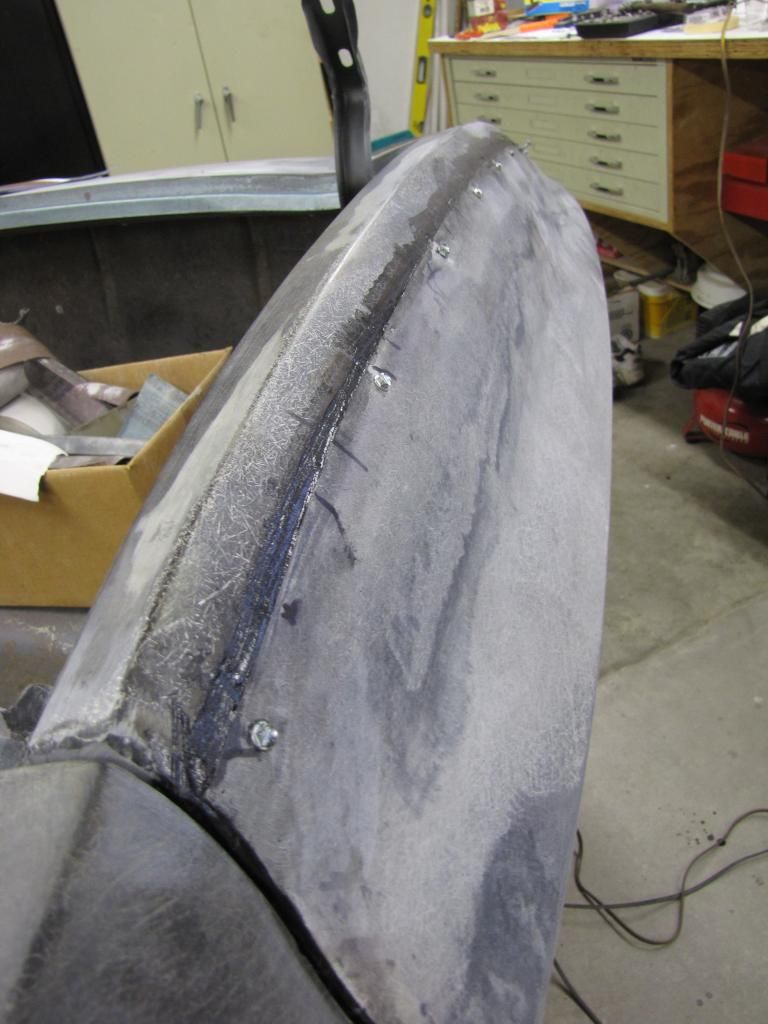
Jim came over again on Saturday and we got a lot done. Started grinding all the bonding adhesive off the rear qtr and prepping the B pillar lip for bonding. I also needed to re-bond the pass side lower rear qtr as the lower 10" had been separated from the brace. When the replacement driver rear qtr was removed from it's original car, quite a bit of the back side of the glass was torn off so I had the grind it down and back glass to original thickness. Most of the surface glass was unaffected though. Here's a pic of the rear of the qtr during the grinding process.
The B pillar lip after bonding, a little heat overnight and it was solid.
The last pic is of the back glass in place on the qtr, I mixed in the black gelcoat for this because I also finished the last coat of glass over the driver door mirror repair.
Last edited by slalomfiend; 12-21-2017 at 03:34 PM.
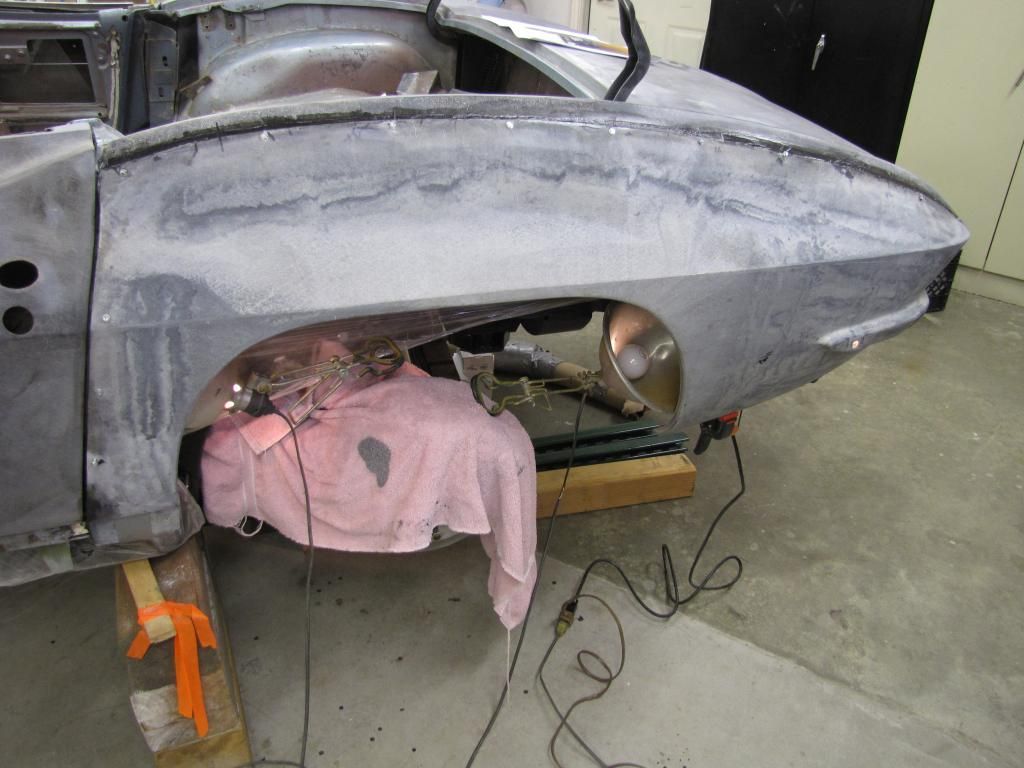
Was a beautiful 70 degrees here Sat so took advantage of the warmth. There are many little fiberglass chips, cracks and dings in need of repair. Also, the top bonding area at the top of the pass B Pillar had separated so I cleaned it all out and re-bonded.
The rear deck lid had been slammed down in the latched position and shattered the glass...
Fixed...
Driver side repairs...
The driver door top edge had missing/broken glass as well, I made some quick back up forms and after 3 passes of glass and grinding got it close to where it ought to be. It's much stronger now at least. Here's the before and after.
Also did a bit of pre-fit on the rear quarter, need to grind down the bonding strip a bit but it's fitting really nice.
Last edited by slalomfiend; 12-21-2017 at 03:42 PM.
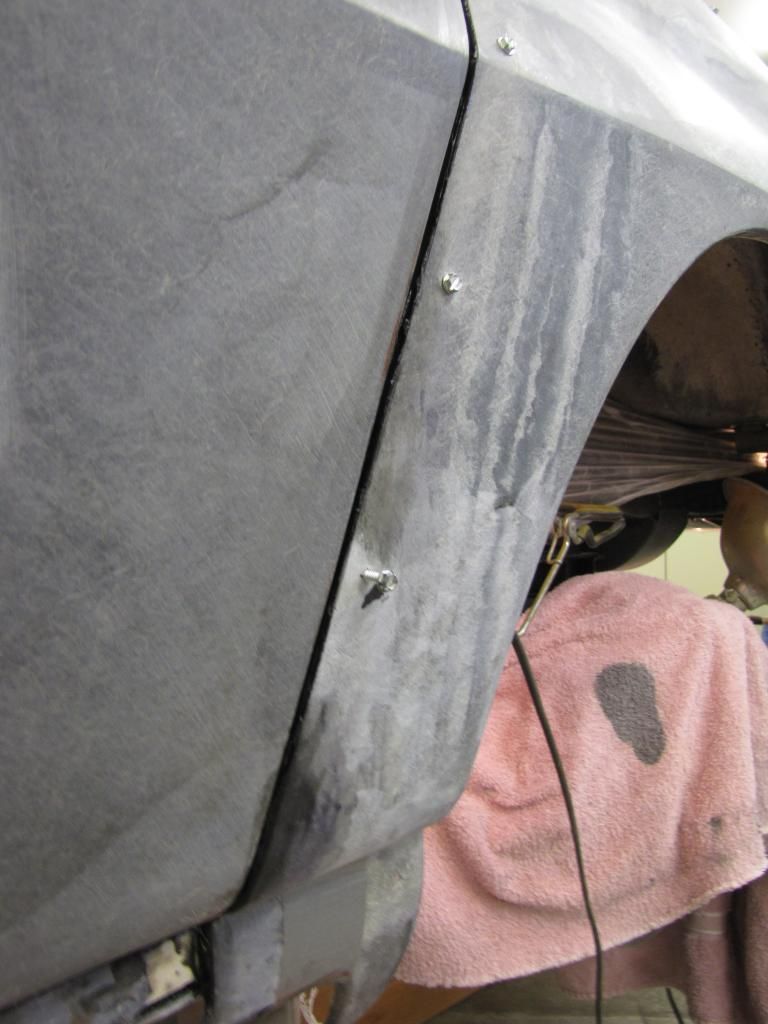
Jim and I made some minor adjustments to the door fits and now they are right where I want them with ALL the bolts in (found out the line ups changed just a bit when I added the rest of the bolts...) I also finished the grinding work on the rear quarter and bonding strip, fits really nice now. Will dry fit with screws and then get it bonded soon - have to keep reminding myself to measure 20 times and bond ONCE!!
We also got the front clip adjusted and clamped on, next will be screws and then pre-fit the bumpers, hood, etc. Feels like I'm approaching a milestone... as well as the itch of fiberglass in my fingers!
Last edited by slalomfiend; 12-21-2017 at 03:44 PM.
After you mentioned that you were doing the same project I search and found it. It's like a mirror image of what I've been struggling with for way too long now.
I'm glad you posted so many photos. I'm reviewing yours now to pick up some lessons on what I should have done different or did the best way available. Nice details!
Wow: does time fly when you're having fun! I just ran through your whole thread and see that we did indeed duplicate a lot of work and I somewhat feel a bit better that mine was bad but a little better than yours to begin with. I like the way you spliced some replacement parts into the originals. I replaced a few pieces with repros and now find that they are not prefect and need additional work to make them fit!
My chassis was also decayed and I started making repair pieces by hand until a member tipped me off to the company that makes chassic parts. The more I fixed the more rot I found so the chassis was cut 1/2 back and a new replacement was added on. I had all the stuff to coat the interior but timing got crossed and the outside got painted first. Now I have to plug all the holes to paint the inside.
Question: I see you attached the package tray behind the seats, what did you use for dimensions? Mine was rotted there so I could not find a what to relocate the new one. Are the B pillars a guide? Should they be plumb? Right now my doors latch to loose pillars.
Slalomfiend, did the quarter get attached? I'm looking at your photo trying to figure out how you are holding the panel in place and I only see a bar clamp. Is there more that I can't see?
Small world Leif, you were smart to get out. The only thing worse than the rotting metal on the Vette is the government here.
VICTORY!!! - rebuilding the body! And more glass...
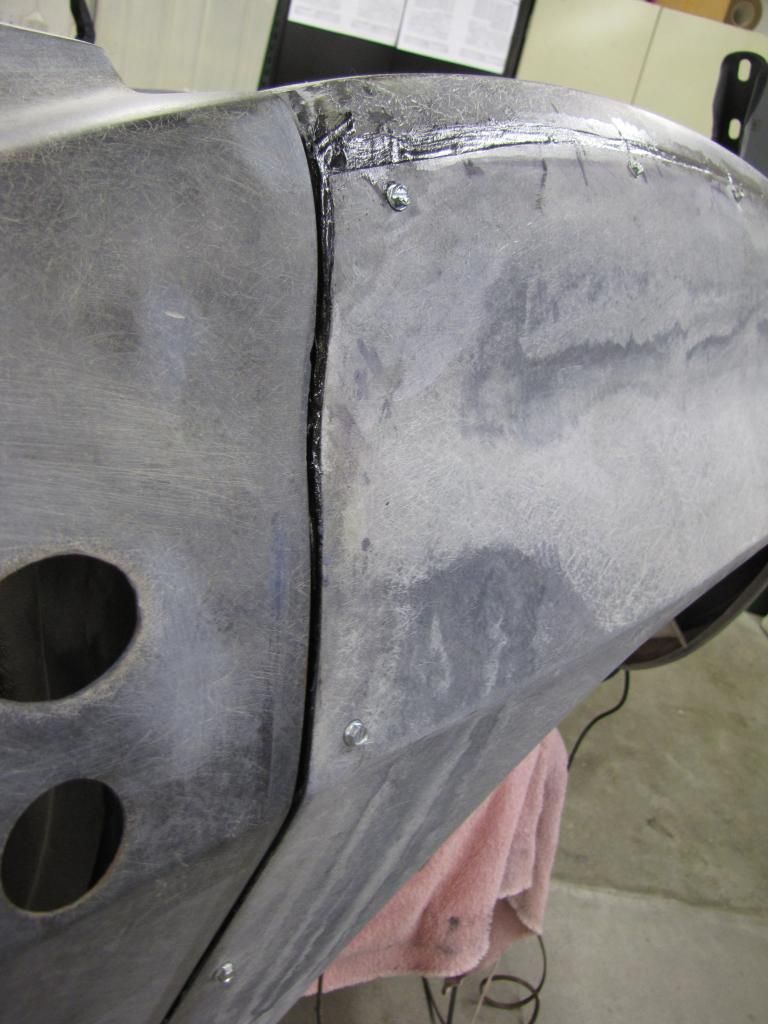
Wahoo!!! After measuring a bazillion times, I finally made the decision to bond the rear quarter on. It came out great! The line ups are true and all is solid. Used screws, clamps and tape as all the threads explain and so my first bonding experience is a success. The screws are all out now so I'll get them glassed in when I glass the bond lines.
Then I did some prep for the final glass repair at the bottom of the door sill/B pillar.
The rear lower valence has about 12 minor cracks in it but they have to be fixed or they will transfer through the new paint.
I should be done with the minor glass repairs soon, then we'll tackle the final front clip fit/bond.
Last edited by slalomfiend; 12-21-2017 at 03:53 PM.
Exquisite! The lines are perfect. I admire your courage to tackle any job.
I have been following along saying to myself "He's making it too nice for a driver. . . Every time he drives it it will need to be dusted, tires dressed, is it going to rain today, are their any dirt roads I'll need to take to get to my destination etc. etc." LOL LOL
God Bless everyone; MERRY CHRISTMAS!
You have had me waiting at the edge of my seat so it's like getting an early Christmas present. Congrats and it looks awesome. You can come over and do mine soon if you are bored.
Do you mind offering some details like what bonding agent did you use and how long was your working time before it started to set?
Really appreciate the photos.
Wahoo!!! After measuring a bazillion times, I finally made the decision to bond the rear quarter on. It came out great! The line ups are true and all is solid. Used screws, clamps and tape as all the threads explain and so my first bonding experience is a success. The screws are all out now so I'll get them glassed in when I glass the bond lines.
Then I did some prep for the final glass repair at the bottom of the door sill/B pillar.
The rear lower valence has about 12 minor cracks in it but they have to be fixed or they will transfer through the new paint.
I should be done with the minor glass repairs soon, then we'll tackle the final front clip fit/bond.
Thanks Pete and Morly, and yes it is going to be a DRIVER!! I'll be in this bad boy whenever the sun is out and we get a lot of that here in good 'ole Tejas. That's why I'm pushing hard since the nerve in my neck is better. I'd really love to be in paint by March at the latest.
Patrick, the bonding adhesive is from Corvette Image and with the current temp here, I mix 16 drops of catalyst to 3.5 oz of material. This gives me plenty of time to apply (30 mins at least) and then it sets up nicely over night with some regular light bulbs for warmth. The paint mix cups I get have lines for ounces so I just cut one down along the 7 oz line and fill it with adhesive, transfer to a mix plate (1/4" acrylic) and blend in 32 drops of hardener.
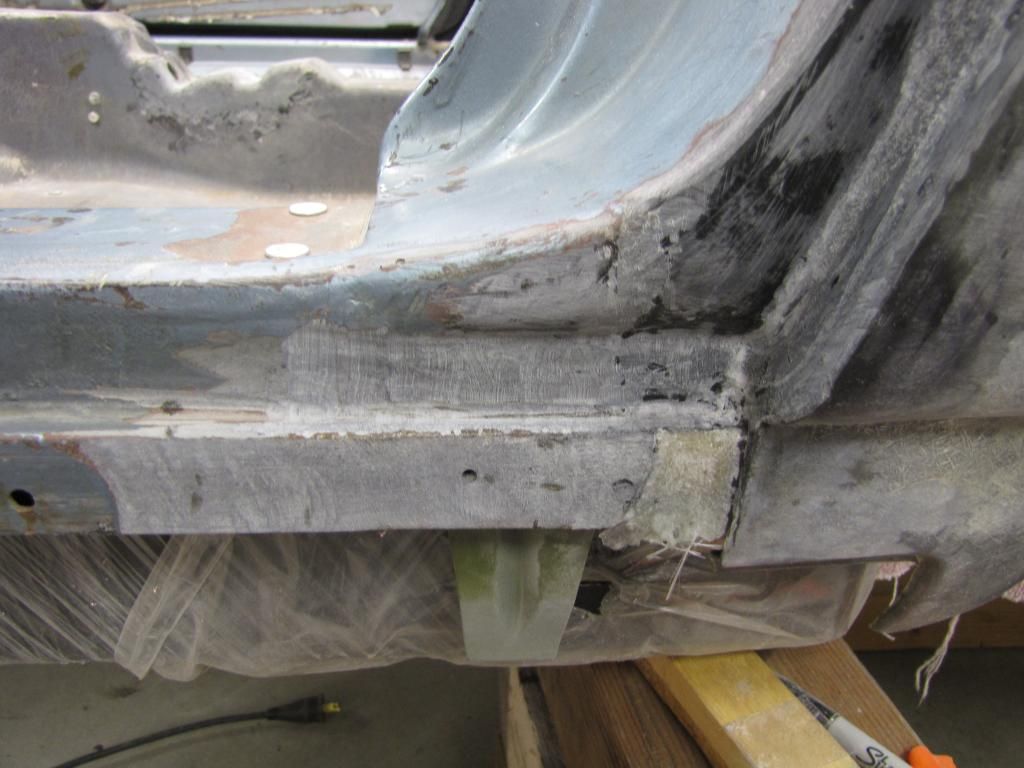
Last night I glassed in the front cap of the rear quarter, ground it smooth for an 1/8" door gap and then glassed in the edge (so there's no adhesive line at the front edge). I'll grind this down level to the door face and then move on to the top of the B pillar where it meets the rear deck.
Here is the rear deck mounted and the existing gaps, won't take much to make this really nice.
I want to get as much done as I can before the fam gets in for Christmas but if I don't post for a few days, y'all have a great Holiday!!
Last edited by slalomfiend; 12-21-2017 at 03:58 PM.
You just answered a lot of questions that have been holding me up for years. Your thread is wonderful and you are the greatest for being the leader for me to learn from.
Information about the resin is just what I need because there seems to be no way I can attach the entire front end in less than 20 minutes and that's if all goes well.
You also posted a photo that I needed. Just this AM in my own thread I asked questions and you answered one of them. The lid lines! All the trouble I've been having with shims was verified in your photo. My lid which is not original to my project hangs over the door gap to a point that over hangs the closed door by !/4". Opening the width to allow the lid to close creates bigger problems with the door opening. I was told not to cut anything but your photo proves that the lid must be chopped.
Thanks for the gift and Merry Christmas plus a Happy New Year.
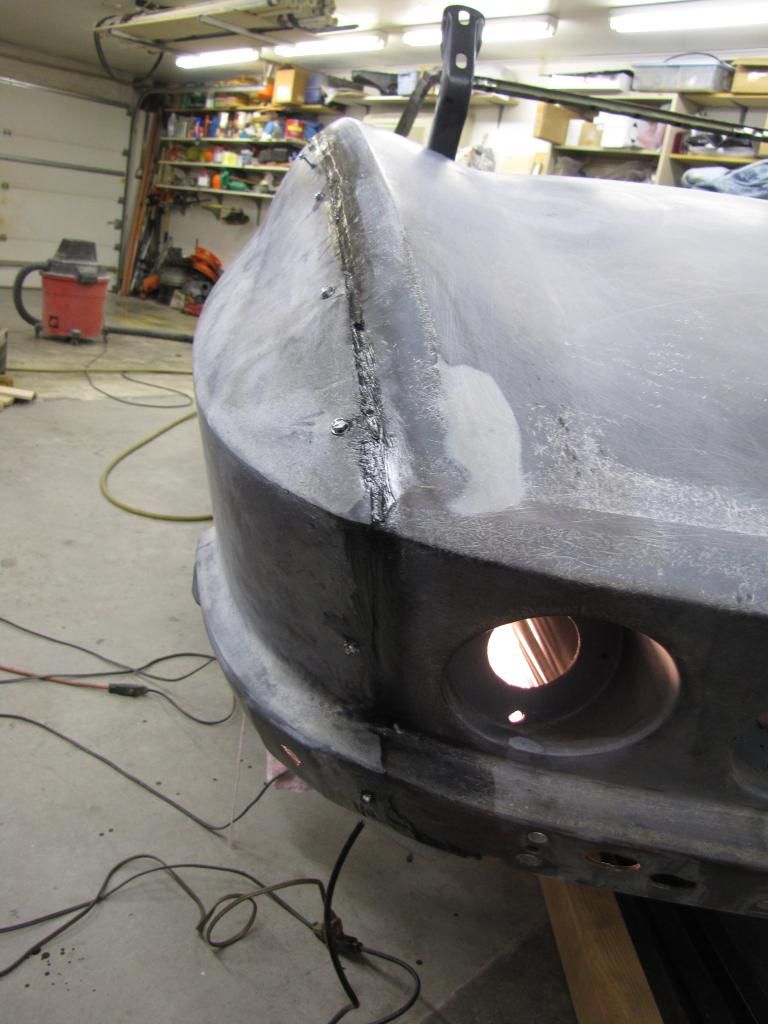
I had a little time before the Christmas family invasion so I sanded down the front edge of the rear quarter at the B pillar. Just a little skim coat of filler later and it will be FAB!
Patrick, here is the bonding adhesive and the makeshift measuring cup I made, also my orange acrylic mixing sheet. The next pic are the tools I am finding to be super invaluable, the straight grinder is great for tight spots/inside curves and the 3" right angle grinder is the most used with 40 and 100 grit disks that I get at Harbor Freight.
I did some adjusting to the rear deck lid to get the back edge at 1/8" gap and it leaves me with a really nice pass side gap but 1/4" on the driver's side, I'll rotate it a bit to balance out the gaps and then have to do some fill/tapering...after the Holidays...
Last edited by slalomfiend; 12-21-2017 at 04:03 PM.
Great info and thanks! Your quarter looks super. Using your photos I've made some adjustments to my project by lifting the deck lid out of the way so that I can align the quarter, pillar and door. All looks OK with little shimming. My deck lid is a PITA. Members are telling me not to cut it back the 3/8" needed to get it to fit but if I don't do that I need to push the door forward and there is no room there. Other option is pushing the entire clip back but then the quarter is too short and the door gaps are huge!
Nice going and thanks for sharing.
Slalomfiend, I determined today that my deck lid is correct and it's the body that needs to grow and presently it seems that the area between the door gap and lid hinge bracket is where the stretch needs to take place. If you don't mind, I'd appreciate a dim. or two that will give me some idea as to where I can stretch this body. I measured from the front edge of my B pillar cover that faces the door to the front edge of the deck lid hinge bracket that bolts to the floor on both my car and the go by car from the body shop. Would you mind measuring yours for me? Also, from the top outside hinge bolt on the A pillar to the face of the B pillar at the top, same place the other measurement came from to give me an idea how much of an opening you have for your doors. I'd certainly appreciate that.
 11-24-2014, 10:56 AM