Replacing the rear clip on my 60 - Anxiety attack
 05-12-2014, 06:10 AM
#21
Drifting

[QUOTE=mickatbp;1586876655I'm in contact with another forum member who has a stripped 1960 body who can take some photos for me so I can ascertain what has been messed with around the rocker panel to firewall bonding area.[/QUOTE]
Mick:
Here are shots from inside and wheel well of firewall to rocker panel:
Bill


Mick:
Here are shots from inside and wheel well of firewall to rocker panel:
Bill


Last edited by mashinter; 05-12-2014 at 06:51 AM.
 05-12-2014, 07:24 AM
#22
Drifting

Thread Starter

Bill great photos to date, especially those from the inside looking forward. The left rocker panel has now been completely removed ... about 99% intact. Have taken some photos but will take a few more tomorrow once I have removed all of the bondo and then will post all together. All of the inside and outside mating surfaces had been laminated over (luckily it was a very poor job and there was an air gap behind in almost all instances so wqas able to grind through with a die grinder. When I say easy .... easy from the wheel well access wise but I was quite contorted for the cockpit / fire wall side ... I'm 6'2" tall and not that young any more .... but happy with the result. Will post photos soon.
10-25-2014, 01:01 AM
#25
Drifting
Thread Starter
Well, all is just about prep'd and the surgery will take place (start) on Saturday 1st of November. I've decided to use the seat bases to help with floor alignment / measurements. Will position the door (hinged) in the door openings with correct gaps prior to the first cut as well as the under sill steel reinforcing. ... then ensure door gaps are maintained when the new clip is introduced.
An update from last entry ... front clip is also off ... is was crap to say the least ... must have been a mid 80s hand laid replacement (had been done once before that as well) with one join in line with the fire wall and one further back leaving only the windshield support area as original ..... Expecting the new front press moulded clip mid to end of November. So, I have approximately 2ft of original body from the fire wall to the first set of captured nuts on the floor.
I'm getting excited though ... by the start of 2015 things will be coming back together nicely ... might even look like a C1 by then.
Wish us luck!
I'll post some photos then to celebrate
 You're a brave man.
  10-26-2014, 05:53 AM
#28
Drifting
Thread Starter
Well, 1st weekend in November (next weekend) and the splicing will begin. I've got myself a list of to do's. I had all of the steel sill reinforcing 'spun' galvanised and then I've painted all chassis black .... so no more rot .... ever. Will use these and the seat bases and door gaps to ensure alignment is spot on. Got my rivet gun and bucks and boxes of Rivets (from Jay Cee's), have the rotisserie and body (bits that I have) ready for transport to my fibre glasser mate's place who has been working on getting the replacement rear clip ready. Wow ........ I AM GETTING EXCITED (and a bit apprehensive)
Lots of things going on:
-Front clip removed, birdcage painted ... luckily no rust ... a break for a change
-Put the pedal box back together this morning ... new bushes and repainted (overcame the mess I made with it a couple of weeks ago) ... but that is another story.... will put that in another post.
Got the handbrake shaft zinc plated... will put that assy back together tomorrow
-Made inroads into replacing the worn throttle shafts on my 2x4s ... just waiting for the package from the US, sourced a specialty guy in Brisbane who reco's these bases ... has the correct long pilot reamer.
- Coming to terms with redundancy mid 2015 and possibly having to move to chase work.... hence the increased motivation to at the very least have the body back on the chassis ..... and driveable ... on and off trailer.
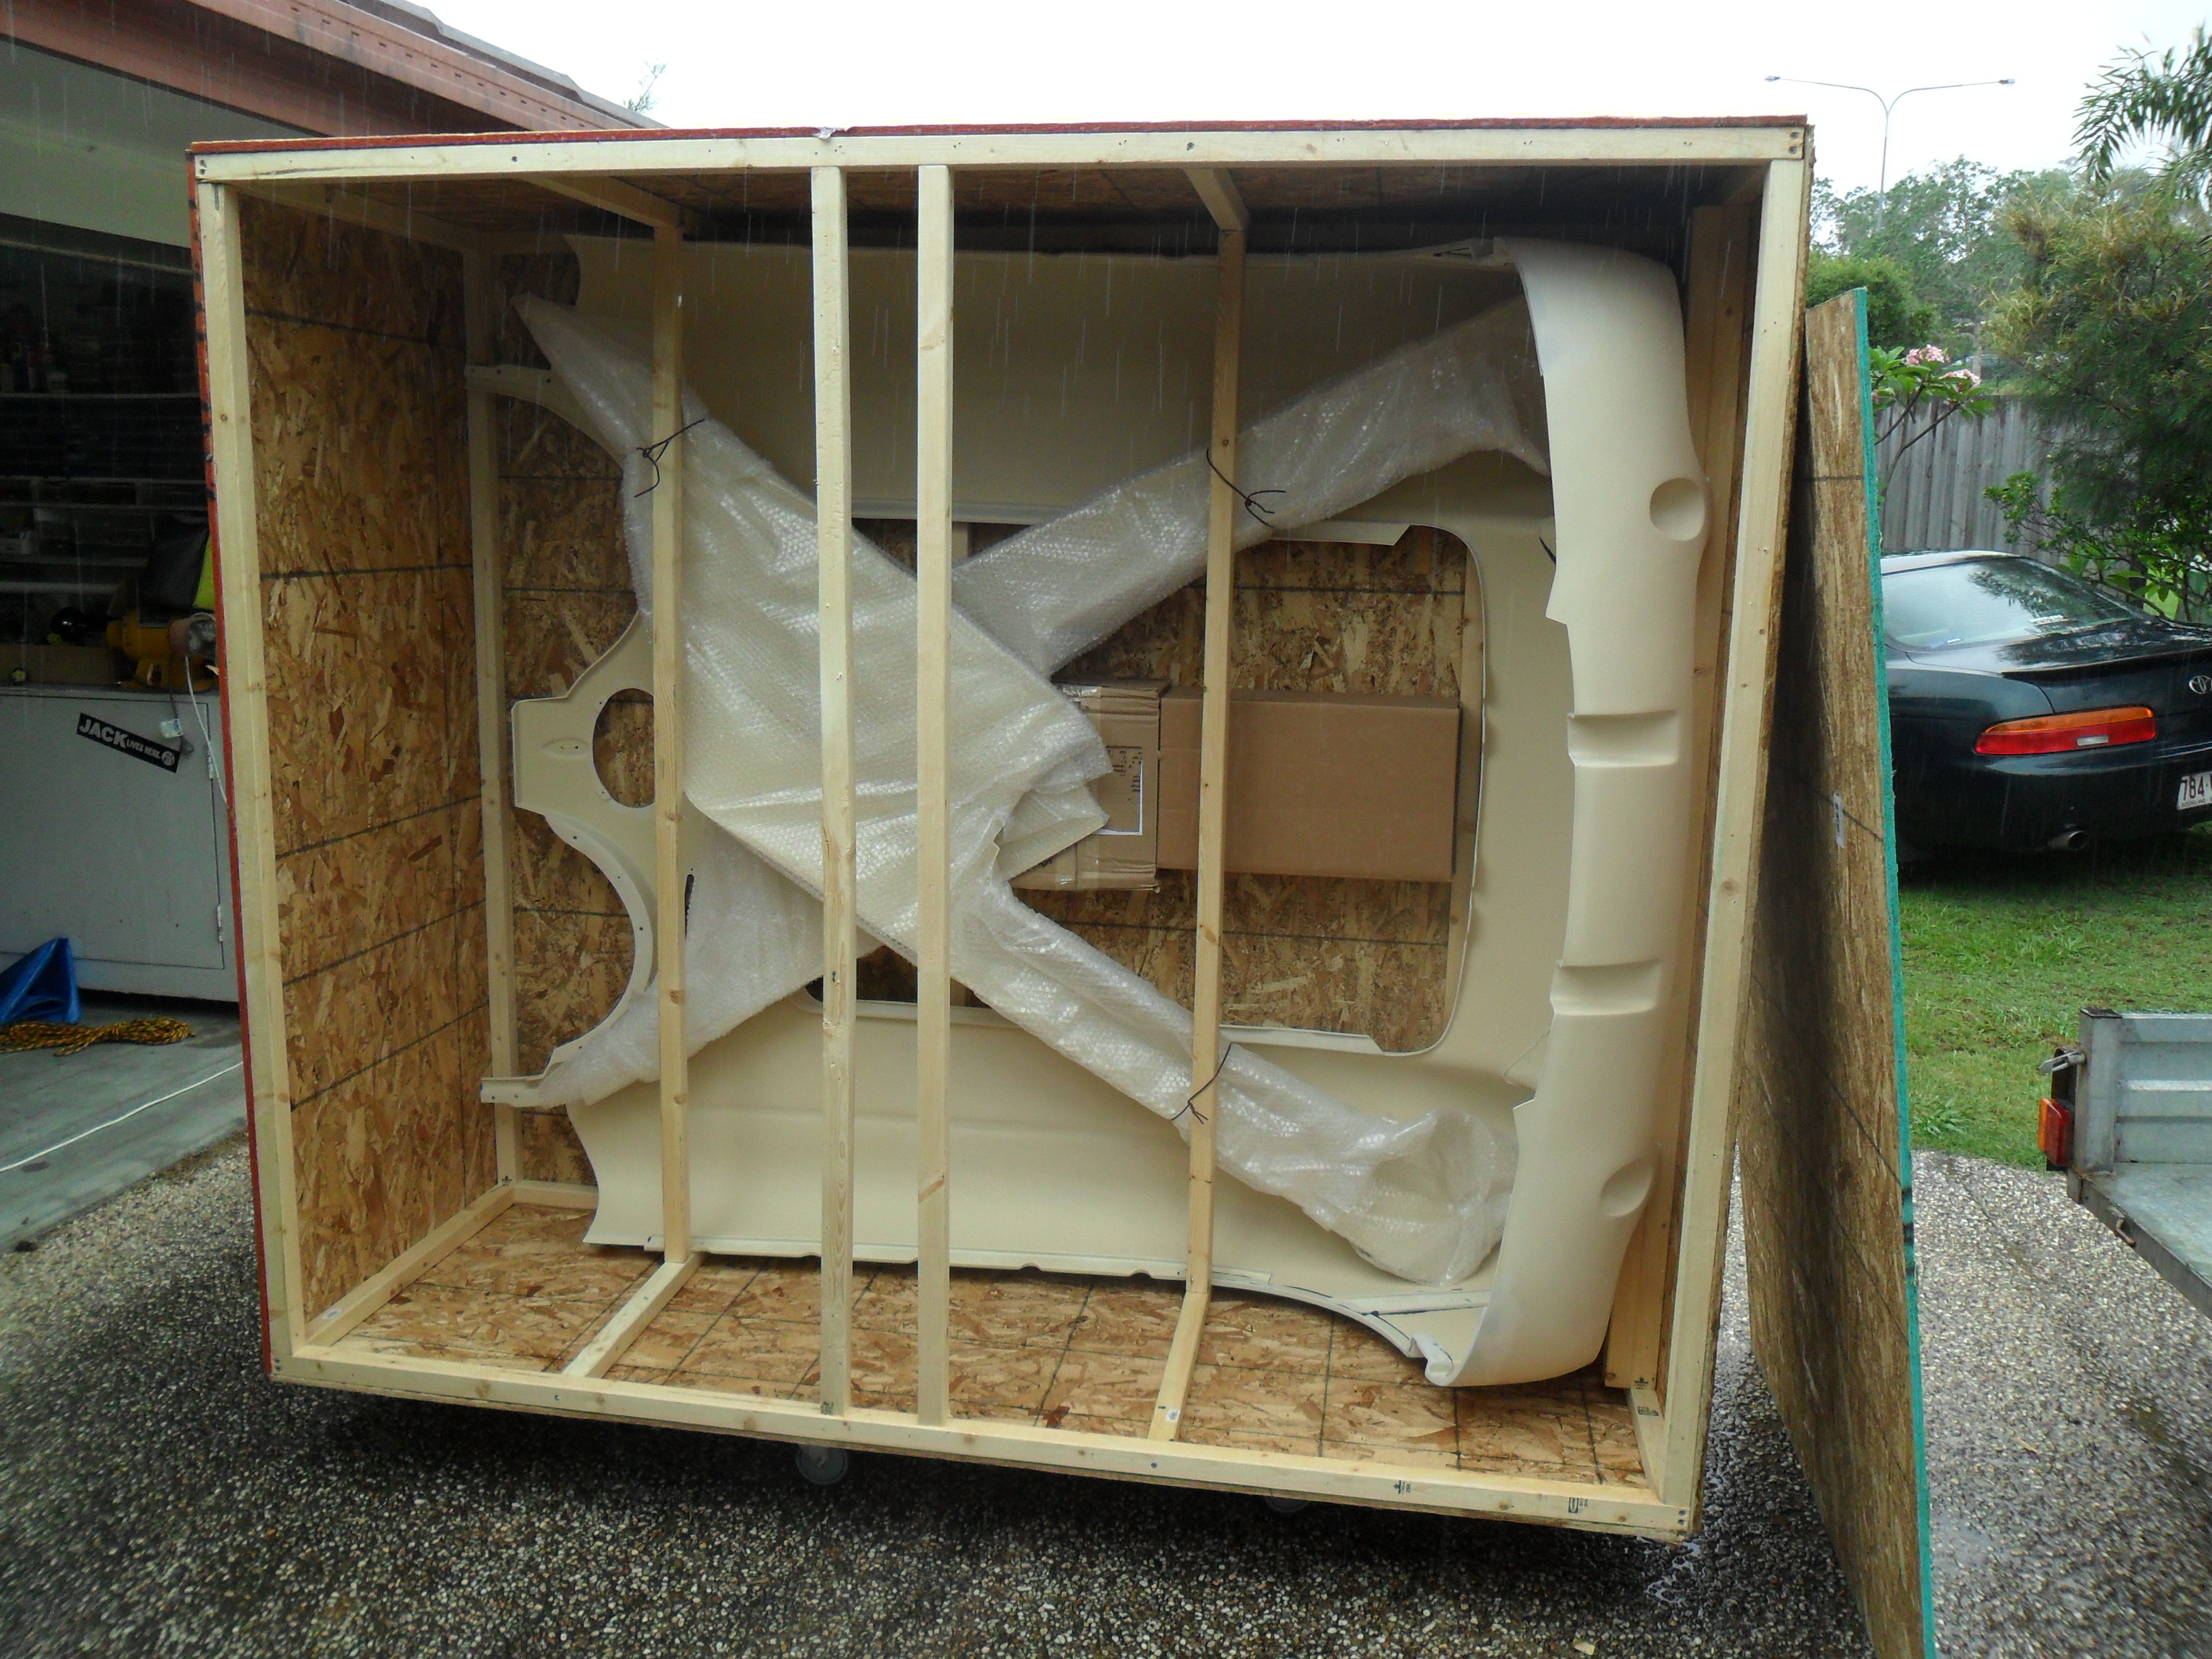
- New front clip due to arrive mid to late November for fitment early to mid December
It is all happening
Lots of things going on:
-Front clip removed, birdcage painted ... luckily no rust ... a break for a change
-Put the pedal box back together this morning ... new bushes and repainted (overcame the mess I made with it a couple of weeks ago) ... but that is another story.... will put that in another post.
Got the handbrake shaft zinc plated... will put that assy back together tomorrow
-Made inroads into replacing the worn throttle shafts on my 2x4s ... just waiting for the package from the US, sourced a specialty guy in Brisbane who reco's these bases ... has the correct long pilot reamer.
- Coming to terms with redundancy mid 2015 and possibly having to move to chase work.... hence the increased motivation to at the very least have the body back on the chassis ..... and driveable ... on and off trailer.
- New front clip due to arrive mid to late November for fitment early to mid December
It is all happening
11-12-2014, 05:21 PM
#29
Drifting
Thread Starter
Latest update. I took photos but left camera at mates place ........ so old rear clip was cut away at the rear edge of the front seat frame captured nut lip ... then the replacement rear clip was placed in position with an overlap so that the front seat frame captured nut holes lined up exactly (the front seat frame nut plates were removed on the replacement) and the two halves were then bolted together at these front nut plates. With both halves securely bolted together a new cut was made through both pieces about 1/2" behind these front nut plate holes and scrap then removed.
This left a nice little gap at the grafting point between the original and replacement pieces. I then refitted the under-sill steel reinforcing (using 5mm bolts with nuts where the rivets would normally go - as a temporary fit - 5mm bolts are very close to the 3/16" rivets) to the front and replacement sections, this all fitted nicely with rivets holes in steel and glass lining exactly ... even so far as the inner rear and outer front steel pieces.
This pretty well much secured the two pieces rigidly together on the outer edges and aligned the sills. Next I've fitted the seat frames in position and this has helped to keep the floor aligned and also ensured alignment was correct.
We also fitted the LH door hinges to the birdcage and to the door but may have the top and bottom hinges around the wrong way (and wear on these hinges is effecting alignment) ....... so need to swap hinges and try again. rear gap is small but this may be because door has been sprayed with putty and still needs a sand. I would have been more concerned about the door fit but the alignment of the sills and steel reinforcement has convinced me we are going okay.
This is as far as we have progressed.... but all seems okay so far.
Promise to post photos when I get a chance to get the camera ... may not be for a week or two though
![Name: IMG_1161[1].JPG
Views: 440
Size: 796.4 KB](https://www.corvetteforum.com/forums/attachments/c1-and-c2-corvettes/47892306d1434197378-replacing-the-rear-clip-on-my-60-anxiety-attack-img_1161-1-.jpg)
![Name: IMG_1163[1].JPG
Views: 325
Size: 799.1 KB](https://www.corvetteforum.com/forums/attachments/c1-and-c2-corvettes/47892309d1434197966-replacing-the-rear-clip-on-my-60-anxiety-attack-img_1163-1-.jpg)
![Name: IMG_1169[1].JPG
Views: 338
Size: 723.4 KB](https://www.corvetteforum.com/forums/attachments/c1-and-c2-corvettes/47892310d1434197966-replacing-the-rear-clip-on-my-60-anxiety-attack-img_1169-1-.jpg) 06-13-2015, 08:28 AM
06-13-2015, 08:28 AM
#32
Drifting
Thread Starter
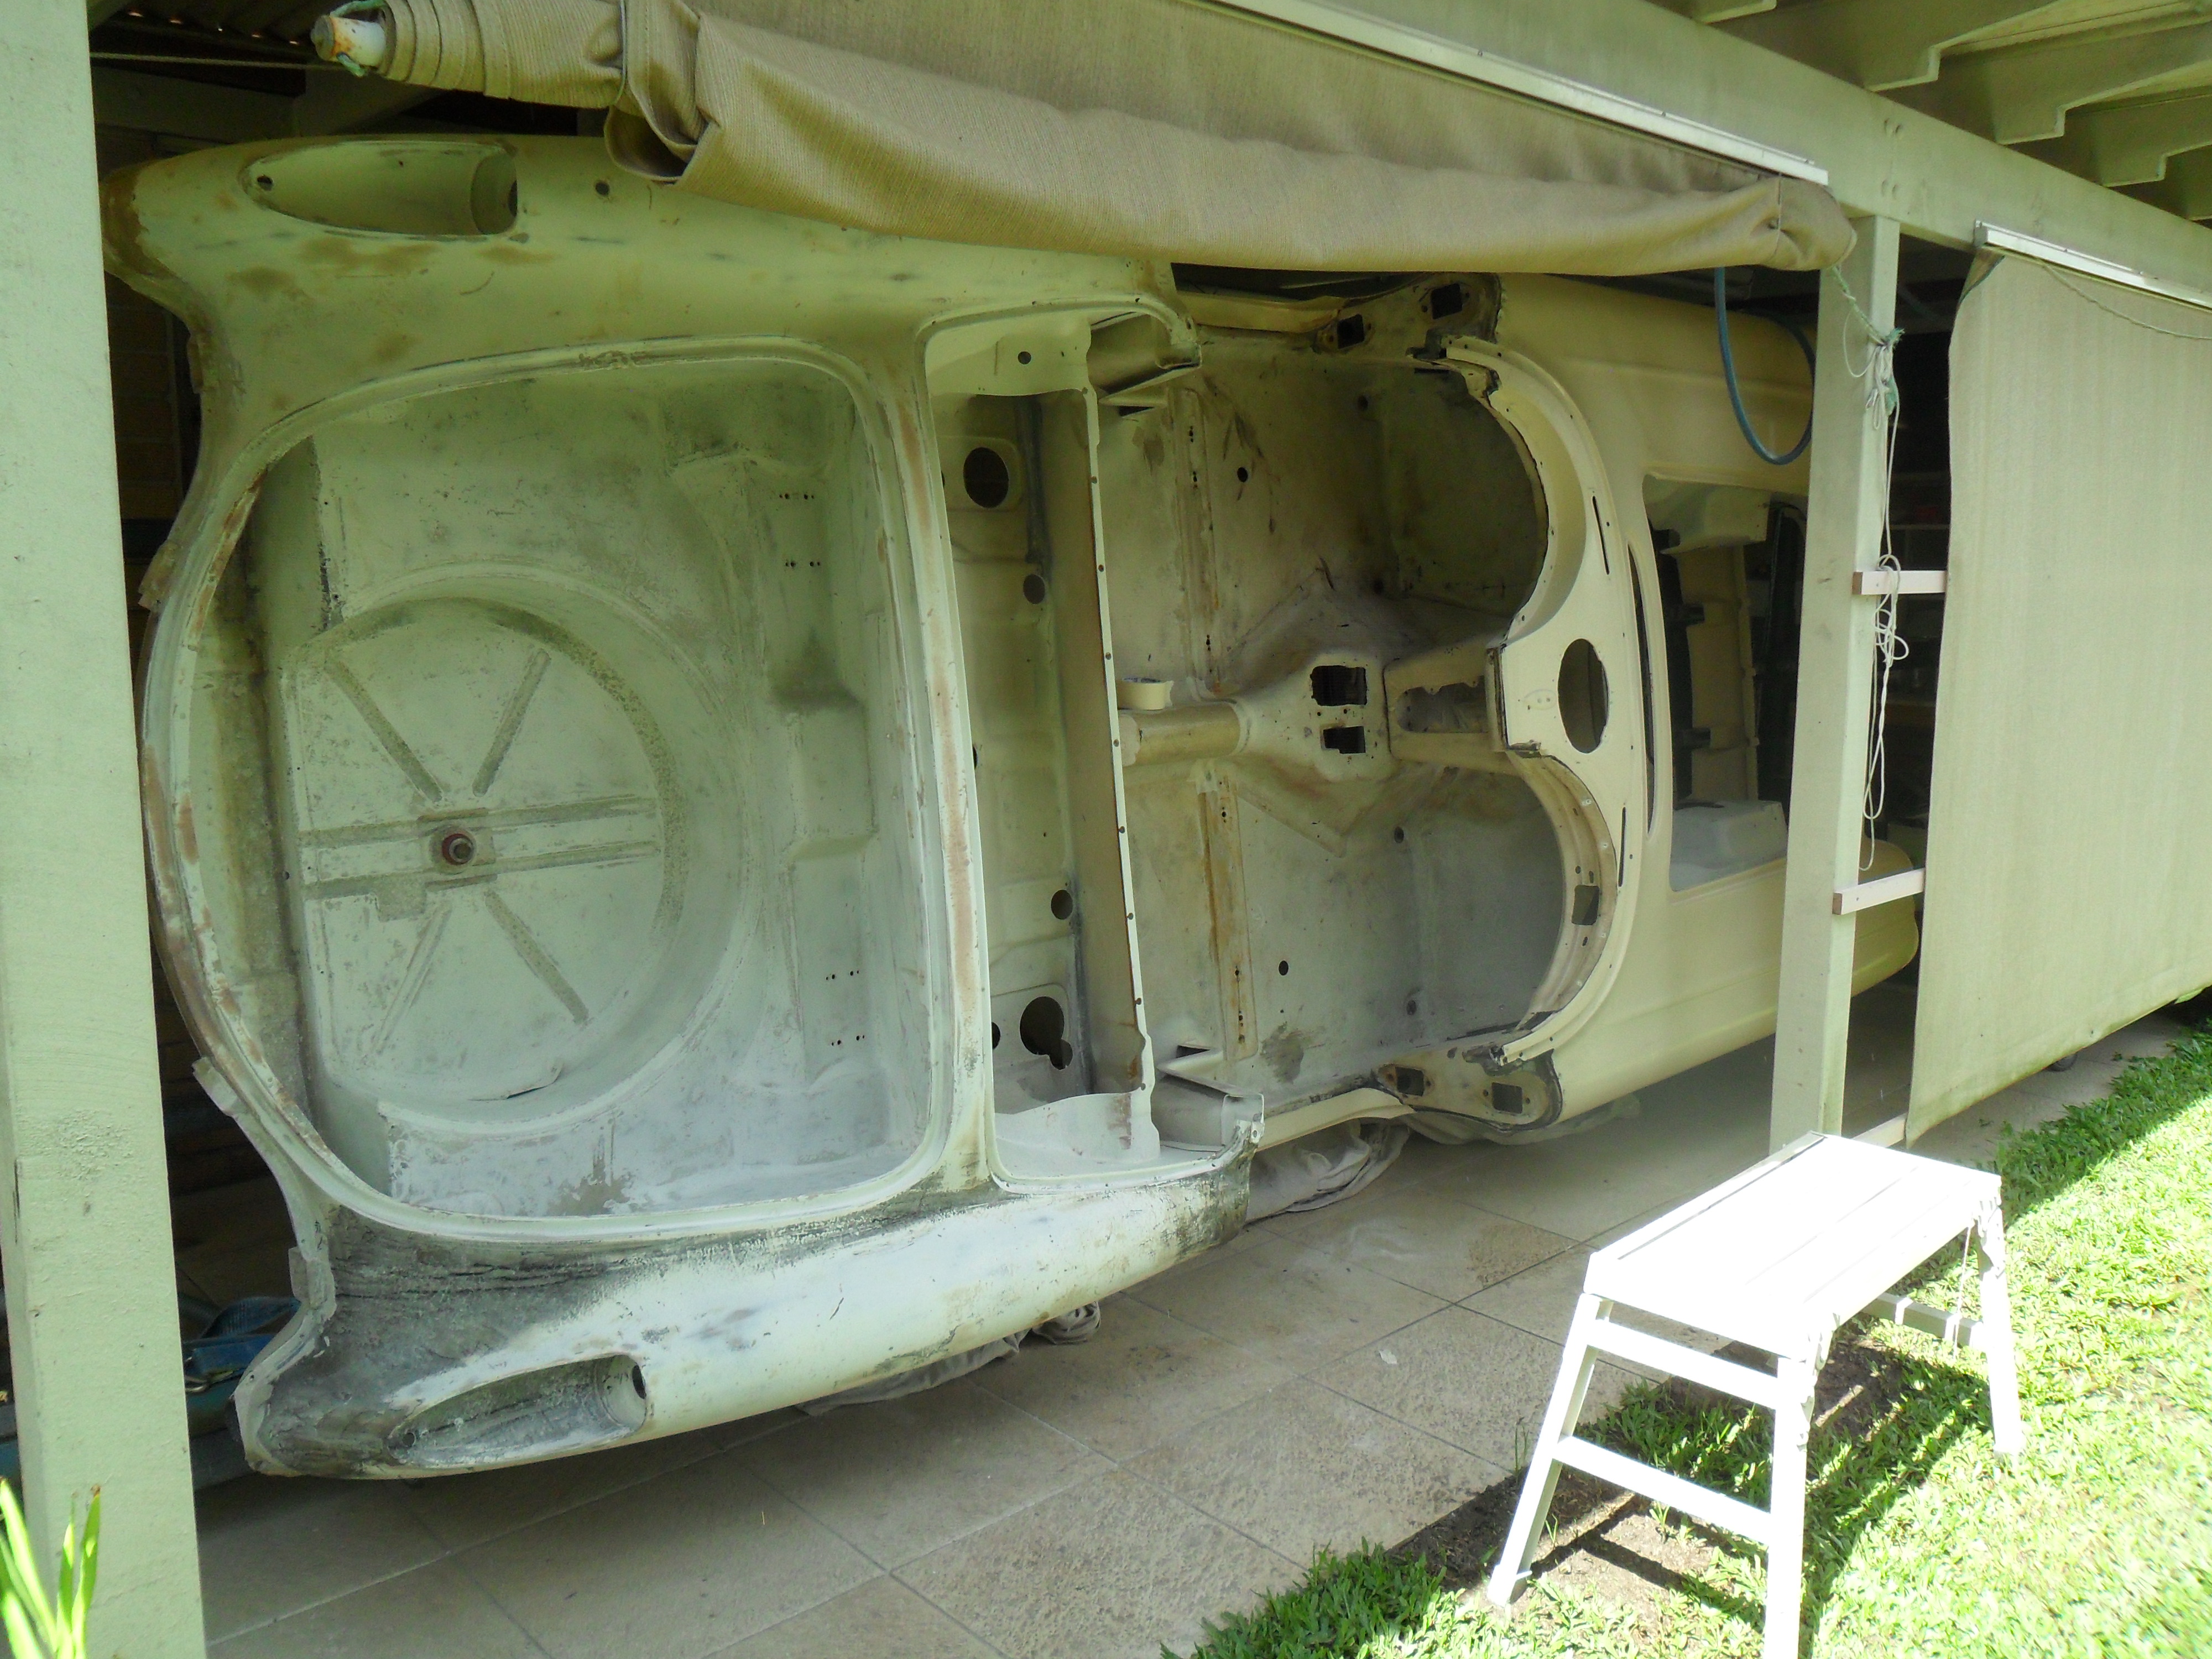
Really not much left of the original body, luckily I managed to sell all of the old panels which greatly added to my funds..... paid for my new front clip and a bit of the cost of the replacement rear clip.

 06-14-2015, 05:50 PM
#35
Team Owner


Member Since: Apr 2008
Location: Coloring within the lines
Posts: 27,340
Received 1,919 Likes
on
1,332 Posts

Wow.
The courage, skill, and determination of so many on this site is humbling.
The courage, skill, and determination of so many on this site is humbling.
 06-14-2015, 10:18 PM
#36
Drifting
Thread Starter
When I first considered the resto, courage was about 60%, skill was about 20%, determination was about 60% and anxiety was max'd out at about 500%. As the resto has continued and I've sourced good help on the forum or locally my courage is at about 95% (don't want to be too cocky), skill is still going up and may be closer to 50%, determination is now max'd out at around 95% (dedundancy notice has knocked off the other 5%) and anxiety is around 10% ......... just too keep me grounded though this is climbing as I may need to find employment O/S or interstate and the old girl is still in a million pieces and I only have about two weeks of employment left. Funding post July 1 is also under review with a letter submitted to the Minister of Finance though I have most parts now (and all are boxed up and reconditioned) so mostly labour involved in assembly .......... I might just have a bit of time to devote to her now

She has been a very good distraction from pending unemployment gloom though
 06-28-2015, 05:52 AM
#37
Drifting
Thread Starter
[QUOTE=jimh_1962;1586550853]pictures... Now, I do not know the entire process since I was not there at the time when this was done.
[IMG]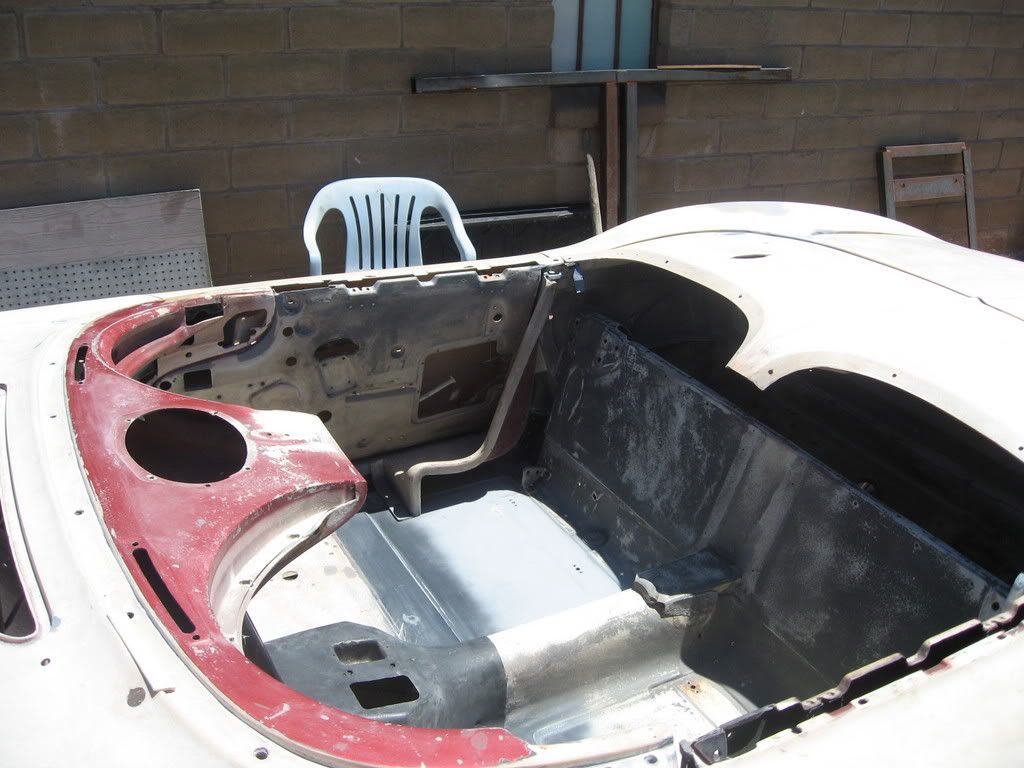 [/IMG]
I'm looking at the right dash section and mine doesn't quite look like this so need to ask some questions. Because this post was about the rear clip I'm going to start a new thread about this front clip issue then I'll link them together. Here is the link: https://www.corvetteforum.com/forums...dash-area.html
Here is what mine looks like (more photos on new thread)
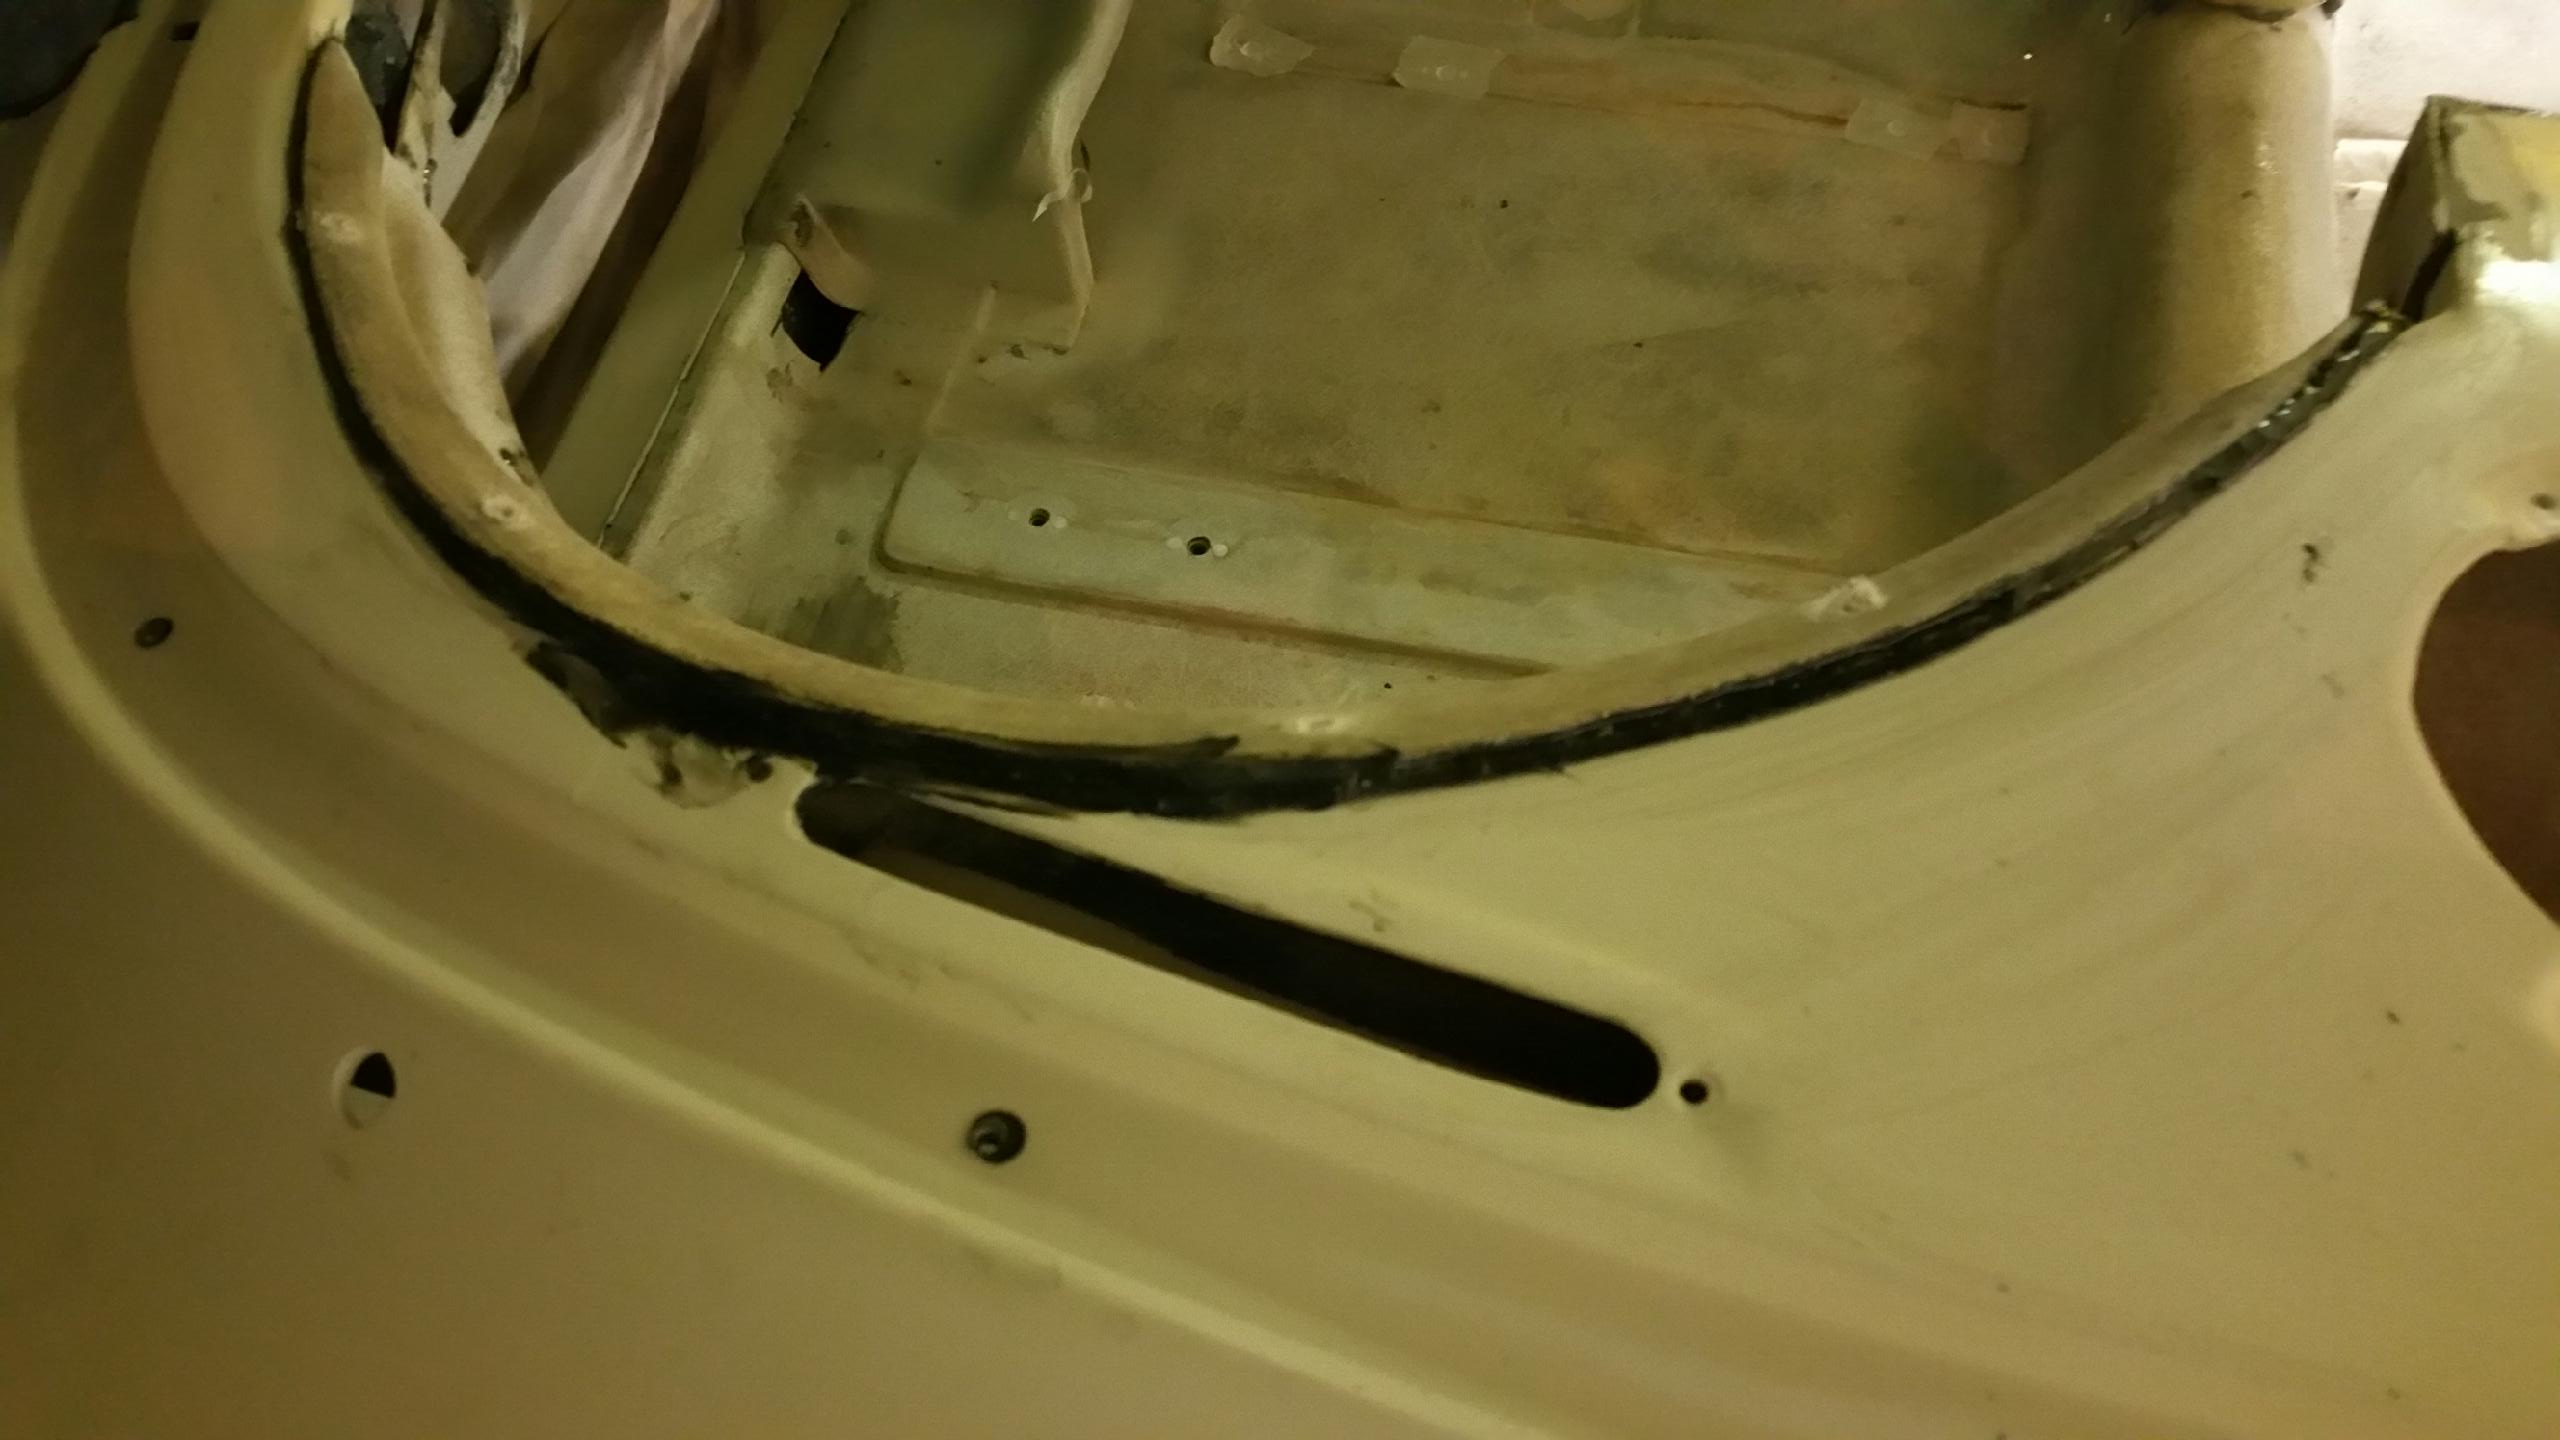
[IMG]
 [/IMG]
I'm looking at the right dash section and mine doesn't quite look like this so need to ask some questions. Because this post was about the rear clip I'm going to start a new thread about this front clip issue then I'll link them together. Here is the link: https://www.corvetteforum.com/forums...dash-area.html
Here is what mine looks like (more photos on new thread)
Last edited by mickatbp; 06-28-2015 at 04:37 PM.