My '67 Convertible Project...Build Thread

 05-08-2014, 08:43 PM
#22
Drifting

Thread Starter

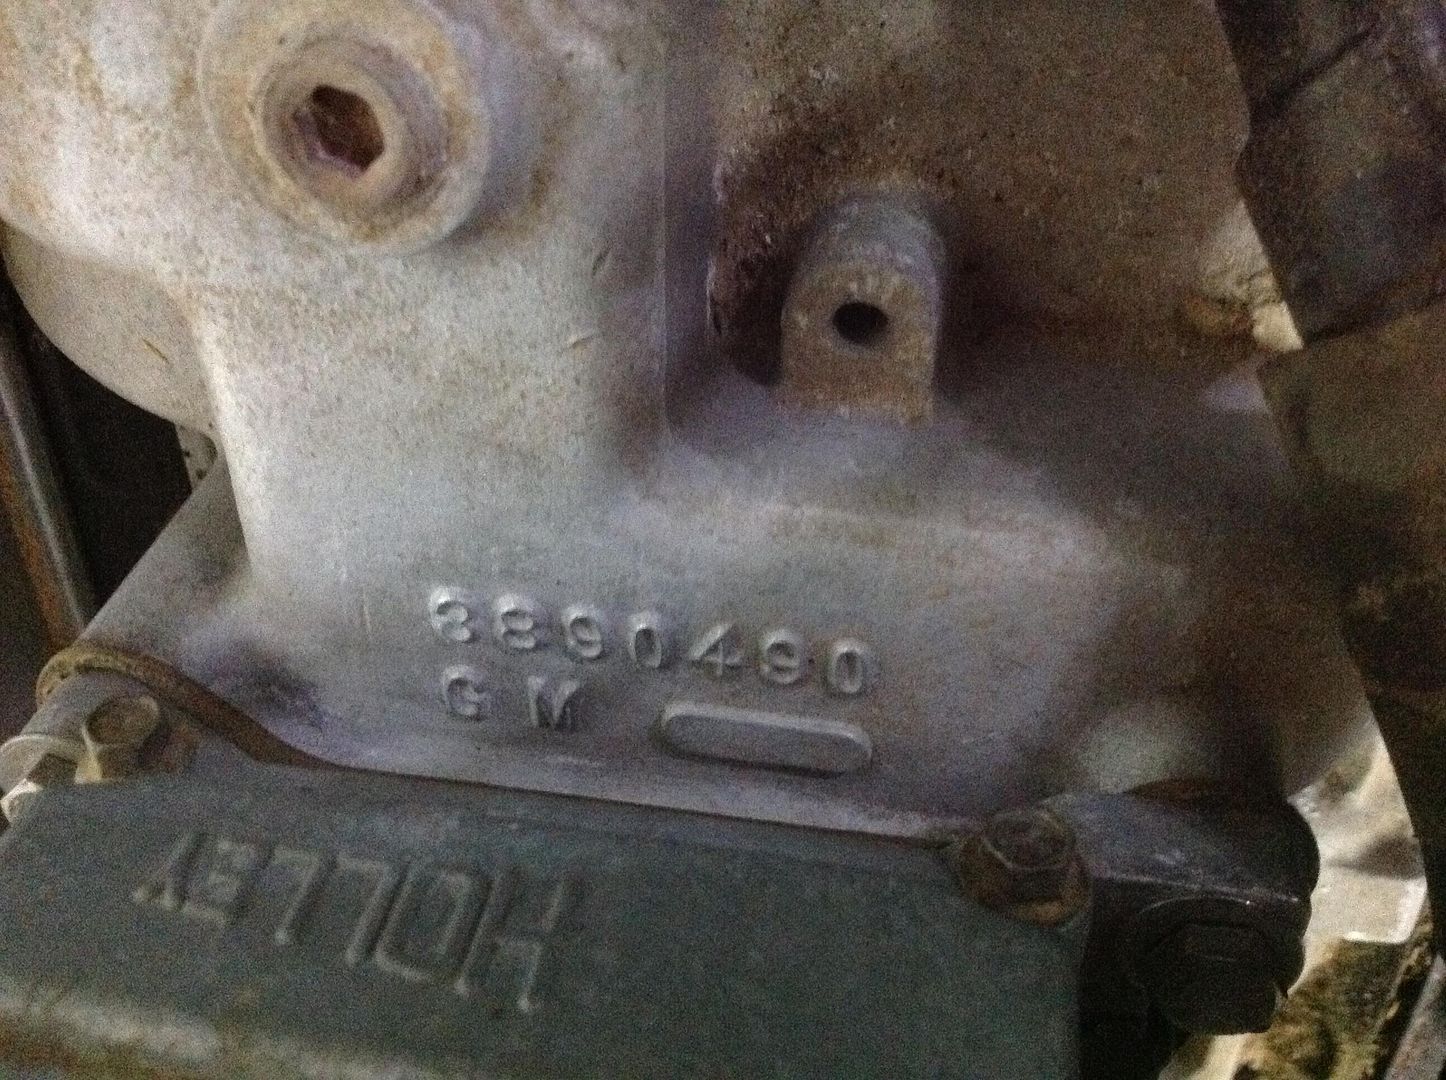
Just ran a few numbers off the engine...apparently the intake manifold came off of a 350hp 327 and isn't my original intake. Casting number is 3890490. I was considering installing a 151 cam to upgrade to the 350hp specs anyways, so no big deal.
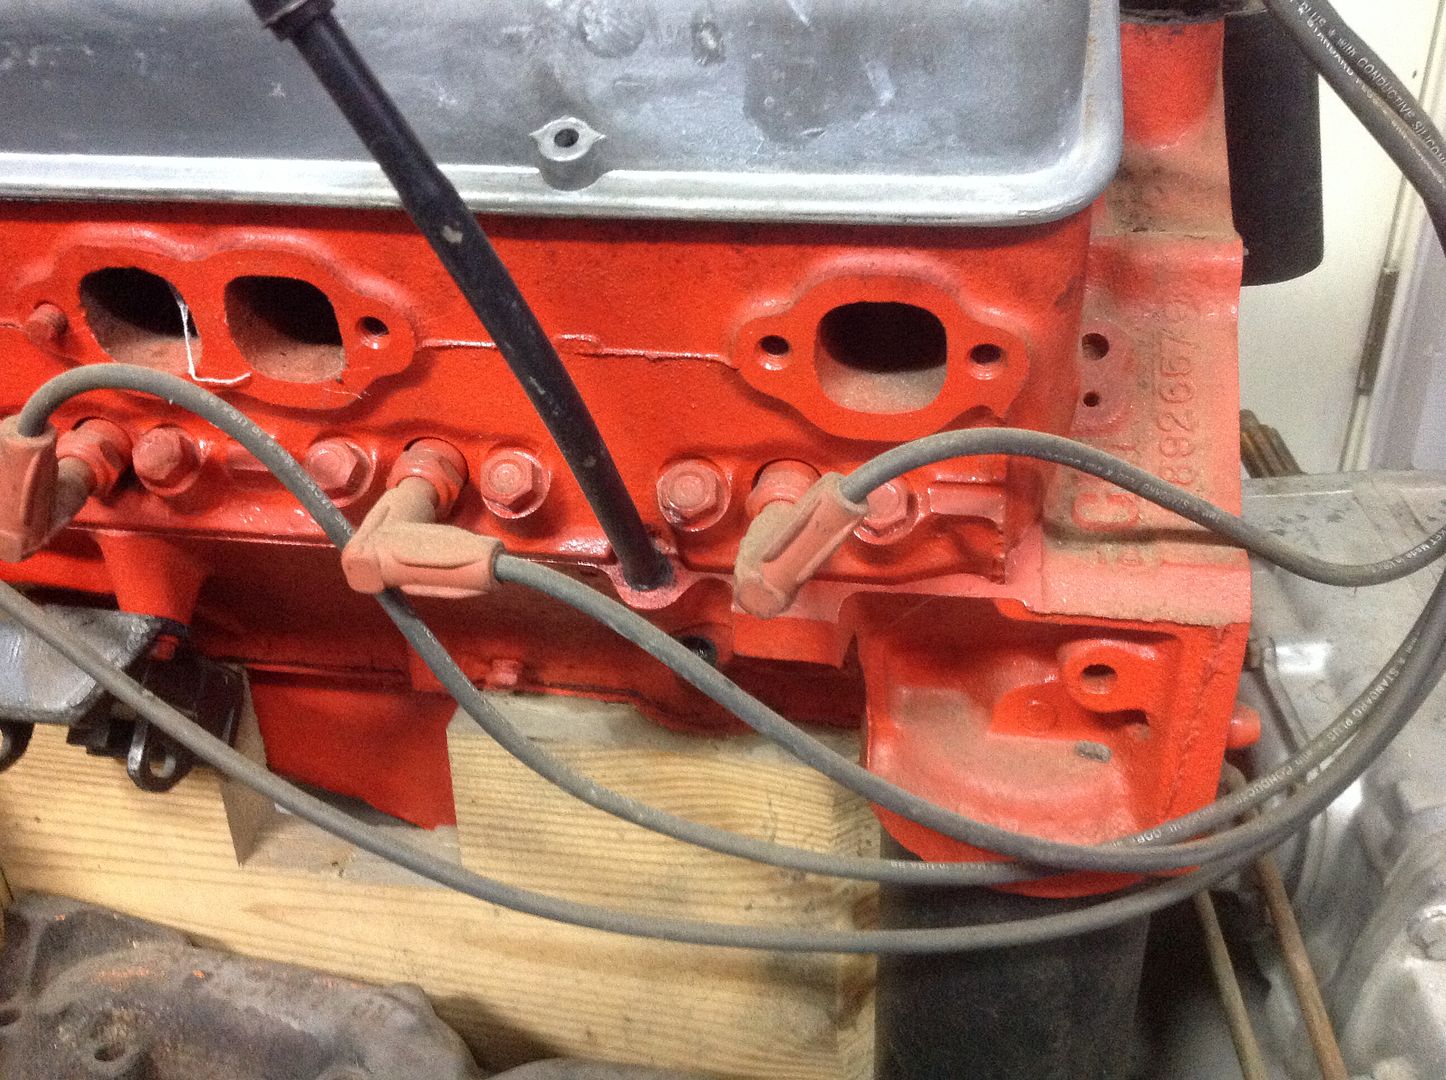
Pulled a valve cover and ran the number on the cylinder head...3890462. Info on this head is a little confusing...looks like the same casting number was used on both the 300hp and 350hp 327? I don't know whether it's 2.02 or 1.94 intake valves...and I don't intend to pull the heads.
The block is stamped HE, so I know its a 327/300hp car. Just wondering if someone went through the trouble along the way to put the 350hp parts on it...
05-12-2014, 08:29 AM
#23
Drifting
Thread Starter
So I think I've about decided to get all the mechanical things in line on the car before doing anything with the interior. The last thing I want to do is have to take the dash in and out a bunch of times while I track down issues running from the engine bay through the firewall, etc. So last night I turned on my focus to the engine.
This is what I'm working with. I'm going to pull the valve covers, carb, intake manifold, etc to get everything cleaned up and repainted (where appropriate), and also to inspect the condition of the internals.
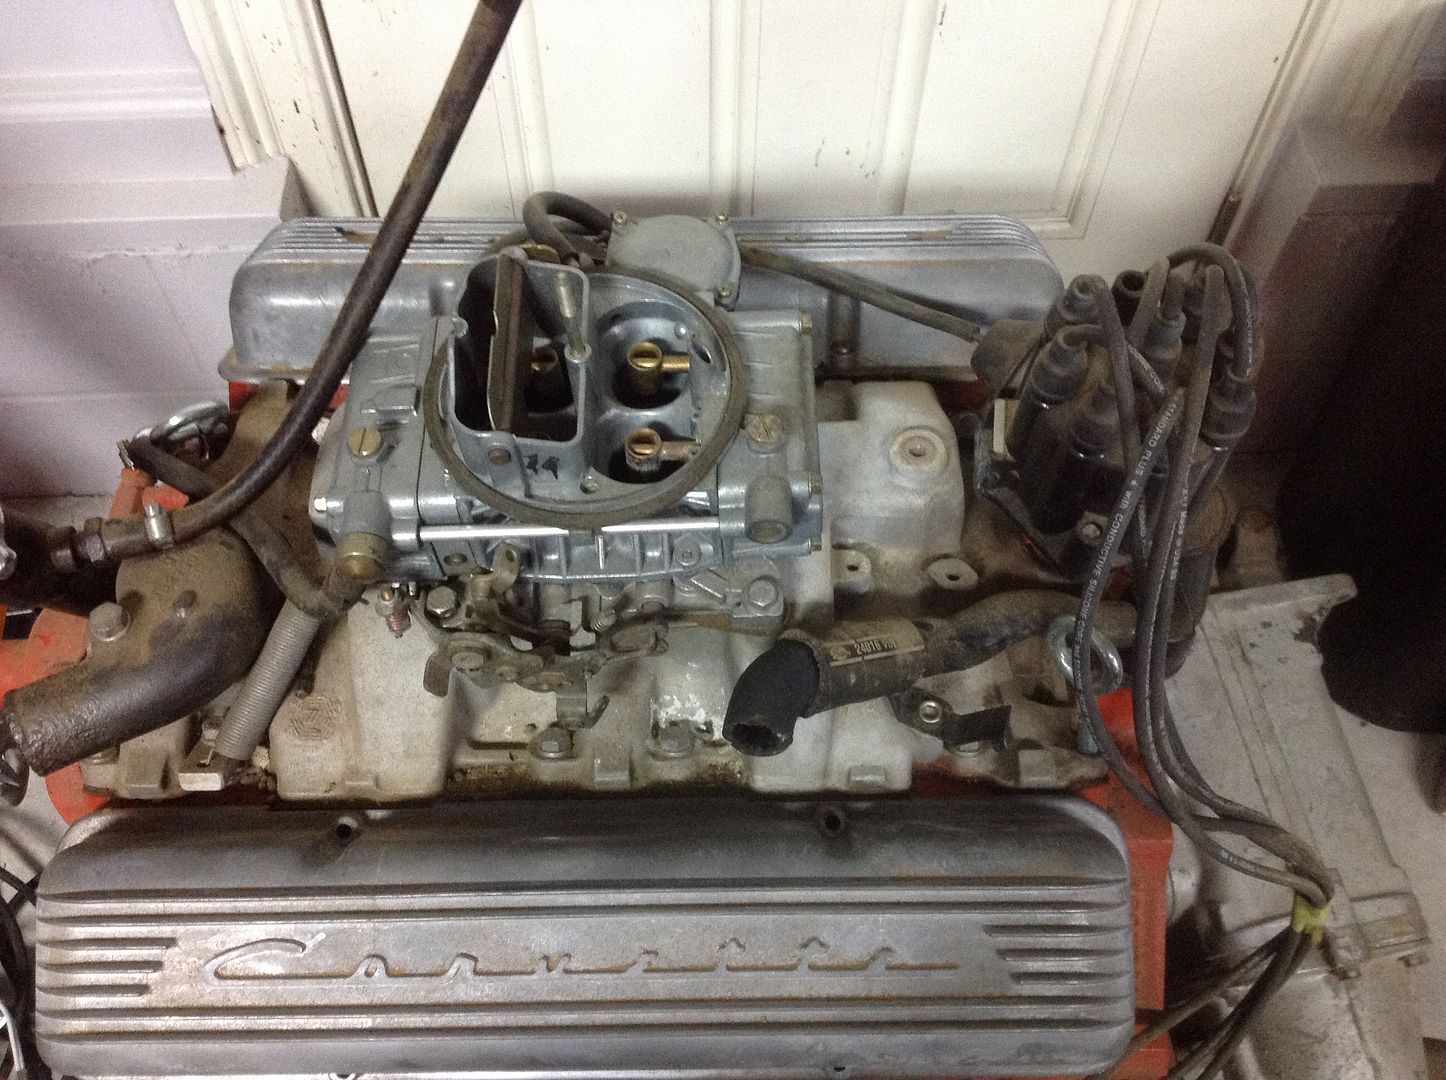
I already had a valve cover unbolted from taking a look the other day, so here's a photo of underneath. Everything looks to be in very good condition....the springs and retainers looked to be nearly new to me. And, as previously stated, they are in fact 462 heads.
Also, as previously stated...350hp intake manifold.
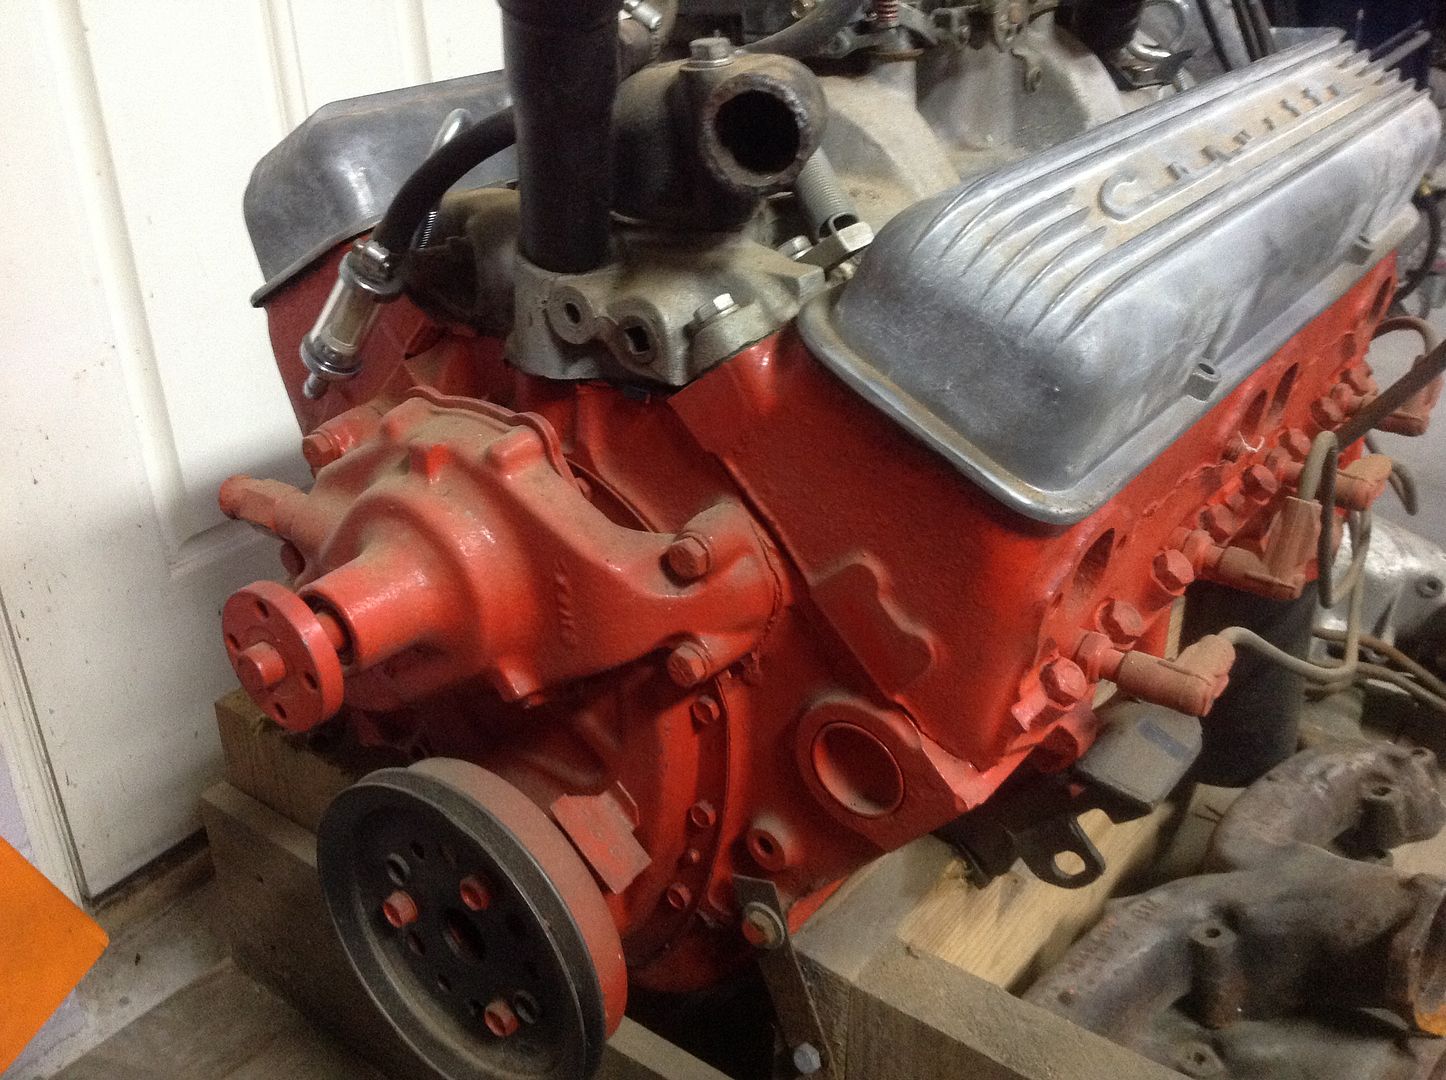
So I went ahead and pulled the water pump, balancer, and timing cover to get a look inside. I was surprised to find what appears to be a brand new double roller timing set. No slack in the chain...it looks very, very recently installed. Looks though the ports into the lifter galley, I can see the pushrods look like they are also nearly new. A pleasant surprise.
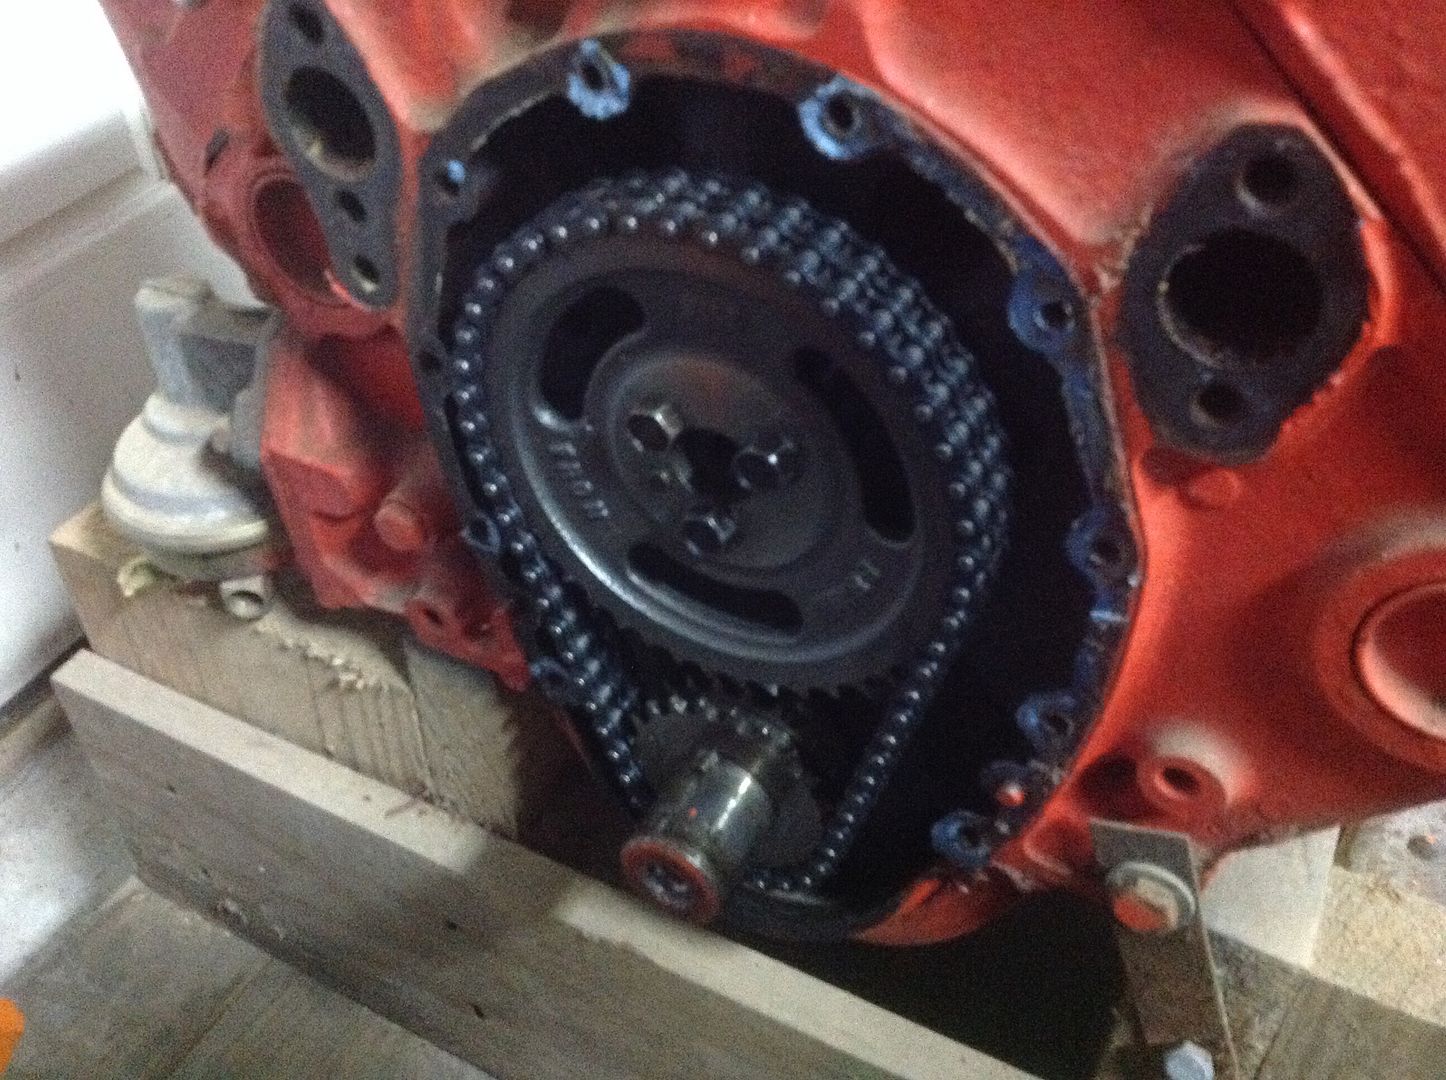
So between the timing components and the condition of the valve train, it looks to me like this motor may have had at least a partial refresh recently. That would be good news for me, since I had planned on replacing all these components. I'm going to pull the car and intake manifold tonight and get a look at some of the rest of the visible internals. If everything looks as good as it seems, then I'll just replace some gaskets, button it back up and get to detailing the motor.
This is what I'm working with. I'm going to pull the valve covers, carb, intake manifold, etc to get everything cleaned up and repainted (where appropriate), and also to inspect the condition of the internals.


I already had a valve cover unbolted from taking a look the other day, so here's a photo of underneath. Everything looks to be in very good condition....the springs and retainers looked to be nearly new to me. And, as previously stated, they are in fact 462 heads.

Also, as previously stated...350hp intake manifold.

So I went ahead and pulled the water pump, balancer, and timing cover to get a look inside. I was surprised to find what appears to be a brand new double roller timing set. No slack in the chain...it looks very, very recently installed. Looks though the ports into the lifter galley, I can see the pushrods look like they are also nearly new. A pleasant surprise.

So between the timing components and the condition of the valve train, it looks to me like this motor may have had at least a partial refresh recently. That would be good news for me, since I had planned on replacing all these components. I'm going to pull the car and intake manifold tonight and get a look at some of the rest of the visible internals. If everything looks as good as it seems, then I'll just replace some gaskets, button it back up and get to detailing the motor.
05-12-2014, 10:16 AM
#24
Race Director


Member Since: Jan 2002
Location: Close to DC
Posts: 14,544
Received 2,127 Likes
on
1,466 Posts
C2 of the Year Finalist - Modified 2020

Great project for a really nice looking car. Always liked white/red.  Dennis
Dennis
05-12-2014, 10:19 AM
#25


Nice project, from the looks of the exhaust ports and valve train this engine hasn't been run much yet. What a pleasant surprise to find things in this nice condition. Have fun with the build, Brian
05-12-2014, 09:45 PM
#26
Drifting
Thread Starter
Got the carb, intake, distributor, and crankcase vent tube off tonight. Everything looks to be in really good shape and should clean up well.
Here's what things look like under the intake...
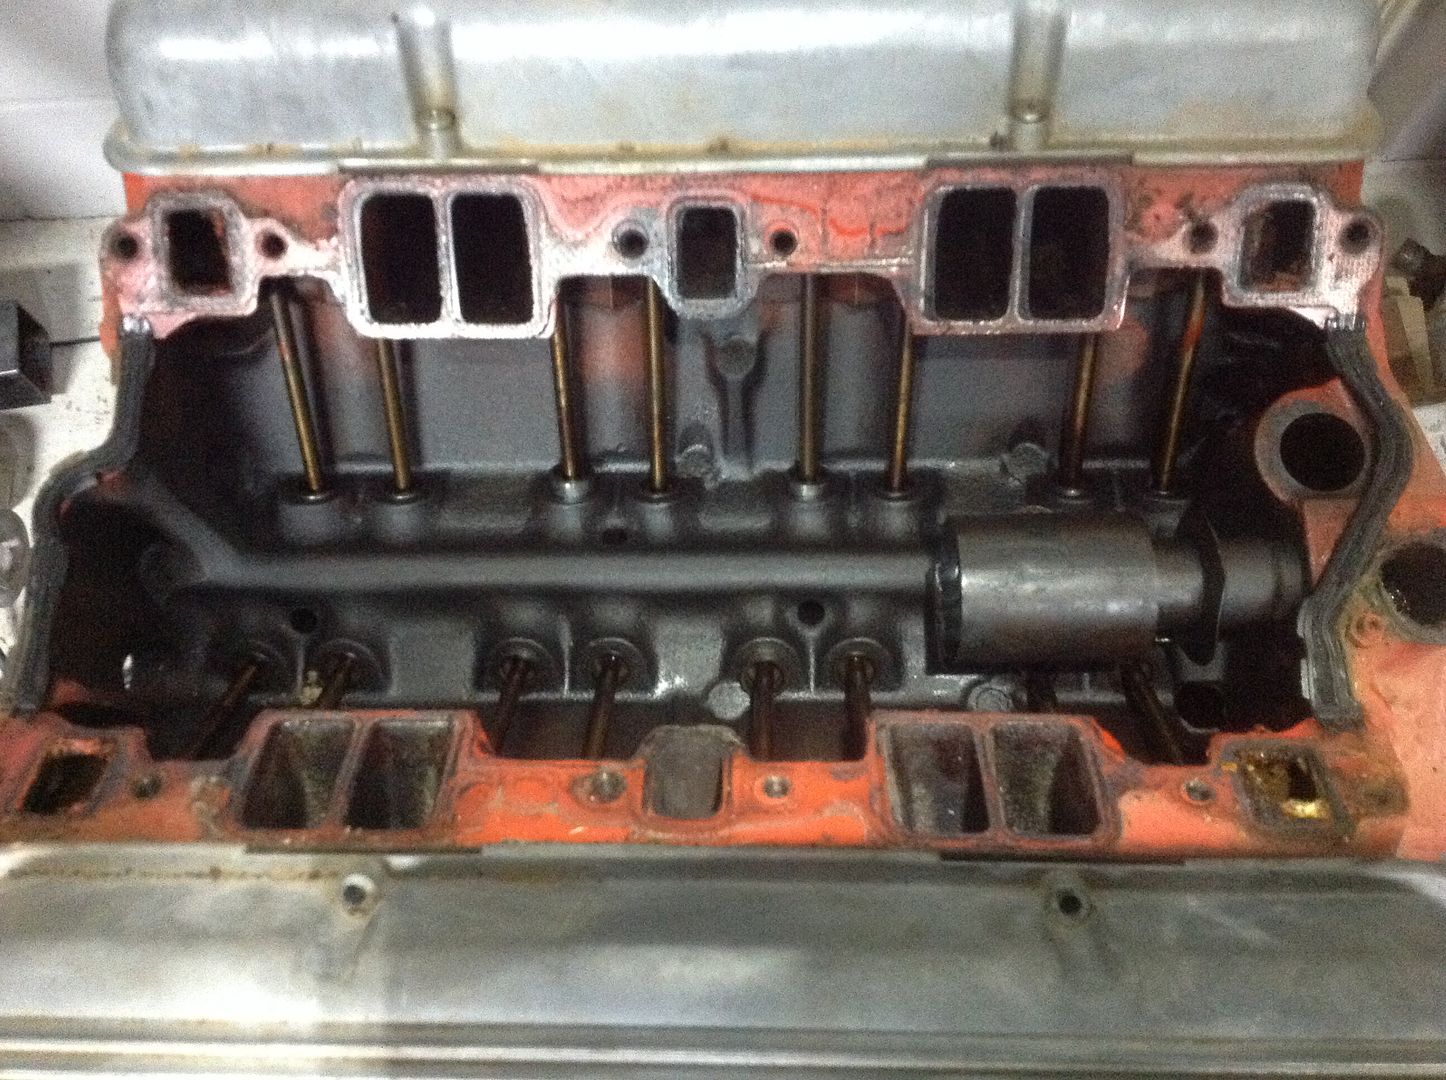
Everything is pretty clean and looks to be in good shape. The dizzy was in really good shape coming out, and showed little wear on the gear teeth.
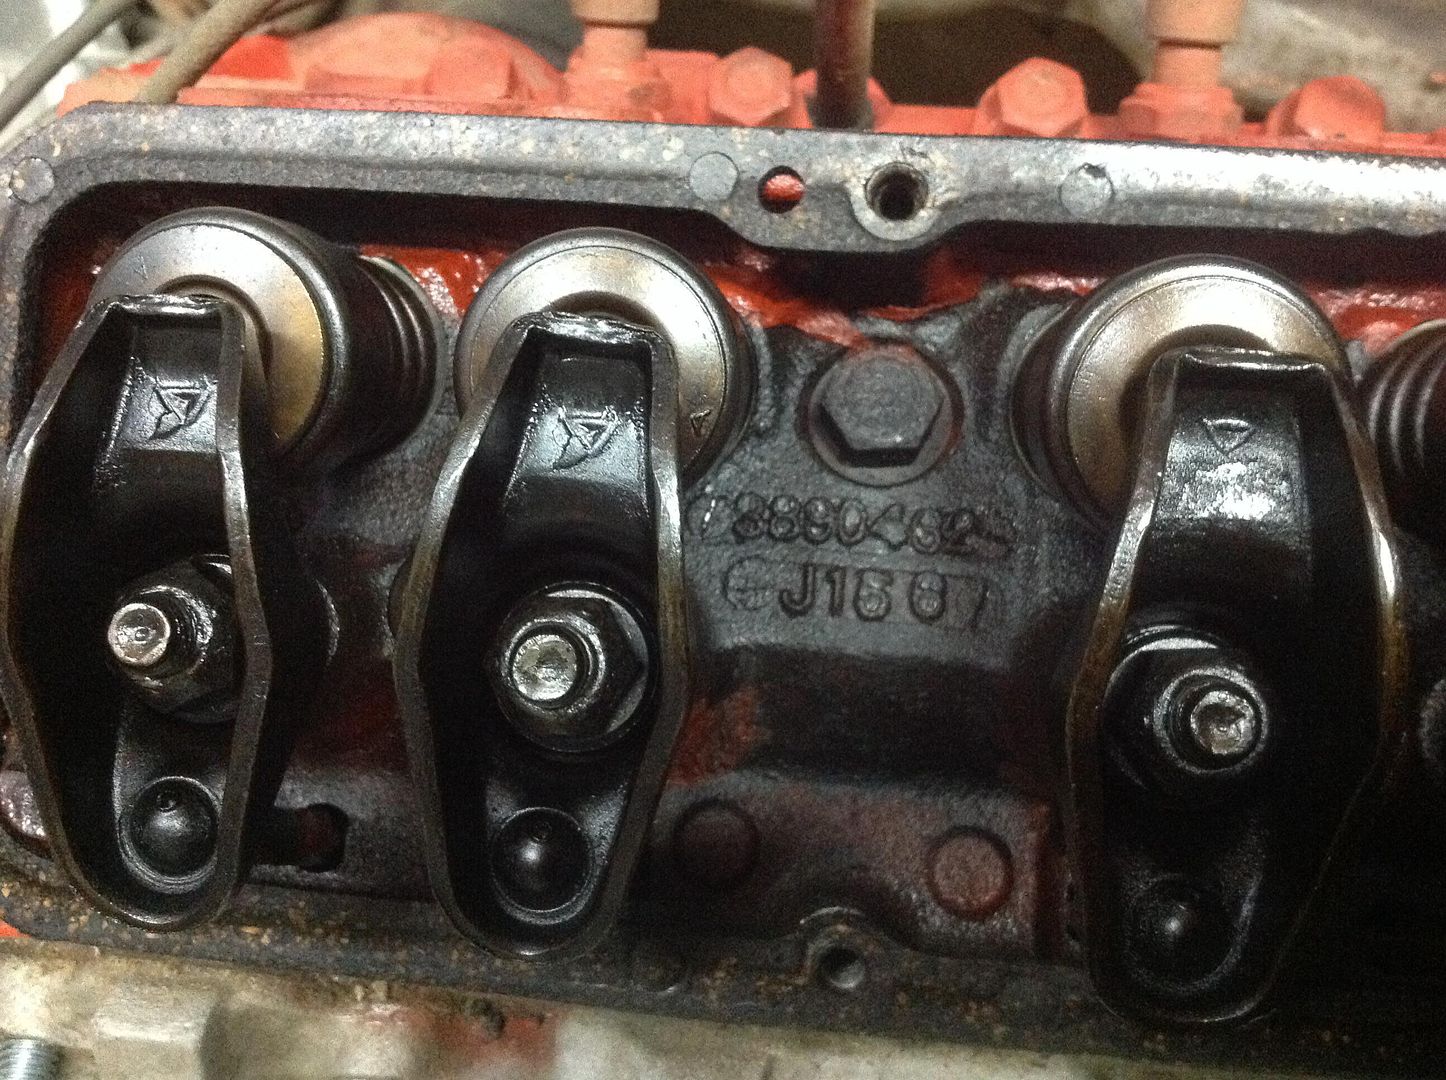
The components under the valve cover look to be factory, but I can't be sure about the springs. What do you guys think? The retainers have an "A" stamped on them...

So I'm debating whether to pull the cam and see what it is, or just leave it be. I'd say it's the stocker. Was thinking about swapping a 151 cam and new lifters and maybe springs, but not sure I want to fool with it or not...
Here's what things look like under the intake...

Everything is pretty clean and looks to be in good shape. The dizzy was in really good shape coming out, and showed little wear on the gear teeth.
The components under the valve cover look to be factory, but I can't be sure about the springs. What do you guys think? The retainers have an "A" stamped on them...

So I'm debating whether to pull the cam and see what it is, or just leave it be. I'd say it's the stocker. Was thinking about swapping a 151 cam and new lifters and maybe springs, but not sure I want to fool with it or not...
05-12-2014, 10:15 PM
#27
Racer

Member Since: Oct 2006
Location: Marysville Washington
Posts: 357
Received 79 Likes
on
46 Posts
2023 Corvette of the Year Finalist - Unmodified
2022 C1 of the Year Winner - Unmodified

OK, now is the time to roll the engine over and pull the oil pan and check the oil pump and bearings. Since you are talking about a new cam go ahead and do it now and you won't be kicking yourself later.
Great project.
Great project.
 05-13-2014, 02:40 PM
#29
Drifting
Thread Starter
Well, I quit fooling around and ordered about $6000 worth of parts this afternoon. That should get me started. Hey, it's only money, right?
 05-14-2014, 06:03 AM
#32
Burning Brakes


The "balancer" on the front of the crank is somewhat larger on a L79, and other shp. configurations. Hard to tell from the pix what is on your crank.
 05-14-2014, 09:48 AM
#33

Just ran a few numbers off the engine...apparently the intake manifold came off of a 350hp 327 and isn't my original intake. Casting number is 3890490. I was considering installing a 151 cam to upgrade to the 350hp specs anyways, so no big deal.
Pulled a valve cover and ran the number on the cylinder head...3890462. Info on this head is a little confusing...looks like the same casting number was used on both the 300hp and 350hp 327? I don't know whether it's 2.02 or 1.94 intake valves...and I don't intend to pull the heads.
The block is stamped HE, so I know its a 327/300hp car. Just wondering if someone went through the trouble along the way to put the 350hp parts on it...
05-14-2014, 09:54 PM
#34
Drifting
Thread Starter
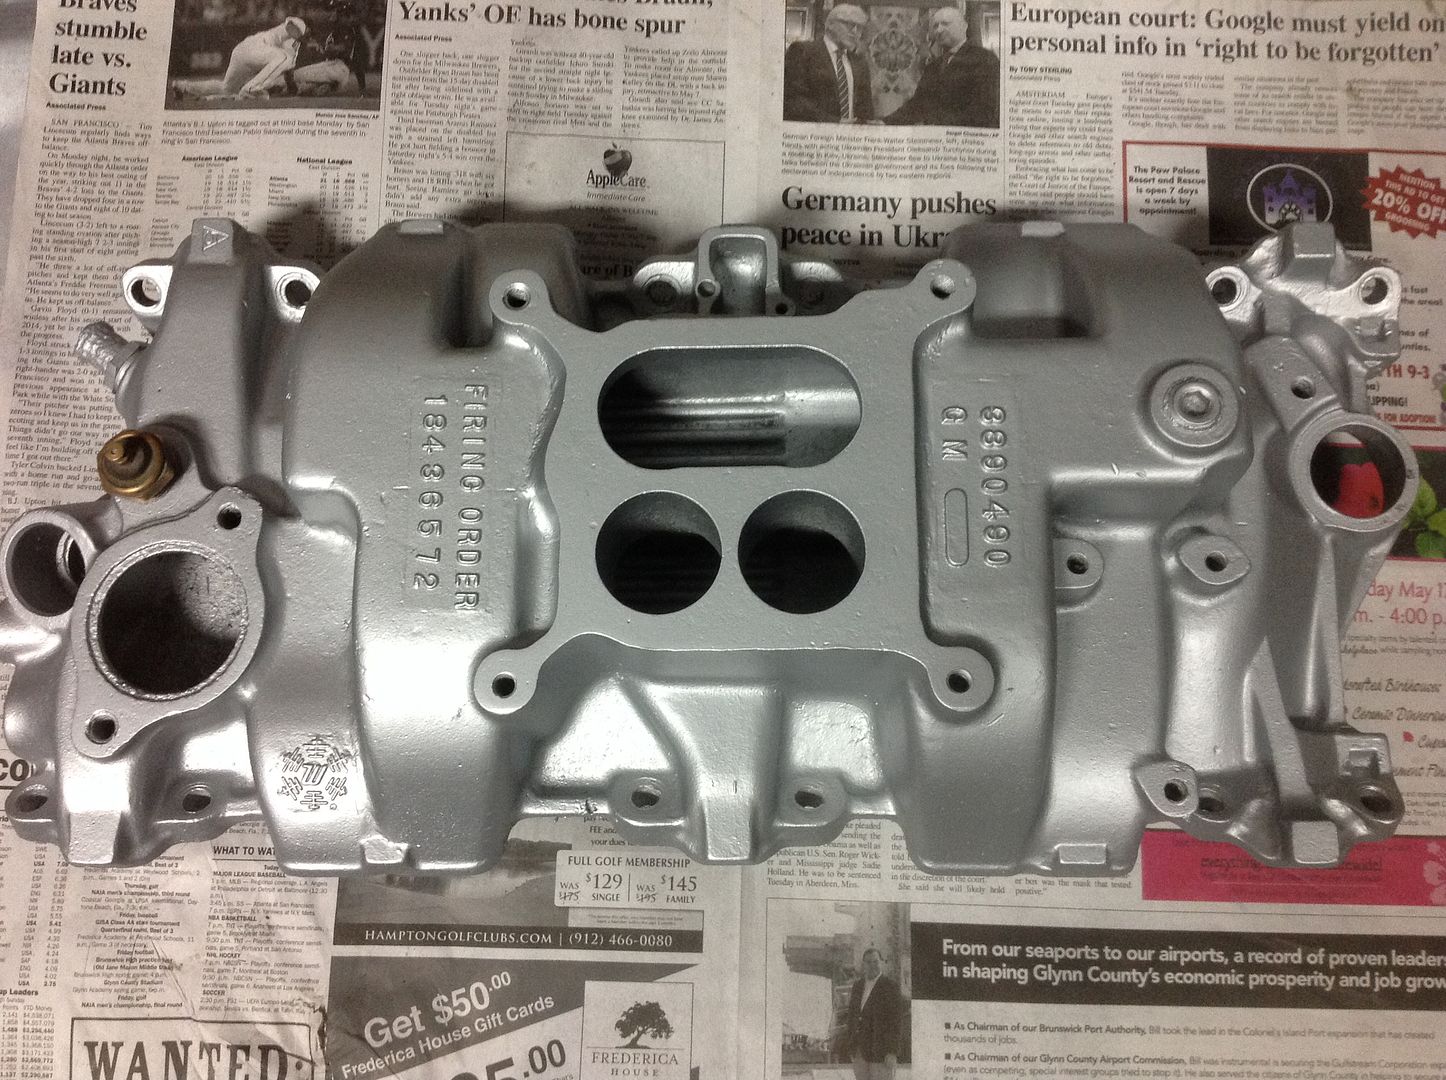
While I wait on this pile of parts to arrive, I decided to start cleaning up engine components. Here's a valve cover before and after, and an intake before and after. I'm not satisfied with the intake yet...researching methods to try to get it to come a little cleaner...
05-17-2014, 10:11 PM
#39
Drifting
Thread Starter
OK, so I just couldn't get the manifold to come clean enough for my liking, so I decided to paint it. If it had been the original, I might have gone through all the trouble to have it blasted or something, but I decided to just go this route instead.
This is after 2 coats of aluminum paint, and 2 coats of satin clear...
Parts are also starting to show up. Once I have all the engine gaskets, I'll start painting the motor and putting everything back together and the mate the trans, clutch, and engine.
This is after 2 coats of aluminum paint, and 2 coats of satin clear...
Parts are also starting to show up. Once I have all the engine gaskets, I'll start painting the motor and putting everything back together and the mate the trans, clutch, and engine.
05-18-2014, 09:07 AM
#40
Le Mans Master

Can't be sure from the pics but it looks like maybe someone flipped the instrument lenses so they are convex instead of the way they came from the factory which was concave. I've seen lots of midyears where someone flipped them for looks but the problem is you'll find there will be a lot more 'glare' because of that.
On your intake manifold, that front heater hose fitting looks to be very corroded, maybe think about replacing it since the parts are so cheap.
Lastly, I understand you're hoping to not tear the engine down to parade rest and it does appear that someone before you did replace a lot of bolt-on items, timing set, intake, etc. Sounds like you acquired this as a non-running project and don't really know the condition of the internals and didn't have the opportunity to do a compression check. As has already been mentioned, due to accessibility, now is the time to check as much as possible before you stab the engine back into the frame. The 300 horse 327 in my 65 Coupe ran good when I bought it back in '85 so with everything else to deal with, I didn't tear it apart but since it was a running car I was able to do a compression check which turned out fine and I saw evidence that someone had the heads off and I assumed (fingers crossed) they had rebuilt the engine. That evidence was the compression-style head gasket sticking out at the front corner where the head meets the block on the driver side. Of course, some guys, maybe not many, might have used the steel shim gaskets instead of the compression gaskets. Here's the pic of my engine showing that corner piece of the compression gasket.

Mike T.
Last edited by Vet65te; 05-18-2014 at 02:34 PM.
