When you click on links to various merchants on this site and make a purchase, this can result in this site earning a commission. Affiliate programs and affiliations include, but are not limited to, the eBay Partner Network.
I think a lot of people on the forum are not familiar with how a laser level can be a valuable tool in setting up your car and giving you faster and more accurate information.
I'd like to share with you some of the ways I have used it, and I'm hoping others will contribute to this post in an attempt to enlighten others that haven't seen the light (no pun intended)...
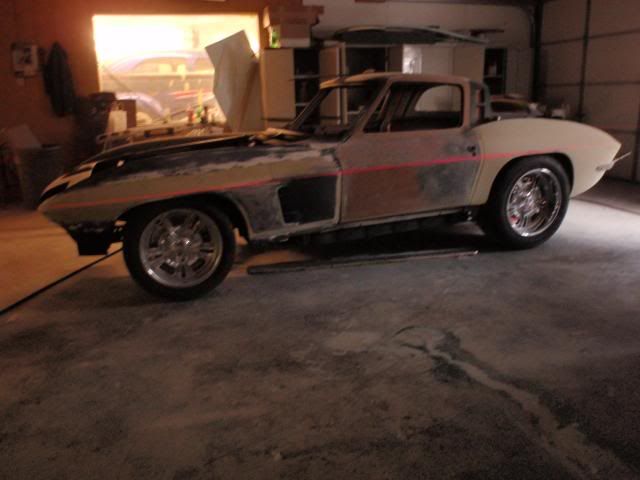
Door Gaps - (#1 picture)
Before I set my door gaps, I want to makes sure the body of my car is sitting on the frame level. Before I can makes sure the body is level, I have to make sure the frame is level. To accomplish this, I jacked up my car, "shot a line" along the bottom of my box frame. Once I knew the frame was level, then I shot the bottom (and top) of my car. If any place was too high/low, I could add/remove a shim. When I shot a line on the top of the car about an inch above the highest point on the body, I could go around with my tape measure, and measure from the body up and see where the laser hit the measuring tape...thus telling me if I had to add/remove a shim.
Side Spears - (#2,3 pictures)
Because of all the body work done on the car, the holes for the side spears where filled, however the hole that is inside and behind the cove wasn't. I used a laser level to center the line in the middle of that hole and knew exactly where to slot my spears. And in the process...just used a file and followed the line...making them nice and straight.
Front end - Radiator support adjustment (#4, 5)
The front section of the body is held on just by the radiator support. There are two holes on each side. I filled those holes cause the front was off as you can see from #4 picture. I then leveled the front, and with my radiator out, drilled in the center of the nuts showing me exactly where the bolt holes needed to go.
What is also nice about a laser level is if anything slips while you are doing something, you can easily see it instead of waiting till your done to find out your off.
Now some people might think, these cars were never that accurate to begin with, so "drop the laser" (as I have heard over and over), but the thing is, the laser can help you find out what is off. It's not an attempt to make a car perfect that wasn't built that way in the first place...but it does allow you to make it better.
I hoping that this post changes the mind of the "nay-sayers" when it comes to the use of the laser. Please contribute any pictures you have and how a laser has help you.
Last edited by jusplainwacky; 05-15-2014 at 04:27 PM.
Man that looks great nice job. But use one for about everything. More so on the c5 with doing the procharger pulleys and belt. Cant have stuff flying off.
jusplainwacky
Sure, I took pictures of everything.
I used the laser like someone else might use a string line to set the initial toe. When I got it aligned one side was right on and the other side needed one small shim moved from one side to the other. Easily good enough for the initial drive.
CUL Jim
Last edited by Jim_C; 11-12-2016 at 08:40 PM.
Reason: new URL for pix
I can see where it could come in handy. Faster than a level and measuring tape. As I don't own a laser level what kind (features) do you recommend? I see you can spend $10 to $500
Handy is a understatement. I personally wouldn't trust anyone working on my frame/body adjustment unless they were using a laser.
Today I made sure my frame was EXACTLY level and now I'm leveling the body. As I tighten up bolts I can easily see where my measurements are. Here is a very simple way of doing this. Just place the same size bolts/dowel on the body and put them in the exact same spot on each side of the car....check this out.
Here I am shooting the X-Frame and sides while I was trying to level it. If you're frame is bent or twisted, you'll immediately see it. You have to get the frame level before you do the body. Try all this with a standard level.
Last edited by jusplainwacky; 05-16-2014 at 10:52 PM.
I am using an Acculine Pro model 40-6660. I have had this model for some time. If you're going to get one, don't get a cheapy. This one has vertical/horizontal..."Ceiling" plumb bob. It' also has a "pulse" laser and a remote detection. If you can't see the line, you can use this flat remote that will beep with arrows telling you to go up or down...when you are right on center...the center arrows light up and it's a solid tone. Ebay is a good place to check.
Well it works even when the car is not level. Just checking bodyline after widening front and rear fender and 1/4s.
Don't worry, bodyline was checked with frame leveled before that picture was taken. Just checking to see if line changed with car sitting on wheels. Which is more important, to make sure nothing changed.
Cool pic! Nice how the laser line follows the seam...looks right on.
You bring up a very good point in re-checking the body after you put the wheels to the ground. Even that can tell you a lot about your springs and if they are equal in compression/tension force...shocks can play a role also. It's good to rock the car after you set it on the ground to get the car in an equilibrium/natural state and again check.
Today I'll be putting on my shims...I'm just hoping when I'm all done that the car remains level.
When I cut my entire frame into pieces I used the laser level to get the frame 100% right on. I cut out the rear crossmember and the two siderails and replaced all the body mounts. When I put the body back on the frame all the bolts dropped right in with no problems what so ever. They are a very valuable tool. I set the frame on a set datum plane then welded steel posts to the frame and epoxy bolted the post baseplates to the floor which allowed me to cut it into pieces without the frame moving in space since I was effectively separating the front frame section from the rear frame.
Interesting. I use a laser level quite a bit for construction, but how do you know with a car what is SUPPOSED to be level? The frames and bodies all have a radius that don't necessarily terminate in the same plane. Is there a reference point from the AIM you are working from? I can understand the car should be level from side to side, for example, but not necessarily from front to back.
Like you, I use my laser level for all sorts of stuff...besides my car. I just lhelped a friend leveled his kitchen floor. His floor had a variance of 2".
In regards to your question...you are correct in that it's pretty self evident when you are using the laser level on the Left or Right side of the car on either the front or back. But the side of the frame is also level. Look at "Poorhouse's" picture...if the frame wasn't level, his car wouldn't be level when looking at the side. You can also see my picture showing me shooting the x-frame and side frame.
When I cut my entire frame into pieces I used the laser level to get the frame 100% right on. I cut out the rear crossmember and the two siderails and replaced all the body mounts. When I put the body back on the frame all the bolts dropped right in with no problems what so ever. They are a very valuable tool. I set the frame on a set datum plane then welded steel posts to the frame and epoxy bolted the post baseplates to the floor which allowed me to cut it into pieces without the frame moving in space since I was effectively separating the front frame section from the rear frame.
I admire your attention to detail, was the frame damaged by collision or just rust. After you finished the work do you think it may have been better to buy a new frame from V/P. I looked at there frames at Carlisle and it's a very nice part,IMO.
These frames can be leveled all day long but when the springs are installed there is no guarantee they will sit level. The front crossmember has to be welded perfectly level etc.
The production tolerances are great with these frames, my 63 frame rear body mount behind the tire is 1/4" higher on the drivers side than the same mount on the passengers side. This height will control the amount of shims at the mount behind the doors etc.
In my experience, the goal to good door fit, level look etc., is to shim the body to the frame the way it was built on the body truck. After the tires are on the frame and it's on the ground the frame may not sit level. The car needs to sit on the frame the way it sat on the body truck and that may mean it's not perfectly level.
Please don't get me wrong, in a perfect world it's all supposed to be level but do you really believe at ?? cars per hour these were built to be level within a fraction of a inch. If the factory got them closer than 1/4" it was probably great.
I would love to see a picture of the jig these frames were built with at A O Smith.
I admire your attention to detail, was the frame damaged by collision or just rust. After you finished the work do you think it may have been better to buy a new frame from V/P. I looked at there frames at Carlisle and it's a very nice part,IMO.
These frames can be leveled all day long but when the springs are installed there is no guarantee they will sit level. The front crossmember has to be welded perfectly level etc.
The original frame was rusted out. A new frame was in the 5,000 dollar range. I'm not doing an N**S restoration so a new frame wasn't needed. I fixed this frame for around 800 dollars. I also added reinforcing plates on the sides and front of the rear kick up frame rails with my own longer trailing arm bolt with cotter pin. I have a coupe so door gaps are not changed much if at all by moving around shims. I leveled the all the body mounts. Then when I set the body on the frame I took the rear shims out. When I set the body down on the frame is when I added the rear shims as needed to give a slight preload to account for any frame flex when loaded. However there was very little as the shims I thought I would need when leveling the frame out with the laser is what I ended up using when the body was set on the frame.
The hardest thing for me on the frame was locating all the new body mounts. I did lots of measuring and plumb bobs are also your friend in this case.
Here are my frame reinforcing plates I am talking about.
A c1 frame will flex a lot when jacked in the wrong place so you must jack it under the rear diff and under front suspension lower arms. If you lift a c1 on a two post lift under the frame always open the doors.
The original frame was rusted out. A new frame was in the 5,000 dollar range. I'm not doing an N**S restoration so a new frame wasn't needed. I fixed this frame for around 800 dollars. I also added reinforcing plates on the sides and front of the rear kick up frame rails with my own longer trailing arm bolt with cotter pin. I have a coupe so door gaps are not changed much if at all by moving around shims. I leveled the all the body mounts. Then when I set the body on the frame I took the rear shims out. When I set the body down on the frame is when I added the rear shims as needed to give a slight preload to account for any frame flex when loaded. However there was very little as the shims I thought I would need when leveling the frame out with the laser is what I ended up using when the body was set on the frame.
The hardest thing for me on the frame was locating all the new body mounts. I did lots of measuring and plumb bobs are also your friend in this case.
Here are my frame reinforcing plates I am talking about.
You did a beautiful job on your frame and it looks like you are a good welder also. Very nice work..
 05-15-2014, 04:15 PM