When you click on links to various merchants on this site and make a purchase, this can result in this site earning a commission. Affiliate programs and affiliations include, but are not limited to, the eBay Partner Network.
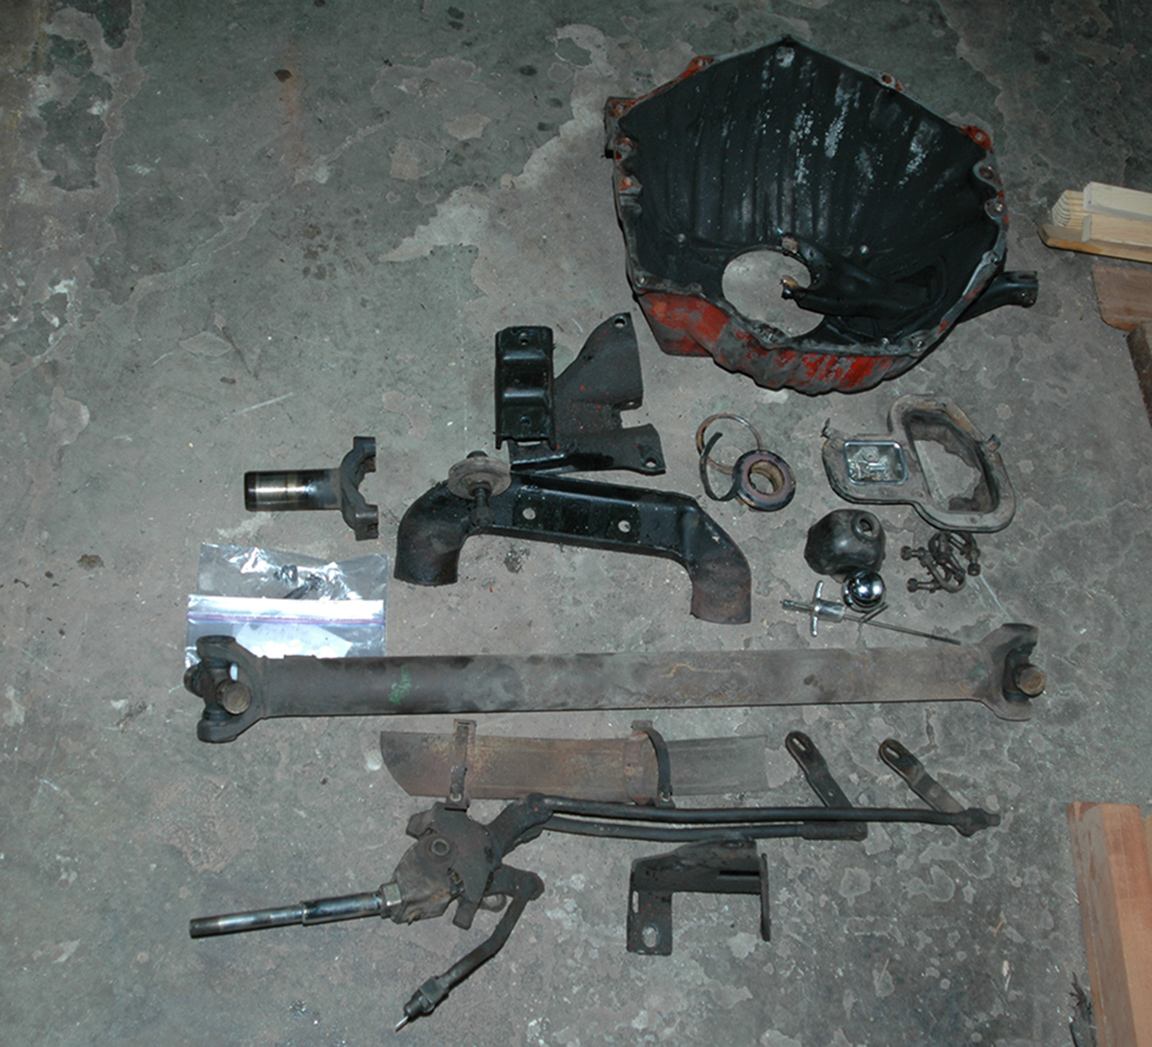
What a tough job! Last weekend, I got the Muncie out of the 67. Now waiting on a clutch fork. Clutch went out last December so it has been sitting for over 6 months. Was waiting on a lift, but, finally, I made some blocks out of wood from shipping pallets (totally free) and set about getting the trans out. Big job, but I made it. The shifter was almost impossible. I nearly gave up twice, but it was Father’s Day, and I know that, somehow, my Dad helped me in spirit or something, and everything started to click. (Dad and I restored this car 33 years ago and he passed away in 2011.) Now it has the clutch, bellhousing, and pilot bearing out. I need to insulate better on the tunnel as the heat inside is unbearable. As soon as the clutch fork arrives, I can put it back together.
Last edited by Diablo427; 06-21-2014 at 01:35 PM.
Reason: picture didn't show up
Congrats on making progress, I know what a Royal PITA is can be to pull a trans out of a Vette while laying on your back. Even worse when you have 'under car exhaust'. In your writeup you mention you have the pilot 'bearing' out. Is it a true pilot bearing or is it a bronze pilot 'bushing'. Reason I ask is that 'some' of us have had issues with the aftermarket and GM pilot bearings and have gone back to the old style bronze bushing. Some people have had good luck with the bearings.
Mike T.
I guess that my mind if befuddled on clutch parts. Pilot bushing. It is either a GM part from 1981 or the original one from 67 so I am sure that it is an oilite. It is non magnetic and bronze. I used the 5/8 bolt trick Thursday night to remove it. I have a Luk 04-021 clutch kit, but the pilot bushing that came with it is silver and magnetic. I found the National PB656HD (formerly Federal Mogul?) one available at O Reilly's. I think that I should probably get it as I don't want to do this again any time soon.
How do I clean the transmission tunnel? It has black grime all in it and I can't move the car to high pressure wash it. The original heat shield is there but I should take it down and clean everything up so that I can put more heat shielding up there. The car is an inferno and this is Texas. It is so hot inside that it is unbearable even with the factory AC. I was thinking of putting some more heat shielding up there if I can decide what to use. I would have to clean it up so that the stuff would stick if I used DEI shielding or Refletix or whatever. Injected Customs is a hot rod shop across the parking lot and he said he has some Dynamat for heat to put inside the car under the carpet. I think that I should do something to stop the heat in the tunnel but don't know what to do yet.
Sounds like you had a true bronze type pilot bushing in there and will be replacing it with a similar bronze bushing. That'll work just fine.
The reason I asked, after seeing you refer to it as a 'bearing' is due to a number of us having issues with the aftermarket and GM pilot bearings. Here's what mine looked like after 6K miles alongside a new GM bearing.
The current GM bronze bushing is a good one to use but can be a bit pricey.
As long as you stay away from the 'dark gray' less bronze versions that are magnetic you'll be fine.
Mike T.
How do I clean the transmission tunnel? It has black grime all in it and I can't move the car to high pressure wash it. The original heat shield is there but I should take it down and clean everything up so that I can put more heat shielding up there.
Plastic scraper, respirator, and lacquer thinner soaked rags will work better than a pressure washer anyways. Especially if you want to use aftermarket, sticky backed heat shield.
I've also used lacquer thinner followed with full strength Simple Green.
You can carefully unbend the metal pointed tabs that hold the original heat shield and reuse them if they aren't rusted out.
Original type heat shields are available or use whatever you want.
Thanks Bill! I used a can of gunk, a wire brush, and sprayed it with a hose. Then I compressed air dried everything. It's a lot better, but the gunk on the top of the frame is still not coming off. I'll get it I'm sure.
Thanks for the idea for cleaning the tunnel! Acetone and Simple Green with a soft scraper are probably a the way to go. After I got it cleaned up some Saturday, I could see what you were talking about. All the tabs are there and the tunnel shield was covered in black grime. I used Gunk and gasoline to clean it up. Probably could use a new one. The tunnel, itself wasn't that bad as most of the grime was on the trans tunnel shield. What about DEI heat shield or using Frost King or Reflectix? Would that work and be durable? I saw that some guys on here have used those products. The factory tunnel shield doesn't look like it does much. Heat shields on the exhaust pipes would be a great idea too.
Did you get gear oil in your hair? I always seem to make a mess with the garage floor whenever I pulled the engine or transmission. Then again I was lazy (no rag at the end of the tail shaft).
Hahaha!! I don't think that I got oil in my hair but I wore old clothes and they got totally trashed. I had grease and black stuff all over me. I had previously used three cans of Gunk to get it ready. The problem was that it was jacked up from the side and I couldn't get the trans area clean or the tops of the mounts or frame clean at all. Luckily, this great forum had a lot of tips and one was the bag the tailshaft. So, not much in the hair but everywhere else was covered. Don't want to do this again soon though it would go much faster the second time around.
What a tough job! Last weekend, I got the Muncie out of the 67. Now waiting on a clutch fork. Clutch went out last December so it has been sitting for over 6 months. Was waiting on a lift, but, finally, I made some blocks out of wood from shipping pallets (totally free) and set about getting the trans out. Big job, but I made it. The shifter was almost impossible. I nearly gave up twice, but it was Father�s Day, and I know that, somehow, my Dad helped me in spirit or something, and everything started to click. (Dad and I restored this car 33 years ago and he passed away in 2011.) Now it has the clutch, bellhousing, and pilot bearing out. I need to insulate better on the tunnel as the heat inside is unbearable. As soon as the clutch fork arrives, I can put it back together.
Great job and now here is a post on how to lower cabin temp in non-AC cars. I just posted it in response to the above question. It will help you as you finish up.
Yes, you can lower the cabin temp by 20-50 degrees by stopping the hot water from entering your heater core. Even though you have both heater and duct controls turned off and pushed in, the heater box under the glove compartment is still getting 180 degree plus water circulating through it. It gets hot, and the glove box gets hot, the dash gets hot, the cluster gets hot and your passenger really gets hot.
Simple fix. Put a cut off valve in the hot water line to the heater box just after the overflow tank. AC cars had an automatic valve to do this , but non-AC cars did not have it.
During the summer you just turn off valve and presto, no heat in cabin.
You can use a $5 valve or a $20 dollar one. 5/8 inch hose I believe. Do not worry about coolant in heater core , just open valve once in a while or when it is chilly out.
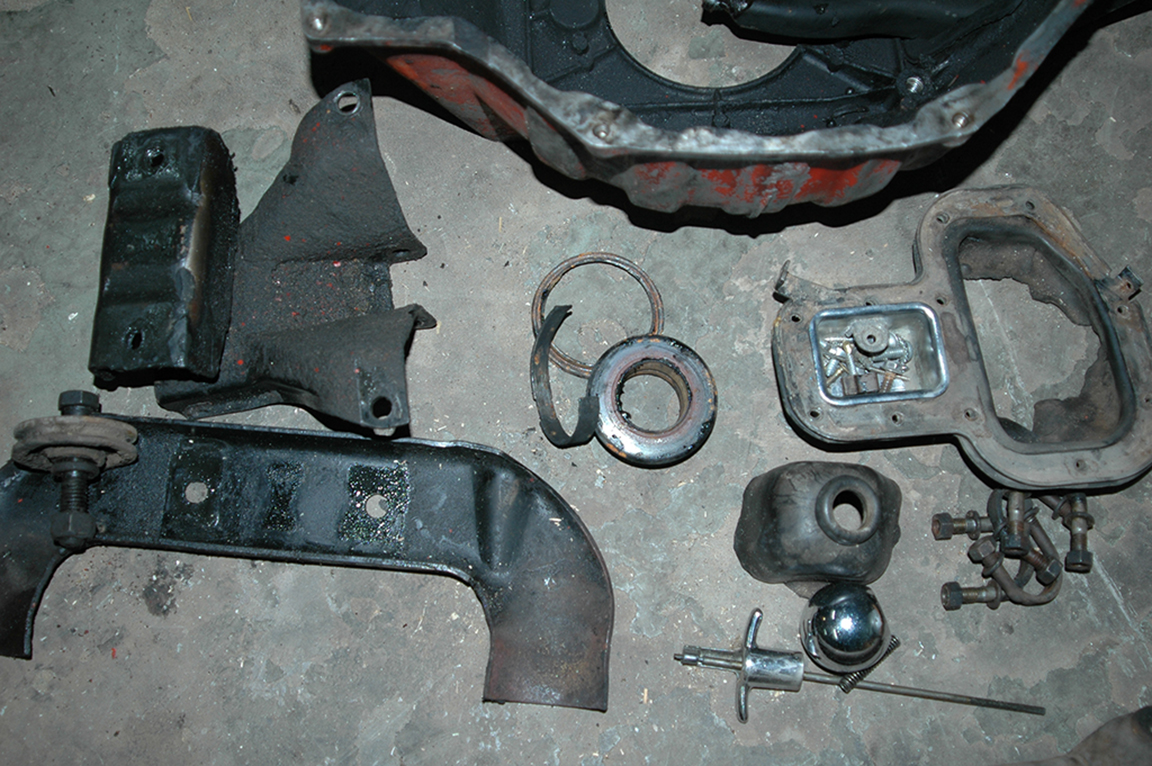
Thanks Jackfit but I have all ready done that a while ago. I also made a spacer to use a C4 fan blower which helped with the AC. As you can see from the pictures, the shift boot is torn in half and useless. One can see the transmission through the hole. I was using a towel wrapped around the shifter to block the tremendous heat from blowing straight in on me. A new shifter boot is obviously in order.
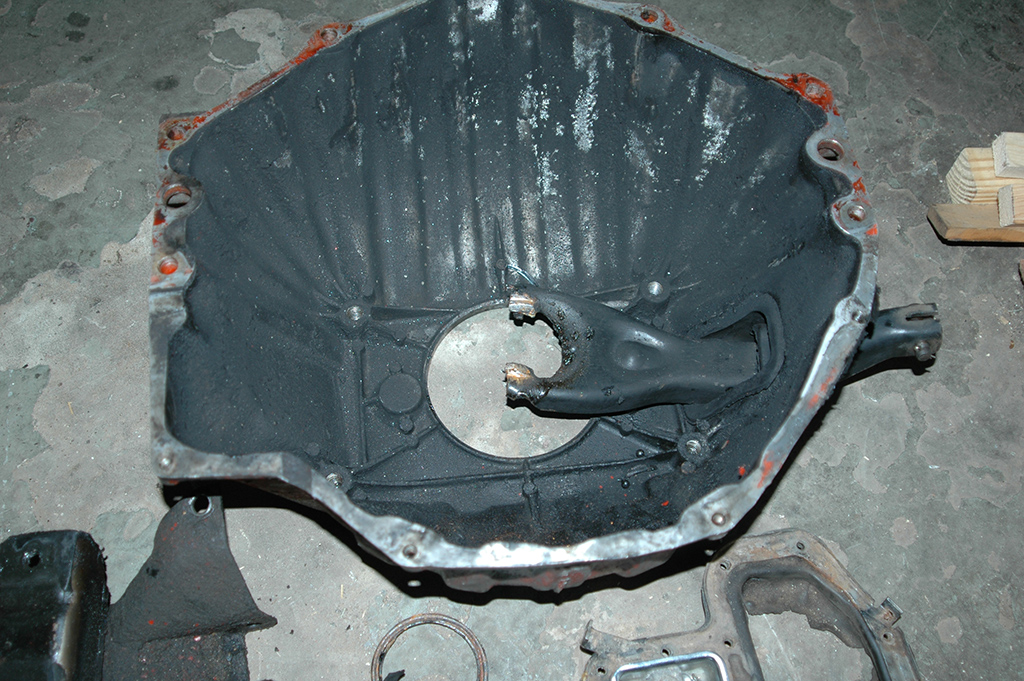
The clutch wasn't that worn at all. The throw out bearing was in multiple pieces and it had ruined the clutch fork as you can see in the pictures. These were taken just after I removed them so they are super grime covered. I have cleaned them up a lot but I'm not finished just yet with the cleaning. That stuff is tough! The bell housing is now clear of the black stuff and is aluminum color. I'll sand and paint it before it goes back on. The flywheel was sprayed with Gunk to no avail. It then soaked in a trash can with gasoline which worked pretty good. It will be off to be resurfaced in a few days. New U joints and the driveshaft will be balanced and painted too.
There is so much project creep that could happen once you get it apart as you all know. My main priority is the curtail the hideous heat as much as possible however it can be done. Thanks everyone for the support and tips on getting this done! You guys are great! This forum rocks!
I used purple cleaner on the underside to clean up all the gook. That's a technical term...gook. Spray on undiluted, wait a few minutes then scrub off with scotch bright or course steel wool. Plastic sheeting on the floor, rubber gloves and crumby clothes...a good episode of dirty jobs. No nasty fuses. On the bell housing, I paid my local shop to dip and media blast it. $20 and it looked like brand new!
Thanks Usafstingray! I'll have to look into that stuff. I have a lot of it fairly clean and I use that term liberally. Of course, now that things are out, I see all kinds of things that could be done "while I'm at it" but I would like to get it back together and running. I'll have to get some pictures of the new and cleaned up stuff before it goes back in.
Looking good, let me know when you want to come over and help overhaul the clutch in my 67.
What clutch did you decide to use? I did this 2 years ago with a LUK unit, and I liked the performance, but am having a problem with it after 900 miles (probably NOT a reflection of the product--I am sure the root cause is elsewhere in my driveline). Are you replacing the flywheel or having it resurfaced?
I'm using a Luk 04-021. I am trashing the pilot bushing in favor of a bronze one.
The throw out bearing is composite!!!! What should I get to replace it? It seems that Timken is a good one but I don't know which one to get. Does anyone know what to use for a metal throwout bearing? I am almost ready to get back on it as soon as I have all of the parts. Thanks so much for you guys help in this!!!
Anyone? This composite throw out bearing doesn't look too bad, but if it is going to cause problems, I would rather replace it now while it is all apart. Fedral Mogul? Centerforce throw out bearing is something that I would have to order and that might take a while. Any suggestions?
Anyone? This composite throw out bearing doesn't look too bad, but if it is going to cause problems, I would rather replace it now while it is all apart. Fedral Mogul? Centerforce throw out bearing is something that I would have to order and that might take a while. Any suggestions?
You might want to try a new thread on just throw out bearings.
I just got the 04-021 kit (again) and it has the composite bearing. O'Reilly had the National release bearing in stock. PN 614018. They also have the National pilot bushing, which I purchased. I didn't check to see if the one in the LUK kit is magnetic.
Worst part for me so far was getting the pilot bushing out. There was a burr on the edge of the hole, and all the grease and BFH in the world wouldn't get it out. I just ran a 5/8-18 bolt through it and it backed out just fine. Did not even need to tap it first, the bolt threaded the bushing without much effort.
 06-21-2014, 12:35 PM


 Pilot bushing. It is either a GM part from 1981 or the original one from 67 so I am sure that it is an oilite. It is non magnetic and bronze. I used the 5/8 bolt trick Thursday night to remove it. I have a Luk 04-021 clutch kit, but the pilot bushing that came with it is silver and magnetic. I found the National PB656HD (formerly Federal Mogul?) one available at O Reilly's. I think that I should probably get it as I don't want to do this again any time soon.