When you click on links to various merchants on this site and make a purchase, this can result in this site earning a commission. Affiliate programs and affiliations include, but are not limited to, the eBay Partner Network.
The past 3 1/2 weeks have between weather and Detroit Autorama put project behind schedule. Will lose 2 work days next week due to Corvette Expo also. Shop doing work, B Rod or Custom will be taking car up to Corvette Expo show this coming weekend. Shop will have the left side of car's body work finished to show off their body work to potential customers. Anyone going to Expo, stop by and take a look at car. You most likely you want have to put up with me...LOL
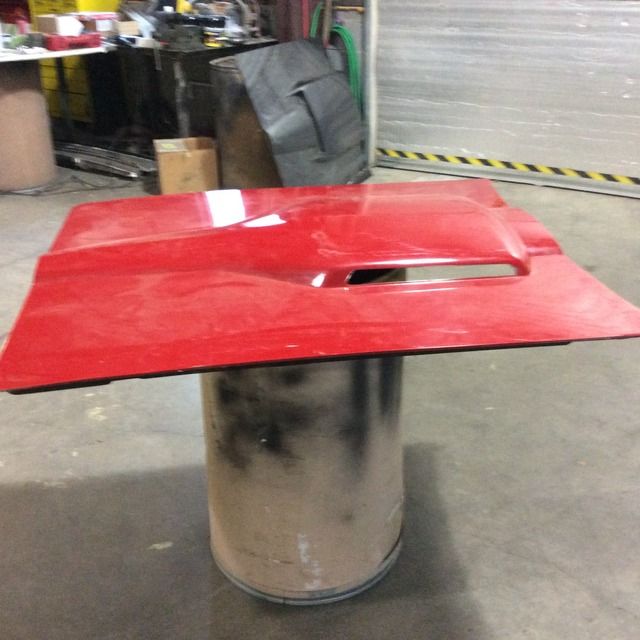
Finally got to go up to shop Friday to go over a few details and to try and come up with hood design that might work to try and give car some of a race look about it. Found that's going to be a major problem to surmount, but it trying to come up with designs changes that's what I love best about building a car.
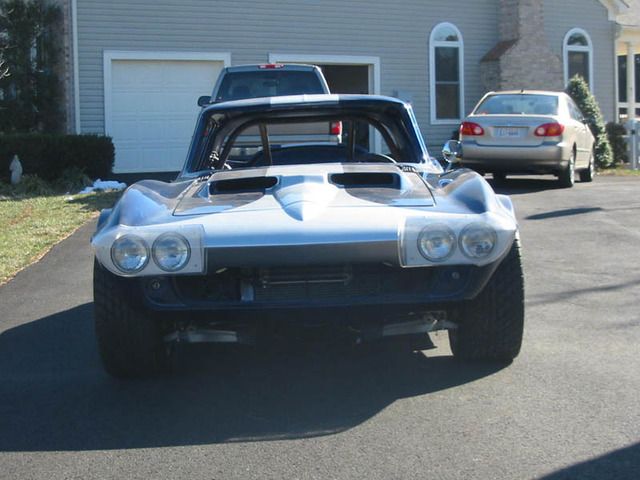
Trying to give car a little bit of a Grand Sport look with hood. Thought the 66 Big Block hood might work with modifications as it budge has low profile I'm looking for. Due to rest of it's design. I'm finding that going to be tough to do.
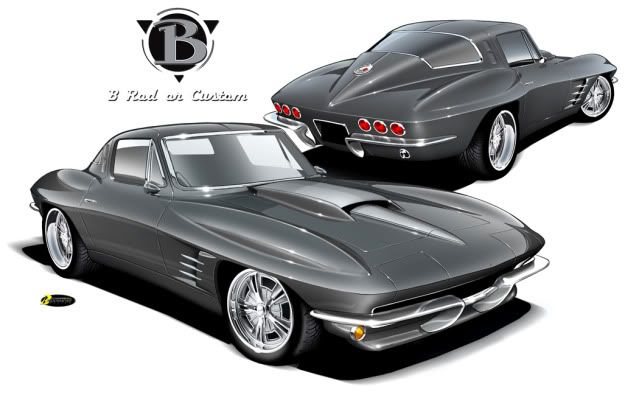
Grand Sport Hood I wanted to try and make a lower version of to short of blend hot rod/race look with something that might could have been done as with a concept car.
66 BB hood's bulge is a little short at both front and rear to give a little more of a flowing look custom look to it, so we tried a few dummy mockups for visualization purposes. Adding length to front and then to rear of budge. Think I'll be better off starting with a stock hood and pulling molds off the 66 & 67 BB hoods. Any way I think I've found a way to achieve the ugly I predicted for project... LOL
Now to what little work that has been done.
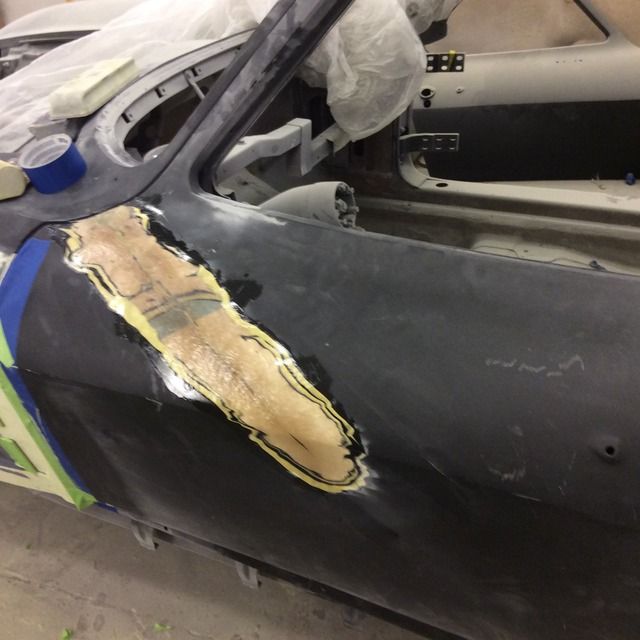
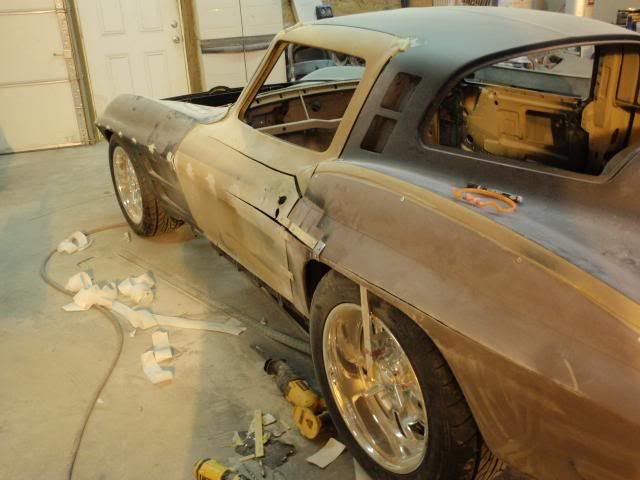
Door skin had to cut an adjusted to blend fender changes into it.
Establishing lower fender vent transition points to door.
Still need to work on rocker panel, rear of door and quarter panel intersections.
Last edited by Poorhousenext; 07-30-2017 at 12:48 AM.
The new project car is looking amazing! . . . I really like the work on the rocker panels on the sides to help blend the fenders together. You may even want to consider a thin "horizontal piece" (carbon fiber???) that runs under the rockers like the piece in the new C7 Z07 Performance Package! The new 2015 Mustang GT uses a similar piece under the rockers! I think such a piece on your car would add a modern touch. Just a thought!
We talked about adding AERO skirt again yesterday. There may not be enough conture in rocker panel to make it wide enough to add to looks.
We want know for sure until we get the rocker panel faired into body. I only want to do it if it fairs in with rocker at each end.
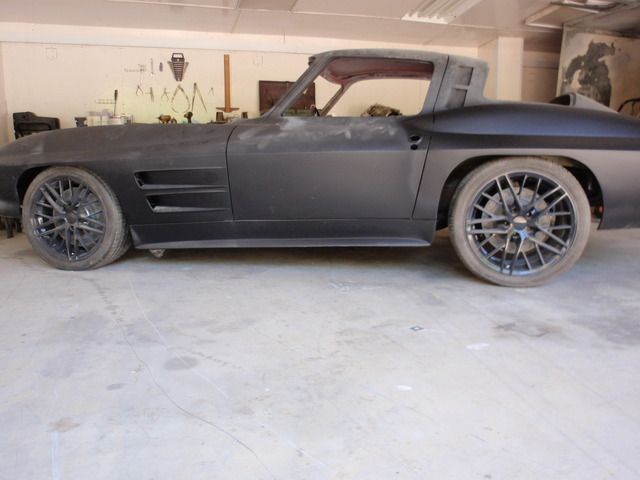
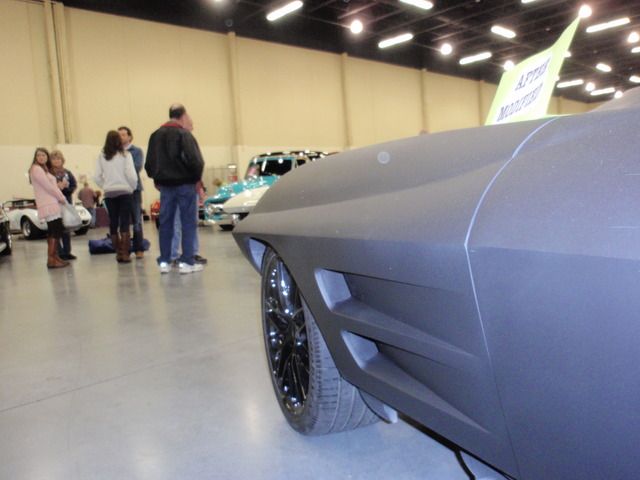
I could have done it easily with my other 64 as it has the coke bottle conture, where up until yesterday the beltline of this one matched up with a bone stock C2's. We added 1/2" outward curve to beltline at center of each wheel well opening so people just might notice body is wider than stock by taking out stock flatter look in that area.
While most people will not realise it, even if it's parked next to my other 64 coupe, it actually will have more outer body panels modified. The hope is you want see that extra 1.0" inch change to car's body with those extra modified panels.
Gone forever now is stock body betline below, even with 6C suspension and wheels offset under it. That was my orignal as well as cars former owner plan. As soon as I just had to do something about the 64's plain lower fender look that plan has gone to hell just a bit at a time....LOL
All you have to do is keep the door to 1/4 panel beltline stock, rather than have that jog in them when adding a flared 1/4 to fit over C6 wheels...
Yes I'm proud of that. It's amazing what you can figure out how to do with a piece of string after you take a long and good look at what you did the first go around.
Last edited by Poorhousenext; 07-30-2017 at 12:50 AM.
I like reading your posts and the extensive body work you have done. Dumb question, but could you have achieved a similar result by reducing the track width?
I like reading your posts and the extensive body work you have done. Dumb question, but could you have achieved a similar result by reducing the track width?
If you reduce the rear track width by moving the tires inboard, that would require re-engineering the C6 suspension parts as it's geomerty will change to fit it inside stock body. Even if you change suspension over to a straight axle that change would cost more than what it cost to do it with body work.
Doing what shop did is not something you can do at home, nor is it something most body shops can do. It takes a bodyman that can visualize how to make the cuts in panels to do it. It's not like taking one of the aftermarket flaired 1/4s and bonding it on, that can be done at home. There is nothing wrong with that, and believe me even a lot of C2 owners that have not seen restomods builds being built doing just that, will even realize the belt line has changed. People just don't pay that much attention. It's that if you've seen one C2 body, you've seen'em all mentality.
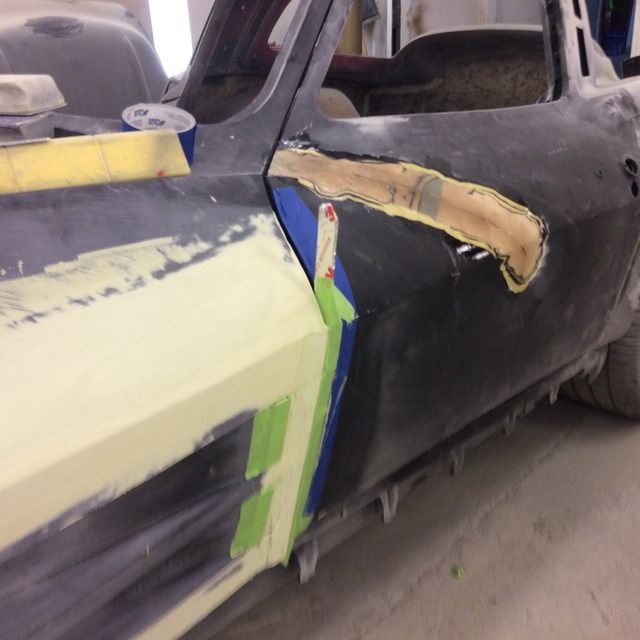
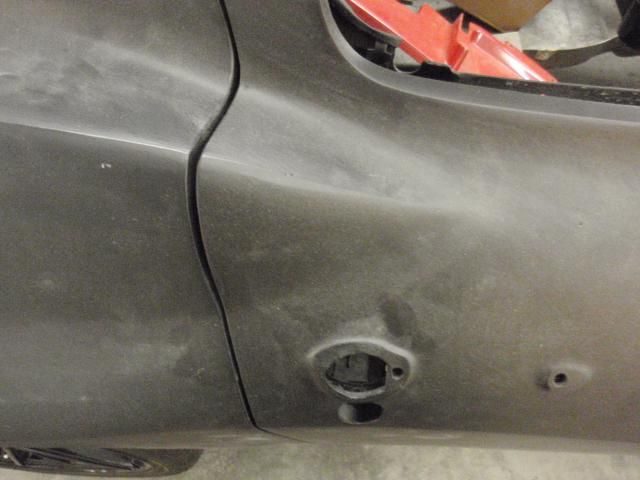
Picture of what beltline line looks like using a GTS 1/4 or most any after market 1/4. Depending on amount 1/4 is flared outward it can be more or less of a jog vs stock body's beltline. Also notice the amount of exposed tire now showing unless you move door jam outward to cover it. If you go back and look at other pictures I have posted of both builds, you'll see I'm very much into making body cover the amount of exposed tire you get due to using wide tires and wheels.
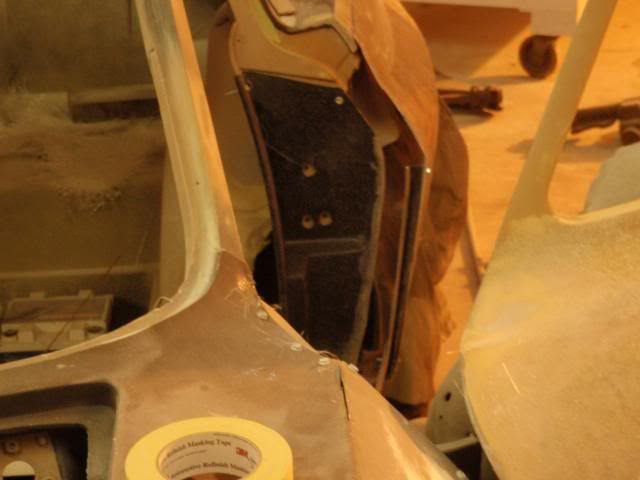
It took bodyman less than 45 minutes to see and make the cuts to door, door jam and quater panel to achieve the coke bottle contour to body after just looking at rendering of what we wanted body to look like.
Renering and picture of door and 1/4 cut to acheive contour.
Hope people understand that both I and Shop doing work, like to try and do things that others most likely have never thought about trying, much less doing.
It's out of respect for Shop that's doing the work that I'm not showing how shop did it, but it has to do with a piece of string pulled taunt or using length of welding wire. I will tell you the one place beltline is slightly off is where front of door skin mates up to rear of front fender. It's not worth effort/cost to match it up with stock belt line. But we more of less did that after I decided to flair the front fender out the same amount as rear fender to keep same front to rear balance as stock body....LOL
Last edited by Poorhousenext; 07-30-2017 at 12:54 AM.
I made this patterned after the Chevrolet engineering design for Roger Penskes daytona 66 coupe that ran at Daytona. Mine was for a small block. The center of the motor and the air cleaner base are in a different place for small block vs big block. Worked very well. Looked great.
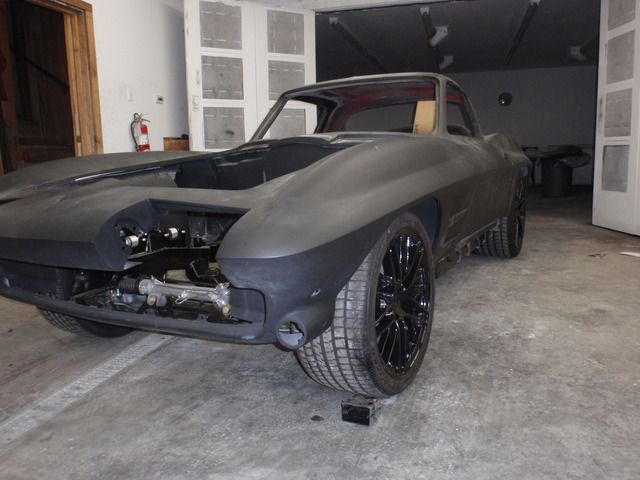
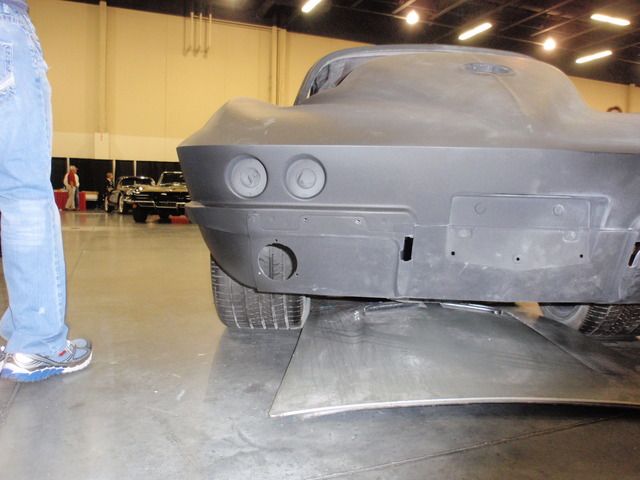
Well, might as well say we lost another week on build due to my Builder getting cars ready for car show at Corvette Expo this past weekend. He even took JimmyJoe to show a little before an after modifications between Left and Right Hand Sides, so you get to see a little of the differences between as bought and as since modified, again. I did at least pickup a stock hood to play with, and most likly use modified or not.
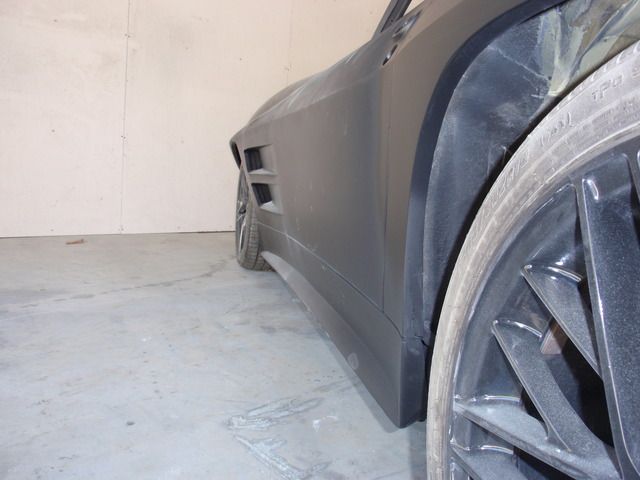
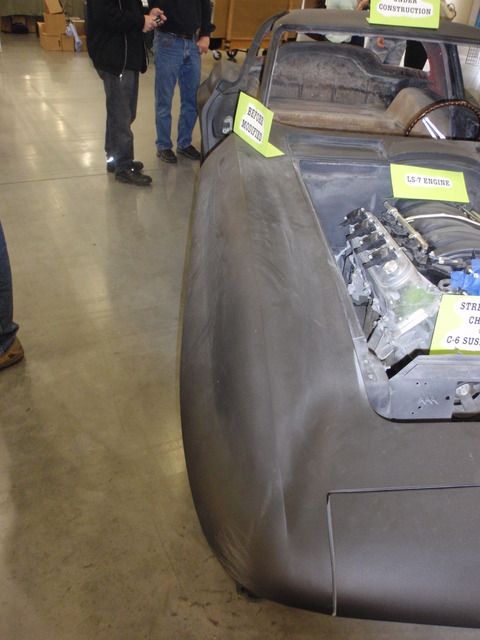
Right hand front stock fender Vs left hand modified from with from stock. You can see that after the wheel well, that the fender flair is kept wider than stock one, and that the bodylines have been made crisper to make them stand out Vs stock ones. The front fenders were flaired outward on a 1/2 away from were tire would hit on sides, while again we moved the center out 1.00" away from tire. That does allow me to mover the tire and wheel on the front outward to get another 1/2 of wheel hoop to show, while also giving the car a 1.00" wider track on the front. Unlike on my other car this mod starts at the nose of the car rather than more toward the wheel well.
This holds true with the left rear 1/4's that base flair is 1 1/2" same as rights, except we moved the center point of the flair out 1/2" more to add more contour were stock 1/4 is flatter there. That mod does not change the width of tire that can be run as it does not move the 1/4 outward any distance from where the current tire is spaced away form it, just center which is meaning less to being able to run a wider tire.
Right Front
Left Front
Right rear
Left rear
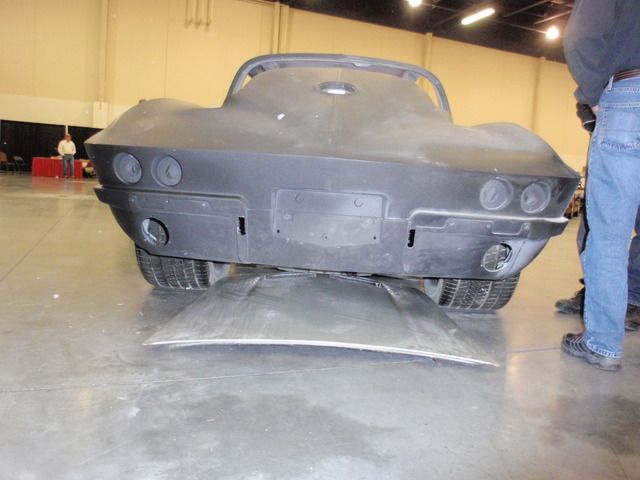
Modifing body to provide tire coverage does tend to make car look more like a Pro Street car than a Pro Touring one from the back.
Front vent mods at least lets people know car is a 64 this go around...LOL
Last edited by Poorhousenext; 07-30-2017 at 12:57 AM.
Amazing workmanship. I like the front on pic of the GS hood. Just enough attitude. Having said that, if you are more concerned about horsepower, the modified '66 BB hood that breaths cool air at the cowl is a winner. Looking forward to the work of art. Dennis
Amazing workmanship. I like the front on pic of the GS hood. Just enough attitude. Having said that, if you are more concerned about horsepower, the modified '66 BB hood that breaths cool air at the cowl is a winner. Looking forward to the work of art. Dennis
Neither hood will help me HP wise because engine isn't a carb one. Both the modified 66 BB hood or stock 66 BB hood would help relieve underhood air pressre at speed to maybe help lessen front end lift at speed.
The modified lower fender side vents will help a little with that, but not all that much. More or less, all you see is for looks when parked or pulling up to starting line...
To run 10's in 1/4 mile car needs to weigh around 700 lbs less than Lydia does with me in it, with it's availble HP of just under 400 at rear wheels. I can only hope that weight distribution front to rear is as good as Lydia's 48% front, 52% rear with me in car to help with traction.
The new project car is looking amazing! . . . I really like the work on the rocker panels on the sides to help blend the fenders together. You may even want to consider a thin "horizontal piece" (carbon fiber???) that runs under the rockers like the piece in the new C7 Z07 Performance Package! The new 2015 Mustang GT uses a similar piece under the rockers! I think such a piece on your car would add a modern touch. Just a thought!
Tom
Tom,
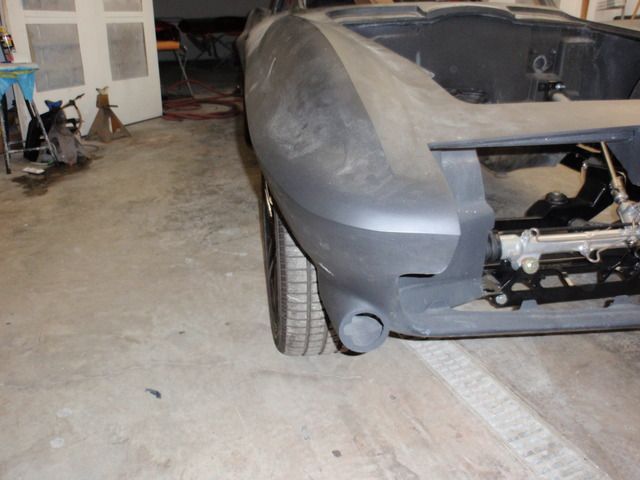
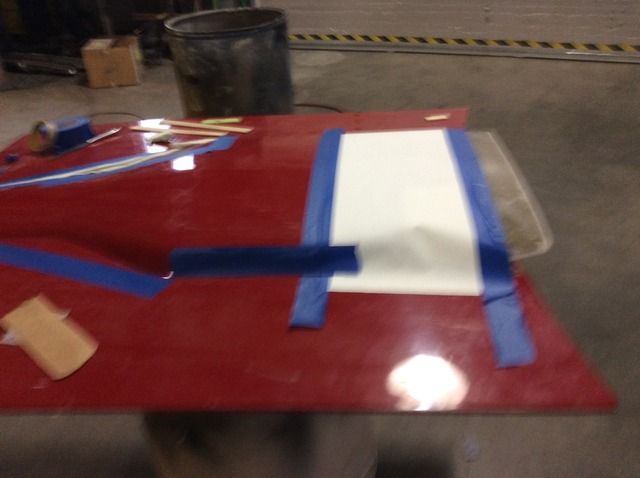
It was looking like I wouldn't be able to have much of an Aero Skirt on car, that is until builder bonded on an aftermarket piece taken off a C5 we bought up at Corvette Expo on "Plug" he's making to make a Rocker Panel Mold off of.
I had been trying to make Skirt by starting flush with Aft end of Rocker Panel. Problem with that is it made for a very thin skirt even at it's widest point.
When I saw that C5 trim piece was sticking off Rocker about 3/4" at rear, I realized that we could change the look of the Rocker so it didn't look like one on my other 64 Coupe. Then I had to convince my Builder it would work. Hence you use what every you can find to dummy up a Mockup to show him what I wanted. Had to fight hard to get him to understand skirt needed to end at front of Rocker not just aft of it...LOL.
Pictures he sent me asking what I thought about using the C5 trim piece. Pics got me to drive 136 miles one way and meet him at his shop at 6:00 PM in evening to talk and work out a plan for what I wanted instead.
C5 Trim Piece
Using what I could find laying around to show builder what I was looking for.
Skirt will be part of rocker rather than Bolt/Stick on, so no high dollar Carbon fiber pieces. The rocker should have a look of it's on Vs looking like rocker on my other 64 coupe too.
Skirt will taper down to point on front end of rocker rather than letting end stick out in air like rear. Rear end most likly have a kickout running up rocker at rear that will knock air flow off what of rear tire is sticking out away from body in airstream.
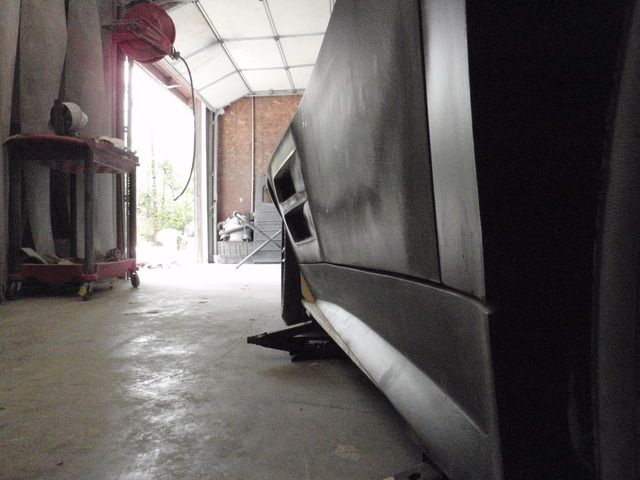
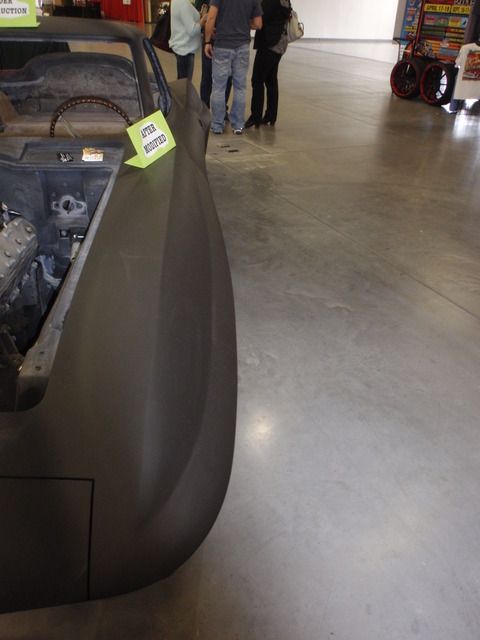
Your just looking at what bottom side of skirt will look like. It's not very wide even at it's widest point.
Closest Aftermarket Set of Skirts I could find that skirt should resemble. I used picture to try and get my Builder to see look I was after. Should know by end of week if I got message across on look...
Last edited by Poorhousenext; 07-30-2017 at 01:00 AM.
After being able to stand back away from car and look at vents as well as studing pictures and view vent treatment, it doesn't drawn your eyes to it. Very sterile/stark/bland look to it.
We are going to try and change that by adding a small radiused lip to edge of each opening. Hope is this will soften look as well as outline the opening more once painted to get people to notice body's change from stock.
I hope that it will be completed by next week too, as change will require the lower fender vent tretment to have to be re-scaned to produce mold for Right Hand side vent. Builder has found machine shop that will CNC mill Plug to make a mold for laying up part off of so that helps.
Originally Posted by CWerner
Great progress. Keep the pics coming.
I do wish we had made great progress, but fact is there is over 8 weeks lost for one reason are another. Lost 2 days this past week, Thursday and Friday due to Spring Pigeon Forge Spriing Rod Run. My builder is displaying another build there. All are nearly all the body work should already have been completed.
We still have to work out design for front spoiler. It will be based off the one on my other 64. It want fit this car, an I want to try and change design of it anyway to see if I can use it to do away with the amount of front tire that's showing outside of body front fenders.
I want to try doing that without taking away from body's orginal Frontal design by just trying to outline it with the spoiler. Run the chance of making frontal area look to wide and Blocky doing this, an I don't care for that look, so spolier may end up with the same base look as my other's 64's an I had rather this car have it's on look to it.
I'm widening the car's front wheel track by 1.00", 1/2" on each side with wheel offset change to match up with flaring of front fenders out to match change to rears, so I'm going to have more tire showing than I do now.
Last edited by Poorhousenext; 07-30-2017 at 01:01 AM.
Some times you don't see the entire picture when looking at things.
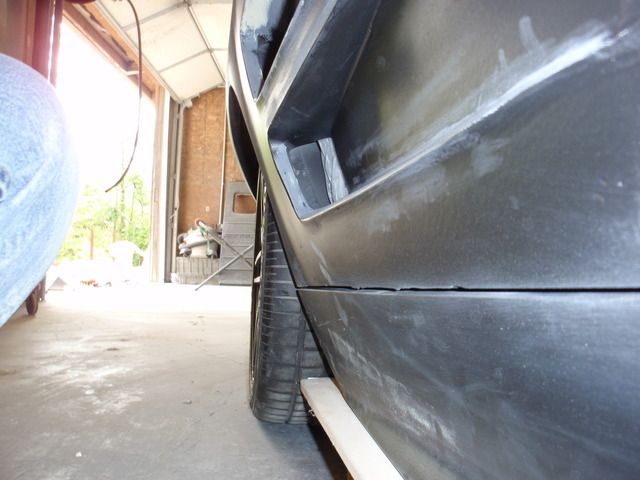
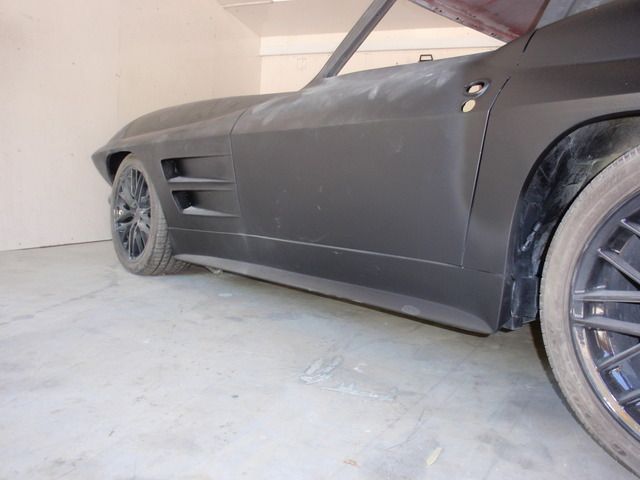
That's exactly what happen trying to add Aero Skirt to Rocker Panel. Think we did ok on rear of panel, but we tunneled in on how to end Skirt in relation to Rocker Panels lower forward end, rather than considering how it would look in relation to front tire.
I should have seen how the Rocker Panel was really flowing inward on front end due to following contour of front of lower fender. Lower bottom end of Lower fender without rocker is ok in relationship to front tire for coverage. Add the rocker an the lower front end of it sits to for inward for providing tire coverage.
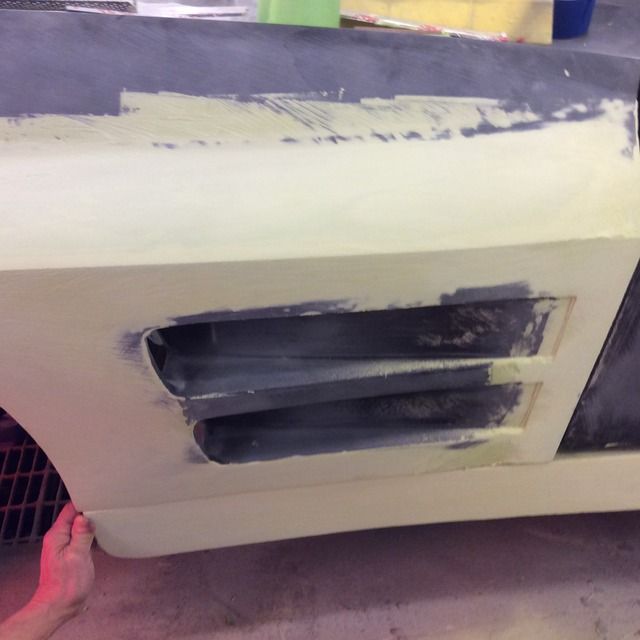
You may notice the small radius lip added to lower fender vent opening in some of the pictures. Work on them is not finished yet, We think it does what we hoped it would, Soften up the looks of them, and when painted should outline them and make them standout so hopefully people will pay some attention to them
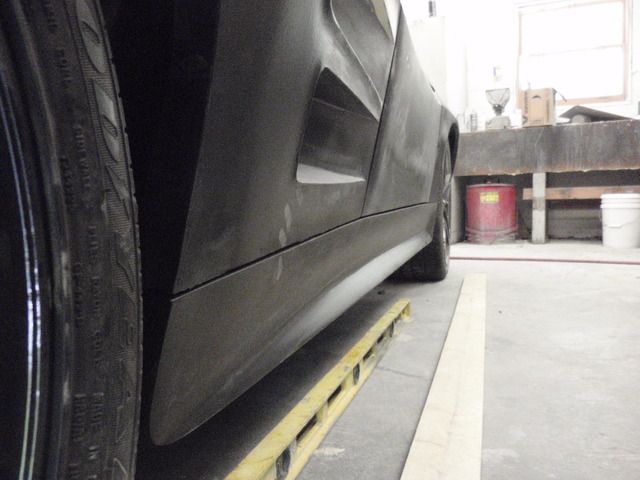
Aero skirt as is it now looks.
Problem and fix I hope turns out to look ok. If not, I just hope people want even notice, which is a real possibility.
Fix. Add a kickout on front of rocker's aero skirt lined up with tire grove , similar to one on aft end of rocker.
Last edited by Poorhousenext; 07-30-2017 at 01:03 AM.
I did say in the title, Loud, Proud & Ugly. I think I'll be able to achieve all 3 of those, leaving only the possibility of failure, turning in 10's in 1/4 mile with under 400 RWHP on street tires with this project.
I signed off on what we've done on the drivers side of project today. Shop will start duplicating design on passengers side as soon as Drivers side is scanned and scan data use to machine plugs for molds for front fender, vent and rocker so we can make parts.
That leaves trying to design a change to front spoiler use on Lydia so it warps around lower part of fender and kicks upward so as to try and knock of as much air as possible from hitting the exposed part of front tire. No sense trying to have a Rocker Panel with an almost Aero skirt built in to try and keep air off rear of tire and underneath from flowing up and down side of car creating drag on it. Then the hood, that I'm trying to figure out a design for that will play into trying to give car a little more of an attitude toward looking like car was built to be competitive on Strip/Track/Street.
What I'm/we are doing design wise will never be that useful, it's just done to try and make sure that when both of my 64s are parked near one another you want see the same car, but if you pay attention to design of each you will the see similarities between their designs with changes to some parts of it.
Little late with this, but if you ever see something that doesn't look that good to you, or an idea how that something's looks could be improved, speak up as I have no problem with that. Just might improve look of car, or give others an idea for their project's design.
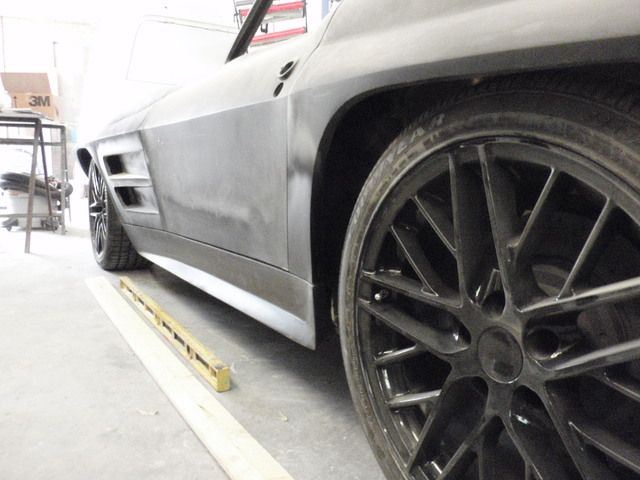
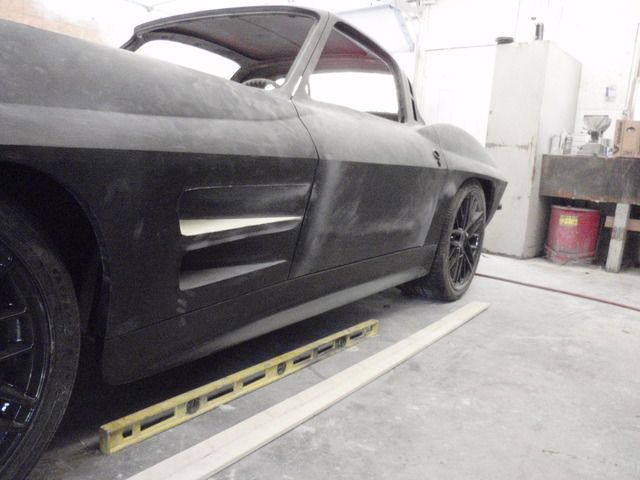
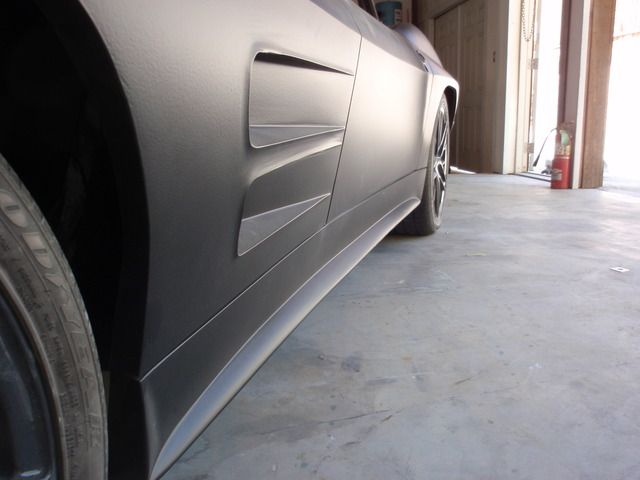
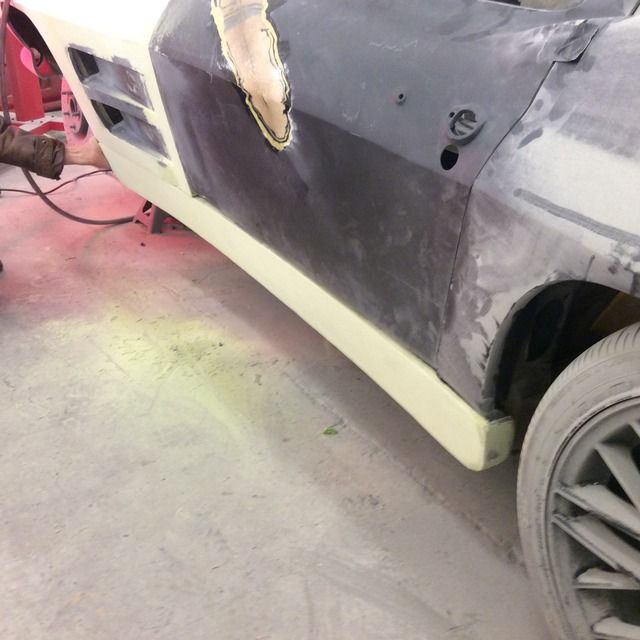
Now for up date on how Rocker Panel with Aero Skirt turned out as well as adding radius lip around each vent opening. The shop came close enough to what I was looking for on front of Rocker Panel I've bought off on it, rather than have them make change to make front kick out on rocker be straight up and down as I'd requested.
Reason why, they went ahead and built in extra tire coverage to cover the exposed tire that will be created when I put wheels on front with 1/2" offset that will give car a 1.0" wider front wheel tract than it has now. Shop kicked front of rocker outward 1/2" at bottom then added kick out to rocker, along with making the aero skirt part of it fatter. They just didn't keep kick out straight up and down as requested, so it has a little angle to it, that I'm willing to live with.
Last update Rocker panel change request.
Final result(s)
Looks like the radius lip will refract light off it's painted surface so people will notice change.
Last edited by Poorhousenext; 07-30-2017 at 01:05 AM.
 03-14-2015, 05:01 PM


 The rocker should have a look of it's on Vs looking like rocker on my other 64 coupe too.