Convertible soft top plastic window polish
 01-31-2015, 12:02 AM
#1
Drifting

Thread Starter

Member Since: May 2006
Location: Santa Barbara California
Posts: 1,842
Received 139 Likes
on
83 Posts

I have a few marks ( not deep scratches) in a soft top window I have. Are there any recommendations for a rubbing compound and/or polish that is effective but not too abrasive?
 01-31-2015, 12:13 AM
#2
Race Director


You can try Einszett Plastic Deep Cleaner.
01-31-2015, 03:30 AM
#3
Drifting

no expert here, but my experience with the flexible plastic windows in soft tops is that when you try some magic cleaner, it usually soon results in the clear plastic clouding over, so only attempt it realizing the risk.
01-31-2015, 06:38 AM
#4
Burning Brakes

Member Since: Oct 2001
Location: Cape Coral Florida
Posts: 1,054
Likes: 0
Received 7 Likes
on
7 Posts

I was told by a automotive glass man that the head light restoration kit would work. I have not tried it, so it would be best to experiment with a small area first.
01-31-2015, 07:07 AM
#5
Race Director
Member Since: Mar 2009
Location: Canada's capital
Posts: 19,777
Received 4,583 Likes
on
2,157 Posts
2020 Corvette of the Year Finalist (appearance mods)
C1 of Year Finalist (appearance mods) 2019

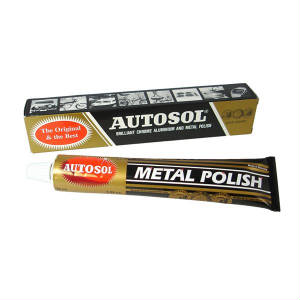
I tried Autosol on an old top widow for fun and was amazed that it worked. It's a metal polish in a tube, but I've used it on glass, plastic, soft metal like gold, and it doesn't leave scratchs. Just use a very wet cloth and a little dab of it on the window and be gentle. It works.
01-31-2015, 07:09 AM
#6
Safety Car

I've used Mother's Aluminum Polish for many years on hard plastic lenses and it works great. IIRC I used it on my '59 ST window before with good results. Then I used a specialized soft window cleaner/polish(I forget the brand) and it brought it back to life.
Rich
Rich
01-31-2015, 07:41 AM
#7
Team Owner


Member Since: Apr 2008
Location: Coloring within the lines
Posts: 27,351
Received 1,920 Likes
on
1,333 Posts
I used to use Brasso to polish plastics, and it worked great. However, I would research it before using it on my soft top plastic window.
 01-31-2015, 07:46 AM
#8
POSSE ZR-1 Driver

I use a convertible plastic window cleaner from BMW parts department. Not cheap, but it works great. Removes the yellow age tint and minor scratches.
01-31-2015, 07:52 AM
#9
Team Owner


I've used McGuiar's PLASTX on the rear soft top window with good results.
Even got out some pretty heavy scratches that I thought were permanent...
Even got out some pretty heavy scratches that I thought were permanent...
01-31-2015, 08:38 AM
#10
Racer

 01-31-2015, 09:21 AM
#12
Team Owner
BTW - NEVER use a paper towel on those rear windows and I never wipe 'em when dry either. Dust 'em off, use a soft cloth (an old T-shirt is good) and some light cleaner...

 01-31-2015, 10:50 AM
#15
Melting Slicks

Even though I'd planned to replace the top this year, last summer wanted to see just how well I could possibly buff the very scratched, scuffed and yellowed plastic window. My Al Knoch top was installed locally 13 years ago and not well (too tight, shrunk too much.) It's now worn through and pulled apart in places. Since it was going to be tossed anyway, I was free to experiment aggressively, and it came out looking like new.
I started with headlight polish using Adams foam buffing pads on a drill. Using Adams foam focus pads with their Paint Correction and Revive Polishes - even 2000 grit wet sandpaper by hand on firm foam blocks for the deeper scratches, I kept working with finer and finer polishes up through to PlastX, which I now use to maintain it.
Tips:
- First thought about taking the whole top off but decided I'd need to work with in on the car as it's really the only way I could keep the window stretched and see the results as I buffed.
- I had someone on the opposite side hold firm a large but not too thick hardbound book wrapped in thin white terrycloth against the window as I worked by hand and with the drill buffer. This really helped provide a flat stable area to work against and minimized any stretching from the inevitable heat and pressure of polishing.
- Cleaned the decklid but wrapped it first in a thing but durable bedsheet cloth. You'll be hitting the decklid a lot with the back of the drill or buffer.
- Used a high speed Dewalt cordless but was careful not to let it spin too quickly lest the frictional heat cause ripples or worse. Went through a couple of batteries so start with them fully charged and ready to use, getting them back onto the charger soon as they are near spent.
- Keep moving and surface moist - Never stay too long in one spot and keep the surfaces cool and well lubricated. I used a diluted mix of Adams detail spray and water.
- Even though you'll want focus on selected problem areas - try to keep going over the entire area and build up. An unevenly polished area looks worse than an evenly scuffed surface.
- Tip the seats forward and put a board and blanket down so you can sit inside the storage area facing back, your legs under the decklid.
- Be ready for splatter. Its inevitable with all the water and polishing pastes/powder you'll get sling everywhere. It's a good idea to polish the window before any planned car both polish or interior cleaning is done. IF you just let the splatter dry first it will be easy to wipe and vacuum away. Resist the urge to wipe splatter while wet!
- Keep your polishes in a small plactic bucket. It's easy to tip them over or even sit on them as you move around. Ask me how I know!
Last edited by PaulUptime; 01-31-2015 at 10:53 AM.
01-31-2015, 11:33 AM
#16
Team Owner
Member Since: Apr 2008
Location: Coloring within the lines
Posts: 27,351
Received 1,920 Likes
on
1,333 Posts
Archiving this thread for my spring clean-up.
01-31-2015, 03:59 PM
#17
Team Owner


Member Since: Oct 2000
Location: Washington Michigan
Posts: 38,899
Received 1,857 Likes
on
1,100 Posts
If you're near an airport, nearly every FBO carries the "Novus" line of cleaners and polishes for Plexiglass aircraft windshields; it works!
01-31-2015, 05:21 PM
#18
Melting Slicks

