When you click on links to various merchants on this site and make a purchase, this can result in this site earning a commission. Affiliate programs and affiliations include, but are not limited to, the eBay Partner Network.
What is the best way to restore the high HP finned SB cast aluminum valve covers?
I want to preserve as much as possible their original factory appearance. I've seen folks that polish these to a high gloss, and this does not look correct to me. Others seem to paint the covers with some sort of aluminum paint, which looks okay, but I'm not sure if the finish would last over time.
Which process/technique is best?
Another option would be to buy new (repro?) ones from a vendor. But would these valve covers be correct in appearance? I see that Paragon sells them - anyone care to comment on their quality and correctness?
I, too, am looking for info on this. I'll tell you what NOT to do. Thought I had a good idea on how to clean them up and put one in the dishwasher. It turned black! Now I'm trying to find something that will remove the baked on oxide.
The new repo valve covers have the casting flaw. From your profile it looks like you have a 67. The new repos would be correct.
A second option would be to send them to Jerry McNeish in Maryland. He has a reskining process that works well. I had mine done last year. Now I'm waiting for him to finish my exhaust and intake manifolds.
Jerry McNeish is the 'guy' as far as this goes. His reskinning process gets things back to near original but not EXACTLY like original. He's done several sets for me.
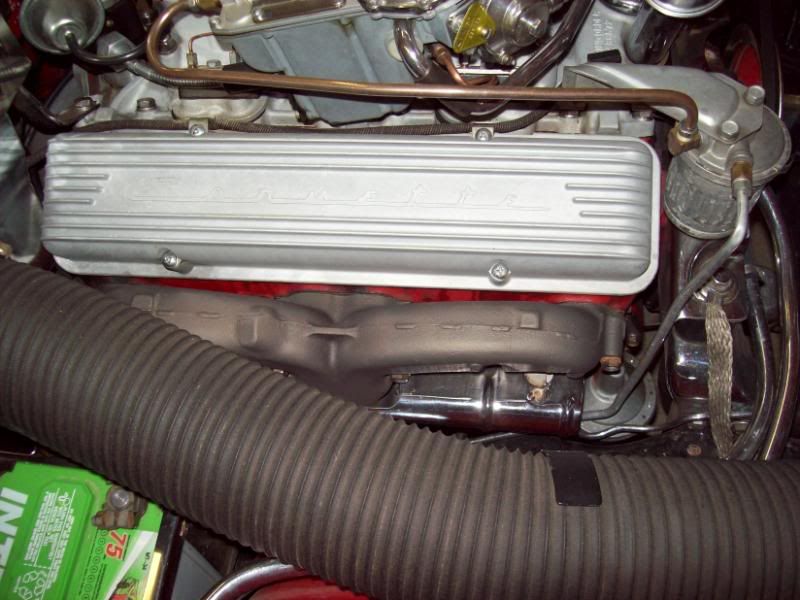
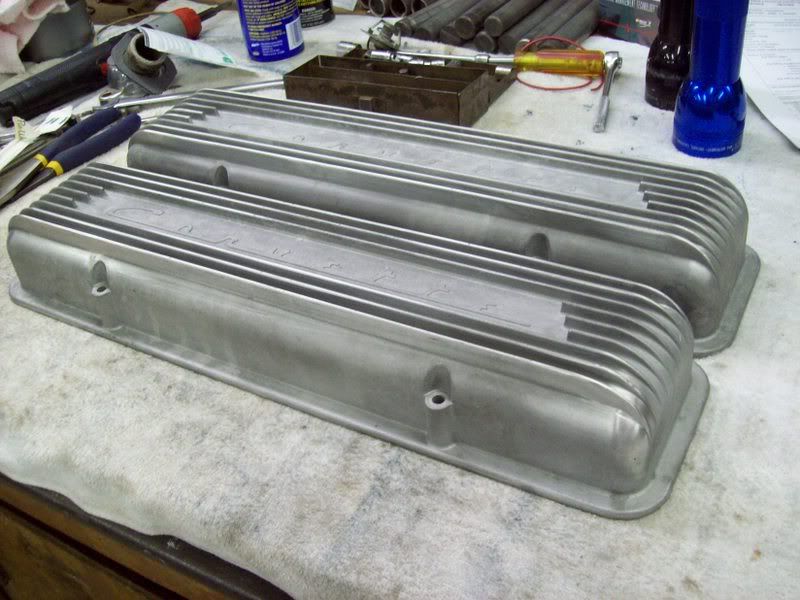
If you ever have the privilege of seeing pristine original valve covers though you'll see his process is close but not perfection. The first pic is one from Jerry straight out of the bubble wrap; next pic is untouched originals. Third pic is my work refinishing another set of covers with Alumi-Blast.
Alumi-Blast can produce very acceptable results if you aren't a stickler for that "perfect" finish; and yes your car's covers should have the 'casting flaw' through the letter "o".
I haven't seen the repros so I can't comment on them
Last edited by Frankie the Fink; 03-31-2015 at 08:05 AM.
The new repo valve covers have the casting flaw. From your profile it looks like you have a 67. The new repos would be correct.
A second option would be to send them to Jerry McNeish in Maryland. He has a reskining process that works well. I had mine done last year. Now I'm waiting for him to finish my exhaust and intake manifolds.
Bob K.
That's what I did. They come back looking original.
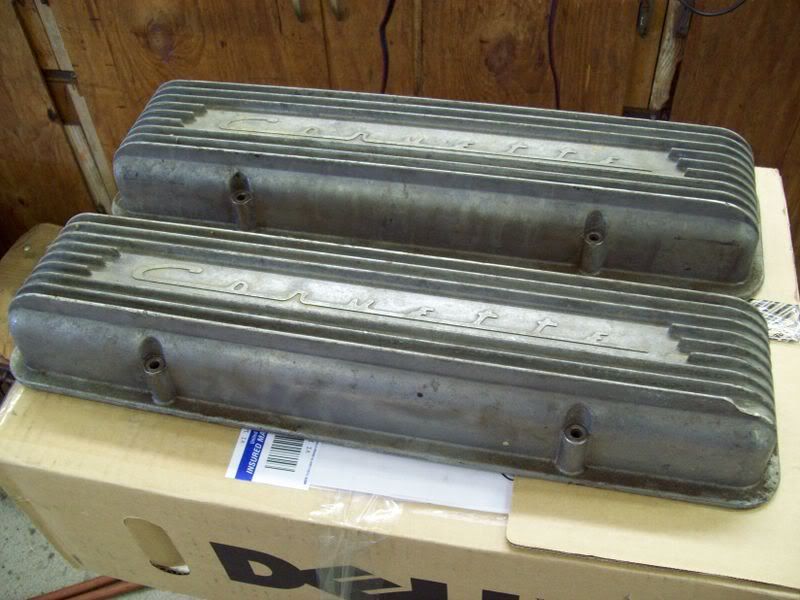
For NON-NCRS applications, I do my own. Over the years, I have bought some damaged/cracked/broken fin covers that I have had welded and repaired. To have ANY welding done to these covers, you need to find a welder that is VERY experienced at welding alum. I even wrote an article on repaired covers and it was published in the NCRS mag a few years ago.
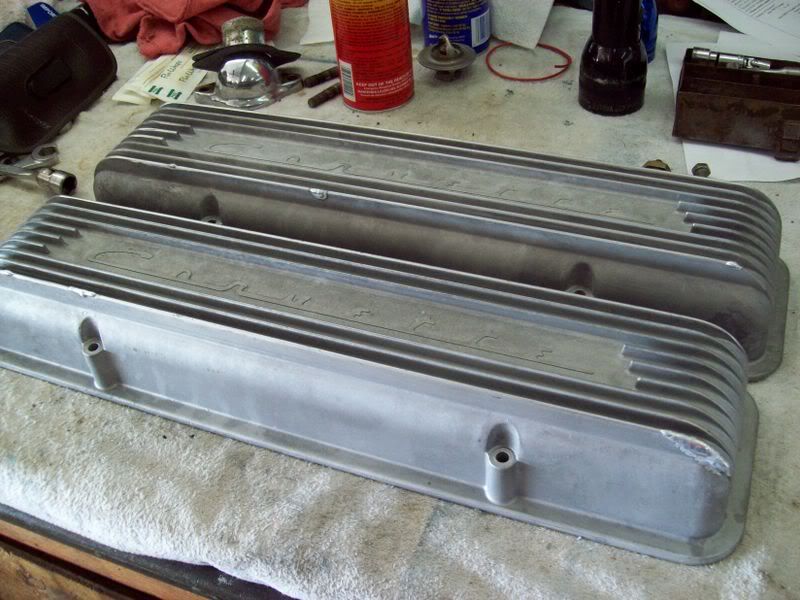
Below is an example of some damaged 9fin covers which I bought for a song. Then after welding repair, is the same covers when I finished with them.
After they are welded, I use a 3M buffing pad (fine) and a 90deg die grinder to work down and smooth the welds (VERY carefully, lots of care and LOTS of patience is required!!!). Then I LIGHTLY blast them with glass beads. I have a friend who owns a wholesale auto detail supply business and I get an alum brightening solution from him in 1gal jugs which I dilute about 3:1 with water. I think it is primarily a phosphoric acid chemical. I submerge the covers in the solution until they begin to foam, quickly remove them and rinse them off with my power washer using hot water. The last picture is the result.
For a more correct finish, after doing all the above, I send them locally to Fred Hudson (he does about the same thing as McNeish) for finishing. Fred is the person that Jerry Bramlett uses for refinishing FI parts.
Here is what they look like after Fred finishes them (this is on my 56).
Jerry McNeish is the 'guy' as far as this goes. His reskinning process gets things back to near original but not EXACTLY like original. He's done several sets for me.
If you ever have the privilege of seeing pristine original valve covers though you'll see his process is close but not perfection. The first pic is one from Jerry straight out of the bubble wrap; next pic is untouched originals. Third pic is my work refinishing another set of covers with Alumi-Blast.
Alumi-Blast can produce very acceptable results if you aren't a stickler for that "perfect" finish; and yes your car's covers should have the 'casting flaw' through the letter "o".
I haven't seen the repros so I can't comment on them
Thanks Frankie - looks like Jerry indeed does a fine job! Dare I ask how much he charges to restore a set (2) of valve covers?
Paragon wants $72 per repro valve cover. They claim these are produced from the OEM tooling, including the casting flaw which is correct for '67.
Where can I get the 'Alumi-Blast'? I assume this is a spray bomb easily applied DIY style?
Thanks DZAUTO - thanks for posting the photos of the fine job you do in restoring your aluminum valve covers!
My covers aren't damaged (e.g. broken fins), they just look rather 'dirty'. I'm not looking to restore them to NCRS standards as I suspect Jerry B./Fred Hudson charge a pretty penny for their work.
How do the covers look after glass beading? Are you saying that this finish is an intermediate step, or that the covers would quickly oxidize and turn blackish unless they are coated with something?
I'm leaning towards the Aluma-Blast as a compromise method to improve the appearance of my valve covers without the expense of the full NCRS quality restoration.
Alex,
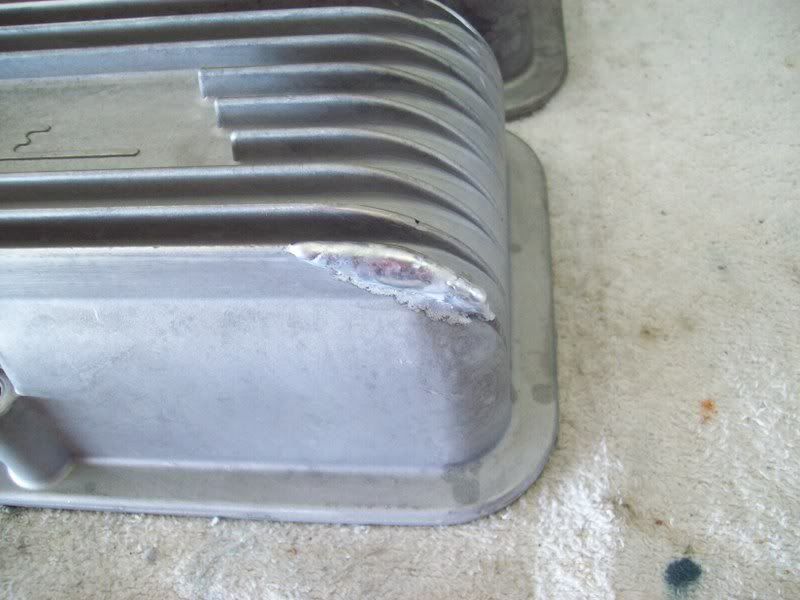
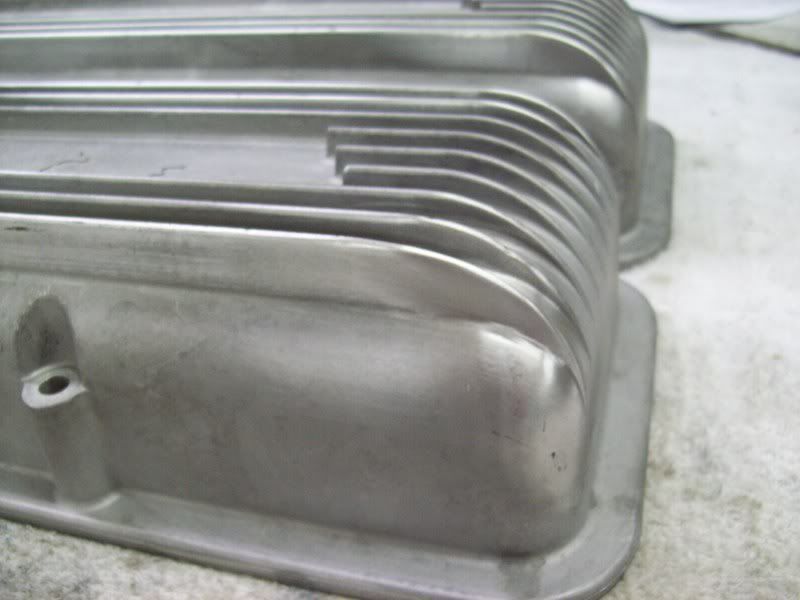
I VERY LIGHTLY glass bead them in my blast cabinet, just enough to clean them up and even out the finish. Then I submerge them in the alum brightening solution that I mentioned above and rinse them with my power washer. Simply rinsing them off in hot running water is NOT adequate, they need to be rinsed with high pressure water to get the solution out of the pores.
Below is what they look like after light blasting with glass beads.
Below is what they look like after I power rinse off the brightening solution. NOT NCRS perfect, but much better than what they looked like when I got them.
If you want a more or less NCRS correct finish (and after all these years, just exactly who is to say what a new 1950s finish looked like???????), then let McNeish or Fred Hudson finish them. I have Fred's covers on the 56 and I'm totally happy with them (last picture in my above comments).
I, too, am looking for info on this. I'll tell you what NOT to do. Thought I had a good idea on how to clean them up and put one in the dishwasher. It turned black! Now I'm trying to find something that will remove the baked on oxide.
If you used the heated drying option (assuming your dishwasher has that), maybe that's where things went wrong. If you'd pulled them out right after the rinse, I wonder if your idea might have worked out.
If you used the heated drying option (assuming your dishwasher has that), maybe that's where things went wrong. If you'd pulled them out right after the rinse, I wonder if your idea might have worked out.
Steve
I think you're right. Some said it was the soap but I think it was the drying cycle. Whatever, not going to try it again, it was very difficult to remove. Brasso was the only thing that would cut it.
Another question or two, which covers had the casting flaw, staggered holes or non-staggered? How can one tell if they have originals or repos?
The one cover that turned black in the dishwasher also has a cracked flange. The other looks good so, unless they are originals, I'll just replace the cracked one with a repro.
The casting flaw started in 1966, six years after the "staggered" covers went out of production.
The "repos" were actually the production-line parts in the 60's, but the (cracked) die-cast mold was aging rapidly and was taken out of production. The mold is now licensed to Paragon, who sells several versions of the covers, with varying degrees of manual rework for appearance and elimination (or not) of the casting flaw.
 03-31-2015, 01:39 AM