When you click on links to various merchants on this site and make a purchase, this can result in this site earning a commission. Affiliate programs and affiliations include, but are not limited to, the eBay Partner Network.
As I continue with preparation for painting I want to refine the adjustment of my headlight buckets. I have read a number of threads on the forum and see that I can adjust open/close position with the bolts and "y" piece, adjust side clearance by changing the location of the shaft collars on both sides of the bucket, but is there an adjustment if the bucket is either slightly skewed (up and down)? And what about the top rear of the bucket relative to the front deck right in front of the hood? Have attached some pictures.
Plan on taking the buckets out and also opening the motors/gears to see if they need to be serviced. As you might guess both sides run at different speeds, etc.
Thank you, Jeff
outboard and inboard feature lines don't quite match body
outboard needs to be lowered a little, inboard pretty close
No worries, lots of adjustment available by loosening the 3 bolts on each side of the bucket. Those bolts secure the pivot ball housings to the "end plates" of the nose openings.
Now there's one bolt that looks impossible to get at, but the trick is to remove the motors and Y-stop so you can rotate the bucket and line up the access hole with the hidden bolt.
Looking at your photos, you should be able to get everything near perfect.
Last edited by Mike Geary; 10-31-2016 at 02:20 PM.
One more question, after I adjust placement so I'm happy with it I plan on removing the entire assemblies for painting. Will I be able to "save" these adjustments when it comes time to re-install or will I need to go through everything again?
take photos of bolt positions so you have a fairly good idea of where to start when installing. Also when installing painted bucket, mask bucket with yellow painters tape and area around bucket,Supposed to be used over fresh paint
One more question, after I adjust placement so I'm happy with it I plan on removing the entire assemblies for painting. Will I be able to "save" these adjustments when it comes time to re-install or will I need to go through everything again?
Don't know of a way to save your settings in a precise way.
At this stage you are basically verifying you can get a decent alignment without any body work. If your nose is no-hit, you should be in good shape without the need to massage the opening.
My convertible needed a bunch of nose rework (including breaking loose the end plates) and I was able to get it pretty decent. The gaps turned out tight because I didn't allow enough for all the coats of primer/sealer/lacquer that went on. I should have set them at 3/16" before any paint. The buckets do not rub, thankfully.
Your question about saving adjustments brought to mind how to save your door adjustments for final assembly. Drill 2 holes in the hinge plates to accept 8d nails (this is inside the door of course). The nails will serve as locating pins during reinstallation. I also shoot the hinge area with some black paint to record exactly where the hinge plate sat on the inner door metal.
I can see now there really is no saving adjustment settings. Ended up removing entire assembly. What a mess. Need to take everything apart and thoroughly clean it and re-grease before I can put it back in and check fitment. However my preliminary take was I can't get quite enough travel to align front feature line and rear surround. Much closer but it seems like I'm about 1/16" to 3/32" shy. Bolts are hitting bolt holes (or pivot shaft is touching). Have you ever heard of enlarging holes a bit? I think if I could get a little more travel I could get a good fit.
Anyway I will clean everything up and reinstall before doing any hole modifications.
How do you get the outboard shaft off? With electrical plugs on both ends it seems the harness will not come out. Please don't tell me I have to take the connectors apart.
Outboard ball was frozen onto the shaft so it turned with the shaft. Maybe that was OK.
Elongating the holes a bit won't cause any problems. If all else has failed, that's the next option.
On the headlight "extension" harnesses -- yes the spade contacts must come out of the plastic connector body (bucket end).
They contacts are retained by a bent tang must be depressed (from the mating side of the connector) with a tool that's like an ultra slim screwdriver. With that tang depressed, the contact/wire just pull out the back.
Don't know of a way to save your settings in a precise way.
At this stage you are basically verifying you can get a decent alignment without any body work. If your nose is no-hit, you should be in good shape without the need to massage the opening.
My convertible needed a bunch of nose rework (including breaking loose the end plates) and I was able to get it pretty decent. The gaps turned out tight because I didn't allow enough for all the coats of primer/sealer/lacquer that went on. I should have set them at 3/16" before any paint. The buckets do not rub, thankfully.
Mike, now those are about the finest looking headlight gaps I've seen in a very long time. They sure as hell didn't come from St. Louis fitting that nice!
One question ... did you paint the car with those buckets out and then re-install them after, or after you had them in there and all adjusted? Bill
Thanks Bill. This was a lacquer job, so I shot a couple of coats with the buckets loose and then installed them for the final 3 coats.
For BC/CC or single stage urethane, I'd probably shoot the bucket sides, and nose sides first. Then install the buckets and do final sanding on the exterior to remove overspray. That's the same method I use on the door jambs before hanging the doors.
Different ways to get good results, but this made sense to me.
Thanks Mike. Mine will be BC/CC. Right now I'm thinking I will paint with everything (doors, headlight buckets, hood, exhaust panel and deck lid) off the car. My plan is to tape up the edges before re-installing after paint to make sure I don't scratch something. But this process does add some risk compared to what you did which is sort of half way in between.
Those headlight gaps look to be about 1/8"? What are your gaps on the doors and hood? Did you tighten them up as well? Does your Nassau coupe have the same tight gaps? Cheers Bill
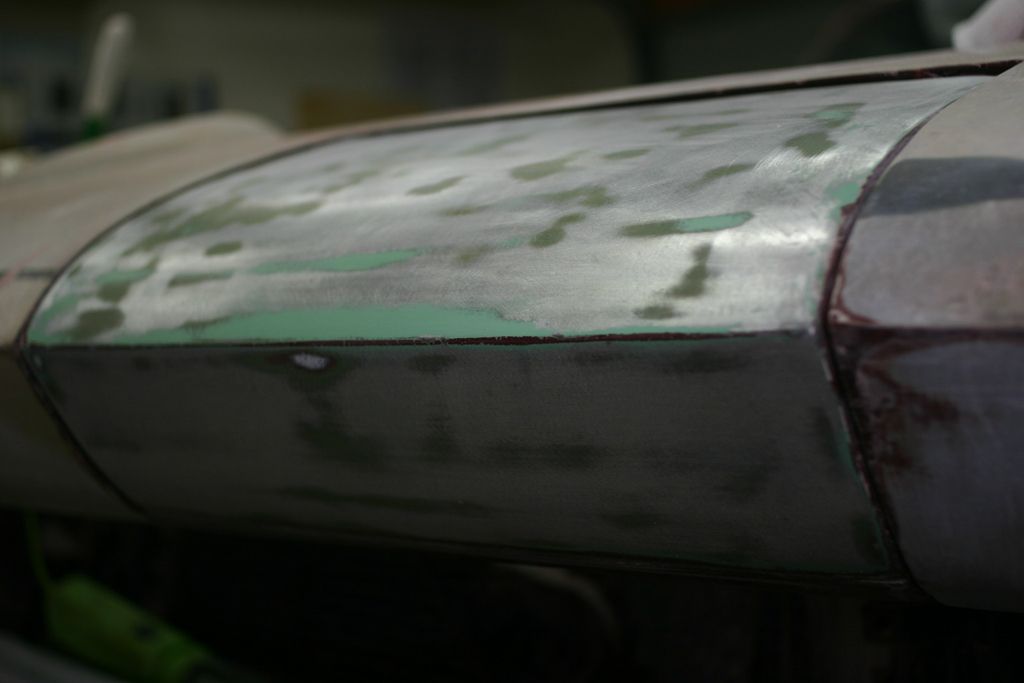
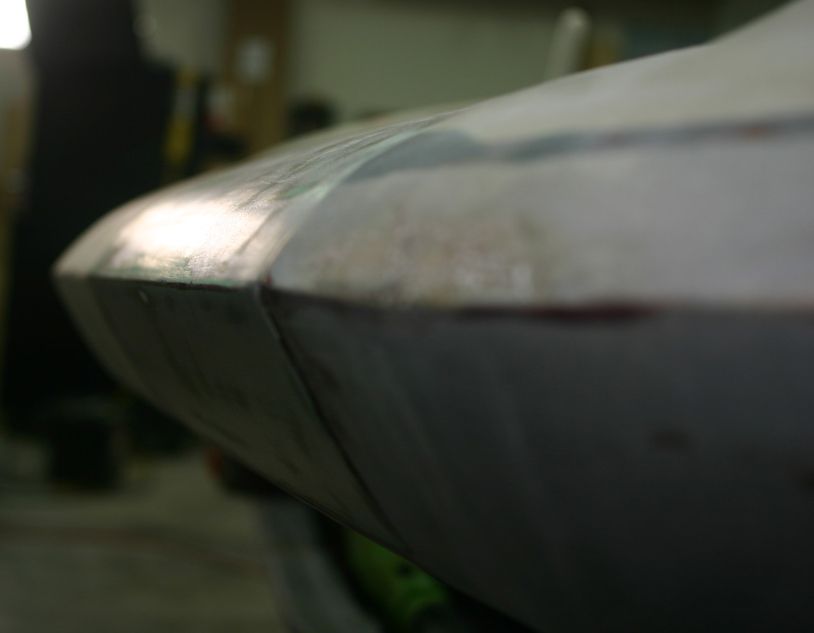
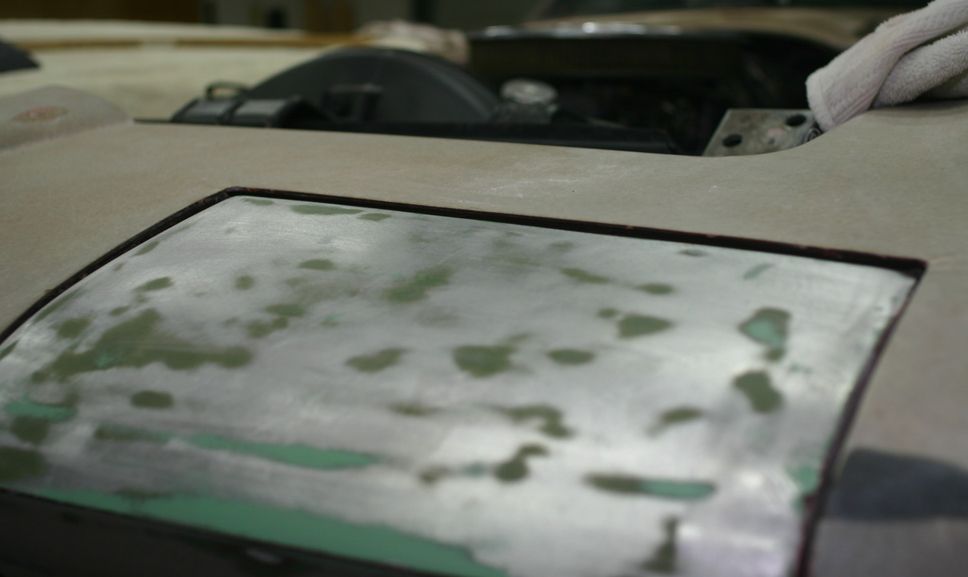
Getting everything lined up and the gaps right on the nose is a tedious process. I put a new Sermersheim front end on my car and had to set all the bucket gaps and get it all right from square one. Even with a new front end there was a lot of work needed to get it all perfect. When doing this make sure your nose support rods are all installed. Elongate the holes for the pivots as needed. And as noted in a previous post you need to allow for paint and primer build thickness when setting the bucket gaps. Just take your time.
Here are some photos of the raw bodywork progress that I needed to do to get it right.
I can see now there really is no saving adjustment settings. Ended up removing entire assembly. What a mess. Need to take everything apart and thoroughly clean it and re-grease before I can put it back in and check fitment. However my preliminary take was I can't get quite enough travel to align front feature line and rear surround. Much closer but it seems like I'm about 1/16" to 3/32" shy. Bolts are hitting bolt holes (or pivot shaft is touching). Have you ever heard of enlarging holes a bit? I think if I could get a little more travel I could get a good fit.
Anyway I will clean everything up and reinstall before doing any hole modifications.
How do you get the outboard shaft off? With electrical plugs on both ends it seems the harness will not come out. Please don't tell me I have to take the connectors apart.
Outboard ball was frozen onto the shaft so it turned with the shaft. Maybe that was OK.
Thanks again...
There was no grease used at the factory when these were built, none on the bearings. However, as noted with your frozen outboard ball, a very small dab on the inside bushing of the ball won't hurt, I do that.
I've elongated the holes before using a Dremel and a cutter or stone BUT be careful, it's easy for the bit to slip out and mess things up, Use 2 hands on the Dremel.
As said above, after paint, tape up the sides and edges of the openings before assembly.
And make sure 3 bolts on each side are the whole way in, finger tight before rotating the buckets , if they are sticking out a little, you may scratch the bucket.
Don't worry about taking the contacts out of that connector, as said, a small screw driver or large paper clip will depress the tang and the contact can be pulled out the back. You can also get a tool for this at the auto parts store. It's easy takes 2 minutes for all 3, just note what color wire goes into what hole. Bend that little tang up a tad before you put the wire back in. The contacts will be loose in the black housing but will be locked in by that tang.
Thanks everyone for their help and inspiration. I'm a long way from my 3 pictures to what I see from Mike and 4Speed. Wow.
Originally Posted by Mike Geary
Thanks Bill. This was a lacquer job, so I shot a couple of coats with the buckets loose and then installed them for the final 3 coats.
For BC/CC or single stage urethane, I'd probably shoot the bucket sides, and nose sides first. Then install the buckets and do final sanding on the exterior to remove overspray. That's the same method I use on the door jambs before hanging the doors.
Different ways to get good results, but this made sense to me.
Mike did you handle the hood underside lip and gutter along the fenders and cowl the same way? Did you tape those areas after reinstalling doors and buckets?
Thanks everyone for their help and inspiration. I'm a long way from my 3 pictures to what I see from Mike and 4Speed. Wow.
Mike did you handle the hood underside lip and gutter along the fenders and cowl the same way? Did you tape those areas after reinstalling doors and buckets?
I painted the hood off the car because I could do a better job that way on the gutters and I wasn't too worried about damage when reinstalling. Easy to align unlike doors.
Keep in mind that this was Ermine White. If it had been metallic, I probably would assembled all the panels before final paint to ensure the flakes were all lined up.
OK so if you do have hood/doors/buckets installed, how do you keep overspray out of the jambs? I only found 2 methods that worked for me: backtaping or using foam cords called "Door Aperture Refinish Tape" or DART. A 3M product. Did a nice job on the door jambs. On the buckets, I think I used some small plastic tubing. The DART was too fat for those undersize gaps I had.
Thanks Mike. Mine will be BC/CC. Right now I'm thinking I will paint with everything (doors, headlight buckets, hood, exhaust panel and deck lid) off the car. My plan is to tape up the edges before re-installing after paint to make sure I don't scratch something. But this process does add some risk compared to what you did which is sort of half way in between.
Those headlight gaps look to be about 1/8"? What are your gaps on the doors and hood? Did you tighten them up as well? Does your Nassau coupe have the same tight gaps? Cheers Bill
Bill: my hood gaps are 1/8". I went a little wider on the door gaps because the convertible body flex had me concerned about making contact under severe driving conditions.
The Nassau coupe is still wearing the tired paint job it had when purchased and the panel gaps are borderline factory rejectable.
But it's so much more fun to drive with that 365/CR/3.70/side exhaust setup. Well... except for long stretches on the freeway.
 10-31-2016, 11:15 AM