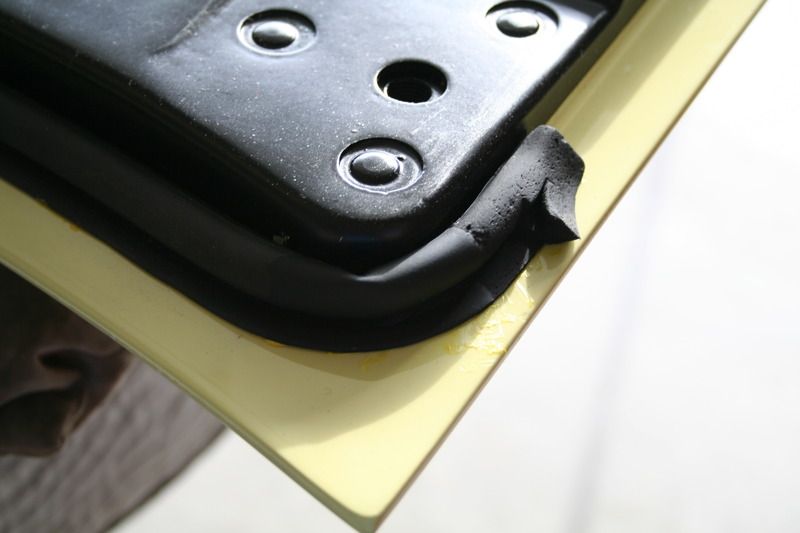
[C2] Rear Deck Weatherstrip
#1
Instructor


Thread Starter
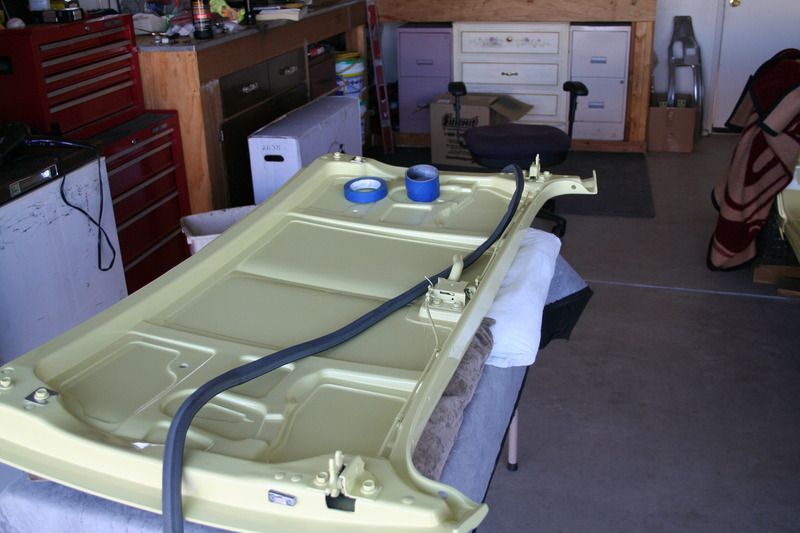
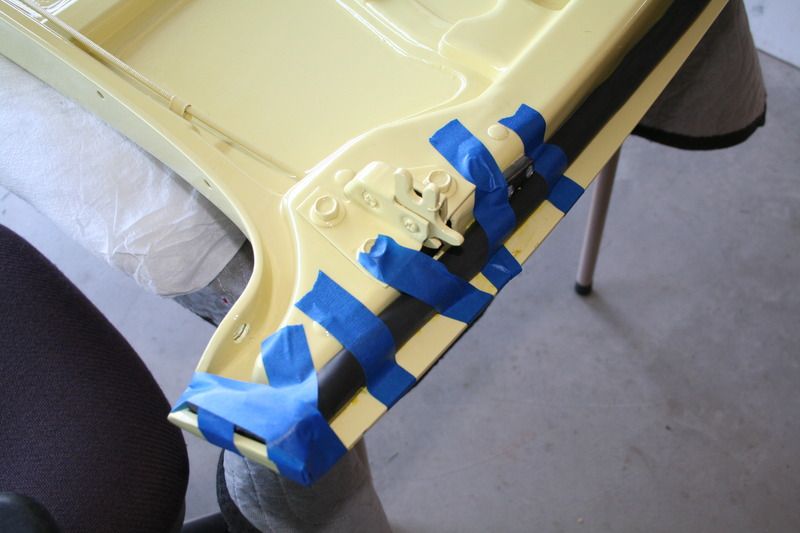
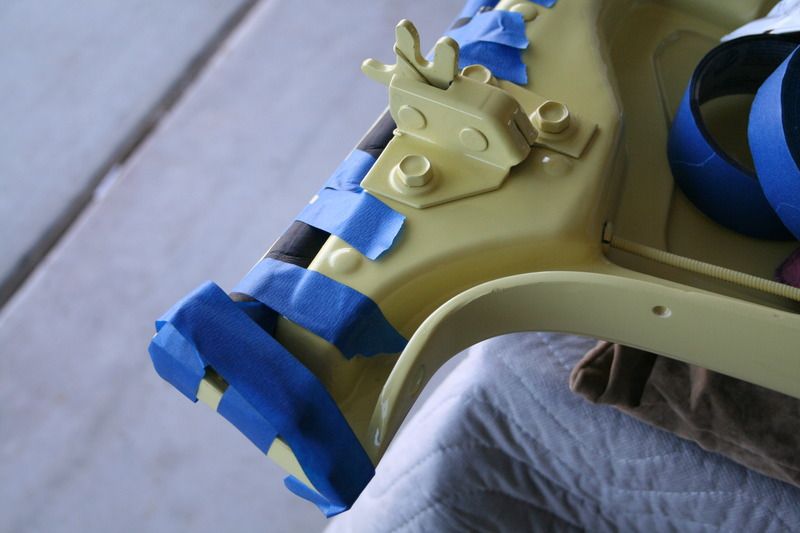
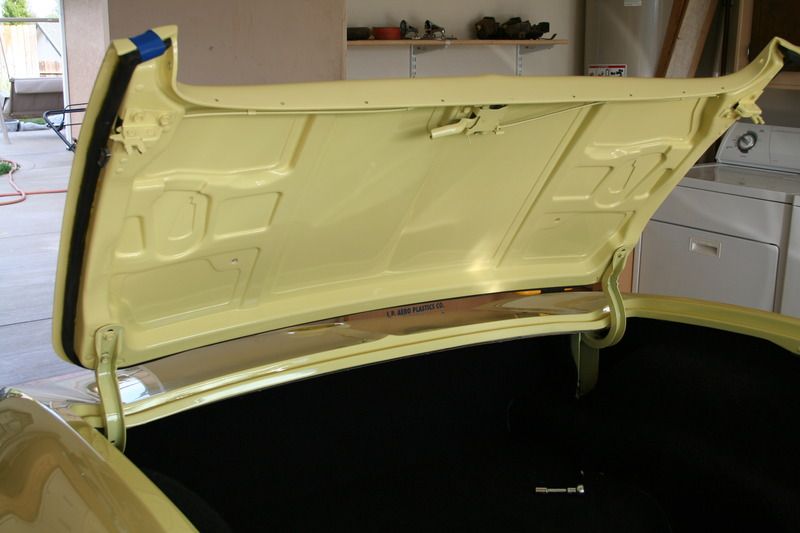
1964 convertible : After gluing the weatherstrip to the rear deck I found that the deck was now a different height at the gap around the deck. It seemed the weatherstrip was not seating properly, meaning I glued it in the wrong place. It looks like I needed to glue it right along the outer edge of the deck.
I'm wondering if
A: there are any pictures available to show exactly where the weatherstrip should be placed and
B: is there a way to removed the previous adhesive (without removing the paint) before re-gluing? Thanks for your advice.
Why is it when you get down to the end of your build, everything seems to be more difficult ?

#2
Melting Slicks<br><img src="/forums/images/ranks/3k-4k.gif" border="0">

Member Since: Mar 2008
Location: Colorado Springs Colorado
Posts: 3,086
Received 1,946 Likes
on
704 Posts
2023 C2 of the Year Finalist - Unmodified

Can you post a picture(s) of how you did yours. You may have done it correct, but as with any new weatherstrip, it may just be that because its new, it isn't compressed yet so things tend to fit differently until it is in place for a while. I put all new weatherstripping on my hard top last year and I could not get the side bolts started until I had a friend put his weight and muscle on the top. After leaving the top on for about 5 months, I took it off for the summer. When I put it back on for this winter, I still needed help to compress the weatherstrip, but it didn't take as much effort as last year. I expect next year it will go on even easier.
The following users liked this post:
Mikey Hawks (01-22-2017)
#3
Team Owner


The following 2 users liked this post by 66jack:
champs65 (01-22-2017),
Mikey Hawks (01-22-2017)
#4
Instructor


Thread Starter
Can you post a picture(s) of how you did yours. You may have done it correct, but as with any new weatherstrip, it may just be that because its new, it isn't compressed yet so things tend to fit differently until it is in place for a while. I put all new weatherstripping on my hard top last year and I could not get the side bolts started until I had a friend put his weight and muscle on the top. After leaving the top on for about 5 months, I took it off for the summer. When I put it back on for this winter, I still needed help to compress the weatherstrip, but it didn't take as much effort as last year. I expect next year it will go on even easier.
#5
Instructor


Thread Starter
Thanks Jack. That's the way I did mine but as stated in my last reply, it seemed to not be sitting in that groove around the body. Am I wrong to assume it should fit in the groove? When I close it, should it fit properly immediately or does it need time to wear in?
#6
Team Owner


:::EDIT::: NOT THE GROOVE ON THE BODY, THE GROOVE ON THE LID...YOU NEED THE SPACE ON BODY SO WATER WILL GET TO THE WEEP HOLES...TO DRAIN...
Last edited by 66jack; 01-22-2017 at 02:58 PM.
#7
Race Director


Member Since: Jan 2002
Location: Close to DC
Posts: 14,535
Received 2,126 Likes
on
1,465 Posts
C2 of the Year Finalist - Modified 2020

When I did mine, as jack appears too have, I made a center registration mark on the deck lid and the rubber. Also did the same on the corners, and to the ends, all the while using the blue tape. The W/S must be stretched and the marks help keep it in position as you fit it into the groove.  Dennis
 Dennis
#8
Race Director


ACTUALLY...posting good photos of your deck lid when it is shut would be helpful.
WHY??? Because....from what I know about these deck lids when I restore these types of Corvettes. The I WANT TO see that the deck lid is lower at the rear body line gap when it has NO weatherstrip in it.
The reason for this is so when the new weatherstrip is installed....it is going to raise up....and then be flush.
The side body panel heights are controlled by your latches..and usually there..I do not have concerns due to the metal latch and catch hold the panel own and compress the new weatherstrip.
As for installing the weatherstrip....YES...if it has to be stretched to get the ends in the correct spot after checking where they NEED to be. I start by gluing the weatherstrip in the center of the deck lid for about 5 inches. Let that set up. Then...I will take the w/strip and by hand...WITHOUT STRETCHING it at this time....I run the weatherstrip on the deck lid and around the corner and up to where I want it to stop.
IF I see that I need to pull the w/strip 2 inches....for example. I will stretch the w/strip and when I am holding it in place..I take my other hand and allow the w/strip to flow around the corner and up to where I want it NATURALLY without being stretched. Once I get that. I apply a piece of tape on the deck lid and also the w/strip so I know that I need to get these two pieces of tape to line up when I go stretch the w/strip and glue it down.
I will then apply the glue on the deck lid and w/strip area also and stop my glue BEFORE the deck lid makes that 90 degree turn. I then allow the glue to tack up really good and I pull it and align my tape that I applied.
When that dries well...I repeat the process by taking that section of w/strip and manually by hand...and NOT stretching it...run the w/strip around the corner and up to where I know I need to stop it. If all works out as planned. I then apply the glue on the deck lid area and w/strip and apply it after it has been allowed to tack up. Then...do the other side the same way.
DUB


