
Follow along as I attempt a frame off restoration on a 71 (Pics)

 06-17-2005, 09:59 AM
#22
Burning Brakes

Thread Starter

Originally Posted by rosslato
hey kortensi, where are u? what no rebuttal?. game 4 a pistons ROUT. series all square, advantage Pistons. game 5 sunday nite.
ouch. ouch , ouch
 Waiting for the spurs to start playing.
06-17-2005, 10:09 AM
Waiting for the spurs to start playing.
06-17-2005, 10:09 AM
#23
Burning Brakes
Thread Starter
Well last night I got some time to do some more blasting. Home Depot and Lowes only had play sand and I've been using a screen to filter it to remove the larger bits of stone. It doesn't work very well. The blaster still clogs up every couple of minutes. I have to shut everything down, clear the blockage and then start it back up again. I just need to find a place that has actual sandblasting sand.
Anyway, I got about the first 1/3 of the top of the frame blasted last night and then I had to watch the Spurs get beat down.
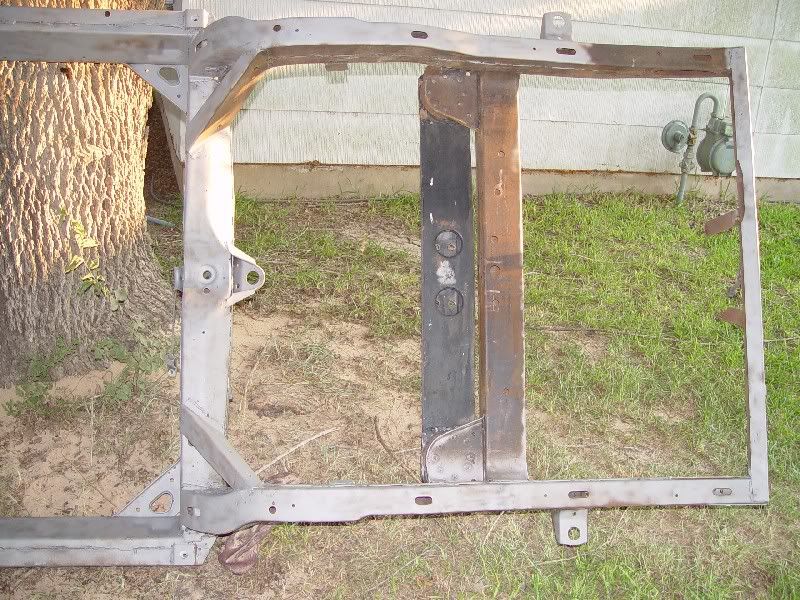
Here she is so far.
Anyway, I got about the first 1/3 of the top of the frame blasted last night and then I had to watch the Spurs get beat down.
Here she is so far.
 06-17-2005, 11:54 AM
#25
Burning Brakes
Thread Starter
We don't have a Menards here in Texas but I found a local place that has a 100 lb bag for only $4.00. I'm going to go get a couple this evening.
06-17-2005, 08:53 PM
#26
Le Mans Master

Nice work. Your frame didn't look too bad in it's original condition. the birdcage rot was getting there, but I have seen worse here on the forum. You must be kind of ****...and that's good. I'd much rather see a guy go overboard and do everything right than halfass the car.
On a side note, I knew our frame welds were not that nice, but geez! Those welds look like crap!
Good luck with the frame off. I imagine you'll be buying/redoing lots of parts, as you seem to want to get it done right.
On a side note, I knew our frame welds were not that nice, but geez! Those welds look like crap!
Good luck with the frame off. I imagine you'll be buying/redoing lots of parts, as you seem to want to get it done right.
06-18-2005, 08:13 AM
#27
Melting Slicks

Originally Posted by kortensi
ouch. ouch , ouch
Waiting for the spurs to start playing.
Waiting for the spurs to start playing. 06-19-2005, 08:19 PM
#31
Instructor


Member Since: Aug 2004
Location: Drayton Ontario
Posts: 191
Likes: 0
Received 0 Likes
on
0 Posts

Cool . We are just begining with our frame off. Interior is out and we are getting the check list ready and also building a rotisserie. We plan to put the frame on it for blasting and then por15 and after that while the body is on a dolly we will put that on the rotisserie . We are building the rotisserie on an old hay wagon frame so that we can just hook the up to the truck and get the body over to a paint shop. BIG plans and hope it goes smooth . I have been reading forever on this so we will see if what is published is true
06-22-2005, 08:19 AM
#32
Burning Brakes
Thread Starter
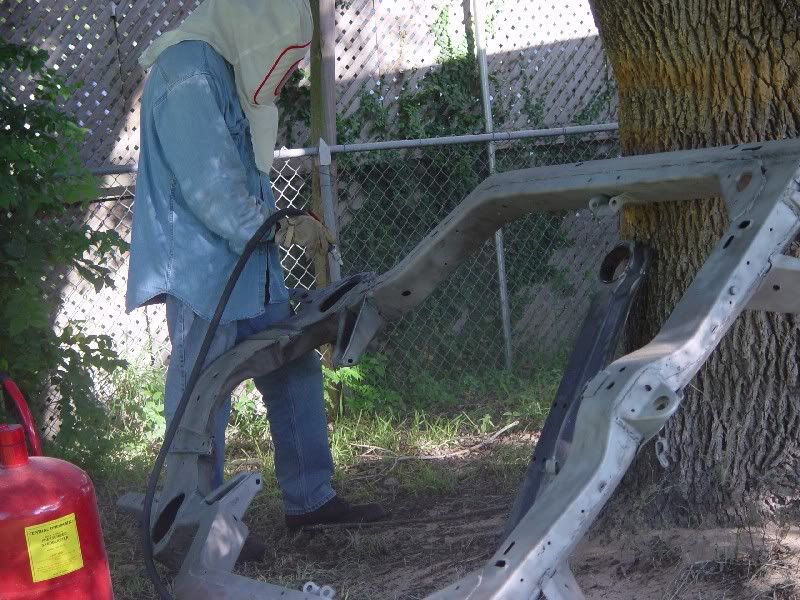
Well I got a chance to work on her some more last night.
The new sand works much better.
I also figured out that if I only open the sand nozzle about a third instead of full, the sand lasts a lot longer.
Here are some more pics.
The new sand works much better.
I also figured out that if I only open the sand nozzle about a third instead of full, the sand lasts a lot longer.
Here are some more pics.
06-22-2005, 10:06 AM
#34
Melting Slicks
Game 7 coming rite at us thurs nite, ought to be a duzzie. which way is the wind gonna blow? how many bags of sand u used so far? what size compressor u using?
06-22-2005, 01:49 PM
#35
Le Mans Master
Your frame looks to be in excellent shape. Keep it up and keep us posted.
If not running a drier on your air hose, moisture might be contributing to the gun clogging up.
Hope your neighbors are cool with it.

If not running a drier on your air hose, moisture might be contributing to the gun clogging up.
Hope your neighbors are cool with it.
06-22-2005, 03:36 PM
#36
Burning Brakes
Thread Starter
Originally Posted by rosslato
Game 7 coming rite at us thurs nite, ought to be a duzzie. which way is the wind gonna blow? how many bags of sand u used so far? what size compressor u using?
I've got a Craftsman (electric powered) and have gone through about 300lbs of sand so far. But since I figured out the adjustments I expect to use a lot less. GO Spurs!
Originally Posted by NHvette
Your frame looks to be in excellent shape. Keep it up and keep us posted.
If not running a drier on your air hose, moisture might be contributing to the gun clogging up.
Hope your neighbors are cool with it.
If not running a drier on your air hose, moisture might be contributing to the gun clogging up.
Hope your neighbors are cool with it.
 06-24-2005, 12:24 AM
#38
Melting Slicks
CONGRATULATIONS TO U AND THE SPURMS, i mean spurs
06-27-2005, 11:23 AM
#39
Burning Brakes
Thread Starter
Yea Spurs, OK that�s done, back to work.
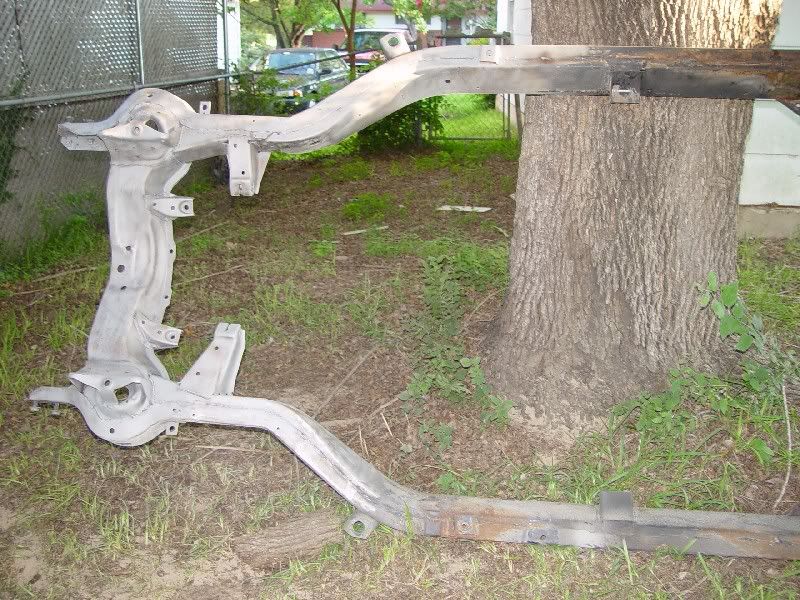
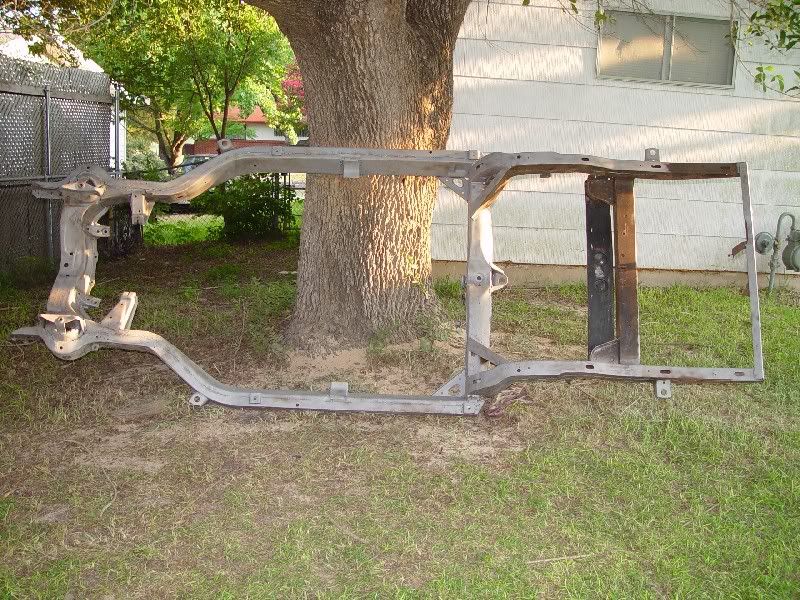
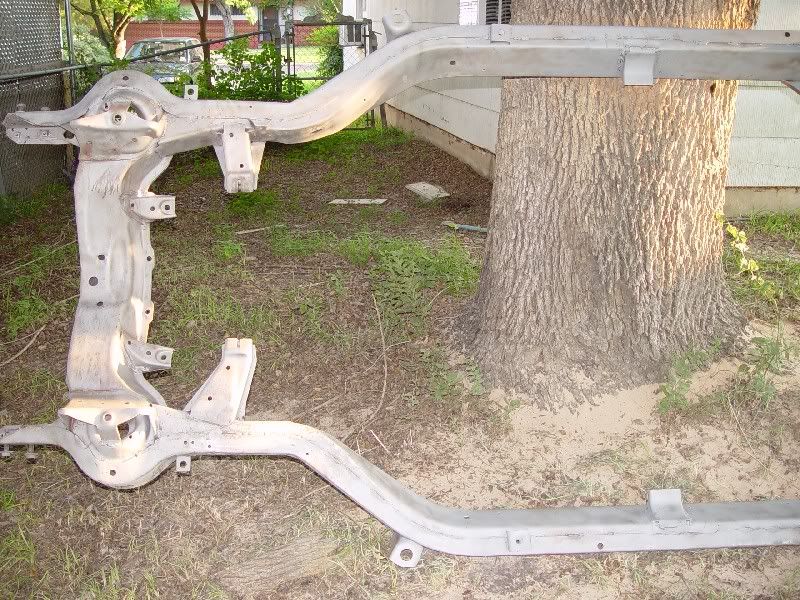
I finished sand blasting the frame and brackets this weekend and I went through about 500lbs of sand.
I planed to gusset the frame but every steel place that I called in SA closed at noon on Saturday. I found a place to rent the welder from for only $40.
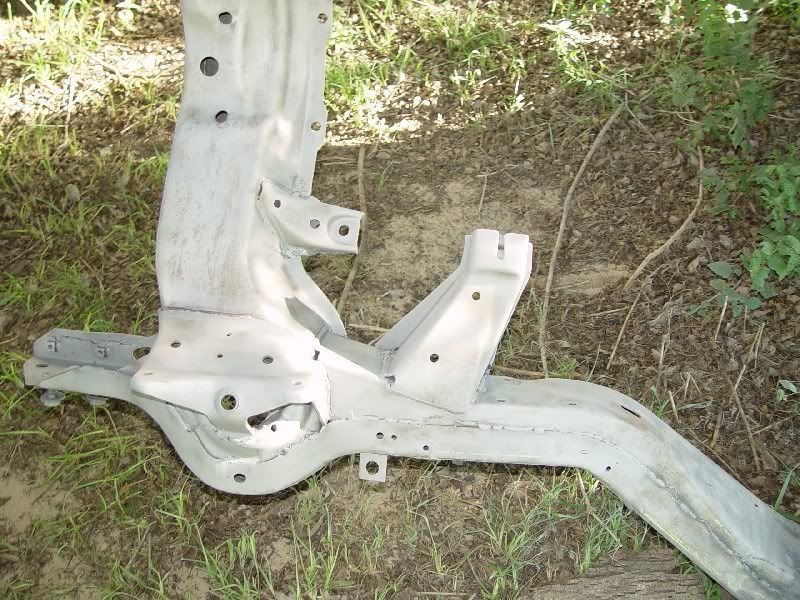
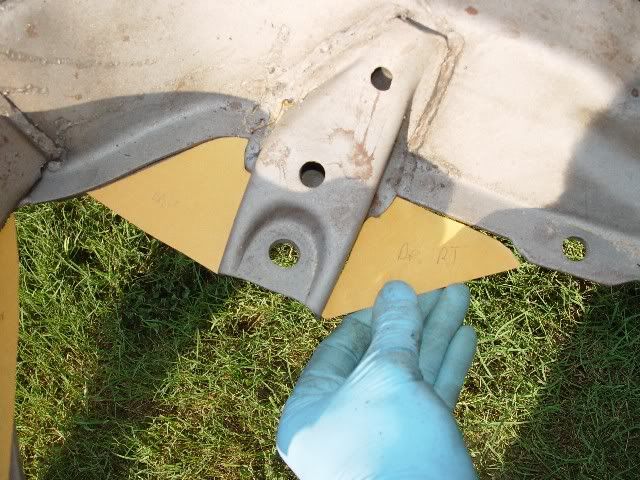
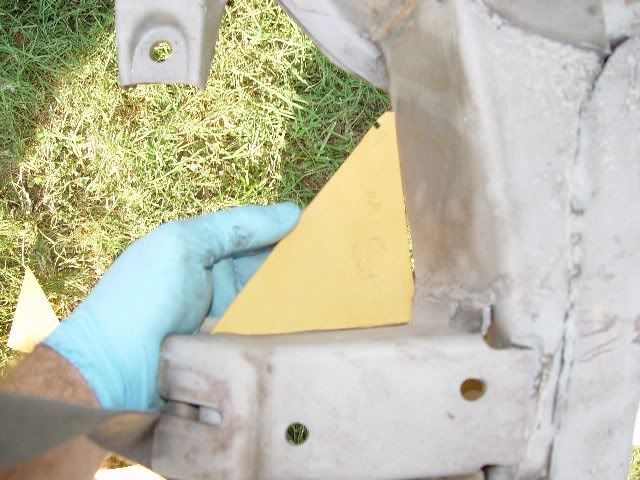
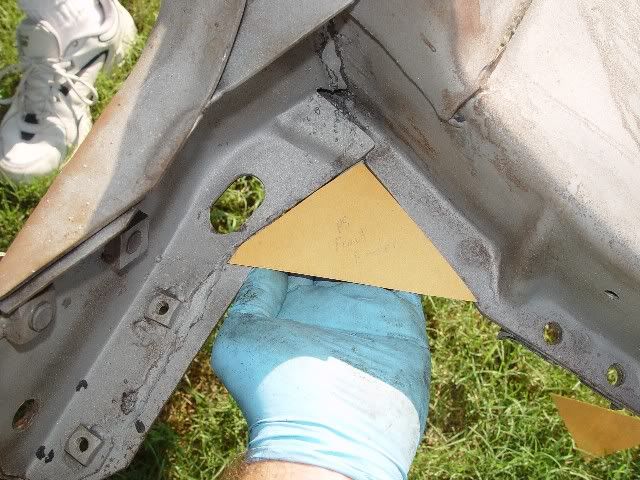
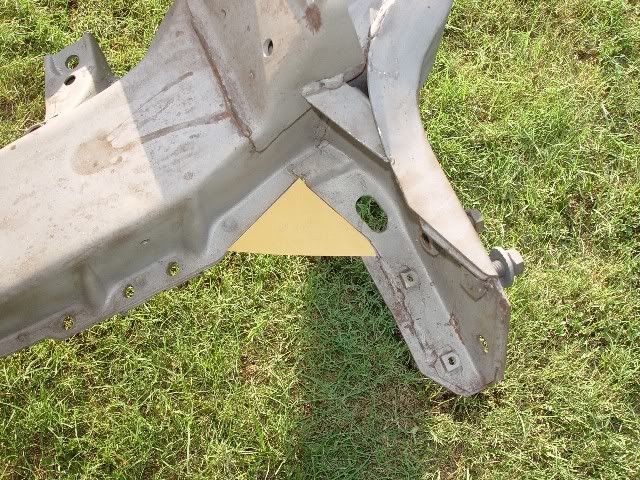
I cut out some templates for the gussets but I was wondering about them.
Do they look right? I saw some in here from NHvette�s (I think) and they look like they go under the frame, where I was just filling the gaps.
Is one way better that the other?
Here are some pics from the weekend.

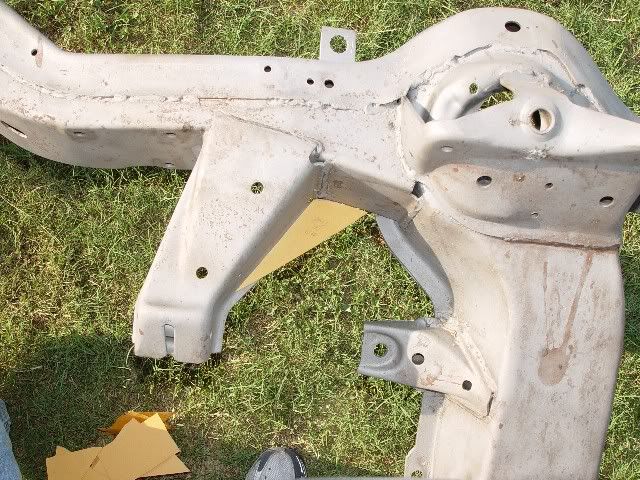

OK that�s done, back to work. I finished sand blasting the frame and brackets this weekend and I went through about 500lbs of sand.
I planed to gusset the frame but every steel place that I called in SA closed at noon on Saturday.
I found a place to rent the welder from for only $40. I cut out some templates for the gussets but I was wondering about them.
Do they look right? I saw some in here from NHvette�s (I think) and they look like they go under the frame, where I was just filling the gaps.
Is one way better that the other?
Here are some pics from the weekend.
06-27-2005, 12:47 PM
#40
Le Mans Master
My gussets were mostly overlapping by an inch or so - welded on both sides of the overlap.
One thing I realized a bit late was that I needed to bend up
custom tranny cooler lines for my TH400. They normally go
right where the gussets are placed. No biggy - with electric
fan, rerunning the cooler lines over the top of the front crossmember
is MUCH neater than between the lower control arm and the frame.
This post shows a lot more than I'd care to ... like my crappy welds:
http://forums.corvetteforum.com/showthread.php?t=734245
However - near the bottom of the first posting are some
good pics of how I cut and attached the lower CA gussets.
Don't forget the front frame horn could use some boxing in - but
I havce also learned that this can (and did) interfere with
the drivers side radiator tank and more-so the lower radiator
outlet on the passenger side.
PS - I managed to cut all of my gussets from 1/8"x2" strip @ Home Depot.
Another shot from the bottom - all painted:
Last edited by NHvette; 06-27-2005 at 12:56 PM.