
Bird Cage Replacement
 06-22-2005, 10:57 PM
#1
Racer

Thread Starter

Member Since: Aug 2004
Location: Rockford Michigan
Posts: 370
Likes: 0
Received 0 Likes
on
0 Posts
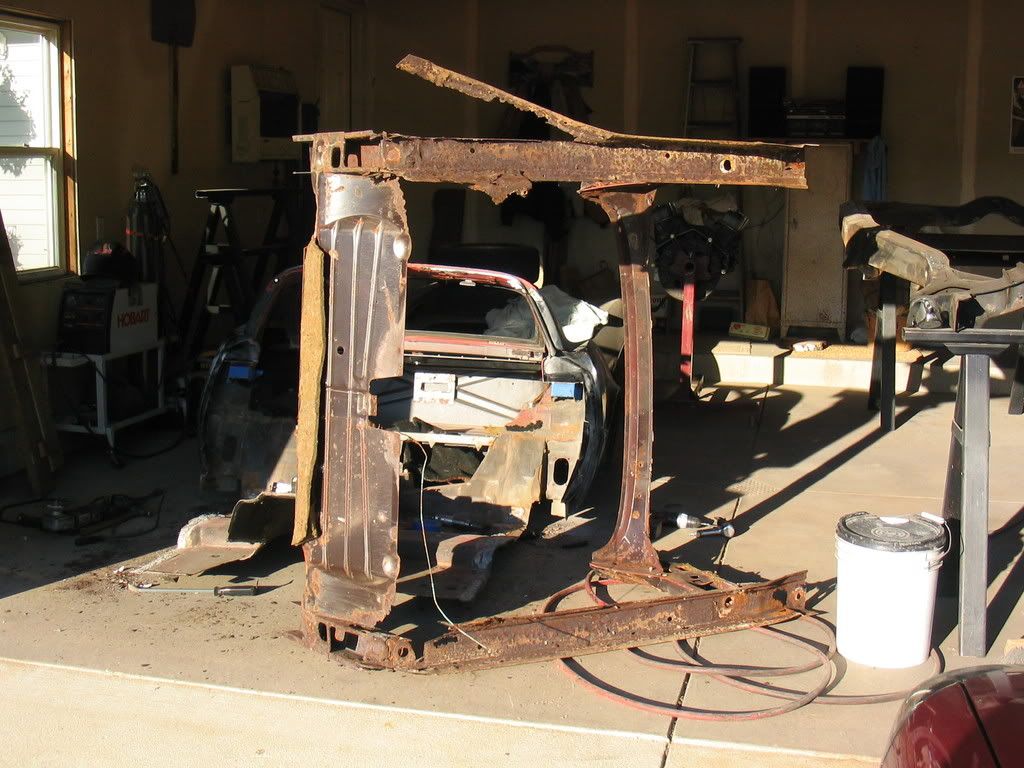
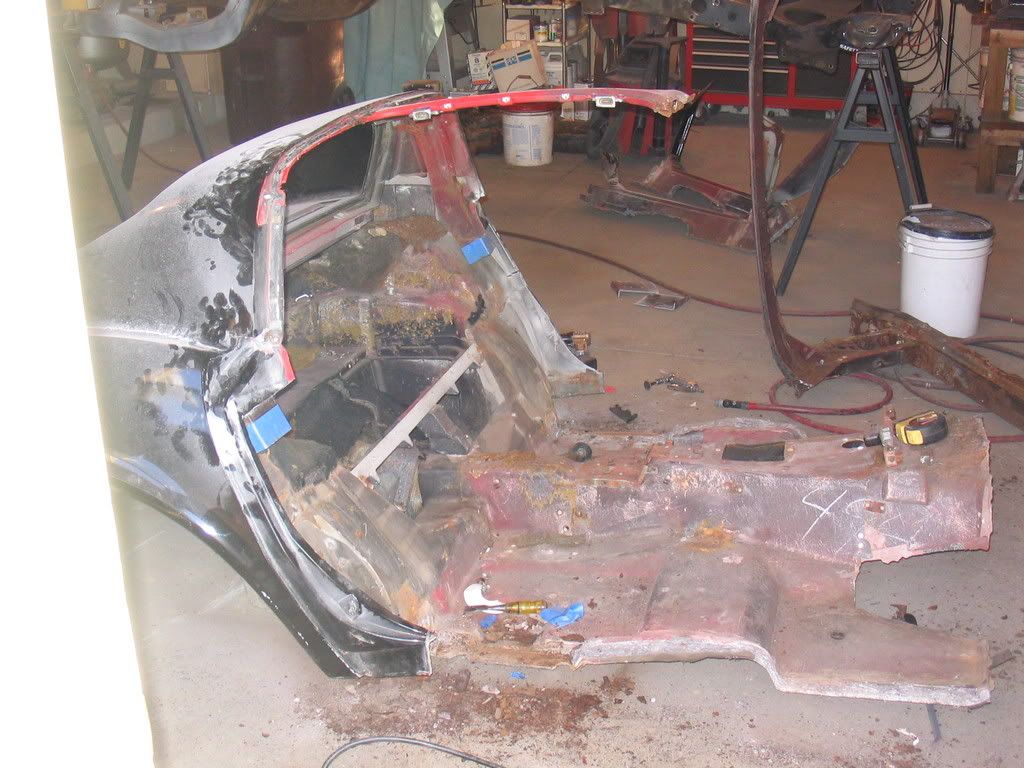
Well, it wasn't as bad as I thought it would be. Here are some pictures of my 72 bird cage replacement including the old bird cage, rear clip with the cage cut out and then the rear clip with the new cage installed.
SEE BELOW FOR THE PICTURES!!!!!!
SEE BELOW FOR THE PICTURES!!!!!!
Last edited by JonnHeather; 06-23-2005 at 07:36 PM.
 06-22-2005, 11:08 PM
#3
Racer
Member Since: May 2004
Location: Eagle WI
Posts: 259
Likes: 0
Received 0 Likes
on
0 Posts
If you upload pics to the forum instead of another photo site the admins have to approve them before they can be seen - usually happens within 24 hrs - and I think they send you an email once they are approved.
06-22-2005, 11:09 PM
#4
Melting Slicks


It will take a day or less for the mods to approve your pics.


 [/IMG]
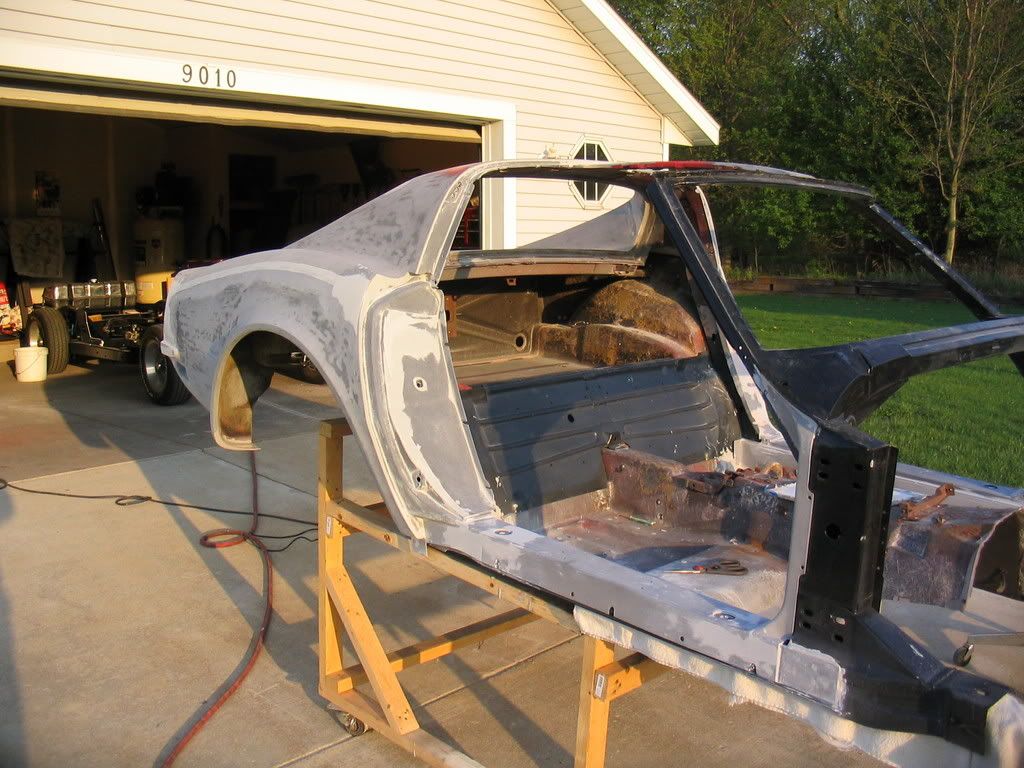
 06-23-2005, 08:23 AM
#10
Team Owner

Originally Posted by Bangkok Dean
Nice work you have done.  Many whould not even think about doing the change. BTW where did you find the new bird cage?
Many whould not even think about doing the change. BTW where did you find the new bird cage? GENE


 06-23-2005, 06:36 PM
#18
Drifting


Originally Posted by Tombags
I hate to sound like a novice but what is considered the bird case????
Tom
Tom
http://www.zip-products.com/Zip/dept...D478339B2B8CC0
BigBlockk
Later.....
06-23-2005, 07:33 PM
#19
Racer
Thread Starter
Member Since: Aug 2004
Location: Rockford Michigan
Posts: 370
Likes: 0
Received 0 Likes
on
0 Posts
--------------------------------------------------------------------------------
Where did you get all the info on where to break everything apart from? I would like to go that route with mine. dont remember reading a post about it. john
There really is not that much information available in books or online for the bird cage replacement. I used standard I-car repair procedures for the lock pillar and then just redid the t-top bar. I drilled out the plug welds on the t-top bar and plug welded them same as the factory spot welds. On the lock pillar I cut it above the striker (for strength when shutting the door), then made a sleeve out of the old pillar, plug welded it in place and then butt welded the upper and lower halves together using the sleeve as a backer. With the sleeve in there the welded joint will actually be stronger than the original sleeve and since it is the lock pillar it will keep the passenger compartment safer in the event of a side impact. (not that there is much protection without side impact bars in the doors in the early C-3's) All of the fiberglass I broke loose along the factor seems except for the part along the lock pillar, that I just cut and then made a bonding strip out of a donar piece of fiberglass. It took a little time, but overall it was straight forward and with it now being powder coated I know it will never rust again. If anyone needs any more specifics let me know, I would be glad to help...
06-23-2005, 10:32 PM
#20
8th Gear

Member Since: Mar 2005
Posts: 8
Likes: 0
Received 0 Likes
on
0 Posts
Saturday I got the cage out of the donor car. I am now trying to figure out where the seam is for the lower fiberglass sills as it starts up the cage where the interior and color codes are located. Or is that all one piece? It looks like there is a seam where is begins to make the transition up. My donor cage is a late '76 or early '77.
How do I post a picture?
How do I post a picture?