
Rookie's first attempt at a restoration...
 12-18-2007, 02:39 AM
#161
Safety Car

Thread Starter
Does anyone have a new GM rag joint they are willing to sell to me at a decent price? I decided not chance the steering wheel connection with the rebuild kit I have...I heard the rebuild kits just fail over time.
Last edited by stinger12; 12-18-2007 at 02:42 AM.
 12-18-2007, 10:28 AM
#162
Tech Contributor

Don't use steel bushings no matter how smooth you think it is.
I have a couple of new GM rags if you can't find one.
12-18-2007, 11:11 AM
#163
Safety Car
Thread Starter
So I can get oilite bronze at any bearing house? I'll have to call around today because I don't think my friend has bronze stock at his shop. Thanks for the response Gary, much appreciated.
12-18-2007, 12:38 PM
#164
Le Mans Master


Member Since: Jul 2000
Location: Saginaw Michigan
Posts: 6,001
Likes: 0
Received 98 Likes
on
81 Posts

The basic reason why I don't recommend the flex coupling rebuild "kits" is that the kits come supplied with common bolts. You should NEVER make a bolted connection through rubber. You must have shoulder bolts so that you make a metal to metal bolted connection. You are steering your car through this part!
In many cased the stop pins that are supplied in the kits do not match the size or shape of the original stop pins that were hot riveted in place on the original equipment flex coupling.
Also the "kits" do not supply a method of conducting electrical current from one side to the other. All of the GM/Saginaw flex couplings either have a ground wire or strap that is wrapped around the inside of the rubber disc or the GM disc itself has a fine wire mesh molded into the face of the disc.
BTW, I have written about a dozen letters to various suppliers outlining my concerns about the above mentioned kits. A few wrote back that they would contact their supplier of the kits. None have contacted me to indicate that the parts in the kits have been corrected.
Thanks for letting me vent!
Merry Christmas,
Jim
12-18-2007, 01:18 PM
#165
Tech Contributor
I agree with Jim on those kits, biggest piece of crap out there. The rag itself in addition to Jim's comments is too flexiable. I had a couple of new in the bag (chinese made) here. I gave one away and tossed the other. Who knows how long the GM rags are going to be around. If you guys plan on keeping your cars you may want to put one on the shelf.
I have (1) NOS 63-66 rag here that is like gold now, the 67-82 may follow in the future.
I have (1) NOS 63-66 rag here that is like gold now, the 67-82 may follow in the future.
12-21-2007, 12:11 AM
#166
Safety Car
Thread Starter
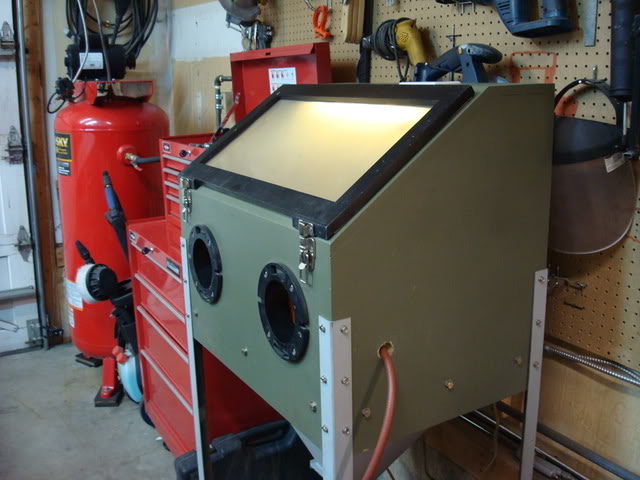
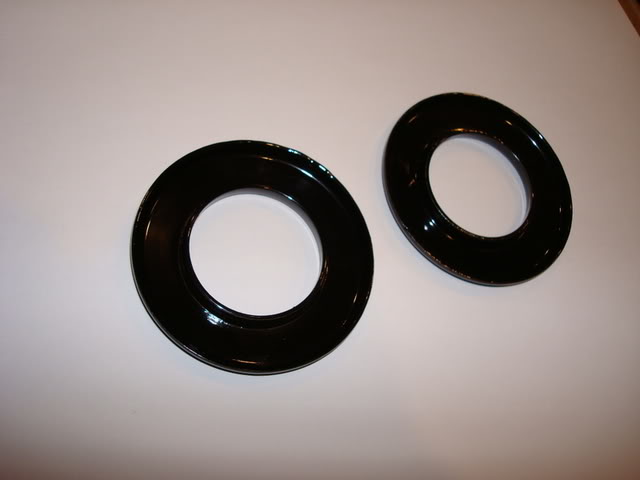
I thought I'd post how I powdercoat my own parts at home.
The first thing I do is degrease the part to be powdercoated, then I sandblast the parts in my blast cabinet - I built the cabinet myself.
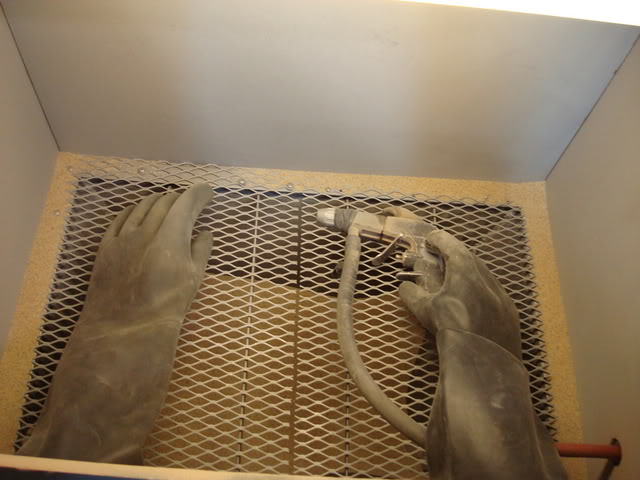
The next step is to wipe the part down with a clean rag to remove all the sand and dust. You could use compressed air too, but I have found that sometimes water gets by my air filter on the lines and contaminates the part. Make sure to wear gloves when handling the part, you don't want to contaminate it. After all the sand/dust has been removed, I preheat the oven to around 400 degrees. Place the pieces in the oven for about 20 minutes. This will burn off any other contaminants which may still be on the surface.
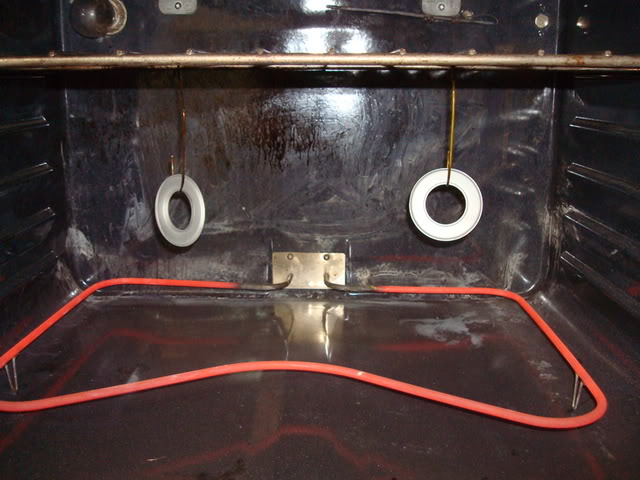
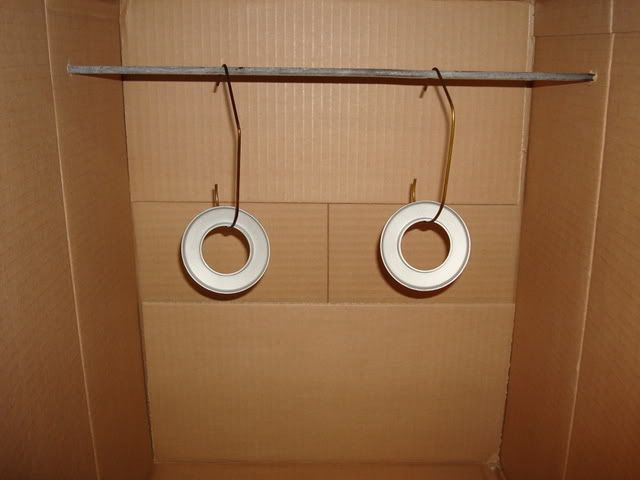
Let the part cool down and hang it on a rack. I use an old cardboard box which I put a piece of metal rod through the sides. Preheat the oven to the temperature indicated on the powder you bought.

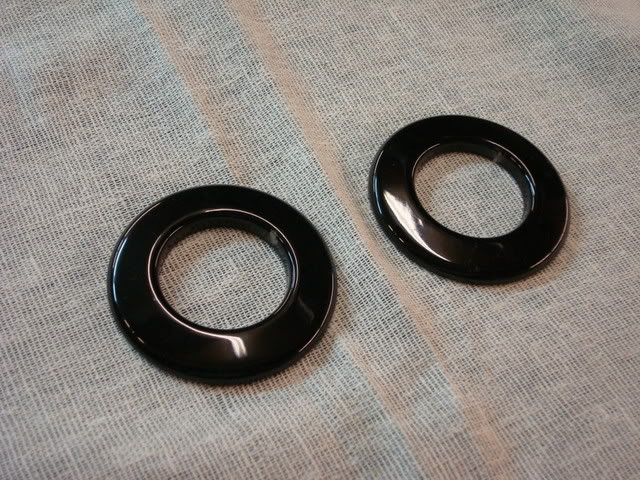
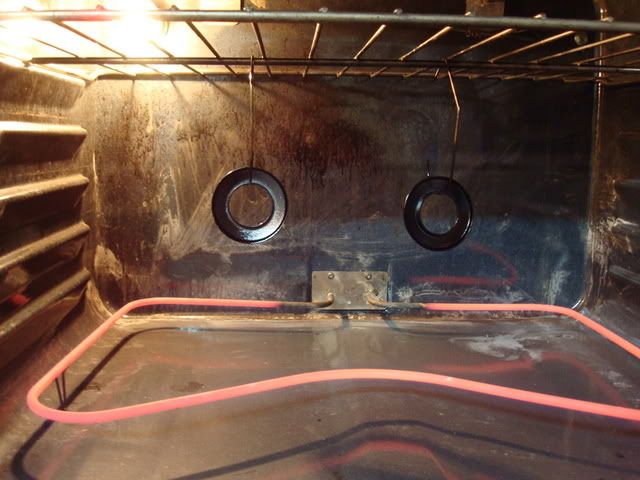
Apply the powder, take the parts to the oven and bake them for 20 minutes (varies with different powders). This picture shows what the pieces look like after a couple of minutes (it looks unevenly coated from this angle, but it is not).

When 20 minutes has past, take the parts out and let them cool down before handing.
The first thing I do is degrease the part to be powdercoated, then I sandblast the parts in my blast cabinet - I built the cabinet myself.
The next step is to wipe the part down with a clean rag to remove all the sand and dust. You could use compressed air too, but I have found that sometimes water gets by my air filter on the lines and contaminates the part. Make sure to wear gloves when handling the part, you don't want to contaminate it. After all the sand/dust has been removed, I preheat the oven to around 400 degrees. Place the pieces in the oven for about 20 minutes. This will burn off any other contaminants which may still be on the surface.
Let the part cool down and hang it on a rack. I use an old cardboard box which I put a piece of metal rod through the sides. Preheat the oven to the temperature indicated on the powder you bought.
Apply the powder, take the parts to the oven and bake them for 20 minutes (varies with different powders). This picture shows what the pieces look like after a couple of minutes (it looks unevenly coated from this angle, but it is not).
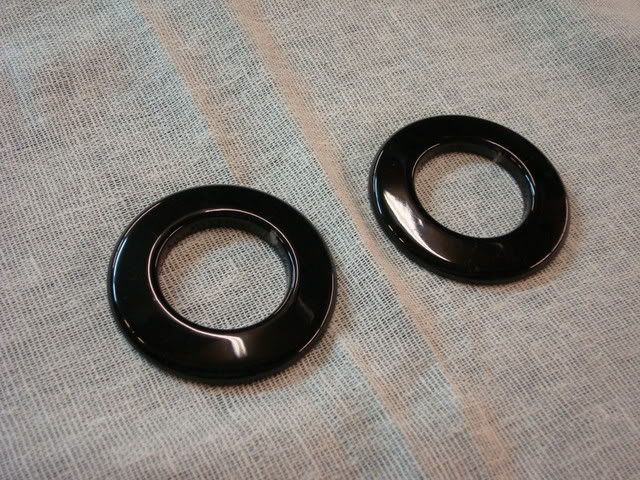
When 20 minutes has past, take the parts out and let them cool down before handing.
12-21-2007, 09:03 AM
#167
Tech Contributor
Looks good, side yoke shields?
12-21-2007, 09:20 AM
#168
Le Mans Master
I thought I'd post how I powdercoat my own parts at home.
The first thing I do is degrease the part to be powdercoated, then I sandblast the parts in my blast cabinet - I built the cabinet myself.


The next step is to wipe the part down with a clean rag to remove all the sand and dust. You could use compressed air too, but I have found that sometimes water gets by my air filter on the lines and contaminates the part. Make sure to wear gloves when handling the part, you don't want to contaminate it. After all the sand/dust has been removed, I preheat the oven to around 400 degrees. Place the pieces in the oven for about 20 minutes. This will burn off any other contaminants which may still be on the surface.

Let the part cool down and hang it on a rack. I use an old cardboard box which I put a piece of metal rod through the sides. Preheat the oven to the temperature indicated on the powder you bought.
Apply the powder, take the parts to the oven and bake them for 20 minutes (varies with different powders). This picture shows what the pieces look like after a couple of minutes (it looks unevenly coated from this angle, but it is not).
When 20 minutes has past, take the parts out and let them cool down before handing.

The first thing I do is degrease the part to be powdercoated, then I sandblast the parts in my blast cabinet - I built the cabinet myself.
The next step is to wipe the part down with a clean rag to remove all the sand and dust. You could use compressed air too, but I have found that sometimes water gets by my air filter on the lines and contaminates the part. Make sure to wear gloves when handling the part, you don't want to contaminate it. After all the sand/dust has been removed, I preheat the oven to around 400 degrees. Place the pieces in the oven for about 20 minutes. This will burn off any other contaminants which may still be on the surface.
Let the part cool down and hang it on a rack. I use an old cardboard box which I put a piece of metal rod through the sides. Preheat the oven to the temperature indicated on the powder you bought.
Apply the powder, take the parts to the oven and bake them for 20 minutes (varies with different powders). This picture shows what the pieces look like after a couple of minutes (it looks unevenly coated from this angle, but it is not).
When 20 minutes has past, take the parts out and let them cool down before handing.
DAMN!! Your wife lets you use the kitchen oven? She must be an
 12-21-2007, 11:10 AM
#169
Safety Car
Thread Starter
Lol, I am only 18...I'm not married yet My parents just bought a new gas oven for the kitchen and instead of selling the old one, they said I could use it for powdercoating. I love my parents
My parents just bought a new gas oven for the kitchen and instead of selling the old one, they said I could use it for powdercoating. I love my parents
12-21-2007, 11:15 AM
#170
Safety Car
Thread Starter
Yeah, they are new side yoke shields which I bought from VanSteel. I installed them yesterday using my hydraulic press...they look awesome. I talked to the powdercoater yesterday and he said the frame will probably be done sometime next week (they are working a bit of overtime). They lost one of their sandblasters and are trying to catch up on stuff. I'll have to keep myself busy until then.
12-21-2007, 08:26 PM
#171
Racer


Member Since: Jan 2007
Location: York PA
Posts: 334
Likes: 0
Received 0 Likes
on
0 Posts
I have to hand it to you. Its a fantistic job your doing ! Something you can really be proud of ! Take a bow! And your wife must be something too as she puts up with the car in the living room. Mine went spastic when I washed some parts in the kitchen sink. I'd never even consider using the oven if I wanted to continue living here. Good luck,
chuck
Good luck,chuck
12-21-2007, 11:28 PM
#172
Safety Car
Thread Starter
Lol, I am only 18...I'm not married yet My parents just bought a new gas oven for the kitchen and instead of selling the old one, they said I could use it for powdercoating. I love my parents. I guess you guys never expected an 18 year old to do this type of job before, now did you ?
?

 12-22-2007, 04:43 AM
#174
Team Owner


Member Since: Oct 2004
Location: Springfield MO
Posts: 23,831
Likes: 0
Received 6 Likes
on
6 Posts
St. Jude Donor '07

Lol, I am only 18...I'm not married yet My parents just bought a new gas oven for the kitchen and instead of selling the old one, they said I could use it for powdercoating. I love my parents. I guess you guys never expected an 18 year old to do this type of job before, now did you ?
?
 12-22-2007, 01:58 PM
#176
Racer
Member Since: Aug 2007
Location: Brinnon Washington
Posts: 267
Likes: 0
Received 0 Likes
on
0 Posts
You will be proud when you drive it down the road. You might even miss the work and challenges this project has and will continue to present. You don't owe anyone a reason why it takes so long. Continue at your pace and smile when anyone gets negitive with you it drives them nuts. All the best and thank your folks for this opportunity and the direction they have given to get you to this point.
12-23-2007, 01:06 AM
#178
Safety Car
Thread Starter
Something has been lingering in the back of my mind lately. Its about when I rebuilt my trailing arms. There are four studs which go through the bearing supports - you put a lock washer on each stud and then tighten down the nuts. I had used 4 lock washers I had laying around the garage - they were brand new, but I don't think they were grade 8 lock washers. I used anti-seize on the threads and then torqued the nuts (I had new grade 8 nuts luckily) to 30. The trailing arms are perfect - I couldn't be happier...but am I doomed for using the lock-washers I had as opposed to using grade 8 lock-washers? I really don't want to take the parking brakes apart just to change the lock-washers...it would be a PIA to put them back together. I tested the grade 8 lock-washers which I recently got for my hardware supplier against the ones I used on the trailing arms. I put them in a vice and clamped them down...they both sprung back exactly the same distance. I don't know why these little things bother me...it drives me nuts

Last edited by stinger12; 12-23-2007 at 01:10 AM.
 12-23-2007, 04:34 AM
#180
Safety Car
Thread Starter
Something has been lingering in the back of my mind lately. Its about when I rebuilt my trailing arms. There are four studs which go through the bearing supports - you put a lock washer on each stud and then tighten down the nuts. I had used 4 lock washers I had laying around the garage - they were brand new, but I don't think they were grade 8 lock washers. I used anti-seize on the threads and then torqued the nuts (I had new grade 8 nuts luckily) to 30. The trailing arms are perfect - I couldn't be happier...but am I doomed for using the lock-washers I had as opposed to using grade 8 lock-washers? I really don't want to take the parking brakes apart just to change the lock-washers...it would be a PIA to put them back together. I tested the grade 8 lock-washers which I recently got for my hardware supplier against the ones I used on the trailing arms. I put them in a vice and clamped them down...they both sprung back exactly the same distance. I don't know why these little things bother me...it drives me nuts