
Rookie's first attempt at a restoration...
 09-20-2009, 01:54 AM
#981
Safety Car

Thread Starter

I finished fitting most of the pieces earlier today. Still need to bond them in place, but its getting there. It took lots of twisting/tweaking of the panels to make them fit perfect. I also used a trick Mike taught me - using a heat gun to soften some of the glass, then letting it cool off. You can change the shape of a panel using this method, and it works awesome. It also prevents cracking of the panel, as it does not put stress on it.


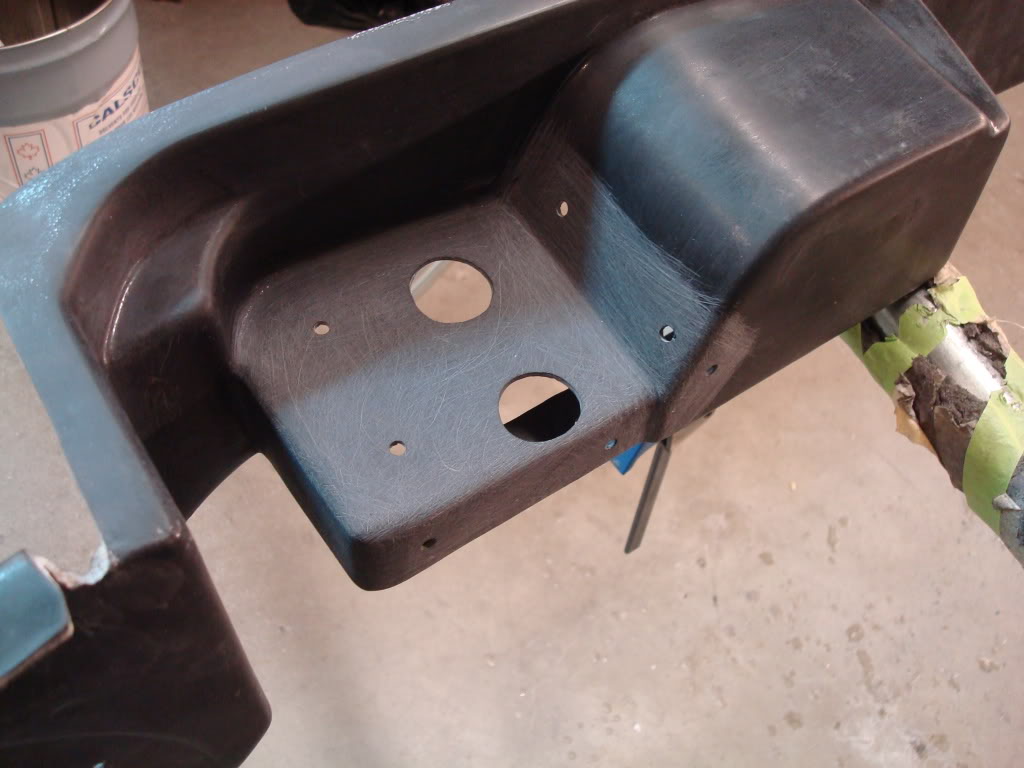
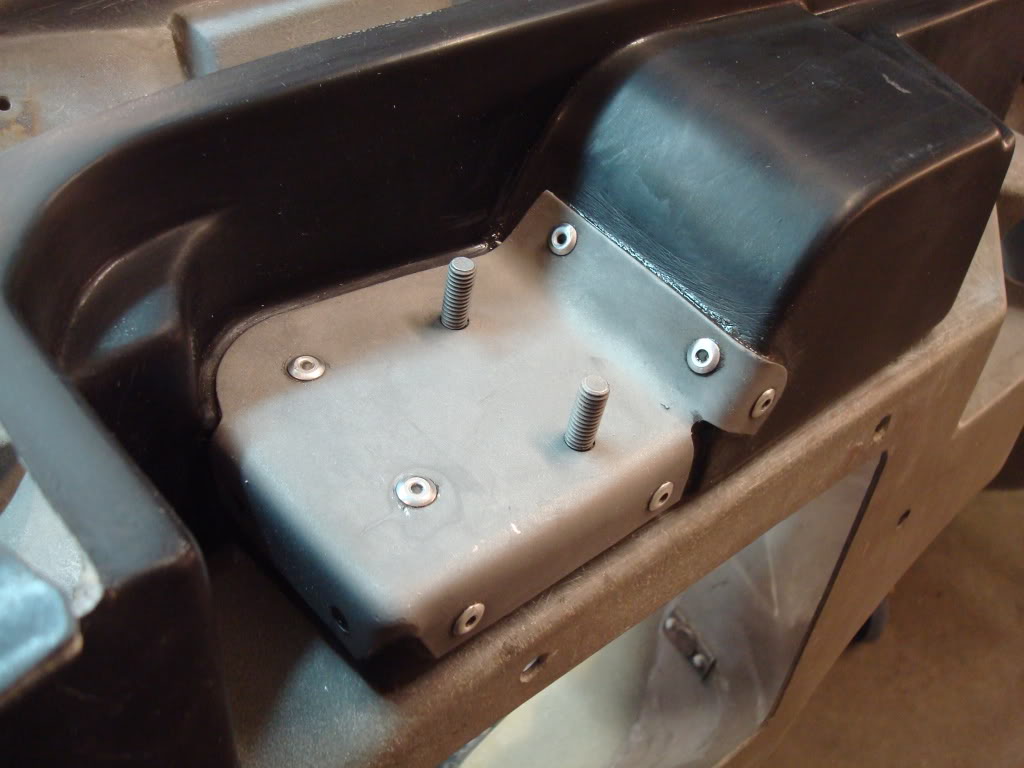
I sandblasted and bonded this metal plate in for the windshield wiper motor...
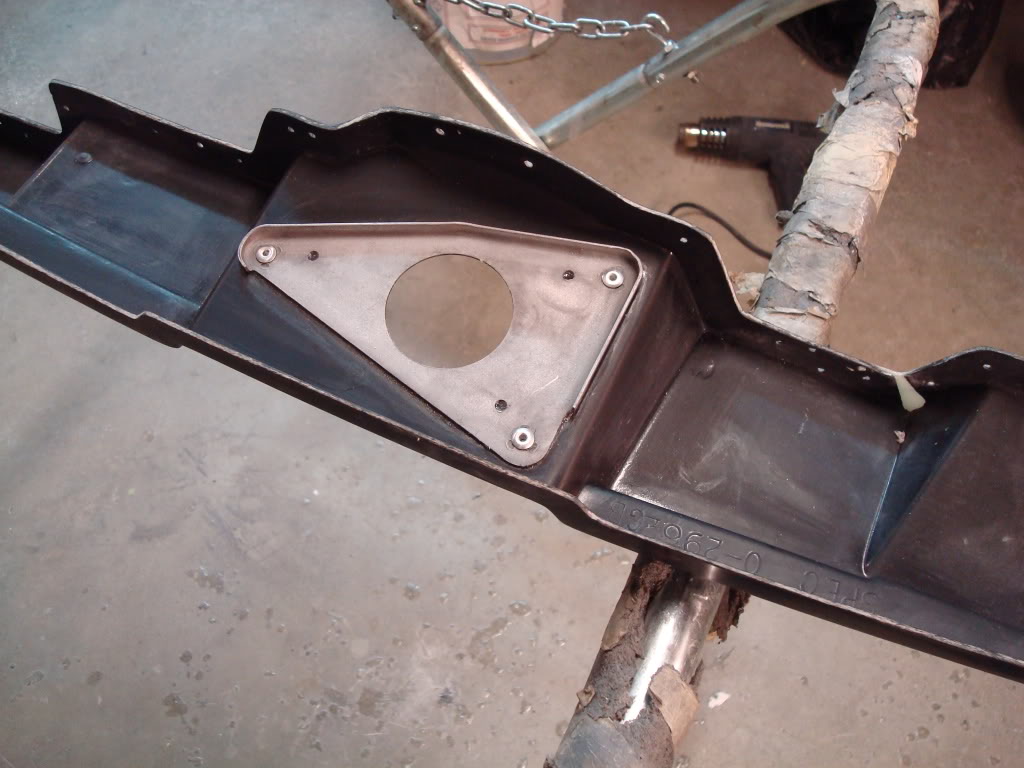
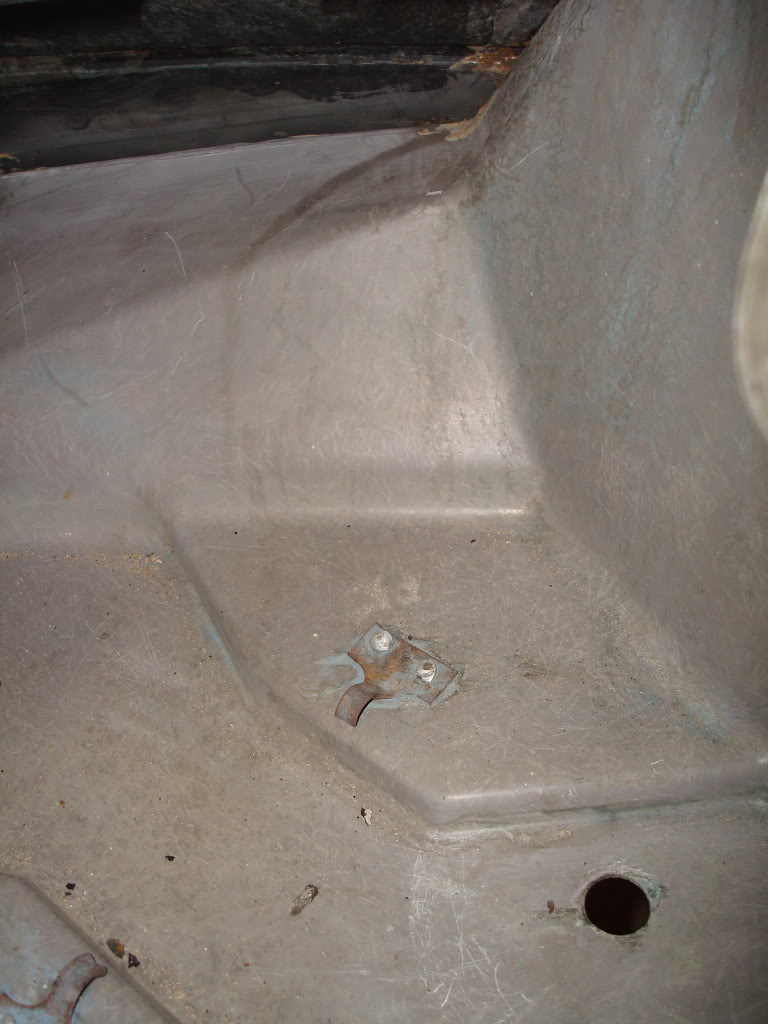
Sandblasted these two brackets (they are getting bonded in place as well). They are for the hood latches.
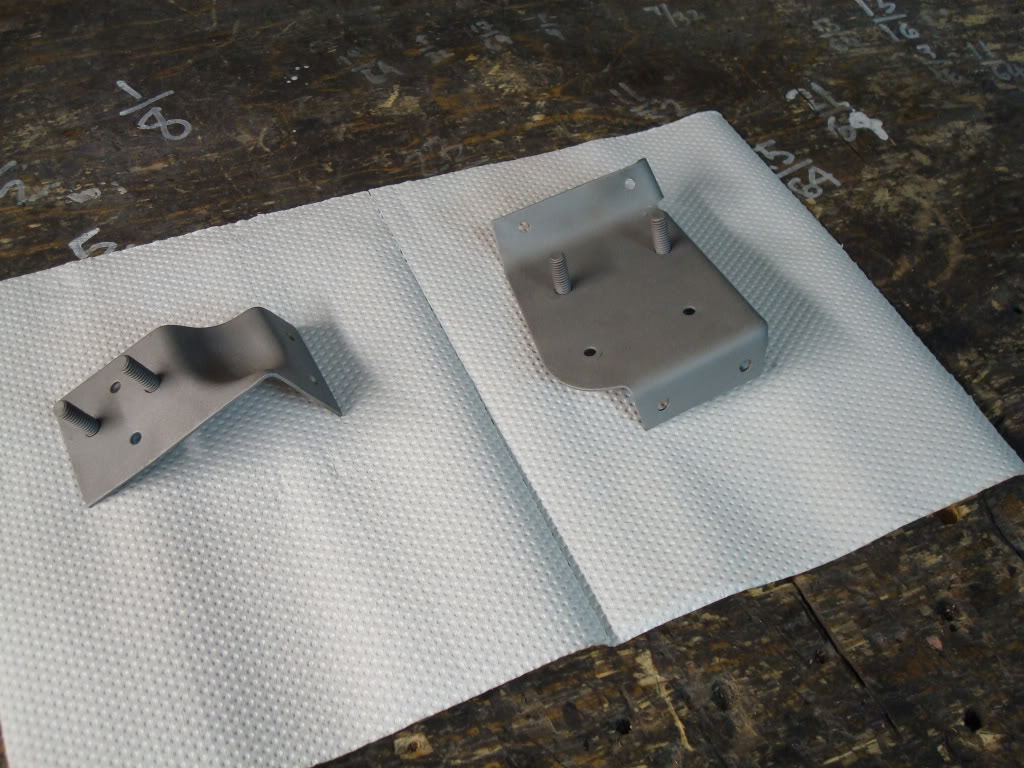
I sandblasted and bonded this metal plate in for the windshield wiper motor...
Sandblasted these two brackets (they are getting bonded in place as well). They are for the hood latches.

 09-22-2009, 07:56 AM
#983
Safety Car
Thread Starter
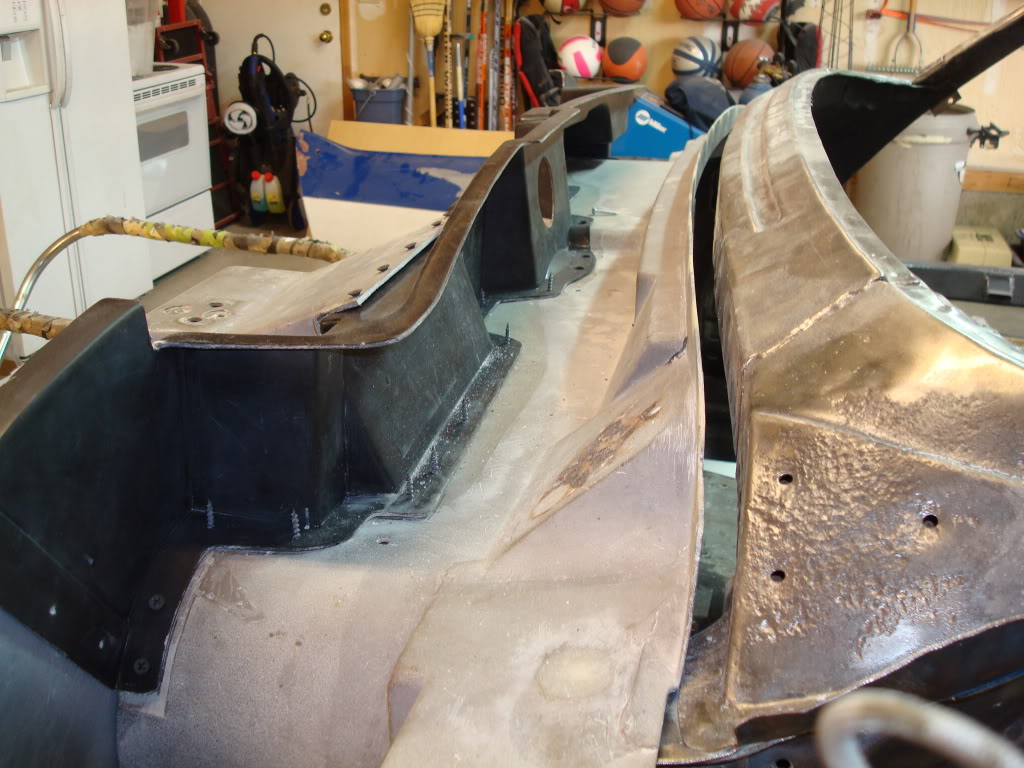
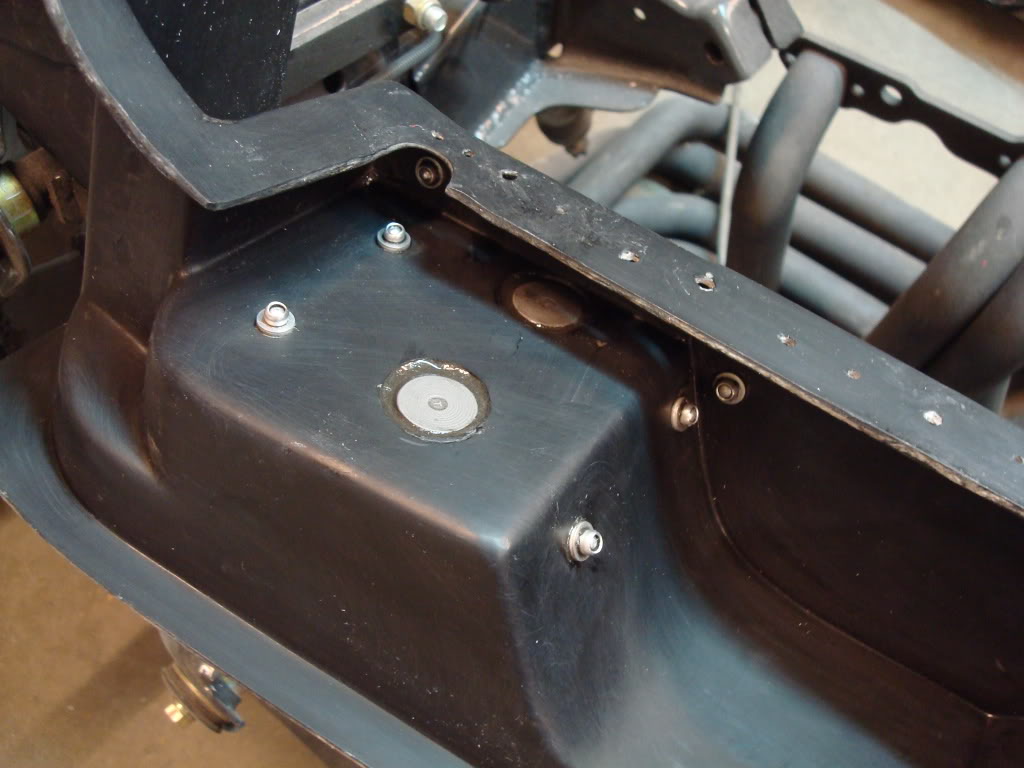
Last of the fiberglass repairs on the firewall!!!!!!
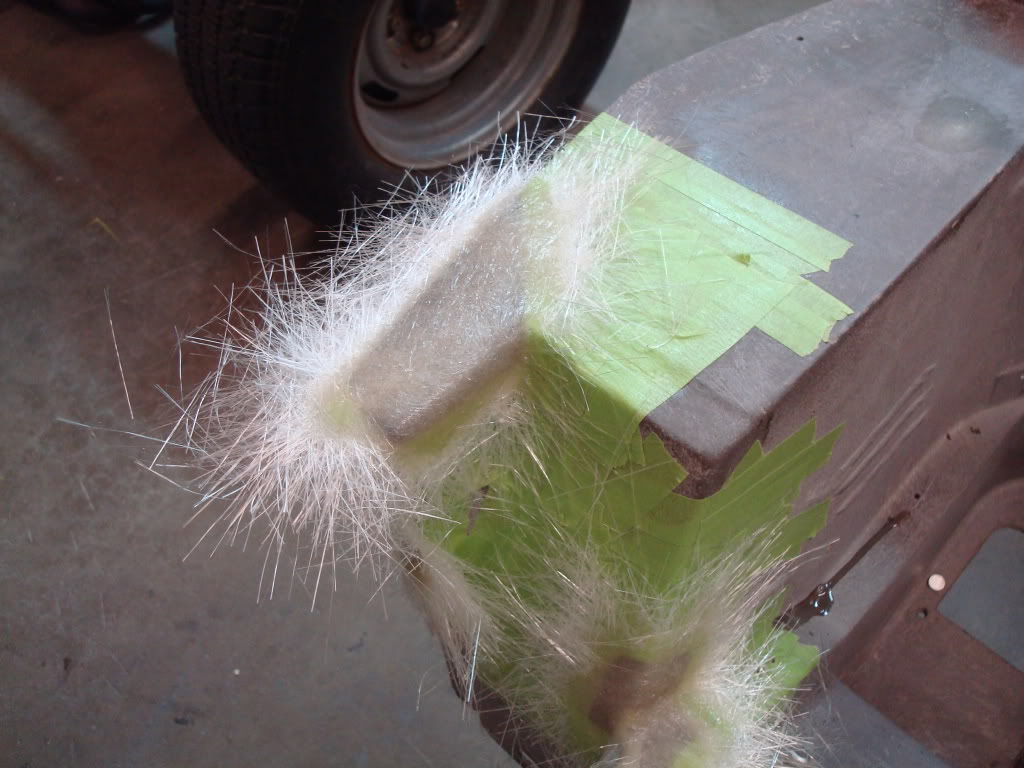
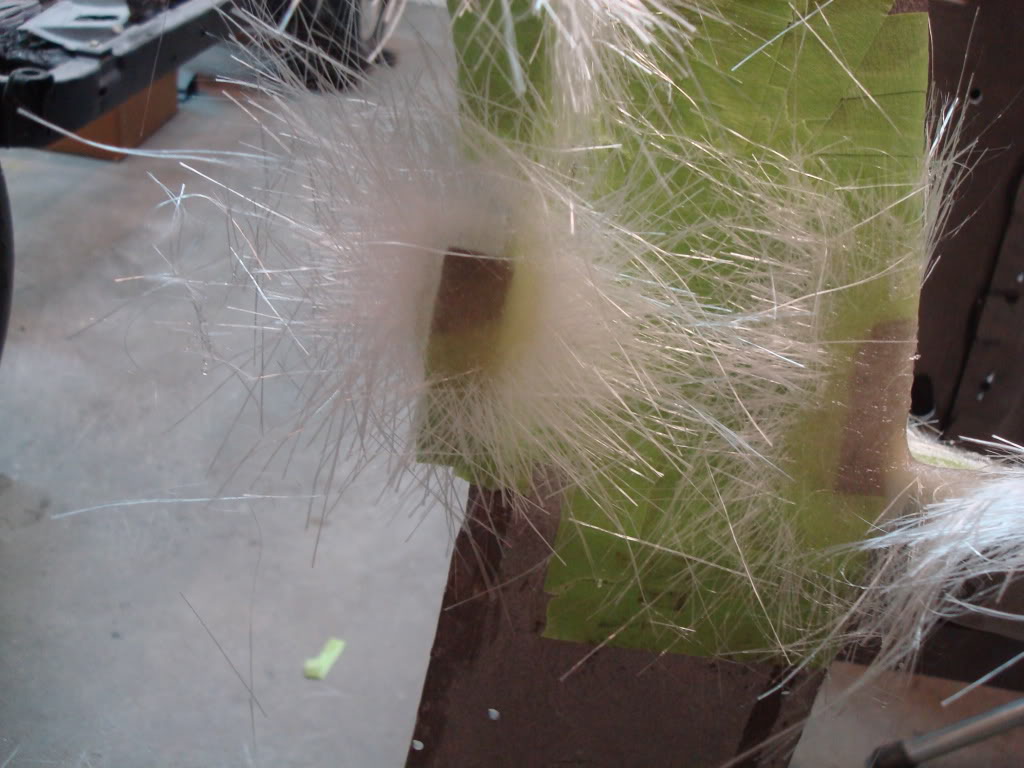
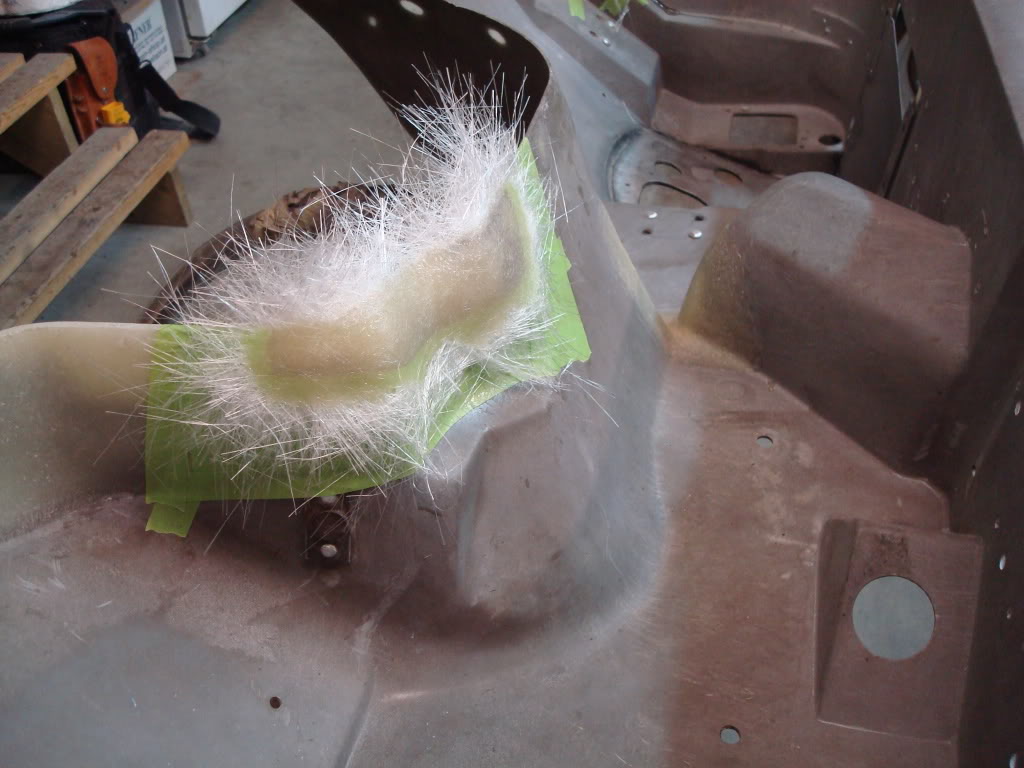
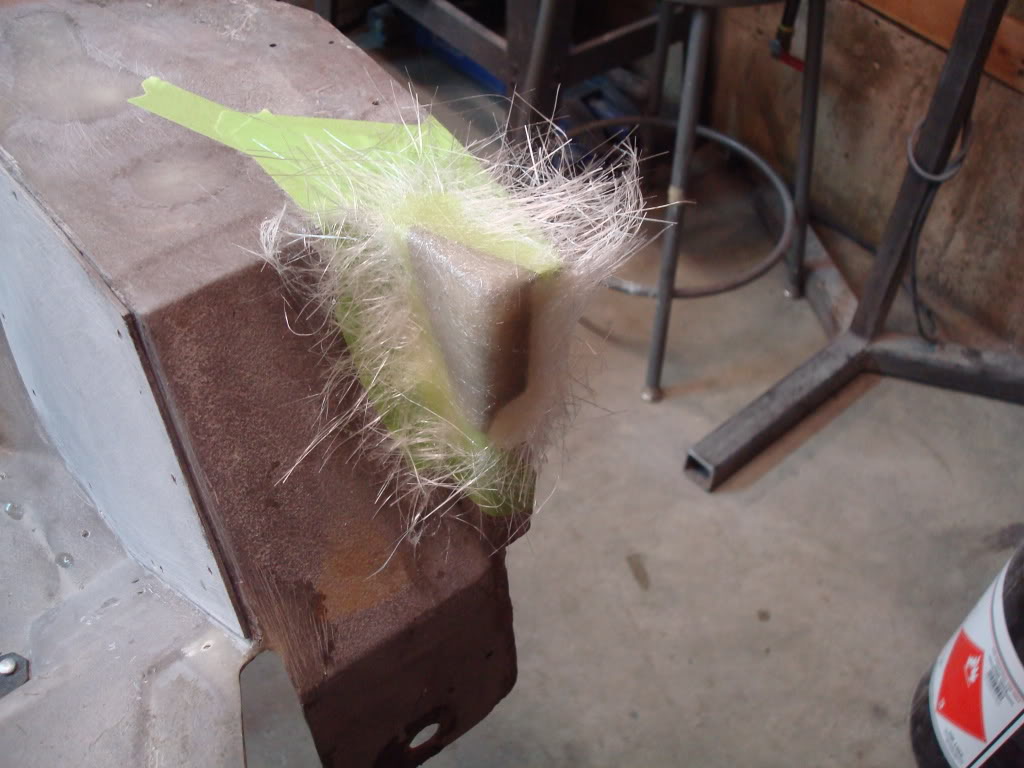
A couple hours of blocking these repairs, and I will be finished with fiberglass (on the firewall that is ). I am almost ready to get going on that body
A couple hours of blocking these repairs, and I will be finished with fiberglass (on the firewall that is
). I am almost ready to get going on that body
09-26-2009, 06:56 PM
#984
Safety Car
Thread Starter
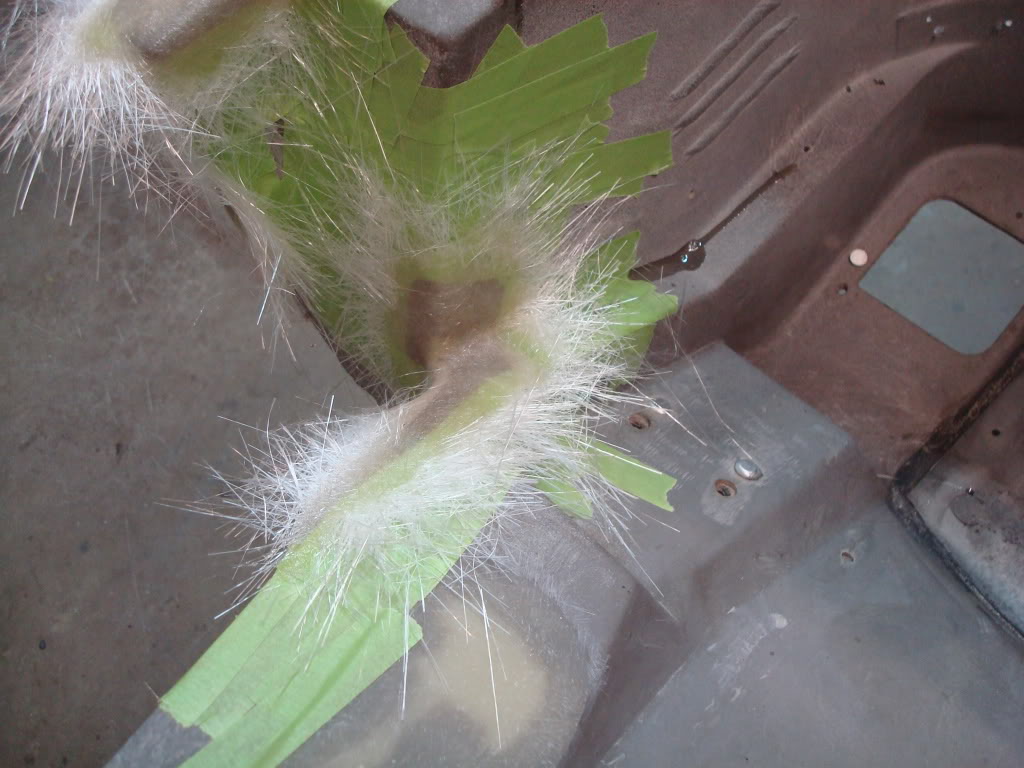
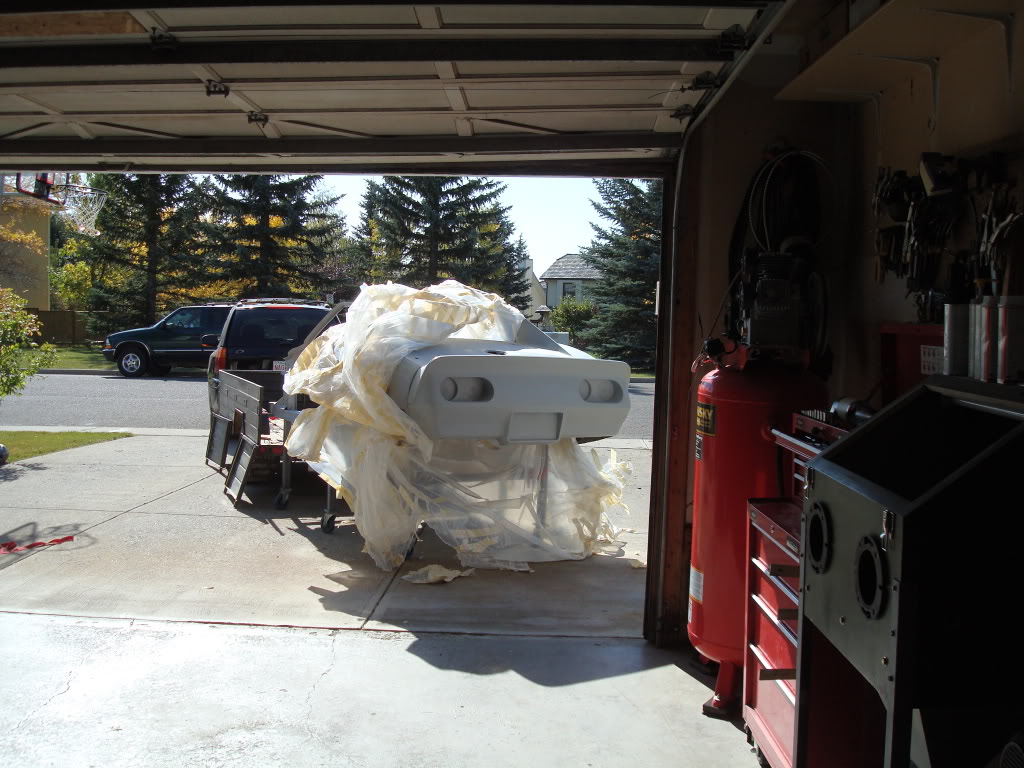
I masked the entire body off yesterday morning for sandblasting (cannot sandblast fiberglass) - it took a very long time. Took 5 rolls of masking tape, and then about 3-4 layers of thick plastic. Not one grain of sand hit the fiberglass.
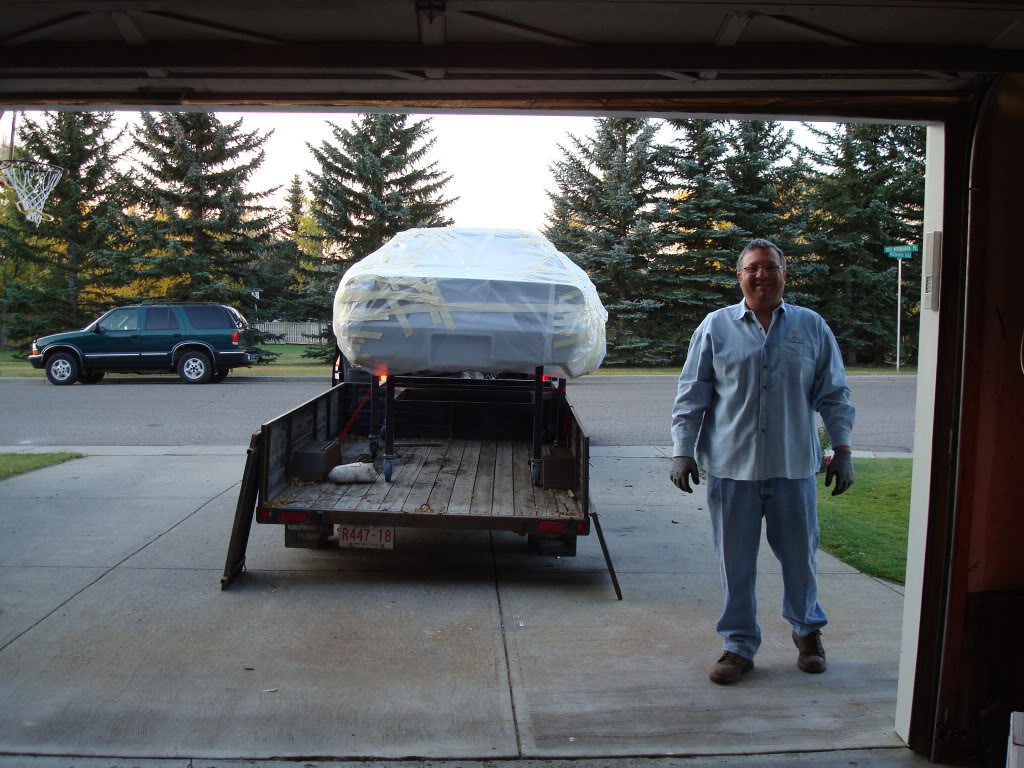
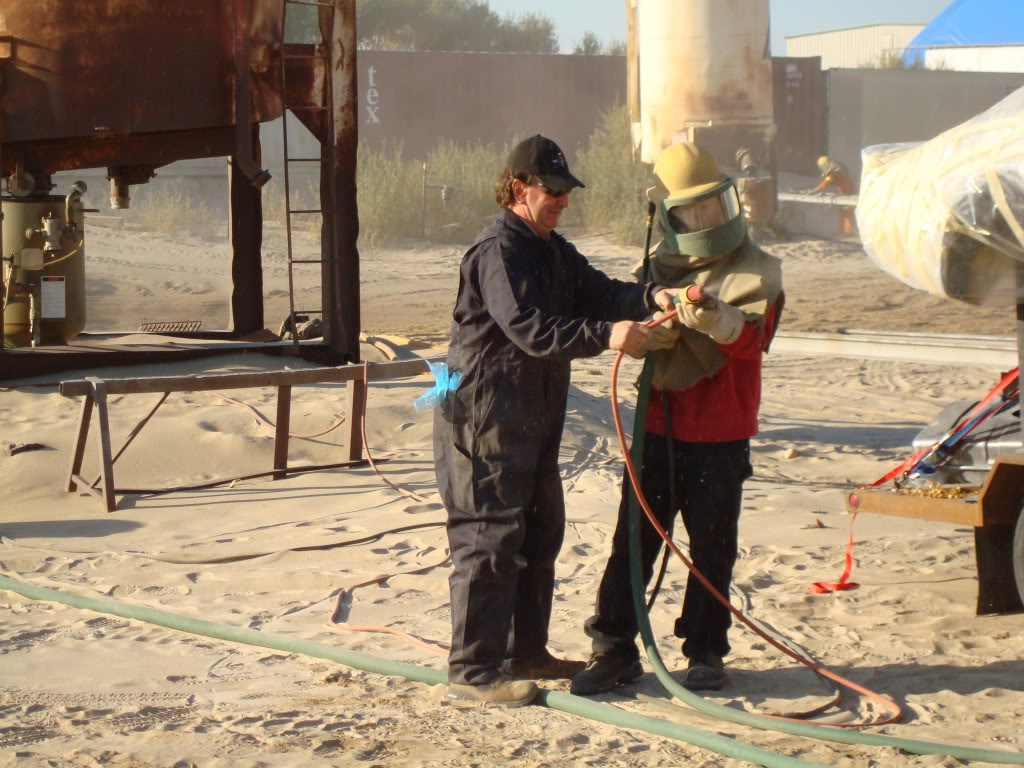
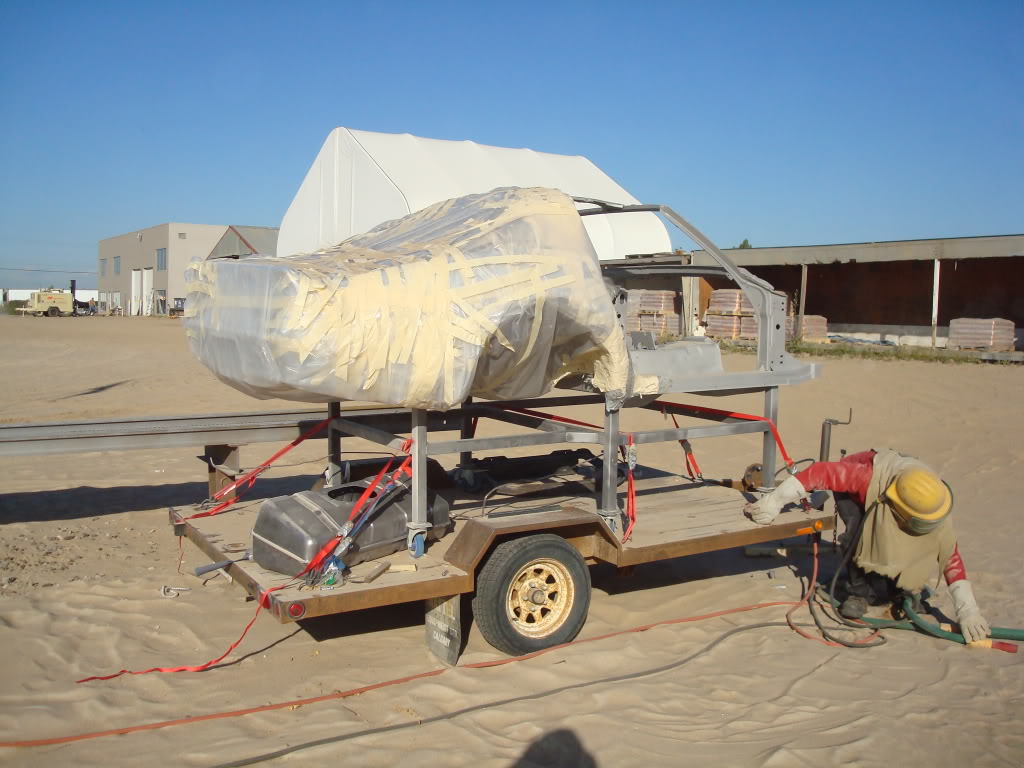
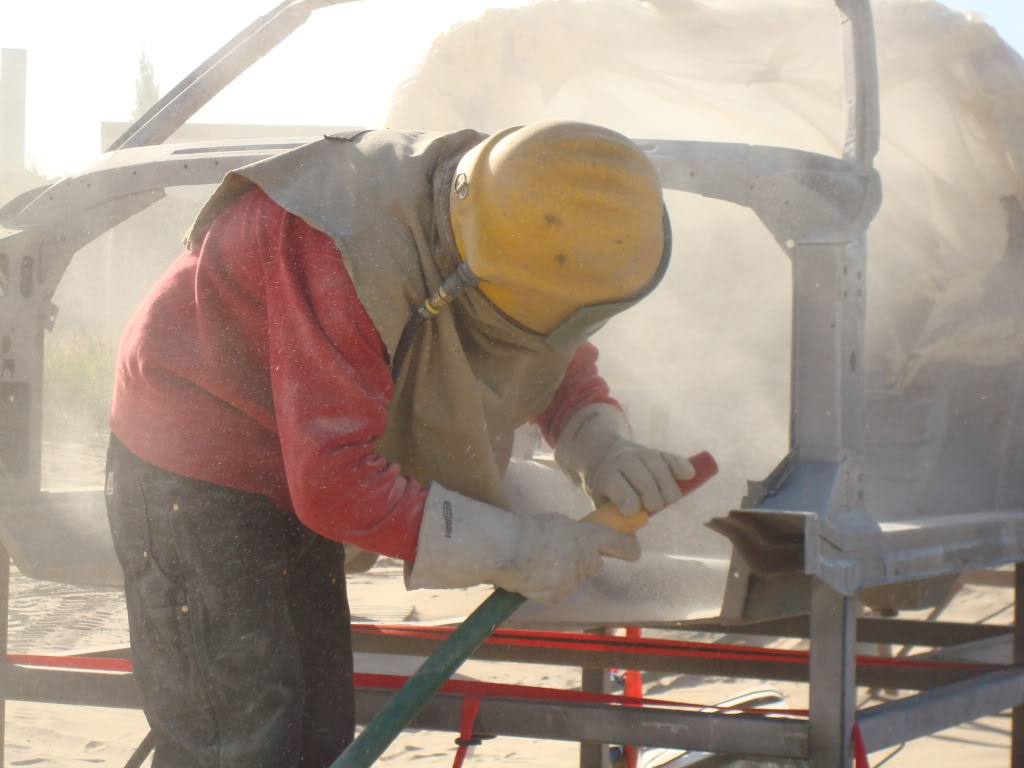
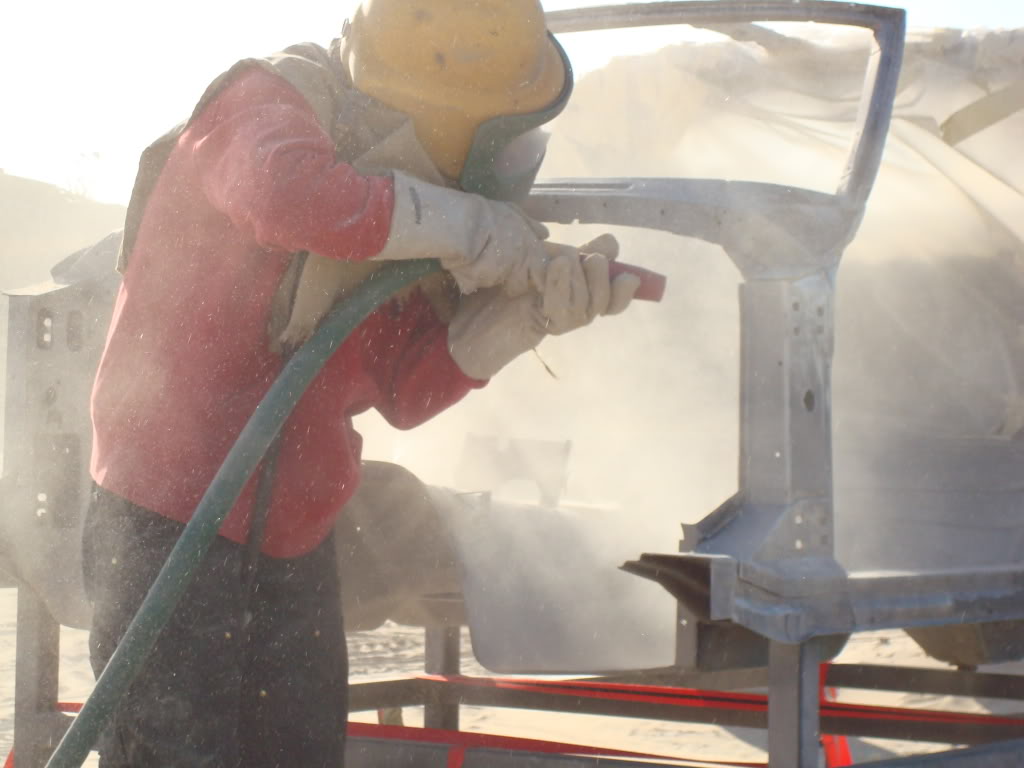
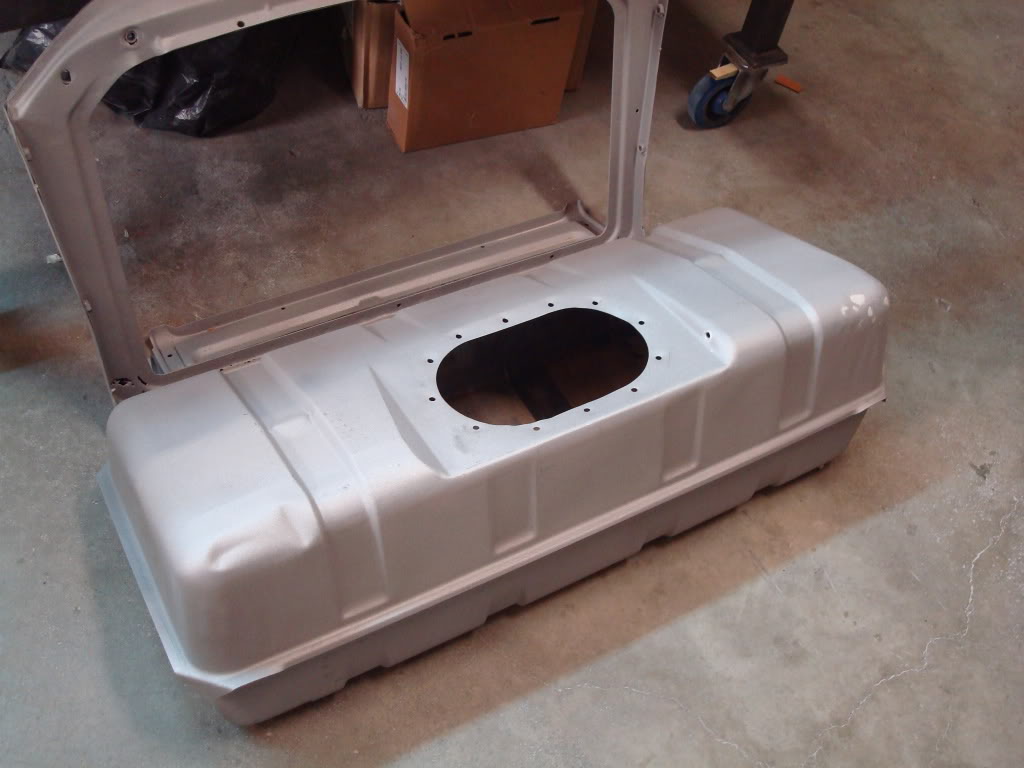
Today, me and my father drove the vette down to consolidated compressor, where I sandblasted it. These are industrial sandblasters - not hobby ones. I could not believe the power of these beasts...it was insane. The compressor they have running the blasters is absolutely incredible...it sucks air like you would not believe. I finished it in under 2 hours - the entire body, fuel lines, radiator support and fuel tank. Cost me all of $188, which is pretty damn cheap if you ask me. The big plus is that there is no damn cleanup at home! Here are some pics...
A picture of the best dad in the world. This project would not be happening if it wasn't for him (and my mom that is). I still can't believe they are letting me restore this thing to full potential (it ain't my house).
At the sandblasters...
I peeled her open once we got home...
The results are amazing - not one spec of rust/paint left on the entire body now. Now that all the bullsh#t work is finished, I can really start tearing into the bodywork
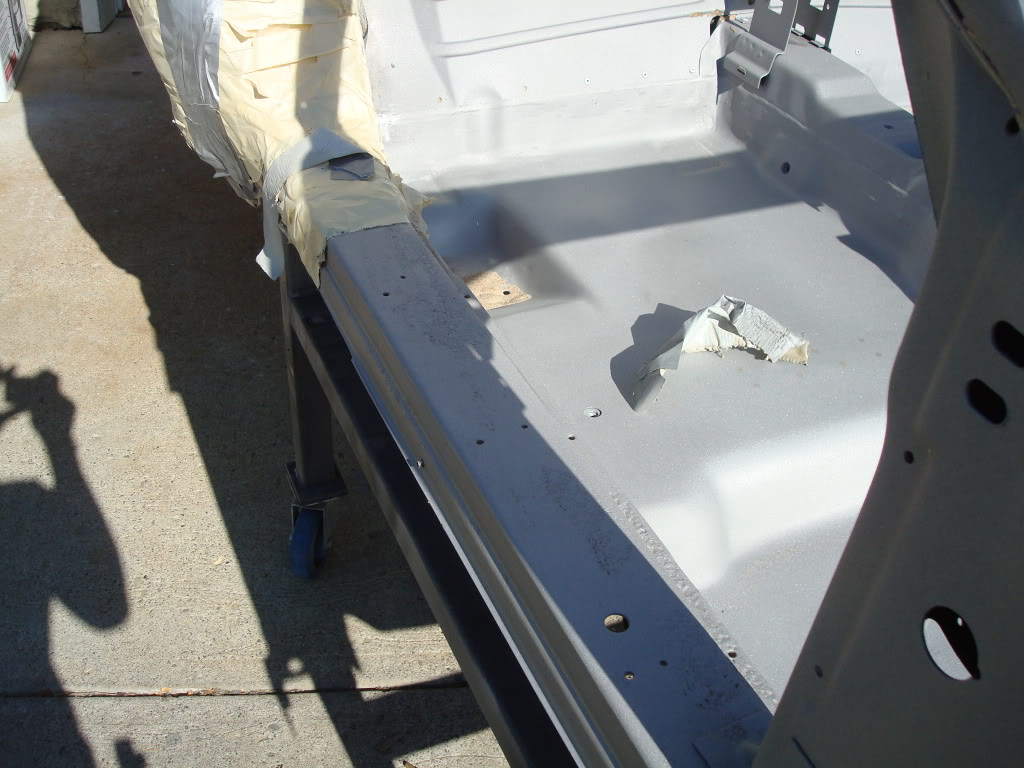
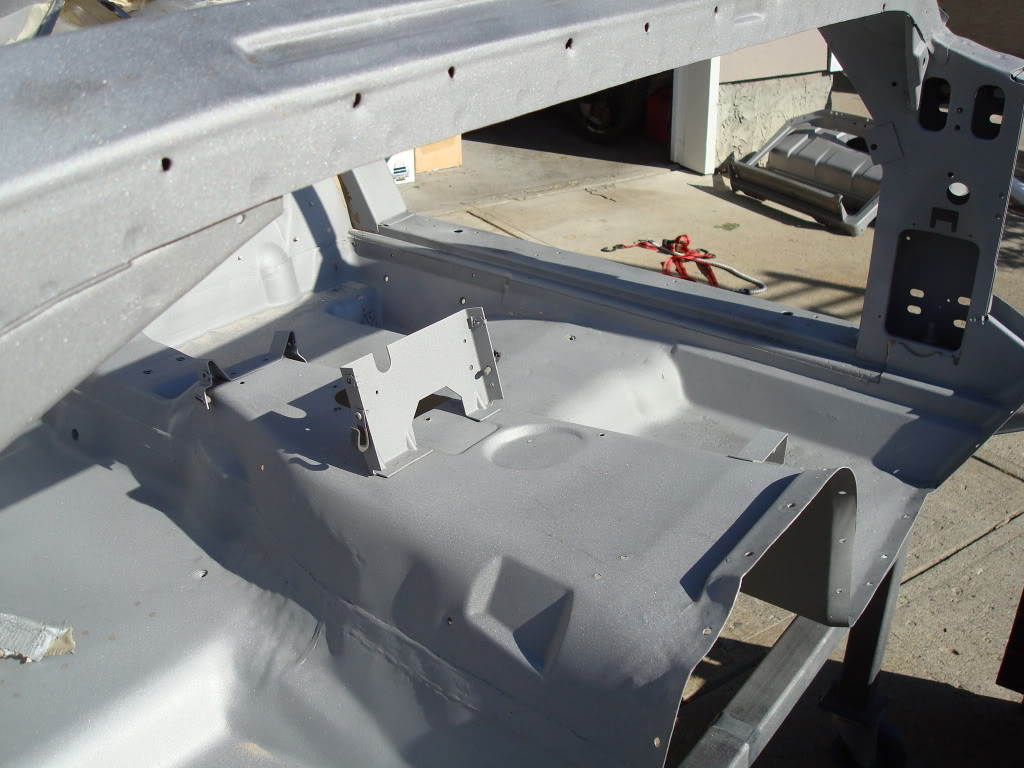
Kudos to Mike for selling me one hell of a body - this thing barely had any rust. YOU THE MAN MIKE!
Today, me and my father drove the vette down to consolidated compressor, where I sandblasted it. These are industrial sandblasters - not hobby ones. I could not believe the power of these beasts...it was insane. The compressor they have running the blasters is absolutely incredible...it sucks air like you would not believe. I finished it in under 2 hours - the entire body, fuel lines, radiator support and fuel tank. Cost me all of $188, which is pretty damn cheap if you ask me. The big plus is that there is no damn cleanup at home! Here are some pics...
A picture of the best dad in the world. This project would not be happening if it wasn't for him (and my mom that is). I still can't believe they are letting me restore this thing to full potential (it ain't my house).
At the sandblasters...
I peeled her open once we got home...
The results are amazing - not one spec of rust/paint left on the entire body now. Now that all the bullsh#t work is finished, I can really start tearing into the bodywork
Kudos to Mike for selling me one hell of a body - this thing barely had any rust. YOU THE MAN MIKE!
Last edited by stinger12; 09-26-2009 at 08:44 PM.
09-26-2009, 08:56 PM
#985
Racer


Member Since: Apr 2009
Location: Gurley Alabama
Posts: 354
Likes: 0
Received 0 Likes
on
0 Posts
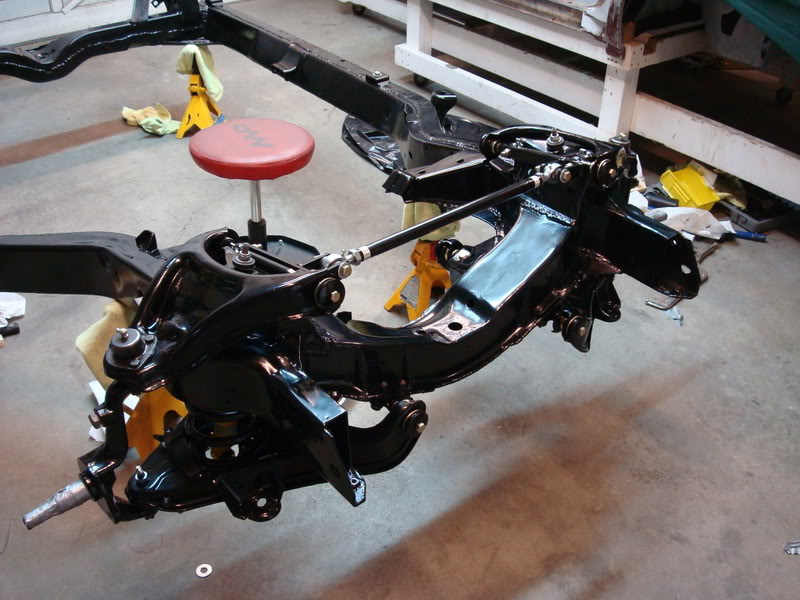
Okay, dumb question...what's the bar between the 2 A-arms...the one with the heim joint ends? Where'd you come up with it? What's it supposed to do? How does it fit behind the radiator?
09-26-2009, 09:31 PM
#986
Safety Car
Thread Starter
This one is designed for an electric radiator setup. The mounts were welded together when packaged. If you have a stock radiator fan, you need to get the kit with the mounts unwelded. The reason being is because it is such a tight fit with a stock fan...you need to mock it up yourself and weld it together. Its very, very tight - so they prefer you weld the tabs in for the heims.
09-28-2009, 02:37 AM
#987
Safety Car
Thread Starter
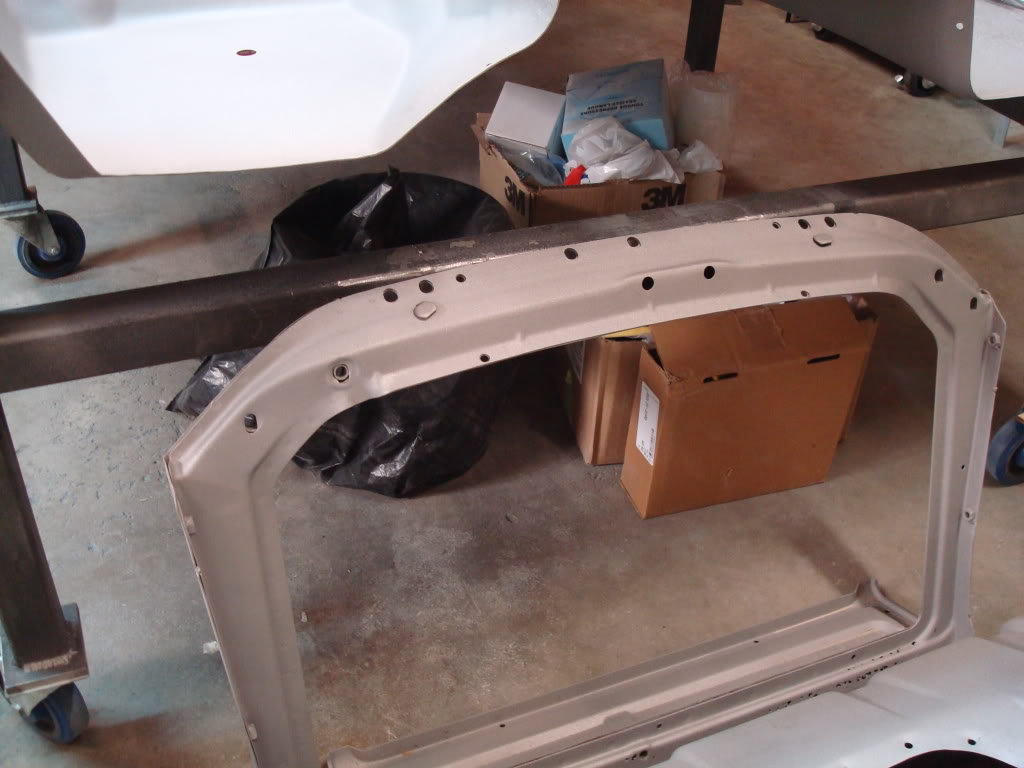
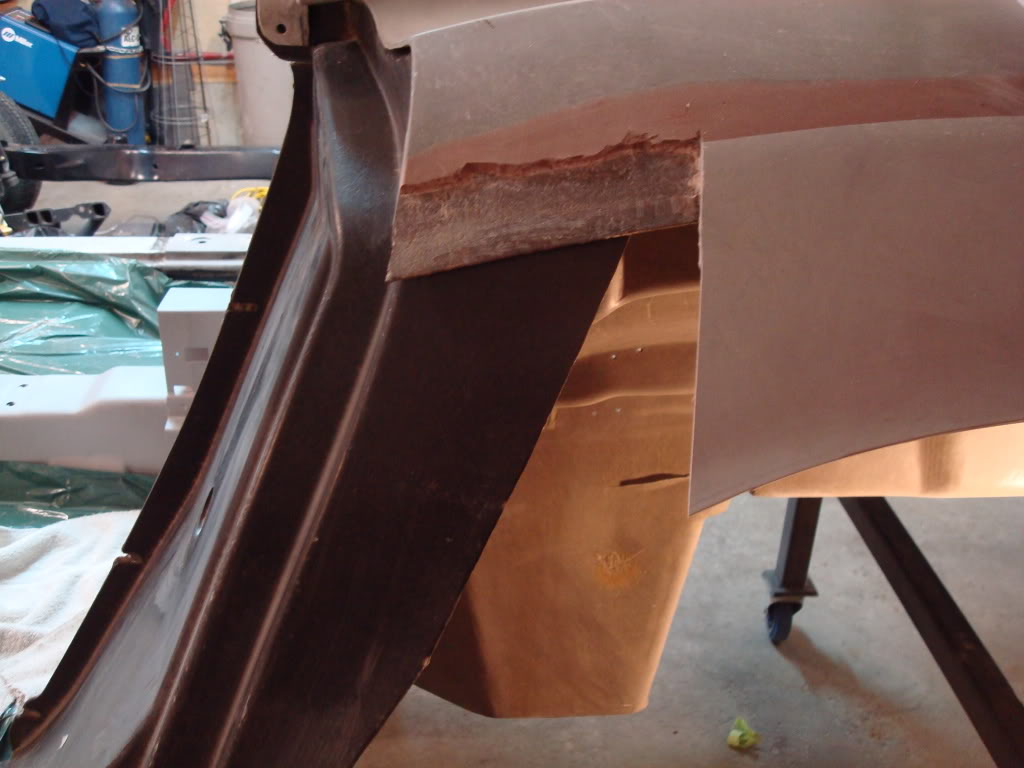
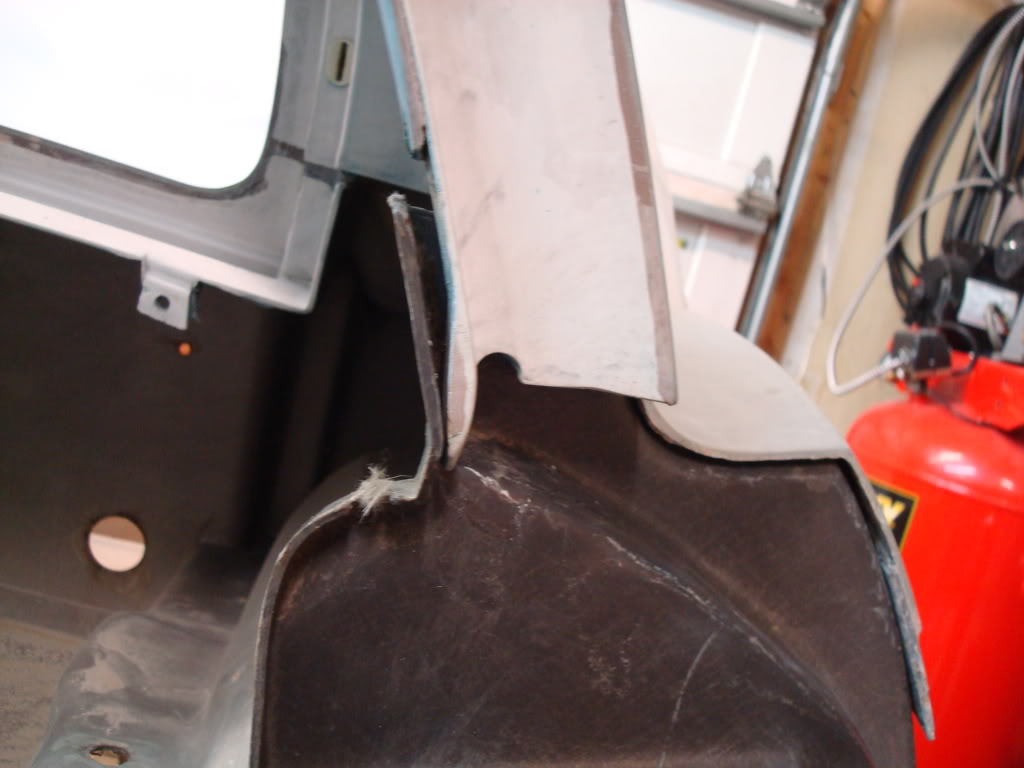
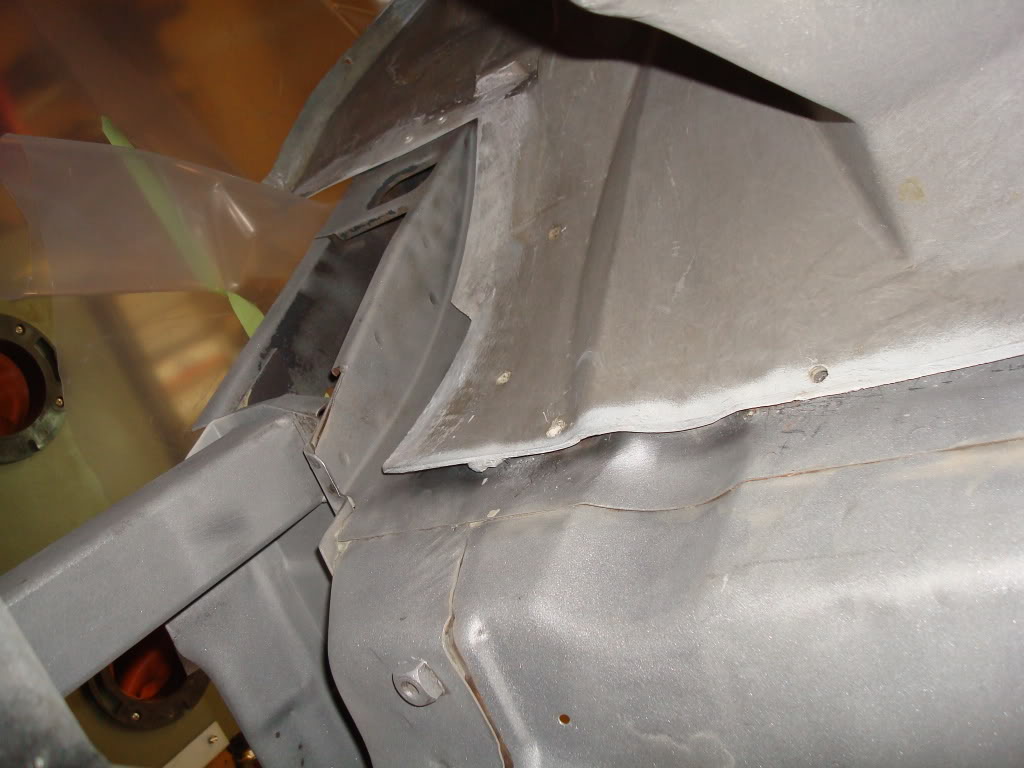
Had to clean up this area for the new door jamb. Bought it off ebay real cheap - its an original GM NOS replacement panel. Needs a little work, but almost every replacement panel does...

 09-28-2009, 07:34 PM
#989
Safety Car
Thread Starter
2 car garage, packed with family necessities and the vette. My room is packed full of parts, and so is our storage room. I also have parts in a storage facility right now. I would not recommend restoring a car in a 2 car garage!
09-28-2009, 08:28 PM
#990
1969/1971/1976 Coupes


 09-29-2009, 12:49 AM
#991
Safety Car
Thread Starter
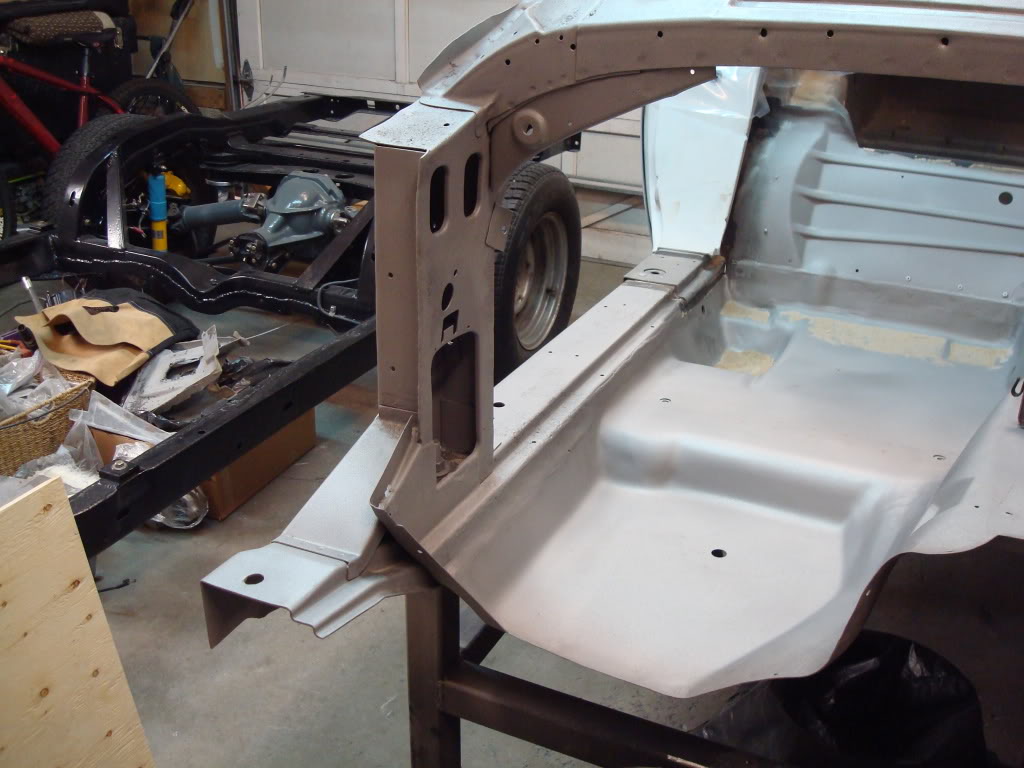
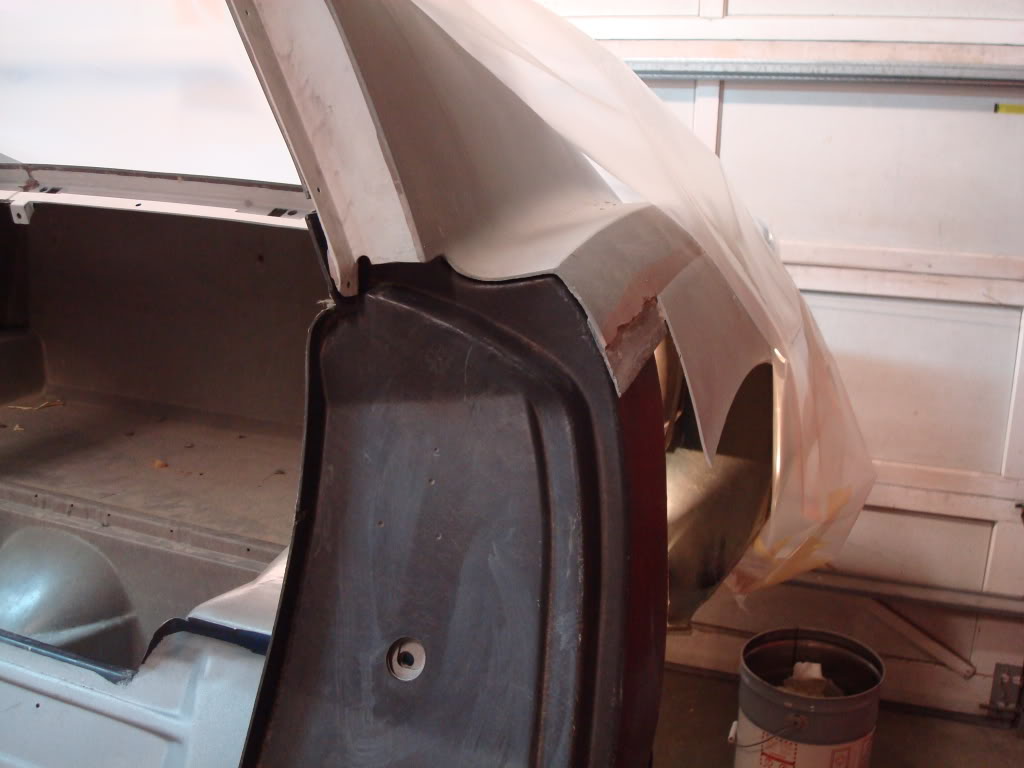
I decided to remove the right door jamb cover. I busted a piece off the inside of it when I was removing the #3 body mount cover, and tore it up pretty good (I totally forgot that there were 3 pieces sandwiched together right behind the dogleg...oh well, sh8t happens). That wasn't the only reason for removing it though. the previous owner messed it up pretty bad where he tried to make a repair on the dog leg. This way I can also put the rocker channel cover back in one piece instead of two pieces (Mike sent me a used panel in my last package). I'll have to sandblast this pillar before I put the body back on the frame. This is the farthest I am going with this thing...I'm not removing any more panels (come to think of it, the only panels I haven't removed are the rear deck and quarter panels ).
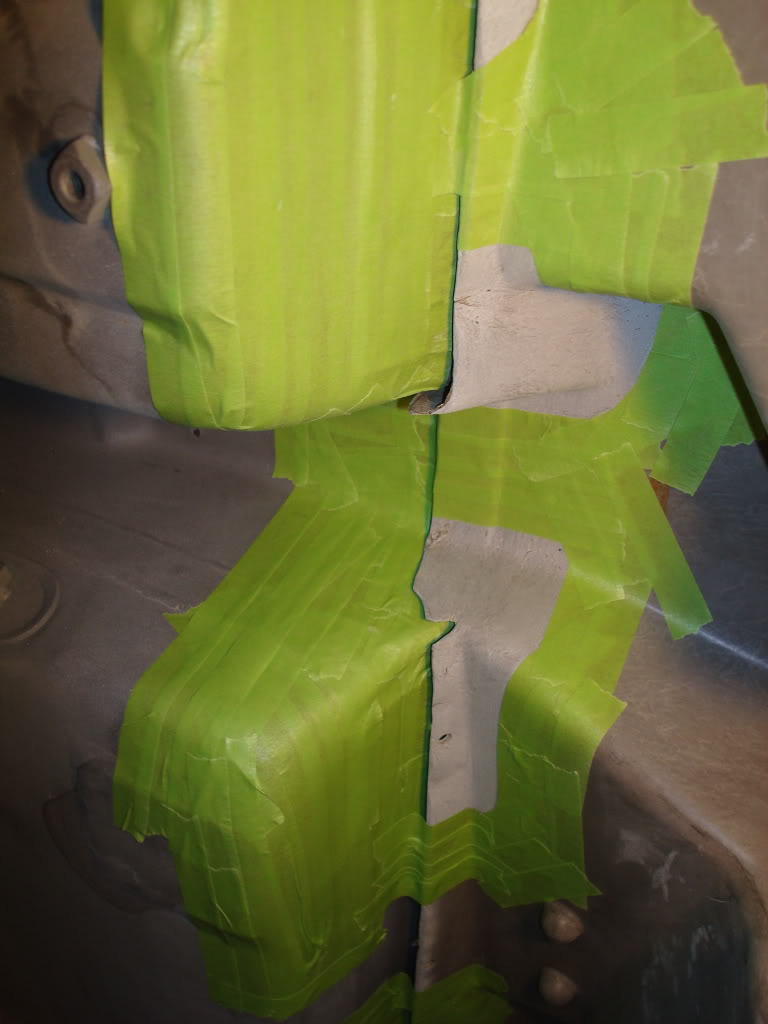
I also started prepping the joint between the tub and the floor pan. I need to bond it together with marinetex. God damn fiberglass. I just want this thing together already ...seems like it is never gonna end.
). I also started prepping the joint between the tub and the floor pan. I need to bond it together with marinetex. God damn fiberglass. I just want this thing together already
...seems like it is never gonna end.
Last edited by stinger12; 09-29-2009 at 12:53 AM.
10-04-2009, 11:25 PM
#992
Safety Car
Thread Starter
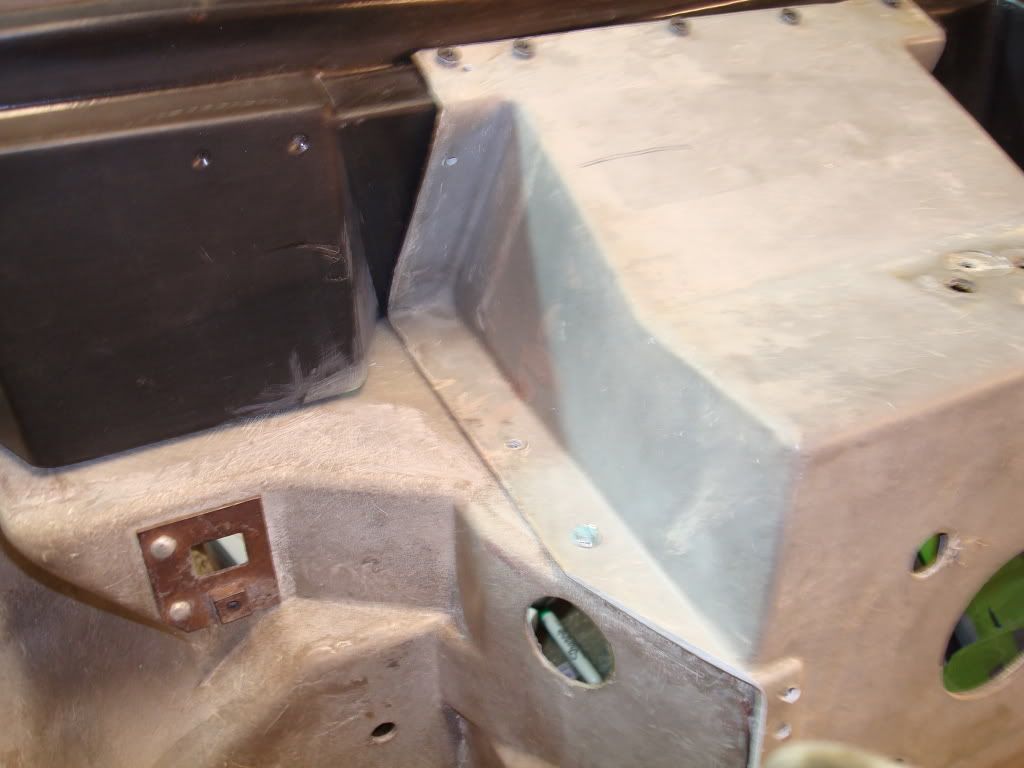
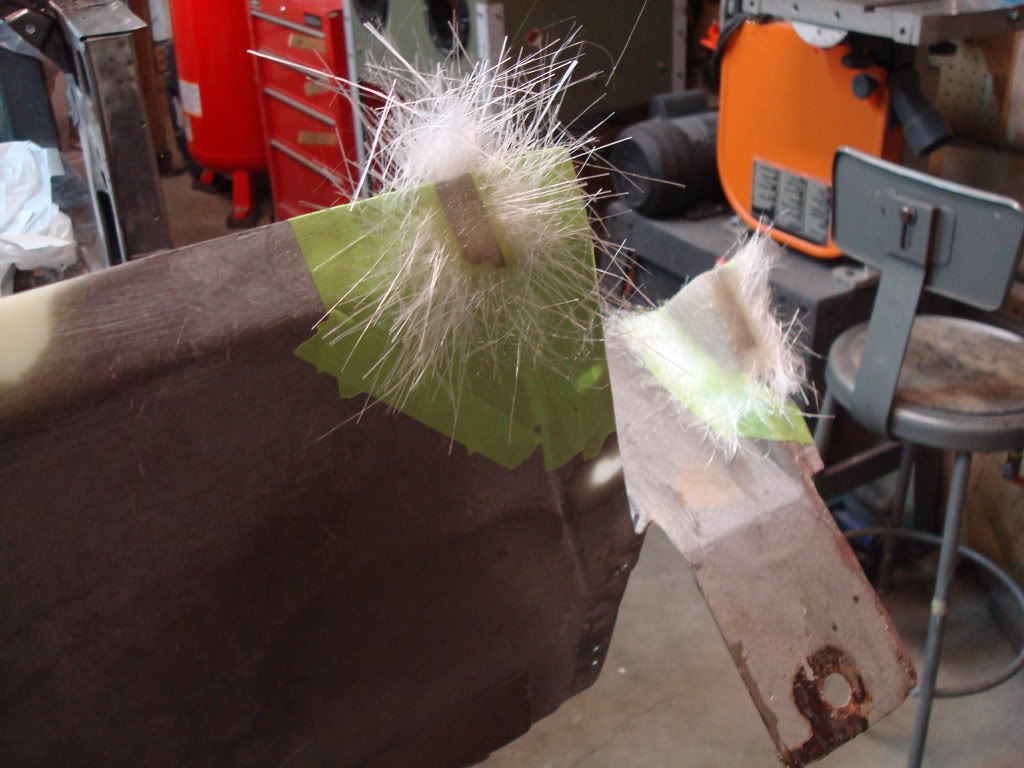
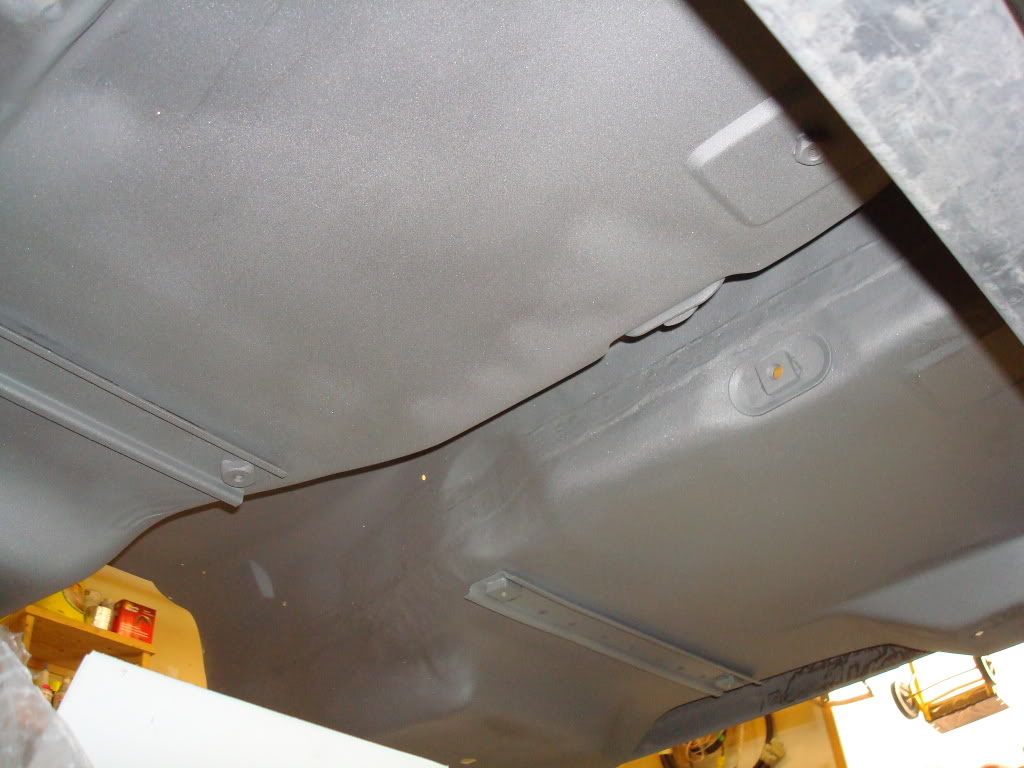
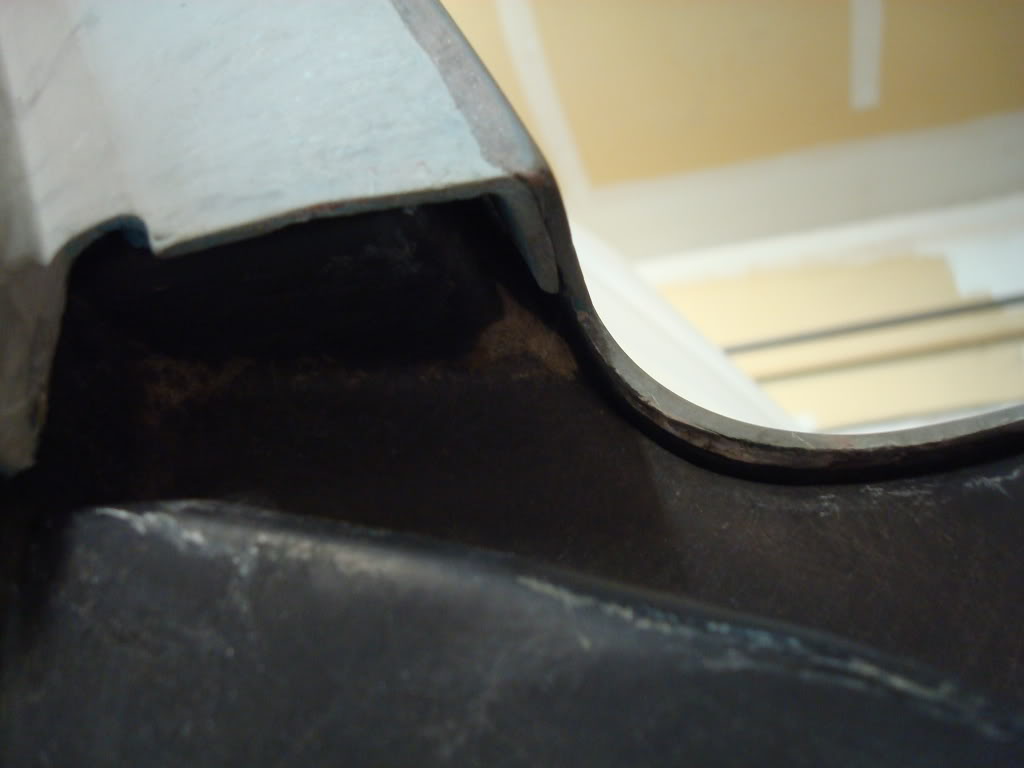
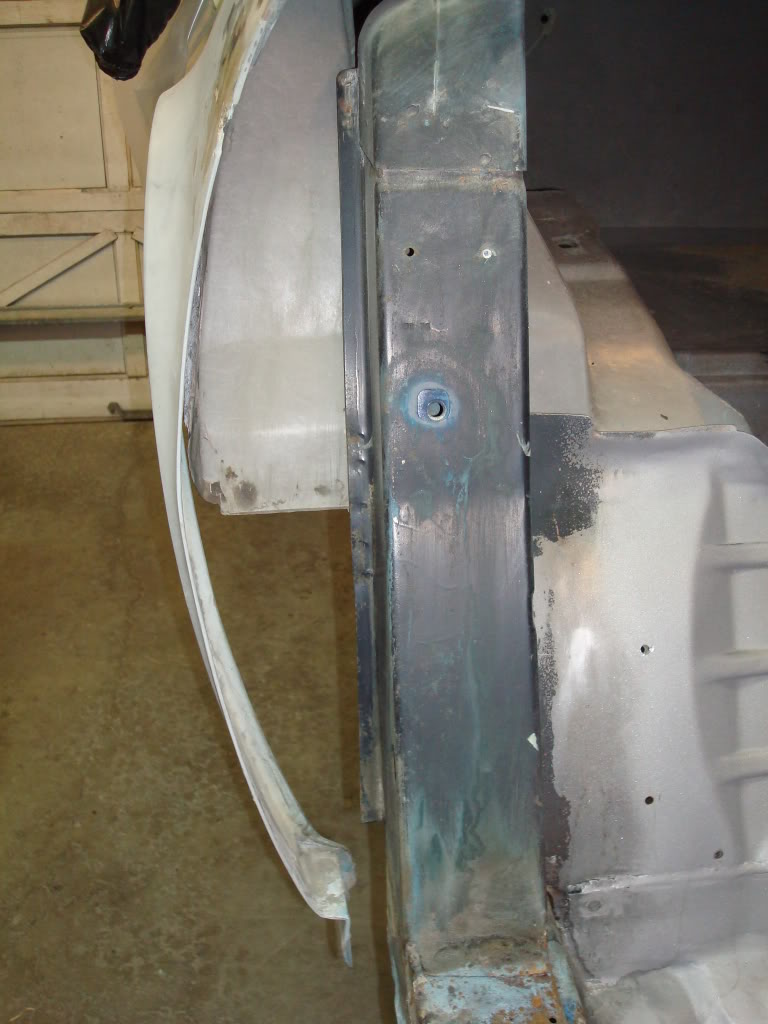
I need to finish some repairs on the underbody before it goes back on the frame for good. One of those jobs is rebonding the area where the tub meets the floorpan/ seat riser. This is important, as it is one of the few areas where the birdcage is actually bonded to the rear section of the car. I sandblasted, wire wheeled, sandblasted and scrubbed with scotch brite and lacquer thinner until the bonding surfaces were rough and clean. I also used hacksaw blades...worked great. I had to get in the rear of the interior like a moron...i could barely move, but I needed to sandblast this area for bonding (the area is at the top of the pic...picture was taken before sandblasting)
Here is the are I cleaned to perfection...
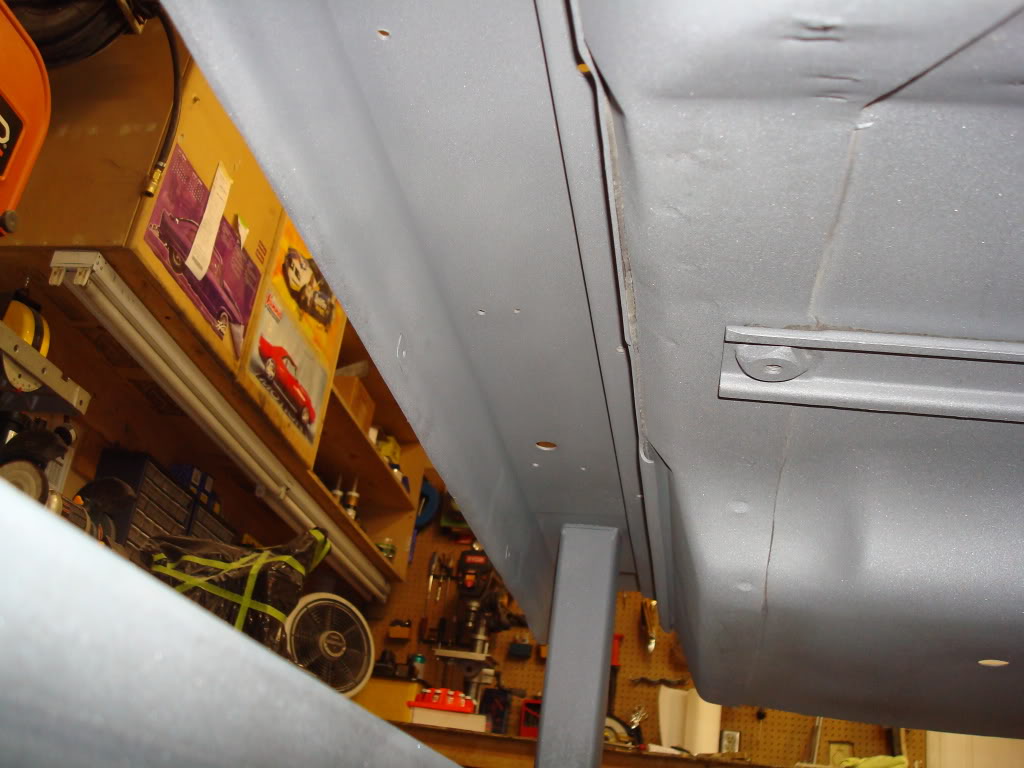
Here is what I found underneath GM bonding adhesive...

The underside of the repair was in plain sight (this picture was taken after I pulled all of the cloth off!)...
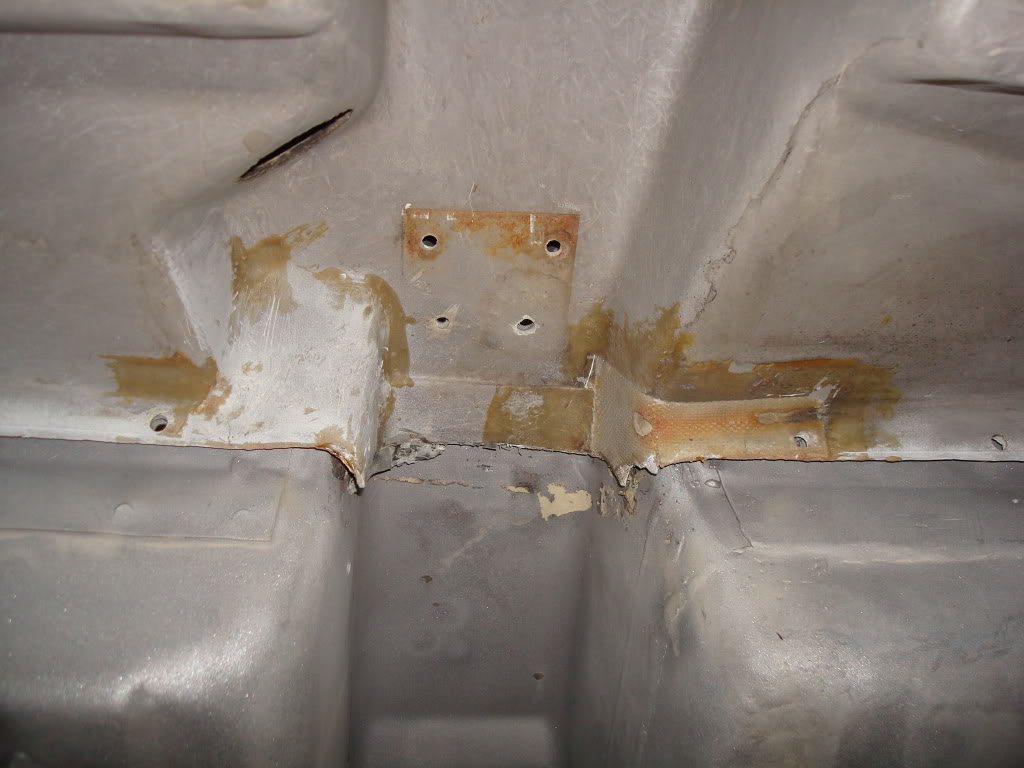
Yes, that is correct. I found this under GM applied bonding adhesive and sealant. There were pieces of cloth in areas which could not have been applied unless the tub was off the car at some point, which it was not. I talked to Mike about this, and he said he's seen repairs just like this done by GM from the factory - they never made the panels, so they repaired them the easiest way they could when they got damaged during assembly. I also found fiberglass cloth under my #4 body mount reinforcements. The reinforcements were still riveted with original GM body rivets. Anyways, This crap had to come off. I want to do this right. I sanded and stripped all the resin that was on the underbody, then I prepped any cracked/fractured areas for fiberglass. It took me more than a few hours...there was a ton of crap to clean between the tub and floor pans.


Here is the are I cleaned to perfection...
Here is what I found underneath GM bonding adhesive...
The underside of the repair was in plain sight (this picture was taken after I pulled all of the cloth off!)...
Yes, that is correct. I found this under GM applied bonding adhesive and sealant. There were pieces of cloth in areas which could not have been applied unless the tub was off the car at some point, which it was not. I talked to Mike about this, and he said he's seen repairs just like this done by GM from the factory - they never made the panels, so they repaired them the easiest way they could when they got damaged during assembly. I also found fiberglass cloth under my #4 body mount reinforcements. The reinforcements were still riveted with original GM body rivets. Anyways, This crap had to come off. I want to do this right. I sanded and stripped all the resin that was on the underbody, then I prepped any cracked/fractured areas for fiberglass. It took me more than a few hours...there was a ton of crap to clean between the tub and floor pans.
 10-05-2009, 07:14 PM
#994
Drifting

Stinger,
I appreciate how you continue to post all the photo's of your
fiber glass repairs, You sure do make it look easy. I hope to do
some custom work to the hood of mine and you have taken the
guess work out of this for me.
Thanks, I will continue to read your post.
Riggs.
I appreciate how you continue to post all the photo's of your
fiber glass repairs, You sure do make it look easy. I hope to do
some custom work to the hood of mine and you have taken the
guess work out of this for me.
Thanks, I will continue to read your post.
Riggs.
10-05-2009, 09:13 PM
#995
Melting Slicks

Jeremy,
Birdcage looks great after the sandblasting. That dolly is working for you! Have you primed all that you sandblasted?
Your weather sense is good too. Just beat the snow, didn't you!
Birdcage looks great after the sandblasting. That dolly is working for you! Have you primed all that you sandblasted?
Your weather sense is good too. Just beat the snow, didn't you!
10-05-2009, 11:40 PM
#996
Safety Car
Thread Starter
I have not primed the sandblasted stuff. Its weird, as Calgary is extremely dry and sandblasted stuff does not rust...even if you touch it. I have touched this thing with sweaty palms all over, and not one spec of rust. I only have 2 small fingerprints on the doorsI blasted months ago...that's how dry it is. Once I finish the rest of the fiberglass repairs on the underbody, I finally get to undercoat everything. Once that is done, I will be painting the birdcage and interior which I sandblasted last week. And then once that is completed, I am puttin this bitch back on the frame for good!!!!!
10-05-2009, 11:42 PM
#997
Safety Car
Thread Starter
10-06-2009, 12:07 AM
#998
Safety Car
Thread Starter
Stinger,
I appreciate how you continue to post all the photo's of your
fiber glass repairs, You sure do make it look easy. I hope to do
some custom work to the hood of mine and you have taken the
guess work out of this for me.
Thanks, I will continue to read your post.
Riggs.
I appreciate how you continue to post all the photo's of your
fiber glass repairs, You sure do make it look easy. I hope to do
some custom work to the hood of mine and you have taken the
guess work out of this for me.
Thanks, I will continue to read your post.
Riggs.
Just take a look at what this man is capable of - this is Zwede's car, which he just finished. The guy is an artist...and the amount of body filler he uses is insanely little. Nevdr sands on original glass...he is the best. I'm sure Markus (Zwede) is one proud vette owner! http://forums.corvetteforum.com/c3-g...-in-paint.html

