
Custom Fiberglass Dash / Interior
 12-13-2007, 04:10 PM
#41
Race Director

Member Since: Oct 2000
Location: Kansas City, MO ...I'd like to go fishing and catch a fishstick. That'd be convenient. - Mitch Hedberg
Posts: 11,891
Likes: 0
Received 2 Likes
on
2 Posts

I think the flat portion of the center console where you plan on mounting the heater controls and the 90 degree rise of the center stack seems a little awkward. I think three different angles would work better. One for the heater controls (elevated in the front, not flat), one for the screen and finally a vertical one for the gauges. Will the center stack fit in the gap of the dash that the original center guage bezel sits? I guess I'm just not sure how it ties into the dash. I think seeing how the two tie together would help see the end vision.
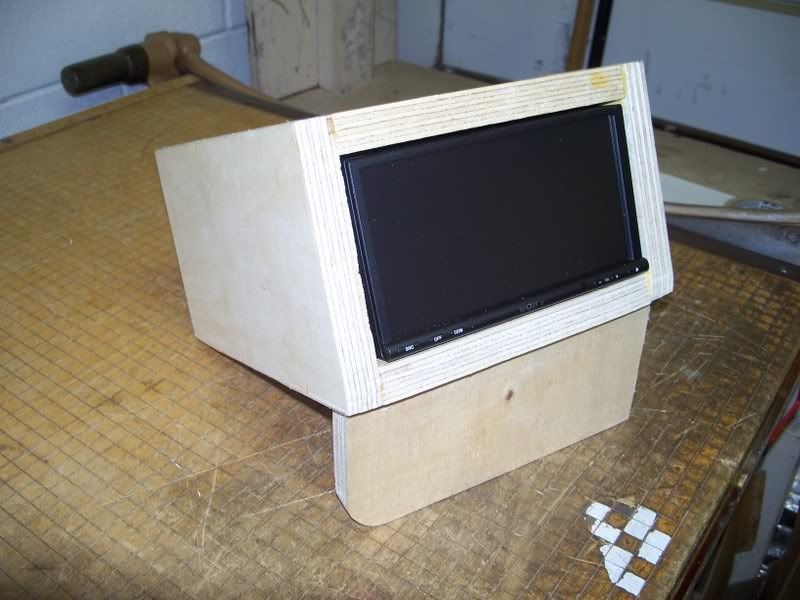
My stock dash is trashed and has a plastic cap over it currently. Next summer I'm planning on removing it and building off the plastic frame of the dash. I want to tie it into a one piece center console and create new door panels that roll into the dash. I want all the pieces to mesh together, not just sit next to each other like the stock layout. I intend to cover most or all of it in leather. I'm not much for the painted fiberglass dashes that seem so popular in the sport compact scene.
Last edited by Ak. Mal; 12-13-2007 at 04:12 PM.
 12-13-2007, 06:16 PM
#42
Racer

Thread Starter
I agree that the screen needs to be at more of an angle, maybe even higher.....It would be much easier to see the farther forward it is mounted in the car....I think three different angles would work better. One for the heater controls (elevated in the front, not flat), one for the screen and finally a vertical one for the gauges....I want to tie it into a one piece center console and create new door panels that roll into the dash. I want all the pieces to mesh together, not just sit next to each other like the stock layout..
12-15-2007, 10:46 AM
#43
Racer
Please make sure you leave some room in the DVD slot area for ventilation or it will overheat. Those NAV systems with DVD/CD players generate a lot of heat and need air around them.
Nice project, can't wait to the see the end product.
Nice project, can't wait to the see the end product.
12-15-2007, 12:35 PM
#44
Le Mans Master

u can always install a computer fan in the cavity to help circulate the air.... i used 2 fans for my amp install....
b
b
12-16-2007, 03:49 AM
#45
Melting Slicks


 12-18-2007, 10:46 PM
#46
Racer
Thread Starter
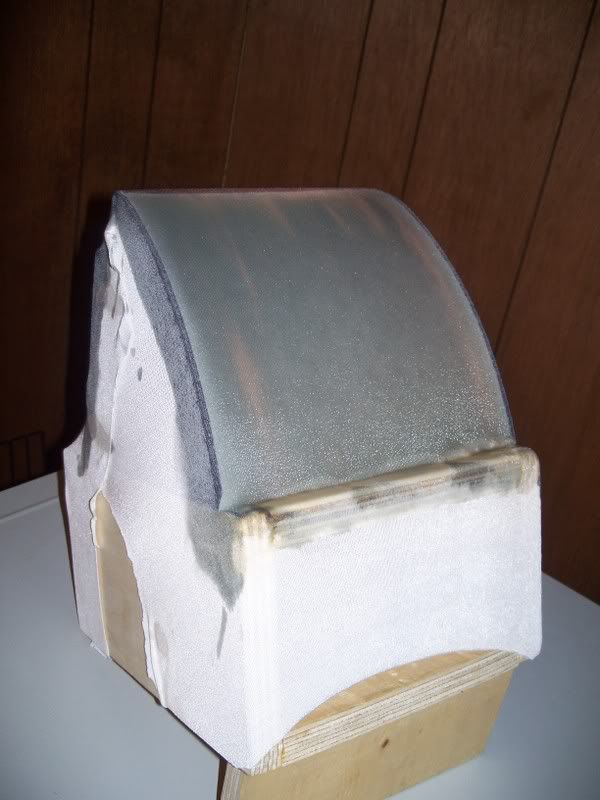
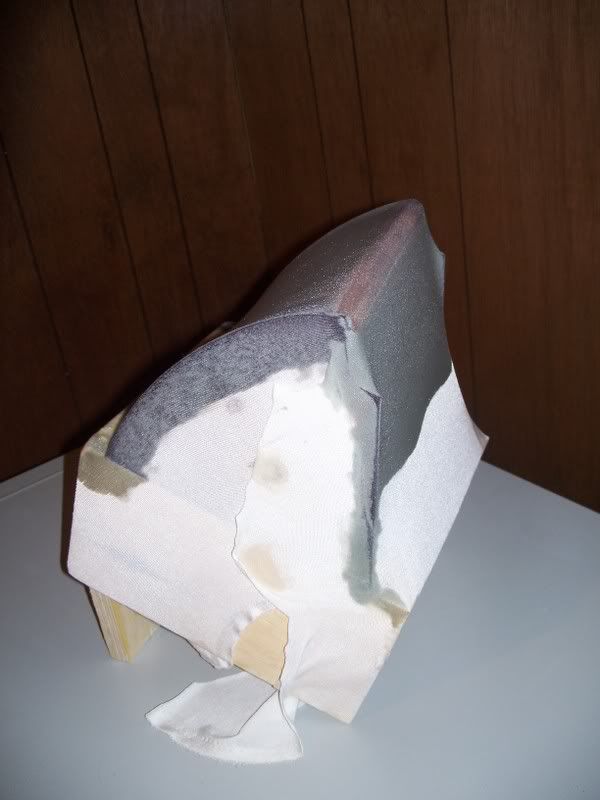
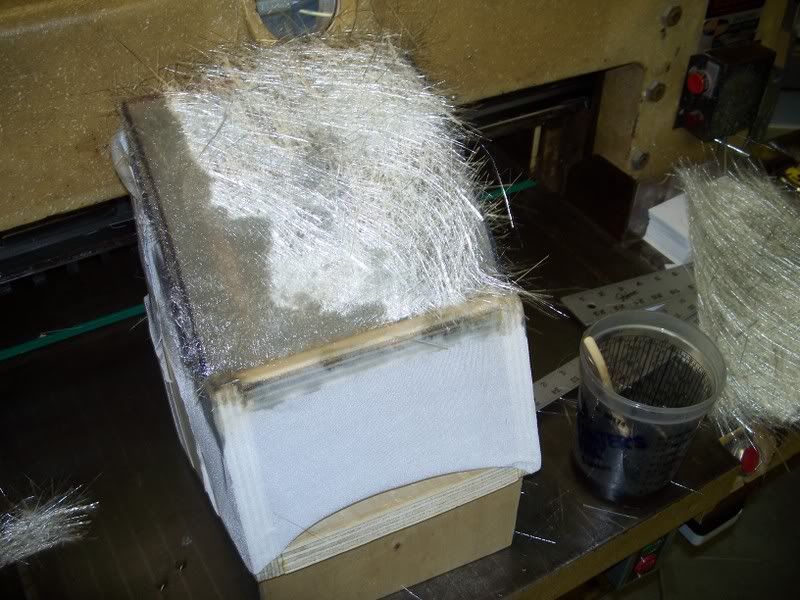
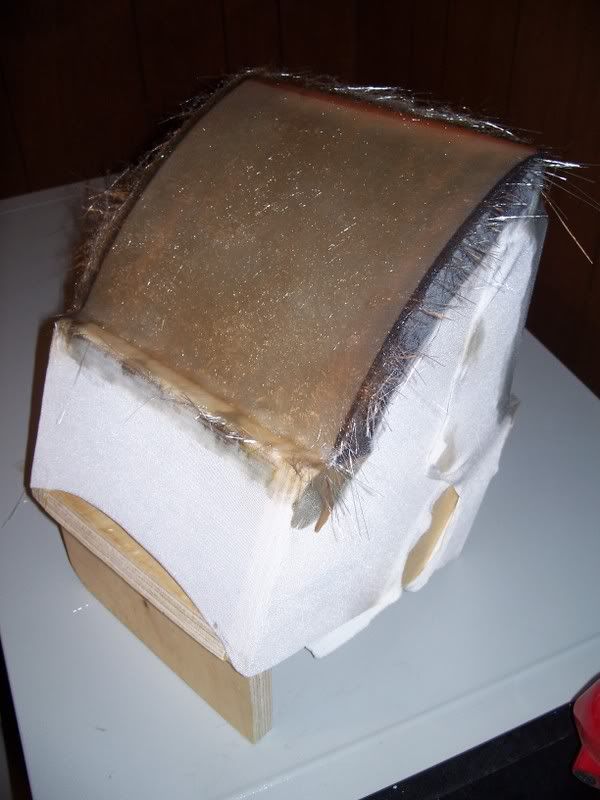
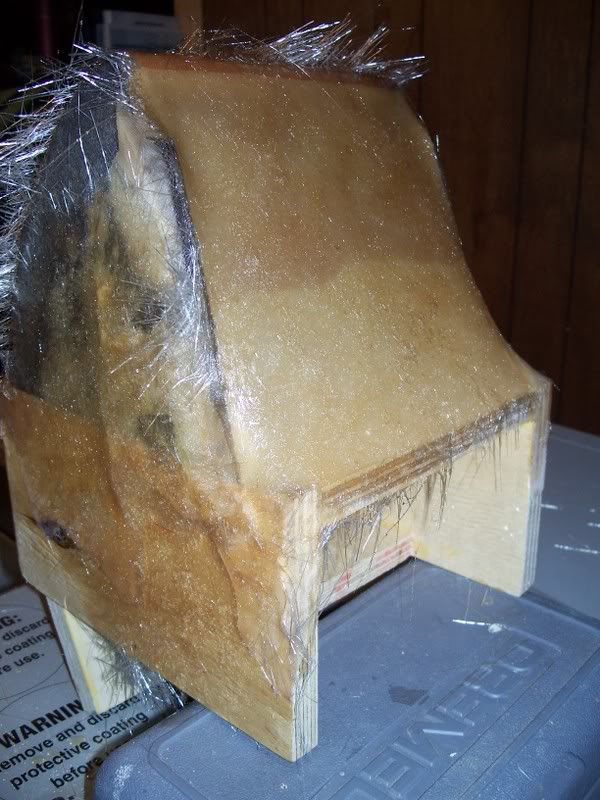
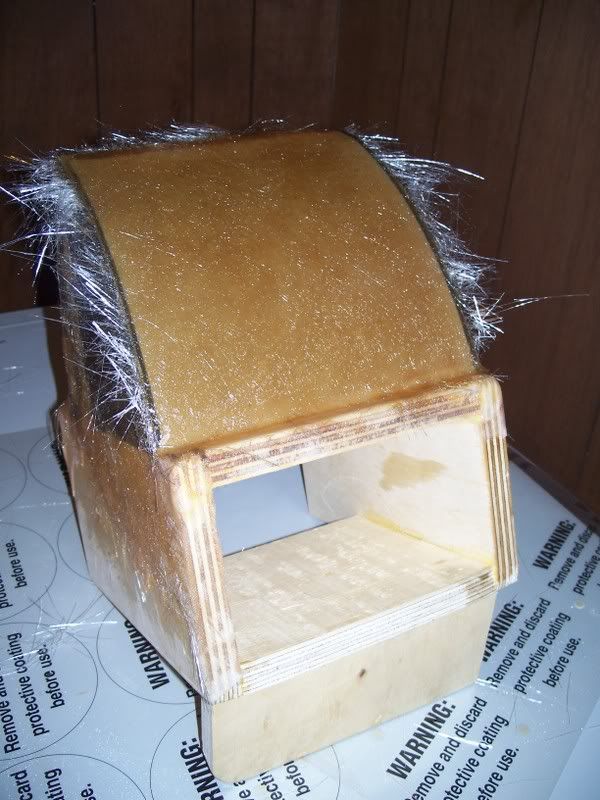
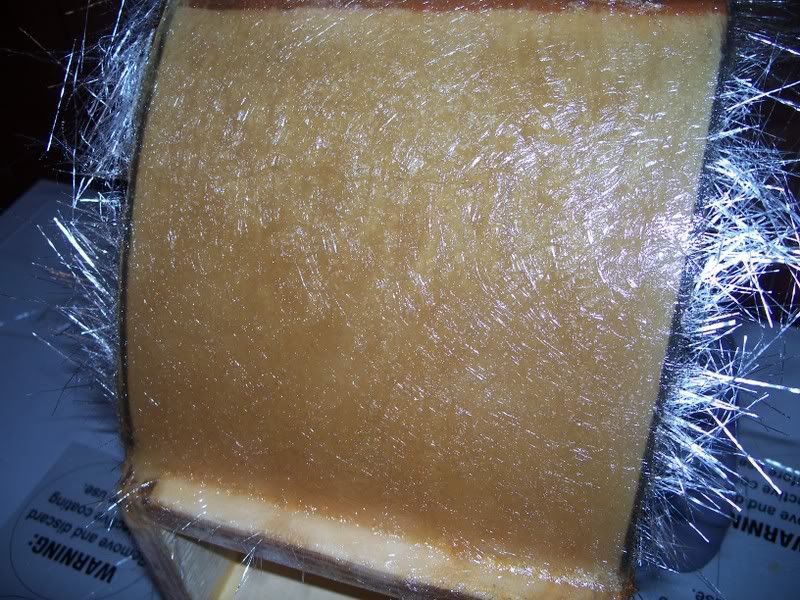
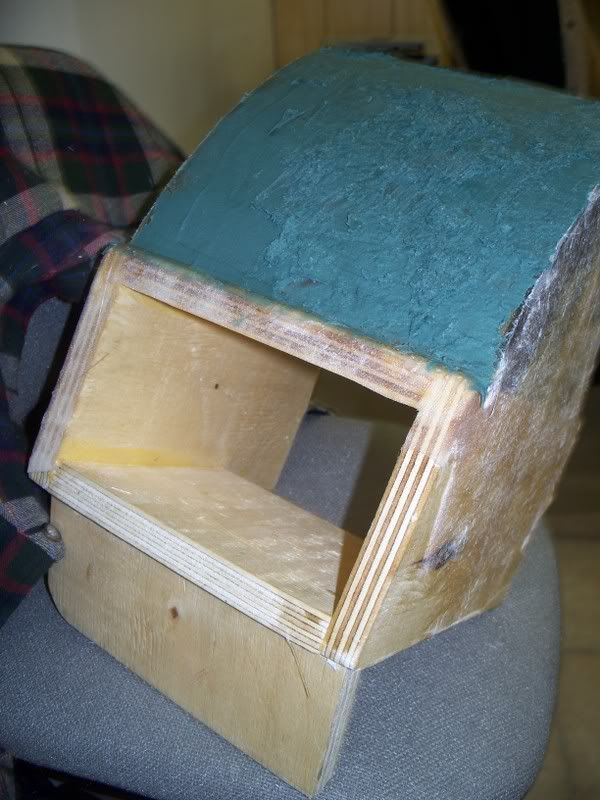
I salvaged what I could from my first design and put the screen at an angle. Then I made the sides and streched some polyester spandex like material over it, glued it down with some ca glue, then brushed the areas I wanted with polyester resin. After it set up some I ripped off some chunks of fiberglass chop map and brushed them down with more resin. I got two layers down before the spandex began to sag inward, so I flipped it down so gravity would keep it from sagging any further. With any luck I can sand it down and throw a few more layers down tomorrow.
12-18-2007, 11:28 PM
#47
Le Mans Master
let the resin soak into the fabric first and let it cure before you start adding more weight to it..... it'll help with the saggin issues.......
as for a trick for smoothing out everything once done....... mix up a 1:1 ratio of bondo/hardener and resin/hardener and this will create a paste that you can pour over the mold to help level everything....... if it's toooo runny just add more bondo/hardener......... remember that you only have a few minutes to pour/spread also so setup you part before hand
b
12-18-2007, 11:32 PM
#48
Racer
Thread Starter
let the resin soak into the fabric first and let it cure before you start adding more weight to it..... it'll help with the saggin issues.......
as for a trick for smoothing out everything once done....... mix up a 1:1 ratio of bondo/hardener and resin/hardener and this will create a paste that you can pour over the mold to help level everything....... if it's toooo runny just add more bondo/hardener......... remember that you only have a few minutes to pour/spread also so setup you part before hand
b
as for a trick for smoothing out everything once done....... mix up a 1:1 ratio of bondo/hardener and resin/hardener and this will create a paste that you can pour over the mold to help level everything....... if it's toooo runny just add more bondo/hardener......... remember that you only have a few minutes to pour/spread also so setup you part before hand
b

 12-19-2007, 10:01 PM
#51
Le Mans Master
idea...
you could cut out a hole in the top or the bottom of the wood structure and mount a computer fan.... wire it up to the remote wire (blue maybe) on the head unit so the fan kicks on when you power up.... or you could wire it to the ignition turn on and have a mounted switch....... you'll need to move some air in there.......
just an idea
b
12-20-2007, 12:37 AM
#52
Racer
Thread Starter
idea...
you could cut out a hole in the top or the bottom of the wood structure and mount a computer fan.... wire it up to the remote wire (blue maybe) on the head unit so the fan kicks on when you power up.... or you could wire it to the ignition turn on and have a mounted switch....... you'll need to move some air in there.......
just an idea
b
you could cut out a hole in the top or the bottom of the wood structure and mount a computer fan.... wire it up to the remote wire (blue maybe) on the head unit so the fan kicks on when you power up.... or you could wire it to the ignition turn on and have a mounted switch....... you'll need to move some air in there.......
just an idea
b
12-20-2007, 09:44 AM
#54
Racer
Thread Starter
 12-20-2007, 04:13 PM
#55


Wow that's one of the nicest dashes I've seen so far!
Good job on the fiberwork, keep up the pics!
Good job on the fiberwork, keep up the pics!
12-21-2007, 12:02 AM
#56
Burning Brakes

Member Since: Feb 2005
Location: Mesa AZ
Posts: 1,235
Likes: 0
Received 0 Likes
on
0 Posts

i don't think fiberglass is going to stick to pcv(not much does) so plan the mounting so you're not relying on the bond between the pvc and glass for structual support
12-21-2007, 12:22 PM
#57
Instructor

Member Since: Jul 2005
Posts: 246
Likes: 0
Received 0 Likes
on
0 Posts
Yes you may have a hard time getting it to stick to any plastic. What I did was used sanded the plastic with 80 grit, used plastic primer (kinda melts the plastic) and drilled some holes in the plastic and flared the hole on the other side. This way it kinda acted like a rivet, just made from resin. Time will tell how long it will last. Currently its been a year and it still looks good.
Mike
Mike
12-21-2007, 02:40 PM
#58
Racer
Thread Starter
Yes you may have a hard time getting it to stick to any plastic. What I did was used sanded the plastic with 80 grit, used plastic primer (kinda melts the plastic) and drilled some holes in the plastic and flared the hole on the other side. This way it kinda acted like a rivet, just made from resin. Time will tell how long it will last. Currently its been a year and it still looks good.
Mike
Mike
12-21-2007, 03:41 PM
#59
Racer
Thread Starter
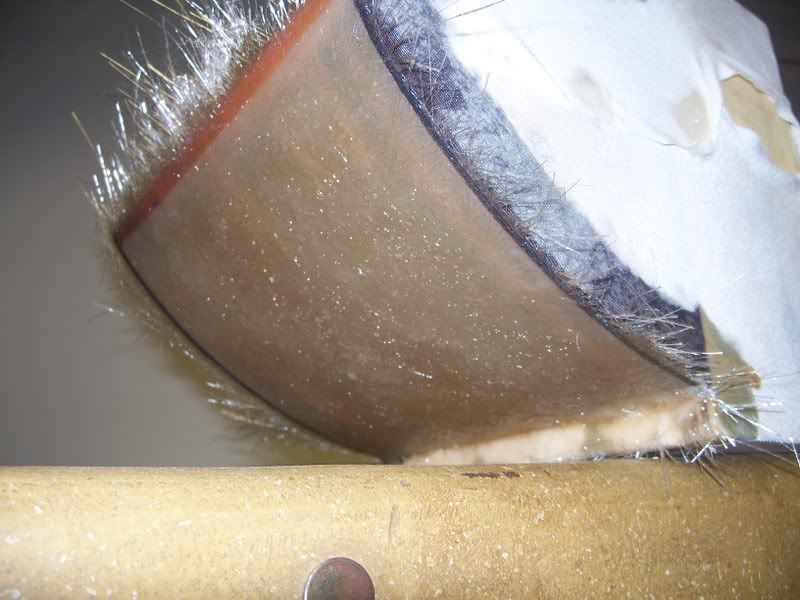
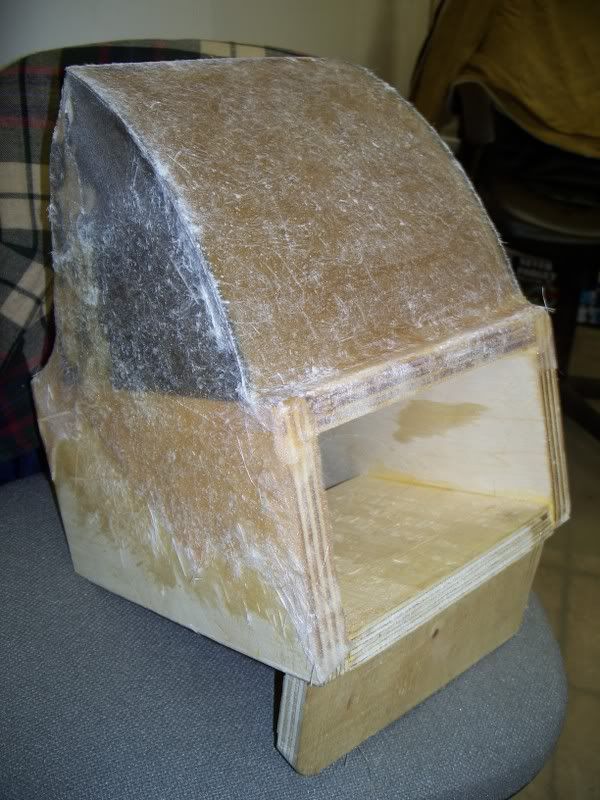
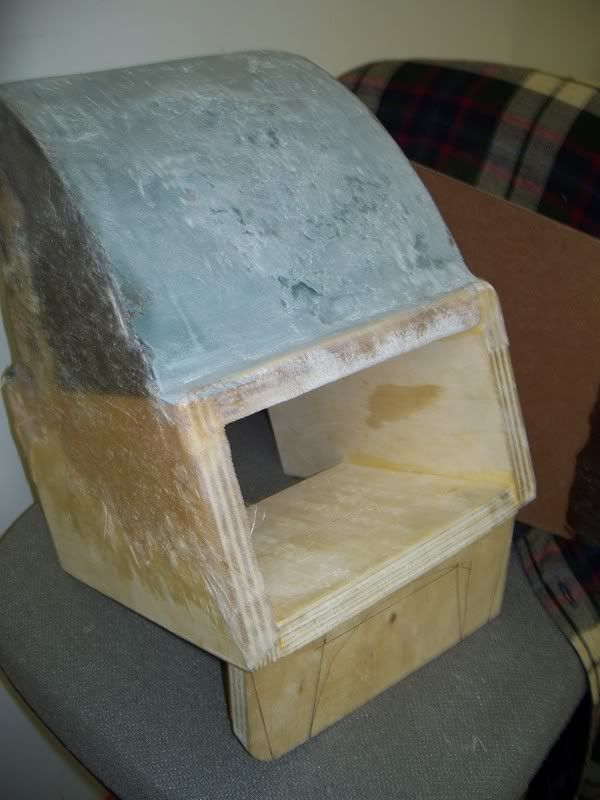
Trimmed the sides of the fiberglass with my dremel and gave it a nice rub down with some 60 grit sand paper. Then I used the pvc to make sure the gauges will fit and look good. I noticed that the glass sagged in the middle more than I relized when I layed down the chopmat, so I mixed up some duraglass (its like bondo with fiberglass fibers mixed in it) and built up the middle. In the last photo you can see I still need a little more in the middle, but one more coat and I should be fine. Then I will mix up some Rage Gold and give it another sanding, cut the holes for the gauges and figure out a way to fix the pvc to the dash piece.
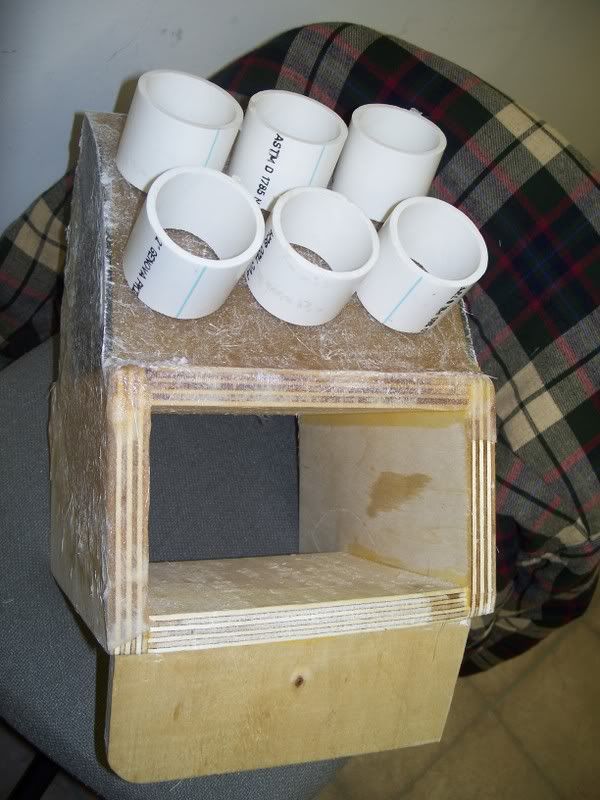
Last edited by davidm_comp; 12-21-2007 at 03:44 PM.
12-21-2007, 03:45 PM
#60
Race Director
Member Since: Oct 2000
Location: Kansas City, MO ...I'd like to go fishing and catch a fishstick. That'd be convenient. - Mitch Hedberg
Posts: 11,891
Likes: 0
Received 2 Likes
on
2 Posts
How are you going to orient the pvc tubes? My opinion is that you should cut an angle into the back of them so they face up towards the driver. But I would make it so the face of the gauge that is closest to the console is nearly touching the curved section of the console you have made.
It's looking pretty good. Do you plan to paint the new console or wrap it in a material?
It's looking pretty good. Do you plan to paint the new console or wrap it in a material?