
How to install rear emblem on 68 Corvette?
 05-17-2008, 08:57 AM
#1
Instructor

Thread Starter
Member Since: Feb 2002
Location: Clarkston MI
Posts: 186
Likes: 0
Received 0 Likes
on
0 Posts

I just got my 68 back from the paint shop and I have bought new 'C-O-R-V-E-T-T-E' emblems for the rear tail panel. Unfortunately, the body shop filled all the mounting holes  Does anyone know a good way to redrill these holes? I was hoping there was a template available, but I can't find one. Thanks!
Does anyone know a good way to redrill these holes? I was hoping there was a template available, but I can't find one. Thanks!
 05-17-2008, 09:06 AM
#2
Burning Brakes

You will still be able to see where the original holes are from the back.
But drilling them will be trick as not to cause paint and filler to pop off around the hole.
You will need to remove the rear tire carrier and the fuel tank to get access to the rear with a drill. This will be a PITA as you have to remove at least one muffler to get the fuel tank out.
Be very careful and start out using a 1/16 bit from the back. Don't put much pressure on the drill. Let it drill very slowly.
Then drill to the correct size from the front.
Bottom line is that I would be very upset that your body shop covered up the holes.
05-17-2008, 10:41 AM
#4
Burning Brakes
Member Since: Jun 2004
Location: Cortlandt Manor New York
Posts: 872
Likes: 0
Received 2 Likes
on
2 Posts

I would also take it back to the body shop. What kind of shop bondos the emblem holes? What did they think they were? Bullet holes??? They should have known better and should correct the mistake at no charge to you.
05-17-2008, 11:28 AM
#5
Burning Brakes
05-17-2008, 11:29 AM
#6
Burning Brakes
05-17-2008, 11:55 AM
#7
Safety Car


No, I don't.
He paid for the shop to do this right. I would take it back and point this problem out to them. If this is a shop that works on Vettes on a regular basis, they should know how to fix it. If not, or if they sound like they don't want to deal with it, time to deal with another shop next time, and fix it the way you described
He paid for the shop to do this right. I would take it back and point this problem out to them. If this is a shop that works on Vettes on a regular basis, they should know how to fix it. If not, or if they sound like they don't want to deal with it, time to deal with another shop next time, and fix it the way you described
05-17-2008, 07:13 PM
#9
Burning Brakes
05-17-2008, 07:30 PM
#10
Le Mans Master

05-17-2008, 08:26 PM
#11
Team Owner

Member Since: Sep 2006
Location: Westminster Maryland
Posts: 30,173
Likes: 0
Received 2,878 Likes
on
2,515 Posts

I used a drill bit in a 'Pin Vise'. A pin vise is a little tool that holds the drill bit and you twirl it with your fingers. You have really good control over it so you don't screw up the paint. You can buy the pin vise in a hobby shop.
Regards,
Alan
Regards,
Alan
05-18-2008, 09:25 PM
#12
Instructor
Thread Starter
Member Since: Feb 2002
Location: Clarkston MI
Posts: 186
Likes: 0
Received 0 Likes
on
0 Posts
 05-20-2008, 02:17 PM
#13
Le Mans Master
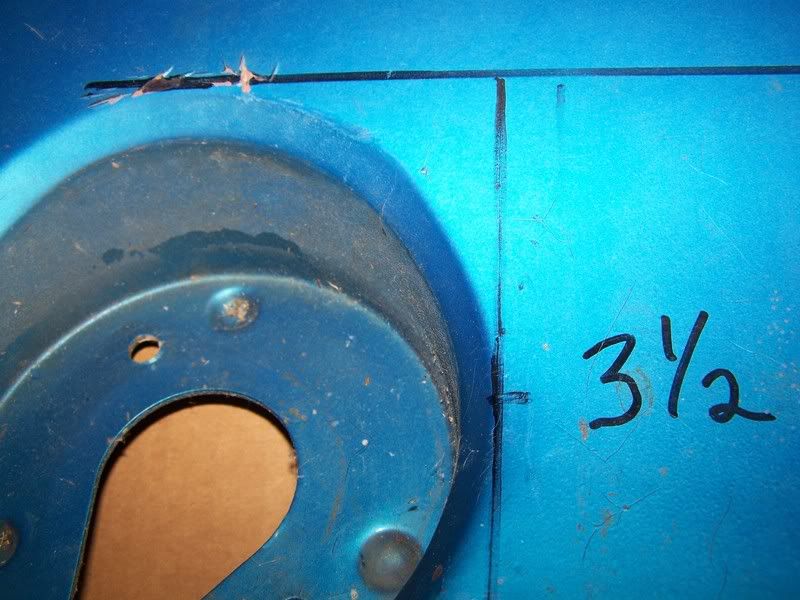
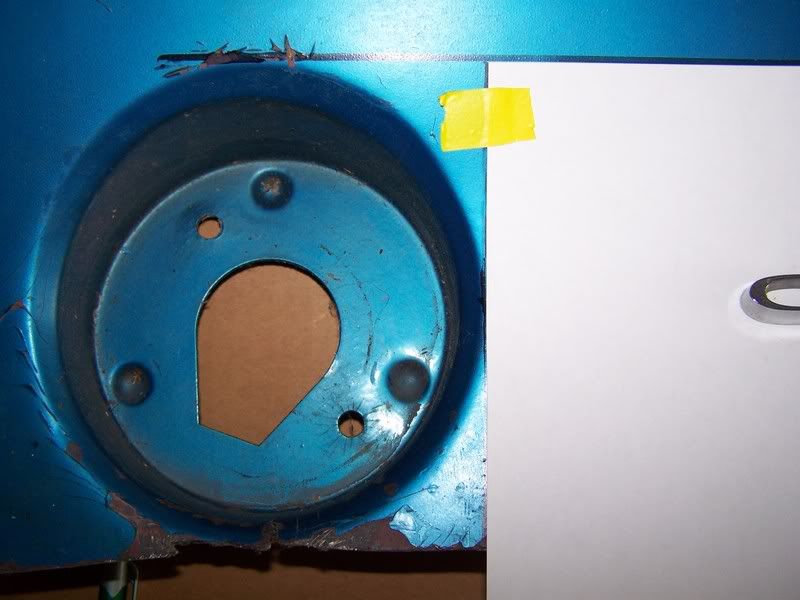
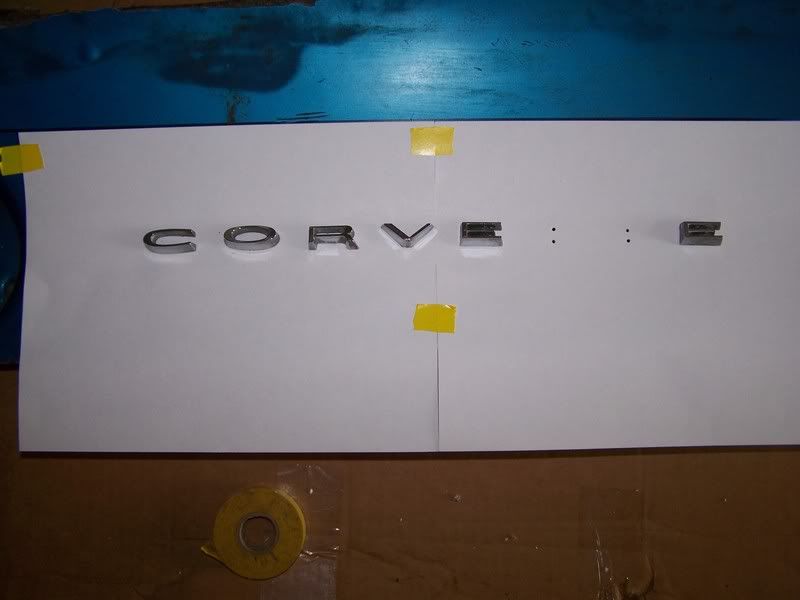
Here's how I made the template this morning, instead of using a marker you'll want to use a chalk box at least for the top line.
I'll need addresses for the 3 guys that asked for theses too.
Can't find my spare Ts
I'll need addresses for the 3 guys that asked for theses too.
Can't find my spare Ts
 05-20-2008, 04:58 PM
#15
Le Mans Master

You may have been the 1st, possibly the one that perfected how I make these now too.
I wish I had kept names and usernames of all the members I've sent stuff to as well as what I sent them. I know I've got most of the states covered along with 3 countries.
 Slowly running out of parts.
 06-04-2008, 08:45 PM
#17
Melting Slicks


I had same problem with my 68.
I obtained templates from several different 68 owners and they were all different.
I did not drop the tank or the spare tire carrier.
I placed a droplight behind the rear valance and was able to see where the filler was for the covered over holes.
I then made a tiny ***** mark to start a drill bit by hand, no power drill.
Each letter has two holes, one to attach the letter with and the other smaller hole was for the tab that keeps the letter in positon and prevents it from moving or rotating once it is installed.
Do one letter at a time testing with the letter as you go and gradually enlarging the hole until it is just large enough to accept the pin for the letter. That's why you use the drill bit mounted in a hand held holder instead of a machine. You rotate the drill by hand and it takes just a little material at a time.
Took me less than 2 hours to do them all because I took my time as I was paranoid I would scratch something.
Go slow
Kurt
06-04-2008, 11:29 PM
#18
Le Mans Master
I did think you guys would have received them sooner but at least you've got it now.From what Kurt said I'd suggest test fitting your letters into my template to make sure they fit the same as original letters
I had same problem with my 68.
I obtained templates from several different 68 owners and they were all different.
I did not drop the tank or the spare tire carrier.
I placed a droplight behind the. rear valance and was able to see where the filler was for the covered over holes.
I then made a tiny ***** mark to start a drill bit by hand, no power drill.
Each letter has two holes, one to attach the letter with and the other smaller hole was for the tab that keeps the letter in positon and prevents it from moving or rotating once it is installed.
Do one letter at a time testing with the letter as you go and gradually enlarging the hole until it is just large enough to accept the pin for the letter. That's why you use the drill bit mounted in a hand held holder instead of a machine. You rotate the drill by hand and it takes just a little material at a time.
Took me less than 2 hours to do them all because I took my time as I was paranoid I would scratch something.
Go slow
Kurt
Was it the templates that were different or the pins on the letters, because I really thought the the way I made this made it foolproof.
06-05-2008, 11:52 PM
#19
Melting Slicks
The templates seemed to differ but that could be attributed to human error based on how they were made, if the paper moved, etc
I have seen 68 & 69's on the road and the letters don't always line up perfectly straight so if someone like that made a template it would be off a little.
Kurt
I have seen 68 & 69's on the road and the letters don't always line up perfectly straight so if someone like that made a template it would be off a little.
Kurt
06-06-2008, 07:53 AM
#20
Melting Slicks
Member Since: Dec 1999
Location: Pensacola FLA
Posts: 2,157
Likes: 0
Received 0 Likes
on
0 Posts
Kurt,
I did the same thing. I had my son shine a flash light on the backside and the holes glowed perfectly. I placed the letters up against the glowing holes to make sure that the studs matched before I drilled.
Bryan
I did the same thing. I had my son shine a flash light on the backside and the holes glowed perfectly. I placed the letters up against the glowing holes to make sure that the studs matched before I drilled.
Bryan