
The Inner Workings of Seat Tracks - Post 1 of 3
 01-04-2015, 07:58 AM
#81
Senior Member


Thread Starter
Member Since: Jan 2008
Location: Easton, PA
Posts: 12,154
Received 2,031 Likes
on
1,103 Posts
St. Jude Donor '10

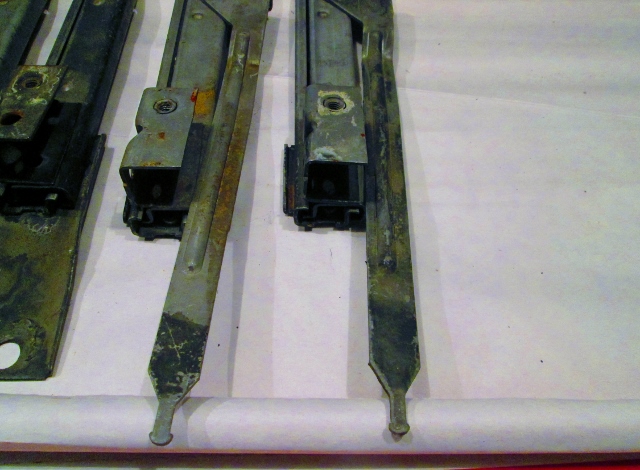
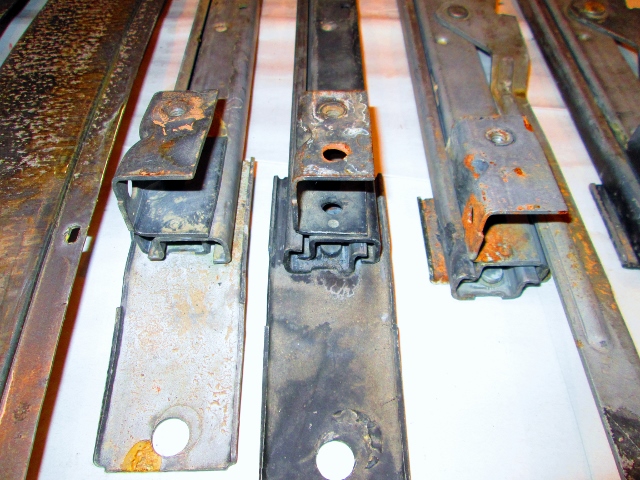
When I purchased a large group or "lot" of seat tracks the goal was to find some good ones amongst the group that could be rebuilt and shared back with forum members that may need them.
My latest batch of 68 tracks is nearing completion so I put some new parts in my cleaner and those came out yesterday. Here are the four seat tracks and two seat back mechanisms that have been cleaned of major rust. Next step on these is to wire brush them and remove any remaining surface rust, paint, debris, grease and dirt. These have potential and they are a complete set.
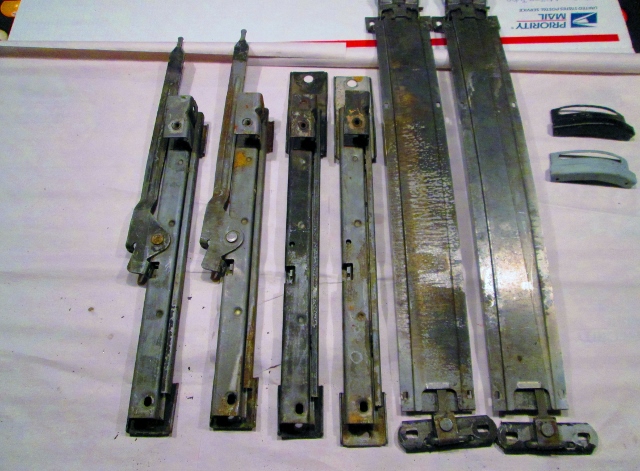
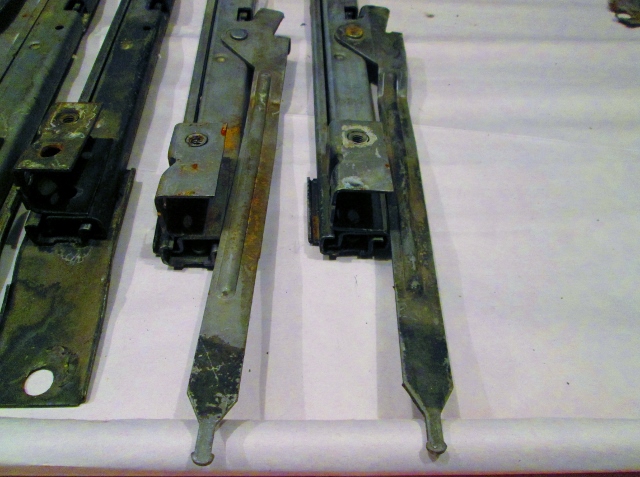
These are definitely not 68-72 tracks so I have to do a little investigation on these. The fronts of two of them have been broken off which is to say they may have been rusted to the retention frame under the seats. Those can be fixed. The back bracket is raised and new to me, interesting. Anyone recognize this style? Flat handle too.
Fascinating.
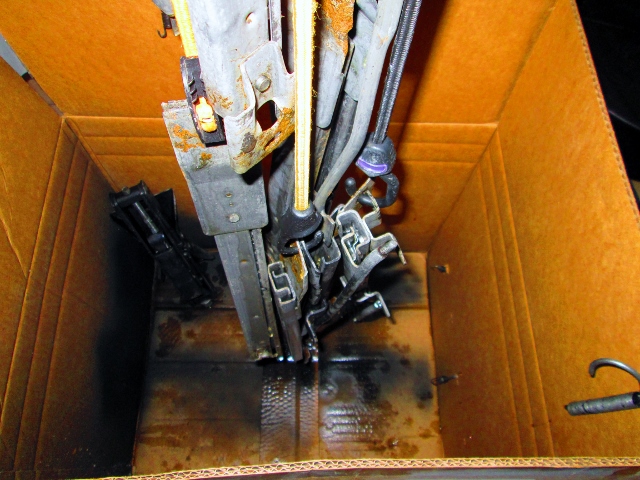
And here is a quick picture of the next batch just removed and draining before inspection and pictures. There are 11 tracks on this "tree". If you look at the right side of the picture you see a hold down spring and bracket for a jack just peeking out. That came out great too. More on these later but here is the next batch. Oh, I did my first jack as well but have not photographed it yet. FYI.
David
My latest batch of 68 tracks is nearing completion so I put some new parts in my cleaner and those came out yesterday. Here are the four seat tracks and two seat back mechanisms that have been cleaned of major rust. Next step on these is to wire brush them and remove any remaining surface rust, paint, debris, grease and dirt. These have potential and they are a complete set.
These are definitely not 68-72 tracks so I have to do a little investigation on these. The fronts of two of them have been broken off which is to say they may have been rusted to the retention frame under the seats. Those can be fixed. The back bracket is raised and new to me, interesting. Anyone recognize this style? Flat handle too.
Fascinating.
And here is a quick picture of the next batch just removed and draining before inspection and pictures. There are 11 tracks on this "tree". If you look at the right side of the picture you see a hold down spring and bracket for a jack just peeking out. That came out great too. More on these later but here is the next batch. Oh, I did my first jack as well but have not photographed it yet. FYI.
David
 01-05-2015, 09:37 AM
#82
Senior Member
Thread Starter
Member Since: Jan 2008
Location: Easton, PA
Posts: 12,154
Received 2,031 Likes
on
1,103 Posts
St. Jude Donor '10
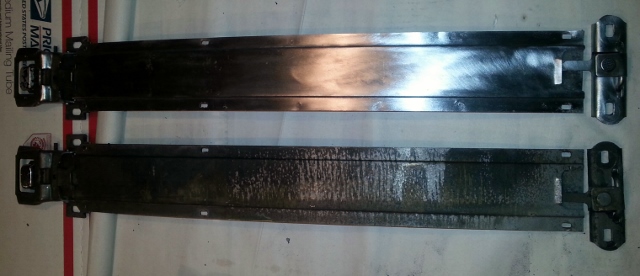
Top seat back assembly has been cleaned of rust and polished.
Lower seat back assembly in picture has been cleaned of rust, not yet polished. Once polished I will offer these up for sale in the forum. Another good example of how you can recover rusty parts some of the time and put them back into service, what I call donor parts.
If you are rebuilding your seats these can be a mess, but they are salvageable with a little effort.

Thanks for looking.
01-05-2015, 09:44 AM
#83
Senior Member
Thread Starter
Member Since: Jan 2008
Location: Easton, PA
Posts: 12,154
Received 2,031 Likes
on
1,103 Posts
St. Jude Donor '10
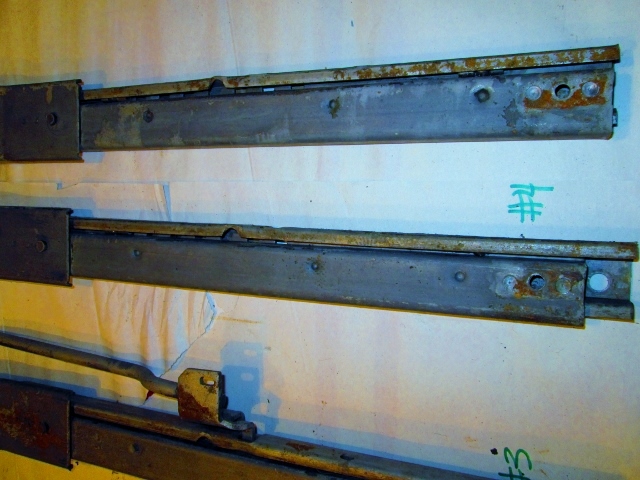
Of the 11 tracks I had available to clean up I only lost one to damage beyond repair, which is pretty good when you consider 90% recovery.
Of these ten tracks, six of them are moving freely and smoothly without any additional effort, which is a great sign. The other four move but take more effort, so they will need more cleaning. Not all tracks move smoothly if the grease and dirt and rust are bad on the inside. Pleasantly surprised to have these in such good condition. Now the feet are another issue, but we will tackle that another day.
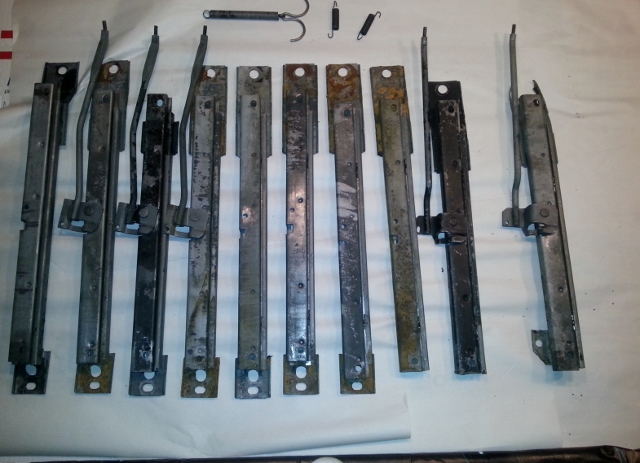
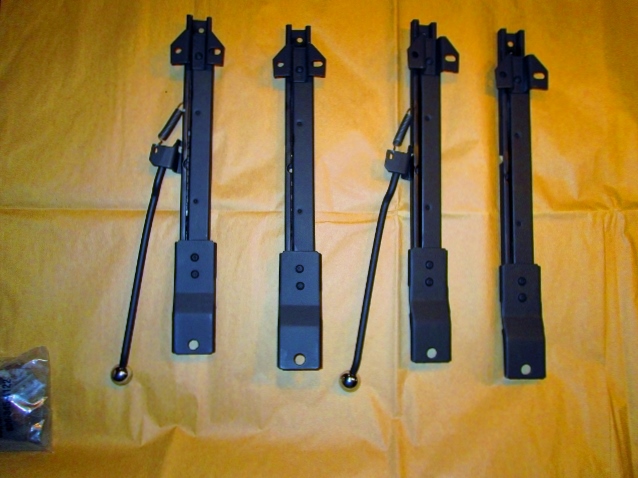
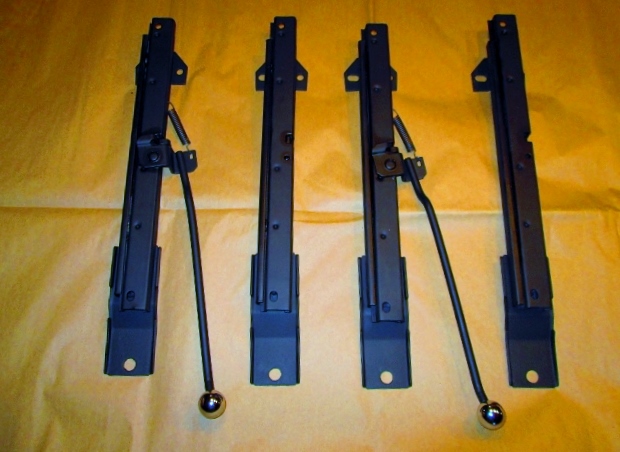
AND I have this set of four tracks to rebuild if someone can use them.

All have been cleaned and rust removed. I will document them and then put them away for now as I have no one asking for help with these parts at this time. With the rust gone they will store nicely.
Thanks for watching and have a great day.
David
Of these ten tracks, six of them are moving freely and smoothly without any additional effort, which is a great sign. The other four move but take more effort, so they will need more cleaning. Not all tracks move smoothly if the grease and dirt and rust are bad on the inside. Pleasantly surprised to have these in such good condition. Now the feet are another issue, but we will tackle that another day.
AND I have this set of four tracks to rebuild if someone can use them.
All have been cleaned and rust removed. I will document them and then put them away for now as I have no one asking for help with these parts at this time. With the rust gone they will store nicely.
Thanks for watching and have a great day.
David
01-18-2015, 08:03 AM
#84
Senior Member
Thread Starter
Member Since: Jan 2008
Location: Easton, PA
Posts: 12,154
Received 2,031 Likes
on
1,103 Posts
St. Jude Donor '10
A full set from a 1968 just about finished in this picture. They are done now and shipped. More pictures soon. Full set from a 1969 sitting in the wings now awaiting their restoration.
02-11-2015, 07:24 AM
#85
Senior Member
Thread Starter
Member Since: Jan 2008
Location: Easton, PA
Posts: 12,154
Received 2,031 Likes
on
1,103 Posts
St. Jude Donor '10
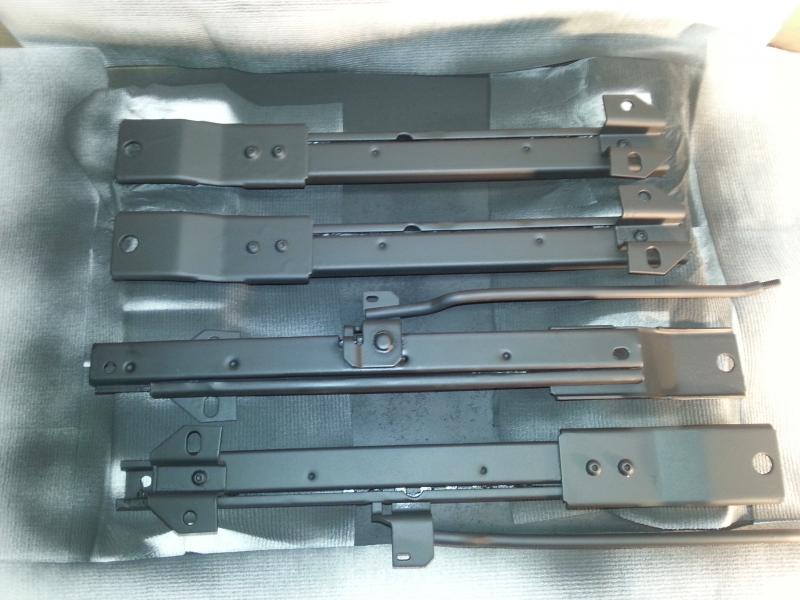
Here are the 1968 seat tracks finished pictures. I was late getting these posted and the tracks are already back with their happy owner.
68 Seat track full set, bottom side view with all new brackets, new springs, and new handles.
68 Seat track full set, top side view.
68 Seat tracks with final lubrication halo. You can see the halo from the lubricant which in time will flash off and leave the tracks lubricated and protected.

Next up will be a complete set of 1969 seat tracks which, as it turns out, will be receiving the same treatment as these 68's getting all new brackets.
More soon and thanks for watching.
David Howard
68 Seat track full set, bottom side view with all new brackets, new springs, and new handles.
68 Seat track full set, top side view.
68 Seat tracks with final lubrication halo. You can see the halo from the lubricant which in time will flash off and leave the tracks lubricated and protected.
Next up will be a complete set of 1969 seat tracks which, as it turns out, will be receiving the same treatment as these 68's getting all new brackets.
More soon and thanks for watching.
David Howard
02-11-2015, 07:32 AM
#86
Senior Member
Thread Starter
Member Since: Jan 2008
Location: Easton, PA
Posts: 12,154
Received 2,031 Likes
on
1,103 Posts
St. Jude Donor '10
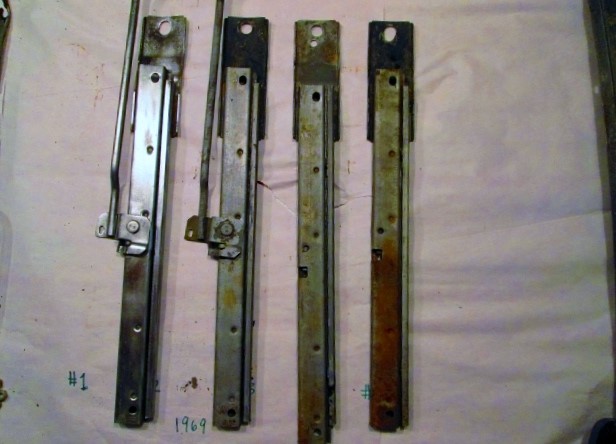
I always like to start with a complete set of "before" pictures so I can remind myself along the way where we are starting from on any one of these seat track projects. Here are the 69 seat tracks we will be restoring.
Surface rust on the top is not too bad on this set.
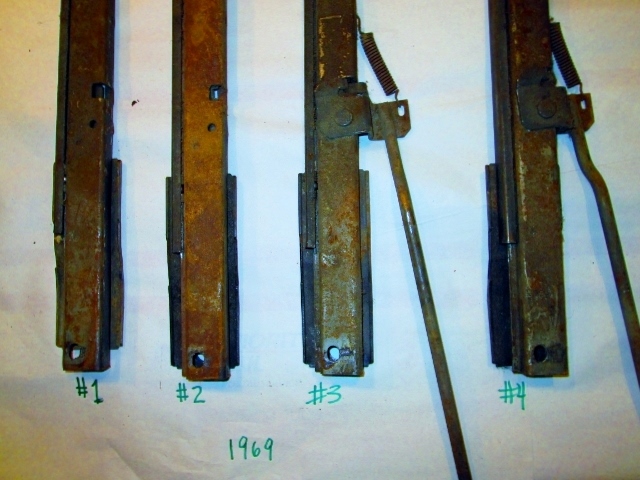
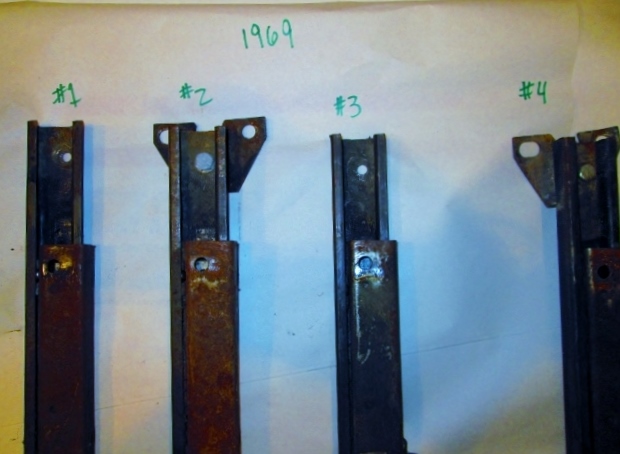
The rust on the brackets or feet is much deeper and pitted. This weakens the parts so we will remove these feet and replace with new ones. Rear brackets are incorrect for 1969 so we will fix that too.
And the adventure has already begun, more soon.
Thanks for watching.
David
Surface rust on the top is not too bad on this set.
The rust on the brackets or feet is much deeper and pitted. This weakens the parts so we will remove these feet and replace with new ones. Rear brackets are incorrect for 1969 so we will fix that too.
And the adventure has already begun, more soon.
Thanks for watching.
David
02-11-2015, 07:54 AM
#87
Senior Member
Thread Starter
Member Since: Jan 2008
Location: Easton, PA
Posts: 12,154
Received 2,031 Likes
on
1,103 Posts
St. Jude Donor '10
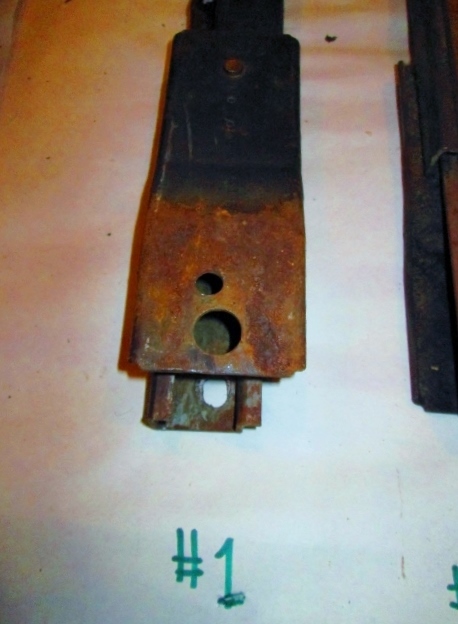
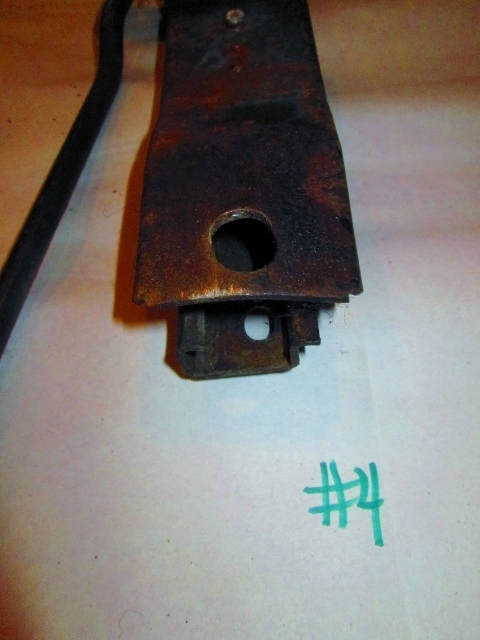
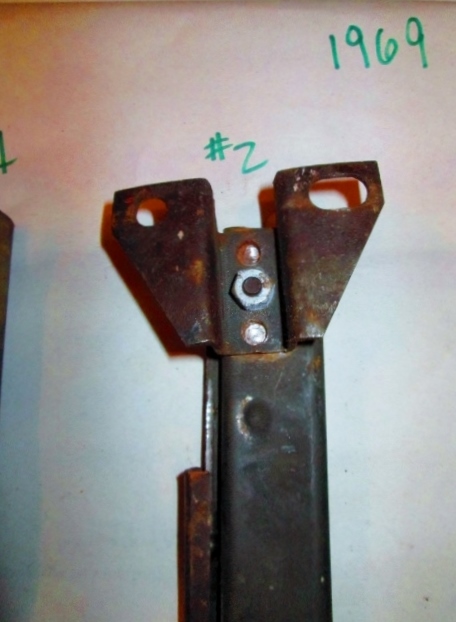
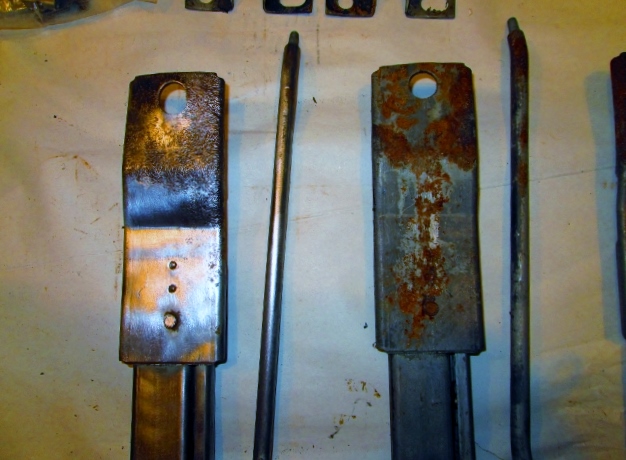
Rear brackets are removed and compared with correct 69 bracket shown in the lower part of this picture.
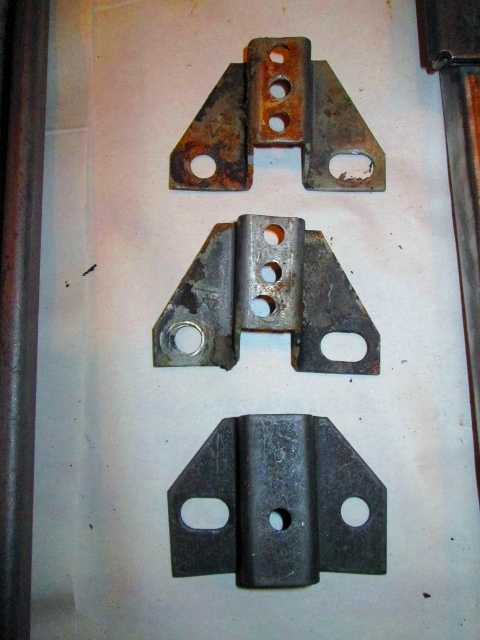
Rear brackets off of the rails now and rails ready for soak tank.
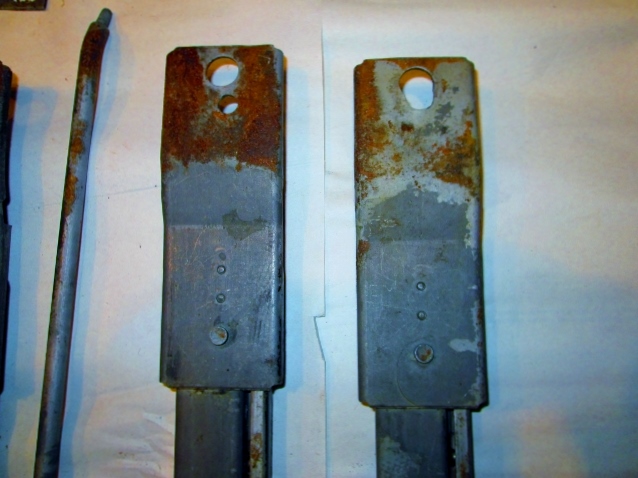
I was able to get one rail in the soak tank along with some other parts I am cleaning and then dried and wire brush polished. Here are three before rust removal, one with rust removal and wire brush cleaning.
I left the bottom front bracket on to show the pitting. It was easier to see once it had been wire brushed, so I did that for this picture. This bracket will be removed and replaced with new ones.
Now the three remaining tracks will get their front brackets removed, head for the soaking tank, on to drying, then wire brush polishing.
Stay tuned for more updates soon as I walk through this process with you.
Thanks for watching, ask any questions, let me know what you think.

Best regards,
David Howard
AllC34Me
Rear brackets off of the rails now and rails ready for soak tank.
I was able to get one rail in the soak tank along with some other parts I am cleaning and then dried and wire brush polished. Here are three before rust removal, one with rust removal and wire brush cleaning.
I left the bottom front bracket on to show the pitting. It was easier to see once it had been wire brushed, so I did that for this picture. This bracket will be removed and replaced with new ones.
Now the three remaining tracks will get their front brackets removed, head for the soaking tank, on to drying, then wire brush polishing.
Stay tuned for more updates soon as I walk through this process with you.
Thanks for watching, ask any questions, let me know what you think.
Best regards,
David Howard
AllC34Me
12-24-2015, 10:21 AM
#88
Instructor

Alan and David, very interesting stuff. It sounds as though the original bracket segment that was bolted to the floor was parkerized. It also sounds like another segment was semi-permanently attached to this part using rivets. If so, is there any way to Parkerize the lower section while only cleaning up the upper section? Traditional Parkerizing requires emersion in liquid, doesn't it?
Do you know if NCRS allows any kind of sealing treatment on unfinished metal? I live in a very humid area where anything uncoated rusts in the blink of an eye.
Best,
Jeff
Do you know if NCRS allows any kind of sealing treatment on unfinished metal? I live in a very humid area where anything uncoated rusts in the blink of an eye.
Best,
Jeff
12-24-2015, 10:52 AM
#89


Had to look up what Parkerizing was....
Parkerizing, bonderizing, phosphating, or phosphatizing is a method of protecting a steel surface from corrosion and increasing its resistance to wear through the application of a chemical phosphate conversion coating. Parkerizing is usually considered to be an improved zinc or manganese phosphating process, and not to be an improved iron phosphating process, although some use the term parkerizing as a generic term for applying phosphating (or phosphatizing) coatings that does include the iron phosphating process.
Parkerizing is commonly used on firearms as a more effective alternative to bluing, which is an earlier-developed chemical conversion coating. It is also used extensively on automobiles to protect unfinished metal parts from corrosion.
The Parkerizing process cannot be used on non-ferrous metals such as aluminium, brass, or copper. It similarly cannot be applied to steels containing a large amount of nickel, or on stainless steel. Passivation can be used for protecting other metals.
Why not zinc plate it? could be done in the garage. Not very hard to setup, Dave already has a bead blaster! And since has has gotten rid of a lot of parts, probably has the room for it also.
Merry Christmas Dave!!
12-24-2015, 02:18 PM
#90
Instructor
Zinc Plating? Two questions: 1. How does one zinc plate something that has bearing running within an internal race (without taking it apart)? (similar to my question regarding parkerizing); and 2. Will this comply with NCRS scoring for an early 1968?
12-24-2015, 03:51 PM
#91
Second question...defer to someone with a NCRS manual? Would be interested to know what the manual checks for.
01-24-2019, 10:47 AM
#92
Senior Member
Thread Starter
Member Since: Jan 2008
Location: Easton, PA
Posts: 12,154
Received 2,031 Likes
on
1,103 Posts
St. Jude Donor '10
I had some questions about seat tracks and thought I would bring this one back up and let folks review it.
I hope you enjoy it.
David
I hope you enjoy it.
David
The following users liked this post:
ScottEwine (01-31-2019)
01-31-2019, 07:39 PM
#93
Burning Brakes

04-04-2021, 11:48 PM
#94
1st Gear

Member Since: Apr 2021
Posts: 1
Likes: 0
Received 0 Likes
on
0 Posts
Of the 11 tracks I had available to clean up I only lost one to damage beyond repair, which is pretty good when you consider 90% recovery.
Of these ten tracks, six of them are moving freely and smoothly without any additional effort, which is a great sign. The other four move but take more effort, so they will need more cleaning. Not all tracks move smoothly if the grease and dirt and rust are bad on the inside. Pleasantly surprised to have these in such good condition. Now the feet are another issue, but we will tackle that another day.
Attachment 47853637
AND I have this set of four tracks to rebuild if someone can use them.
Attachment 47853638
All have been cleaned and rust removed. I will document them and then put them away for now as I have no one asking for help with these parts at this time. With the rust gone they will store nicely.
Thanks for watching and have a great day.
David