
My 1977 Project - Body off restoration


 05-31-2011, 02:21 AM
#22

I wouldn't let the difference in the quality of the various finishes you mentioned be a factor in deciding. The least durable of all these is probably at least 100 times better than what it left the factory with and I'll bet your project has seen the last of the snow and salted streets.
What sheen do you like? Go with that.
I'm a purist restorer. I want everything as it left the factory. To improve on the durability I prime all painted parts with epoxy then use a urethane ceramic chassis black. It's an Eastwood product, and while I think most of their stuff is over priced and mediocre quality, this stiff is great. Very durable and has a sheen level that comes very close to what you see on the OE finish. To that end, some of the parts are semi-gloss (most), some are gloss (upper control arms come to mine). Very few, if any flat black parts.
BTW, here's a couple of pointers on your frame off. It is by far easiest to undo the car in the reverse order that it was assembled. GM went to great lengths to determine and design the fastest way to put the car together. If you reverse that order, it comes apart fastest and easiest. To that end, removing the body first, prior to removeing the eng etc makes all the eng and drive train work a breeze. If you look closely at the rad shroud the bottom has a spot missing, just enough to clear the fan as the body was lowered onto the frame. It took me 4 hours to have the body ready to lift off the frame, engine and drivetrain all intact. With the body off, standing over the frame and engine, that disassembly is minutes. The fan shroudn and rad, likewise with the frame and engine out of the way.
As you disassemble look at things and try to figure out the order it was put together, you will save a lot of skin on your knuckles and time.
When splitting eng and at, the converter always stays with the trans. Undo the converter bolts and slide the converter back then unbolt the bellhousing. Taking it apart the way you did risks damaging the converter. Of course it's impossible to put it back together that way anyways.
Bag and label everything. Take more pics than you think you need.
Instead of sandblasting everything make yourself an acid bath. I use a plastic storage tub. At your local hardware store you can buy gallons of Muriatic acid for about $10/gal. Cut it 50% with water. Use gloves and don't stick your face in the tub when dropping things in. The reason I do this is that it restores the appearance of the part without changing the surface like blasting does. Very good for parts that don't get painted. IE., the ashtray on my 442. Removed the rust and left the part with a surface texture identical to a new part. Media blasting leaves a tell tale sign. Half shafts come up like new with the heat line that runs the length of them still intact and you can even see the paint mark daub. Much easier than blasting. When you take them out of the acid rinse them well with water. They will want to flash rust quite quickly so spray them with Rust Mort from your body shop supplier. I let them dry then spray them with a clear satin finish verathane. The clear is undetectable when it dries, but protects from future rusting.
Steve
05-31-2011, 02:40 PM
#23
Racer


Thread Starter

I wouldn't let the difference in the quality of the various finishes you mentioned be a factor in deciding. The least durable of all these is probably at least 100 times better than what it left the factory with and I'll bet your project has seen the last of the snow and salted streets.
What sheen do you like? Go with that.
I'm a purist restorer. I want everything as it left the factory. To improve on the durability I prime all painted parts with epoxy then use a urethane ceramic chassis black. It's an Eastwood product, and while I think most of their stuff is over priced and mediocre quality, this stiff is great. Very durable and has a sheen level that comes very close to what you see on the OE finish. To that end, some of the parts are semi-gloss (most), some are gloss (upper control arms come to mine). Very few, if any flat black parts.
BTW, here's a couple of pointers on your frame off. It is by far easiest to undo the car in the reverse order that it was assembled. GM went to great lengths to determine and design the fastest way to put the car together. If you reverse that order, it comes apart fastest and easiest. To that end, removing the body first, prior to removeing the eng etc makes all the eng and drive train work a breeze. If you look closely at the rad shroud the bottom has a spot missing, just enough to clear the fan as the body was lowered onto the frame. It took me 4 hours to have the body ready to lift off the frame, engine and drivetrain all intact. With the body off, standing over the frame and engine, that disassembly is minutes. The fan shroudn and rad, likewise with the frame and engine out of the way.
As you disassemble look at things and try to figure out the order it was put together, you will save a lot of skin on your knuckles and time.
When splitting eng and at, the converter always stays with the trans. Undo the converter bolts and slide the converter back then unbolt the bellhousing. Taking it apart the way you did risks damaging the converter. Of course it's impossible to put it back together that way anyways.
Bag and label everything. Take more pics than you think you need.
Instead of sandblasting everything make yourself an acid bath. I use a plastic storage tub. At your local hardware store you can buy gallons of Muriatic acid for about $10/gal. Cut it 50% with water. Use gloves and don't stick your face in the tub when dropping things in. The reason I do this is that it restores the appearance of the part without changing the surface like blasting does. Very good for parts that don't get painted. IE., the ashtray on my 442. Removed the rust and left the part with a surface texture identical to a new part. Media blasting leaves a tell tale sign. Half shafts come up like new with the heat line that runs the length of them still intact and you can even see the paint mark daub. Much easier than blasting. When you take them out of the acid rinse them well with water. They will want to flash rust quite quickly so spray them with Rust Mort from your body shop supplier. I let them dry then spray them with a clear satin finish verathane. The clear is undetectable when it dries, but protects from future rusting.
Steve
What sheen do you like? Go with that.
I'm a purist restorer. I want everything as it left the factory. To improve on the durability I prime all painted parts with epoxy then use a urethane ceramic chassis black. It's an Eastwood product, and while I think most of their stuff is over priced and mediocre quality, this stiff is great. Very durable and has a sheen level that comes very close to what you see on the OE finish. To that end, some of the parts are semi-gloss (most), some are gloss (upper control arms come to mine). Very few, if any flat black parts.
BTW, here's a couple of pointers on your frame off. It is by far easiest to undo the car in the reverse order that it was assembled. GM went to great lengths to determine and design the fastest way to put the car together. If you reverse that order, it comes apart fastest and easiest. To that end, removing the body first, prior to removeing the eng etc makes all the eng and drive train work a breeze. If you look closely at the rad shroud the bottom has a spot missing, just enough to clear the fan as the body was lowered onto the frame. It took me 4 hours to have the body ready to lift off the frame, engine and drivetrain all intact. With the body off, standing over the frame and engine, that disassembly is minutes. The fan shroudn and rad, likewise with the frame and engine out of the way.
As you disassemble look at things and try to figure out the order it was put together, you will save a lot of skin on your knuckles and time.
When splitting eng and at, the converter always stays with the trans. Undo the converter bolts and slide the converter back then unbolt the bellhousing. Taking it apart the way you did risks damaging the converter. Of course it's impossible to put it back together that way anyways.
Bag and label everything. Take more pics than you think you need.
Instead of sandblasting everything make yourself an acid bath. I use a plastic storage tub. At your local hardware store you can buy gallons of Muriatic acid for about $10/gal. Cut it 50% with water. Use gloves and don't stick your face in the tub when dropping things in. The reason I do this is that it restores the appearance of the part without changing the surface like blasting does. Very good for parts that don't get painted. IE., the ashtray on my 442. Removed the rust and left the part with a surface texture identical to a new part. Media blasting leaves a tell tale sign. Half shafts come up like new with the heat line that runs the length of them still intact and you can even see the paint mark daub. Much easier than blasting. When you take them out of the acid rinse them well with water. They will want to flash rust quite quickly so spray them with Rust Mort from your body shop supplier. I let them dry then spray them with a clear satin finish verathane. The clear is undetectable when it dries, but protects from future rusting.
Steve
Thanks a million for the response... this helps a great deal! On the chassis, you've helped me in making the call on moving to the semigloss finish as that sheen is my favorite. While I am not a purist restorer, my wife and I are looking to keep the car as "period correct" as we can. For example, if we need to swap the hood for clearance we'll go with an L88 hood which would have been seen on a 1970's Vette. Sure it's aftermarket, but it would be correct or better stated, possible. The Chassis is along the same lines.... I would not go red... but I would like to keep it looking as correct as I can.
On the restoration tips.... thanks even more! The media blasting is being done on all parts that are hidden from view but still need to get a protective finish. For example, the dash brackets and the center console support. They get clean and then got a primer and flat black paint. In most cases these parts will never been seen, let alone touched. So the clean and painting is done well that way. However, when it comes to certain items that may be seen, for example, the drive and half shafts you recommendation is awesome! I did not know that would work and not damage the finish. I was considering media blasting with less aggressive media to keep sheens/shines/surfaces looking correct. Thanks for the help and idea.
On the "bagging and tagging" of parts.... we've been good. We read quite a bit here and learned the right way to do this. Anything that fits in "baggies" is in one with a tag in each bag and the basic info on the bag. We even have an inventory sheet we've put together on a spreadsheet. We have the 1977 AIM in hand and it has helped a bit to get things disassembled. For now, it has been more for making sure everything was as it should be... but it helps to see the exploded view. On the photos..... there, trust me, we're covered. The shots I've shown here are just the tip of the iceberg. Every part I've taken out has been shot in and coming out of the car. To date.... we have north of 500 photos and a couple of videos. So between the AIM and the photos.... we should be good. Of course, there will be something that comes up.... but I am sure we'll be covered.
Thanks again!
05-31-2011, 03:00 PM
#24
Racer
Thread Starter
So it was the Memorial Day weekend and we originally had not planned to work on the car.... but the way the weekend came together, we got some time. So we took the first "restoration" steps.... we actually painted something!
OK so what we did....
Took off the master cylinder and booster
Took out the steering wheel
Took out the brake and accelerator pedals
Took out the shifter and cables
Here are some shots....
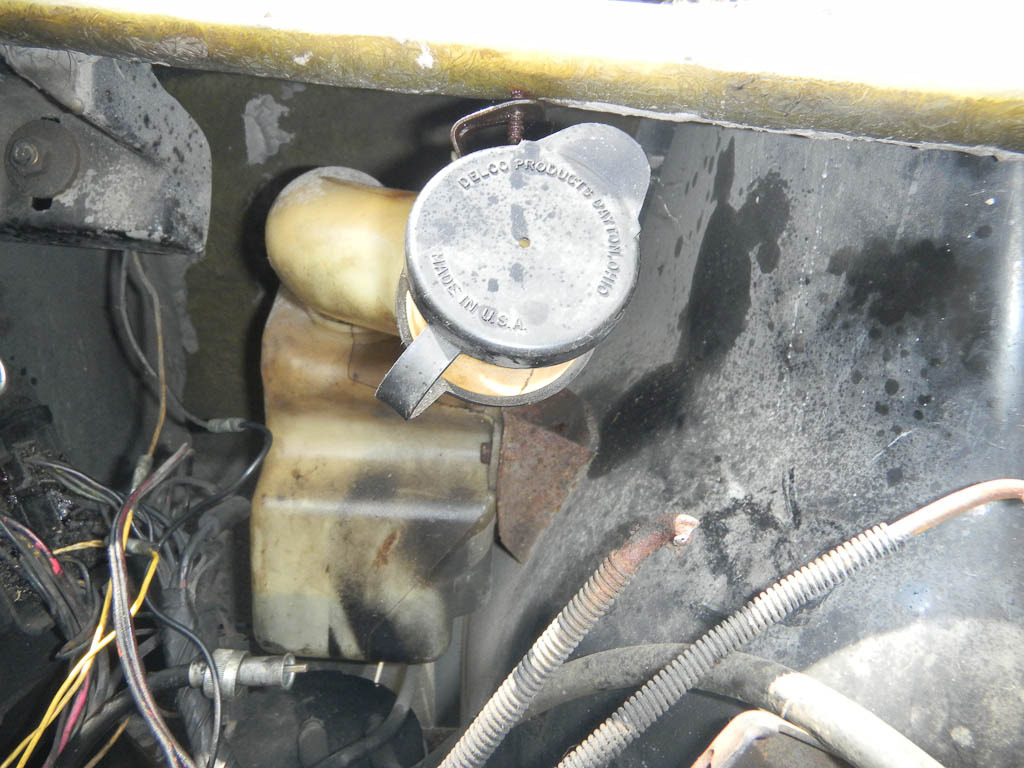
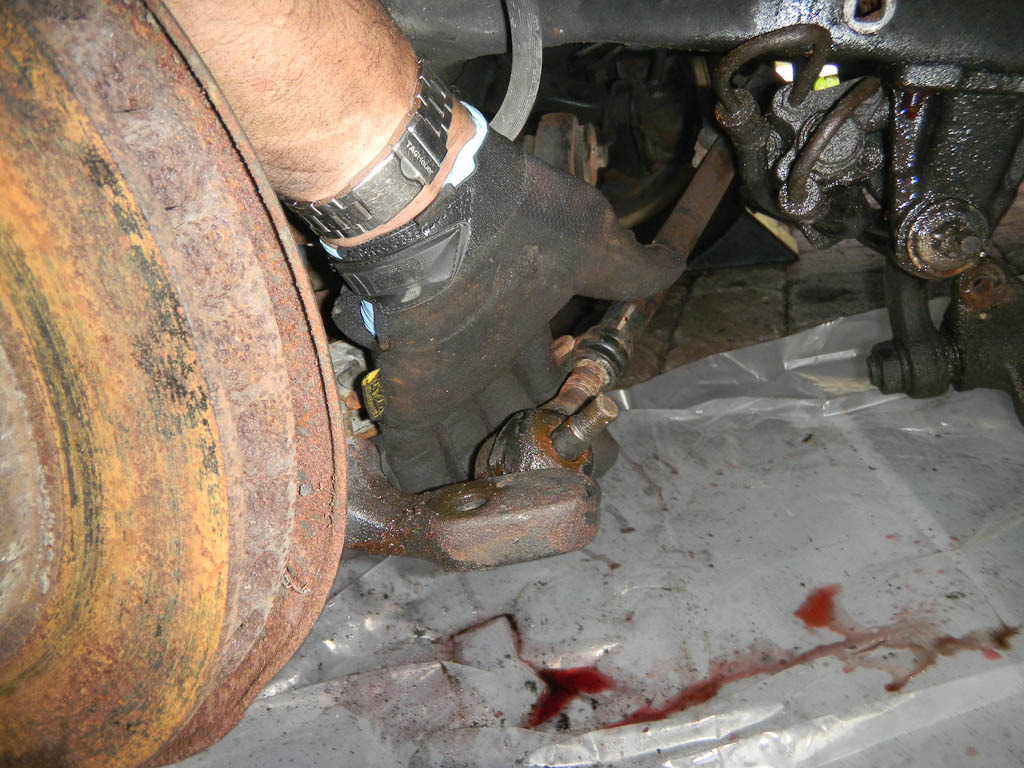
Started with the brakes..... I don't know.... but I think there may be a leak someplace.... the master was bone dry.... that's what I saw when I pulled the cap...
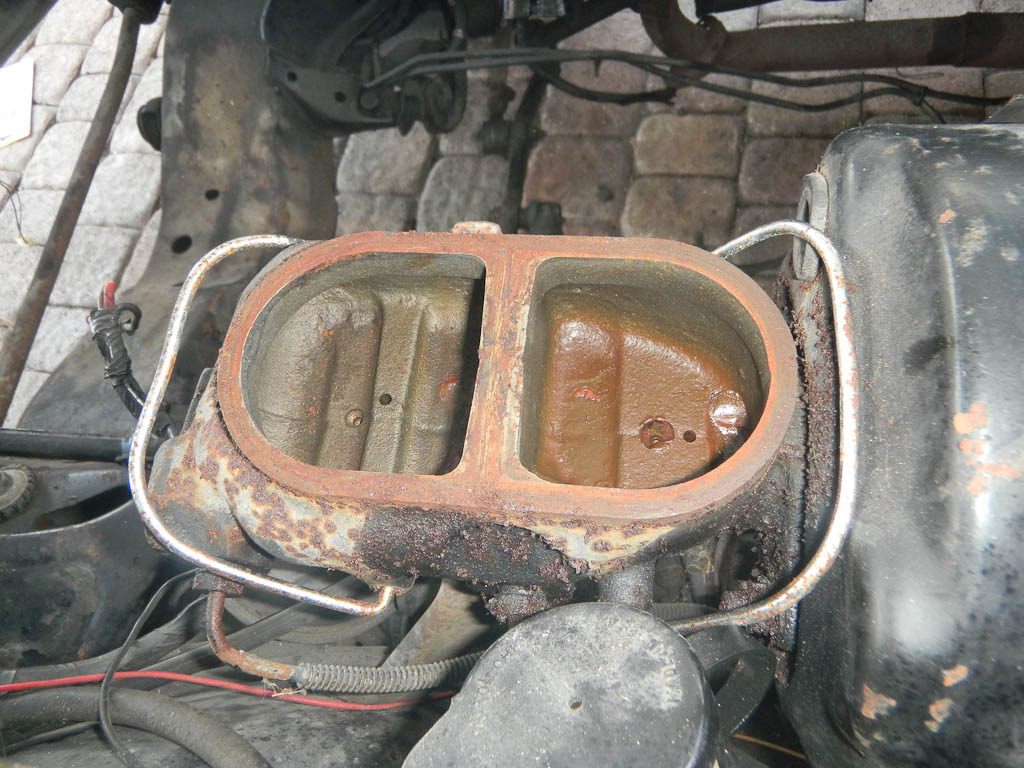
I think I found the leak....
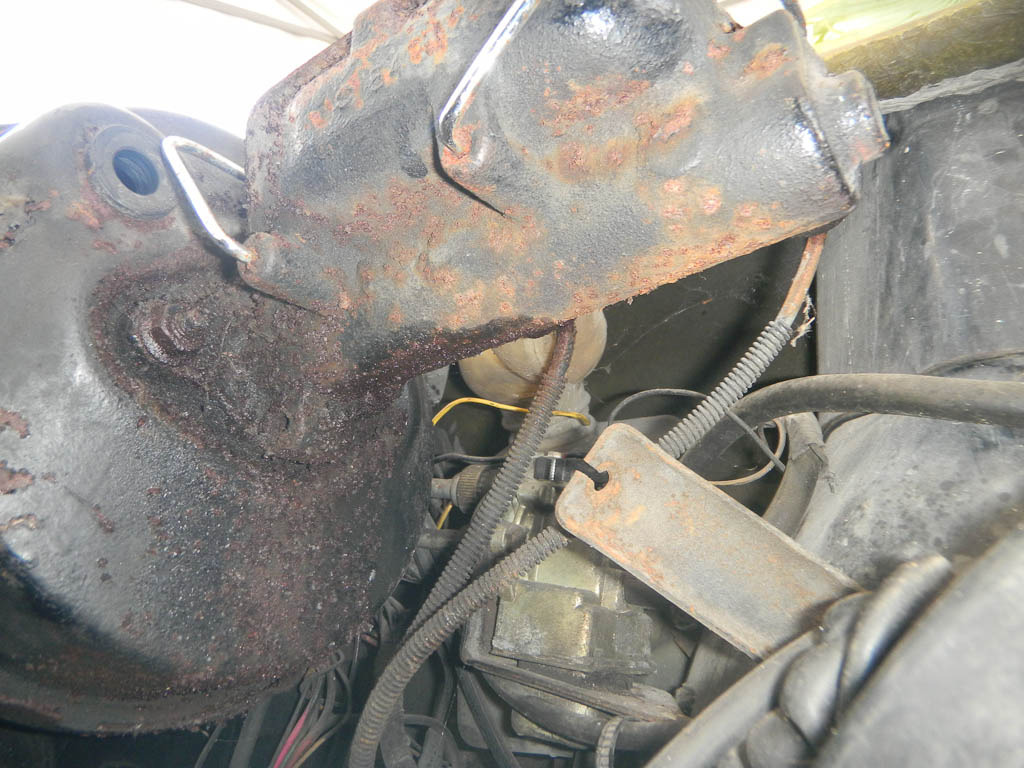
Once the master cylinder and the booster were out, the steering column was next. We got to the bolts and they came off easily.... might be the fact I've been spraying WD40 on them for three weeks. Every time I would do anything to the car... any bolts I saw would get a hit with WD40 before I stoppped for the day. So far, every bolt has come out without a single issue.
For these we loosened all the bolts but only removed (if not it pins the shaft in place) the tension bolt that holds the shaft in the joint. A slight tweak with the small pry bar to break the rust glue and some WD40 for good measure and the steering column pops right out.
From there with the steering and brakes out.... the pedals and the support assemblies came out. That was a breeze....
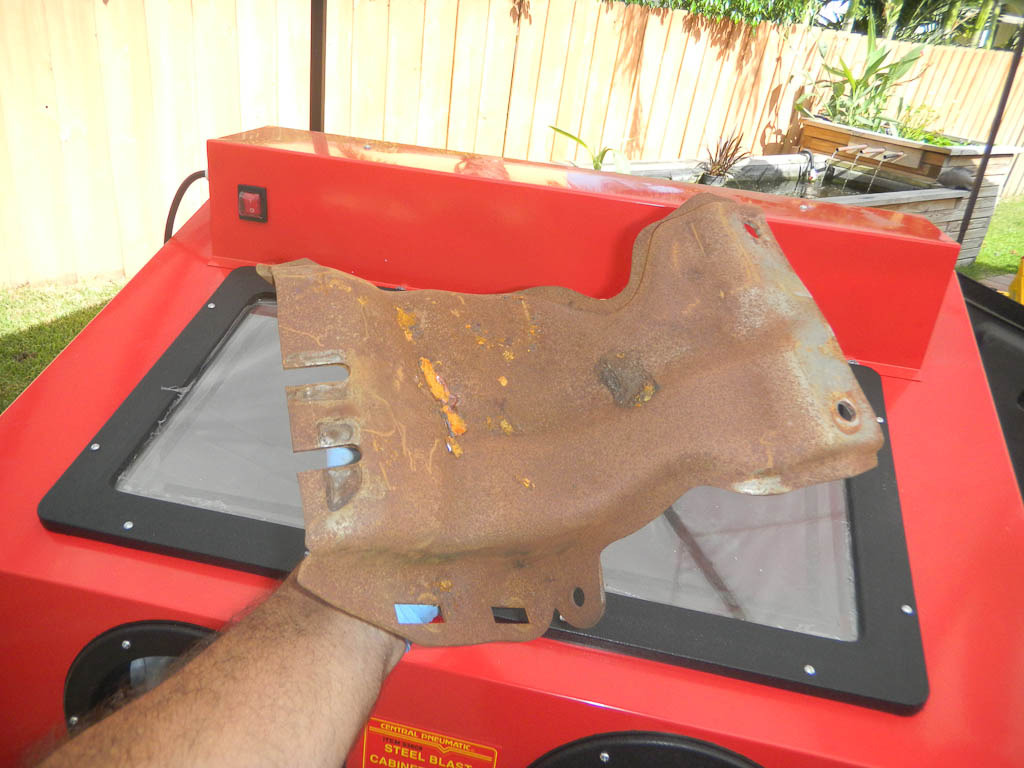
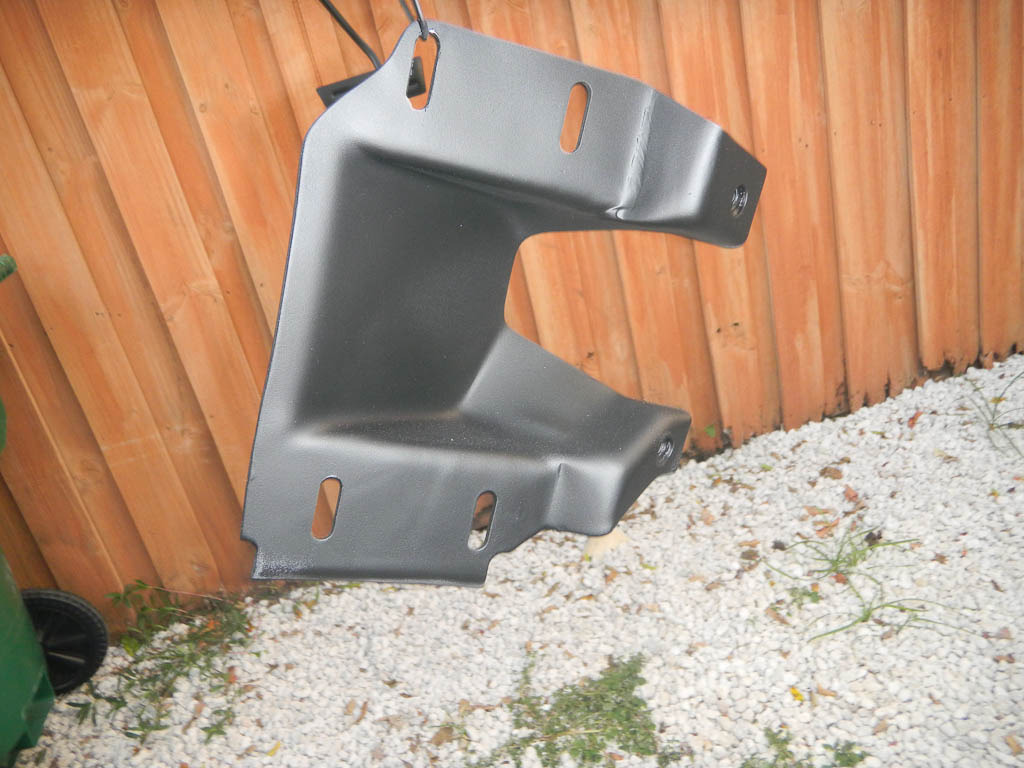
Once we had it out, the pedals cam apart into the brackets and components. These are the brake and steering brackets (one unit) pulled apart to get blasted, buffed with a synthetic cookie and then painted. They got three coats of primer and three coats of flat black. Came out pretty well, if I do say so myself.
Before:
And.... the After.... I think there is a slight improvement. I think you should be able to tell in the photos....
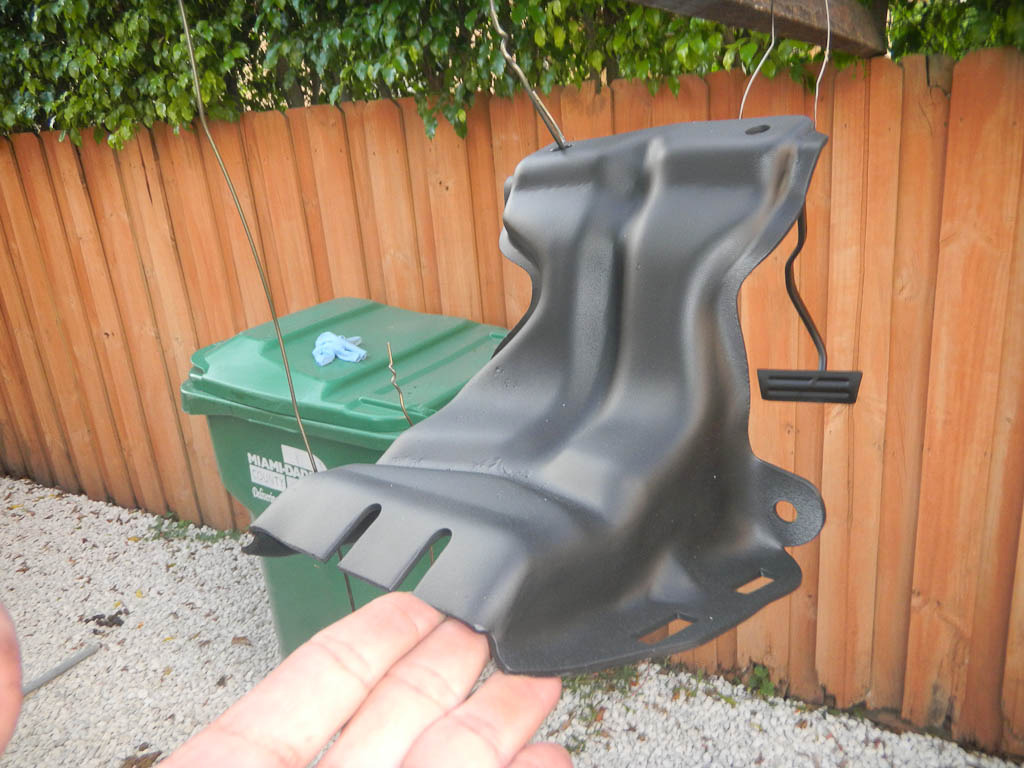
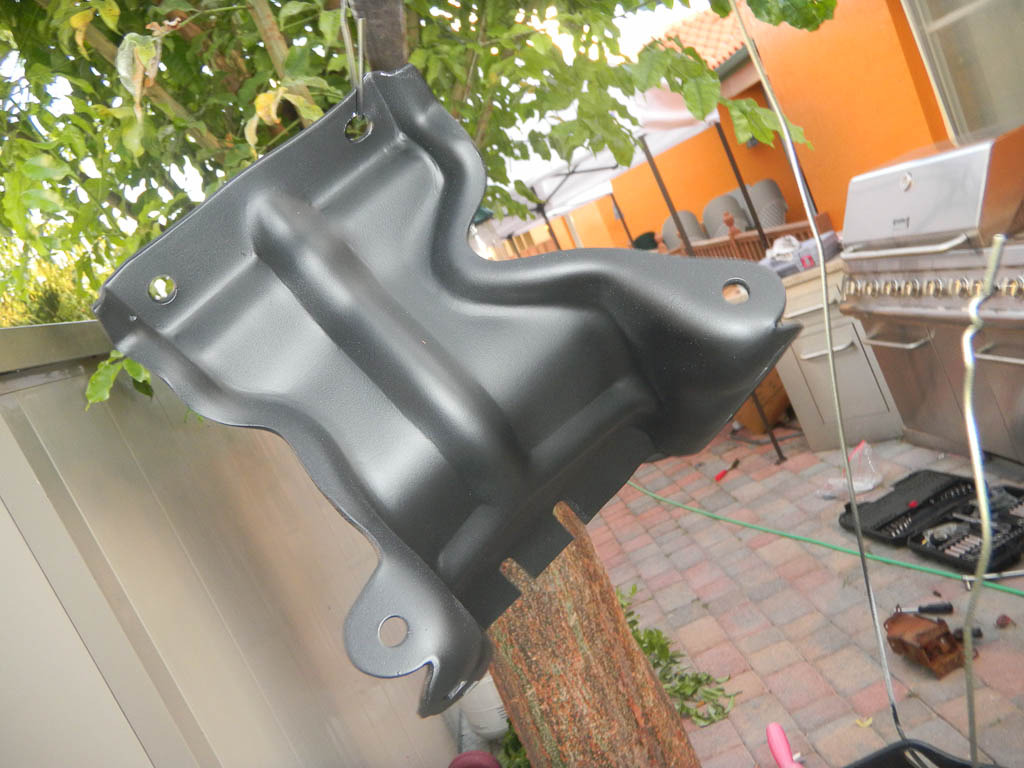
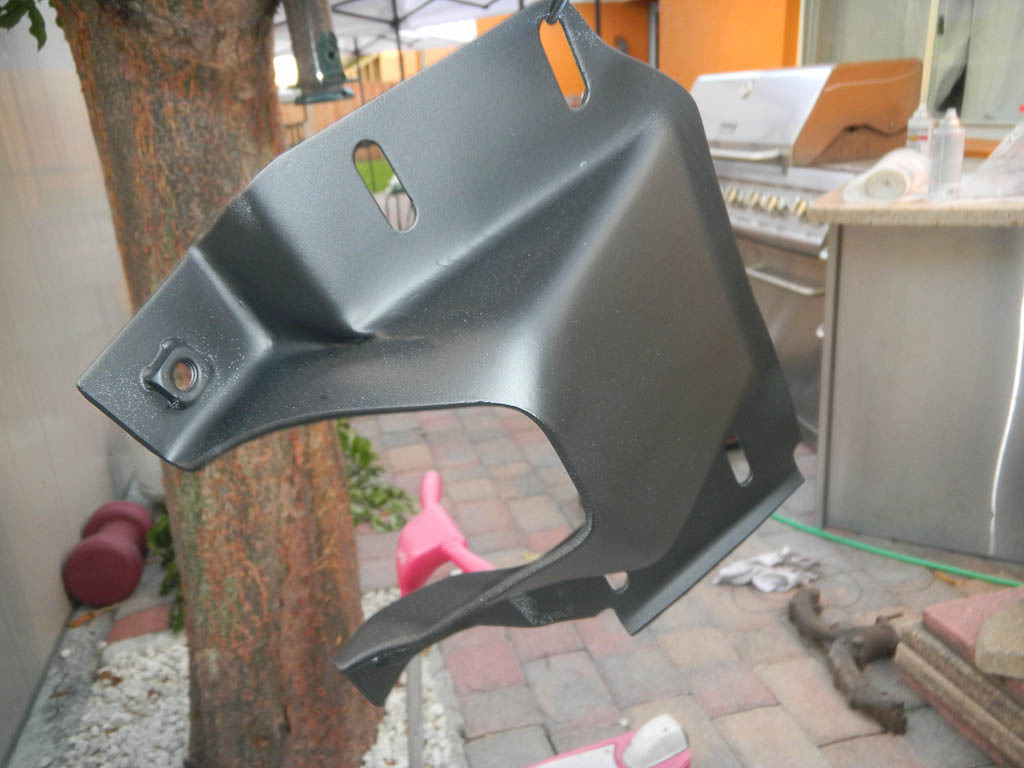
Now.... off to get new bolts. It's a crime to put on the rusty bolts... likely going to Stainless where possible..... If not, I will go with the basic bolts and clearcoat. In the end, I will reassemble everything with new parts, where needed.
OK so what we did....
Took off the master cylinder and booster
Took out the steering wheel
Took out the brake and accelerator pedals
Took out the shifter and cables
Here are some shots....
Started with the brakes..... I don't know.... but I think there may be a leak someplace....
the master was bone dry.... that's what I saw when I pulled the cap...I think I found the leak....
Once the master cylinder and the booster were out, the steering column was next. We got to the bolts and they came off easily.... might be the fact I've been spraying WD40 on them for three weeks. Every time I would do anything to the car... any bolts I saw would get a hit with WD40 before I stoppped for the day. So far, every bolt has come out without a single issue.
For these we loosened all the bolts but only removed (if not it pins the shaft in place) the tension bolt that holds the shaft in the joint. A slight tweak with the small pry bar to break the rust glue and some WD40 for good measure and the steering column pops right out.
From there with the steering and brakes out.... the pedals and the support assemblies came out. That was a breeze....
Once we had it out, the pedals cam apart into the brackets and components. These are the brake and steering brackets (one unit) pulled apart to get blasted, buffed with a synthetic cookie and then painted. They got three coats of primer and three coats of flat black. Came out pretty well, if I do say so myself.
Before:
And.... the After.... I think there is a slight improvement. I think you should be able to tell in the photos....
Now.... off to get new bolts. It's a crime to put on the rusty bolts... likely going to Stainless where possible..... If not, I will go with the basic bolts and clearcoat. In the end, I will reassemble everything with new parts, where needed.
Last edited by luisv; 02-02-2021 at 01:32 PM.
05-31-2011, 09:42 PM
#25
Racer
Thread Starter
So while on this topic.... What do you all use for this type of work?
I have seen a few go with the POR15 but that finish does not really appeal to me. Also... The difficulty in working with it is a concern....
Is there something short of powder coating I can do with internal metals (for example, the pedal brackets above, the center console frame, etc.) to make them rust proof?
If it's not too much.... A brand or product name would be best.... Ie.... PPG, Rustoleum, etc... I would prefer a primer and paint combo but have been told that's not very good....
05-31-2011, 09:51 PM
#26
Le Mans Master


use rustoleum product if you're not using a higher grade 2part paint... the krylon/vals../etc spray can stuff is crap when doing stuff for the car......
05-31-2011, 10:30 PM
#27
So while on this topic.... What do you all use for this type of work?
I have seen a few go with the POR15 but that finish does not really appeal to me. Also... The difficulty in working with it is a concern....
Is there something short of powder coating I can do with internal metals (for example, the pedal brackets above, the center console frame, etc.) to make them rust proof?
If it's not too much.... A brand or product name would be best.... Ie.... PPG, Rustoleum, etc... I would prefer a primer and paint combo but have been told that's not very good....
I have seen a few go with the POR15 but that finish does not really appeal to me. Also... The difficulty in working with it is a concern....
Is there something short of powder coating I can do with internal metals (for example, the pedal brackets above, the center console frame, etc.) to make them rust proof?
If it's not too much.... A brand or product name would be best.... Ie.... PPG, Rustoleum, etc... I would prefer a primer and paint combo but have been told that's not very good....
All bare metal should have either an etch primer or an epoxy primer for proper adhesion. I personally prefer epoxy. It is used like contact cement. It's two parts are mixed and it is sprayed on. After the solvents flash off it is painted over, without sanding, with your next product. If you miss the epoxy's recoat window (usually 24 to 72 hrs) you must sand it and start the process over. Just like contact cement. If you let it dry too long it won't stick. This provides a strong chemical bond to your metal.
Urethane paints are today's technology. By today I mean the last 20 years or more. Urethane is available in 2 styles if you will, both are 2k. One is base/clear the other known as single stage. I have done the base/clear on the underside and frame by adding a flattening agent to the clear. Very difficult to achieve consistent results. Same with single stage black, there isn't a semi gloss in a premix package. Until, that is, Eastwood came out with their chassis black. I generally think that Eastwood's stuff is marginal and over priced. But this stuff rocks. Does exactly as it says and looks great. With the durability of a urethane finish.
Yes, cleaning your gun is a nusance, but you save up your parts until you have a few ready and in one session shoot them all. If you don't have a gun, buy yourself a low end brand name HVLP gun, like a Devilbiss Finishline III.
You may find you like spraying and decide to paint the car yourself. While not a top of the line gun that one is capable of a show quality finish.
For tips on using it join the forum at the Autobodystore.com. Ask all your questions and the guys will be glad to help you out.
BTW, this process and quality of paint is as good, in my opinion, as powder coating. I use it everywhere now.
Steve g
06-06-2011, 04:09 PM
#28
Racer
Thread Starter
....Urethane paints are today's technology. ...Eastwood came out with their chassis black. I generally think that Eastwood's stuff is marginal and over priced. But this stuff rocks. Does exactly as it says and looks great. With the durability of a urethane finish
...
BTW, this process and quality of paint is as good, in my opinion, as powder coating. I use it everywhere now.
Steve g
...
BTW, this process and quality of paint is as good, in my opinion, as powder coating. I use it everywhere now.
Steve g
Is this the consensus? Any other options before I buy Eastwood's solution?
06-09-2011, 09:46 AM
#29
Racer
Thread Starter
OK.... I'd like to shimmy back up the read list.... I may be on page 27 by now.... LOL...
The question is.... what options do I have? Is Eastwood's solution the only one?
Is there something I can source locally? For example and a body shop supplier....
I am not, at all, doubting the quality of what Steve mentioned.... I would just imagine there have to be options...
The question is.... what options do I have? Is Eastwood's solution the only one?
Is there something I can source locally? For example and a body shop supplier....
I am not, at all, doubting the quality of what Steve mentioned.... I would just imagine there have to be options...
06-28-2011, 04:56 AM
#30
Pro

I used a two part epoxy paint on all my frame and suspension parts and that would be my choice if I was to do it over again. Initially I was going to powder coat, but changed my mind, as I plan to daily drive my project and wanted something durable and easy to repair. The Epoxy I used comes from a place in Chilliwack, BC, Canada and it's called Bullet Proof Coatings and I don't know the distributor in the US. Like Steve I also like to use an epoxy primer and two part urethane paint system whenever I can.
http://gemblasters.com/bp.html You can look under "Product Comparison" to see what Greg has to say about his product.When I first met him he said here and handed me a sledge and a piece of metal that was coated in BP Epoxy and said beat on this. I did and was impressed enough that I bought it.Good luck with your build.
ikwhite
OK.... I'd like to shimmy back up the read list.... I may be on page 27 by now.... LOL...
The question is.... what options do I have? Is Eastwood's solution the only one?
Is there something I can source locally? For example and a body shop supplier....
I am not, at all, doubting the quality of what Steve mentioned.... I would just imagine there have to be options...
The question is.... what options do I have? Is Eastwood's solution the only one?
Is there something I can source locally? For example and a body shop supplier....
I am not, at all, doubting the quality of what Steve mentioned.... I would just imagine there have to be options...
07-05-2011, 11:53 AM
#31
Racer
Thread Starter
It's been a while since I last posted anything here. There has been little real time (more than an hour or two) on the car in the last few weeks because of other committments. This weekend however, we took a big step. I'll condense this as much as possible because let's face it.... what's coming off is not nearly as interesting as what will be going in. However, getting down to the chassis is cool.
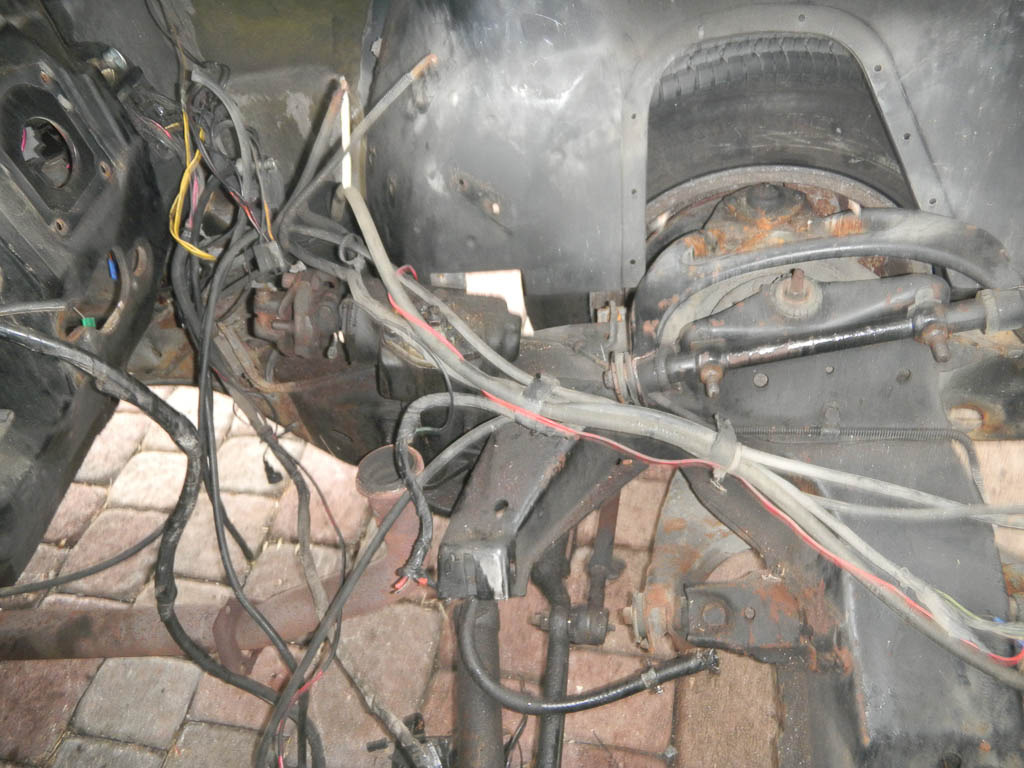
So after the last update (brake bracket removal and refurbish) we continued to get more out of the engine bay so we could get down to the firewall and a completely empty engine bay.
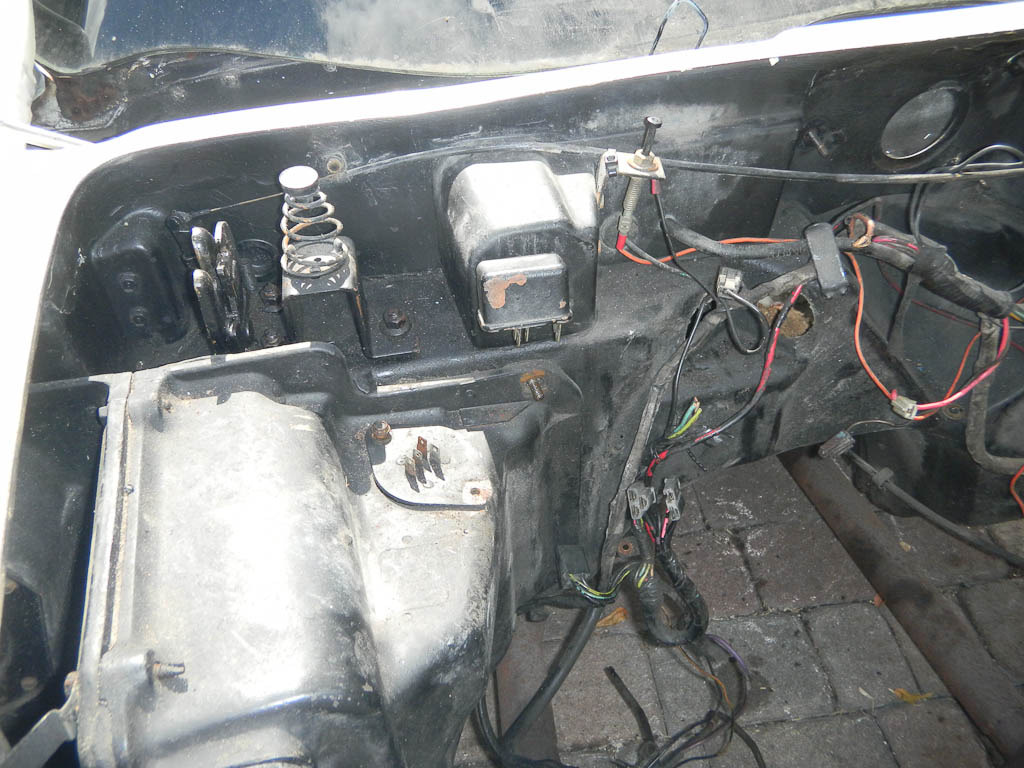
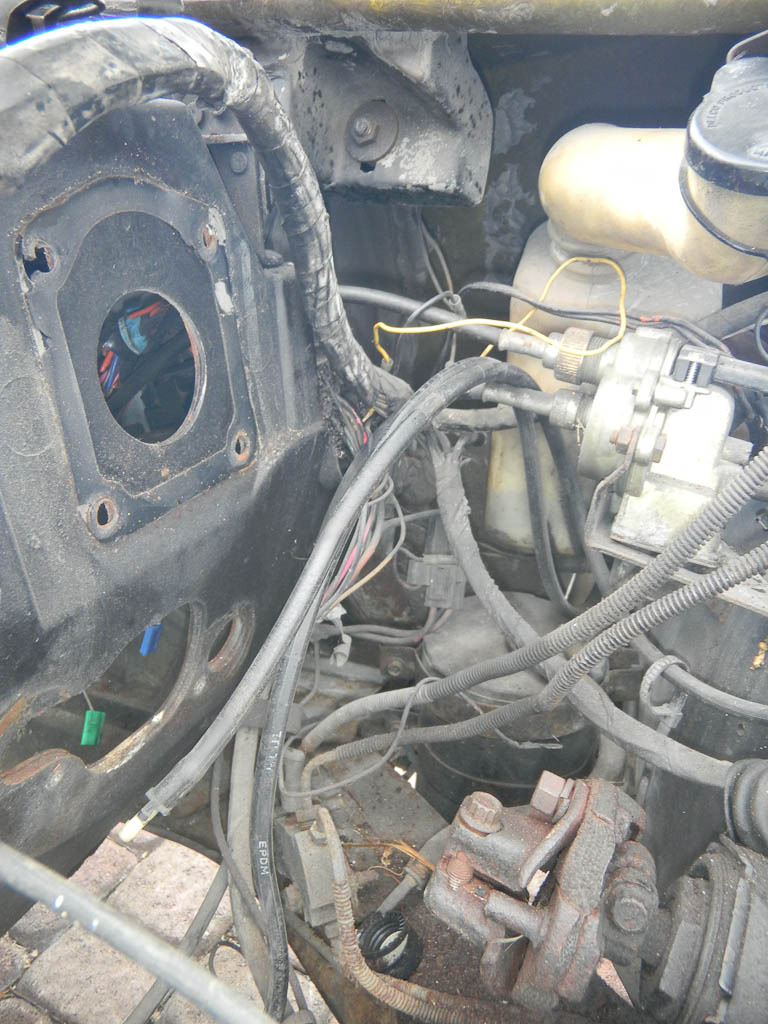
With the master cylinder out we moved onto the wiring harness in the engine bay. The thing was a mess from being in there for 34 years and having some "creative changes" made. We released all the clips on the path, cut some tie wraps (never in there) and removed the connectors to the bulbs etc. We then got to the firewall and pulled out the worst placed fuse box in history ... with that the harness was out. We then disconnected the vacuum lines and we were done...
Next we got the washer tank and radiator reservoir out.
We did this in bits (an hour at a time) over the past weekends when we had some time. This left us down to a bare engine bay. Next was the steering.
So after the last update (brake bracket removal and refurbish) we continued to get more out of the engine bay so we could get down to the firewall and a completely empty engine bay.
With the master cylinder out we moved onto the wiring harness in the engine bay. The thing was a mess from being in there for 34 years and having some "creative changes" made. We released all the clips on the path, cut some tie wraps (never in there) and removed the connectors to the bulbs etc. We then got to the firewall and pulled out the worst placed fuse box in history
... with that the harness was out. We then disconnected the vacuum lines and we were done...Next we got the washer tank and radiator reservoir out.
We did this in bits (an hour at a time) over the past weekends when we had some time. This left us down to a bare engine bay. Next was the steering.
Last edited by luisv; 02-02-2021 at 01:39 PM.
07-05-2011, 11:55 AM
#32
Racer
Thread Starter
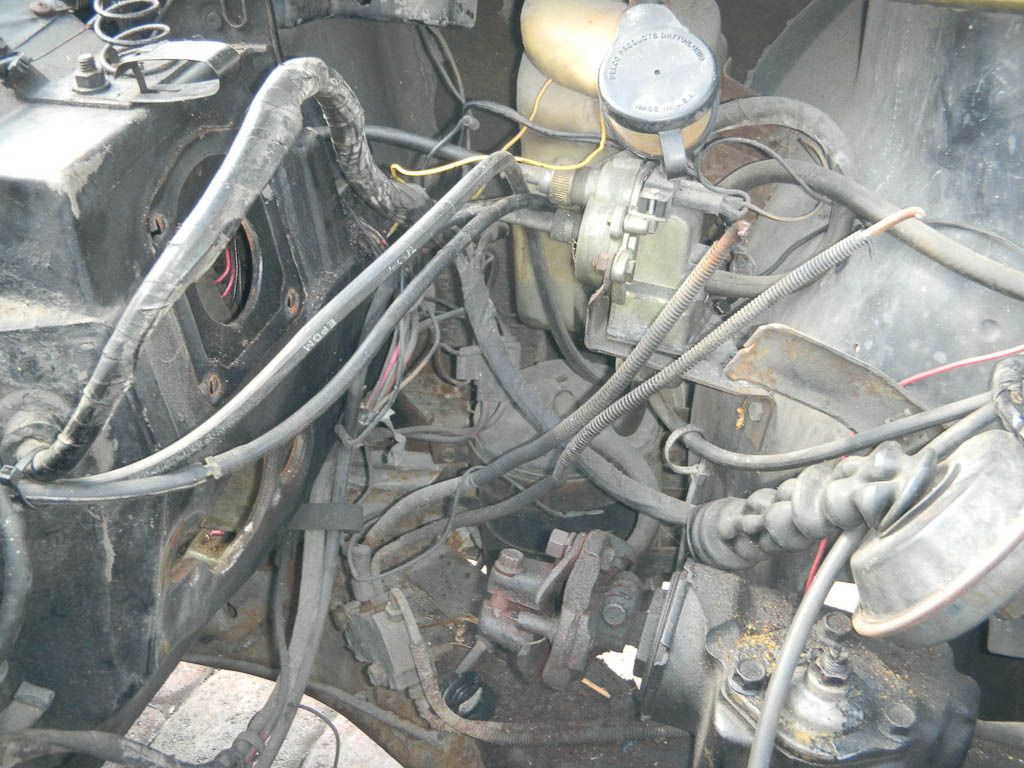
So this weekend we had just two last items to get our of the way in the engine bay. The steering linkage and the A/C plenum in the bay. The cooling half of the unit is on the outside of the firewall.
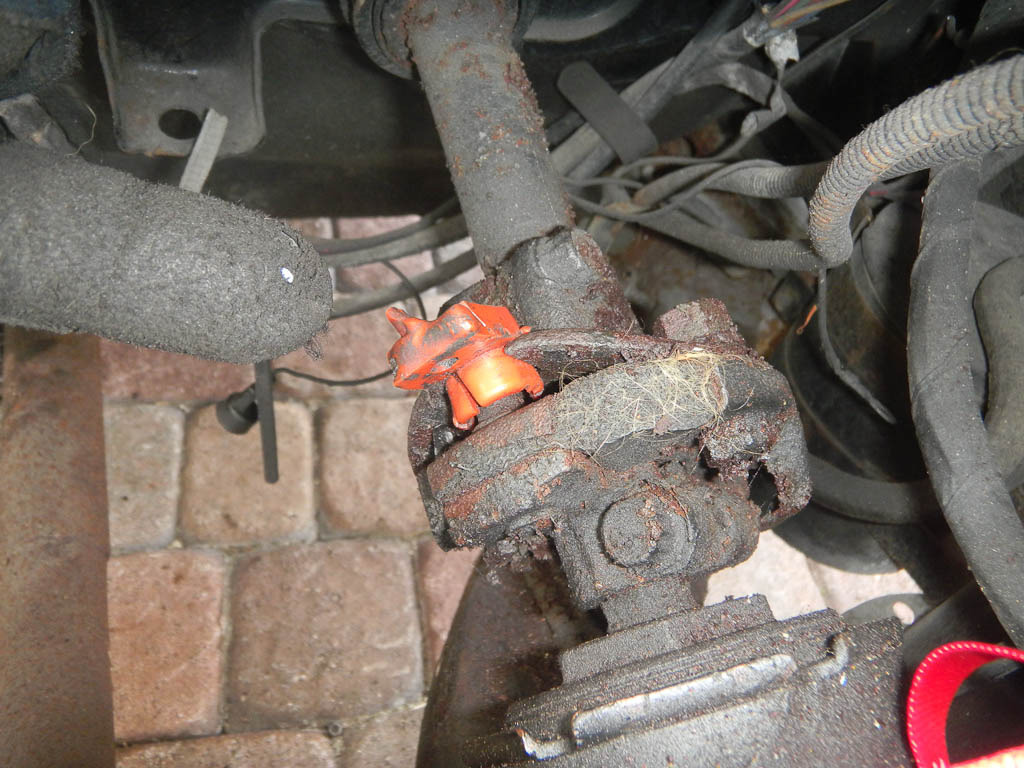
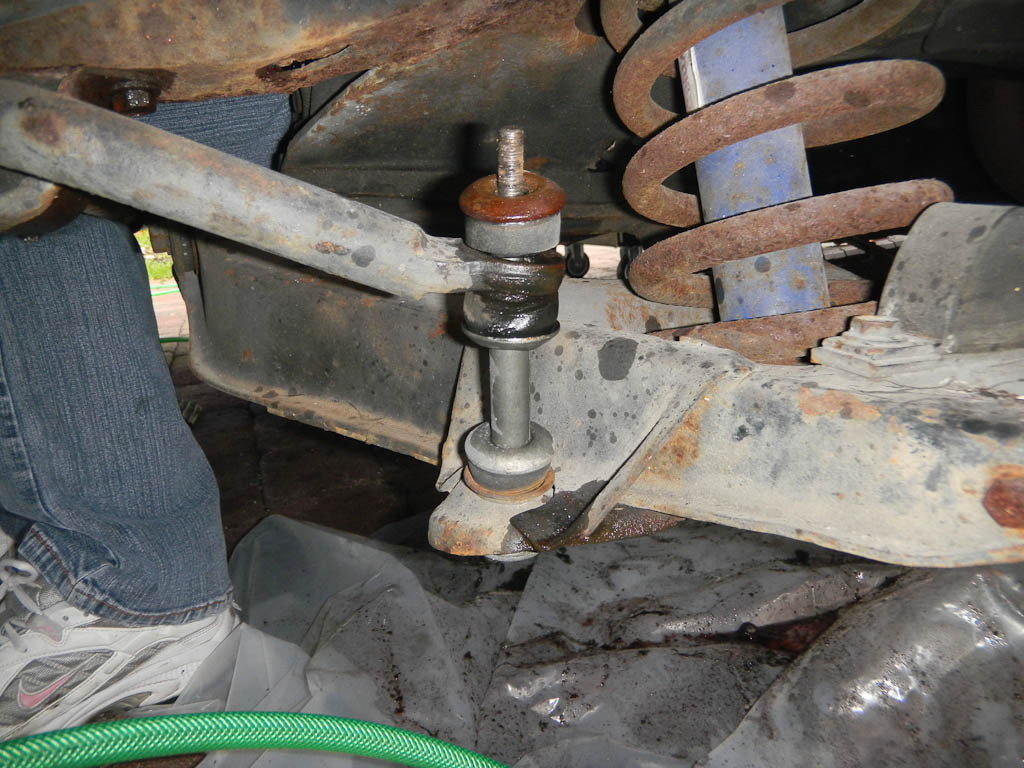
So first the steering. My original idea was to get the steering out but leaving the link connecting the left and right tires. It would make it easier to move the car. Unfortunately, the steering had different plans.
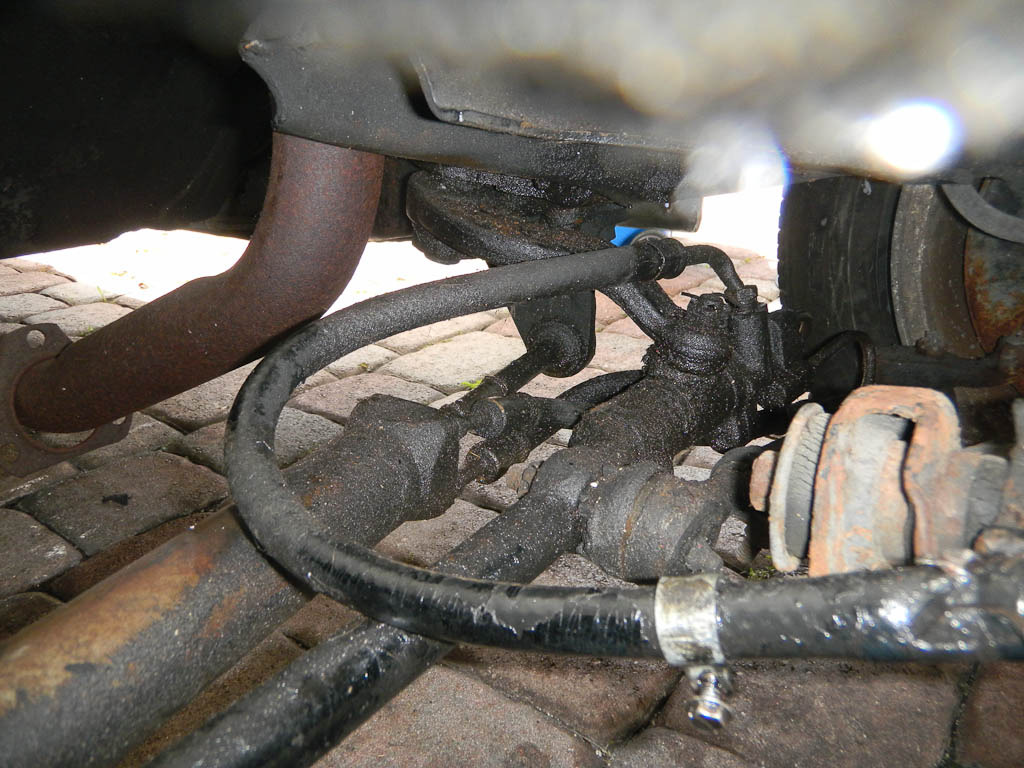
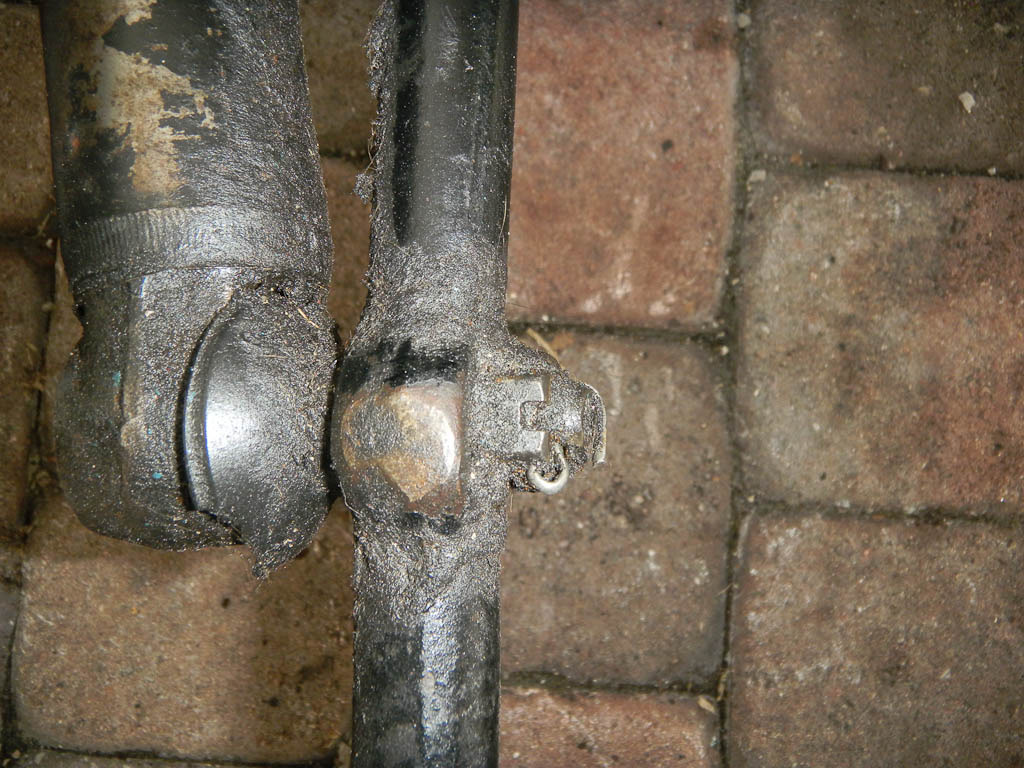
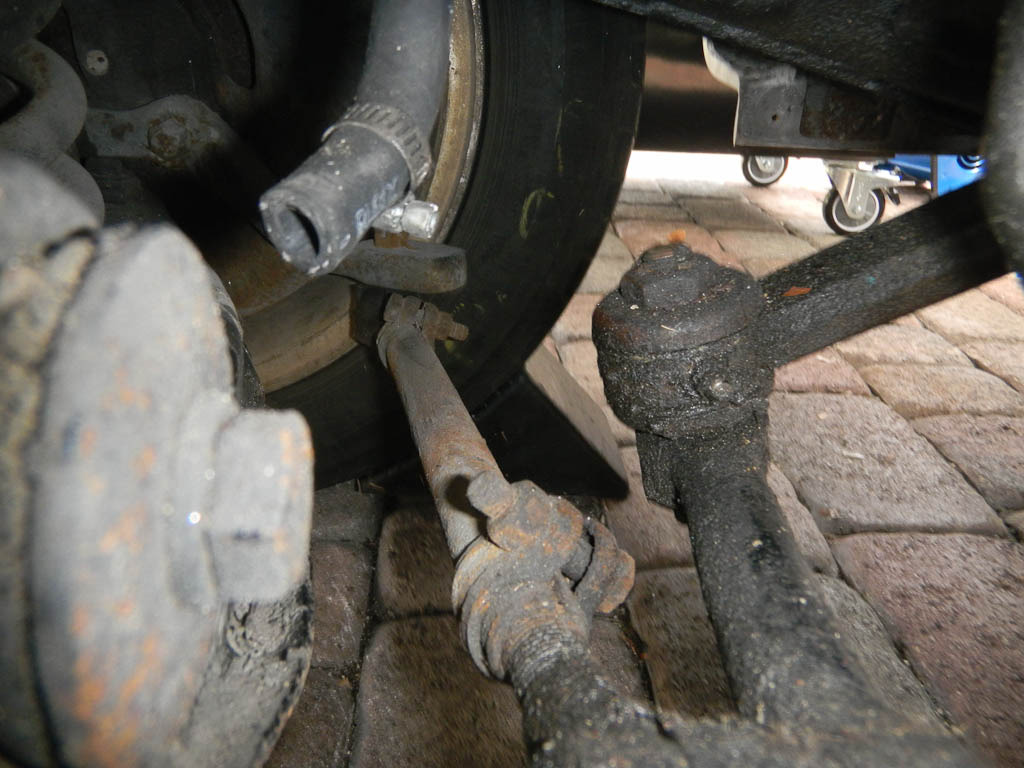
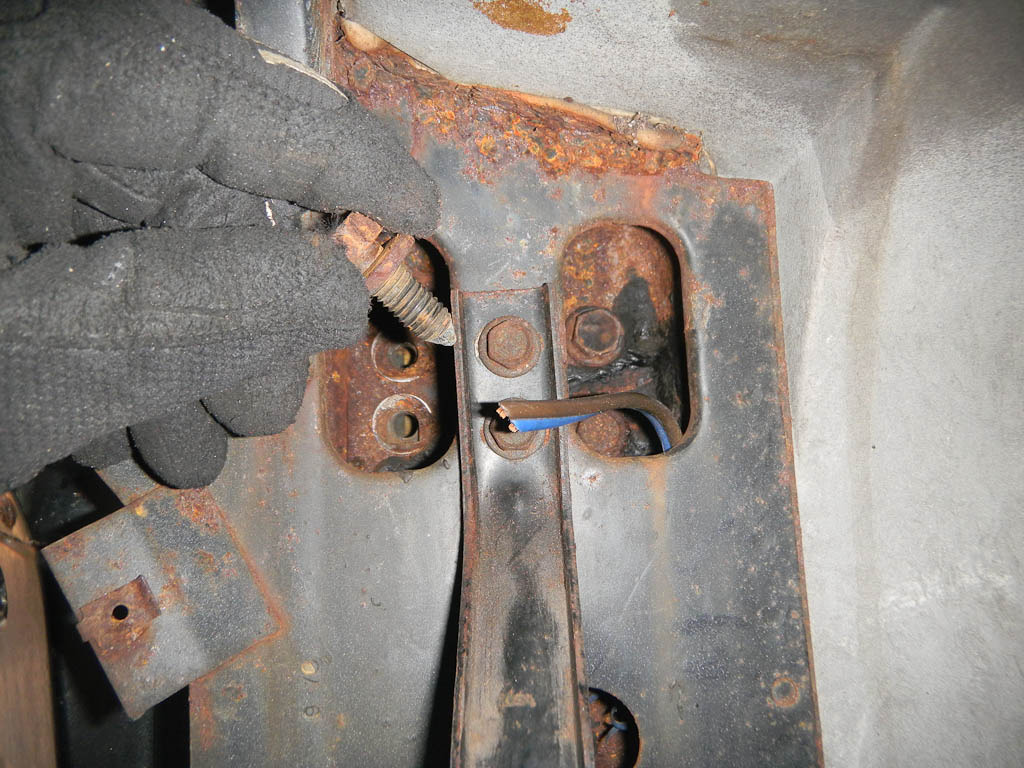
What was happening... All that crud is just grease and dirt. I got that off, but even with the nuts off, the bolts would not back out at all. So my only option was to get the whole assembly off as one part. Either way it was going to happen... now it just happened faster.
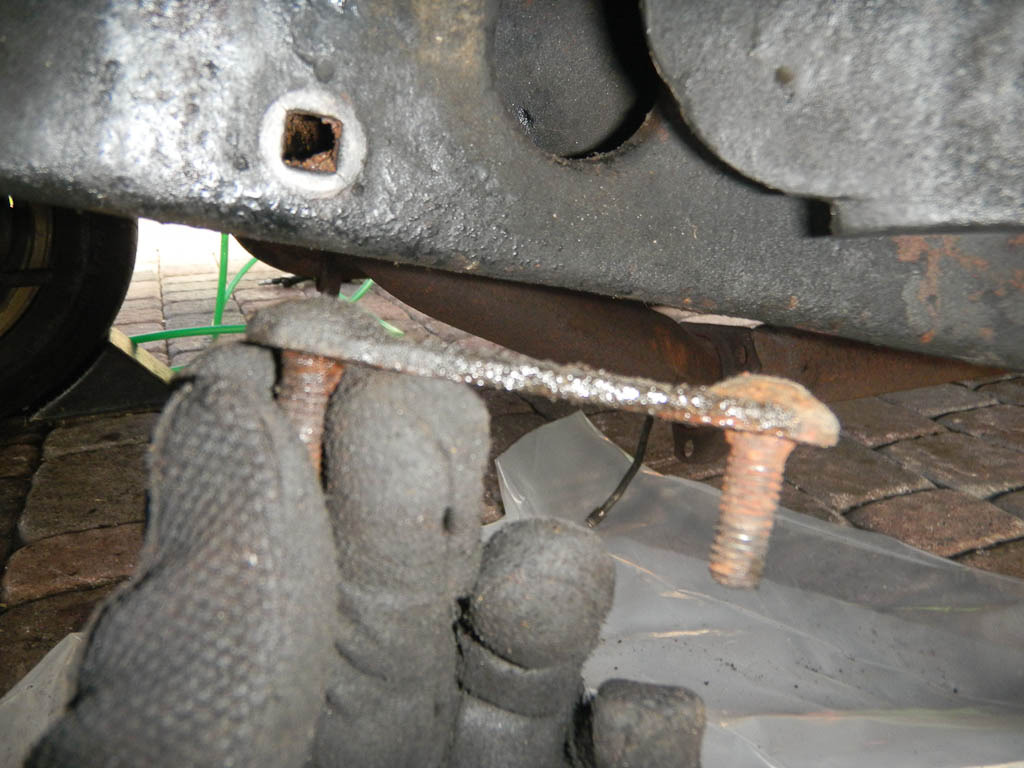
So first the steering. My original idea was to get the steering out but leaving the link connecting the left and right tires. It would make it easier to move the car. Unfortunately, the steering had different plans.
What was happening... All that crud is just grease and dirt. I got that off, but even with the nuts off, the bolts would not back out at all. So my only option was to get the whole assembly off as one part. Either way it was going to happen... now it just happened faster.
Last edited by luisv; 02-02-2021 at 01:43 PM.
07-05-2011, 11:55 AM
#33
Racer
Thread Starter
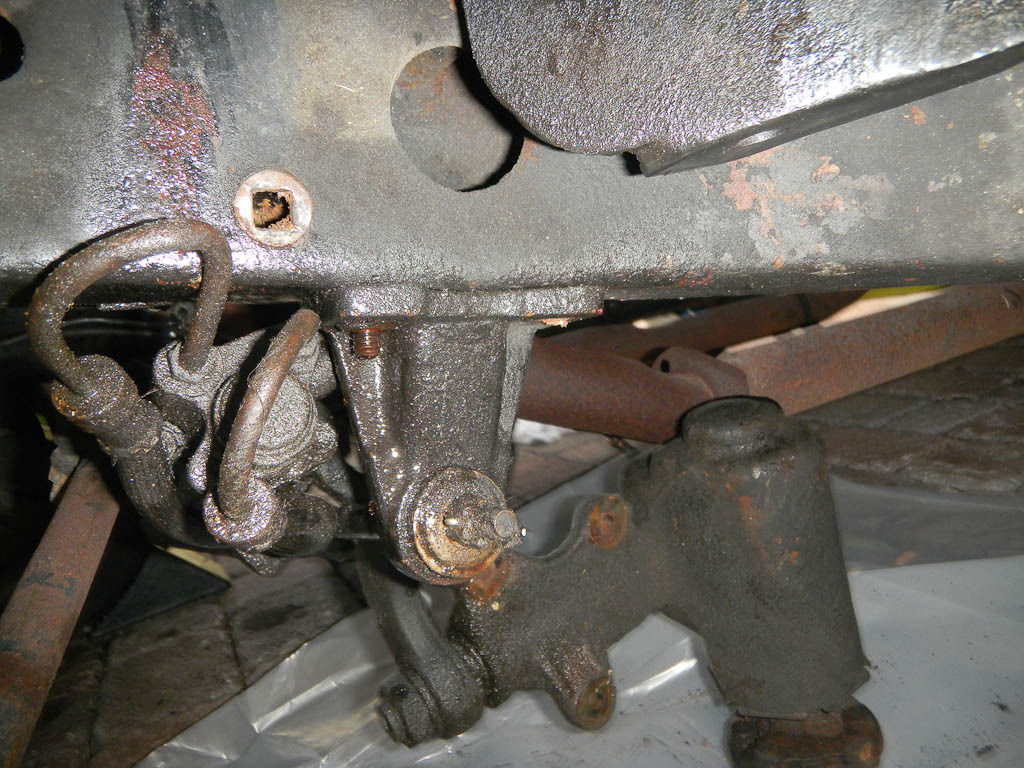
Once I had it the bolts on the frame off and the links to each tire off, the steering system dropped off in one shot. Heavy as hell!
Since I had the wheels off on the front I took the chance and removed the front brake calipers and sway bar.
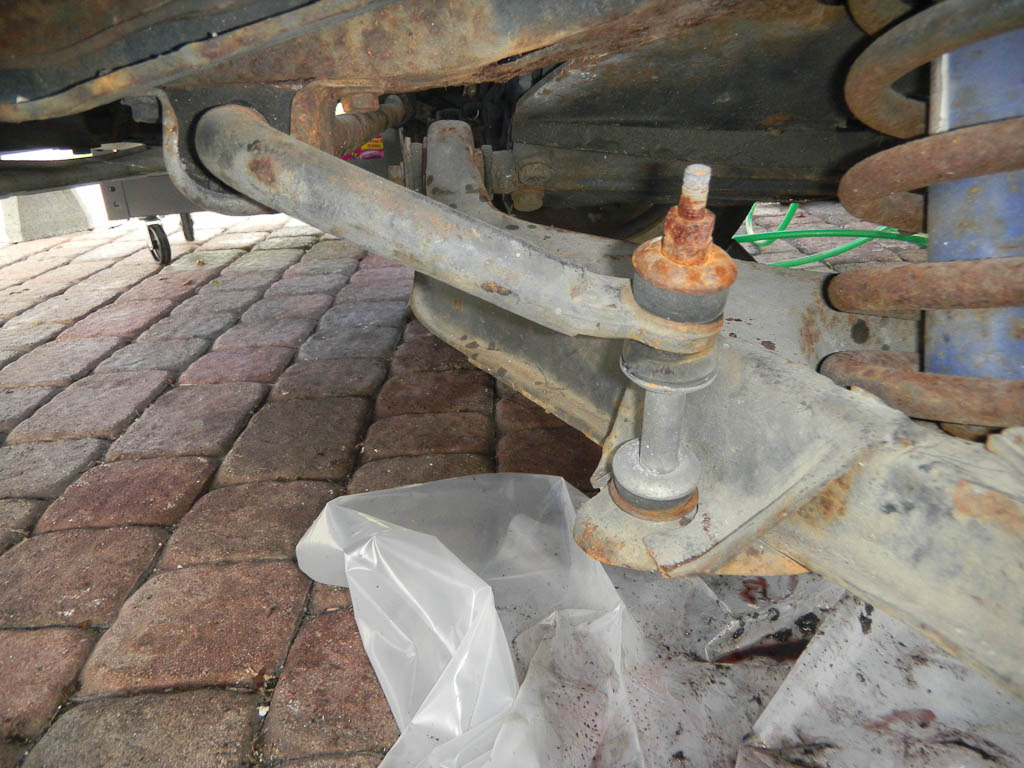
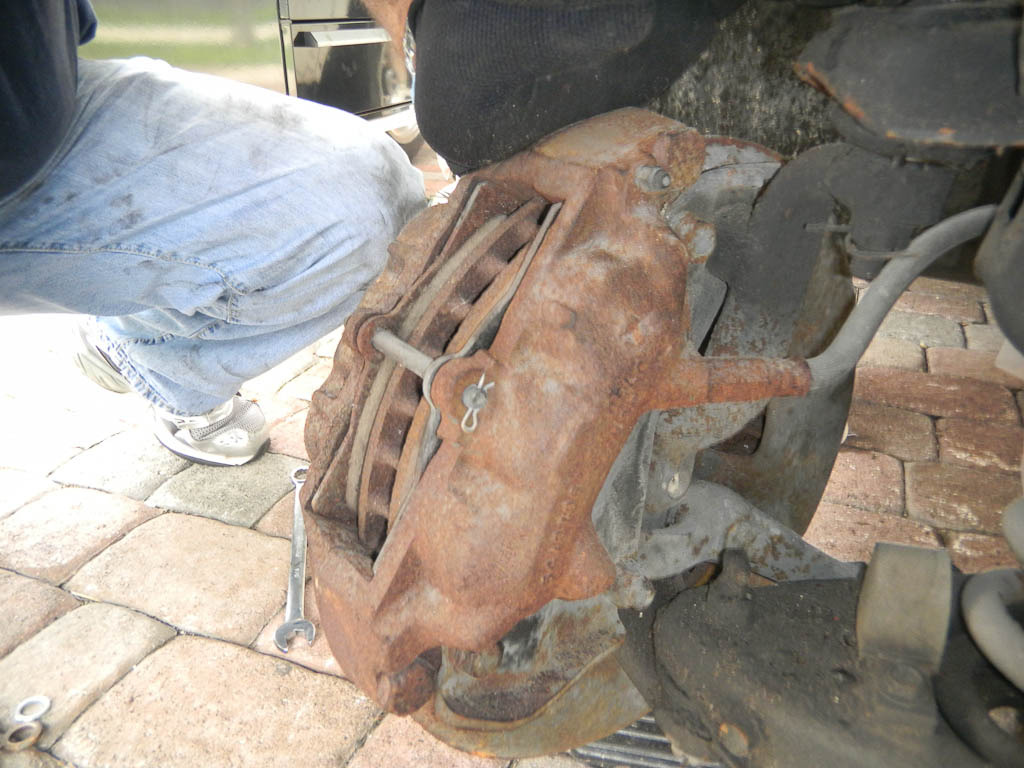
Since I had the wheels off on the front I took the chance and removed the front brake calipers and sway bar.
Last edited by luisv; 02-02-2021 at 01:46 PM.
07-05-2011, 12:00 PM
#34
Racer
Thread Starter
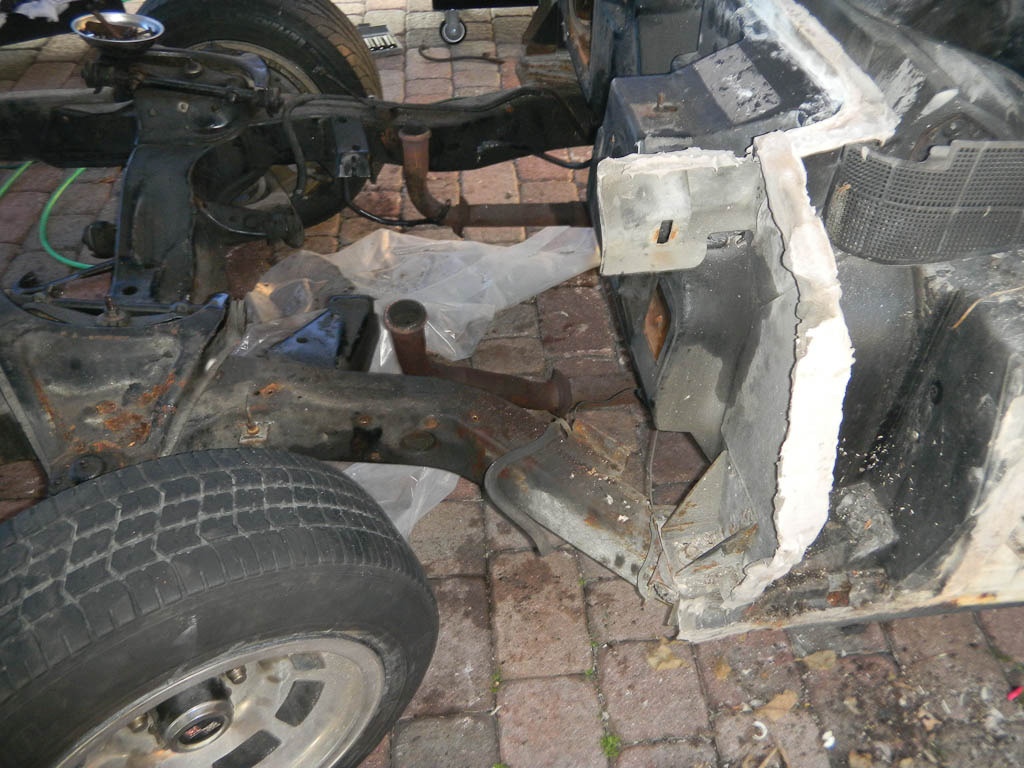
OK.... so now onto the final thing we did..... We got the front clip off.
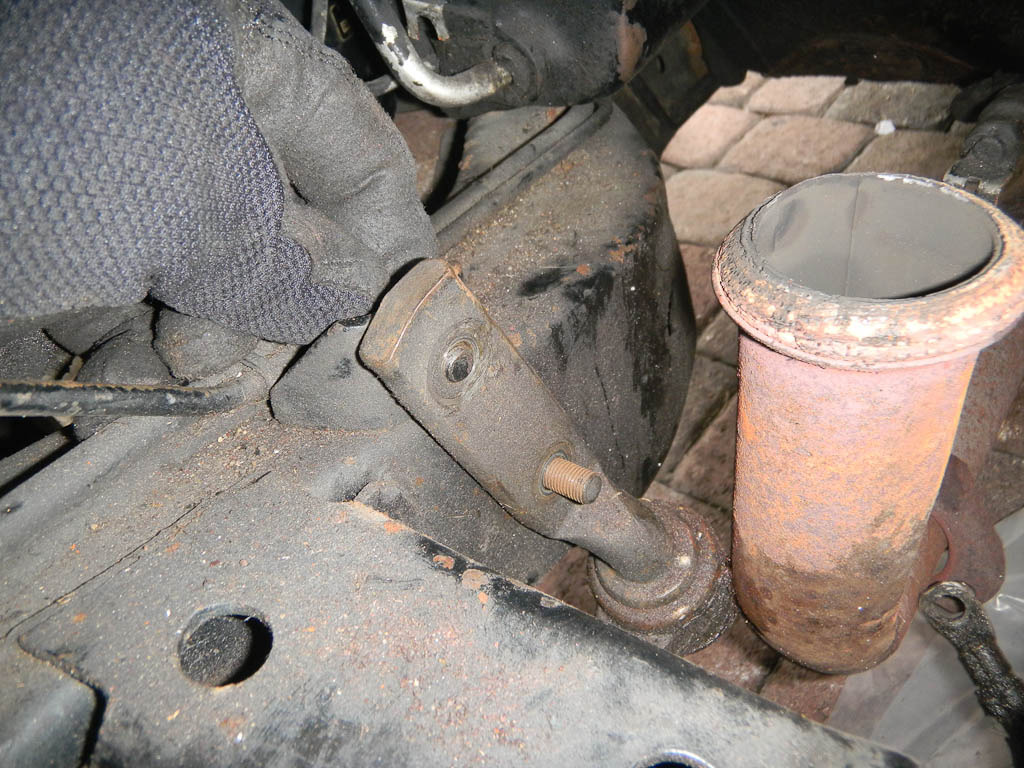
To start, we decided to get the front bumper off. So to get the bumper off took hours. It was a pain. Very tight space to get bolts out of. Then to top it off a couple of bolts that were welded to the frame broke loose. As a result, when we tried to get the bolts off, the welded nuts would just spin. We had to cut them off. In any event, the process was simple but the odd bolts and tight space made a one hour job a 5 hour ordeal.
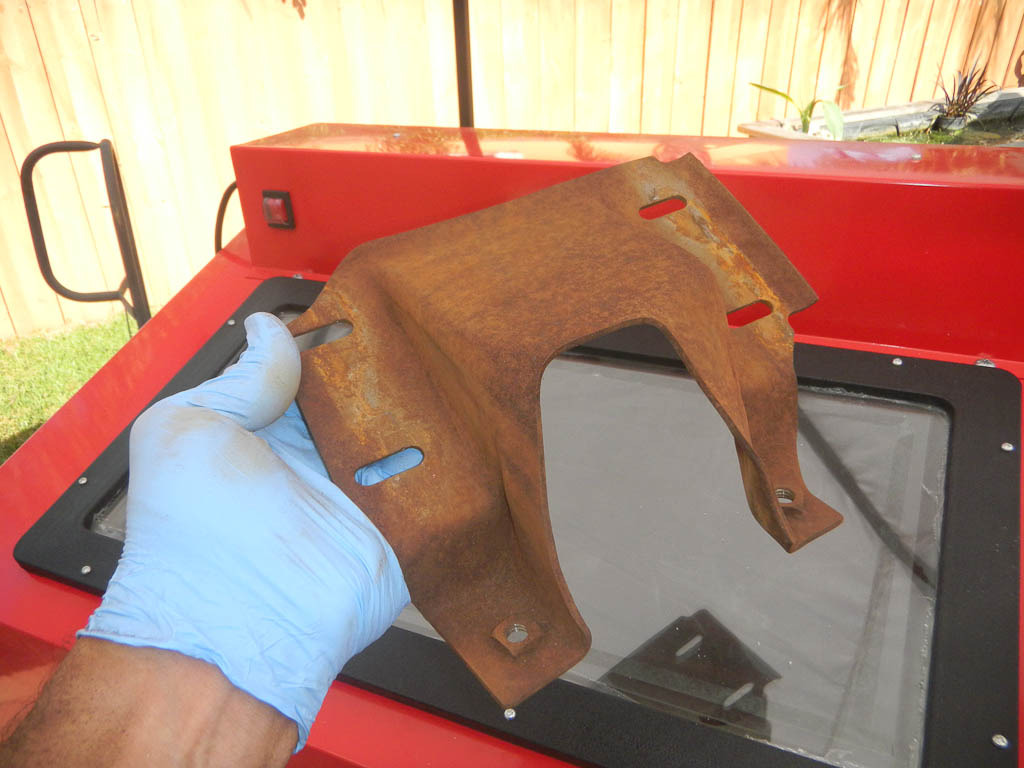
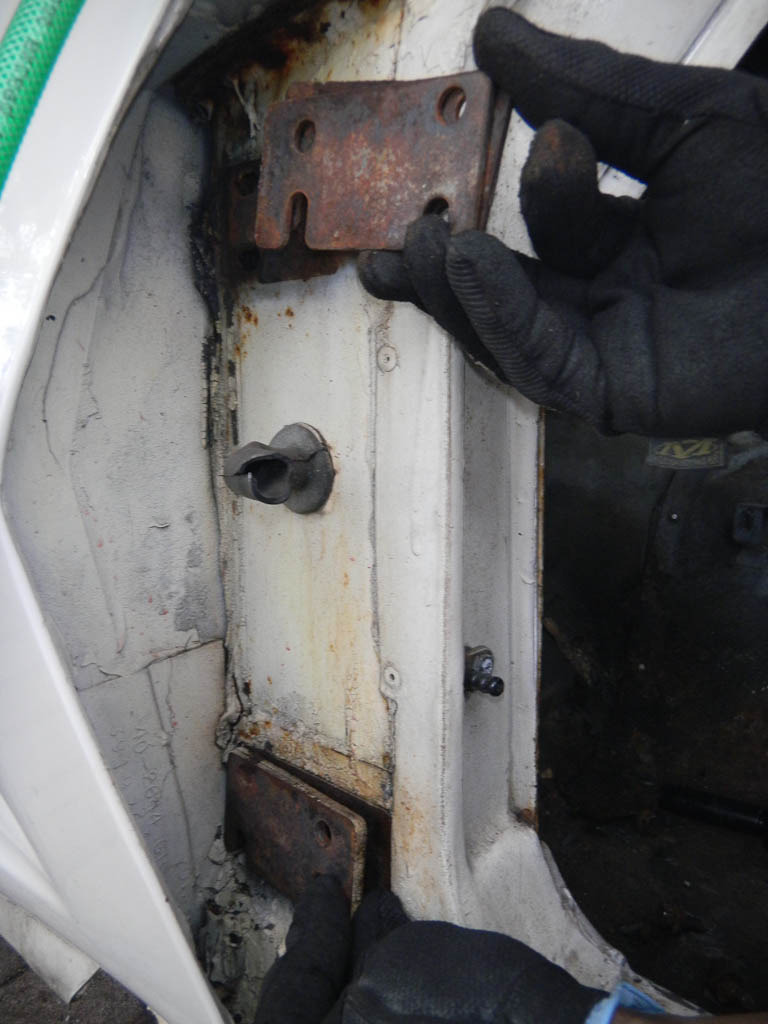
We took off the front bumper by first removing a lower panel on the front end. Then the front bumper cover is held in place by a dozen screws running through a metal brace attached to the front clip. Once we had it out, the front clip would be next.
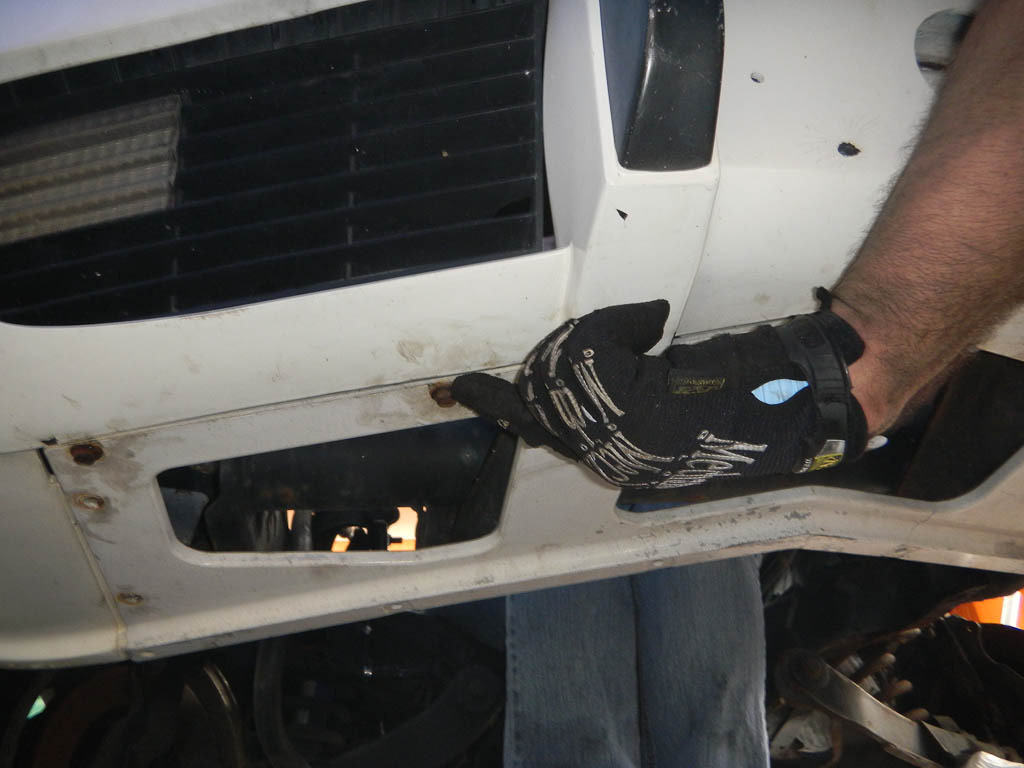
rusted bracket where the front bumper cover attaches to.
Once the lower panel and bumper cover are off, we moved onto getting the front clip free.
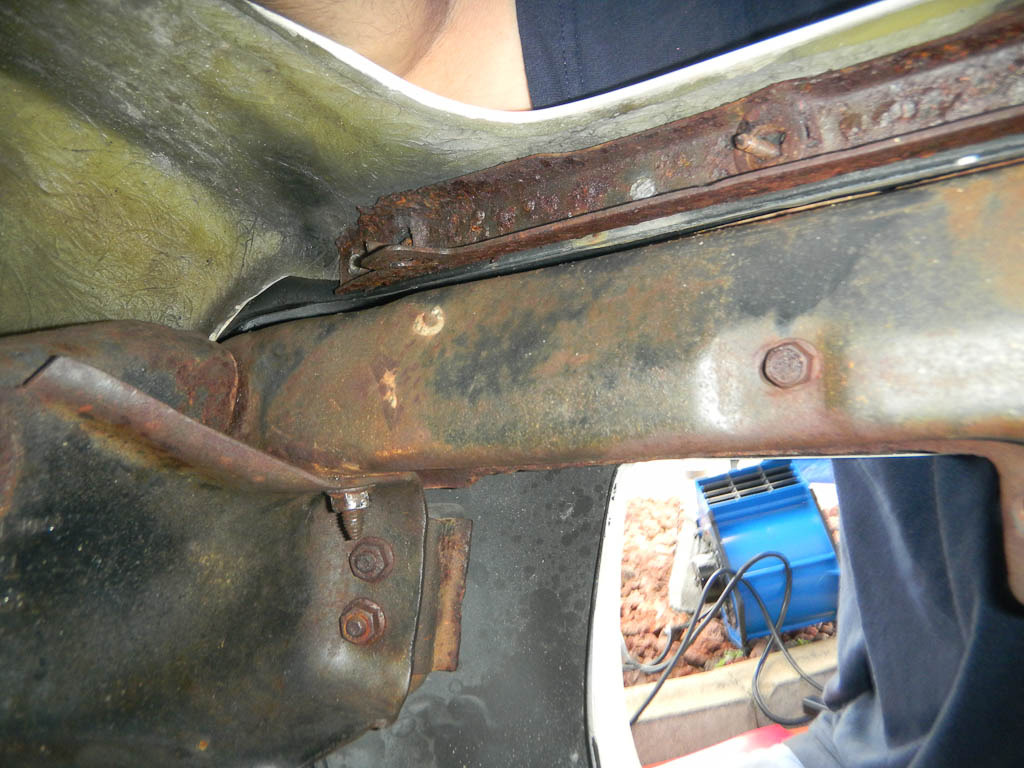
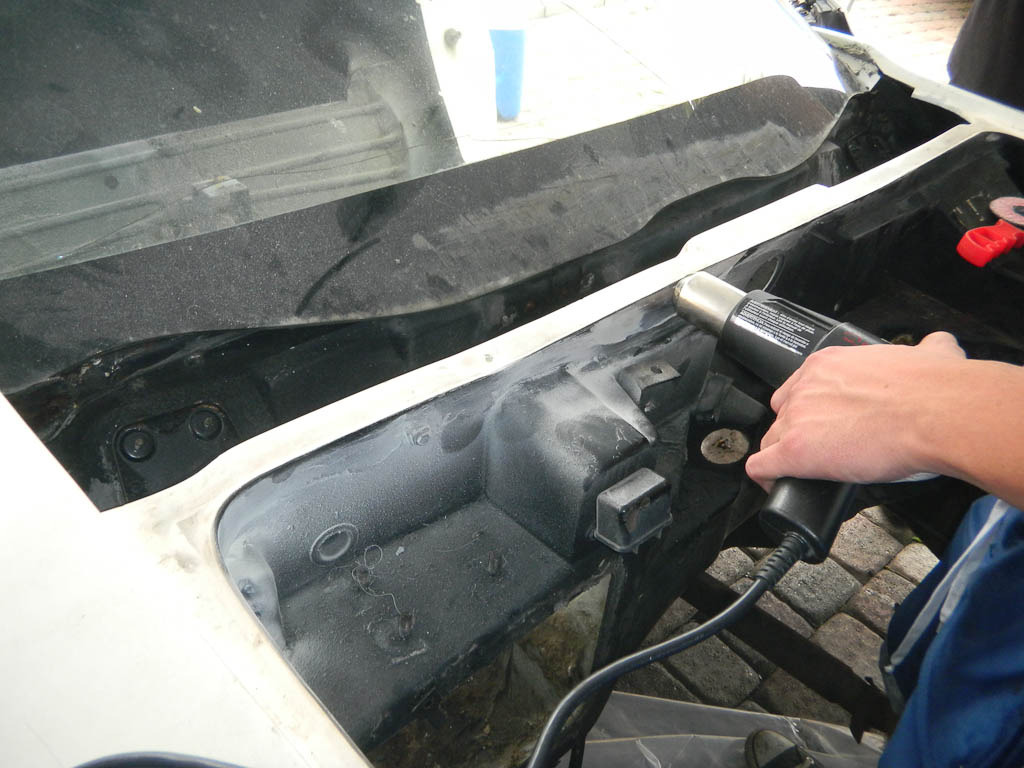
So I had a vague idea on how to get the clip off (mostly Myron's help and some internet searches) but there was some "exploratory" work done. We took an abrasive pad to the joint that runs across the top of the firewall. Once we found the point at which the joint was located, we started to heat up the joint with a heat gun. That helped a great deal. Once we got the joint warm, we used painter's tools to break the joint loose. The whole clip is essentially glued on. There is just one bolt at the front where the body rests on the chassis.
The next step was to get the doors off so we could get to the side joints. We took off the glass (and nearly Albert's chin) from both doors. What a pain that was... and then we took off the doors. The doors come off with eight bolts that are on the inside.
To start, we decided to get the front bumper off. So to get the bumper off took hours. It was a pain. Very tight space to get bolts out of. Then to top it off a couple of bolts that were welded to the frame broke loose. As a result, when we tried to get the bolts off, the welded nuts would just spin. We had to cut them off. In any event, the process was simple but the odd bolts and tight space made a one hour job a 5 hour ordeal.
We took off the front bumper by first removing a lower panel on the front end. Then the front bumper cover is held in place by a dozen screws running through a metal brace attached to the front clip. Once we had it out, the front clip would be next.
rusted bracket where the front bumper cover attaches to.
Once the lower panel and bumper cover are off, we moved onto getting the front clip free.
So I had a vague idea on how to get the clip off (mostly Myron's help and some internet searches) but there was some "exploratory" work done. We took an abrasive pad to the joint that runs across the top of the firewall. Once we found the point at which the joint was located, we started to heat up the joint with a heat gun. That helped a great deal. Once we got the joint warm, we used painter's tools to break the joint loose. The whole clip is essentially glued on. There is just one bolt at the front where the body rests on the chassis.
The next step was to get the doors off so we could get to the side joints. We took off the glass (and nearly Albert's chin) from both doors. What a pain that was... and then we took off the doors. The doors come off with eight bolts that are on the inside.
Last edited by luisv; 02-02-2021 at 01:55 PM.
07-05-2011, 12:02 PM
#35
Racer
Thread Starter
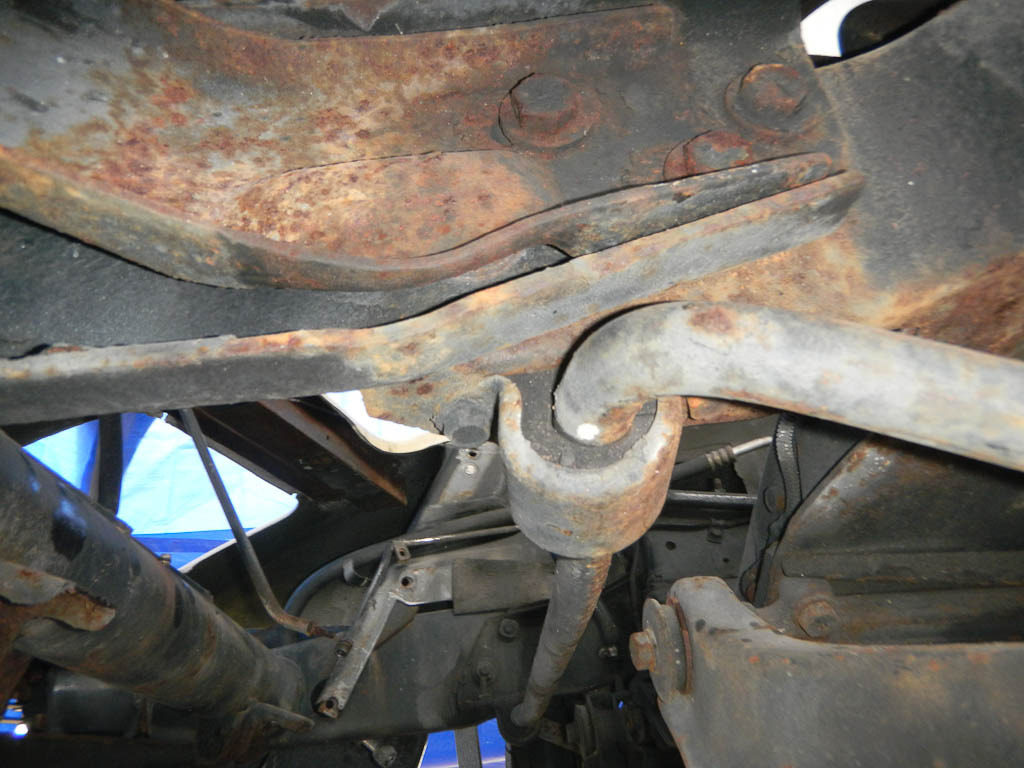
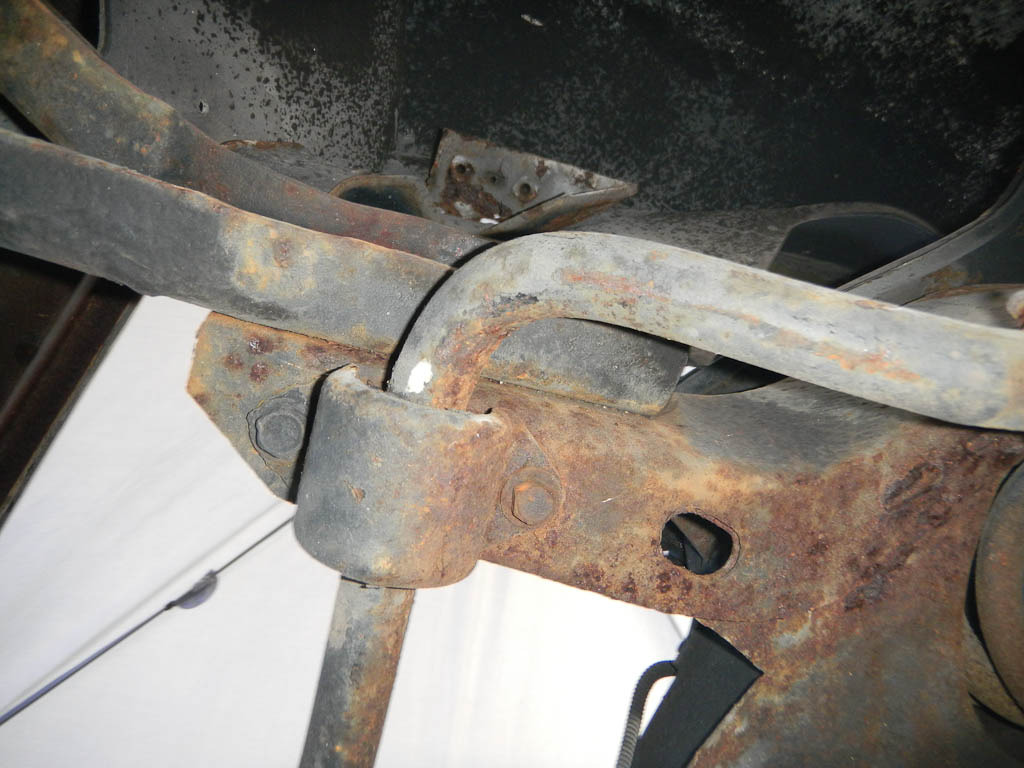
Now we moved onto the joints on the sides. Again, the process was the same. We heated the joint up a bit and then used the painter's tool to pry the joint apart. The passenger side was easier than the driver's side. In the end though, it took about 4 hours to do. That included getting the glass out (harder than it sounds.... trust me), the doors, a pair of brackets in the way at front and the center mounting bolt at the front. That one was not coming out easily. It was so rusted the nut became a solid mound of rust. The only thing we could do was cut it. So I got down in under the clip and took a cutting wheel to it. Once that was cut... we took the front clip off.
So once all the glue joints are separated, the two bumper brackets are out of the way and the front bolt was cut we got to the big moment....
These are the joints and how we left the car on Sunday night...
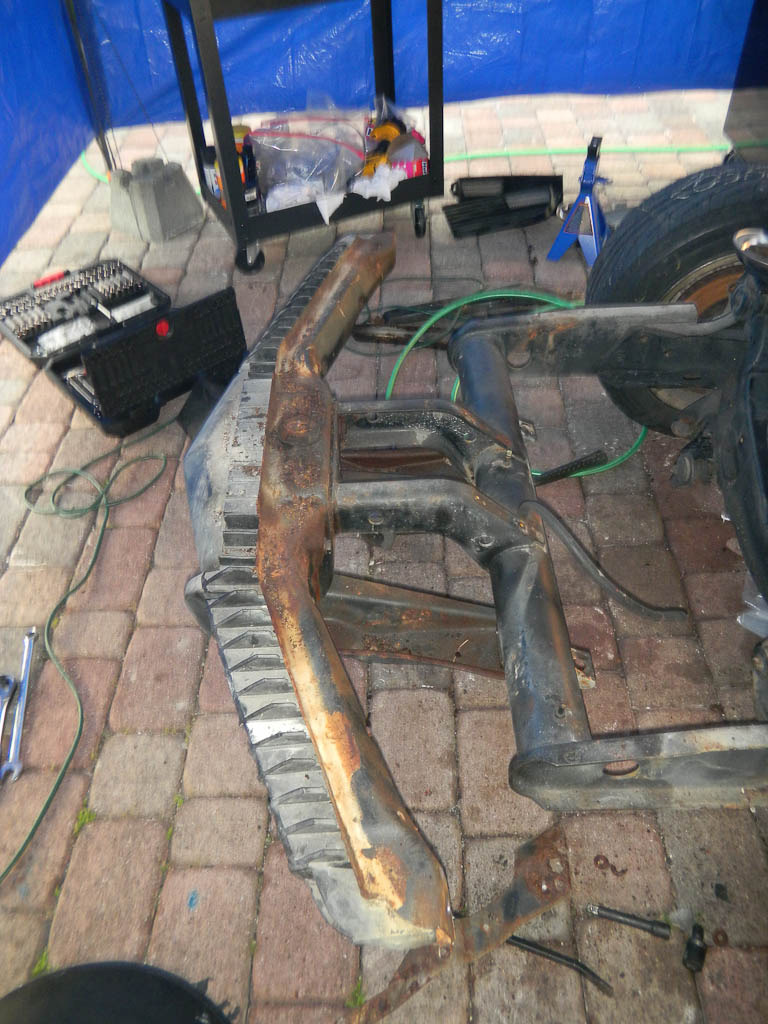
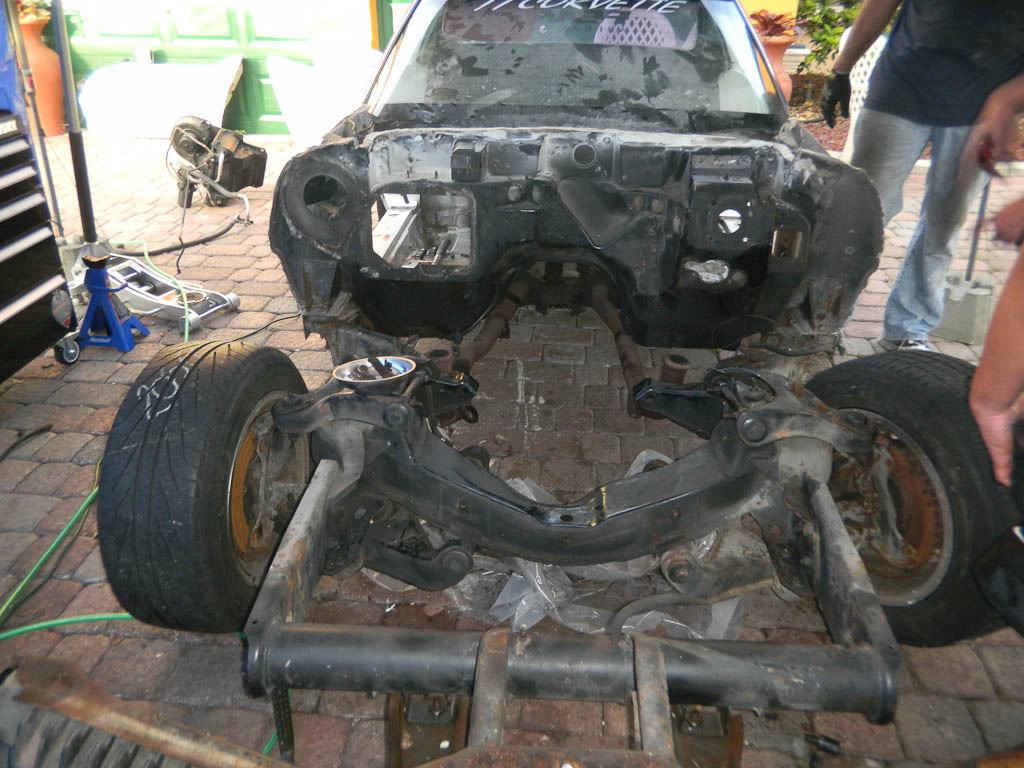
So that's our current status as of July 3rd, 2011... Now onto the rear clip. If everything works out.... We'll have it off this weekend!
So once all the glue joints are separated, the two bumper brackets are out of the way and the front bolt was cut we got to the big moment....
These are the joints and how we left the car on Sunday night...
So that's our current status as of July 3rd, 2011... Now onto the rear clip. If everything works out.... We'll have it off this weekend!
Last edited by luisv; 02-02-2021 at 01:56 PM.
07-05-2011, 12:14 PM
#36
Racer
Thread Starter
Allright... I was able to find a bunch of detail on the removal of the front clip. There are a few out there that have done it and shown videos, how-to's, etc. I can't seem to find much on the rear clip.
So, once again, I am going to ask here.... You've helped us along so far so....
We are looking to take the rear clip off the car. The main reason is to get the birdcage off the car as a unit, to have it repaired, cleaned up and ultimately, powdercoated to make sure I never have to do this again. The floor is good, as is the rear panel (behind the seats). As a result, I will deal with that as a single unit. All of it will ultimately come down to the matal and then powdercoated.
So the question now is, how do we take off the rear clip. I've got the rear bumper cover off.
- The issue I have is where the bond is at the birdcage? I can see it is bonded (I find no bolts anywhere at the birdcage) but I don't see where the joint is.
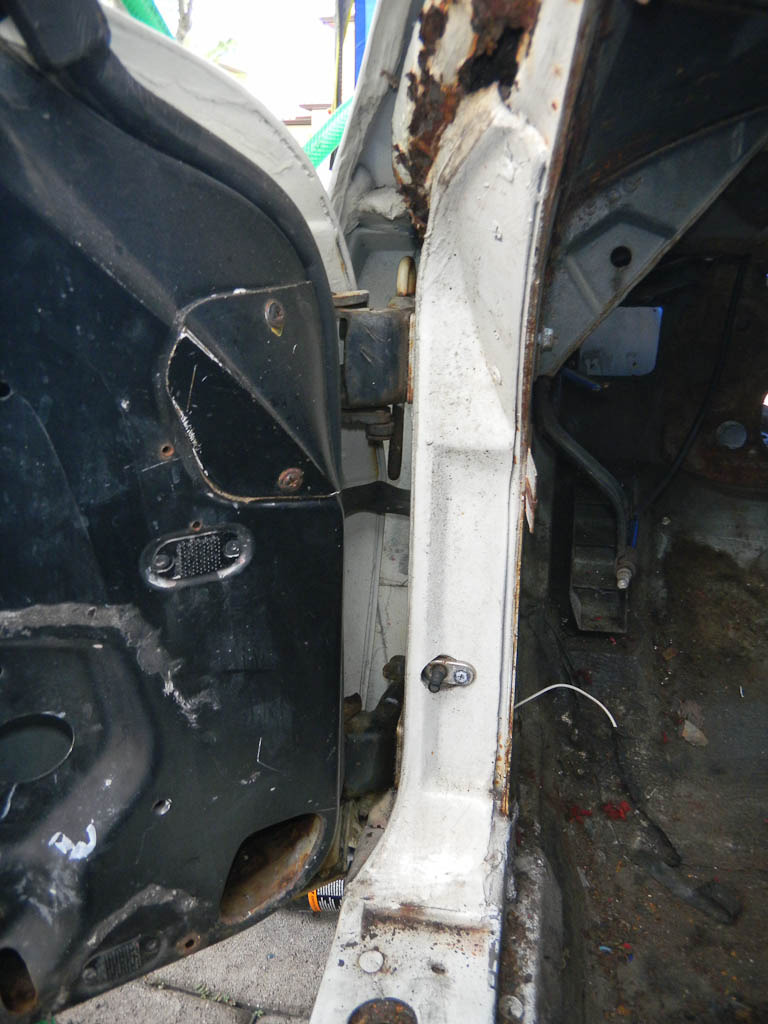
- Is the door jamb a separate part? The door jamb where the striker bolt is looks like it is one part with the rear clip but that soes not seem possible. Is there a joint that is glassed over? ie. Does the body wrap around into the door jamb? I doubt it but I don't know.
I'd love to find out, see one removed (you tube, etc) before this weekend rolls around. If I can get there, I can get the chassis out to powder coating during the next two weeks. I could have it back by early August! Then the rebuild begins...
So, once again, I am going to ask here.... You've helped us along so far so....
We are looking to take the rear clip off the car. The main reason is to get the birdcage off the car as a unit, to have it repaired, cleaned up and ultimately, powdercoated to make sure I never have to do this again. The floor is good, as is the rear panel (behind the seats). As a result, I will deal with that as a single unit. All of it will ultimately come down to the matal and then powdercoated.
So the question now is, how do we take off the rear clip. I've got the rear bumper cover off.
- The issue I have is where the bond is at the birdcage? I can see it is bonded (I find no bolts anywhere at the birdcage) but I don't see where the joint is.
- Is the door jamb a separate part? The door jamb where the striker bolt is looks like it is one part with the rear clip but that soes not seem possible. Is there a joint that is glassed over? ie. Does the body wrap around into the door jamb? I doubt it but I don't know.
I'd love to find out, see one removed (you tube, etc) before this weekend rolls around. If I can get there, I can get the chassis out to powder coating during the next two weeks. I could have it back by early August! Then the rebuild begins...
07-05-2011, 02:16 PM
#37
Melting Slicks


This may help http://www.corvette-restoration.com/ I think you have to take the firewall out and its bonded and riveted.
Scott
Scott
07-05-2011, 03:32 PM
#38
Racer
Thread Starter
This may help http://www.corvette-restoration.com/ I think you have to take the firewall out and its bonded and riveted.
Scott
Scott
The question I have on the rear clip/deck is whether or not I can take the deck and quarter panels off as a unit. I have no major body work to do (in terms of reparation) to the rear. As a result, taking off the rear deck and rear quarters as an assembly would be far better for me.
What I need to do is get to the birdcage...
07-05-2011, 03:54 PM
#39
Melting Slicks
Did you see the part in the link where he removes the firewall to get to the birdcage?
http://www.corvette-restoration.com/...ll_removal.htm
http://www.corvette-restoration.com/...ll_removal.htm
07-05-2011, 05:37 PM
#40
Racer
Thread Starter
Roco.... Thanks for that... I have seen his page. The problem I have is the rear clip. I know how to get the firewall off.... The issue I have is the rear...from the doors to the rear bumper.
The bird cage makes up the windsheild, the t-top center brace, the "roll bar" and the two rear pillars down the door jamb. I am looking at powder coating the whole thing...
What I am trying to do is get the whole rear body section off as one part... In other words, the quarter panels, the rear deck and the roof segment as on piece.