When you click on links to various merchants on this site and make a purchase, this can result in this site earning a commission. Affiliate programs and affiliations include, but are not limited to, the eBay Partner Network.
Tried to remove the #4 mount bolt and the nut cage spun (go figure)
The square nut is way back in the corner (pass side, 72) and down in a bit of a hole, I could reach in and touch it but not see it without mirrors.
Tried vise grips (actually managed to get them clamped at one point!)
wrenches (it's about a 1" but a 1" wrench wouldn't fit, slightly rusted)
Ended up digging around and found a piece of square tube (1-1/4) that has just over an inch inside.
(Uncle Bubba would be proud)
Ground the outer edges a little to let it go down into the hole
Wedged a piece of 15/16" hex bar into the other end
Put a 15/16 wrench on it (boxed end) and held it down tight and let the wrench go up against the inner wheel well
Powerbar on the bolt and it worked it's way out (did slip off a few times but more or less works well
If I knew, I would have found a 1-1/2" inside tube and put it right over the cage and may not have sheared the rivets. Run a chaser up through the net and put in a new bolt.... hindsight
Not sure what will go back in, doesn't look like I'll be able to reinstall the cage rivets. Replace the bolt, probably just a normal nut with large washer on the inside.
Anyway, just thought I'd toss it out there in case someone else comes across the same.
When playing around I found a 1-1/4 piece of square tubing seemed to have an inside dim of just over 1" and fit the nut with no cage.
A 1-3/4 piece of tubing has about an 1-1/2 inside and fits with the cage on.
Weld a nut or use a larger adjustable to hold the tube and then tighten the bolt
Last edited by Mooser; 01-12-2019 at 05:54 PM.
Reason: added cage dim
The metal reinforcement box was gone along the bottom front (looks like just crap kept filling it up)
I soaked the top with PB for a few days and put a socket on it to try (I was feeling lucky for once) The bolt turned pretty good for about 1/2 a turn then stopped, I pulled and then the two rivets on the cage sheared (don't seemed to have pulled out, just clean shear at the cage edge)
Didn't want to get in there with the grinder (have all the gas lines disconnected right behind there so I figured I'd try to turn it out before drilling.
Everything else (frame mount, glass, puck) except the one shim is nice and clean, don't really see why the reinforcement box was gone other than from water and crap sitting inside forever.
Go figure, it was the only 2 mount bolts that I was not easily able to remove when I lifted the body. The other 6 just came right out. A high speed with a cut off wheel took care of those bolts quick enough. I'll replace the cage and nut when I get to the body work. Nice job on the tool though.
Mooser: get some venture capital together, patent your tool, get it into production, and sell it. Anyone who's beat their brains out playing with #4 mount would buy it!
Mooser: get some venture capital together, patent your tool, get it into production, and sell it. Anyone who's beat their brains out playing with #4 mount would buy it!
I too have a 72 coupe with the almost identical problem ( except ) I have not broken any thing YET. The right side #4 body bolt is quite frozen and does not want to budge, The # 3 body bolt on the left side has the same problem as well. I realized the trouble I would be in if the cage nut broke loose so I have not got any further with it yet. If any one else has any solutions please post it as I know there are many with the same problem.
Good info. Does anyone have a good picture of what the # 4 cage nut and the captive nut holder ( viewing it from the top side ) looks like from inside the car. That would be good so I will have a pretty good idea of what the tool mentioned above has to do to fit properly ? Thanks for the info.
Good info. Does anyone have a good picture of what the # 4 cage nut and the captive nut holder ( viewing it from the top side ) looks like from inside the car. That would be good so I will have a pretty good idea of what the tool mentioned above has to do to fit properly ? Thanks for the info.
This is from someone else's post. I came across it when looking at how to deal with mine
If you search you can probably find the post, wish I remembered who needs to get the credit for it.
If I was going to try it again,
Soak the cage for a few days using everything I could find (deep creep, PB plaster, release-all whatever)
I would find a piece of sqr tube with an inside of 1-1/2 x 1-1/2. Weld a nut to it that I could get a socket & power bar onto.
Put that over the cage and have someone hold it. (without twisting the cage off
Work the bolt loose (if it moved, try tightening it, back and forth hopefully getting some of the penetrant to work it's way in.
if it breaks your down and will need to take the cage out anyway but it's worth a try, mine would have worked since the bolt did turn out once I got the nut to stop.
My 2 cents
Mooser
A
Last edited by Mooser; 01-12-2019 at 05:52 PM.
Reason: image moved
Thanks for the additional post. Just a quick clairification however. Your first post you said you used an 1 1/4" square tube that was just a little over an inch inside. At the last post you recommended using a square tube with an inside of 1 1/2". It would seem to me you would want a square tube to go over the nut ( cage ) as close to the size of the cage size ? Just trying to be as accurate as possible ( I'm not troubleshooting you ). I also realize as you do how important it is to do it as correctly as possible as this mistake can bring a lot of grief ( hence the reason I have not completed it yet ). You may have discovered a great resolution for this. I agree, you should have some tools made up and reward yourself with selling them.
Thanks for the additional post. Just a quick clairification however. Your first post you said you used an 1 1/4" square tube that was just a little over an inch inside. At the last post you recommended using a square tube with an inside of 1 1/2". It would seem to me you would want a square tube to go over the nut ( cage ) as close to the size of the cage size ? Just trying to be as accurate as possible ( I'm not troubleshooting you ). I also realize as you do how important it is to do it as correctly as possible as this mistake can bring a lot of grief ( hence the reason I have not completed it yet ). You may have discovered a great resolution for this. I agree, you should have some tools made up and reward yourself with selling them.
I had already broken the cage off when I turned the bolt, so I needed one to fit the nut only (1" inside)
When a put a caliper over the cage (slightly rusty but not horrific) I get 1.416 one way and 1.456 the other, so if you could find something around 1.475-1.500 (remember the tube is usually measured outside with a wall thickness) and make sure it's "pre-loaded" so the cage doesn't turn, you might be ok.
Or the bolt will just snap and it's all for nothing.
I've machined up a "gizmo" to fit on my 1/2" power-bar and the cage to re-install the one from my car (going to rivet the cage and cleaned nut back in and use a new bolt). I'll use it to tighten the bolt and protect the cage, just in case. See how it goes
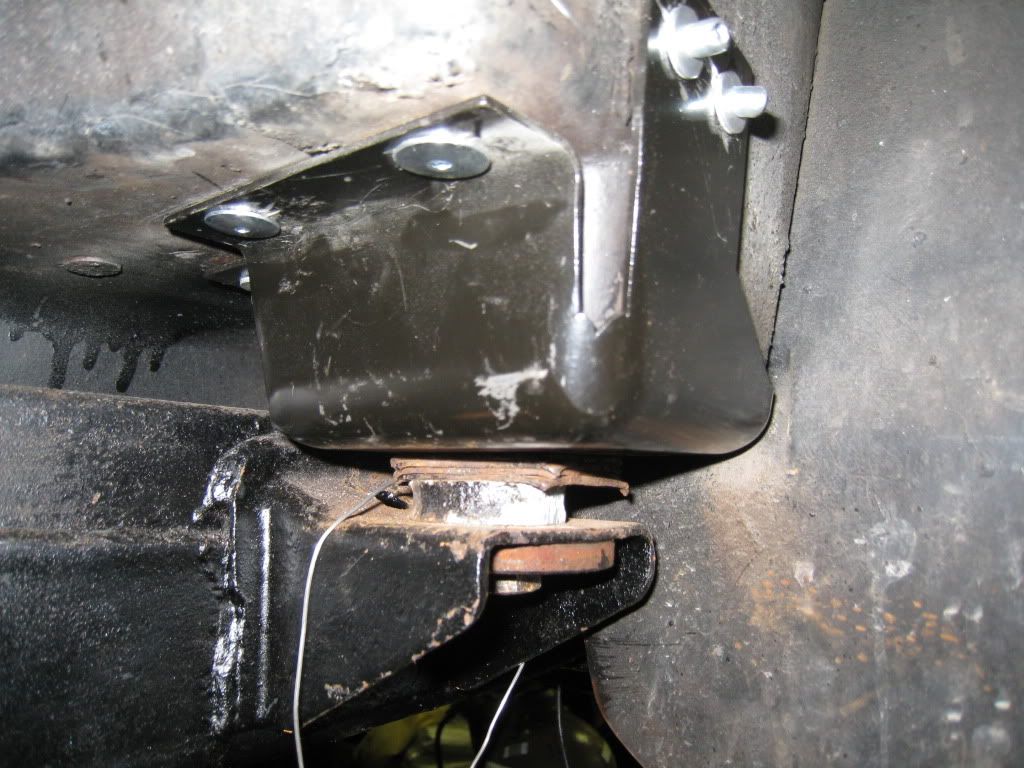
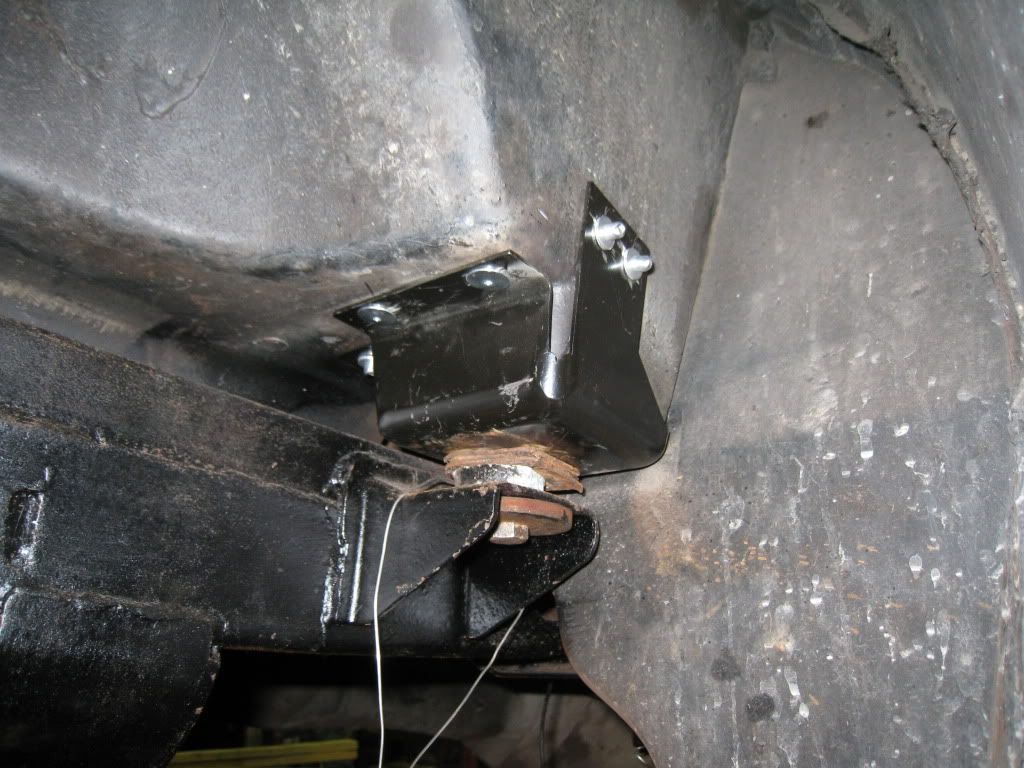
The outer support bracket can be installed w/rivets as shown in the pic.
Glenn
Just curious, the rivets on the side you did from the inside-out, any special reason? I was planning on doing all from the outside-in.
Warnings before I get there and need to change?
My plan is to replace mine without lifting the body (well maybe just a 1/16")
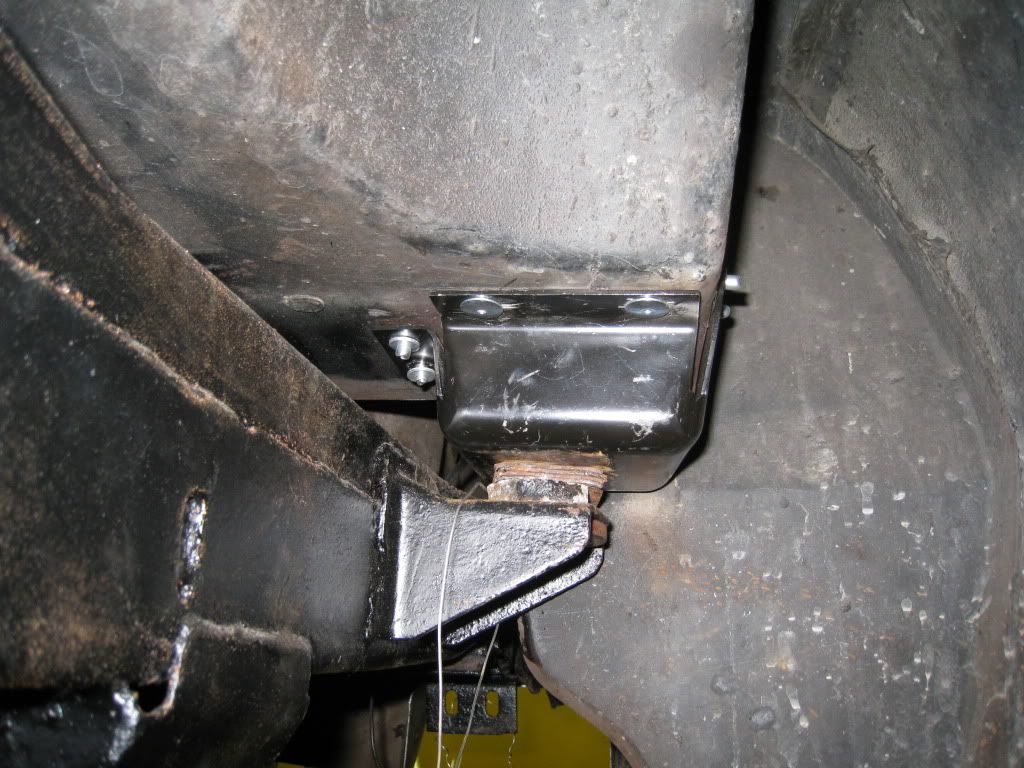
I'll be cutting the back tab off the new bracket to just fit into the gap between the frame bracket and the glass pod (can't really get in there to rivet or add a washer or anything anyway)
Give a good blob of panel-bond into the bottom of the new bracket
Remove the puck and spacer shim, slide the new bracket in, replace the puck and shim
Rivet the two sides and front.
Wait for everything to dry
Clean the hole out and put the bolt back (put back the cage etc.)
Forget about it until the body falls off (mine or the car, whichever comes first)
Agree, Mid america sells vette specialty tools with instructions how to do the jobs. Yours could be there too. Have it welded, hardened and chromed and you're in business.
Just curious, the rivets on the side you did from the inside-out, any special reason? I was planning on doing all from the outside-in.
Warnings before I get there and need to change?
My plan is to replace mine without lifting the body (well maybe just a 1/16")
I'll be cutting the back tab off the new bracket to just fit into the gap between the frame bracket and the glass pod (can't really get in there to rivet or add a washer or anything anyway)
Give a good blob of panel-bond into the bottom of the new bracket
Remove the puck and spacer shim, slide the new bracket in, replace the puck and shim
Rivet the two sides and front.
Wait for everything to dry
Clean the hole out and put the bolt back (put back the cage etc.)
Forget about it until the body falls off (mine or the car, whichever comes first)
Mooser
This was done at a shop and I didn't ask why the rivets were installed that way.
Look at your AIM. The answers may be there.
BTW, the body was not lifted. They put a bunch of washers to maintain the height just enough to get the bracket in place.
This was done at a shop and I didn't ask why the rivets were installed that way.
Look at your AIM. The answers may be there.
BTW, the body was not lifted. They put a bunch of washers to maintain the height just enough to get the bracket in place.
Glenn
Was just curious, on mine it's pretty hard to get in there from the inside but fairly easy from the outside so I wasn't sure if it was done for some reason I couldn't see.
As for the AIM, that bracket went on with solid rivets from the outside, but was put on when only the interior bucket was there (no body or anything, I only wish I had that kind of access, I'll bet the verts even have better access to that cage (ok maybe the hinges are in the way)
Good to know someone else has replaced it without undoing the whole side, Should be this weekends project so hopefully it goes at least half decent.
Thanks for the info.
Mooser
I happened to be at the shop when they were installing the rivets inside, but at the time it didn't occur to me to ask why. Pull your seats. It will make it a lot easier to get back there.
Another $100 solution to a $1 problem, I need to get a real hobby
Trimmed the back flange of the bracket to fit into the existing space (can't get a new rivet into it if I wanted to anyway
Put about 1/8" of panelbond into the bottom of the bracket, let it skin-over so it doesn't fully bond to the body (just in case down the road someone else gets the pleasure of de-bubbafying my bubbafying)
Line everything up and let it set with weight until the bonding cures
Hopefully get to riveting and need to tighten up the mount bolt (using special tool #FUBAR-4) and forget about it.

 01-06-2012, 04:52 PM