
Replacing the body mounts
 02-08-2012, 07:40 PM
#1
Burning Brakes

Thread Starter

Member Since: Apr 2009
Location: VIRGINIA BEACH VIRGINIA
Posts: 807
Likes: 0
Received 1 Like
on
1 Post
Well I am in the progress of removing all the body mounts and replacing them with Poly bushings I got from WILLCOX.
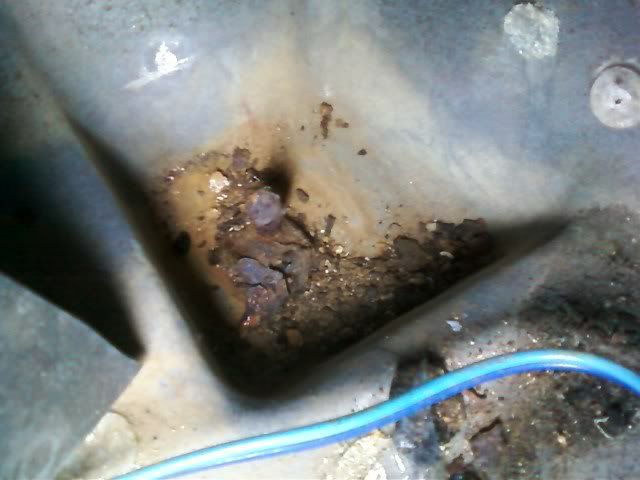
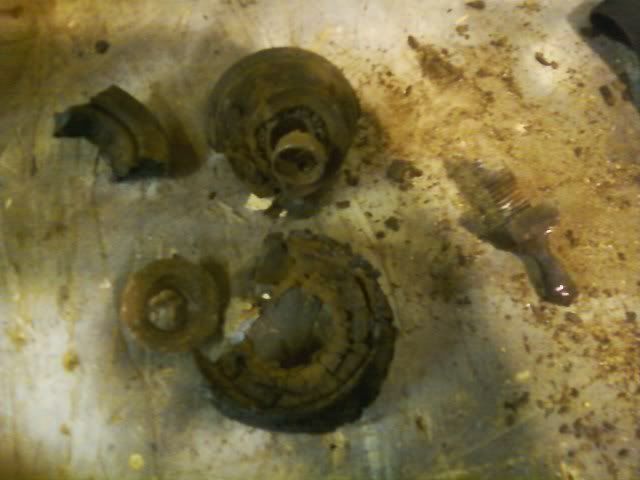
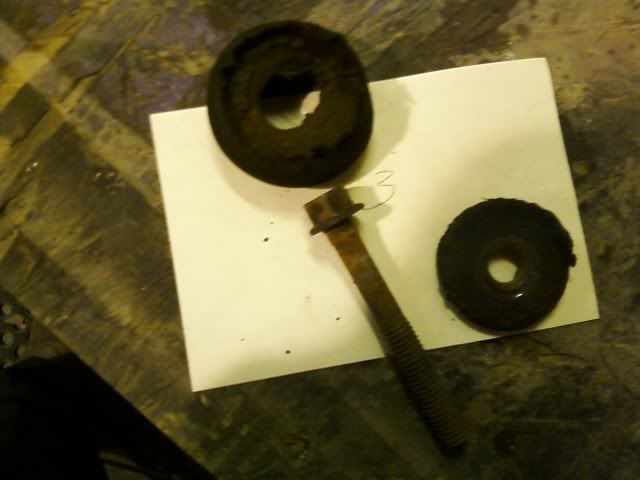
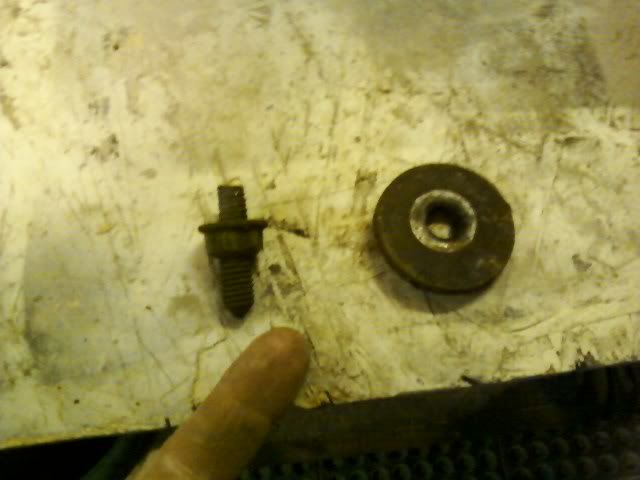
I pulled the front bumper to re-align it and to loosen up the frame bolts up front when I lift the body up a few inches. Removed the rear tire to get to #4 which was the first one I tried and it was totally rusted out. I had to use a chisel to get it off and dug all the rubber out. The captive nut inside was rusted off so I will have to get new bolts, grade 8, to replace everything.
#3 was pretty easy, just screwed right out with the help of a breaker bar. Still need to pull all the rubber out of that one. This one has a captive nut also, can't see it until the body comes up some but it did not rotate at all so I assume it is still good.
#1 was next. I tried getting it out from up top in the engine compartment and broke a socket. Went at it from underneath with a bigger breaker bar and broke the bolt. Still need to dig the rubber out of this one. So far I have about 4 hours into the ordeal and it will continue. I will post some pictures as I go along.
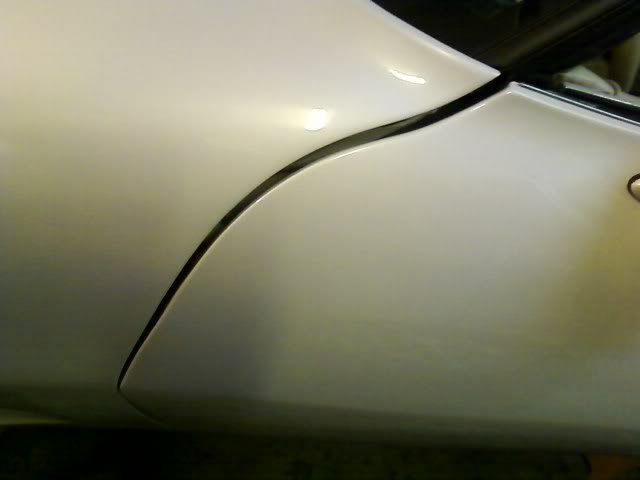
Once i finish the body mounts I am going to see if the gap on the front of both doors evens out. It is pretty wide at the top front of both doors.
I pulled the front bumper to re-align it and to loosen up the frame bolts up front when I lift the body up a few inches. Removed the rear tire to get to #4 which was the first one I tried and it was totally rusted out. I had to use a chisel to get it off and dug all the rubber out. The captive nut inside was rusted off so I will have to get new bolts, grade 8, to replace everything.
#3 was pretty easy, just screwed right out with the help of a breaker bar. Still need to pull all the rubber out of that one. This one has a captive nut also, can't see it until the body comes up some but it did not rotate at all so I assume it is still good.
#1 was next. I tried getting it out from up top in the engine compartment and broke a socket. Went at it from underneath with a bigger breaker bar and broke the bolt. Still need to dig the rubber out of this one. So far I have about 4 hours into the ordeal and it will continue. I will post some pictures as I go along.
Once i finish the body mounts I am going to see if the gap on the front of both doors evens out. It is pretty wide at the top front of both doors.
 02-08-2012, 07:43 PM
#2
Burning Brakes
Thread Starter
Member Since: Apr 2009
Location: VIRGINIA BEACH VIRGINIA
Posts: 807
Likes: 0
Received 1 Like
on
1 Post
Forgot to post pictures of progress:
top of passenger door
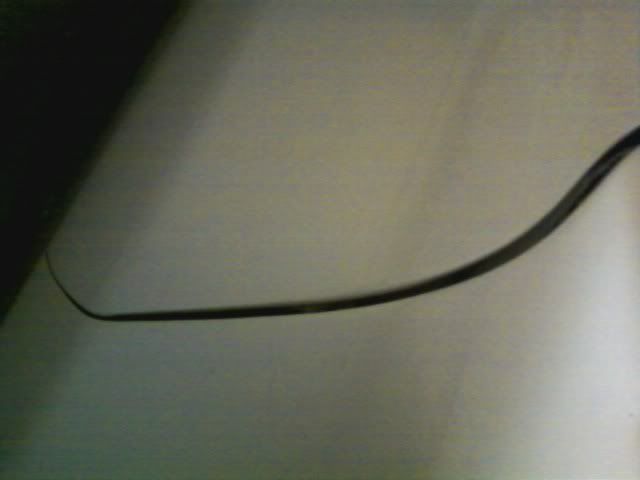
top of drivers door
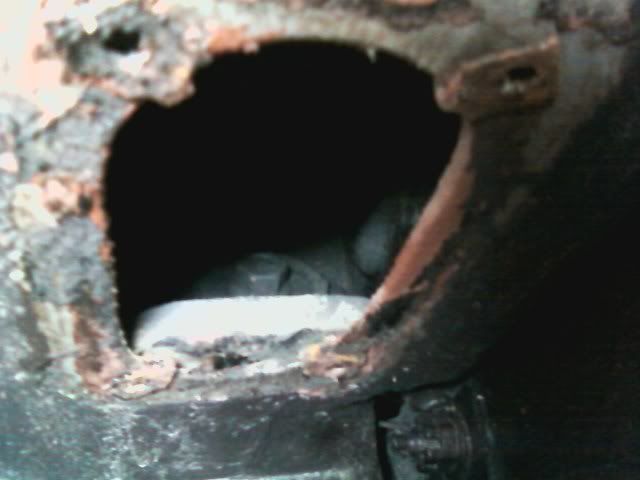
drivers side #4 mount on the inside
drivers side #4 mount
drivers side #4 mount outside
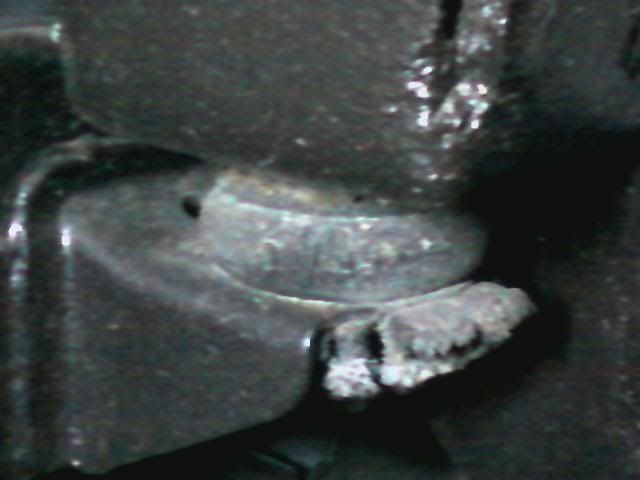
drivers side #4 mount inside
drivers side #4 mount
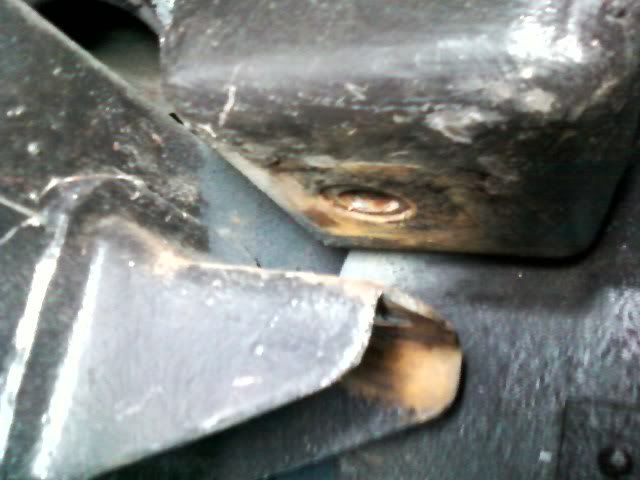
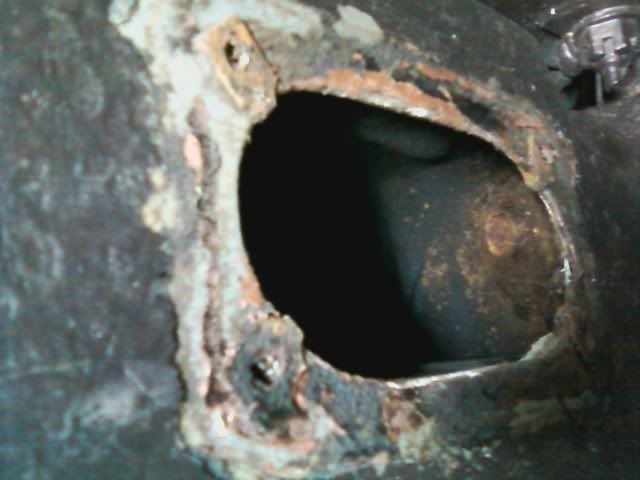
#3 drivers side mount
#3 drivers side mount
#3 drivers side mount
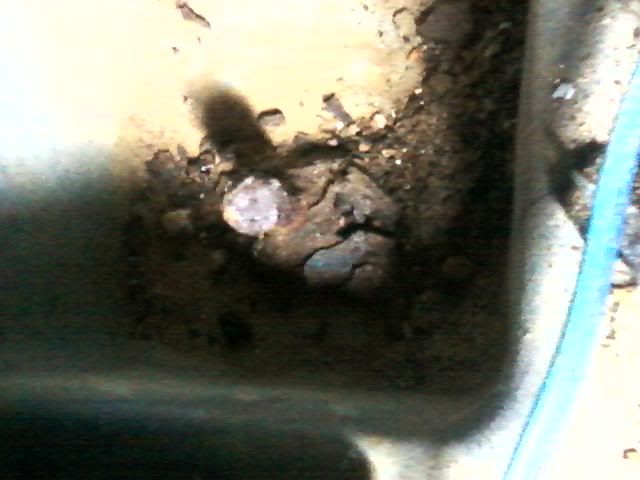
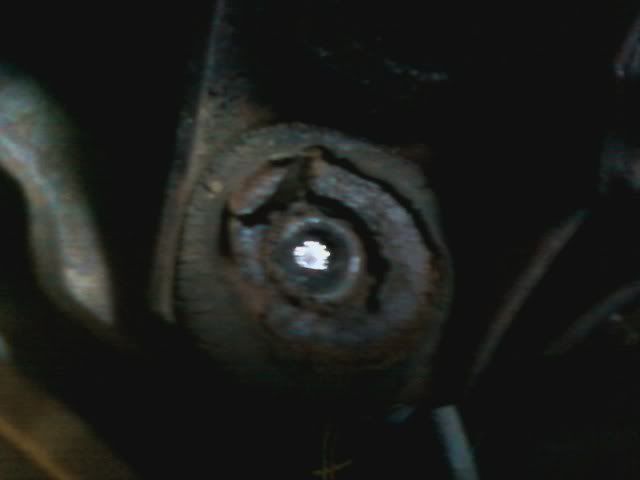
#1 drivers side mount broken bolt
underside of #1 mount after I broke the bolt off
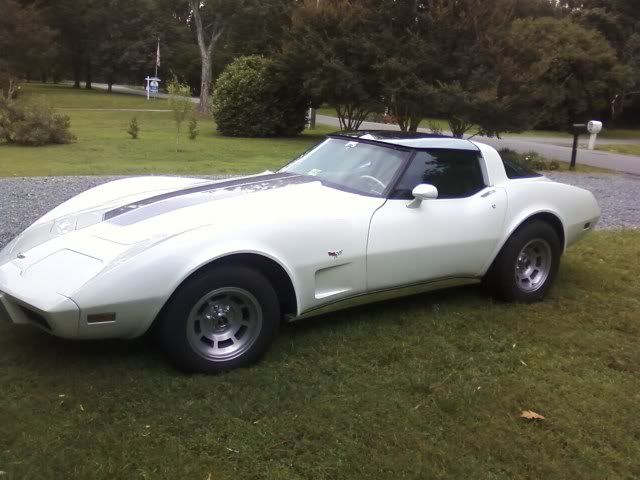
picture of car. Pearl white with grey strip on the hood.
top of passenger door
top of drivers door
drivers side #4 mount on the inside
drivers side #4 mount
drivers side #4 mount outside
drivers side #4 mount inside
drivers side #4 mount
#3 drivers side mount
#3 drivers side mount
#3 drivers side mount
#1 drivers side mount broken bolt
underside of #1 mount after I broke the bolt off
picture of car. Pearl white with grey strip on the hood.
Last edited by dgood; 02-08-2012 at 07:47 PM.
02-09-2012, 08:57 AM
#3
Team Owner


Fun job, isn't it??
My wife had a '79 'Vette, bought it new in the fall of '78, and kept it through the summer of '97. From day one, her car had a similar door gap. I swapped the body mounts somewhere in the early 90s, and IIRC, the door alignment didn't change.
My wife had a '79 'Vette, bought it new in the fall of '78, and kept it through the summer of '97. From day one, her car had a similar door gap. I swapped the body mounts somewhere in the early 90s, and IIRC, the door alignment didn't change.
02-09-2012, 03:35 PM
#4
Burning Brakes
Thread Starter
Member Since: Apr 2009
Location: VIRGINIA BEACH VIRGINIA
Posts: 807
Likes: 0
Received 1 Like
on
1 Post
So far the job has not been that bad. Lots of banging and swear words. Hopefully everything will come out relatively easy when I lift the body on the drivers side. I am not that concerned about the doors that much. They line up everywhere else and open and shut fine. I wonder if the clip was just put on wrong because I do not see any damage underneath or rot on the frame.
Hope to get the drivers side done this weekend.
Hope to get the drivers side done this weekend.
02-11-2012, 04:43 PM
#5
Burning Brakes
Thread Starter
Member Since: Apr 2009
Location: VIRGINIA BEACH VIRGINIA
Posts: 807
Likes: 0
Received 1 Like
on
1 Post
The bolt for the #2 body mount came out very easy. The mount is still trashed and rusted. I thought I saw somewhere here on the forum that you could lift the frame up a few inches to put in the new mounts. I am searching for it but I think it was deep in another thread.
I put a 2X4 on its edge and tried jacking the body up off the frame but it would not budge.......lifted the whole side of the car up. What am I doing wrong? anyone out there that can help me.
Thanks
Dan
I put a 2X4 on its edge and tried jacking the body up off the frame but it would not budge.......lifted the whole side of the car up. What am I doing wrong? anyone out there that can help me.
Thanks
Dan
02-11-2012, 05:27 PM
#6
Melting Slicks


Member Since: May 2001
Location: May help you? You can sure as hell try!
Posts: 2,131
Likes: 0
Received 4 Likes
on
3 Posts

Did you check your door hinge bushings? They will often wear causing the door to sag and open the front gap up towards the top. Easy job to replace them. Much easier than replacing body mounts. On the other hand, the door gaps on many C3's were nothing to write home about even when they were new.
02-11-2012, 11:09 PM
#7
Burning Brakes
Thread Starter
Member Since: Apr 2009
Location: VIRGINIA BEACH VIRGINIA
Posts: 807
Likes: 0
Received 1 Like
on
1 Post
figured out my problem with lifting the body off the frame. The two by four was not tall enough and the back of the jack was lifting the frame. dumb me! Got all the old mounts out and will clean the frame up tomorrow and prime and paint. Hope to install the new ones first thing next week.
Lemans,
My door hinges bushings are new, that was the first thing I tried last year. While I was trying to figure out how to raise the body off the frame, I loosened the 3 large bolts that are behind the front tires that connect the frame to the front bumper support and the front sagged a little. I may try to lift that up some and see if it closes the gap some. More to follow.
02-12-2012, 08:36 AM
#8
Safety Car


There is a lot of little things to check as you are lifting the body. Mostly ground wires. Did you disconnect the rag joint? There was an article a few years back in Vette Magazine that told how to do it but it did not go into much detail. I ended up having to replace the rocker channels so the whole body had to come off. Then the "while-your-at its" came into play.
My door gaps still look like yours.
My door gaps still look like yours.
02-14-2012, 06:39 PM
#9
Burning Brakes
Thread Starter
Member Since: Apr 2009
Location: VIRGINIA BEACH VIRGINIA
Posts: 807
Likes: 0
Received 1 Like
on
1 Post
Well the door gaps will stay. No "lifting" the front end up with those 3 bolts. I thought I disconnected everything before I lifted the drivers side up but forgot 1 ground strap up by the charcoal canister. Will have to replace that one. Over all I jacked the drivers side up about 3 inches and I was able to get in above the frame and sand it all down and prime and paint it. Getting the new body mounts, spacers and washers in there will be something else. Hopefully will finish the drivers side this weekend.
I did remove the charcoal canister to make it easier to get to the number one body mount. I am going to replace the filters and charcoal in the canister before I put it back in. I have owned this car for about 5 years now and have always had a strong fuel odor in the garage after driving. After pulling the canister I see that the inlet house coming from the fuel line was split right down the side and the hose going up to the engine was split also. I will change those out also.
I will post some more pictures once I finish the drivers side.
The following users liked this post:
Snickers1948 (02-25-2018)

 02-15-2012, 04:10 PM
#12

I'm not an expert, but I'm in the process of a frame off http://ls273stingray.blogspot.com , and learned the hard way that I should have counted the body shims when I dropped the frame. I had to replace the p side #3 cage bolt when the frame was blasted.
What I've learned, but don't know for a fact yet, from researching threads on the forum, reading, and talking to a couple forum experts is that body ride height and door seam alignment can be adjusted by changing numbers of shims at each mount. The number of shims per mount was determined by the factory assembly guys using some mystical formula that is probably interred with Zora Arkus-Duntov.
My body is on now but no front clip. I experimented with changing numbers of shims and it did affect the door seams, but have not done a final adjustment. That will wait until the front clip is on, the car is fully assembled at road weight, and it has been moved enough to "settle" the suspension.
Just food for thought that you guys with door seam problems might consider. I know mine were way off when I bought the car. It was a non-driving no motor project car when I bought it...and it had been hit in the front end.
02-15-2012, 05:24 PM
#13
Burning Brakes
Thread Starter
Member Since: Apr 2009
Location: VIRGINIA BEACH VIRGINIA
Posts: 807
Likes: 0
Received 1 Like
on
1 Post
wan2run,
I am going to keep it for now. The "little" things that were wrong with my car that did not bother me or what I saw as an easy fix were some reasons that people would look at my car but not buy it. I am fixing the body mounts, brake calipers, carpet, and some other little things. I will have it all done here in a month or two and I will probably just keep it. Its fun, I own it, and everything works. Why not.
I am going to keep it for now. The "little" things that were wrong with my car that did not bother me or what I saw as an easy fix were some reasons that people would look at my car but not buy it. I am fixing the body mounts, brake calipers, carpet, and some other little things. I will have it all done here in a month or two and I will probably just keep it. Its fun, I own it, and everything works. Why not.
02-15-2012, 05:26 PM
#14
Burning Brakes
Thread Starter
Member Since: Apr 2009
Location: VIRGINIA BEACH VIRGINIA
Posts: 807
Likes: 0
Received 1 Like
on
1 Post
Miffi115,
I may try that. My number 1 mount had 1 shim, # 2 had 4 ships, #3 had 1 shim, and #4 had 4 shims. I may try to move some shims around and set the car down and see if it changes at all.
Just got all my new bolts and shims from WILLCOX so I will start this weekend putting the drivers side back together.
02-15-2012, 05:29 PM
#15
Burning Brakes
Thread Starter
Member Since: Apr 2009
Location: VIRGINIA BEACH VIRGINIA
Posts: 807
Likes: 0
Received 1 Like
on
1 Post
sideways 73,
when you start, let me know and I will give you some pointers and things to look out for. I have about 6 hours into it so far so not that bad...but then again that is only one side. I have had one "while I am at it" (the charcoal canister) so far but everything else look ok underneath.
when you start, let me know and I will give you some pointers and things to look out for. I have about 6 hours into it so far so not that bad...but then again that is only one side. I have had one "while I am at it" (the charcoal canister) so far but everything else look ok underneath.
02-16-2012, 07:03 AM
#16
Heel & Toe

Member Since: Oct 2007
Location: Charlotte NC
Posts: 21
Likes: 0
Received 0 Likes
on
0 Posts
Here are a couple of articles that may give some insight:
http://www.europeancorvette.com/html...eplacement.htm
http://www.digitalcorvettes.com/foru....php?p=1419248

http://www.europeancorvette.com/html...eplacement.htm
http://www.digitalcorvettes.com/foru....php?p=1419248
02-16-2012, 07:57 AM
#17
Team Owner
I know this is going to sound really stupid, and at this point, it's water that flowed over the bridge a LONG time ago.....
When I did the body mounts on my wife's former '79, I was aware that there could/should be shims at the mounting points, but in all honesty, I didn't see any...anywhere.
When I did the body mounts on my wife's former '79, I was aware that there could/should be shims at the mounting points, but in all honesty, I didn't see any...anywhere.
 02-16-2012, 10:20 AM
#19
Advanced
Member Since: Oct 2011
Location: Pinehurst NC
Posts: 68
Likes: 0
Received 0 Likes
on
0 Posts
dgood, Thanks I will definately hit you up. But most likely I won't be jumping on that one until summer time. I just ordered a new front end suspension kit from Willcox so will be banging that together soon. Then will do the rear and all shocks/springs. Once I get that all done I will be headed to the body mounts. Fun times ahead! plan on posting progress as I go so everyone can get a good laugh out the fumbles and cussing that is sure to go along with it!

02-16-2012, 02:14 PM
#20
Team Owner
You could drive the car on a set of ramps, between the arms of the lift, to allow some work room under the frame. Then, using the arms of the lift, and some 4x4s between the lift arms and the body, lift the body off the frame. However, you'd need some additional support under the front portion of the body while doing this.