
My 1970 painting thread
 07-16-2012, 11:39 PM
#41
Racer

Thread Starter

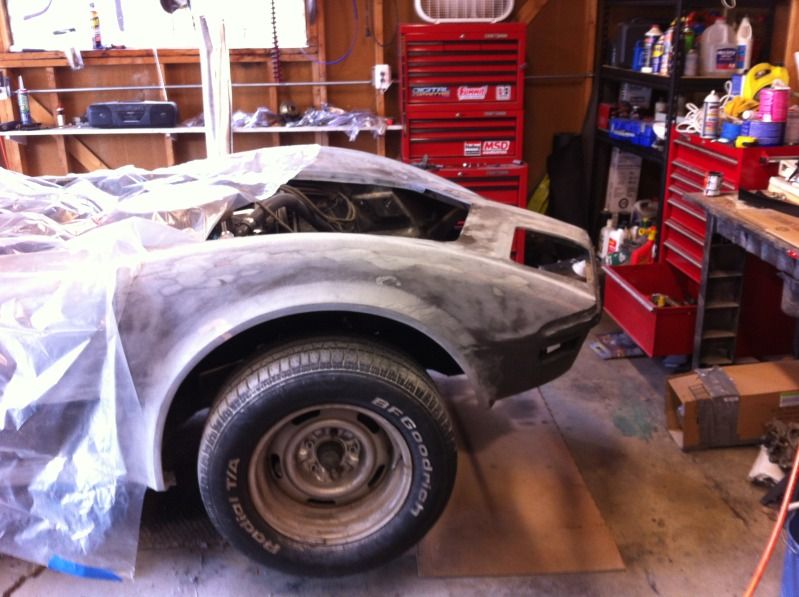
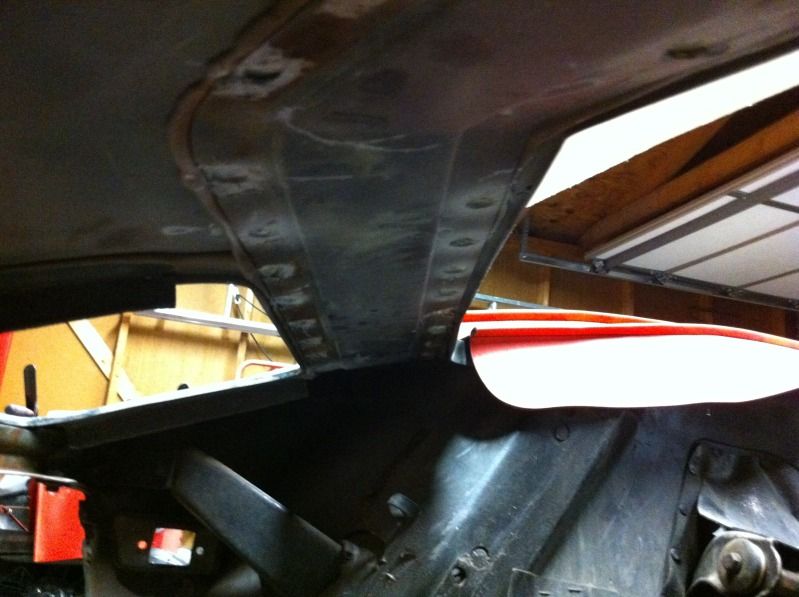
Its been a while and its time for another update. Progress has been slow since late may due to weddings and family being in town almost every weekend. I have made a little progress on a lot of parts though. The big win was getting the headlight header bar completely out. It didnt take very long, but was a dirty messy job. I also picked up some key parts at bloomington gold. I grabbed a complete wiper door assembly with grill, SS trim, actuator, bracket, and rubber boot for $450. And I scored a complete passenger side headlight assembly (my door had a broken tab) with a broken main mounting bracket for $100. If anyone is looking for headlight parts shoot me a pm.
And no update is complete without pics:
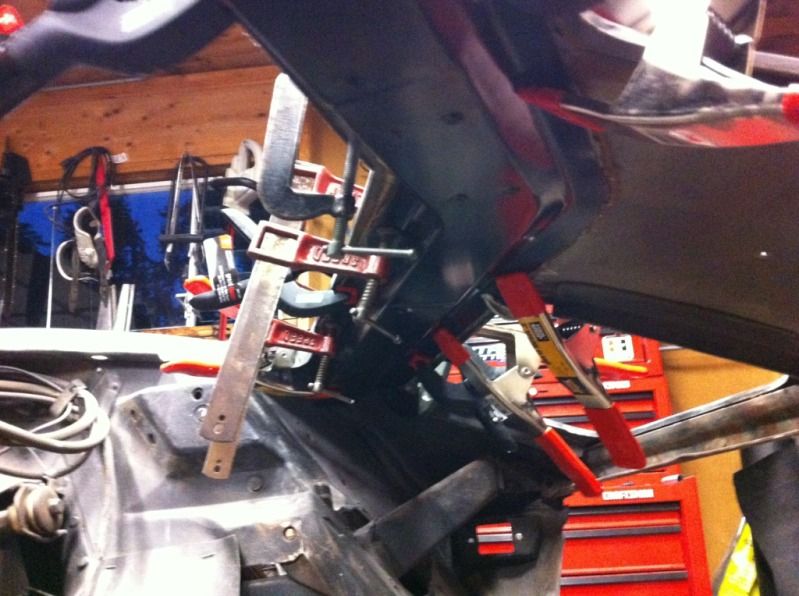
Header bar removal:
All done and rivets removed:
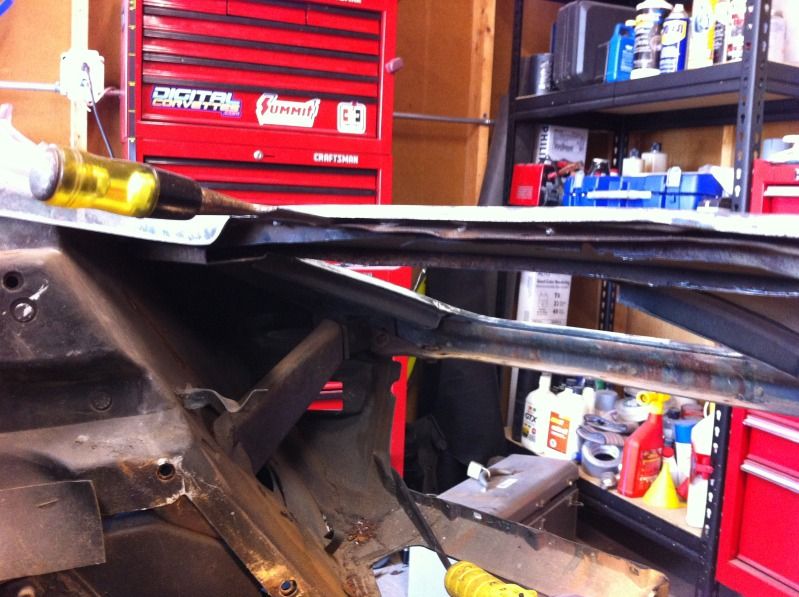
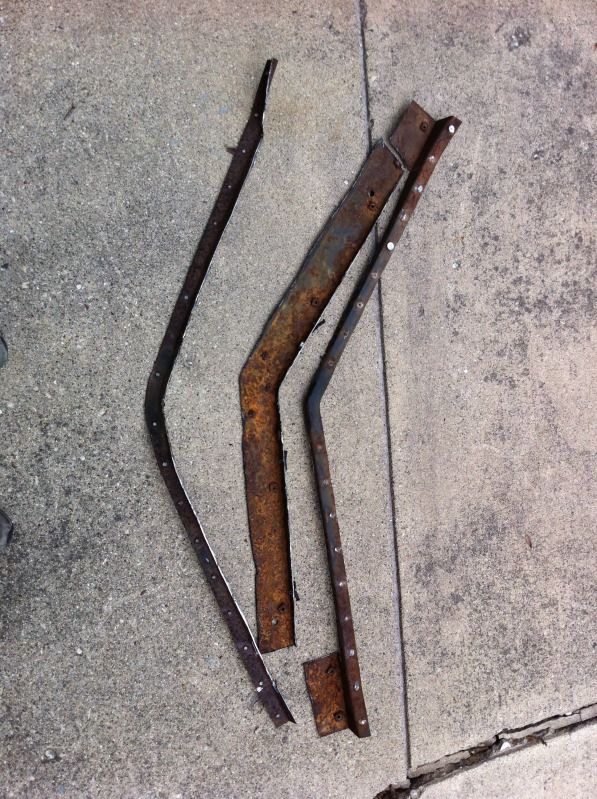
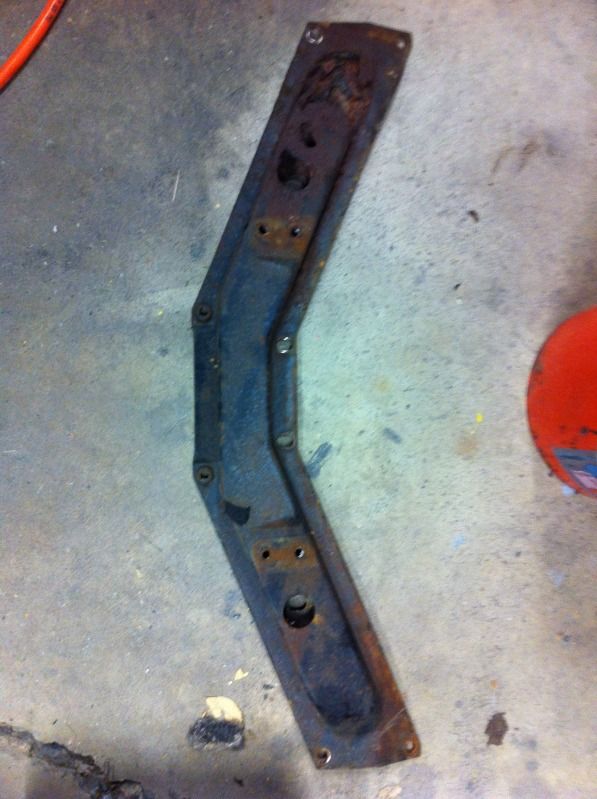
I new front frame extension was bad when i bought the car. Now is the time to replace it. This is most rusted out part on the car. Not sure why its so bad on that one side. The carnage:
And no update is complete without pics:
Header bar removal:
All done and rivets removed:
I new front frame extension was bad when i bought the car. Now is the time to replace it. This is most rusted out part on the car. Not sure why its so bad on that one side. The carnage:
Last edited by Double_take; 07-16-2012 at 11:42 PM.
 07-17-2012, 02:13 PM
#43
Racer
Thread Starter
07-17-2012, 02:36 PM
#44
Melting Slicks


You are rocking along nicely! Just a different way if you want to try: the headlight assemblies can also be put in through the front. Of course tape every painted edge twice and across the top and then you can apply a light pressure down on the valence and they go right in. I found it easier that way. But since you have the radiator and support out you will probably just put it back in that way which works just fine too!
looking great so far!
Sully
looking great so far!
Sully
07-17-2012, 02:52 PM
#45
Racer
Thread Starter
You are rocking along nicely! Just a different way if you want to try: the headlight assemblies can also be put in through the front. Of course tape every painted edge twice and across the top and then you can apply a light pressure down on the valence and they go right in. I found it easier that way. But since you have the radiator and support out you will probably just put it back in that way which works just fine too!
looking great so far!
Sully
looking great so far!
Sully

How much of the headlight door piece is body colored? Im wavering between painting the entire thing and assembling the rest into the painted part, or painting everything thats not visible black.
07-25-2012, 12:03 AM
#46
Racer
Thread Starter
Another weekend, another wedding...
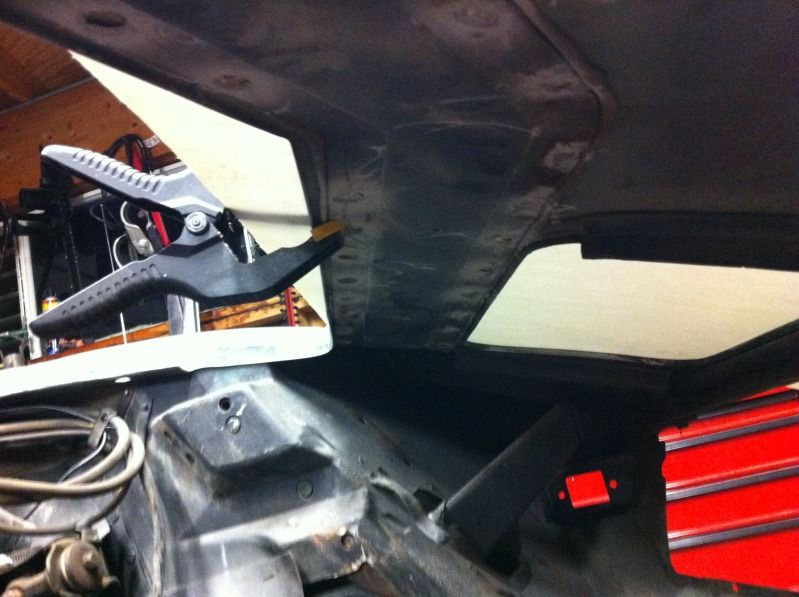
Tonight I finally got the new bar in place. I used this adhesive from ecklers. It did not require a special gun, just some care to mix them to the right ratio. I scuffed both the header bar surfaces and the old bonding strip, which was left in place, with 24 grit sand paper. I cleaned up the surfaces using compressed air followed by a wipe down with acetone on a clean rag.
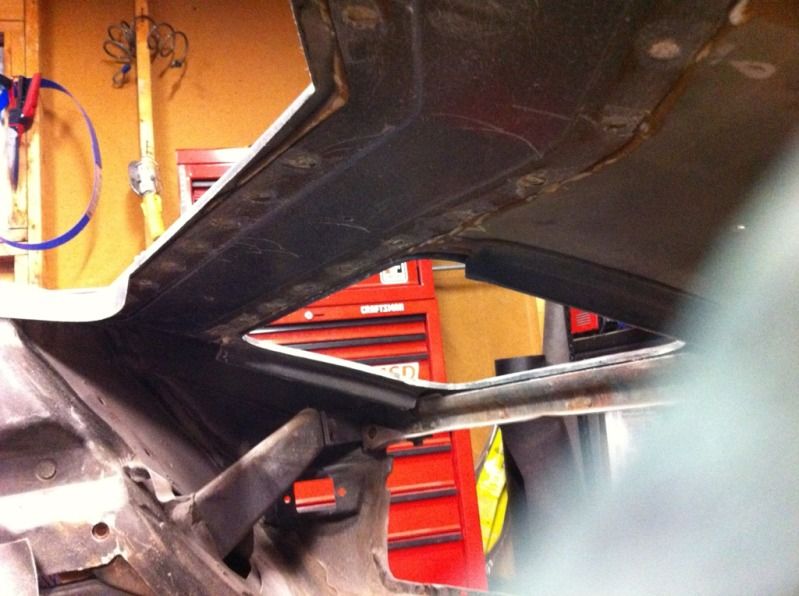
I mixed up the epoxy and applied it to the header bar contact surfaces using a plastic trawl. Sorry no pics. I had on my thick gloves, this stuff is nasty. I slid the header bar in through the grill area (a little angle into one side first allows it to slip right in). By resting the ends on the frame extensions and supporting it with one hand, I was able to move into a more comfortable position. I grabbed it with both hands, one from the hood side, the other from one headlight and slowly moved it into placed. The key is to immediately line it up with the old bonding strip, once stuck in place I grabbed a quick clamp and put it on one end. After a few small adjustments I was reaching for more quick clamps. It wasnt too bad at all and im really happy with how it turned out.
Tonight I finally got the new bar in place. I used this adhesive from ecklers. It did not require a special gun, just some care to mix them to the right ratio. I scuffed both the header bar surfaces and the old bonding strip, which was left in place, with 24 grit sand paper. I cleaned up the surfaces using compressed air followed by a wipe down with acetone on a clean rag.
I mixed up the epoxy and applied it to the header bar contact surfaces using a plastic trawl. Sorry no pics. I had on my thick gloves, this stuff is nasty. I slid the header bar in through the grill area (a little angle into one side first allows it to slip right in). By resting the ends on the frame extensions and supporting it with one hand, I was able to move into a more comfortable position. I grabbed it with both hands, one from the hood side, the other from one headlight and slowly moved it into placed. The key is to immediately line it up with the old bonding strip, once stuck in place I grabbed a quick clamp and put it on one end. After a few small adjustments I was reaching for more quick clamps. It wasnt too bad at all and im really happy with how it turned out.
07-25-2012, 04:31 PM
#47
07-25-2012, 09:23 PM
#48
Racer
Thread Starter
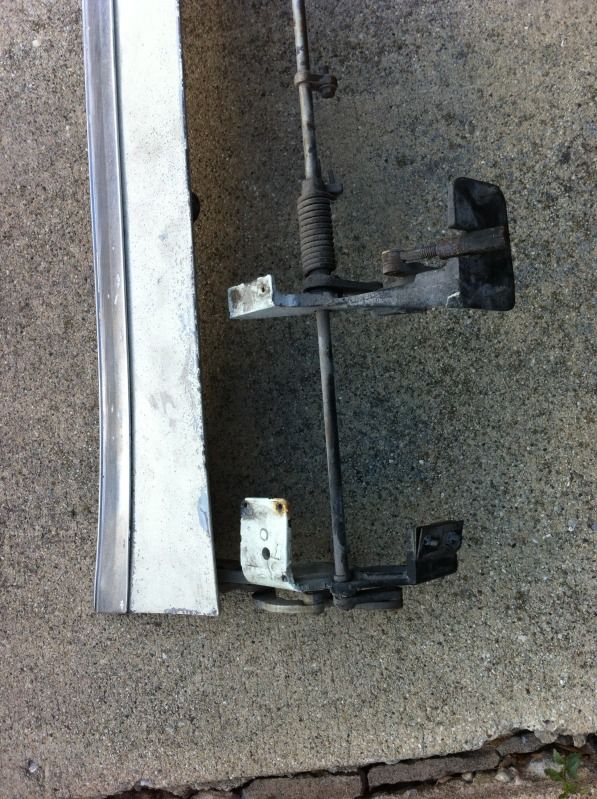
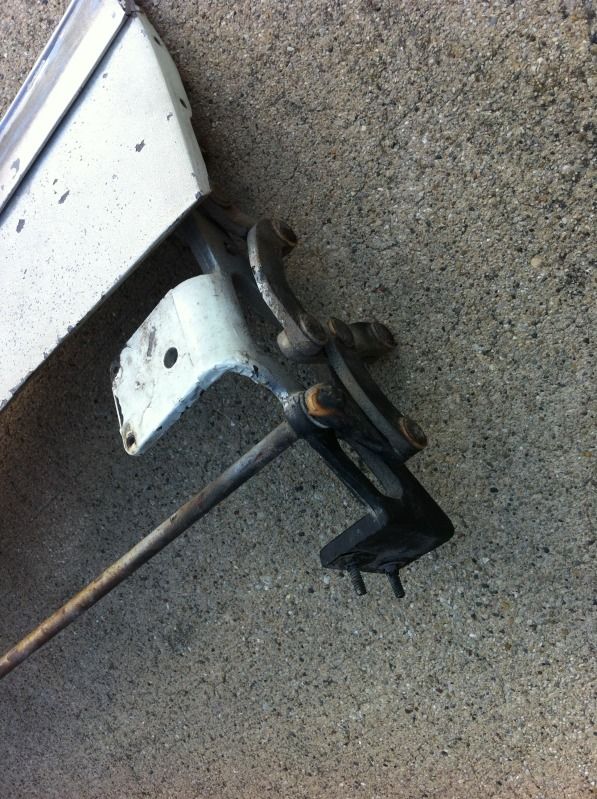
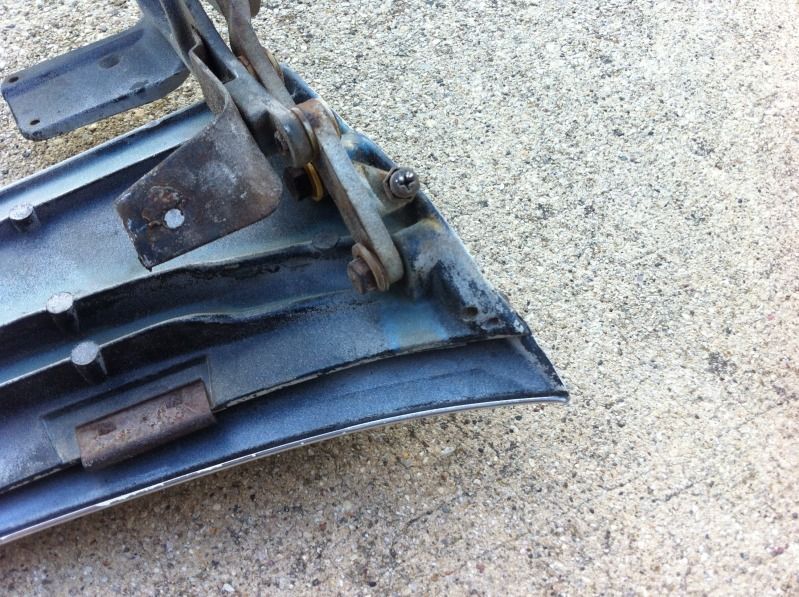
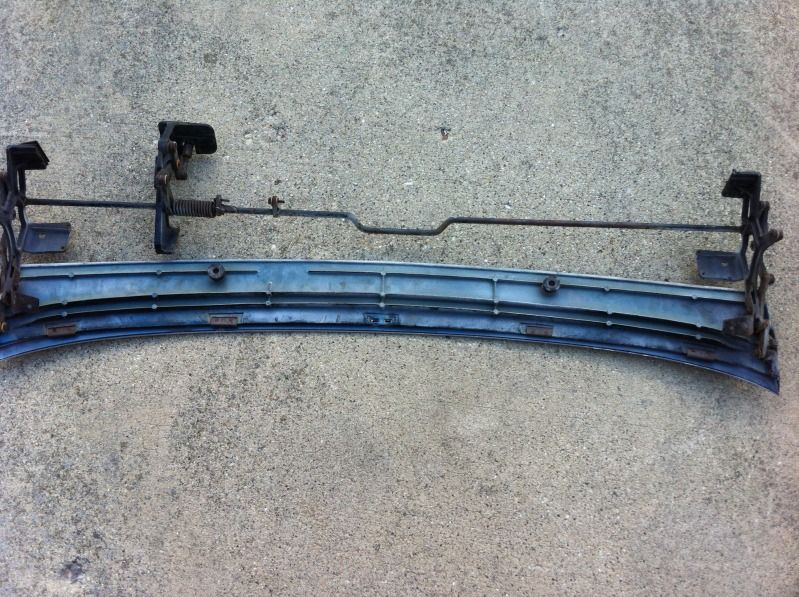
Here are some shots of the parts im cleaning up. Everything is getting sand blasted and repainted.
Headlight supports, actuators, and wiper door mechanism.
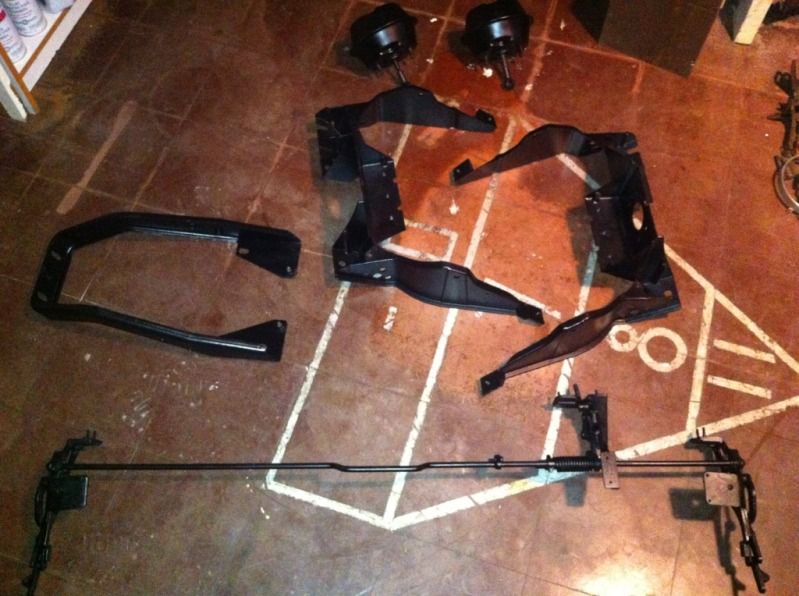
Headlight parts
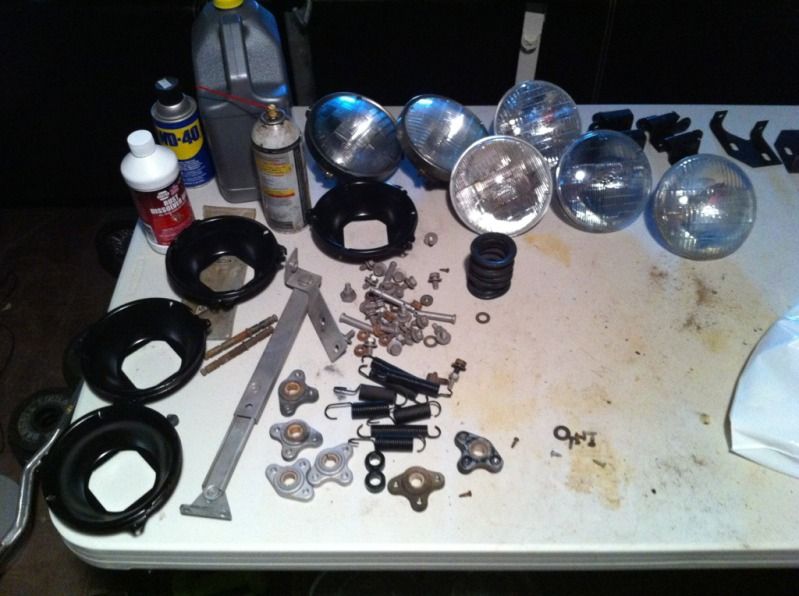
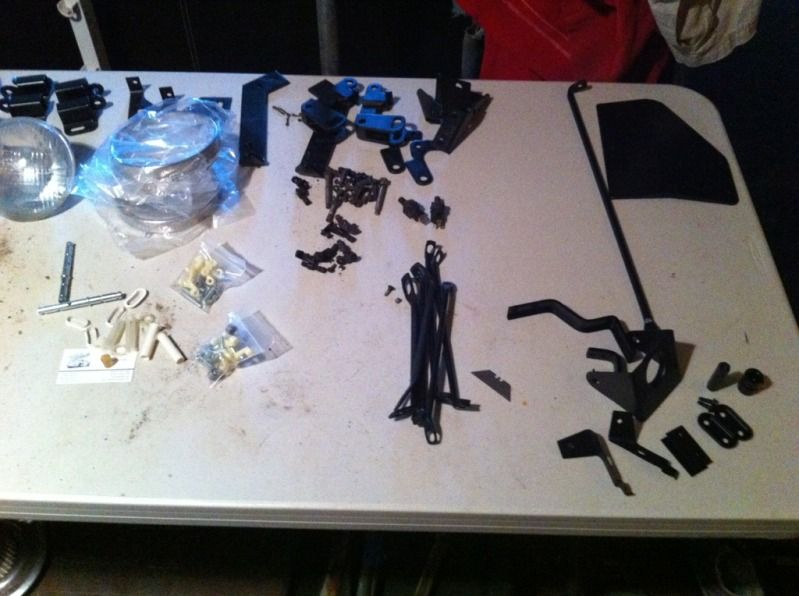
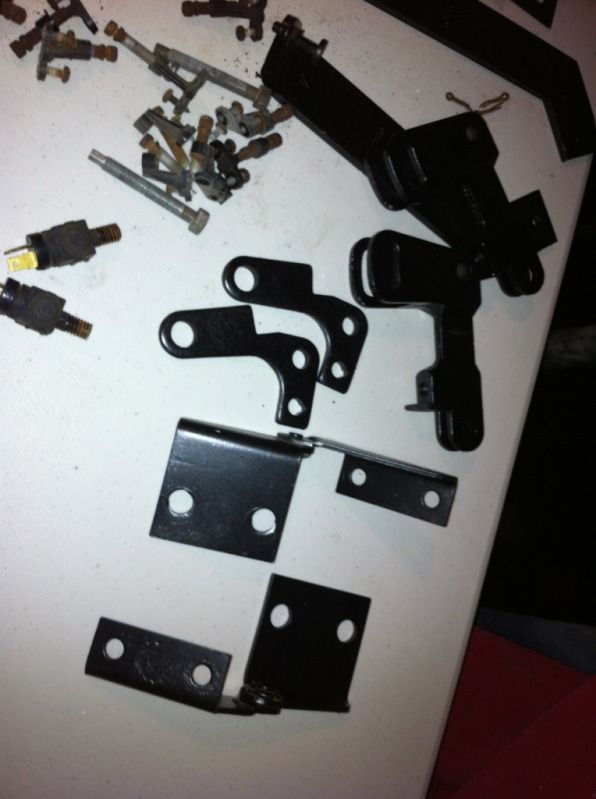
Headlight supports, actuators, and wiper door mechanism.
Headlight parts

 07-26-2012, 08:40 AM
#50
Racer
Thread Starter
Thanks.
It feels like a lot more work has been done when I think about all the time spent on the little parts. Things should start coming together quickly now.
It feels like a lot more work has been done when I think about all the time spent on the little parts. Things should start coming together quickly now.
07-26-2012, 08:45 AM
#51
Burning Brakes

Member Since: Mar 2011
Location: Communist party of MD
Posts: 862
Likes: 0
Received 8 Likes
on
2 Posts
Just keep her out of the rain and all those parts will still be shiny for years to come! Once she's assembled and on the road, you'll have a new OCD to be constantly checking weather radar
07-31-2012, 10:02 AM
#52
Racer
Thread Starter
LOL. I know the feeling. I painted my last 1970, got it put back together, went to bloomington gold...and it rained. Lots of work to get it all cleaned up again. lol
08-15-2012, 12:28 AM
#53
Racer
Thread Starter
Things are starting to come together. Had a friend come over today and help do some major aligning. I also finally got the windows, mechanism and actuators out of the doors. Someone had been there before me and the window regulators were not riveted in place. Ill post some pics of those later when I get around to cleaning them up.
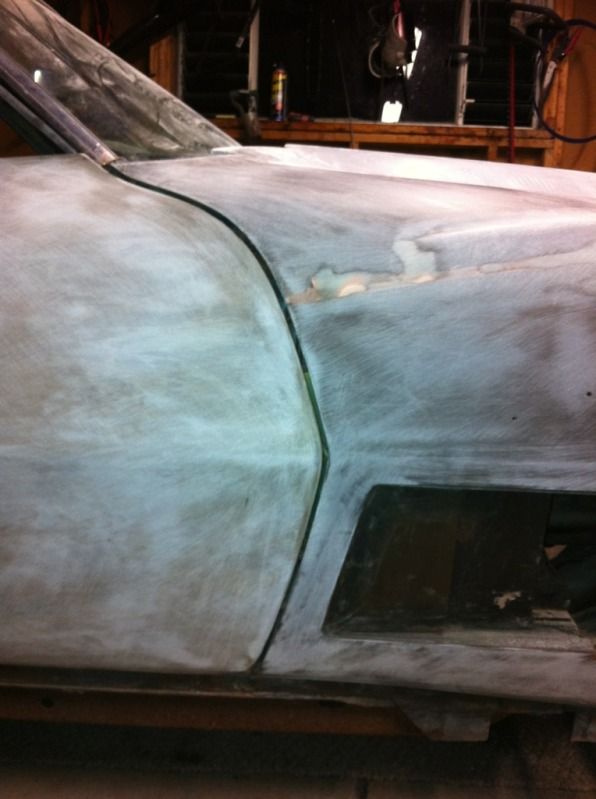
Did some adjusting of the passenger side door. It still needs some work. The fender waist line protrudes out further than the door and the body lines next to the handle arent correct. Any tips to get these little things fixed? It looks terrible.

Im thinking the rear of the door can be sanded down a little to even up the gap. After looking at it more, I want to lift the rear a little more to close the front top gap with the fender.
Ill take some pics of the drivers side when I have the car pulled out of the garage later this week. It looked great as is and needed no adjustments.
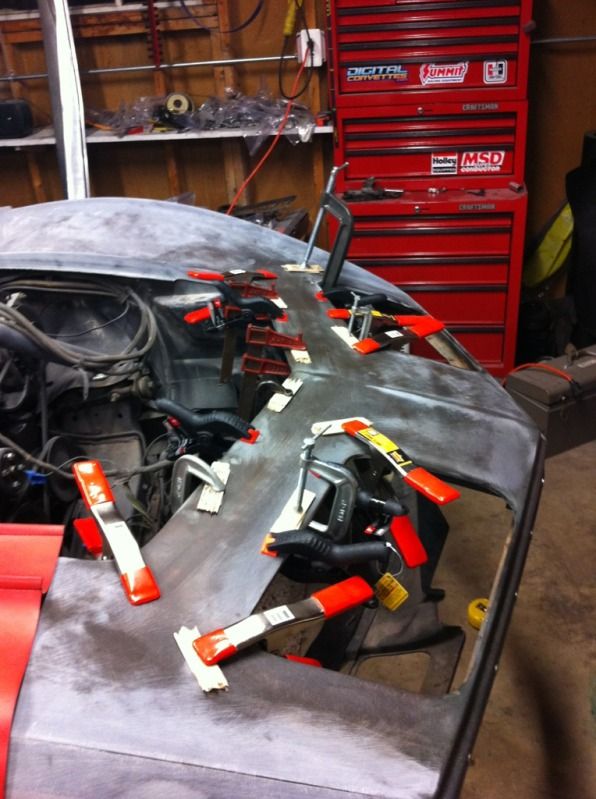
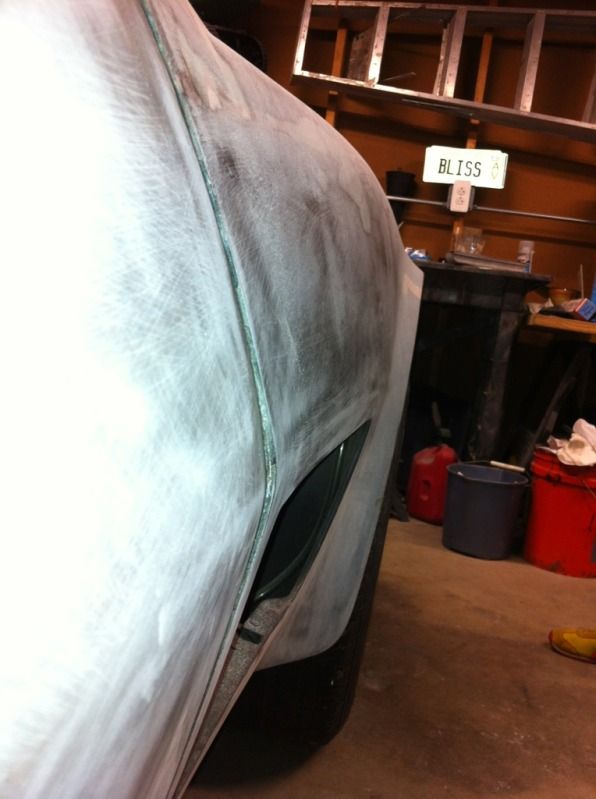
I also got the L88 hood mounted and centered.

It needs some serious massaging to line up correctly. The gaps are all over the place, the front is too high (I expect it to improve after I reinstall the front center brace) and I still need to convert it to a short hood. The price was too good to pass up.
Tomorrow ill start laying some glass on the hood to even up the gaps.
Did some adjusting of the passenger side door. It still needs some work. The fender waist line protrudes out further than the door and the body lines next to the handle arent correct. Any tips to get these little things fixed? It looks terrible.
Im thinking the rear of the door can be sanded down a little to even up the gap. After looking at it more, I want to lift the rear a little more to close the front top gap with the fender.
Ill take some pics of the drivers side when I have the car pulled out of the garage later this week. It looked great as is and needed no adjustments.
I also got the L88 hood mounted and centered.
It needs some serious massaging to line up correctly. The gaps are all over the place, the front is too high (I expect it to improve after I reinstall the front center brace) and I still need to convert it to a short hood. The price was too good to pass up.
Tomorrow ill start laying some glass on the hood to even up the gaps.
08-15-2012, 11:49 PM
#54
Burning Brakes
Great thread and very inspirational! 
I'm delivering my '70 to the painter in 6 weeks to get redone over the Winter. Your thread has me wishing she was already there. Keep the updates coming!

I'm delivering my '70 to the painter in 6 weeks to get redone over the Winter. Your thread has me wishing she was already there. Keep the updates coming!
08-16-2012, 02:00 AM
#55
Safety Car

You probably should have waited to install the header bar permanently. By the looks of it, the front point of your hood sits too high. Your surround could have been pushed up and shaped to the contour of the hood, then once you had that in the correct position (with something supporting it in the middle), you float your header bar underneath it and bond it permanently. The support from the rad support to the header bar helps, but if the shape of the surround isn't right, pushing up using the support is going to not just bring up the point, but the whole front of the surround.
Last edited by stinger12; 08-16-2012 at 02:03 AM.
08-16-2012, 09:15 AM
#56
Racer
Thread Starter
You probably should have waited to install the header bar permanently. By the looks of it, the front point of your hood sits too high. Your surround could have been pushed up and shaped to the contour of the hood, then once you had that in the correct position (with something supporting it in the middle), you float your header bar underneath it and bond it permanently. The support from the rad support to the header bar helps, but if the shape of the surround isn't right, pushing up using the support is going to not just bring up the point, but the whole front of the surround.
The entire front surround does need to come up. With no support in place it is easy to pull it up .25-.5 inches. The first step is to close the completely uneven gaps around the hood. Ill be putting strips along the top and bottom of the hood (after grinding down a healthy taper) to build up the edges. Once I have the gaps correct Ill start worrying about the contour. If there is a better process, Im all ears.
08-16-2012, 09:19 PM
#57
Safety Car
Contour always takes precedence over gapping. Gapping is easier to fix than reshaping the whole contour. We treat steel bodies the same way - contour always comes first.

 08-17-2012, 10:54 AM
#59
Racer
Thread Starter
08-17-2012, 10:56 AM
#60
Racer
Thread Starter
To everyone else: Thanks. Its been difficult finding time, but your comments keep me going. It helps to know people want to see more which forces me to make time.