
My 1970 painting thread
 04-13-2012, 07:32 PM
#1
Racer

Thread Starter

I had so much fun painting my last corvette that I decided to sell it 1.5 years ago for another one that needed a fresh coat of paint. 
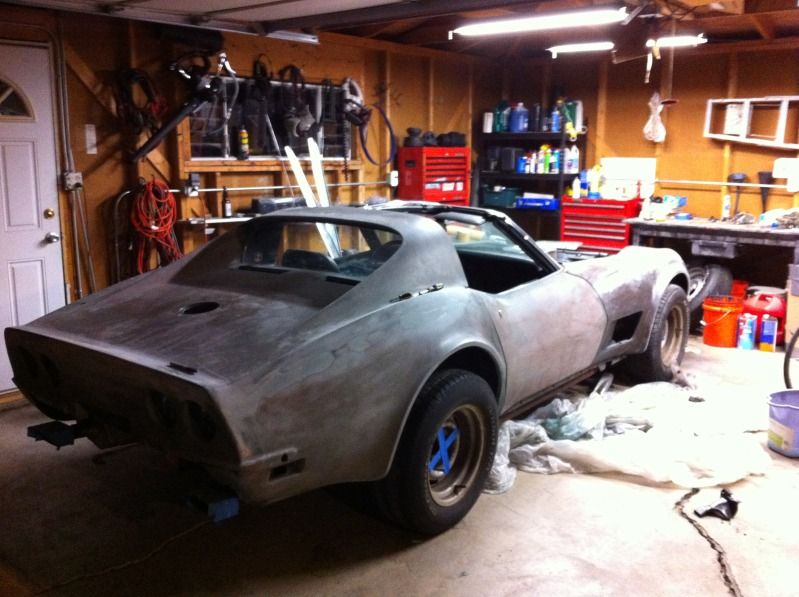
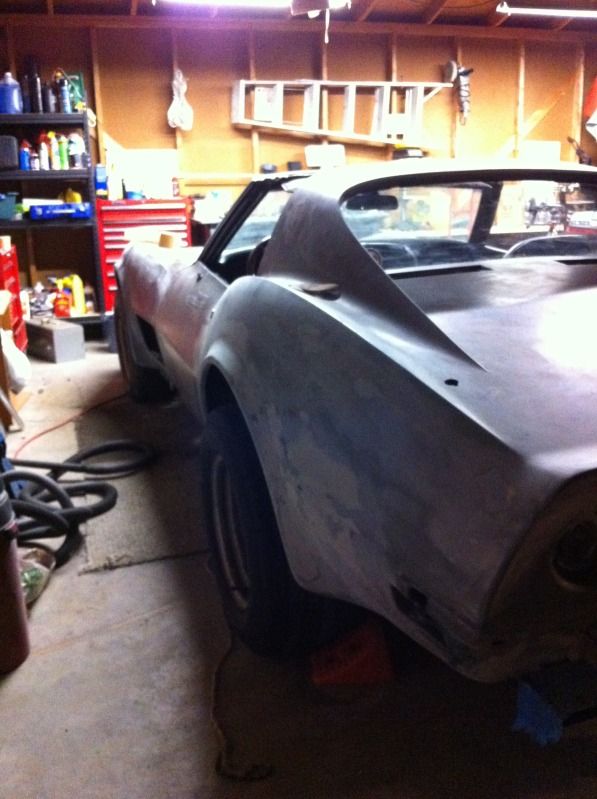
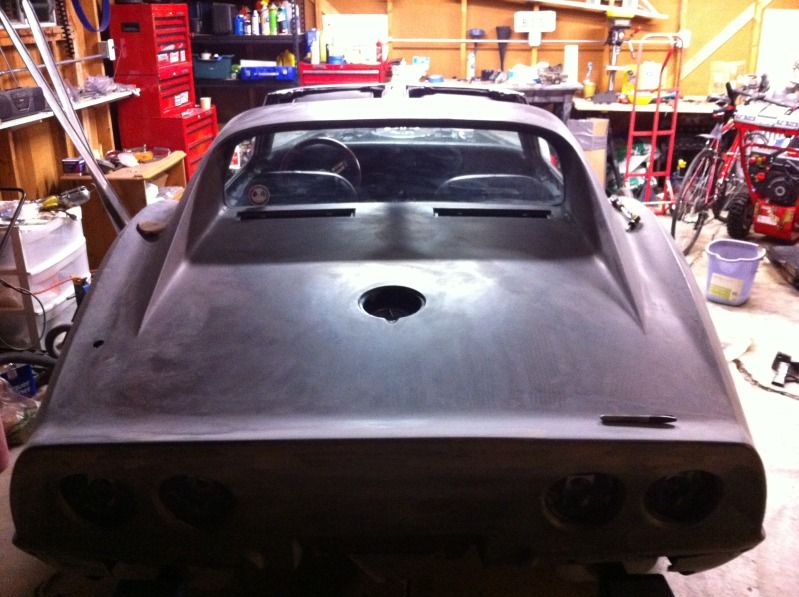
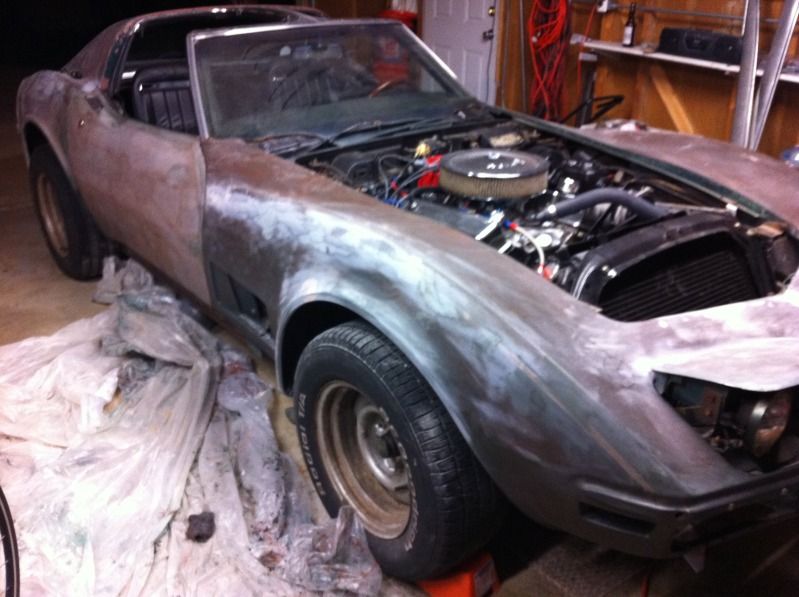
Back in November I started attacking the car with a razor blade, making quick work of the '80's lacquer repaint. A kitchen remodel and 3 months of cold weather later Im 99% done taking off the paint. Just have the door jams to go. I will gladly answer any questions about my progress to date, but for now Im posting the only thing that really matters around here, pics.
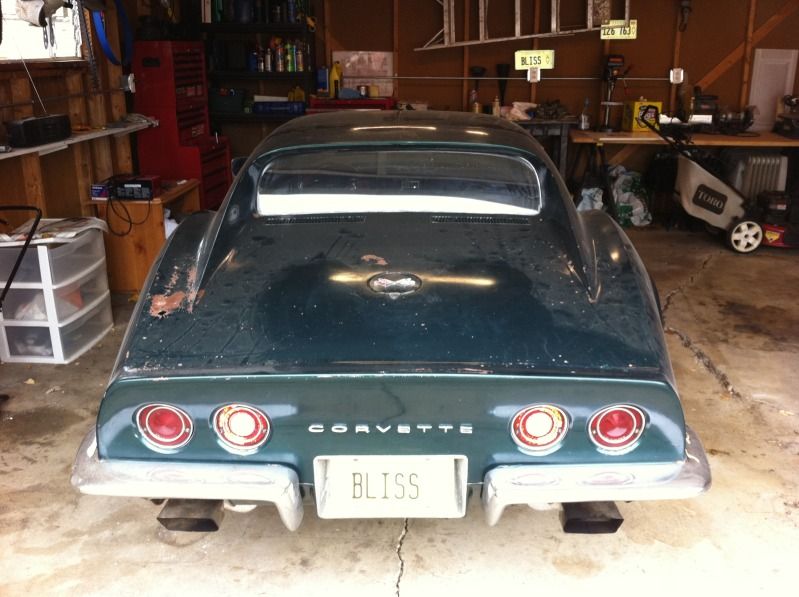
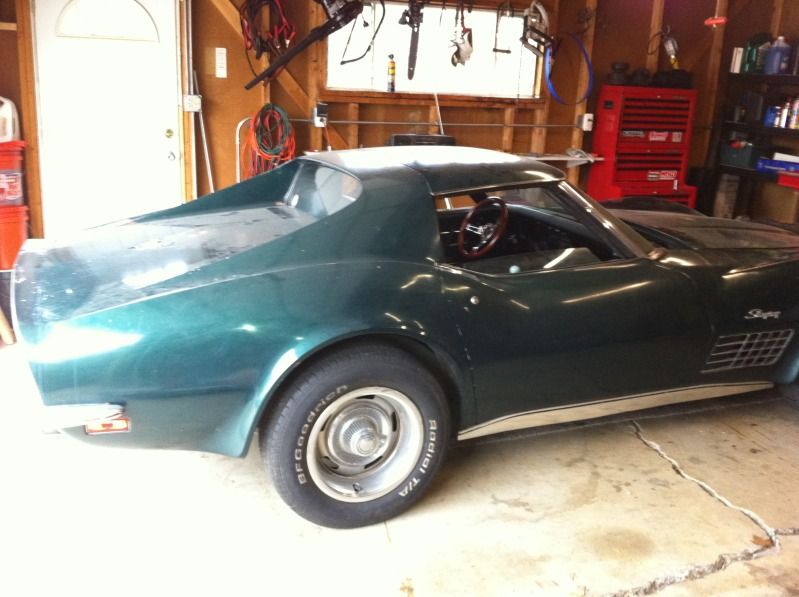
Last year:
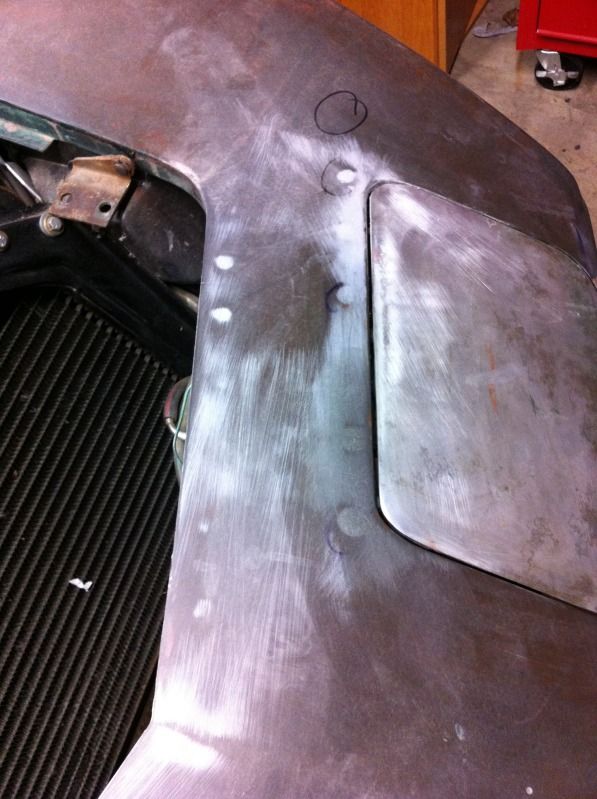
Last night I finally finished taking apart and stripping the t-tops along with under the front bumper:
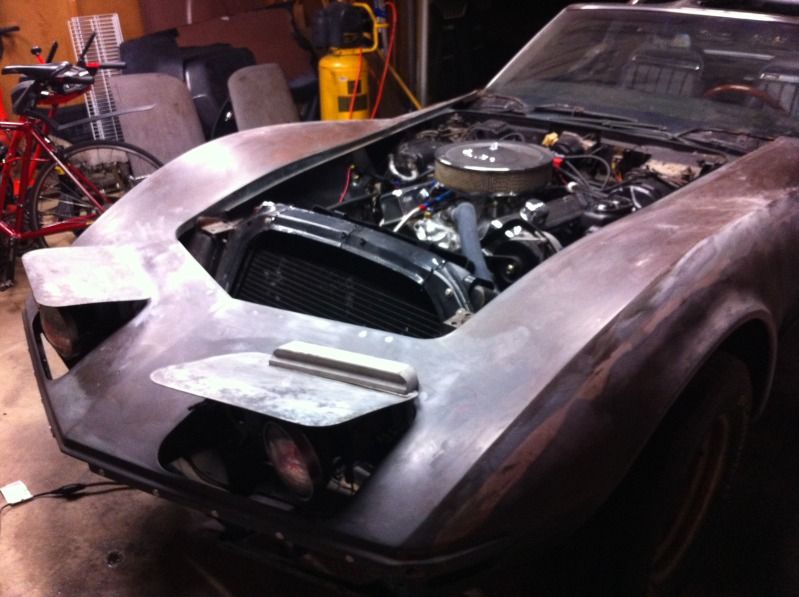
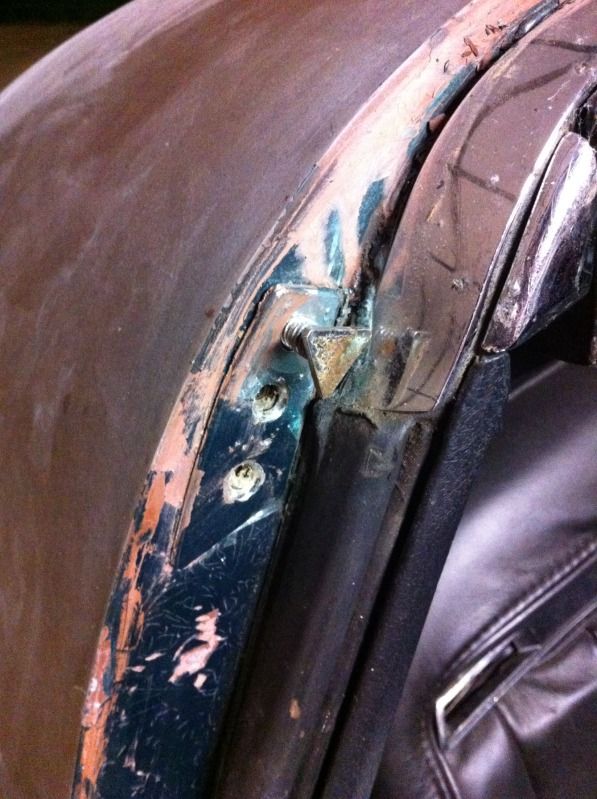
The front rivets have started to pop through. Anyone know the best course of action to fix this?
If I remove both screws and the T-top post it appears the inner piece is going to disappear forever into the body. Can I get access to this piece with the interior panels removed?
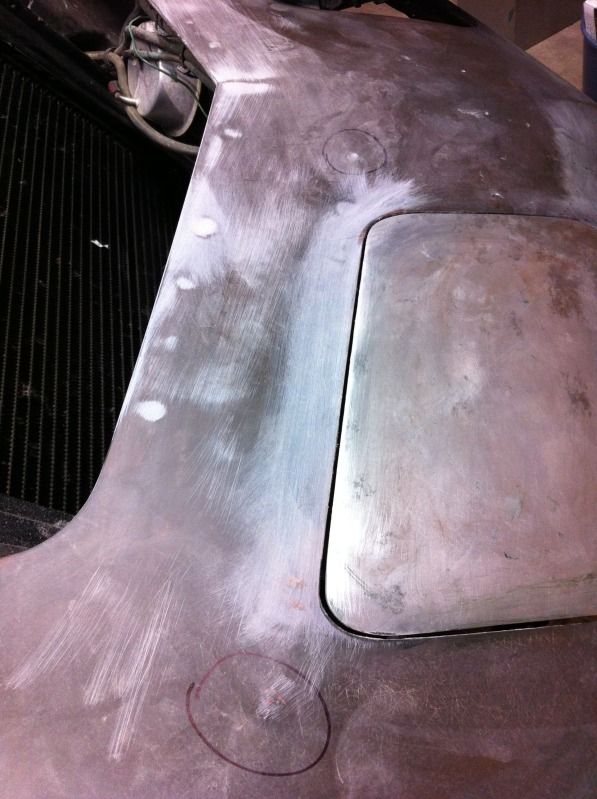
One reason I purchased the car was the quality of the body. Other than a little filler on the bonding seams, the rear lip and the drivers side rear its near perfect. There are little spots here and there with cracks, but thats expected with a 42 year old car. It also looks like the drivers side front may have been replaced. The bonding seam is less uniform than the other three, and there appears to be dots there someone screwed the new panel into place. However the repair was done right and I dont plan on redoing it.
Ill keep updating this thread to answer questions and to post progress pics. Im not getting the body as clean as Stinger12's (thats impossible and IMO an insult to stinger to think I can get it that clean :thumbsup , but he is certainly an inspiration.
Back in November I started attacking the car with a razor blade, making quick work of the '80's lacquer repaint. A kitchen remodel and 3 months of cold weather later Im 99% done taking off the paint. Just have the door jams to go. I will gladly answer any questions about my progress to date, but for now Im posting the only thing that really matters around here, pics.
Last year:
Last night I finally finished taking apart and stripping the t-tops along with under the front bumper:
The front rivets have started to pop through. Anyone know the best course of action to fix this?
If I remove both screws and the T-top post it appears the inner piece is going to disappear forever into the body. Can I get access to this piece with the interior panels removed?
One reason I purchased the car was the quality of the body. Other than a little filler on the bonding seams, the rear lip and the drivers side rear its near perfect. There are little spots here and there with cracks, but thats expected with a 42 year old car. It also looks like the drivers side front may have been replaced. The bonding seam is less uniform than the other three, and there appears to be dots there someone screwed the new panel into place. However the repair was done right and I dont plan on redoing it.
Ill keep updating this thread to answer questions and to post progress pics. Im not getting the body as clean as Stinger12's (thats impossible and IMO an insult to stinger to think I can get it that clean :thumbsup
, but he is certainly an inspiration.
 04-13-2012, 08:46 PM
#3
Burning Brakes

I admire not only the hard work but also someone that makes time to do the hard work. I'm sure there has been many projects which have derailed you over the past few months, but your work is awsome.
04-13-2012, 08:46 PM
#4
Melting Slicks


Unscrew that top adjuster with impunity. The captive plate underneath won't go anywhere. You've done a clean, thorough job so far! Keep the pics and narrative coming.
04-13-2012, 09:53 PM
#5
Drifting

I'm getting close to doing the body work on my coupe. You stated that you used razor blades to start to removal of the paint. What was your next form of paint removal. I assume you sanded down the car. What grade/grit of sand paper did you use. I'm looking forward when I can start the body work on this car. 

Thanks for any information.
Thanks for any information.
 04-14-2012, 10:10 AM
#7
Melting Slicks
Member Since: Aug 2004
Location: www.Z16.org North/West Pennsylvania
Posts: 2,220
Likes: 0
Received 4 Likes
on
4 Posts
My first thoughts when seeing your license plate were..."BLISS...he might want to change that to BLISTERS before he's finished." 
Keep up the good work and pictures flowing.
Keep up the good work and pictures flowing.
 04-14-2012, 10:39 AM
#9
Team Owner

Member Since: Sep 2006
Location: Westminster Maryland
Posts: 30,173
Likes: 0
Received 2,878 Likes
on
2,515 Posts

Hi Dt,
A lot of hard work showing in those pictures.
Those rivet 'bumps' have ben caused by the rivets that are part of the healight reinforcing bar that's bonded to the underside of the surround oxidizing over the years. They put enough presssure on the fiberglass to foorm a bump.
The only complete cure is to unbond the bar and start over.
Good Luck!
Regards,
Alan
04-15-2012, 07:46 PM
#10
Racer
Thread Starter
I'm getting close to doing the body work on my coupe. You stated that you used razor blades to start to removal of the paint. What was your next form of paint removal. I assume you sanded down the car. What grade/grit of sand paper did you use. I'm looking forward when I can start the body work on this car.
Thanks for any information.
Thanks for any information.
After all the paint is gone, I am going to put down a layer of filler and sand it down with 80 grit. Ill post the products when I get to that point. Im going to use House of Kolors new KD3000 sealer/primer which can fill down to 36 grit scratches. Its better to have a rough surface for the sealer/primer to grip.
Hi Dt,
A lot of hard work showing in those pictures.
Those rivet 'bumps' have ben caused by the rivets that are part of the healight reinforcing bar that's bonded to the underside of the surround oxidizing over the years. They put enough presssure on the fiberglass to foorm a bump.
The only complete cure is to unbond the bar and start over.
Good Luck!
Regards,
Alan
A lot of hard work showing in those pictures.
Those rivet 'bumps' have ben caused by the rivets that are part of the healight reinforcing bar that's bonded to the underside of the surround oxidizing over the years. They put enough presssure on the fiberglass to foorm a bump.
The only complete cure is to unbond the bar and start over.
Good Luck!
Regards,
Alan
04-15-2012, 07:58 PM
#11
Racer
Thread Starter

 04-16-2012, 12:12 AM
#14
Melting Slicks

Doubletake, I'm doing a similar thread to yours over in the tech section. Same car, same color (Donnybrooke Green '70). Started stripping paint last May, but mine had three different paint jobs on it so a LOT more work getting the old paint off. You're making good progress...didn't recall seeing what color you're going to paint yours though...
04-16-2012, 12:19 AM
#15
Safety Car

Don't write on your vette with a sharpie, or any car for that matter! It can bleed through new paint, even when removed, and come back to haunt you. Even on steel cars writing with sharpie is a big nono. Use pencil.
04-16-2012, 09:07 AM
#17
Racer
Thread Starter
Doubletake, I'm doing a similar thread to yours over in the tech section. Same car, same color (Donnybrooke Green '70). Started stripping paint last May, but mine had three different paint jobs on it so a LOT more work getting the old paint off. You're making good progress...didn't recall seeing what color you're going to paint yours though...
 The car is going to be green. Not sure what shade yet. Im leaning towards a custom color using Autoair paint. Ive airbrushed with the stuff for years and painted my last car with it. Its water based, super easy to spray (dont have to mess with flash times etc) and cheap because you dont need catalyst and reducers.
Last edited by Double_take; 04-16-2012 at 09:09 AM.
04-16-2012, 11:56 AM
#18
Melting Slicks

If I remove both screws and the T-top post it appears the inner piece is going to disappear forever into the body. Can I get access to this piece with the interior panels removed?
yep those retainers or supports will fall down and be lost. Be very careful and remove the large screws then rotate the base plate to the side and then put the screws back in the retainer. Then remove the large upper bolt that the t-top sits onto.
hth,
Sully
yep those retainers or supports will fall down and be lost. Be very careful and remove the large screws then rotate the base plate to the side and then put the screws back in the retainer. Then remove the large upper bolt that the t-top sits onto.
hth,
Sully
04-16-2012, 04:43 PM
#19
Racer
Thread Starter
If I remove both screws and the T-top post it appears the inner piece is going to disappear forever into the body. Can I get access to this piece with the interior panels removed?
yep those retainers or supports will fall down and be lost. Be very careful and remove the large screws then rotate the base plate to the side and then put the screws back in the retainer. Then remove the large upper bolt that the t-top sits onto.
hth,
Sully
yep those retainers or supports will fall down and be lost. Be very careful and remove the large screws then rotate the base plate to the side and then put the screws back in the retainer. Then remove the large upper bolt that the t-top sits onto.
hth,
Sully