
**Mike's 72 Coupe Restoration Kickoff**


 01-20-2013, 10:51 PM
#22
Instructor

Thread Starter
Well, got all the wood cut for the dolly today, but gave in and quit because I was too darn cold!

I did get this number off the block though, can someone help me decode it?
"12S516160 V0228CKX"
Perhaps it's an "O" instead of a zero after the V? Regardless, the "2S516160" is the last 8 of my VIN (1Z37K2S516160) but I dunno what the "V0228" is. CKX is the 350 V8 200hp engine with the THM-400 auto transmission which is what the car has.

I guess maybe I'm confused that either it's been re-stamped or I'm not understanding the format that multiple corvette "fact" sites are giving.
Any help for a beginner?
Thanks,
Mike
I did get this number off the block though, can someone help me decode it?
"12S516160 V0228CKX"
Perhaps it's an "O" instead of a zero after the V? Regardless, the "2S516160" is the last 8 of my VIN (1Z37K2S516160) but I dunno what the "V0228" is. CKX is the 350 V8 200hp engine with the THM-400 auto transmission which is what the car has.
I guess maybe I'm confused that either it's been re-stamped or I'm not understanding the format that multiple corvette "fact" sites are giving.
Any help for a beginner?
Thanks,
Mike
01-21-2013, 01:06 PM
#23
Instructor
Thread Starter
Can someone verify "V0228" means Flint February 28th of 1972?
Now just need to figure out the stuff before the last 5 of my VIN, the "12S5" part.
Now just need to figure out the stuff before the last 5 of my VIN, the "12S5" part.
Last edited by Mike7143; 01-21-2013 at 04:55 PM.
01-26-2013, 11:23 AM
#24
Instructor
Thread Starter
Can anyone link or have a body removal checklist for a 72? I have one from Corvette Repair Inc. but I think it's geared towards 63-67's. I'm sure there's a lot that's similar, but just curious if there was a "newer" one.
Also, anyone have a guestimate on how heavy a 72 coupe body is with most the interior removed? 1,000lb? We have a forklift with ~60" forks, but if it's not that heavy I'm thinking it might be safer to man-power it off in the event we miss something!
Also, anyone have a guestimate on how heavy a 72 coupe body is with most the interior removed? 1,000lb? We have a forklift with ~60" forks, but if it's not that heavy I'm thinking it might be safer to man-power it off in the event we miss something!
01-26-2013, 07:10 PM
#25
Le Mans Master

Member Since: Dec 2009
Location: Saskatoon Saskatchewan
Posts: 6,397
Received 640 Likes
on
463 Posts

I think this is your biggest challenge. You can try with each person getting 1/4 of the time with the car, but what happens when something breaks, how do you assess responsibility and who pays for it? I think eventually one person will want to buy out the interests of the others in the car and be the sole owner.
01-26-2013, 08:04 PM
#26
Instructor
Thread Starter
Thanks for the input Priya; still haven't quite figured out what to do about it yet.
Progress made today: body dolly mostly assembled. Can't decide if casters are even needed as we have the forklift to move it around and there's nowhere really to roll it as the driveway is gravel.

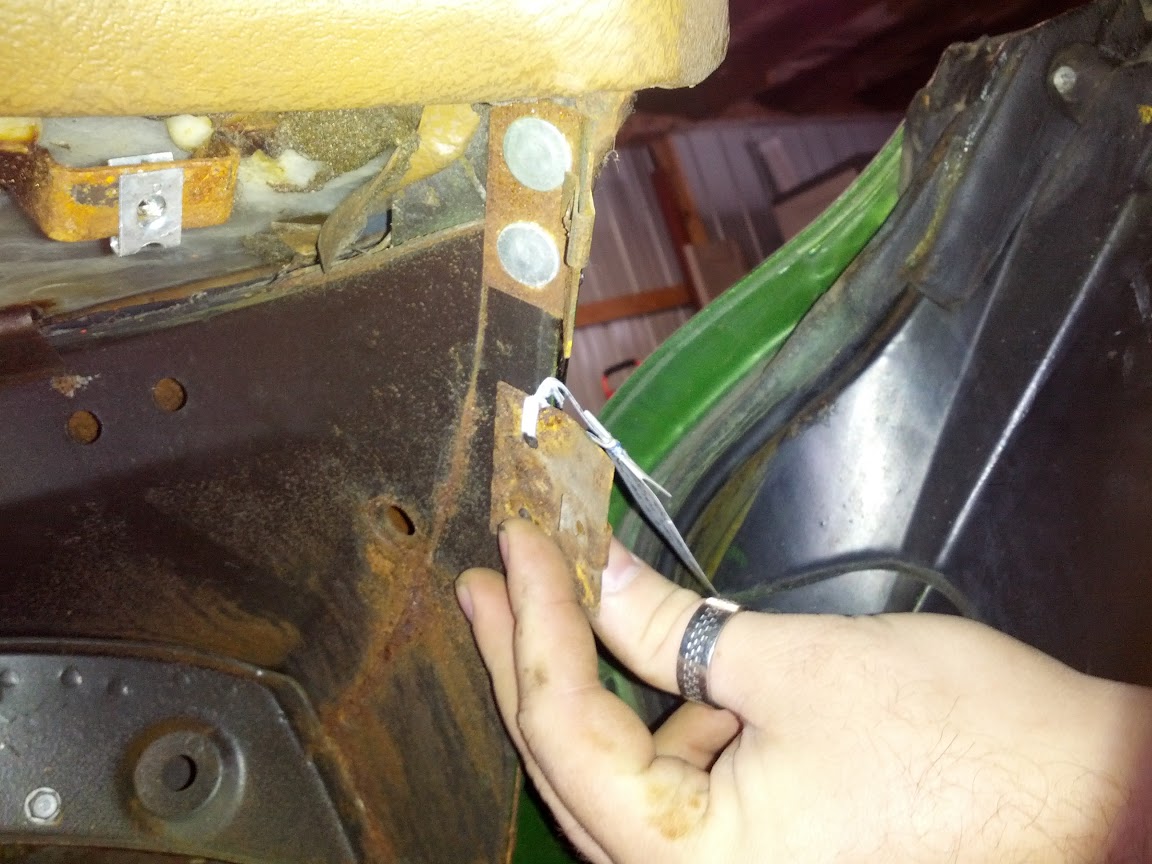
Does anyone know what this might be? I found it in the passenger's side #2 mount cubby hole down by the feet. It's definitely painted green, I assume at some point it was attached to the car. Dunno where it goes.


#1 mount bolts are removed and the driver's #2 was removed. Removed passenger #2 tonight. I'm nervous to try the #3's as the heads look rusted and not much room in there. PB blasted the crap out of them. Also PB blasted the #4's but wasn't as intimidated. Tried driver side and it was pretty stuck. Passenger side... well... I'm not sure what's happening... I broke it loose I though, but I just kept spinning and spinning, not actually coming out. Peeked into the back inside thinking maybe a nut was on top and it was spinning. All I saw is what looked like a square steel nut maybe? Not sure. Anyway, I tried taking pictures after spinning the bolt, the square thing never seems to rotate, so is the bolt stripped? Driver's side looks like there's a "wedge" between the 'glass and square that'd keep it from rotating? I'm positive though that the square thing isn't rotating as I spin the bolt.... What am I missing?

And here's the driver's side with what looks like a wedge?:

Frustrating when it's cold out, I feel like I don't get anything done... Hopefully tomorrow I can work on #3's and figure out the #4's.
Also starting to wonder if this vehicle has ever been restored in its life. Finding little things here and there that seem strange, like a bunch of thin twist nuts under glued down carpet padding... so far only $0.02, 1975 penny and a I want to say a 1964 penny.
Progress made today: body dolly mostly assembled. Can't decide if casters are even needed as we have the forklift to move it around and there's nowhere really to roll it as the driveway is gravel.
Does anyone know what this might be? I found it in the passenger's side #2 mount cubby hole down by the feet. It's definitely painted green, I assume at some point it was attached to the car. Dunno where it goes.
#1 mount bolts are removed and the driver's #2 was removed. Removed passenger #2 tonight. I'm nervous to try the #3's as the heads look rusted and not much room in there. PB blasted the crap out of them. Also PB blasted the #4's but wasn't as intimidated. Tried driver side and it was pretty stuck. Passenger side... well... I'm not sure what's happening... I broke it loose I though, but I just kept spinning and spinning, not actually coming out. Peeked into the back inside thinking maybe a nut was on top and it was spinning. All I saw is what looked like a square steel nut maybe? Not sure. Anyway, I tried taking pictures after spinning the bolt, the square thing never seems to rotate, so is the bolt stripped? Driver's side looks like there's a "wedge" between the 'glass and square that'd keep it from rotating? I'm positive though that the square thing isn't rotating as I spin the bolt.... What am I missing?
And here's the driver's side with what looks like a wedge?:
Frustrating when it's cold out, I feel like I don't get anything done... Hopefully tomorrow I can work on #3's and figure out the #4's.
Also starting to wonder if this vehicle has ever been restored in its life. Finding little things here and there that seem strange, like a bunch of thin twist nuts under glued down carpet padding... so far only $0.02, 1975 penny and a I want to say a 1964 penny.
Last edited by Mike7143; 01-26-2013 at 08:08 PM.
01-26-2013, 08:41 PM
#28
Instructor
Thread Starter
Pg M119 of UPC1 isn't showing much of what's on the top side of #4 mount asm. Looks like an inverted or "hat" shaped riser? What I've got pictures of doesn't look like the AIM... Hmm.
01-26-2013, 08:42 PM
#29
Instructor
Thread Starter
 01-26-2013, 10:23 PM
#30
Instructor
Thread Starter
Arg... more research and it's sounding like either
A. the bolt or square nut is stripped
B. the square nut inside the cage rounded over and is spinning in the cage
C. the rivets holding the cage broke and the entire cage/nut is spinning
My driver's side looks properly riveted with the rivets at the front/back while the passenger side looks like the "ears" or flanges of the cage are side-to-side, hard to tell in the pictures. If that's the case, I'd wager the cars been worked on in the past. Any tips on fixing this? Thinking easiest will be to cut bolt from exterior to get body off for now.
May try wedging one of these in between the wall of the cage and the square nut to keep it from spinning... just gotta find one now!
Last edited by Mike7143; 01-26-2013 at 11:30 PM.
01-29-2013, 09:28 PM
#31
Instructor
Thread Starter
Body mount bolts done! Ended up just cutting them all. Dremel and right angle drive head was the winner combo, coupled with the sawzall on one. All are loose except passenger #3, large washer still has bolt through it and can't get it up. Ground flush with bolt and removed burrs and left blaster all over it. Started disconnecting more things. Any tips on how to most easily disconnect steering column? All wiring is separated that I'm aware of, sounds like there's ALWAYS something you miss while lifting off. Parking brake, spedo,tach still left.
I'm gonna feel good when the body is separated. Can't wait to start tearing into the chassis!
Edit: one of the rivets holding cage on #4 passenger was broken so that's why it was spinning. Add that to the fix list!
I'm gonna feel good when the body is separated. Can't wait to start tearing into the chassis!
Edit: one of the rivets holding cage on #4 passenger was broken so that's why it was spinning. Add that to the fix list!
Last edited by Mike7143; 01-29-2013 at 09:42 PM.
01-29-2013, 10:49 PM
#32
Burning Brakes

Kind of a long shot, but could possibly be one of the two pieces that the passenger side dash would screw to. Open the door and look at the side of the A Pillar where the door panel meets the side of the dash pad. I believe there should 2 holes on the side of the dash pad that would allow for screws to be screwed into the tabs/ears that are part of the A Pillar. Maybe one of them fell off? I don't have pics from an assembly manual, but maybe someone else can chime in...
01-30-2013, 10:52 PM
#33
Melting Slicks


Kind of a long shot, but could possibly be one of the two pieces that the passenger side dash would screw to. Open the door and look at the side of the A Pillar where the door panel meets the side of the dash pad. I believe there should 2 holes on the side of the dash pad that would allow for screws to be screwed into the tabs/ears that are part of the A Pillar. Maybe one of them fell off? I don't have pics from an assembly manual, but maybe someone else can chime in...
01-30-2013, 11:35 PM
#35
Melting Slicks
Use big casters (4" or better) on the dolly...will roll much easier with the body on there.
I didn't read if anyone suggested it yet but photograph and bag EVERYTHING..and throw NOTHING away
I didn't read if anyone suggested it yet but photograph and bag EVERYTHING..and throw NOTHING away
01-31-2013, 09:44 AM
#36
Instructor
Thread Starter
Thanks bluray72 for the nice picture! As of now I don't have casters on the dolly. Gravel driveways suck, not to mention the ground isn't firm (well.... depends on the day here!) We'll probably use a forklift to move it around, and if we need casters (or maybe fab up some type of pneumatic wheels to actually be usable!) we'll throw them on at that time.
I've started tagging wires and hoses. 20 years ago my dad had the same idea but unfortunately, 20 years later, the masking tape on stuff has fallen off or writing is no longer legible, so there's gonna be a handful of stuff unlabeled that I never saw plugged in!
Should be fun!
I've started tagging wires and hoses. 20 years ago my dad had the same idea but unfortunately, 20 years later, the masking tape on stuff has fallen off or writing is no longer legible, so there's gonna be a handful of stuff unlabeled that I never saw plugged in!
Should be fun!
01-31-2013, 11:04 AM
#37
Melting Slicks
Thanks bluray72 for the nice picture! As of now I don't have casters on the dolly. Gravel driveways suck, not to mention the ground isn't firm (well.... depends on the day here!) We'll probably use a forklift to move it around, and if we need casters (or maybe fab up some type of pneumatic wheels to actually be usable!) we'll throw them on at that time.
I've started tagging wires and hoses. 20 years ago my dad had the same idea but unfortunately, 20 years later, the masking tape on stuff has fallen off or writing is no longer legible, so there's gonna be a handful of stuff unlabeled that I never saw plugged in!
Should be fun!
I've started tagging wires and hoses. 20 years ago my dad had the same idea but unfortunately, 20 years later, the masking tape on stuff has fallen off or writing is no longer legible, so there's gonna be a handful of stuff unlabeled that I never saw plugged in!
Should be fun!
 02-03-2013, 10:47 AM
#38
Instructor
Thread Starter
Man it feels good to get stuff done! Before anyone laughs, I ran out of kerosene again; busting knuckles in 20� isn't fun.
Was a little surprised to see that alarm horn. Was that an option in 72 or standard?
The other thing I found... the odometer has been stuck at 99,900 or so miles since it was bought. Does the spedo drive that? I can't imagine the tach would. Regardless, I couldn't get the twist off tach connector to come off at the distributor, the brass threads were coming out of the distributor housing. Once out, the worm gear on the end of the cable had a few areas with broken teeth. I suppose maybe I could have damaged it during removal, but I didn't feel much resistance as I un-threaded it.
Hopefully I've got everything disconnected now and can remove the body soon! Not sure if I'll get to it today as it's snowing again, plus, you know, there's supposedly some kinda sporting event thing on TV...
EDIT: Any idea what part number the worm gear would be? A.I.M. doesn't show it as I assume it came from the engine plant already assembled? Pretty sure it's THIS that I need. Perhaps THIS brass part as well?
- Removed speedo cable
- Some wire going to trans
- Gear selector cable to trans
- + battery cable to starter
- Wires and ground near starter
- Seat belt safety cable thing
- Parking brake cable
- Alarm horn and its wiring
- Sending unit electrical connections
- Throttle cable
- Tach cable
- Vacuum lines from carb
- Separated the rag joint (was so glad I had room to slide halves! PB Blaster to the rescue!)
Was a little surprised to see that alarm horn. Was that an option in 72 or standard?
The other thing I found... the odometer has been stuck at 99,900 or so miles since it was bought. Does the spedo drive that? I can't imagine the tach would. Regardless, I couldn't get the twist off tach connector to come off at the distributor, the brass threads were coming out of the distributor housing. Once out, the worm gear on the end of the cable had a few areas with broken teeth. I suppose maybe I could have damaged it during removal, but I didn't feel much resistance as I un-threaded it.
Hopefully I've got everything disconnected now and can remove the body soon! Not sure if I'll get to it today as it's snowing again, plus, you know, there's supposedly some kinda sporting event thing on TV...
EDIT: Any idea what part number the worm gear would be? A.I.M. doesn't show it as I assume it came from the engine plant already assembled? Pretty sure it's THIS that I need. Perhaps THIS brass part as well?
Last edited by Mike7143; 02-03-2013 at 11:28 AM.
02-03-2013, 06:13 PM
#39
Instructor
Thread Starter
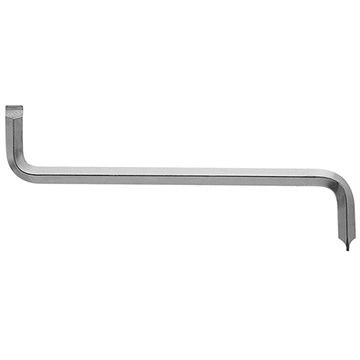
I think I'm ready for lift off! I think I've got everything clear and was able to lift the left and right side about an inch to make sure all my body bolts were free. Now I just need some good weather. Plan is to use some ratchet straps we have that look like this:

Looks like they'll grab onto the rocker channel easily. We'll use a long 4x4 above and longitudinal with the body, sling the straps over it, hook on, and then lift the 4x4 with a forklift. Is it ok to let the staps "hug" or "pinch" the body or is it better to put a 2x4 above the body to spread the straps until they're clear of the body?
After soaking the TA castle nuts about 6 times over the course of 2 weeks I was able to get them free pretty easily. I've read about cutting and I'm hoping my diligent PB blasting will pay off!
Regarding the riveted on bracket for the dash pad that I found, there's already one there... It has a more severe angle than the found one. Hmm... Maybe good ol UAW left a spare for me?
I hope I get some slightly better weather next week!
Looks like they'll grab onto the rocker channel easily. We'll use a long 4x4 above and longitudinal with the body, sling the straps over it, hook on, and then lift the 4x4 with a forklift. Is it ok to let the staps "hug" or "pinch" the body or is it better to put a 2x4 above the body to spread the straps until they're clear of the body?
After soaking the TA castle nuts about 6 times over the course of 2 weeks I was able to get them free pretty easily. I've read about cutting and I'm hoping my diligent PB blasting will pay off!
Regarding the riveted on bracket for the dash pad that I found, there's already one there... It has a more severe angle than the found one. Hmm...
Maybe good ol UAW left a spare for me?I hope I get some slightly better weather next week!
02-03-2013, 06:34 PM
#40
Drifting

Member Since: Jun 2011
Location: iowa city iowa
Posts: 1,540
Received 253 Likes
on
139 Posts
2020 Corvette of the Year Finalist (appearance mods)
C3 of Year Winner (appearance mods) 2019
Just to throw this out there...
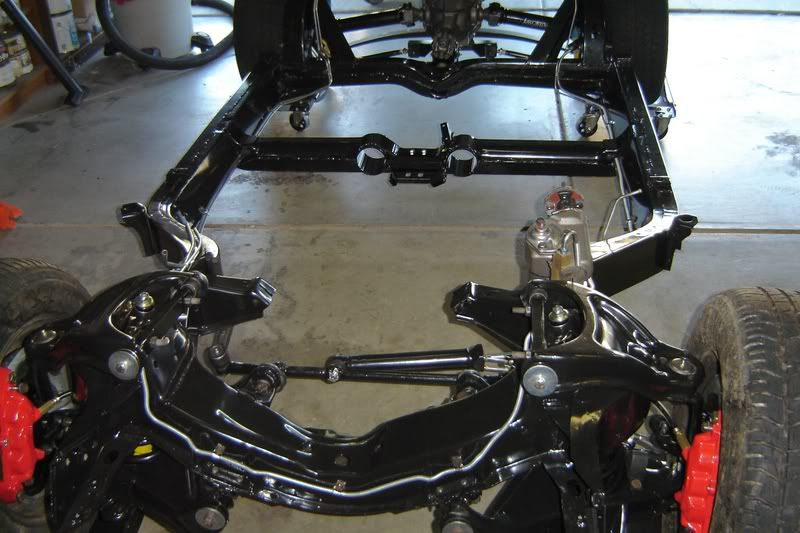
I had my frame blasted and powder coated locally. The bill was $347 and they did a great job. I am sure the price depends on where you are, but I think I would call around and see if it is an option. If it winds up being way more then por is a great option to keep on budget.
I had my frame blasted and powder coated locally. The bill was $347 and they did a great job. I am sure the price depends on where you are, but I think I would call around and see if it is an option. If it winds up being way more then por is a great option to keep on budget.