
**Mike's 72 Coupe Restoration Kickoff**
 02-09-2013, 06:05 PM
#41
Instructor

Thread Starter
Relatively nice day here so I thought I'd get some work done:


Quite a few more pictures at the end of my ever-growing album:
Google photo album
Seems to be in decent shape so far. Tried looking for the VIN stamp on frame but can't remember where it's at. Not sure what to tackle next: engine while it's still installed or pull it and start on chassis.
Good day!
Check out the pics!


 02-10-2013, 01:17 PM
#44
Instructor
Thread Starter
My dad says when he tells people he has a forklift at home they laugh... Who's laughing now!?
After thinking it over, probably going to try and tackle the engine first. It ran great 20 years ago, but after sitting this long, it probably needs some love and a clean-up. Any lists on what a long resting, previously well-running, engine may need? Trying to keep to a low budget. Can't wait to really start restoring now that the body is off! It was really cool to see it come off. Can't say I wasn't sad that page 1 of the tank sticker was long gone. Only hope left perhaps would be behind the cluster or perhaps in the seat?
After thinking it over, probably going to try and tackle the engine first. It ran great 20 years ago, but after sitting this long, it probably needs some love and a clean-up. Any lists on what a long resting, previously well-running, engine may need? Trying to keep to a low budget. Can't wait to really start restoring now that the body is off! It was really cool to see it come off. Can't say I wasn't sad that page 1 of the tank sticker was long gone. Only hope left perhaps would be behind the cluster or perhaps in the seat?
02-10-2013, 07:13 PM
#45


VIN is probably stamped on the frame in two places. On the top horizontal surface, 1) under the driver's side doorsill, and 2) right above the LH #4 body mount. Might have to wire brush things a bit to find 'em.
02-12-2013, 10:53 AM
#46
Instructor
Thread Starter
Thanks for the tip. I'll have to check it out; hopefully it's not too far gone! Today after work I'm going to start taking the accessories/front of engine apart. Need to get some of this so-called Marvel Mystery oil!
02-14-2013, 11:10 PM
#47
Instructor
Thread Starter
Got a few accessories off the engine tonight, also found my frame stamp above the driver #4 mount! So far the suck has been the water pump. 3 of the 4 bolts came out, twisted the head off the last one. It appears that the shank of the bolt is stuck to the inside diameter of the through-hole in the pump because I can rotate the entire pump and the bolt spins with it. I've tried PB blaster, prying with a 3ft bar to slide of off the stud, heating the pump hoping to expand around the stud while prying, jiggling, shocking, and tapping, cut a slot in the end to try a screwdriver with vice-grips.... nothing. I think my next move is let it soak longer, grind 2 flat spots on the end, heat up material on pump body around it, and either use a wrench or vice-grips... Grrrr!
All the bolts holding the header came loose easily except for the rearward bracket for the A/C compressor, I can feel I'm about to twist that head off, and the one under it that needs the bracket removed to access. Spark plugs all came loose easily as well!
As I look and work on the car more, we're starting to suspect a minor front end hit. Passenger's side; is that metal supposed to be bent like that near the large oval hole? Frontal collision may cause it to buckle perhaps or maybe someone put the tip of a hook in there?


And here's the driver's side.... it's actually broken/cracked, but doesn't seem distorted.

Can't imagine it being warped/deformed from factory, and the crack definitely isn't factory, so perhaps a front end collision or could this be the work of improper hook points?
Front cross member's had work done in the past... square nut is stripped out and bubba used a smaller diameter bolt/nut instead of fixing.

Also, gonna need a new front cross member.... or at least some cutting and new metal.

Good to get some more progress done. Next will be to finish off that water pump, the A/C compressor bracket (probably involves twisting a bolt head off), headers off, carb off, and distributor out. Doing some research, it appears the carb is the correct kind, but it's a later Rochester, PN and date stamp indicate Sept 30th, 1978 I believe. Part number is 17054929 with date code of 2738 which should be 273rd day of 1978 since the 1705 prefix on the PN means it's a 1976 to 1979 Rochester. I think my original carb PN should be 7042202 and a date stamp of sometime before March 1972.
All the bolts holding the header came loose easily except for the rearward bracket for the A/C compressor, I can feel I'm about to twist that head off, and the one under it that needs the bracket removed to access. Spark plugs all came loose easily as well!
As I look and work on the car more, we're starting to suspect a minor front end hit. Passenger's side; is that metal supposed to be bent like that near the large oval hole? Frontal collision may cause it to buckle perhaps or maybe someone put the tip of a hook in there?
And here's the driver's side.... it's actually broken/cracked, but doesn't seem distorted.
Can't imagine it being warped/deformed from factory, and the crack definitely isn't factory, so perhaps a front end collision or could this be the work of improper hook points?
Front cross member's had work done in the past... square nut is stripped out and bubba used a smaller diameter bolt/nut instead of fixing.
Also, gonna need a new front cross member.... or at least some cutting and new metal.
Good to get some more progress done. Next will be to finish off that water pump, the A/C compressor bracket (probably involves twisting a bolt head off), headers off, carb off, and distributor out. Doing some research, it appears the carb is the correct kind, but it's a later Rochester, PN and date stamp indicate Sept 30th, 1978 I believe. Part number is 17054929 with date code of 2738 which should be 273rd day of 1978 since the 1705 prefix on the PN means it's a 1976 to 1979 Rochester. I think my original carb PN should be 7042202 and a date stamp of sometime before March 1972.
02-14-2013, 11:30 PM
#48
Melting Slicks

Congratulations on bringing another Corvette back to life! You will get a great sense of accomplishment when it's done, well worth the hard work and sacrifice of your restoration. 
 02-17-2013, 11:20 PM
#49
Instructor
Thread Starter
02-17-2013, 11:35 PM
#50
Instructor
Thread Starter
Another weekend in the books with more tear down progress. Let's see...
Finally got the water pump off, A/C bracket (broke that head off too...), headers, carb, dizzy, exhaust hangars, fuel tank, tank support cross, bumper brackets, starter, fuel lines, tranny cooler lines, got the trans and engine separated... ready for liftoff here soon! Waiting on a borrowed engine stand.
As linked, here's all the pictures: Google album
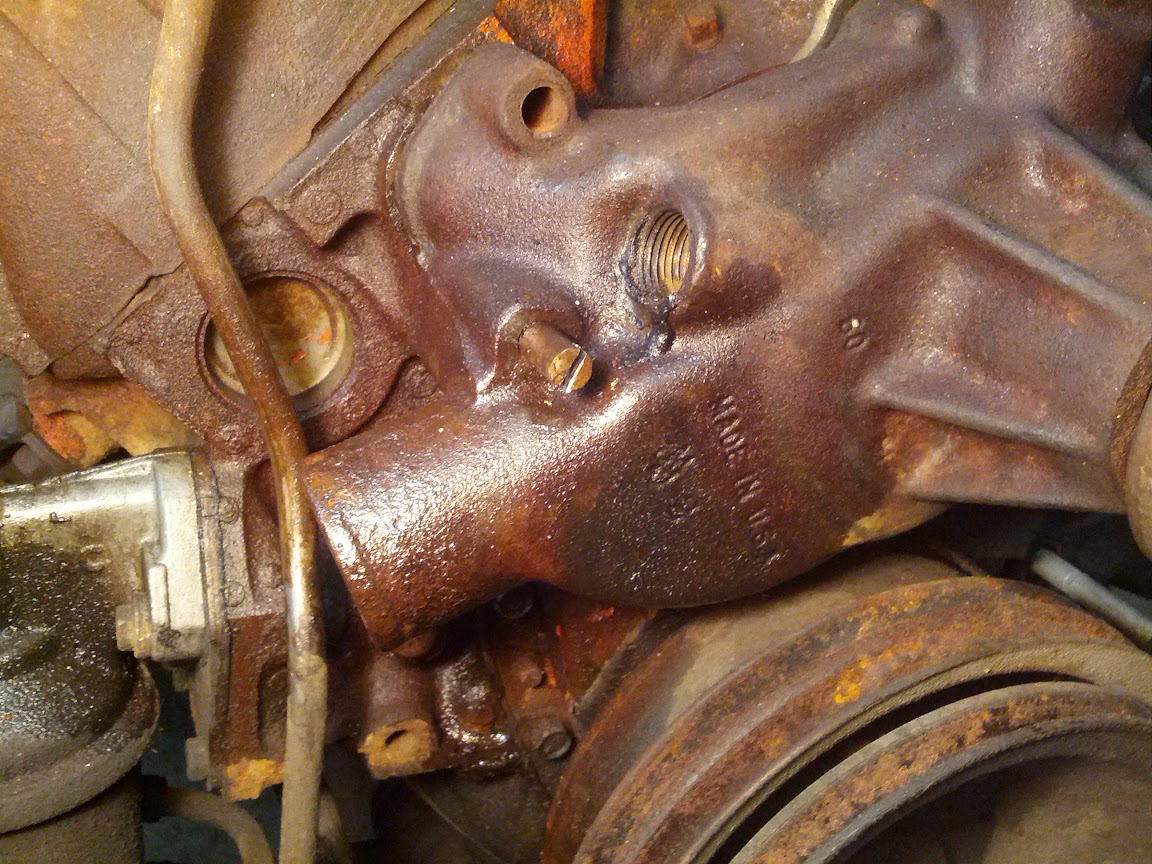
Can anyone tell me what the N T G and arrow at G means? Also, clock cast, is that 9th hour of shift at 3pm? And also, I assume B252 is Feb 25th of 72. Is it normal if my intake manifold is also B252, would both block and intake be cast the same day?


Tried getting the exhaust all out, but every section is welded together and has to come out whole or else cut it up. I suppose I'll have to take the trans cross member out to get it out, but even then, may have to separate the 2 sides as they have different bends.
Finally got the water pump off, A/C bracket (broke that head off too...), headers, carb, dizzy, exhaust hangars, fuel tank, tank support cross, bumper brackets, starter, fuel lines, tranny cooler lines, got the trans and engine separated... ready for liftoff here soon! Waiting on a borrowed engine stand.
As linked, here's all the pictures: Google album
Can anyone tell me what the N T G and arrow at G means? Also, clock cast, is that 9th hour of shift at 3pm? And also, I assume B252 is Feb 25th of 72. Is it normal if my intake manifold is also B252, would both block and intake be cast the same day?
Tried getting the exhaust all out, but every section is welded together and has to come out whole or else cut it up. I suppose I'll have to take the trans cross member out to get it out, but even then, may have to separate the 2 sides as they have different bends.
02-18-2013, 07:49 PM
#51
Instructor
Thread Starter
Had to pull today while it was 55, supposed to be 20's the rest of the week. So here it sits until I get the engine stand later this week. Gonna try and fab a stand for the trans out of 2x4's as well. I must say, coolant and trans fluids both looked perfect for 20+ years of sitting!
Can't wait to take apart the rest of the chassis!


Until next time
Can't wait to take apart the rest of the chassis!
Until next time
 02-19-2013, 07:20 PM
#53
Instructor
Thread Starter
Digging into my carb mismatch... turns out I have a carb from a 1974 corvette/chevelle/monte. Kinda new to some of this stuff. Obviously the #17054929 carb works since it was in driving condition and has just been sitting for 20+ years. Is it worth the money/hassle to buy/trade a correct #7042202 and then turn around and have it rebuilt? Or should I just have the '74 carb rebuilt? The perfectionist side in me is thinking I should try to trade the 74 for the correct one, or try and sell the 74 and buy correct for about the same price... Is there any kind of performance difference? I'm doing a daily driver restore so (as of right now) I don't really mind mixing numbers. A carb would be easy to change down the road if I wanted matching numbers right?
And then I found this on eBay... 1972 7042202 but I feel like it's missing some parts, that or I need to keep some stuff off my existing carb?
Think I could get that price out of the 74? Perhaps even more?

 02-20-2013, 09:02 AM
#54
There's a bit of confusion about that carb number. The '75 and earlier Quadrajets had a seven digit ID code, beginning with "70". The "1" prefix began to be used in 1976 models, so the code then contained eight digits.
Either way, the carb needs to be torn apart, inspected and rebuilt before you can use it. The carb on your engine looks to be in better shape than the one on ebay, anyway.
As for performance, any good running Qjet is hard to beat. As long as you can hook everything up, don't worry about any number mismatch, unless you need NCRS approval.
Send it to Lars Grimsrud, if you don't want to rebuild it yourself.
Last edited by gcusmano74; 02-20-2013 at 09:09 AM.
02-20-2013, 09:26 AM
#55
Instructor
Thread Starter
lol now I'm confused. I found an article on digital that was posted with permission from Lars that says that carb number was "17054929 CHEV 74 350-400 CHVL, VETTE, MONTE"
here's the page: LINK
Also, this carburetion.com LINK is showing that 17054929 is for "74 Chev /GMC/Truck 350/400/454"
What's going on!?
Here's my current carb:

here's the page: LINK
Also, this carburetion.com LINK is showing that 17054929 is for "74 Chev /GMC/Truck 350/400/454"
What's going on!?
Here's my current carb:
02-20-2013, 09:29 AM
#56
Instructor
Thread Starter
Sorry, saw your edit. I could live with the wrong carb. If I ever suddenly can't handle it (haha), It wouldn't be to hard to change. I guess it just comes down to if I can sell what I have for enough to cover the cost of a correct carb. Keeping this carb or buying a correct one will still require a rebuild so that part of the cost is a wash (unless the correct carb is missing parts/broken obviously).
Haha maybe I can find a 74 with a 72 carb and trade?!
Haha maybe I can find a 74 with a 72 carb and trade?!
02-20-2013, 09:42 AM
#58
Instructor
Thread Starter
I guess long story short, I'd just like to find out what it came from/if it's a replacement so that if I ever want an original carb I can properly describe this one in the listing when I try to sell it. PN is indicating a 74 vette, but this could actually be a replacement carb for a 74 vette made in 78?
Last edited by Mike7143; 02-20-2013 at 09:44 AM.
02-21-2013, 12:45 PM
#59
Instructor
Thread Starter
Copy pastas from Carburetordata.com
Can't believe I found such an example!
"MYTH: All 1976 and newer carburetors have a sequence beginning with 1705xxxx and these are easy to interpret because the year is always the fifth-digit.
Comment: This is correct for Original Equipment carburetors between 1976 and 1979. Service Replacement carburetors manufactured after this sequence went into effect, but designed for engines / vehicles from 1968 through 1975 also have the designation of 1705xxxx. Therefore, looking only at the number 1705xxxx does not always mean a ’76 or newer carburetor.
As an example, 17054916 is within the sequence 1705xxxx which would indicate it is a 1976 through 1979 carburetor. The “4” in the 5th position indicates it should be a 1974, at least according to the “rules” found on various Internet sites.
However, if this is a ’74 carburetor, how can it have a ’76 - ’79 sequence?
In this case, this is not a ’74 carburetor. It is a Service Replacement for a 1968 Chevelle, Camaro and Corvette with the 427 engine."
So... based on that information, my carb isn't from a 1974 corvette but it's a service replacement for a.... what? Or is it a simply a service replacement for a 74 vette made 4 years later in 1978?
Last edited by Mike7143; 02-21-2013 at 12:49 PM.
02-24-2013, 12:51 AM
#60
Instructor
Thread Starter
Got some more stuff done today. Not as much as I had hoped but some is better than none!
Engine stand

Built a quick transmission stand

Got the trans cross member out as well as the exhaust. Any tips here on getting the exhaust out? System is fully welded so I'm thinking only way is to cut?

Again, still wondering if it's been in an accident. Check out these pictures.
Here's the driver side, looks like it bends to driver's side after the coil housing (right in this picture). My guess is this is either correct or should be straight...

And here's the passenger side, bending the same way towards the driver's side. I think this is wrong, should either be straight or mirror of driver and thus bent outwards towards the passenger side.

Both

Can anyone chime in on this possibly?
Perhaps tomorrow I'll dig into engine disassembly more.
Engine stand
Built a quick transmission stand
Got the trans cross member out as well as the exhaust. Any tips here on getting the exhaust out? System is fully welded so I'm thinking only way is to cut?
Again, still wondering if it's been in an accident. Check out these pictures.
Here's the driver side, looks like it bends to driver's side after the coil housing (right in this picture). My guess is this is either correct or should be straight...
And here's the passenger side, bending the same way towards the driver's side. I think this is wrong, should either be straight or mirror of driver and thus bent outwards towards the passenger side.
Both
Can anyone chime in on this possibly?
Perhaps tomorrow I'll dig into engine disassembly more.