When you click on links to various merchants on this site and make a purchase, this can result in this site earning a commission. Affiliate programs and affiliations include, but are not limited to, the eBay Partner Network.
Thanks! Unfortunately from what I've learned on the forums, I think I'm still in easy mode! But getting the frame repaired is a good step in the right direction for sure!
Day two of frame repair is in the books and it's done! Today was 5 hours and 25 minutes of work bringing the entire total to 9 hours and 10 minutes for a cool 550 bones!
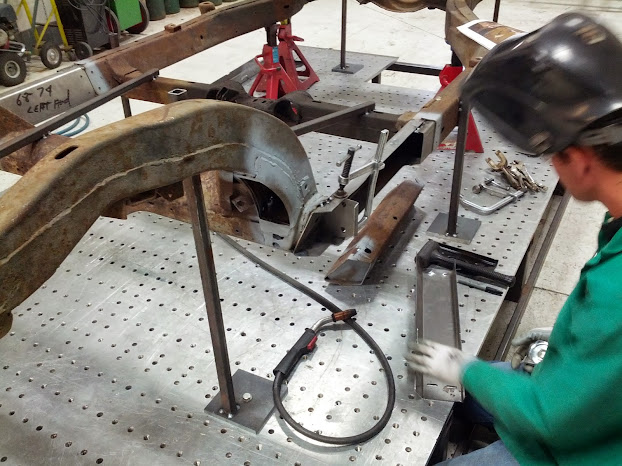
Began by putting in the jack support plates. One thing we noticed here was that the RH and LH sides were incorrect. I don't know if Paragon always puts the wrong side with the RH and LH kits or if it was a mistake this time. Good thing I had both sides, otherwise we'd have had to improvise and make a new one.
Next the outer section was positioned and tacked, the support plate was tacked in too.
Passenger side.
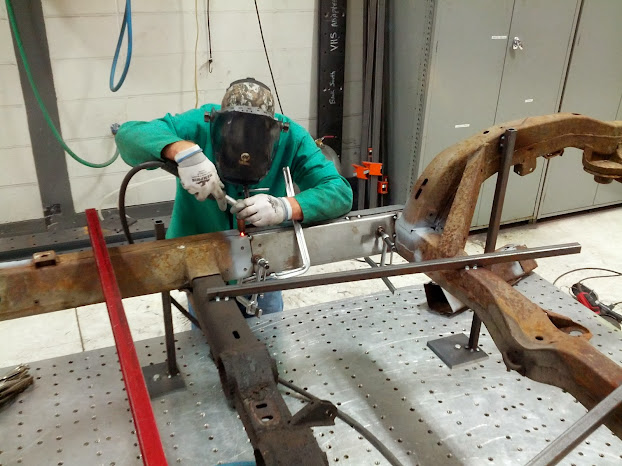
Next the frame gussets were tacked.
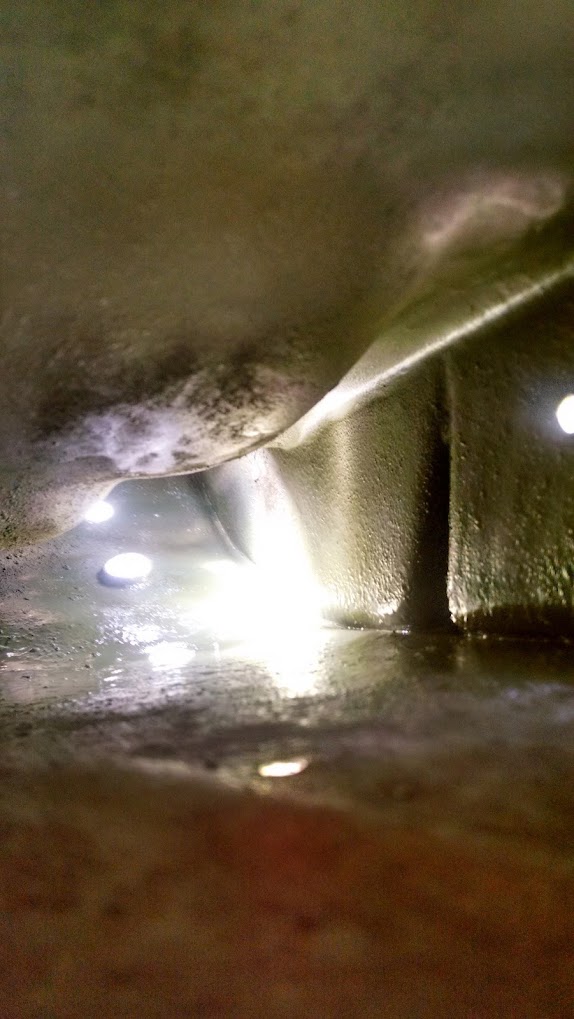
Plug welds at the inner sleeve.
Full welds on support plate.
Now for all the rest of the welding and end caps.
Grind down the welds.
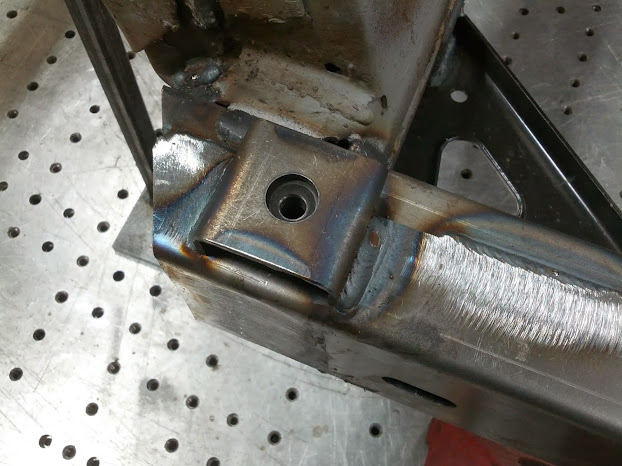
Here you can see the patch we put on the 3rd crossmember where there was a rust through. Again, I have no idea why the heck those gussets have lips cupped up. I plan to seal the seams with something so dirt can't work it's way in between the crossmember and gusset over time.
I didn't know what to do about this rust through here below the pocket. Poor original design to have two exposed edges of steel where road crap gets slung up to collect in that pocket. We started making a patch that would go over the hole and actually went up and over that lower seam, like a cover, but then I remembered that 1. the trailing arm may hit the added material, unlikely, but possible, and 2. the shims probably wouldn't fit down in there nicely and would have to be shortened. So in the end I just let it be. I'm thinking once I'm done painting and all, I may tape up the drain hole, rust hole, and fill that cavity/pocket with something like epoxy so crap doesn't get in there.
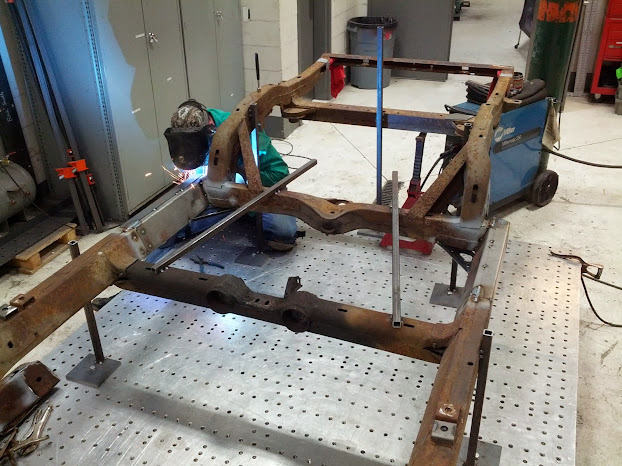
Then we measured, measured, measured, then measured, marked, and drilled the holes for the body mounts. Tacked, measured about 10 more times, then welded them on!
And then we let her free!
All finished!
Overall I'm very pleased with the outcome, we both were surprised in how well it all turned out and that it was much easier than he anticipated! And at that price I'm certainly not going to complain!
Next stop is to straighten the front horns
Left side:
And right:
After that, I guess I'll have to decide if I want to try blasting it myself or take it somewhere. I guess another option would be a dip, but I don't know the costs associated with that. Finally, some Eastwood internal frame coating and then primer and paint, Rustoleum most likely.
I may break down and replace the #2 mounts. They didn't break during removal, but I'm kind of thinking I should just do it now while I'm here so future owners aren't ticked off!
Again, all-in-all, very happy with the work! Hopefully this and the last post will help those about to embark on this journey. Again, plenty more pictures in my album in my signature below.
Long time no progress. Hard winter, no ambition at all to go out in the cold. But today it was 60 and spring is coming. I'm waiting for a stretch of warmer days so I can blast it, coat the internals with Eastwood, then paint. Soon...
Long time no progress. Hard winter, no ambition at all to go out in the cold. But today it was 60 and spring is coming. I'm waiting for a stretch of warmer days so I can blast it, coat the internals with Eastwood, then paint. Soon...
No freakin' doubt on the winter. You guys have had it worse than we have just a little south of you but holy smokes has this sucked out loud. I've barely touch my '64 in two months.
Began work on the 72 again. Warmest day of the year yesterday. Even ended up with sunburn! Anyway, yesterday I got the frame's internal coated with Eastwood's product and some tips from member rafalc. First I used compressed air and long tube to blow out the inside of the frame. Also used on of those flexible reacher claw things.
A couple notes on the Eastwood product, it's much more fluid than I thought it'd be. Also, the extensions that come with it... they come wrapped up in a circle and they more or less stay that way. I had visions of grandeur fishing a long tube deep into the frame and perfectly coating it, not so much. The entire process was more of a, feed it in, don't know where it's going, spray and twist/pull the extension around hoping you got everything. One thing that really helped I thought... I used a straight piece of metal coat hangar wire and taped the tube to it. That helped keep everything straight like I had envisioned and made the process a little easier.
Also, the extension tubes they give you aren't long enough in my opinion. I went to my local Home Depot and bought this:
Then I just took the 360* nozzle (more like 4 jets that make lines...) and put it on the longer tube and attached to the barb at the spray cap.
Here's my super long, straight sprayer for the main longitudinal members. Also used this at the rear kick-ups and the differential crossmember. Could have also used it at the front with some slight bends to the wire.
And the short one
Not knowing how the process would work, I started with the trans crossmember and my new front crossmember as it wasn't coated inside. As I mentioned before, it's much more of a liquid than what I'd imagine a "coating" would be. Taped up some holes and then sprayed.
Then I moved onto the frame after getting to know how it worked. I used short bursts and would fiddle the tube around between. If I had just held it down spraying continuously while removing the tube I don't think I'd have gotten everything and probably would have used double the coating.
Front crossmember:
Rest of the frame:
Not too many more pics, it's all inside ha. Overall, I'd say it was doable, but it wasn't fun. Frankly, it was frustrating to me that the 360* tip didn't spray really, it was more of 4 streams of the stuff shooting out. A regular spray paint can nozzle disperses paint, this thing was just like 4 jets of liquid. To get it to "coat" I felt like I had to twist and turn the tube. In all honesty, I'm not sure it's worth it for about $70. I can't really say for certain that everything got "coated" but I guess it's better than nothing. I ended up using 4 of the cans with one left over that I'll probably use in the rust-prone places after the first "coat" dries completely.
Next step, sandblast. Still debating on whether to do it myself or take it somewhere. I got a quote for about $180 for the frame and crossmembers.
Long-time-no-progress but hey, that's life I guess.
Going to try and make some progress though. I was thinking that my next step would be to blast and then paint the frame, but now I'm having second thoughts.
Once painted, the frame will have to be treated more gingerly as to not scratch it all up. Rather than spend time doing the frame and then let it sit around, constantly being moved around from garage to barn and out of the way, I'm thinking maybe I should instead work on the running gear so that once it's all done, I can do the frame. Then I'll be able to get the running gear on so at least it can roll and the frame will be off the ground.
In the rear... I've got the leaf spring re-done and it's bracket, the two half-shafts, the TA u-joint yokes, strut rod bracket, and I think that's about it. To do would be:
- Trailing arms (think I'll try rebuilding myself, need a new TA as old is rusted out)
- Differential: complete rebuild. Not sure if I can do myself, seems complicated
- Strut rods
- Associated bushings/hardware
In the front... I've got the upper and lower arms done, cross shafts, the springs, and that's really about it. To do would be:
- Spindle assemblies
- Ball joints
- Sway bar
Getting these things done and set aside should allow me to blast and paint the frame and then quickly attach the running gear so that the frame is back on 4 wheels.
Am I missing anything?
Going forward, I'm pretty set on the rear except the differential. I feel pretty confident I can rebuild both TA's after I buy a replacement TA for the one side. I've been doing a little reading about the differential and I'm a little hesitant to rebuild that myself. Any advice on the differential?
On the front, I think I'm cool on everything with the exception of the spindle assemblies. The front rotors are riveted on (backs have been drilled off) and I can't determine if I can break the assembly down to components for sandblasting/painting without taking the rotor off. Can anyone fill me in on spindle assemblies? Whether I need to drill rivets or not to get what I want to do done?
Finally, calipers. I'm thinking I should wait to do calipers until the end is near as it seems like they're always leaking if I keep with the original design. Haven't decided yet if I want to o-ring them or not. Will I have any problem putting wheels on and doing calipers later on?
Productive weekend. Put in some time working on the front suspension parts. Didn't realize to get the spindle assemblies apart I just needed to pop off that dust cap! Got the left and right steering knuckles blasted and painted as well as the drive shaft and the sway bar. That finishes off the front suspension for stuff to be blasted and painted, just need to make a large purchase of replacement parts.
Not sure if this is interesting or not, the drive shaft is a Spicer. Is this original or replacement?
Next up is to sort out the trailing arms. I'm in need of a right side (passenger) TA that's in good shape to rebuild. I think I'm going to attempt to rebuild them myself, I've read over a few how-to's and I think I've got the hang of it.
Also, mostly so I can start looking around... why are the lower a-arm shafts from each side different? Which one is "correct" or should I just leave it as is?
Felt good to get at it again, just been busy with other stuff lately. I'll say one thing though, sandblasting round tube things is terrible!
Nice work Mike. Just found this thread again, and your frame reminds me of mine. 'cept now yours is nicer
Keep at it. I've got my new frame ready to go, and I'm fighting the summer to get the body off the old frame so I can swap everything over to the new one.
Got to looking at the differential today. Figured step one is open it and see what the damage is. One of the side yokes comes right out so I know there's a snap ring in there somewhere, and maybe a half cubic inch of steel turned to powder...
And there it is...
Looks like the other yoke is about done too...
Is it safe to assume this differential's seen more left turns than right?!
Otherwise, it doesn't look bad. I'm not well versed in differentials so I took a video and I'm hoping some of the heavy weights (Mike?) can let me know their opinion on how it looks. I figure I may as well rebuild it while it's out. I have no idea how the gears sounded and I've read that it's not worth the risk? I turned the input 3 revolutions and got just a hair under 1 revolution of the side yoke. I assume this means this is 3.08 gears. Ring has 3756448 12 37 9 76 stamped into the edge. 37 I assume is teeth mating with 3885941 pinion with 12 teeth. September 1976 differential?
Stinger12 wrote a great how-to on rebuilding a differential. I think I'm capable of doing it, but I'm not sure I really want to. I might call a few local places and see what their price is along with maybe a ballpark from Tracdoggg2 based on what I've got?
Anyway, besides the yokes needing replaced, how's it look? Maybe that pinion shaft? I can't hear a single peep from anything in there while I'm turning it, all seems really smooth.
I know, I know... shame on me.
I've been a little busy lately; work has picked up, getting married soon, and started finishing out a basement...
I'm stuck at the part where I have to spend a lot of money having the diff rebuilt along with the trailing arms or spending the massive amount of time to learn how to rebuild these components properly to save some coin.
Yeah, they don't appear to have much interest in the project. One of my three brothers helped me for about an hour while I was removing the front coil springs. The other two have a combined total of 0 hours on the project.
Slightly embarrassed to post this, but so far I have approximately 198 hours into it all. I can't believe its a few months past 2 years since I started this. I thought I'd be done by now! That's an average of 1.6 hours of work on it per week...

 11-19-2013, 08:08 AM